Easy Crochet Chunky Beanie | Free Pattern & Video Tutorial
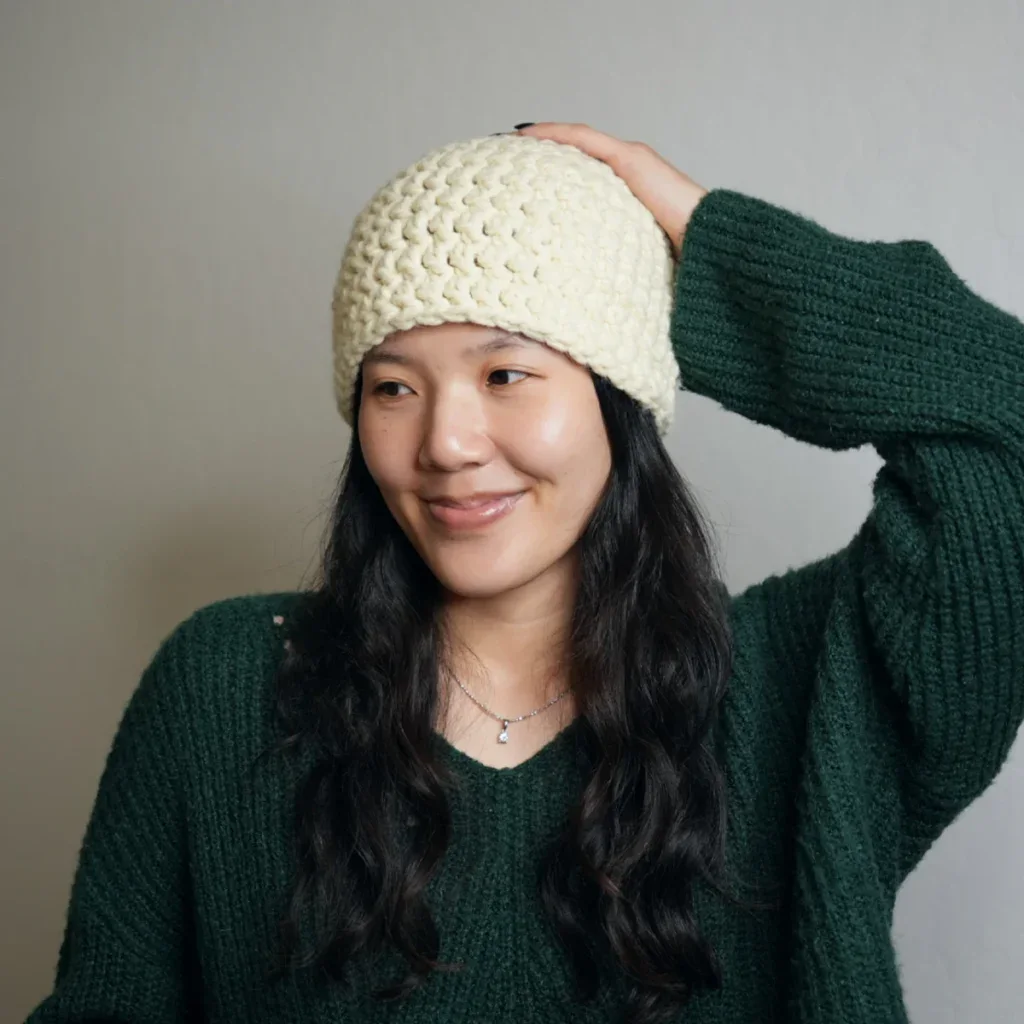
This easy crochet beanie can be made in just 45 minutes! Crochet it as a warm and cozy accessory for yourself or a thoughtful gift to a loved one! This beanie pattern is probably the easiest crochet beanie you can make. It was one of my very first projects as a crochet beginner!
With this crochet beanie pattern, you don’t have to worry about any sort of bunching or extra fabric at the top, even if you use bulky yarn!
If you do prefer the ribbed look, check out my no bunch beanie pattern that’s ribbed, but also adjusted to avoid that extra fabric.
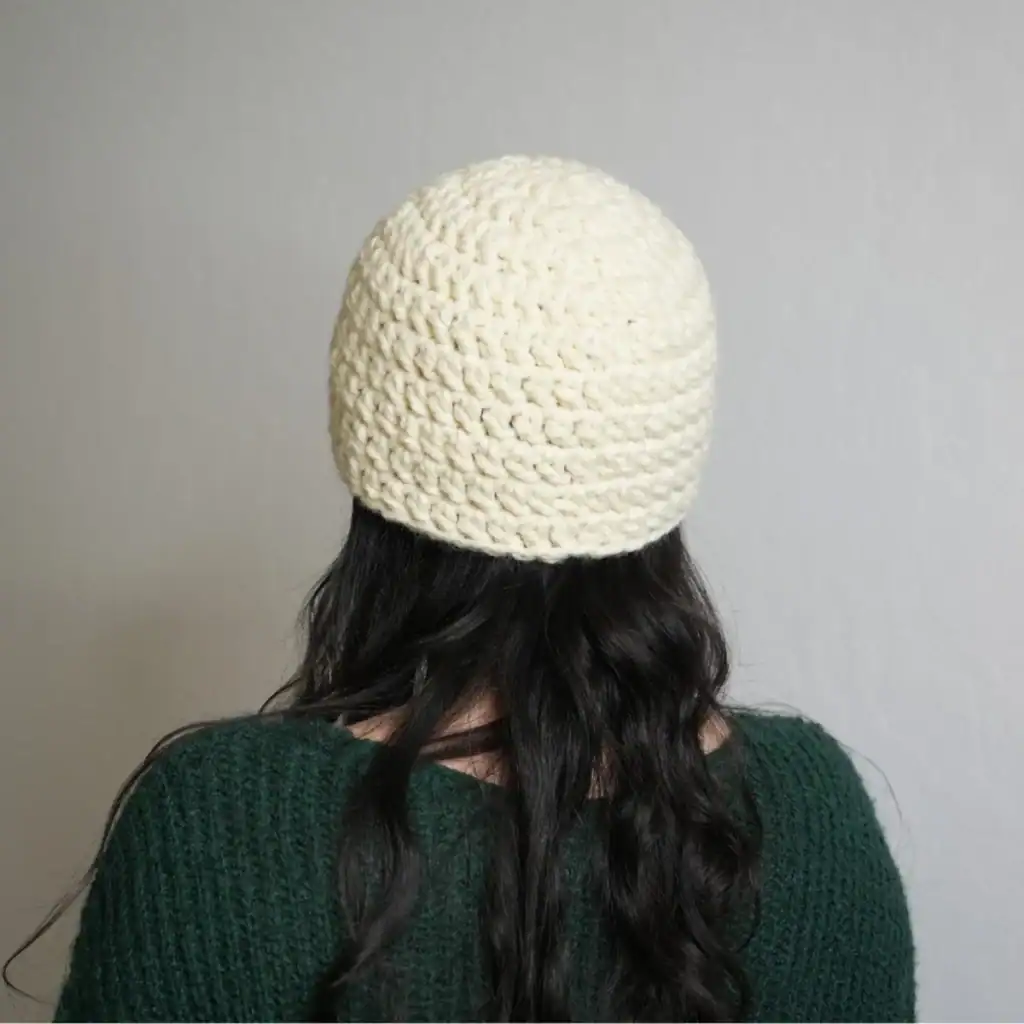
Table of Contents
This post may contain affiliate links. I may earn a small commission on qualifying purchases at no additional cost to you!
Crochet Chunky Beanie Video Tutorial
Become a member to get early access to new videos!
You can follow along with my YouTube video to make your own crochet chunky beanie! I have timestamps included to section the video and help you jump to any point you need to!
Pattern Information
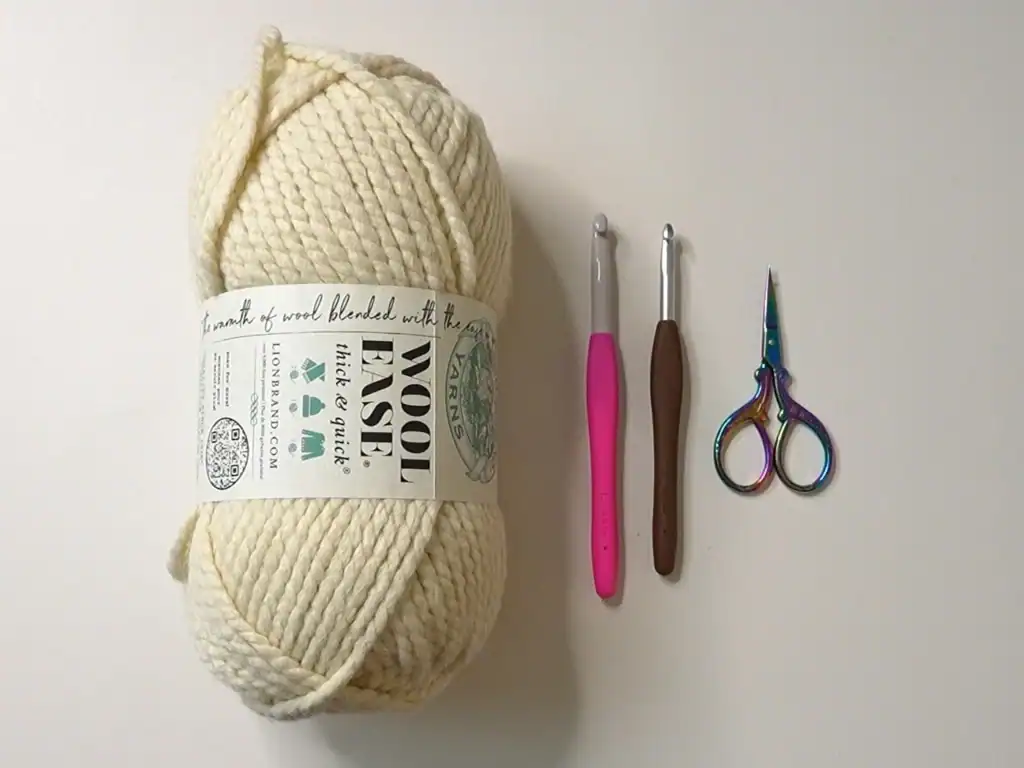
Materials
- 100 grams/65 yards of super bulky weight yarn (Wool Ease Thick & Quick in “Fisherman”)
- 8mm Clover Amour crochet hook
- Scissors
- Jumbo yarn needle OR smaller crochet hook (e.g. 6mm hook)
Crochet Abbreviations
ch = chain
dc = double crochet
inc = increase (2 double crochets into 1 stitch)
rep = repeat
sl st = slip stitch
st = stitch
Gauge
5.5 rows of 8 double crochets makes a 10 x 10 centimeter (4″ x 4″) square
Dimensions
*includes instructions to adjust sizing
Fits: 52 – 54 centimeter circumference (20.5 – 21.3 inches)
Overall: 26 centimeters wide x 19 centimeters long (10.2 x 7.5 inches)
Notes and Tips
- This pattern is written using US crochet terms
- The number in (parentheses) at the end of each row is the stitch count after finishing that round
- Italicized notes tell you what to change to adjust the size
- The chain 2 at the beginning of each round does NOT count as a double crochet
- The slip stitch at the end of each round goes into the first stitch of that round
- The first stitch of every new round goes into the same stitch we slip stitched to in the previous round
Crochet Chunky Beanie Pattern
Increasing Size
Note: The number of rounds before the body of the beanie will determine the size. Do fewer rounds for a smaller size or more rounds for a larger size.
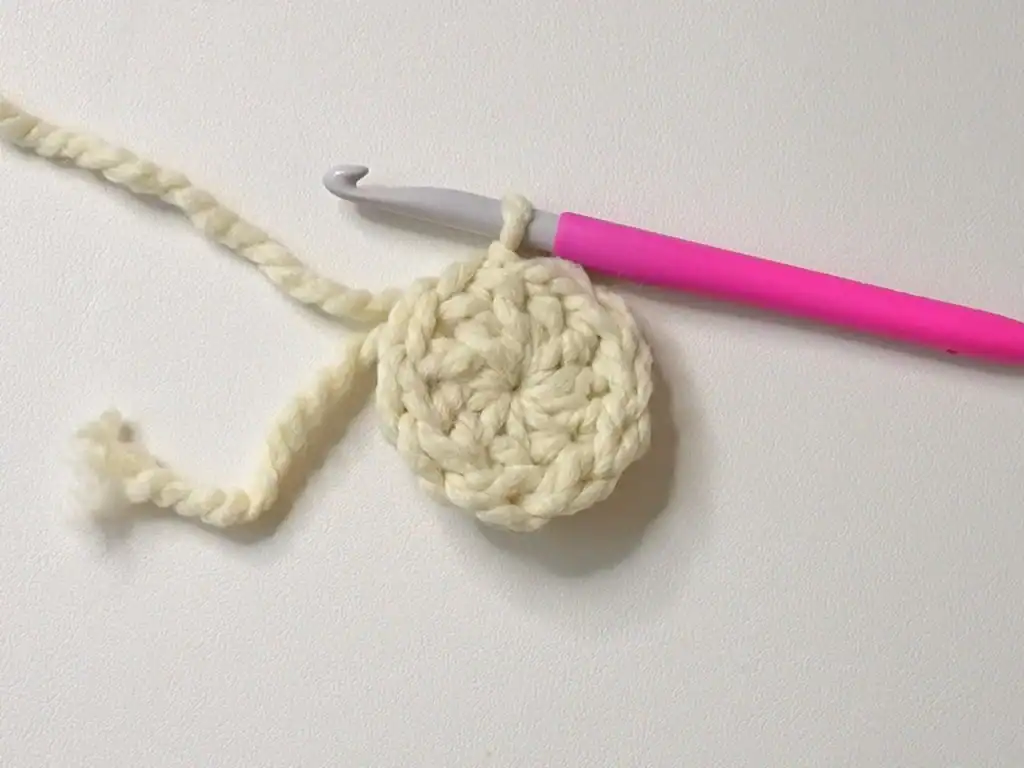
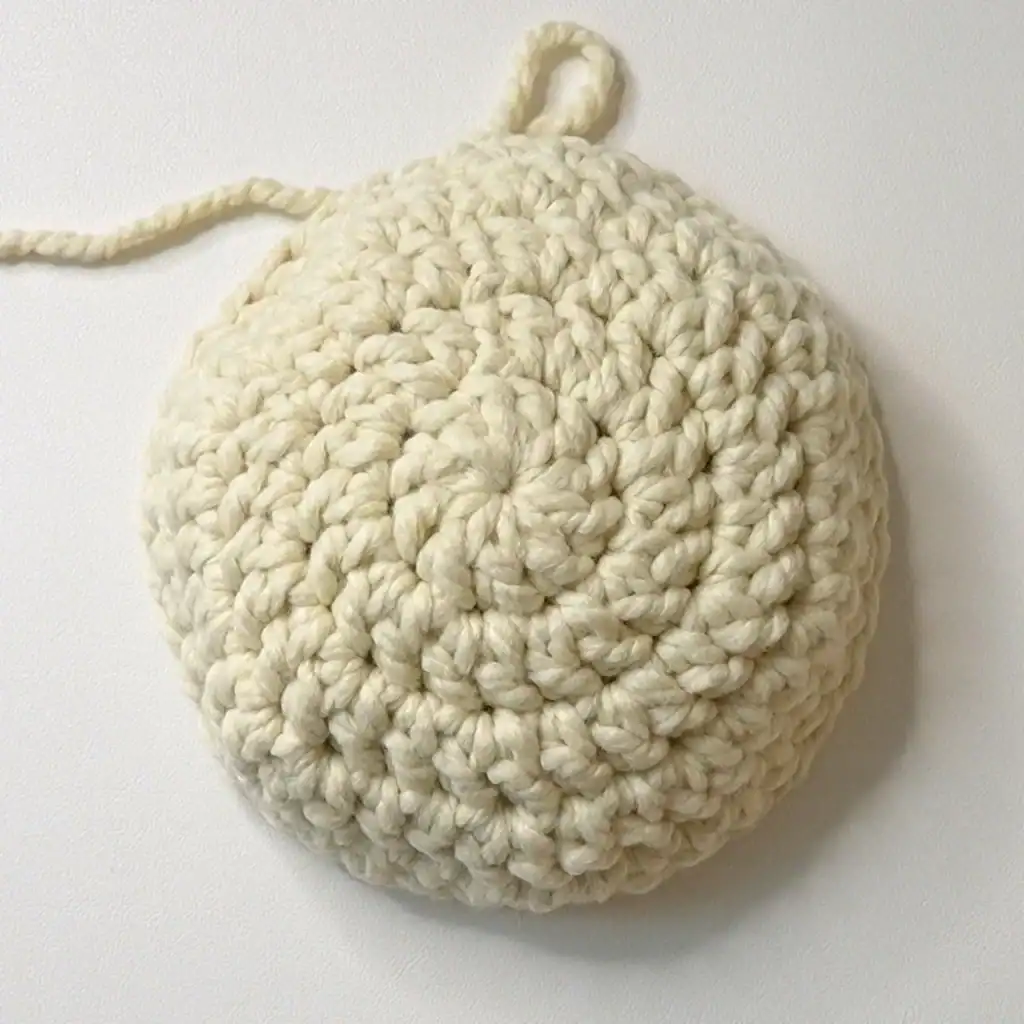
Foundation: Make a magic ring or make a slipknot, ch4, sl st to 1st ch to form a ring
Round 1: ch2, dc10 into ring, sl st (10)
Round 2: ch2, inc around, sl st (20)
Round 3: ch2, rep[dc, inc] around, sl st (30)
Round 4: ch2, rep[dc in next 2 st, inc] around, sl st (40)
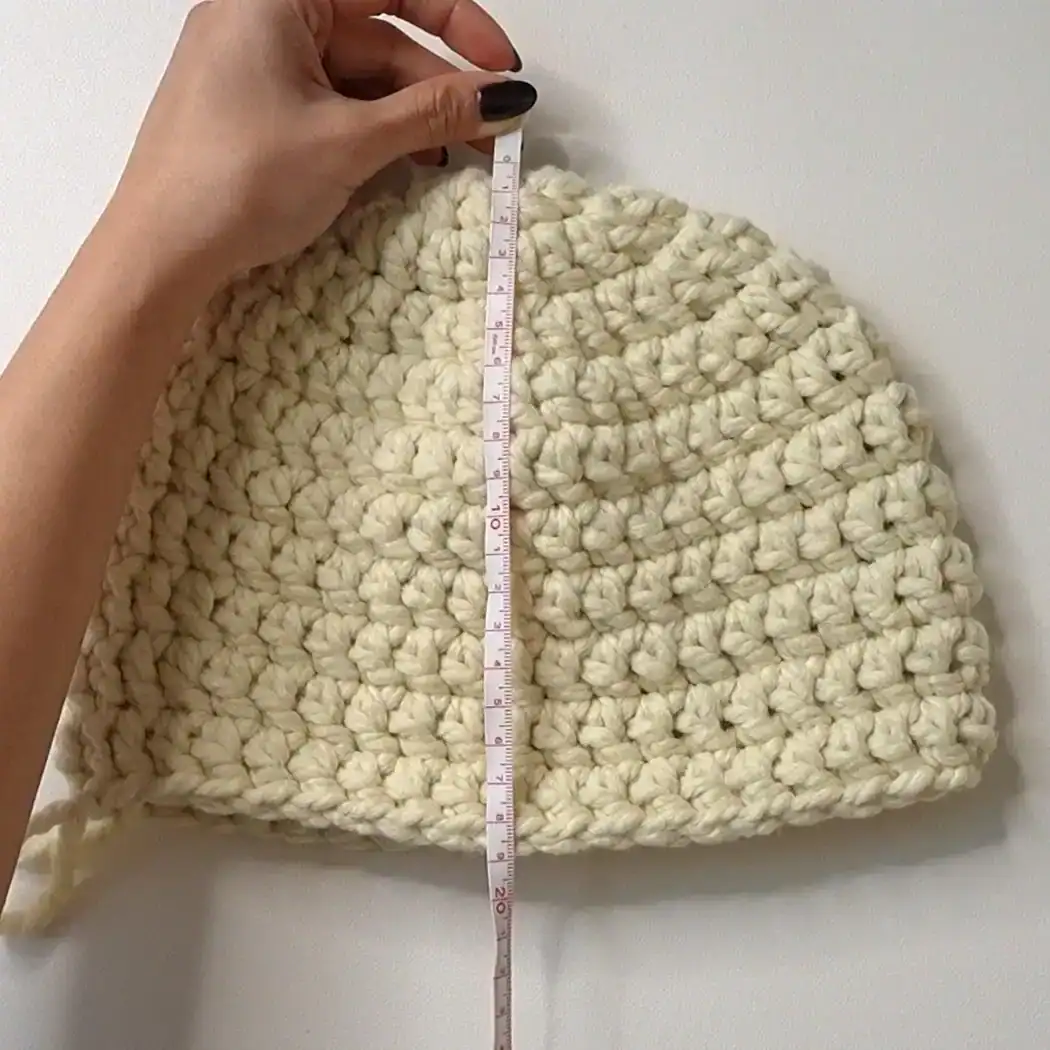
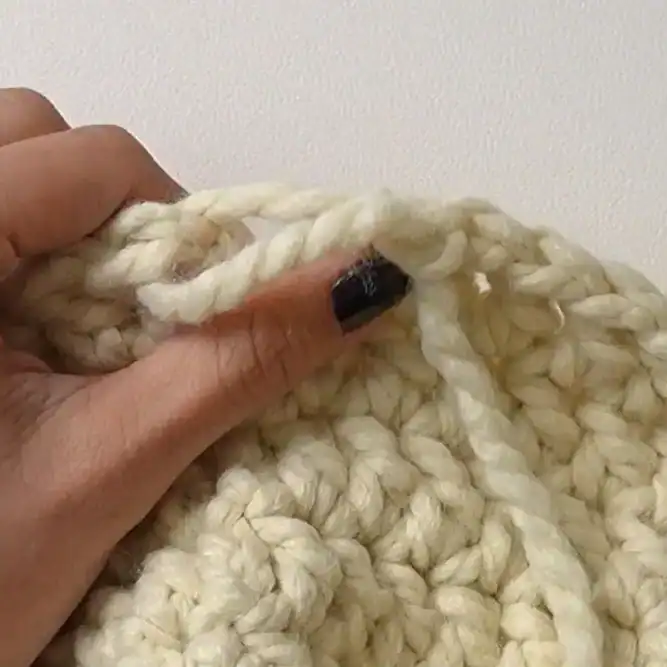
As you add more rounds, make sure to check the size. Measure the diameter from the inside of the stitches (green arrows), not outside (red arrow). Below, you can see that the diameter measures 15.5 centimeters.
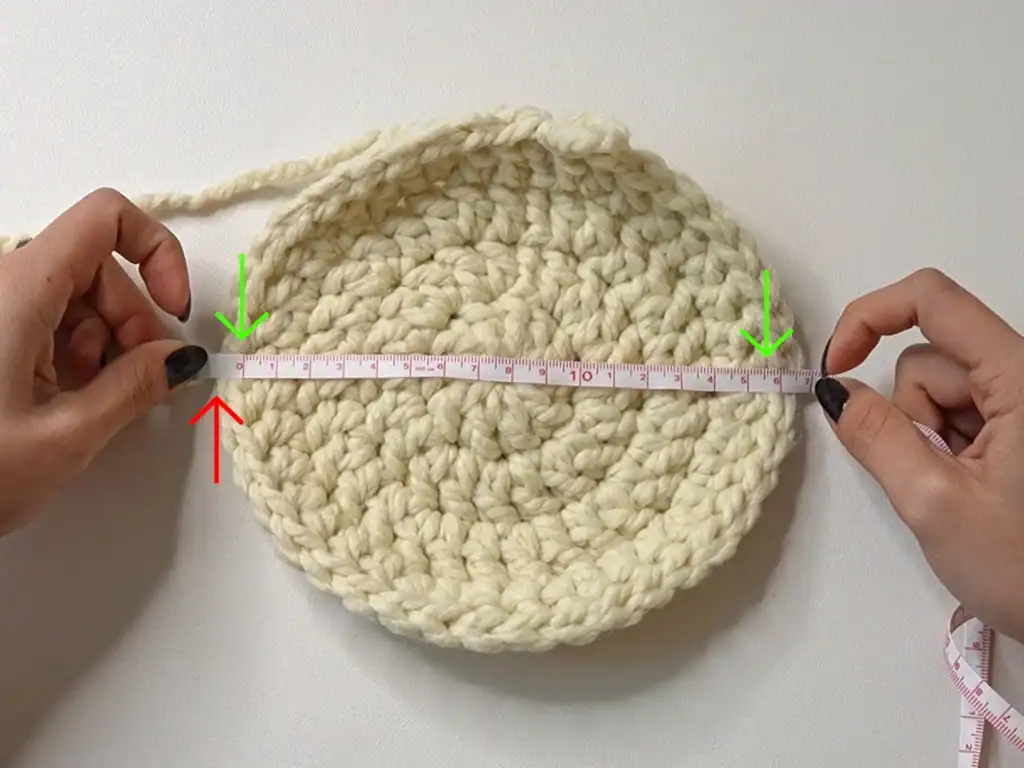
Calculate the circumference by multiplying the diameter by 3.14.
Aim for a circle circumference a little smaller than the circumference of your head. Since my head measures 53 centimeters, and the 4 rounds measures 49 centimeters, this is a good place to stop increasing.
Note: For a larger beanie, add more rounds by doing an increase after one more stitch than the round before. For example, Round 5 would be ch2, rep[dc in next 3 st, inc] around, sl st (50).
For a bulky yarn like the one I’m using, adding just one round might make it too big. For example, if 4 rounds is too small and 5 rounds is too big, do half the number of increases for Round 5. Instead of rep[dc in next 3 st, inc], do rep[dc in next 7 st, inc], so you’re increasing every 8th stitch instead of every 4th stitch.
Body
Rounds 5-10: ch2, dc around, sl st (40)
Note: Do fewer rounds for a shorter beanie, or more rounds for a longer beanie.
Fasten Off
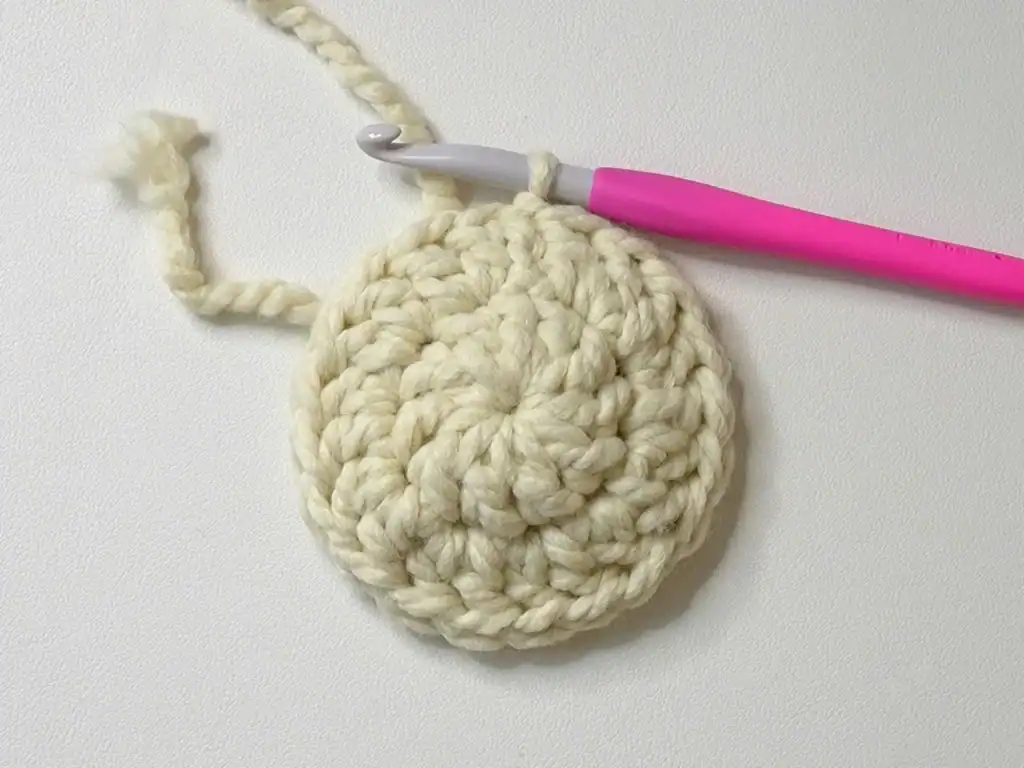
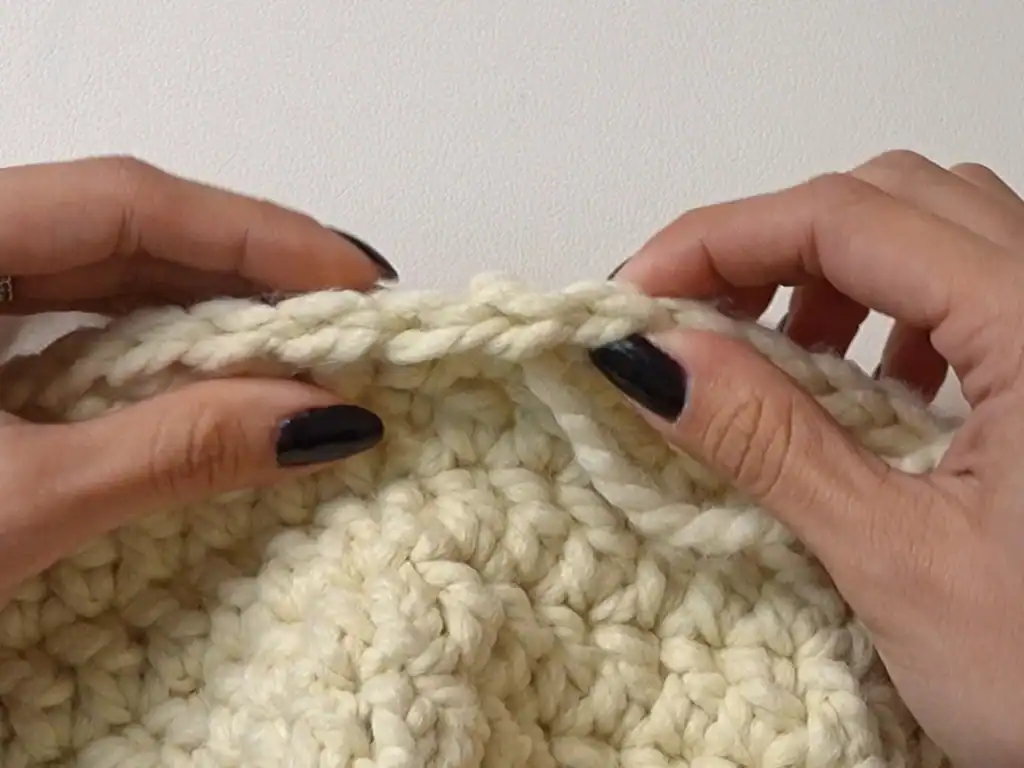
Next, we’ll fasten off. You can fasten off the typical way, by chaining 1, cutting the yarn, and pulling through with the hook, but it’ll result in the knot being along the brim.
To get a smooth edge on your brim, we’re going to undo our last slip stitch, insert our hook back into the loop, cut our yarn about 6 inches or 15 centimeters long, and pull through with our hook.
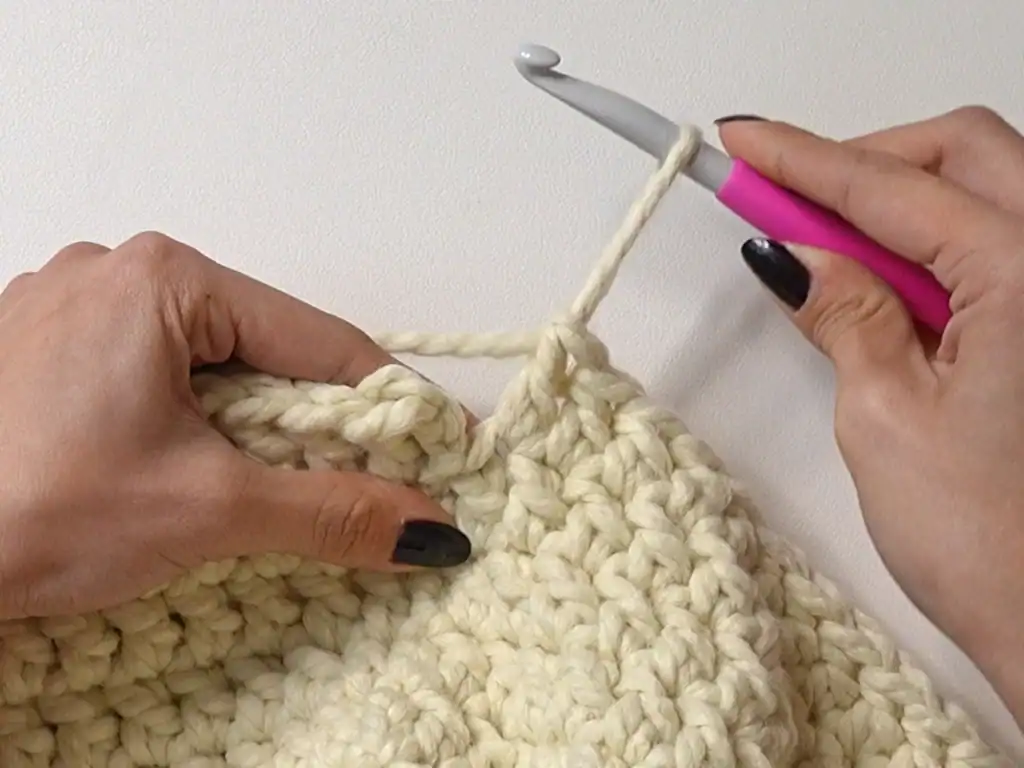
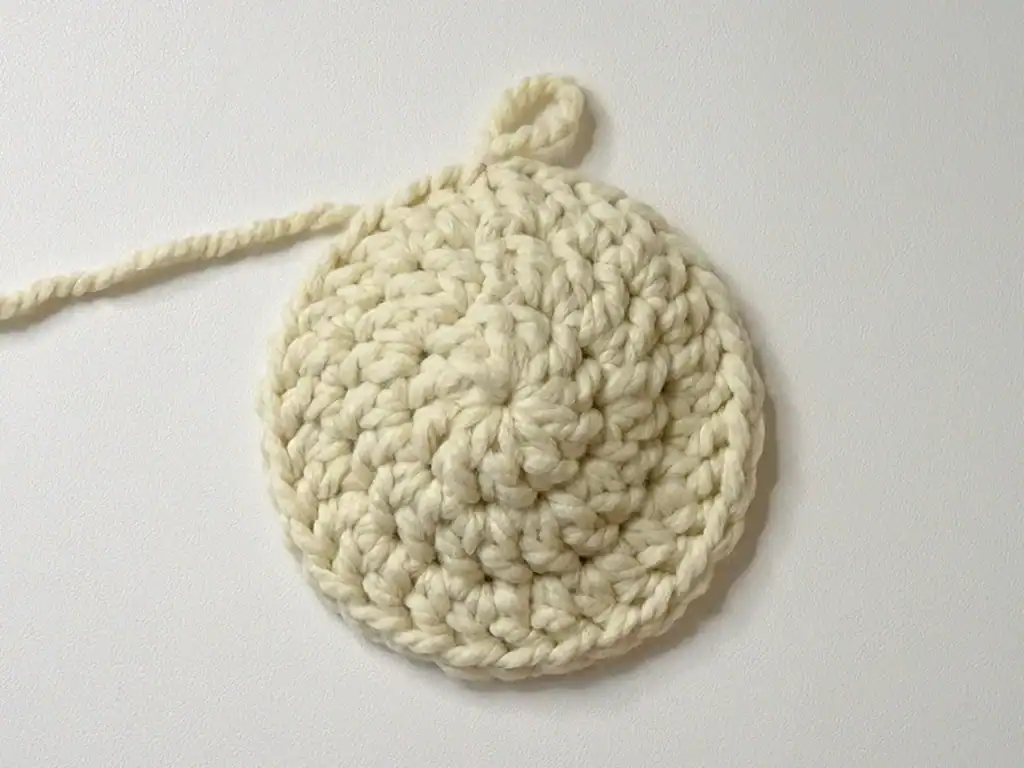
Now, we’re going to attach the first stitch of the last round to the last stitch seamlessly.
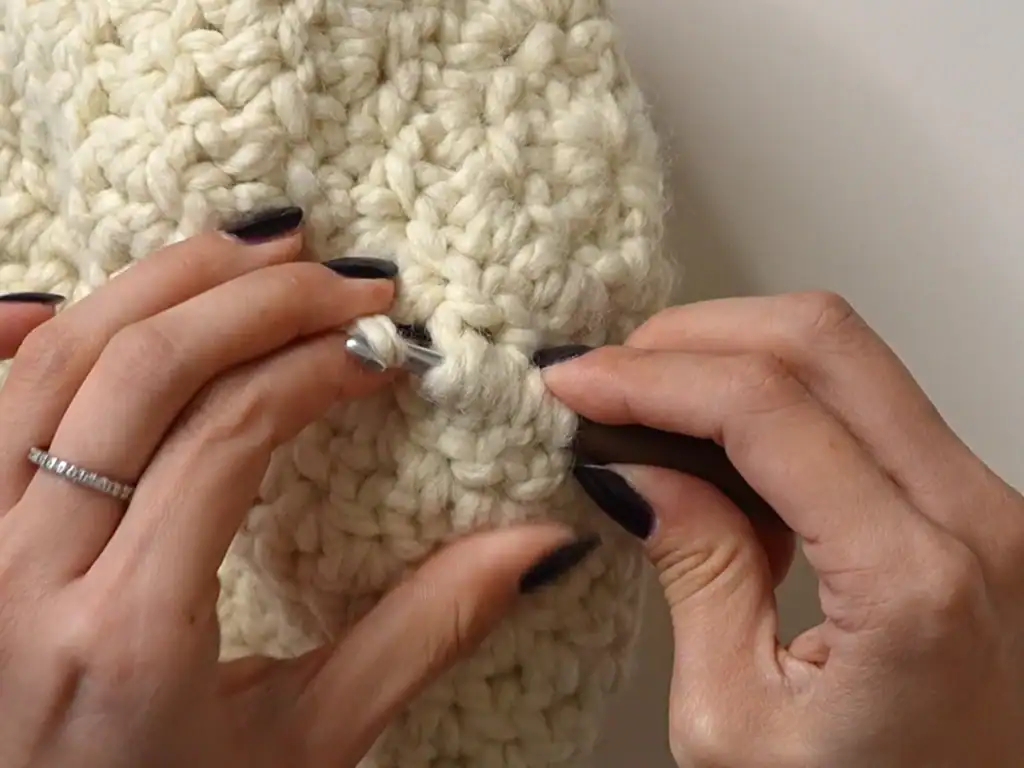
- Insert your hook into the first stitch of the last round
- Loop the tail onto your hook
- Pull it through
- Insert your hook into the front loop of the last stitch
- Loop the tail onto your hook
- Pull it through
Tighten it until it blends in with the other stitches.
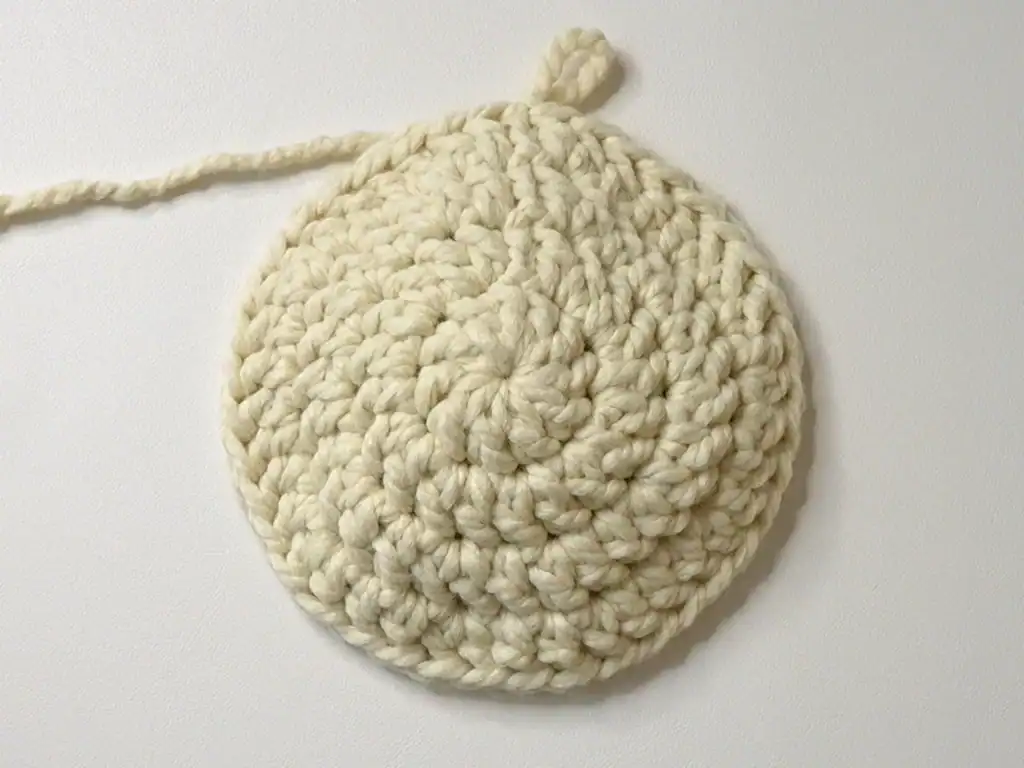
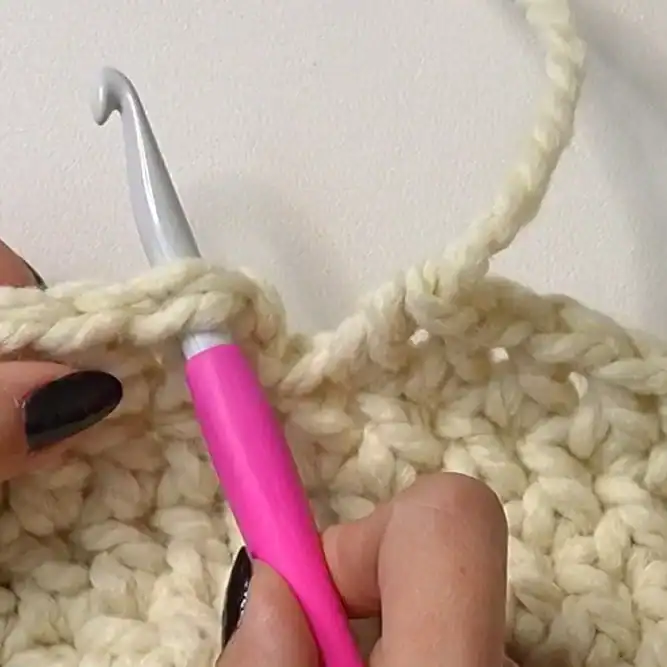
Finally, pull the tail to the inside of the beanie, and tie a knot to secure it.
Weave in your loose ends with your jumbo yarn needle or smaller hook.
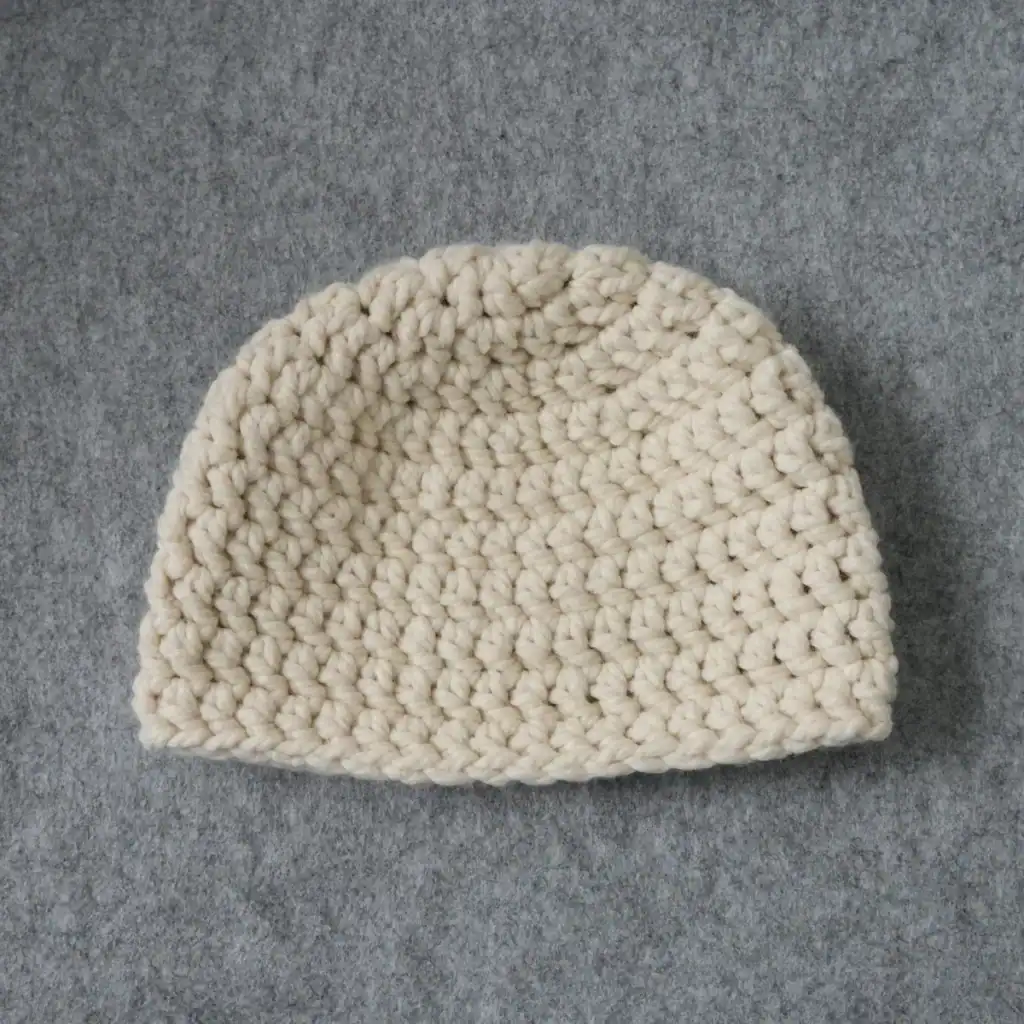
And your crochet chunky beanie is finished!


thank you soooooo muchhhhhhhhhh
great pattern will try it real soon
cindy