Diamond Lace Crochet Bandana | Free Pattern & Tutorial
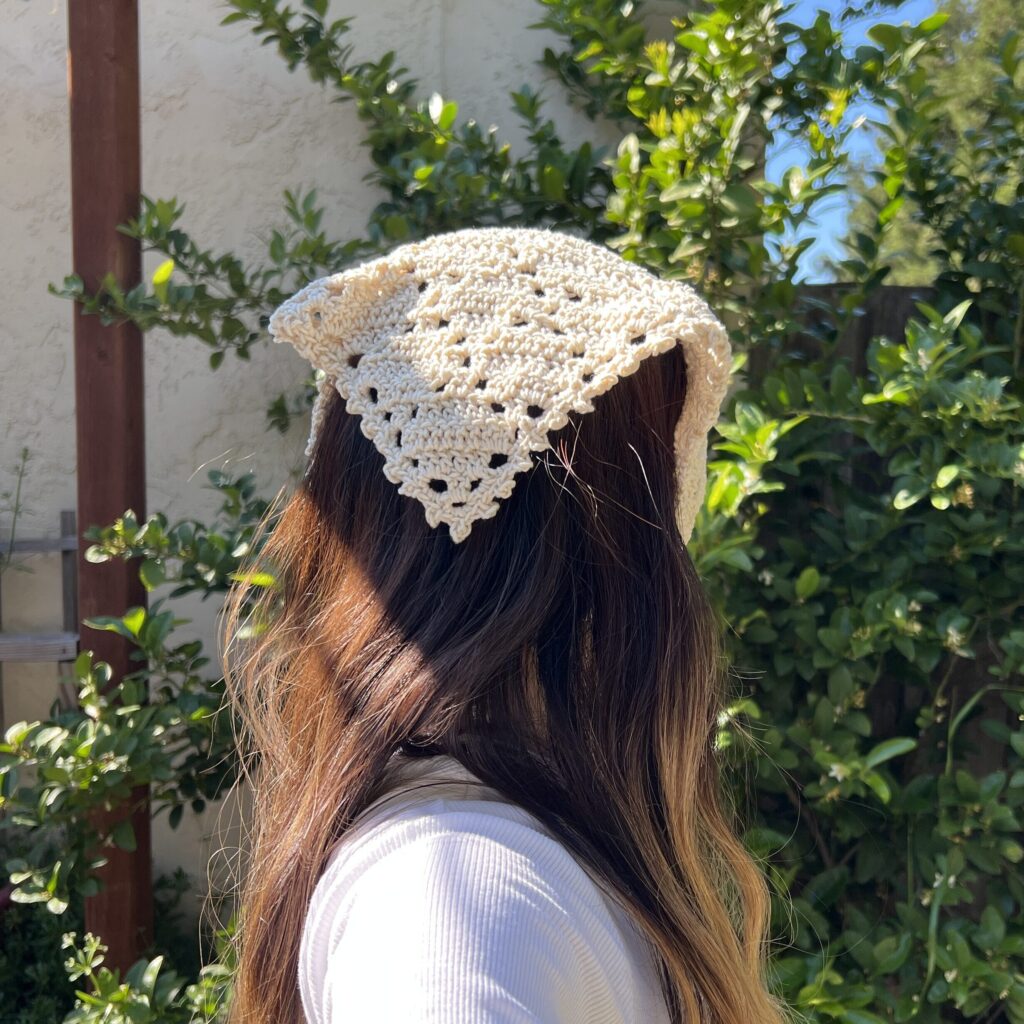
It’s getting sunnier, so it’s time for cute summer accessories! This lacy crochet bandana, using the diamond lace stitch, would be a beautiful addition to your summer wardrobe. Crochet this bandana in any size and with or without picots!
Intermediate Crochet Project
This crochet bandana is more suitable for intermediate crocheters. The diamond lace stitch requires counting rows and understanding when to skip stitches. The pixel grid version of this pattern is included, so that may help newer crocheters.
This bandana pattern also uses a special stitch: the picot stitch, which not all beginners know. However, you can skip the picots if you don’t like how they look or if you want to make the pattern quicker and easier to complete. A slightly easier crochet bandana pattern is this granny triangle bandana pattern.

Make Any Size Crochet Bandana
This crochet bandana pattern can be made to be any size. Continue adding rows and stop at any time to customize the size and make it the perfect fit for you!

Project Overview
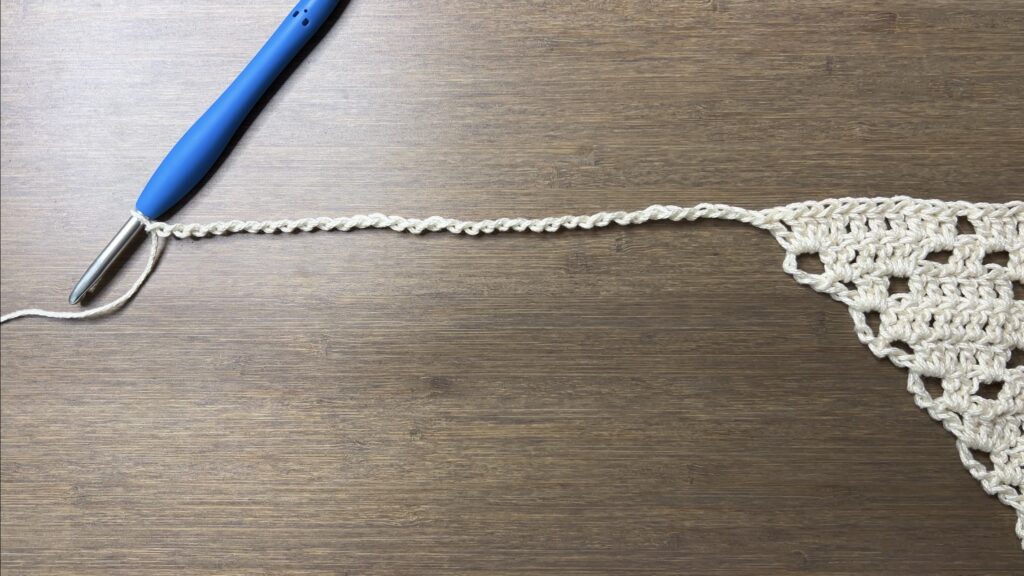
First, we will crochet the triangle with the diamond lace pattern. Then, we will crochet one strap. Then, we’ll crochet along the two shorter sides of the triangle to straighten the edges and crochet our picots. Finally, we will crochet the second strap, fasten off, and weave in our loose ends.
This is all crocheted with one skein of yarn, so you will only have two loose ends!


This post may contain affiliate links. I may earn a small commission on qualifying purchases at no additional cost to you!
Choosing Yarn and Crochet Hook
I find that crochet bandanas look better when they drape well. To get a nice drape, choose yarn that isn’t stiff. I’ve worked with both really soft and stiff acrylic and cotton yarn. Typically, cotton/acrylic blends are softer and drape well, so that could be a good choice for you. I chose to use Lion Brand 24/7 Cotton yarn, which is 100% cotton yarn because I liked the color. This isn’t a super soft yarn, so I would have to make up for that with the crochet hook I chose to use.
Another factor in how well the bandana will drape is the crochet hook you use. A smaller crochet hook will increase tension and create tighter stitches, which are stiffer. Using a larger crochet hook can make looser stitches that drape better. Instead of using the recommended 4 millimeter crochet hook for my cotton yarn, I sized up and chose a 5 millimeter hook. I could still crochet with the yarn easily, but I had looser tension, so the bandana draped softer over my head.
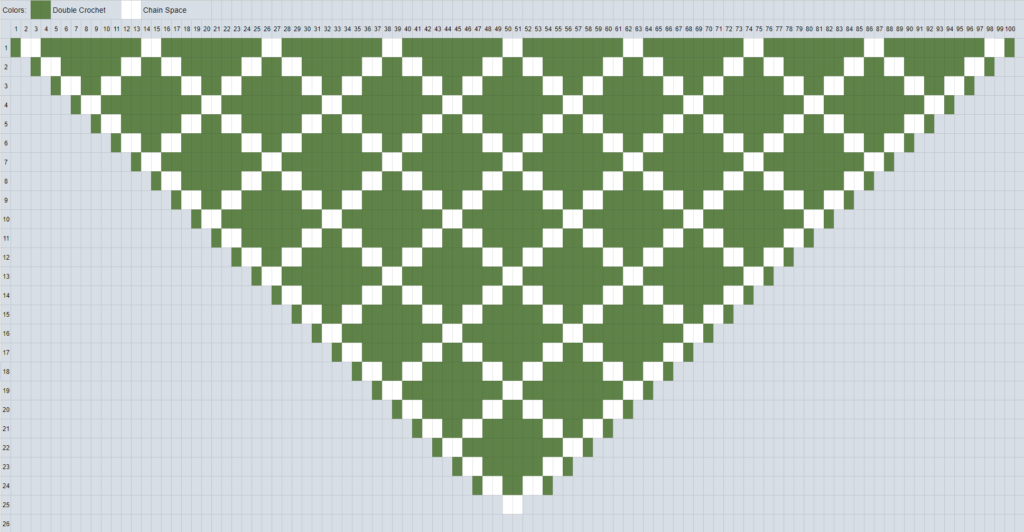
Crochet Diamond Lace Stitch Pixel Grid
The first and last ch-sp of every row will be the same, but the middle will always be slightly different. To work the middle of the row, refer to the pixel grid below or my notes.
How Each Diamond is Created
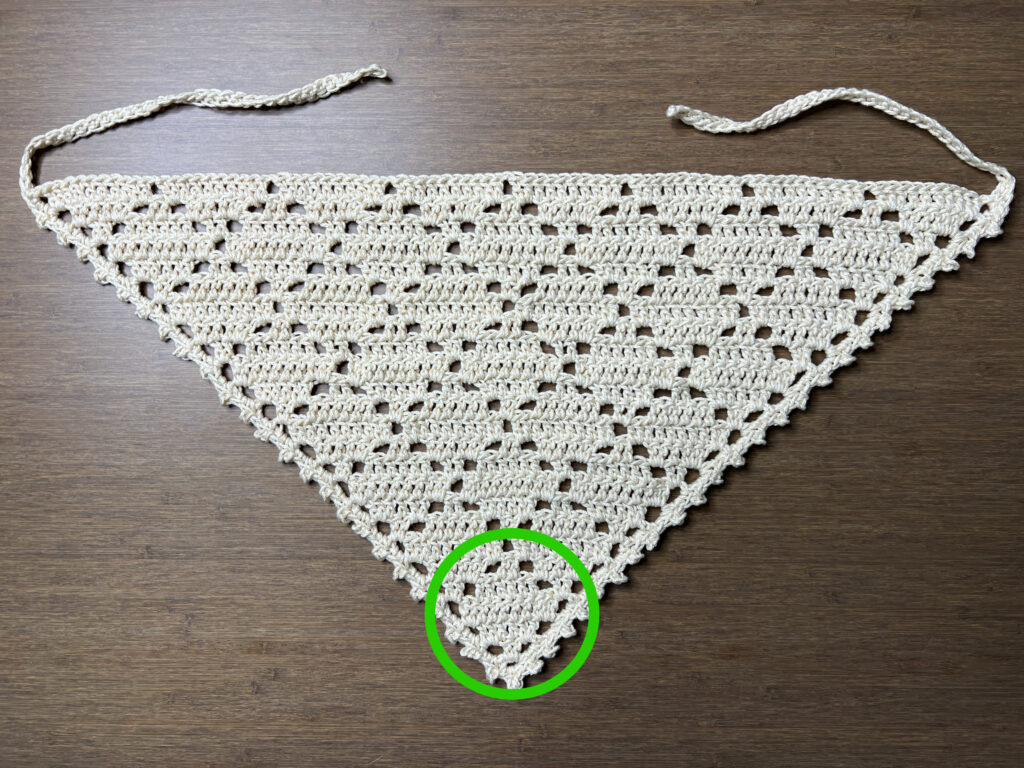
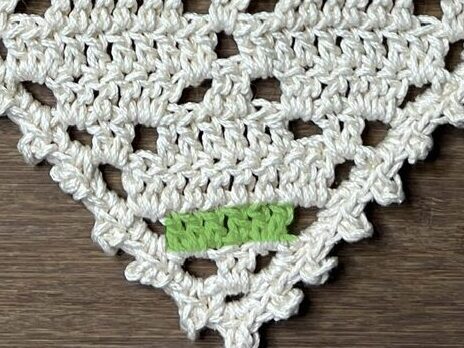
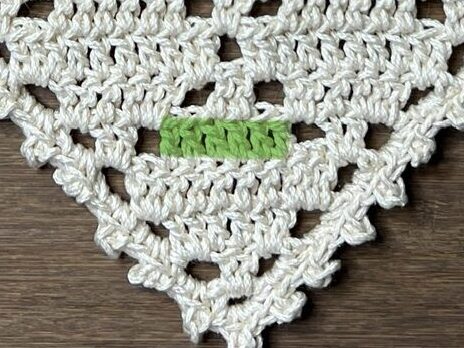
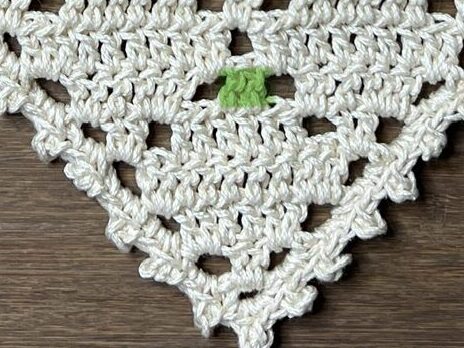
Throughout this crochet bandana pattern, you will work on many individual diamonds. The image below highlights in green the first rows (out of five) of all the diamonds.

Each diamond has five rows. I highlighted each row of the very first diamond on the bottom. The first row has 2 stitches; the second has 6; the third has 10; the fourth has 6; and the fifth has 2. The third row is the widest point of the diamond, so we don’t start skipping stitches until we reach row 4.


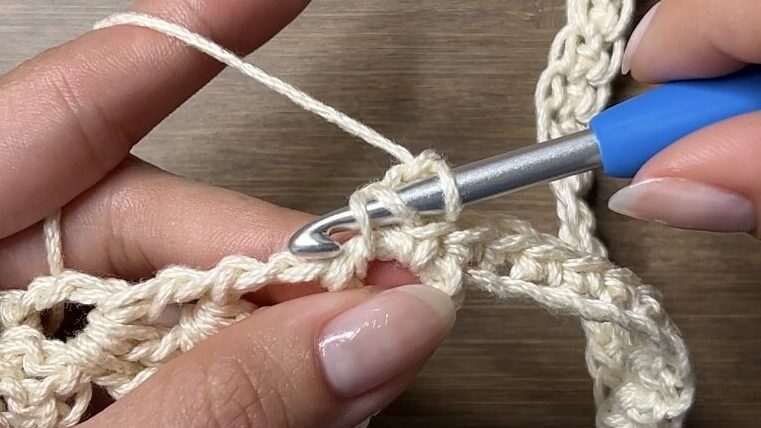
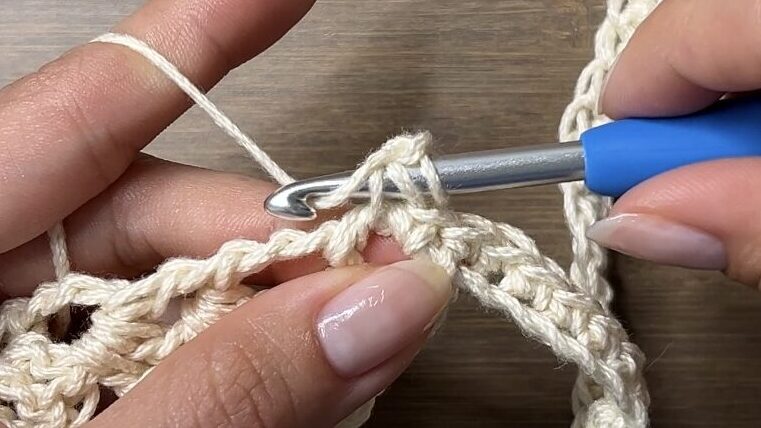
How to Crochet a Picot
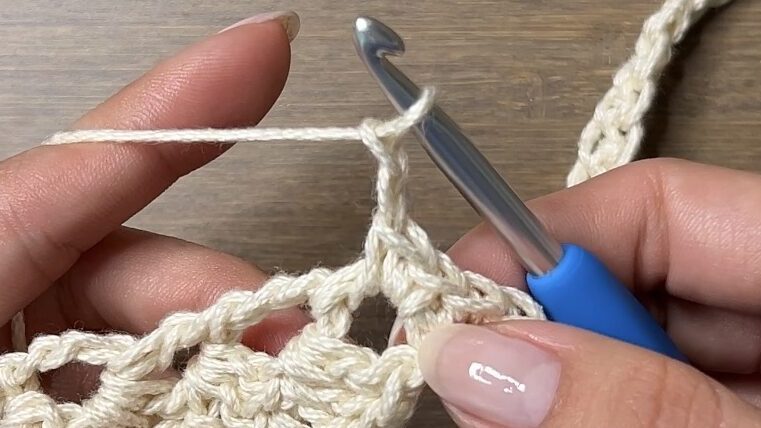
This crochet bandana will have picots along the short sides of the triangle, but you can skip them if you want!
There are many different versions of crocheting the picot stitch. For this pattern, I chained 2, inserted my hook under these two loops, and slip stitched.

Other Projects You Might Like

Crochet Bandana Video Tutorial
Become a member to get early access to new videos!
You can follow along with my YouTube video to make your own crochet bandana! I have timestamps included to section the video and help you jump to any point you need to!
Materials
- 65 grams of medium weight yarn (Lion Brand 24/7 Cotton in “Ecru“)
- 5mm Clover Amour crochet hook
- Scissors
- Yarn needle

Dimensions
Longest side of triangle: 48 centimeters (18.9 inches)
Shorter sides of triangle: 35 centimeters (13.8 inches)
Strap: 20 centimeters long (7.9 inches)
Notes and Tips
- This pattern is written using US crochet terms
- Each diamond is made up of 5 rows; do not skip stitches unless you are past the third row
Abbreviations
ch = chain
ch-sp = chain-space
dc = double crochet
rep = repeat
sk = skip
sc = single crochet
sk = skip
sl st = slip stitch
sp = space
st = stitch
Diamond Lace Crochet Bandana Pattern
Foundation: Make a slipknot, ch4, sl st to 1st ch [4th from hook] to form a ring
Row 1: ch4, [dc2, ch1, dc] into ring

Row 2: ch4, turn, dc2 in first ch-sp, dc in next 2 st, [dc2, ch1, dc] in last ch-sp
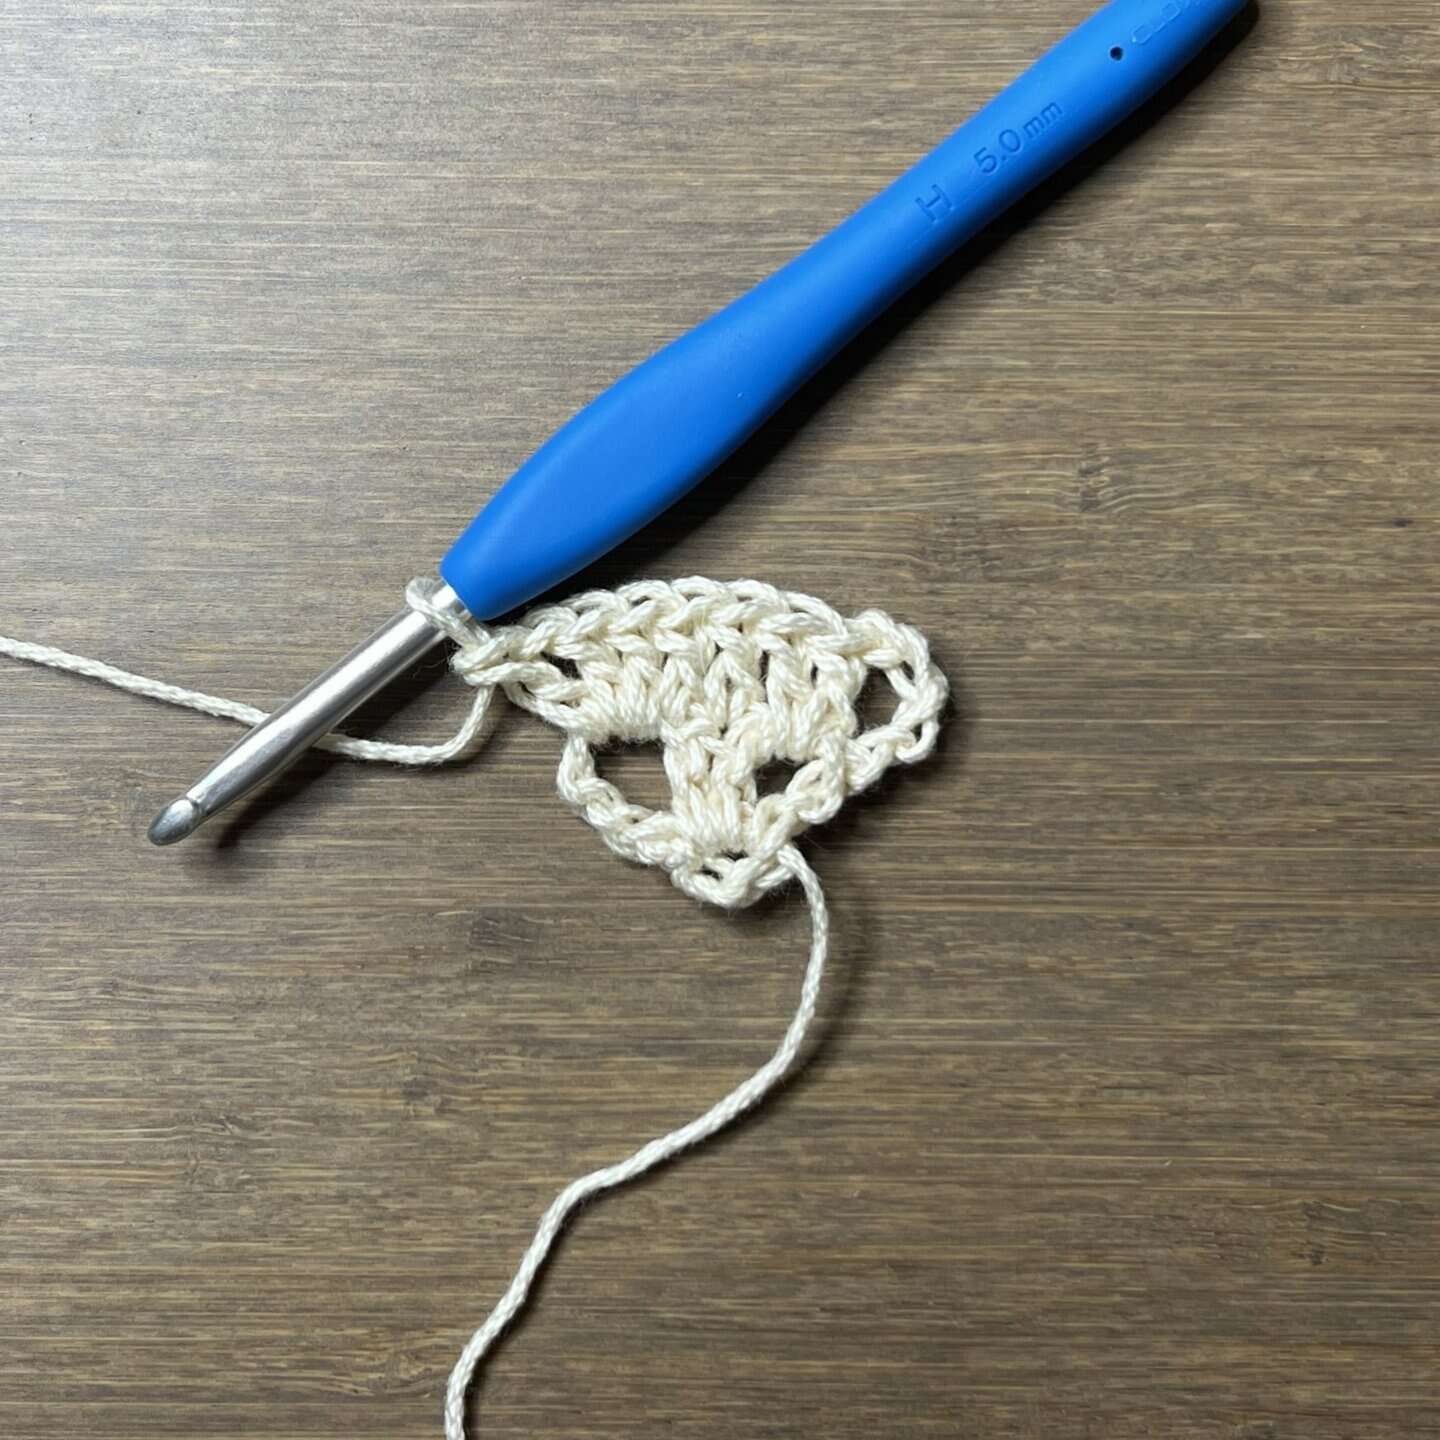
At the end of every row, push your stitches in the last chain space over to the right. This will help give your project a more triangular shape.
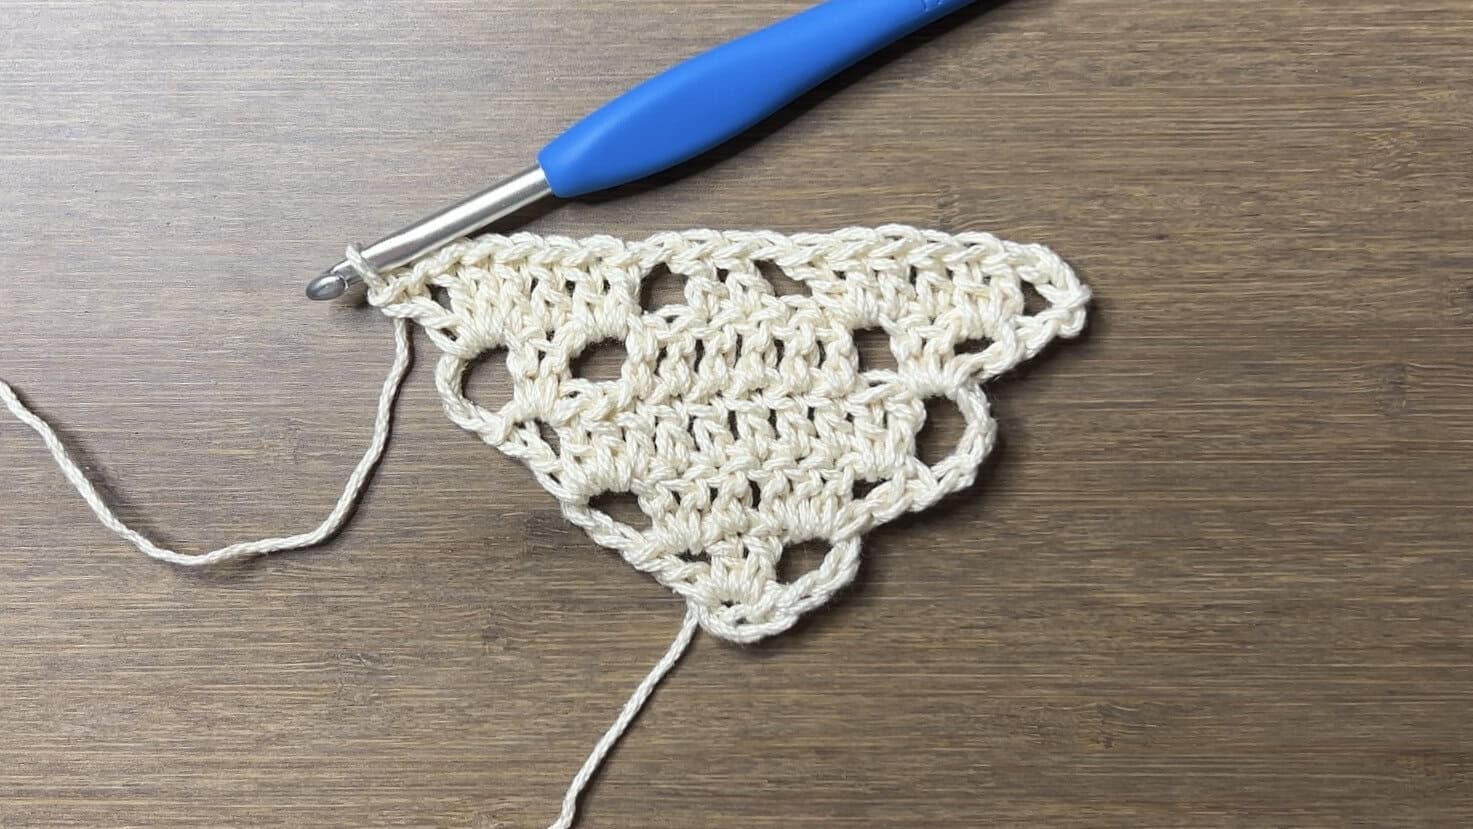
Row 3: ch4, turn, dc2 in first ch-sp, dc in next 6 st, [dc2, ch1, dc] in last ch-sp
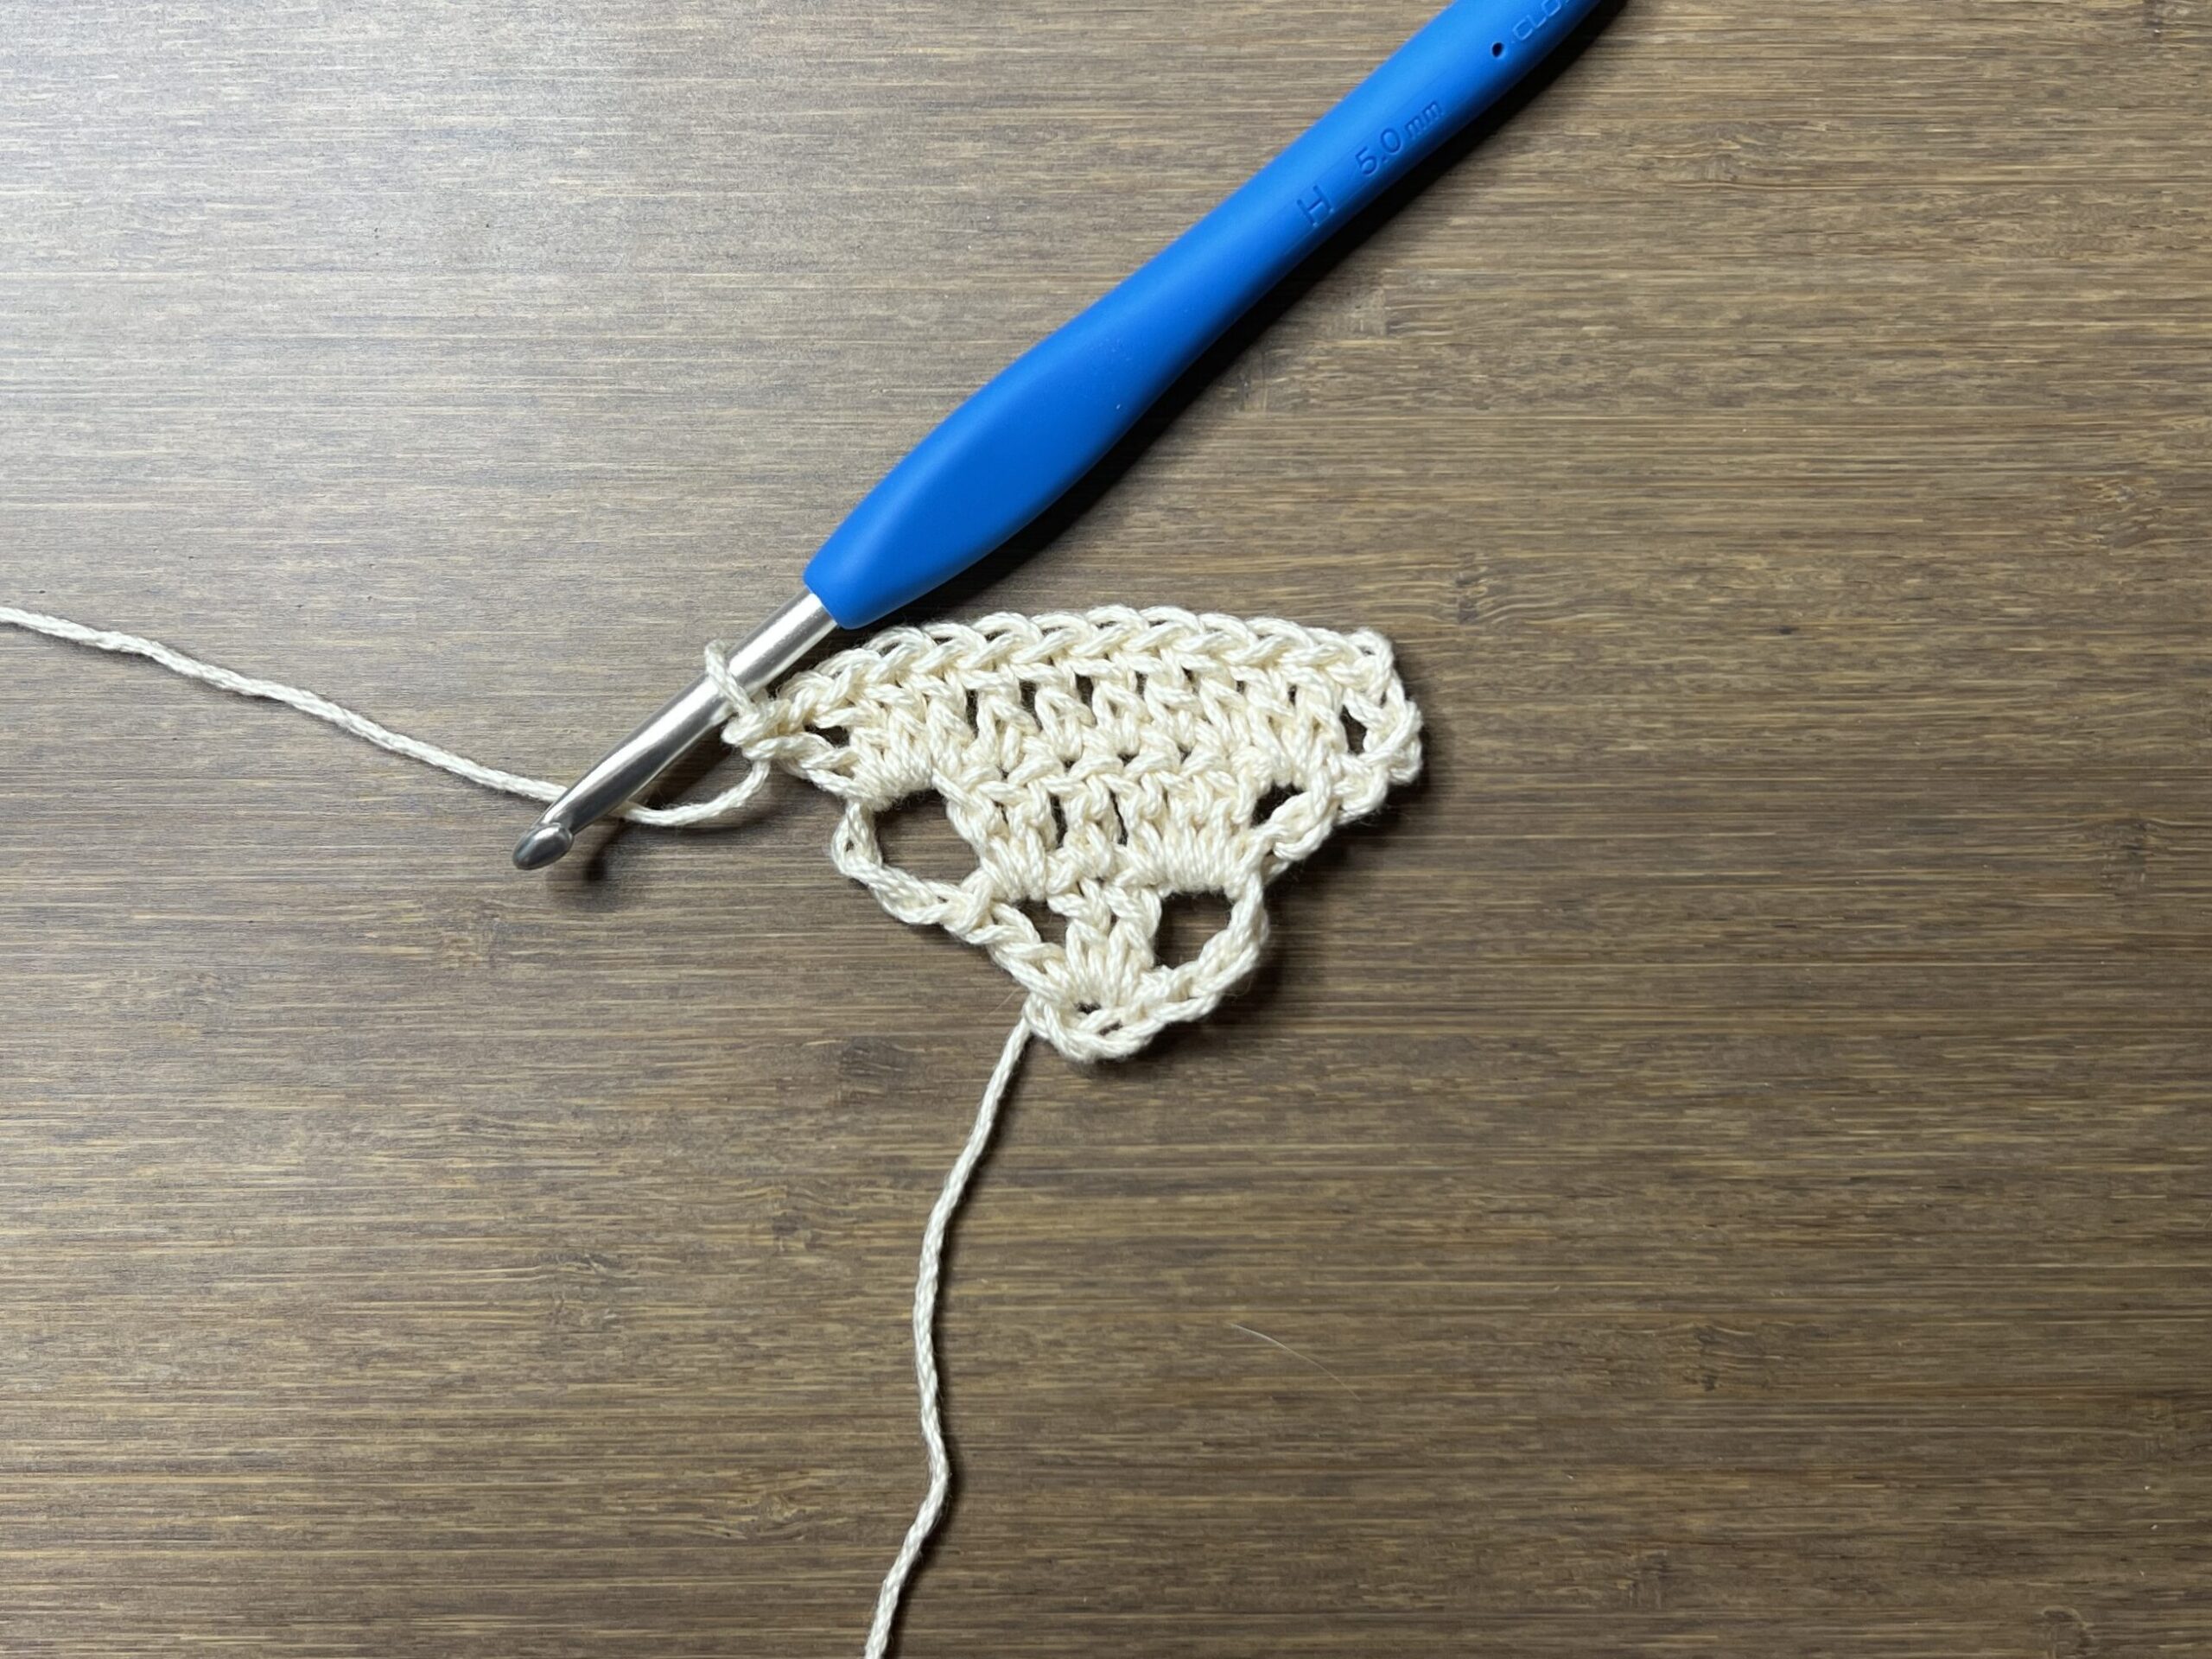
Row 4: ch4, turn, dc2 in first ch-sp, ch1, sk2, dc in next 6 st, ch1, sk2, [dc2, ch1, dc] in last ch-sp
Row 5: ch4, turn, dc2 in first ch-sp, dc in next 2 st, dc2 in next ch-sp, ch1, sk2, dc in next 2 st, ch1, sk2, dc2 in next ch-sp, dc in next 2 st, [dc2, ch1, dc] in last ch-sp
Now, you should see that the diamond at the very bottom is finished!
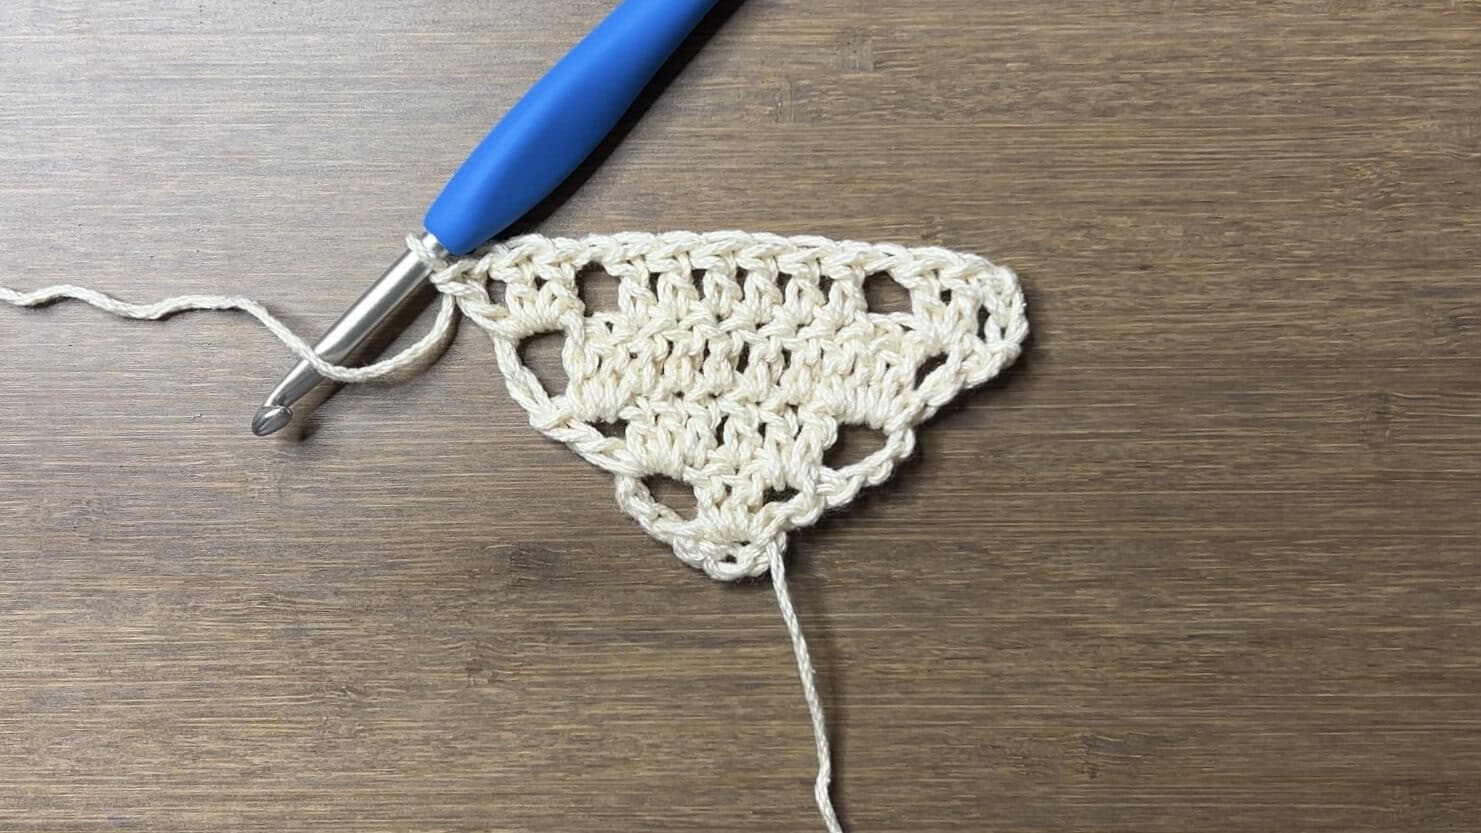
Row 6: ch4, turn, dc2 in first ch-sp, dc in next 6 st, dc2 in next ch-sp, ch1, sk2, dc2 in next ch-sp, dc in next 6 st, [dc2, ch1, dc] in last ch-sp
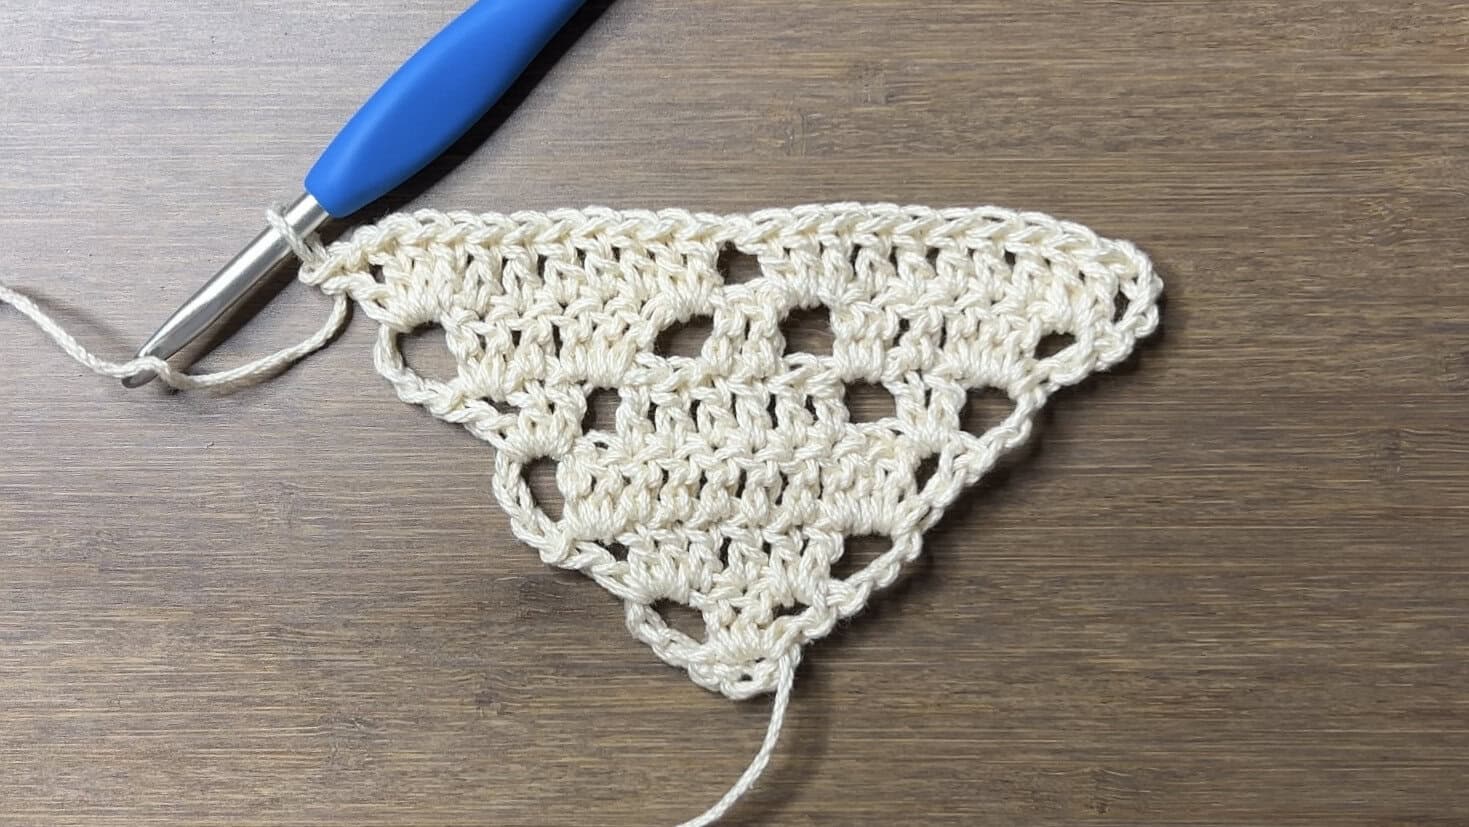
Row 7: ch4, turn, dc2 in first ch-sp, ch1, sk2, dc in next 6 st, ch1, sk2, dc2 in next ch-sp, ch1, sk2, dc in next 6 st, ch1, sk2, [dc2, ch1, dc] in last ch-sp
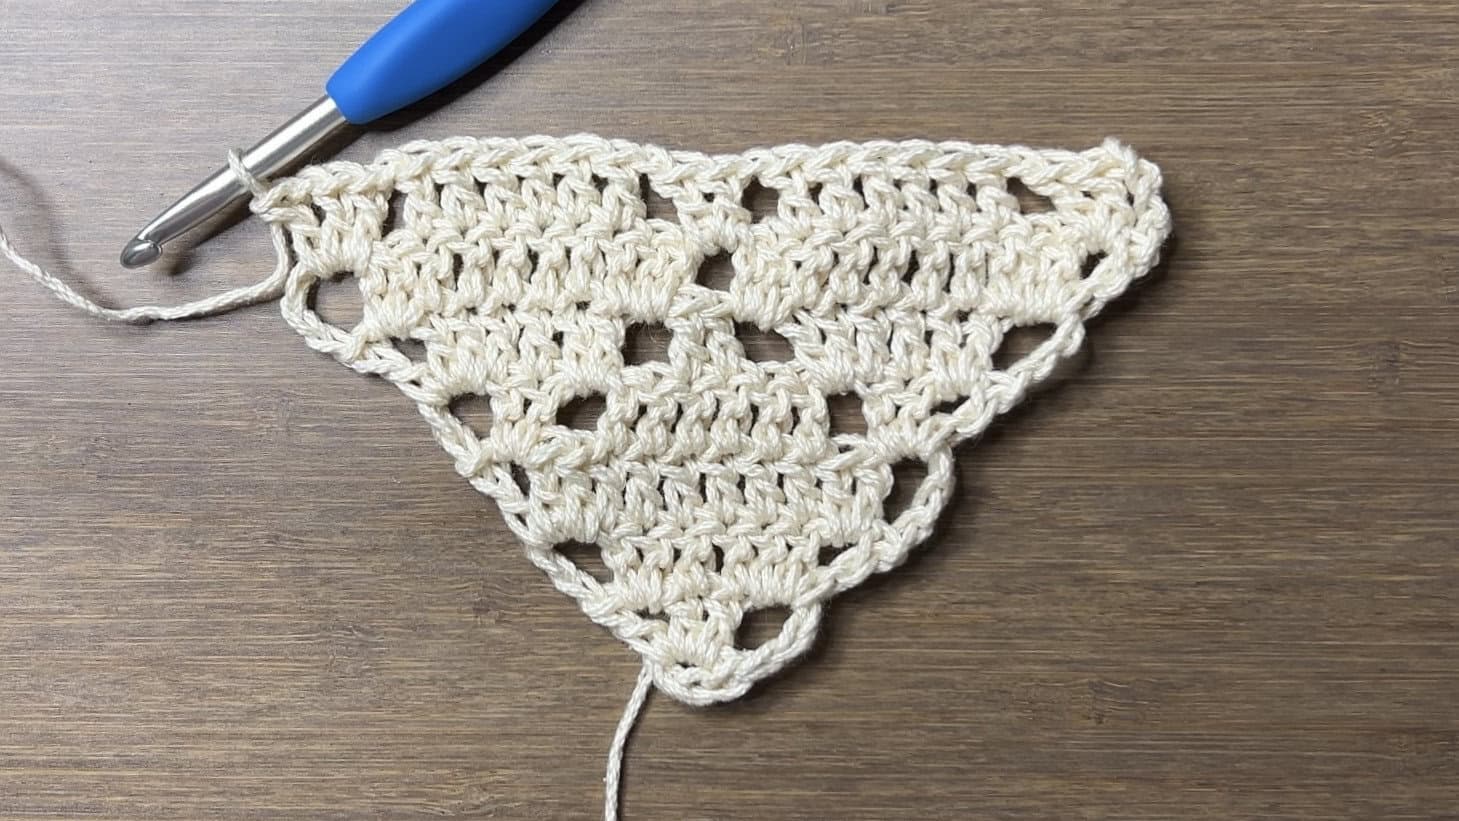
Row 8: ch4, turn, dc2 in first ch-sp, dc in next 2 st, rep[dc2 in next ch-sp, ch1, sk2, dc in next 2 st, ch1, sk2, dc2 in next ch-sp, dc in next 2 st] 2 times, [dc2, ch1, dc] in last ch-sp
Continue with the pattern until the crochet bandana is the right size for you. You can follow the pixel grid or the notes below to help you continue the pattern. If you’re unsure of anything, please don’t hesitate to leave a comment for me or anyone reading to help you out!
Notes to Continue Increasing Size
Start of every row: ch4, turn, dc2 in first ch-sp
Rows 2-3 of the diamond: don’t skip stitches
Rows 4-5 of the diamond: ch1, sk2 on either side
Row after completing diamond: ch1, sk the 2 st of 5th row
Every chain space other than the first and last: dc2
End of every row: [dc2, ch1, dc] in last ch-sp, push stitches to the right
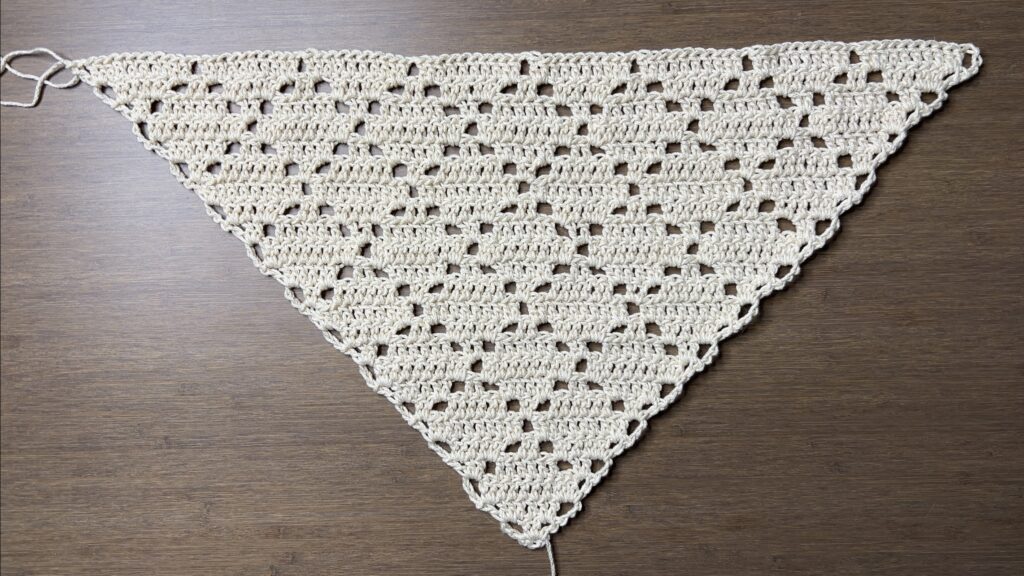
Continue increasing the size of the bandana until you get the size you want. It should wrap over your head from ear to ear and fold in half at the back of your head. I did 24 rows.
Next, we will crochet one strap, clean up the edges and make our picots, then crochet our other strap. And we won’t have to cut our yarn at all!
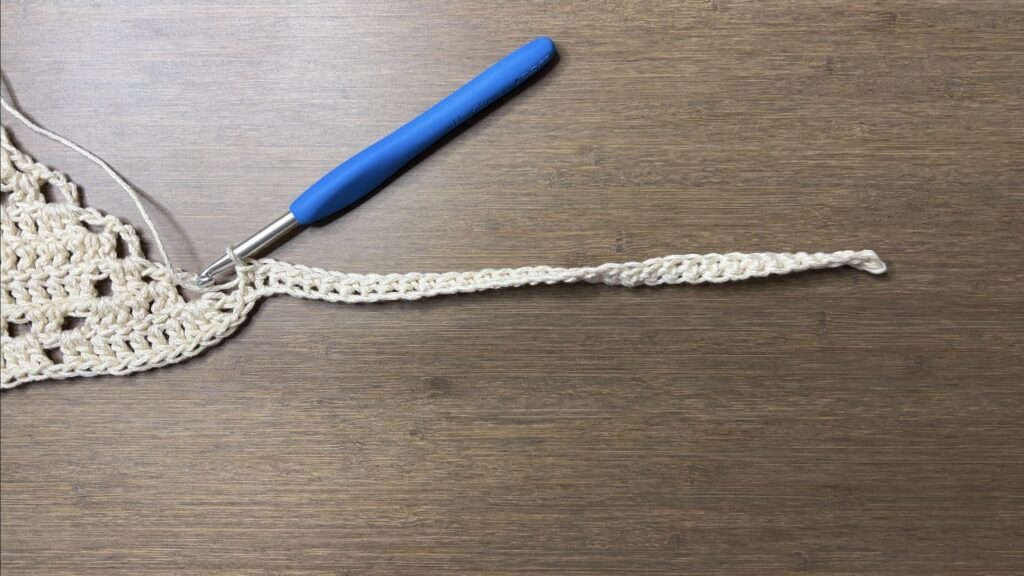
First Strap
ch35, sc in 2nd ch from hook and across (34)
Note: Do a shorter chain for a shorter strap or a longer chain for a longer strap.
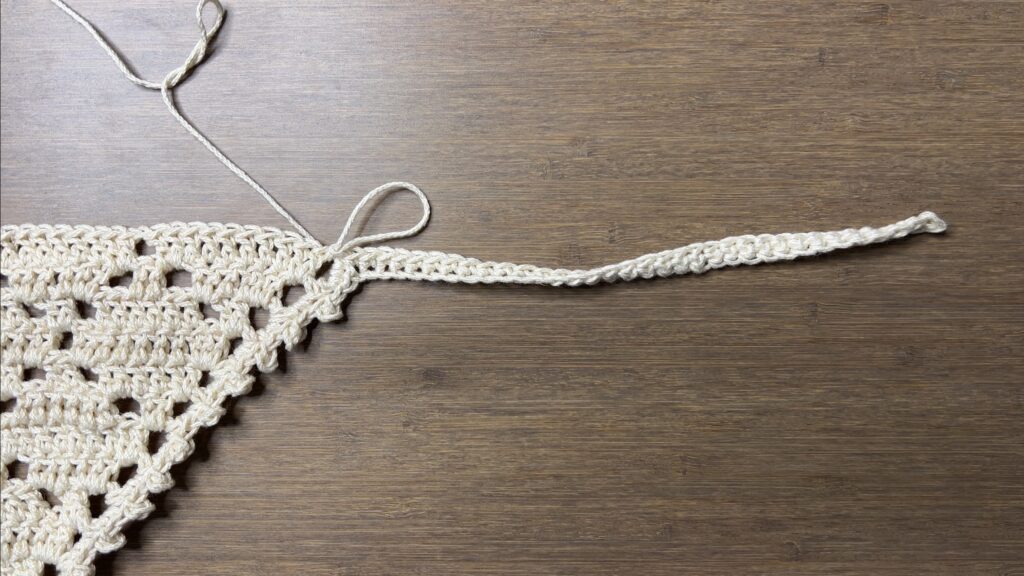
Straightening Edges and Crochet Picots
Now, we will be working into the spaces along the short sides of the triangle. Each row has a space on either end.
rep[sc2 in next sp, p] until ch4-sp at bottom point, [sc2, p, sc2] in next sp, rep[p, sc2 in next sp] along the side
Note: If you prefer your bandana without picots, you can skip them and just do 2 single crochets per space.
Second Strap
ch35, sc in 2nd ch from hook and across, sl st to sp, fasten off (34)
Note: If you did a different number of chains for the first strap, do that same number of chains for an identical second strap.
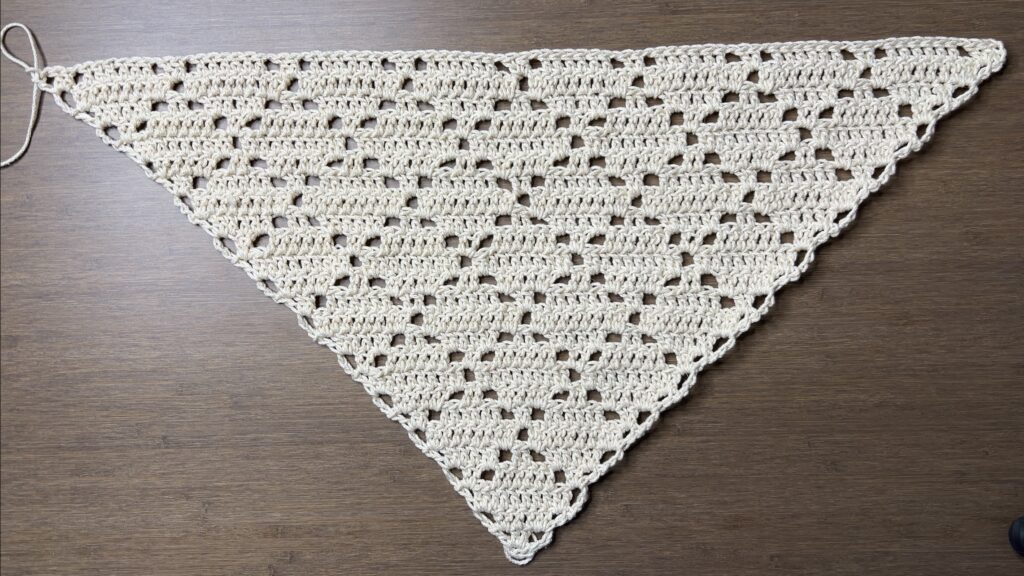
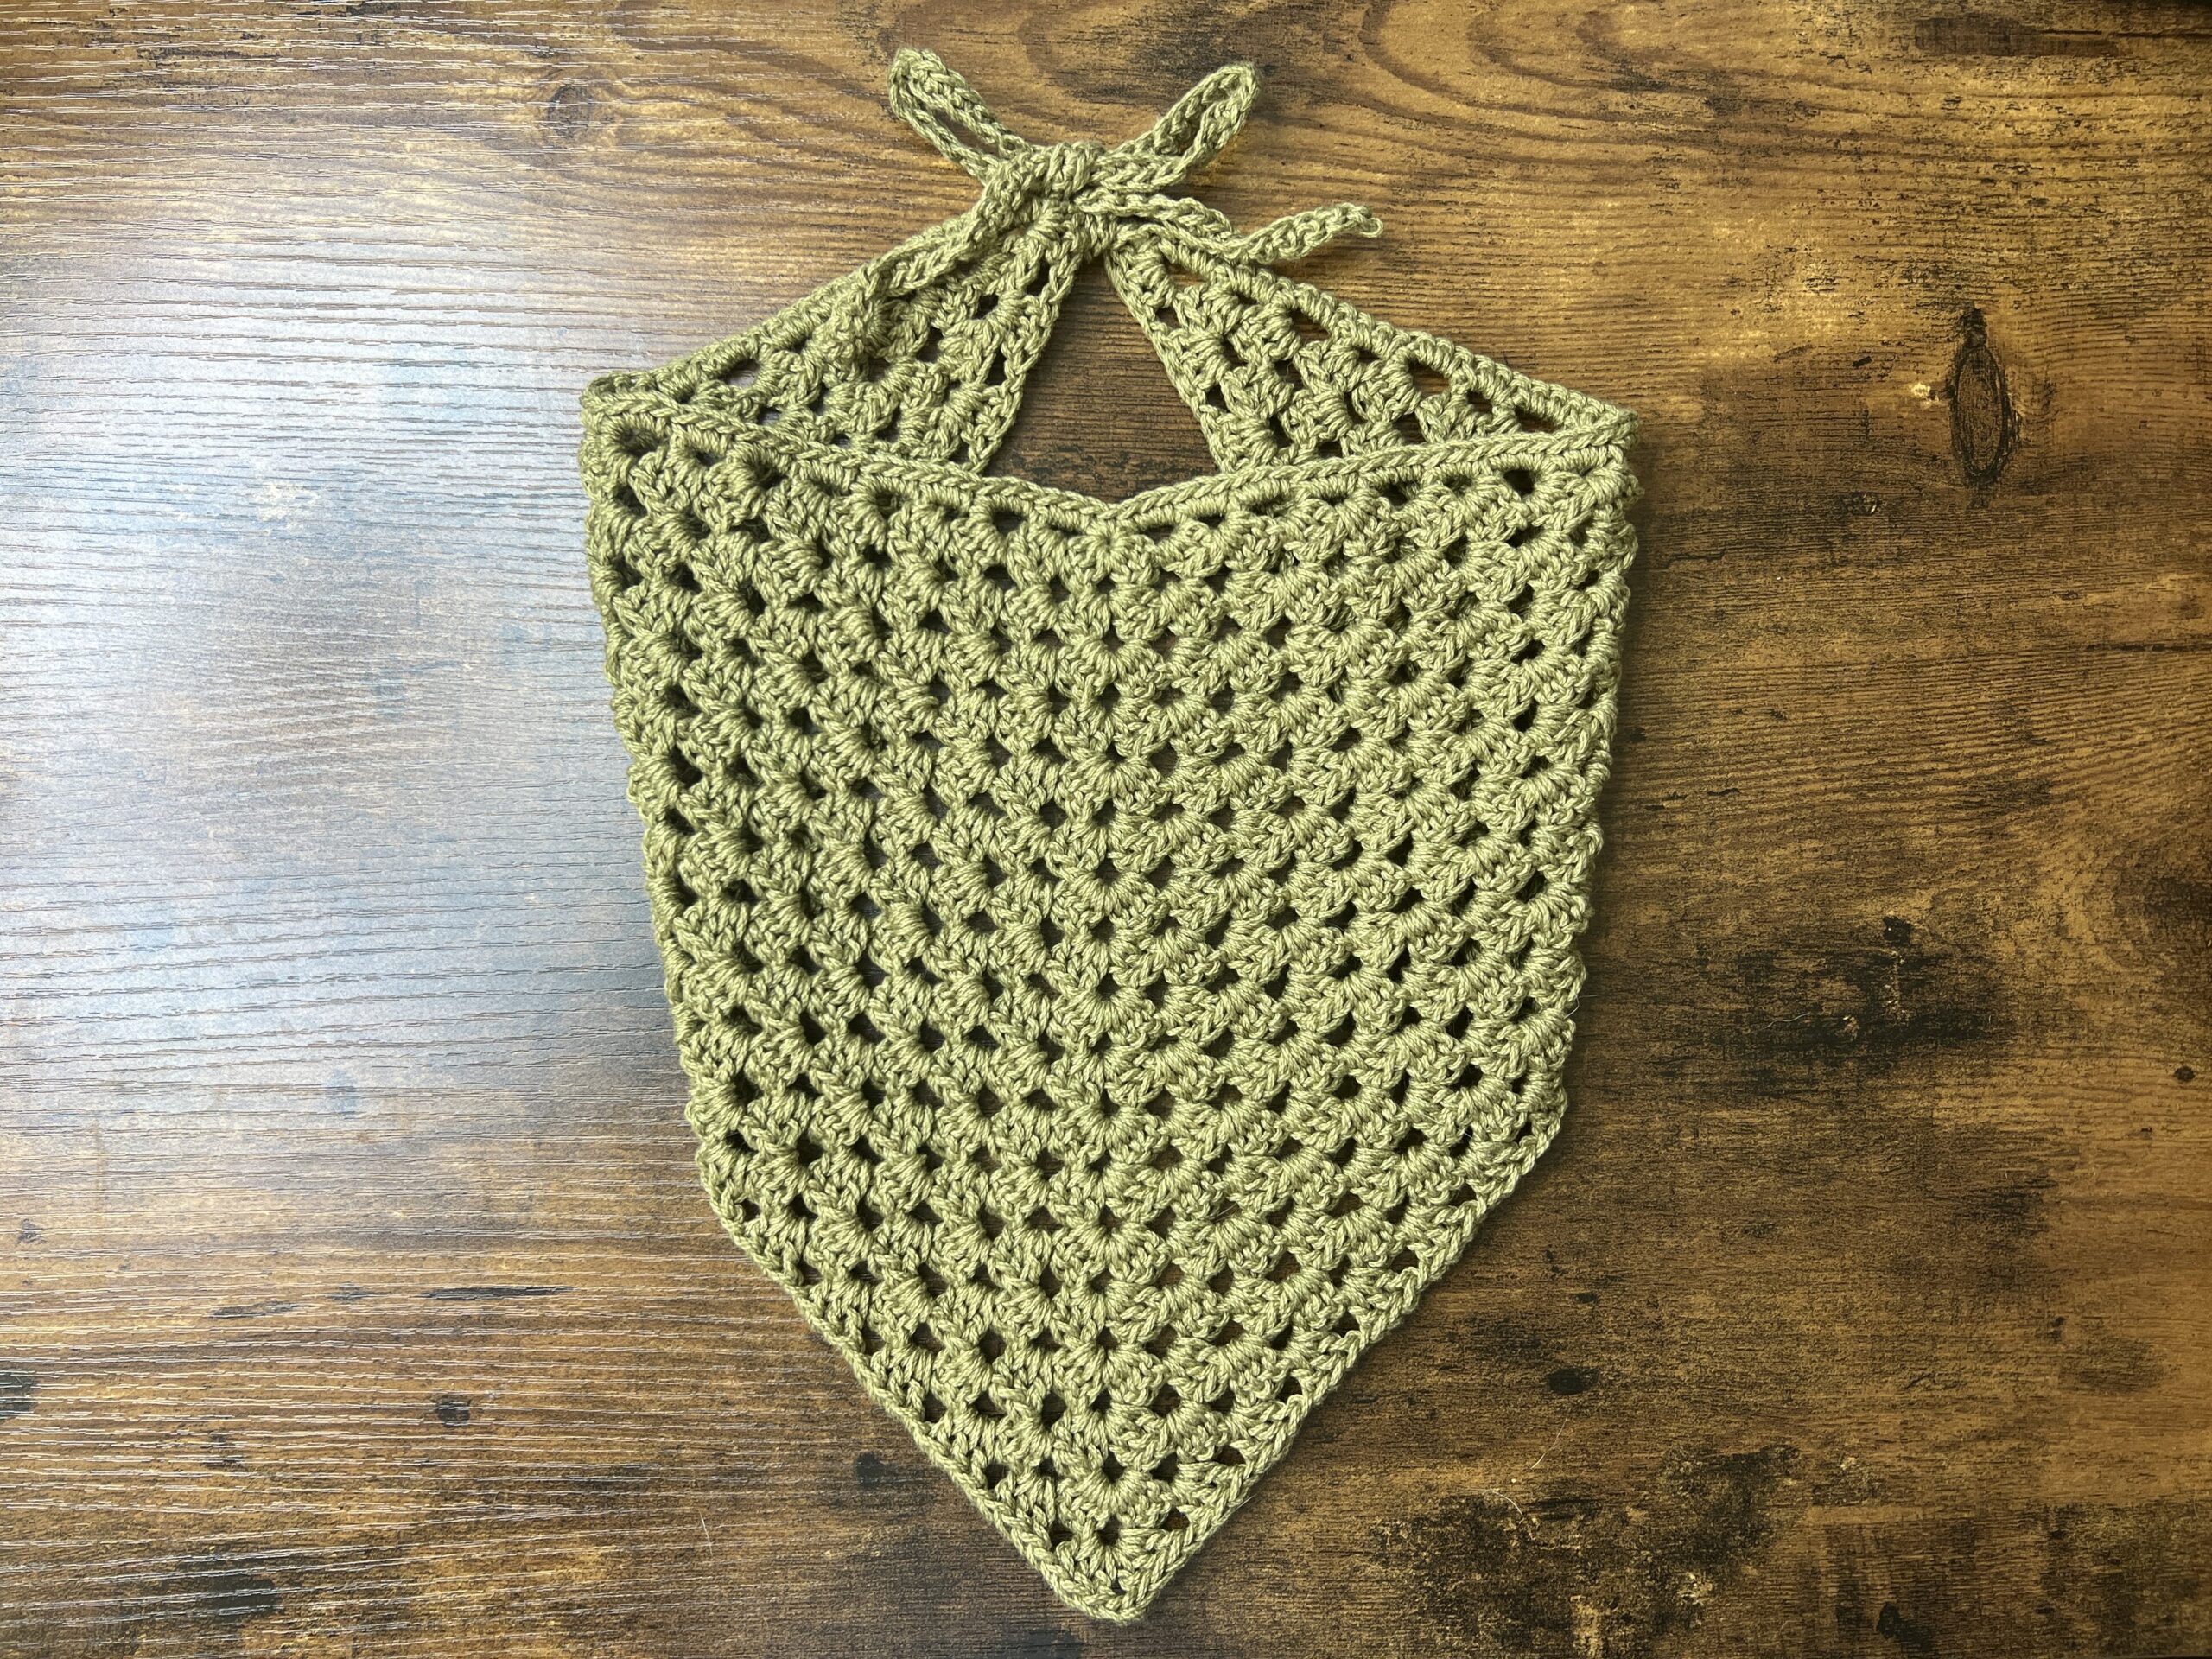
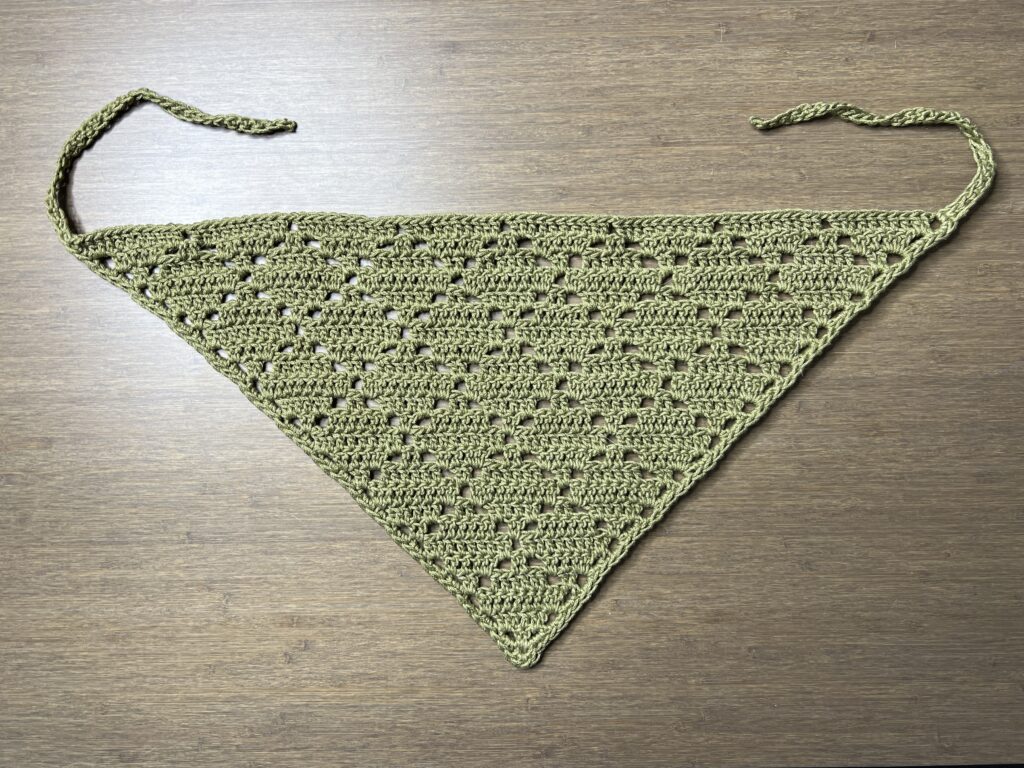
Finished Diamond Lace Crochet Bandana
Weave in your two loose ends and your crochet bandana is finished!


I am really confused on what to do after row 8! Do you think you could help me?
It would be nice if I could print the instructions. I am not going to be tied to the computer while making this. Crochet is great for traveling and waiting rooms etc.
Hi, I’m in agreement with other comments about updating these instructions, if it weren’t for the comments explaining it to others I would’ve crashed out. (Unfortunately not an exaggeration).
love all of these patterns their easy enough for me to understand as a newer crocheter would highly recommend you check it out.
I don’t wish to be critical but I really think you should update the written instructions and include all rows. So many people are stuck and abandoning the project after row 8.
I agree! It would save me from punching parakeets if someone would just provide clear, written instructions for rows 9-finish. (No actual parakeets were harmed…yet)🙄
I agree here, I’ve started and got to the “end” and can’t make out the instructions and probably going to abandon
soooo cute, made it for my mom and she loved it. its really quick to make and i found the pattern easy to follow, thank yeww !!
I love these way this looks but unfortunately I can’t get past row 8, I don’t understand the instructions.
Hi! I’m wondering if I would be allowed to sell bandanas made with this pattern on my Etsy shop? I would credit the pattern in the product description
Cutest Pattern ever! My yarn was a bit thicker than I had hoped, but still love the way the bandana turned out. Thank you!!!
so I’m kind of a beginner, I keep messing up after row 8. I would kiss someone on the forehead if they could post a full pattern for this <3
I can read a pattern but trying to read the pixel image kind of makes my brain melt and I just haven't been able to figure it out lol
after row 8, just repeat rows 6-8 until you get to your size
Thank you @Ash. That helped me figure it out. So the next rows would be:
Row 9: ch4, turn, dc2 in first ch-sp, ch1, REP[sk2, dc in next 6 st, ch1, sk2, dc2 in next ch-sp, ch1], sk2, in last ch-sp: dc2, ch1, dc
Row 10: ch4, turn, dc2 in first ch-sp, dc in next 2 st, REP [dc2 in next ch-sp, ch1, sk2, dc in next 2 st, ch1, sk2, dc2 in next ch-sp, dc in next 2 st], in last ch-sp: dc2, ch1, dc
Row 11: ch4, turn, dc2 in first ch-sp, dc in next 6 st, REP [dc2 in next ch-sp, ch1, sk2, dc2 in next ch-sp, dc in next 6 st], in last ch-sp: dc2, ch1, dc
And just make another repeat (REP) each row.
Hola, básicamente la vuelta 12, 13 y 14 serían como la 9,10 y 11? 🙁 idk
thank you for just spelling it out!
Hello! So sorry to ask but I am slightly confused about the instructions after row 8. Does the count go back to two afterwards? Also, I’m unsure what to do when it says “Don’t skip stitches.” Thank you in advance!
Hi! You can follow the pixel grid or the notes to continue increasing your bandana. The notes apply to each diamond that you create. Just above how to crochet a picot, you can see how to count which row of a diamond that you’re on.
If you’re working the 2nd or 3rd row of the diamond, you don’t skip over any stitches on the sides of the diamond because you’re making the diamond wider. For Rows 4-5, you’re creating the point at the top of the diamond, so you do skip stitches on either side of the diamond.
I hope that helps! Please let me know if you need me to explain anything further
Thank you so much! One last question, however, Does this mean that rows 2-3 will have no gaps or chain spaces until the next few rows?
Not exactly! Every row will always have gaps between the diamonds to separate them. The notes apply to each individual diamond. If you look at Row 5, the first diamond is on its 2nd row, but the second one is on its 5th. And finally, the third diamond is also on its 2nd row. The diamond in the middle will have gaps on either end
Thank you so much for all your help! 🙂
No problem!