Tie-Front Crochet Mesh Top | Free Pattern & Video Tutorial
This crochet mesh top is the perfect summer staple! This crochet pattern is worked in one piece, has very minimal sewing, and is easy to adjust. Crochet a cute tie-front top this summer!
Follow along with this free written pattern, or watch the video tutorial to make your very own crochet top!
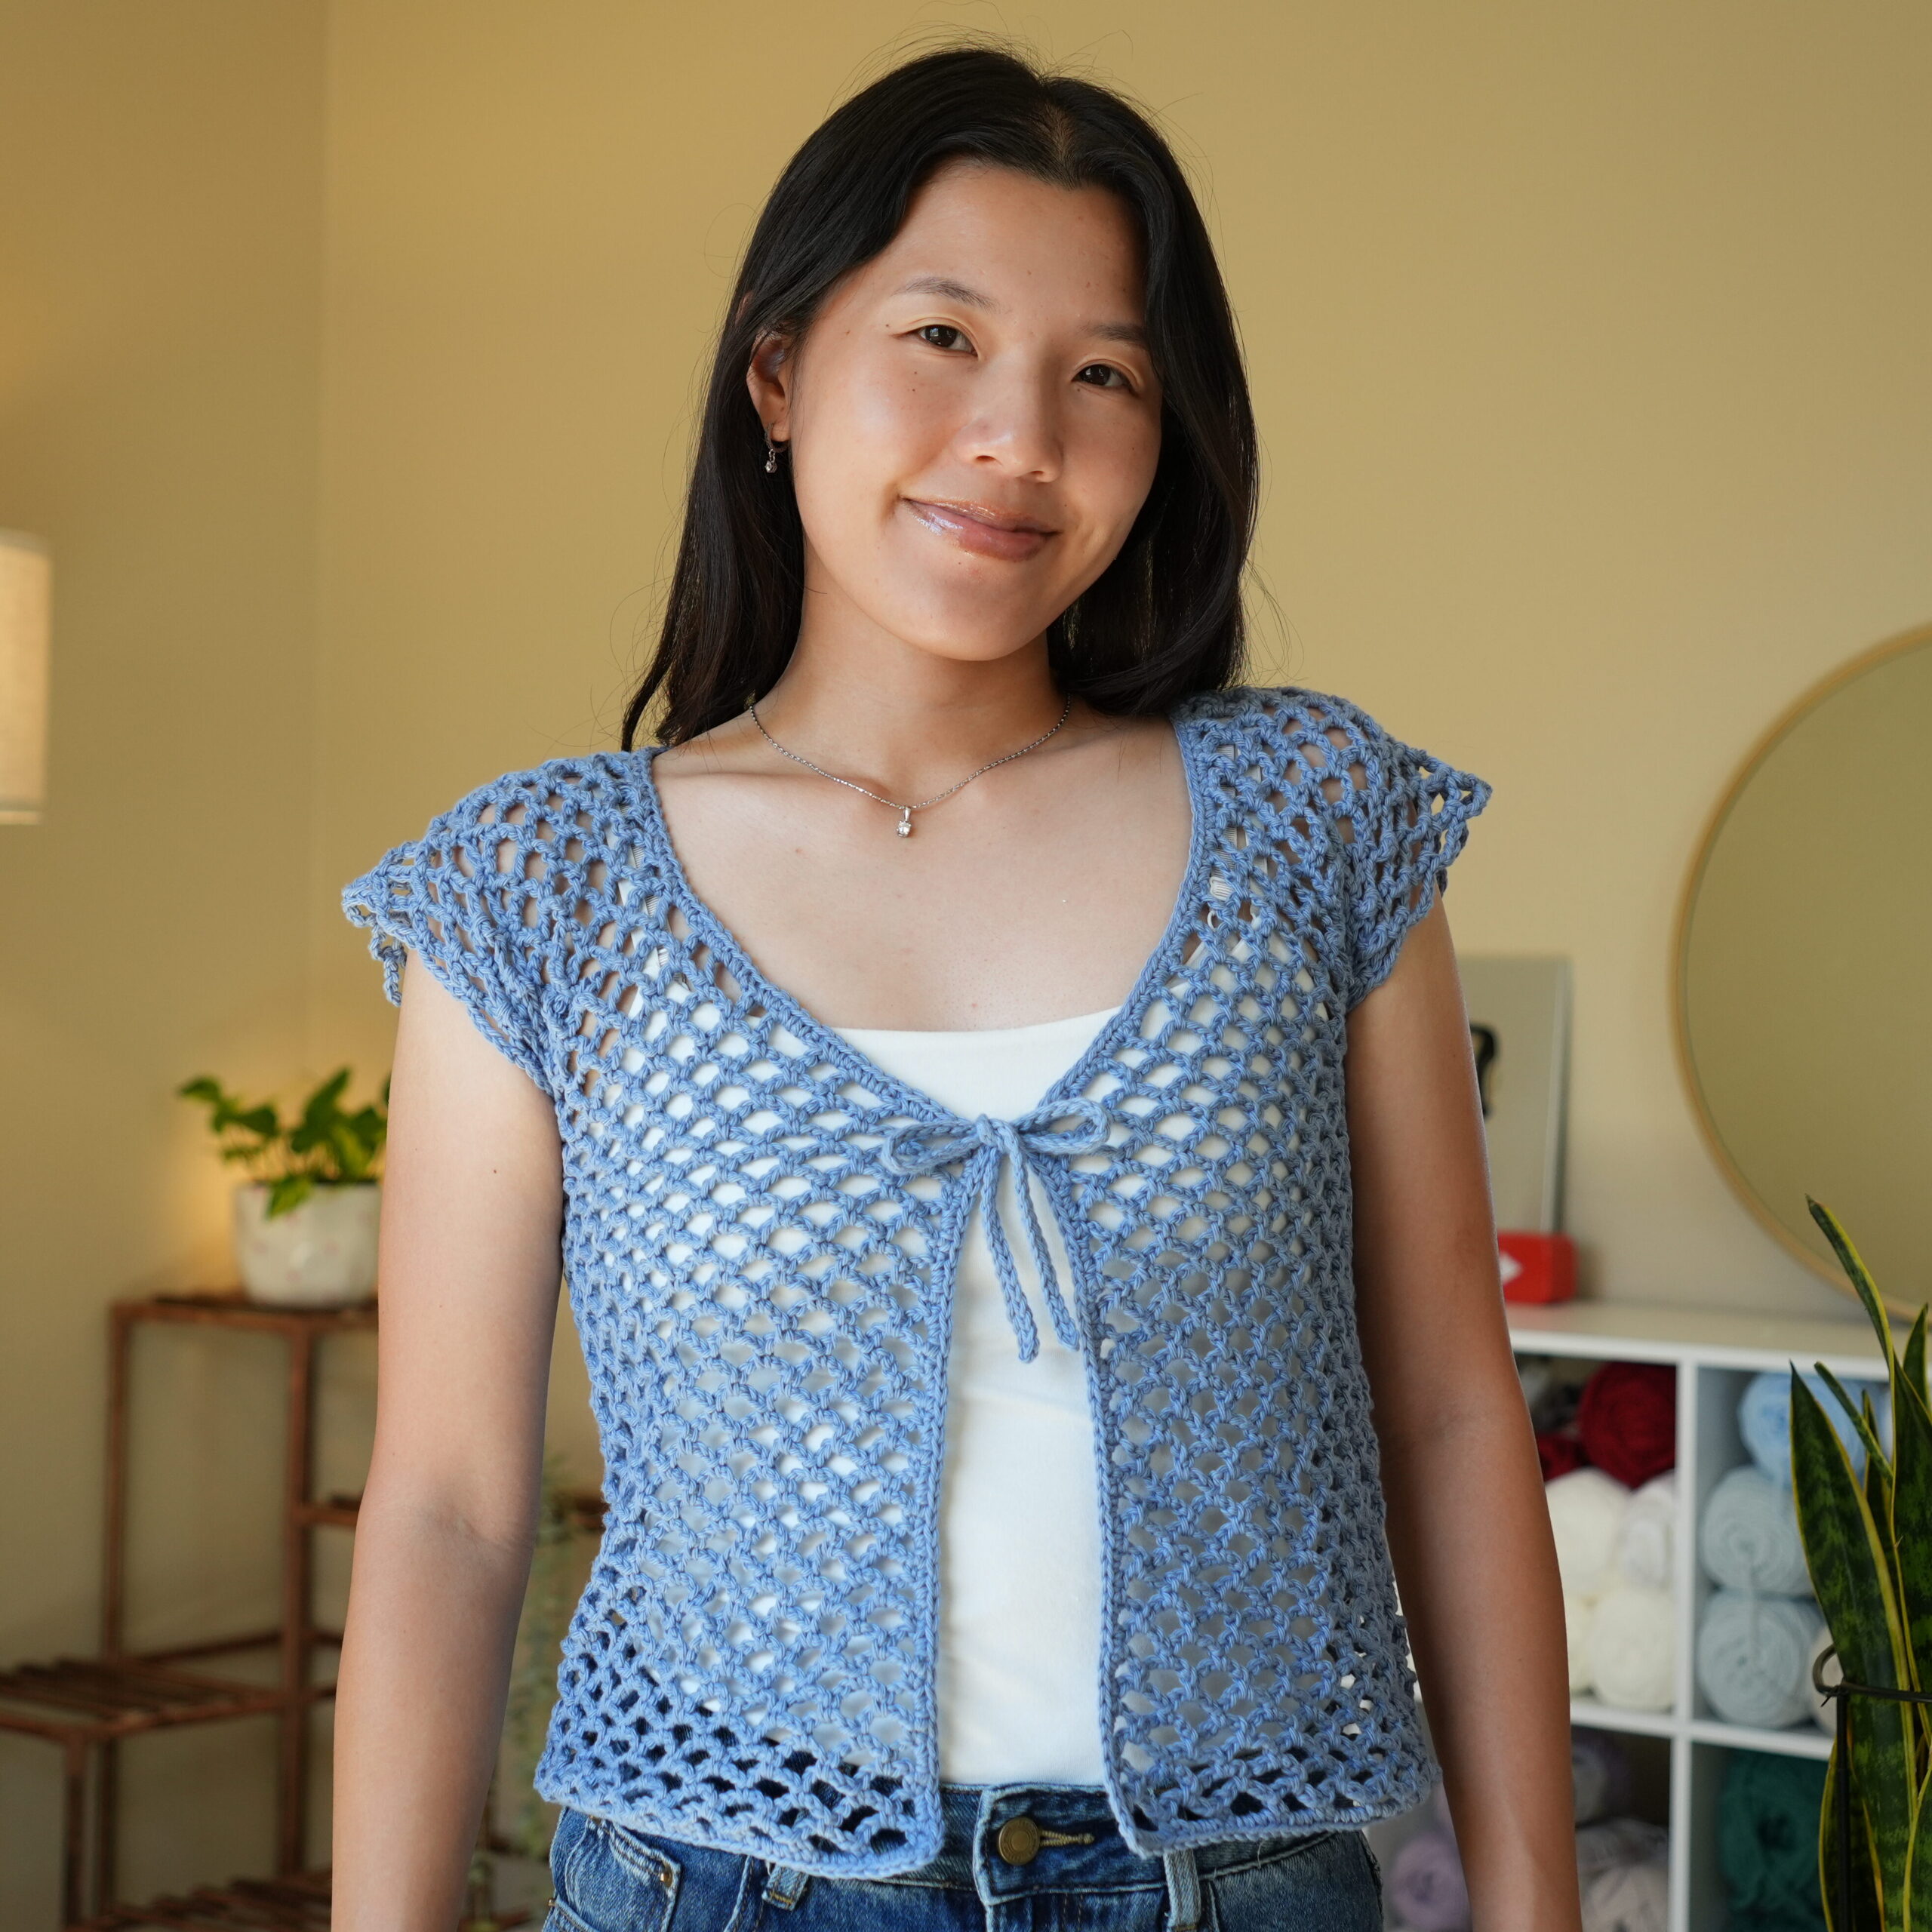
Table of Contents
This post may contain affiliate links. I may earn a small commission on qualifying purchases at no additional cost to you!
Crochet Mesh Top Tutorial
Become a member to get early access to new videos!
You can follow along with my YouTube video to make your own crochet mesh top! I have timestamps included to help you jump to any point you need to!
Pattern Information
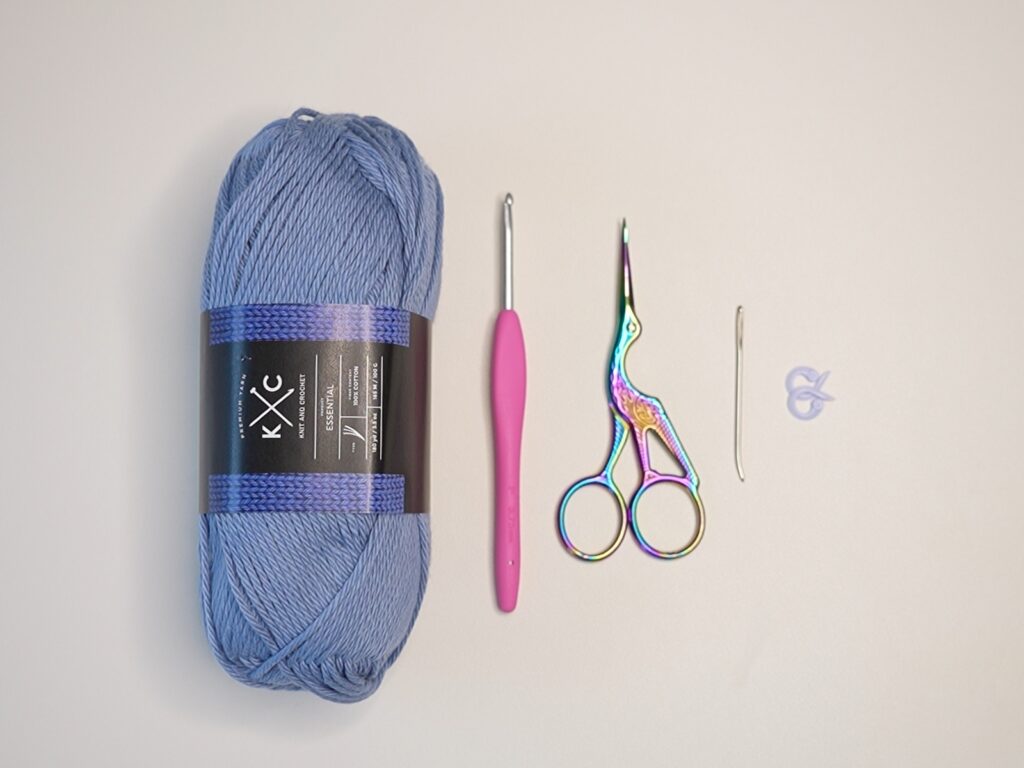
Materials
- 175 grams/315 yards of light weight yarn (K+C Essential Cotton in “Lakeside”)
- 3.75mm Clover Amour crochet hook
- Scissors
- Yarn needle
- Stitch markers
- (optional) Tape measure
Crochet Abbreviations
ch = chain
ch2-sp = chain-2-space
ch3-sp = chain-3-space
ch5-sp = chain-5-space
dc = double crochet
rep = repeat
sc = single crochet
sk = skip
sl st = slip stitch
sp = space
st = stitch
Gauge
5 rows of 5 ch5-sp makes a 10 x 10 centimeter (4″ x 4″) square
Dimensions
*This pattern makes a size small in US adult sizing, but it includes instructions on how to adjust the size
Overall: 40 centimeters wide x 42.5 centimeters long (15.7 x 16.7 inches)
Notes and Tips
- This pattern is written using US crochet terms
- The number in (parentheses) at the end of each row is the stitch count after finishing that row
- Italicized notes tell you what to change to adjust the size
- The chain 5 at the beginning of the row counts as a double crochet, chain 2
- The chain 1 at the beginning of the row does NOT count as a single crochet
- When single crocheting into a ch5-sp, place your single crochet in the center
- The last stitch of a row is either a single crochet or the 3rd chain up on the ch5 from the previous row
Tie-Front Crochet Mesh Top Pattern
Body
Foundation: Make a slipknot, ch150
Note: Do fewer chains for a smaller size or more chains for a larger size. The length of your chain will be the total width of your back panel and two front panels. The number of chains you do must be a multiple of 4, plus 2.
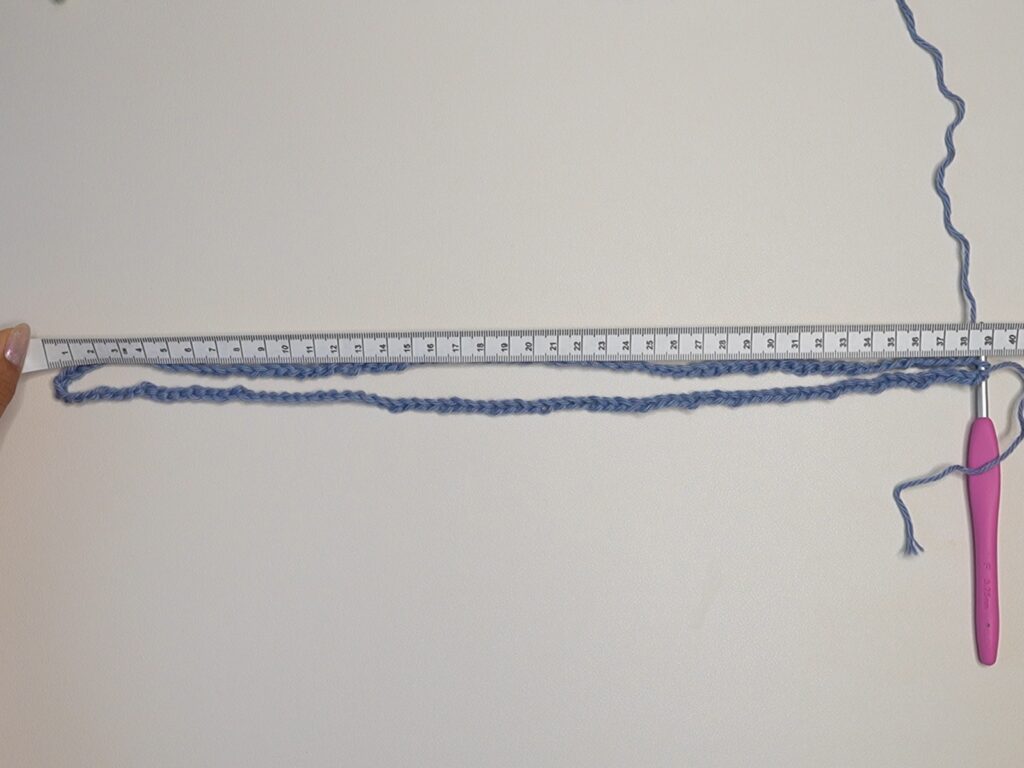
Row 1: sc in 2nd ch from hook, rep[ch5, sk3, sc] across (37 ch5-sp)
Tip: Double check this length for the total width of your top.
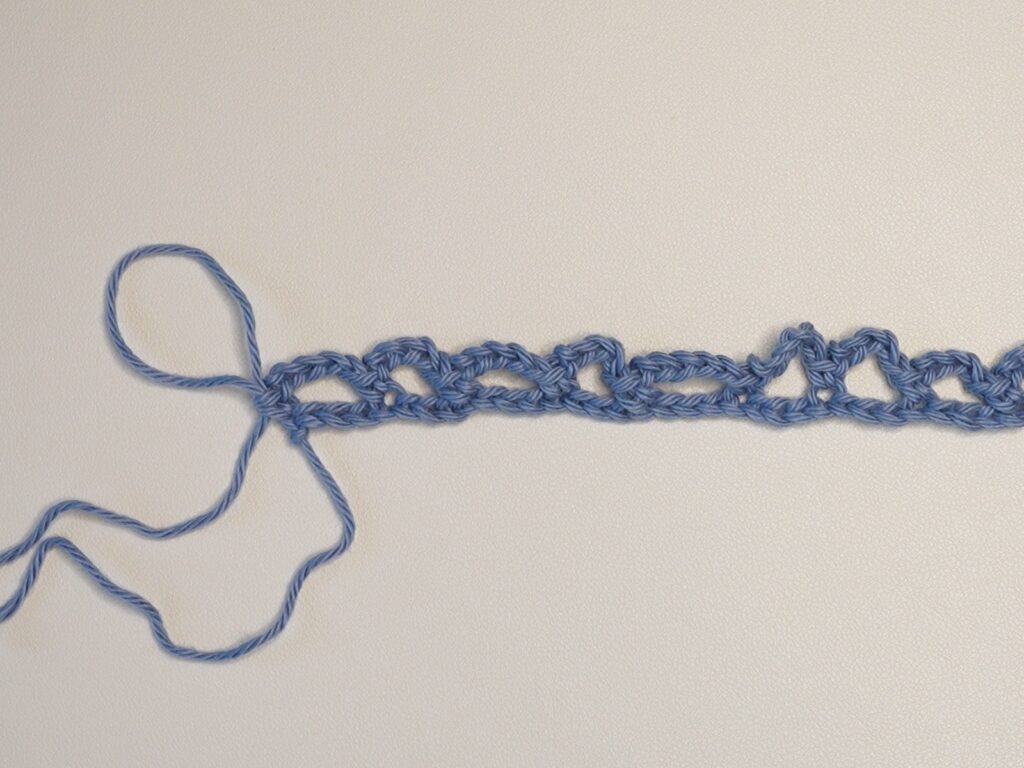
Row 2: ch5, turn, sc in first ch5-sp, rep[ch5, sc in next ch5-sp] across, ch2, dc in last st (36 ch5-sp, 2 ch2-sp)
Tip: When single crocheting into a ch5-sp, place your single crochet in the center.
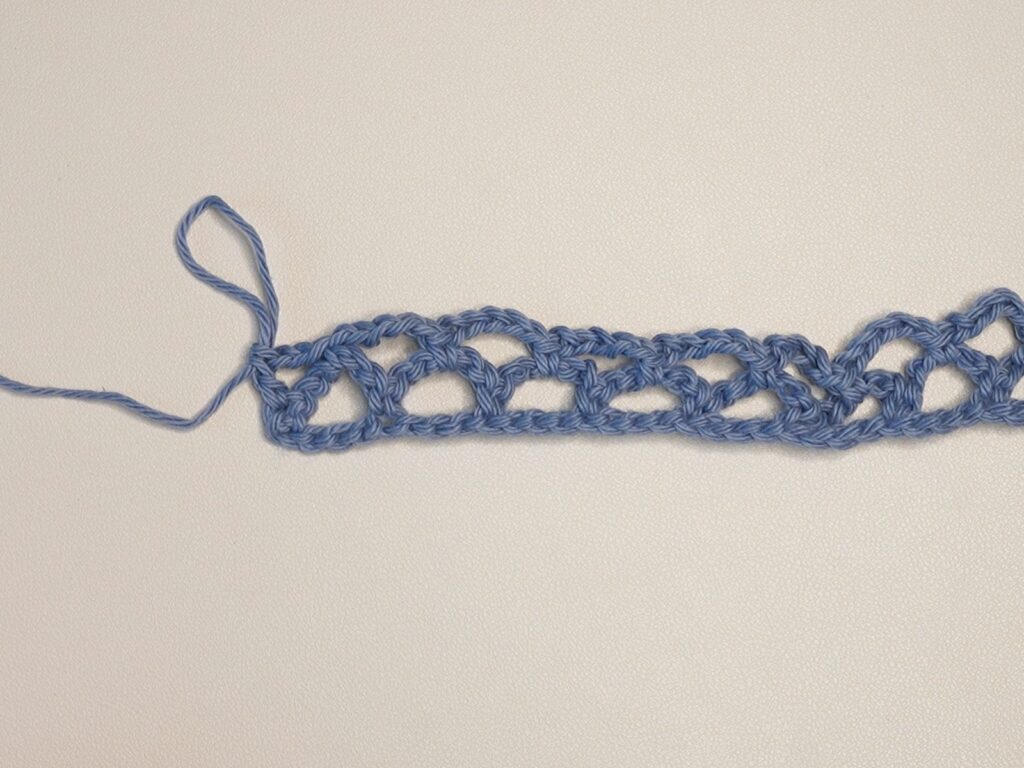
Row 3: ch1, turn, sc, rep[ch5, sc in next ch5-sp] across, ch5, sc in last st (37 ch5-sp)
Tip: The last stitch is the 3rd chain up on the ch5 from the previous row.
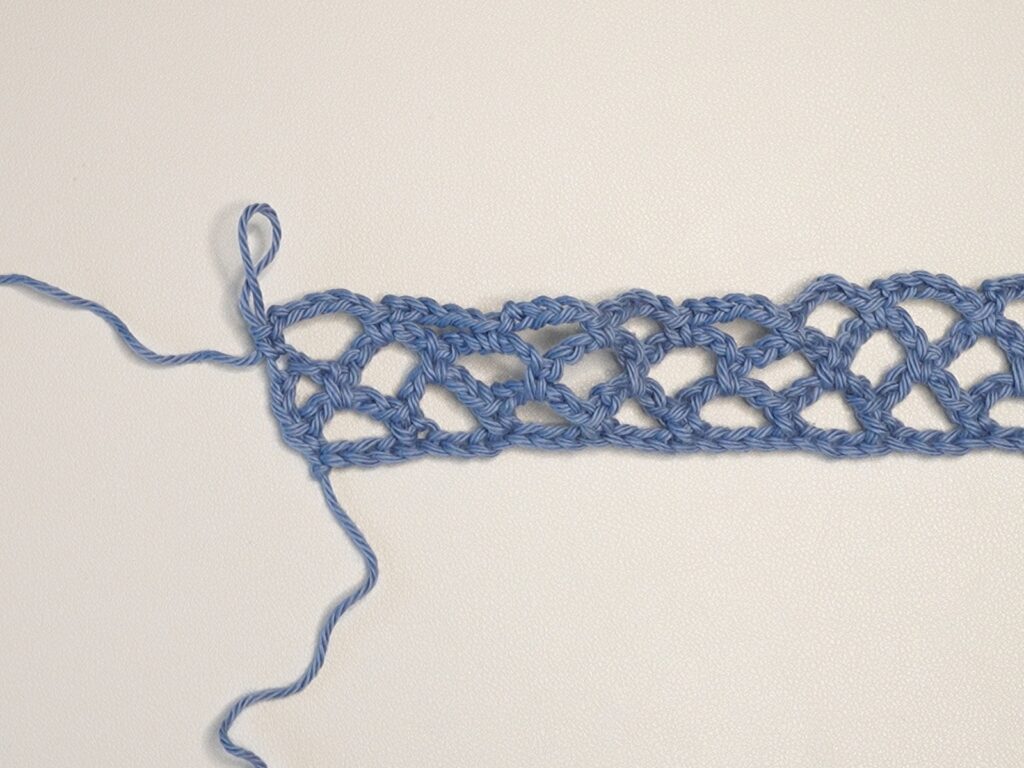
Rows 4-25: rep[Row 2, Row 3] (36 ch5-sp, 2 ch2-sp); (37 ch5-sp)
This means that Row 4 is a repeat of Row 2, Row 5 is a repeat of Row 3, Row 6 is a repeat of Row 2, and so on.
Note: Do fewer rows for a shorter body or more rows for a longer body. The height of these rows will be the length from the bottom to the armholes. Stop after an odd number of rows.
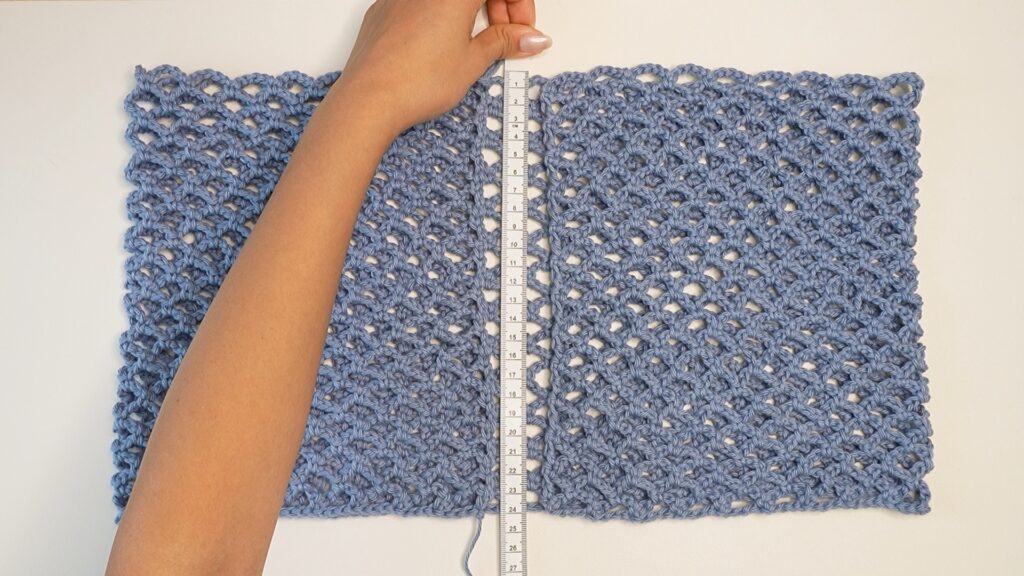
Marking Front and Back Panels
Fold the sides of the body panel in towards the middle. Making sure both front panels are equal, adjust the total width of your top to your liking. Mark the single crochets on either edge. My front panels are each 9 ch5-sp wide, and my back panel is 19 ch5-sp wide.
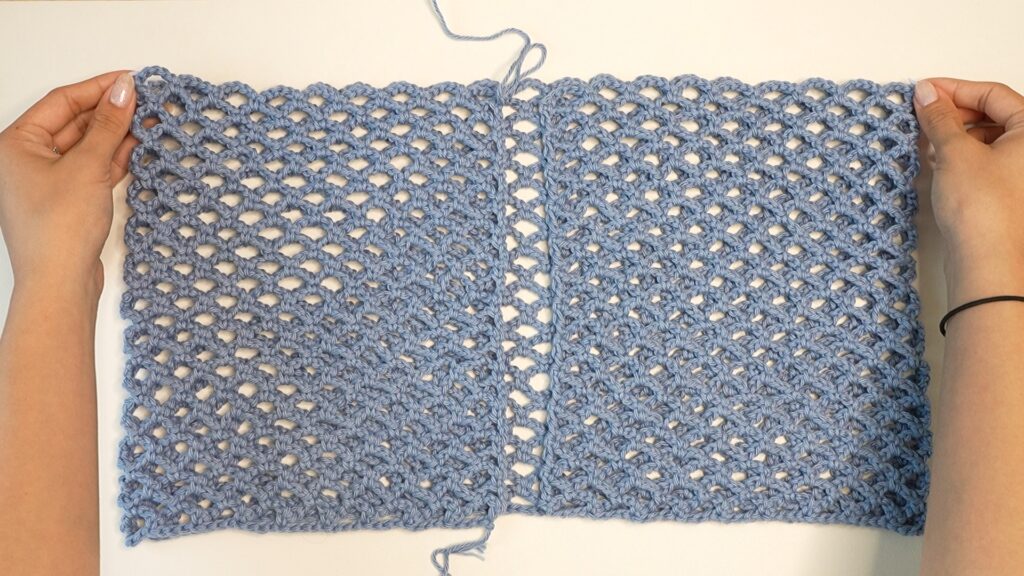
First Front Panel
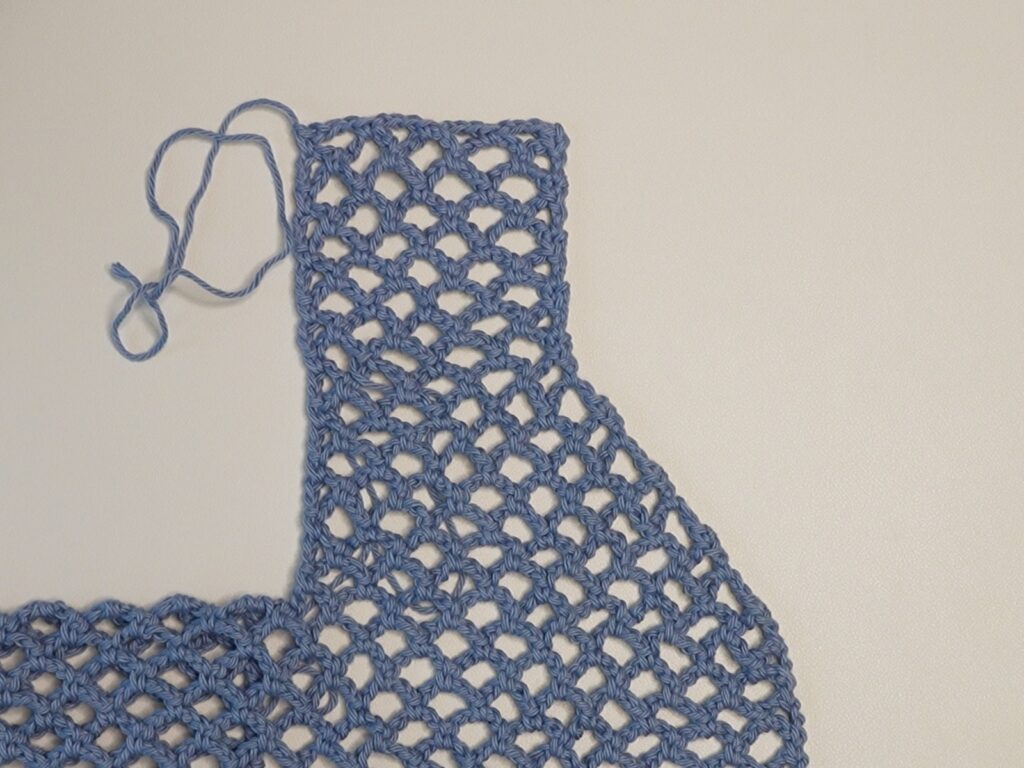
Undo the last sc and ch5 from Row 25, ch2, dc in last st
Tip: The ch2, dc up until Row 8 counts as a ch5-sp
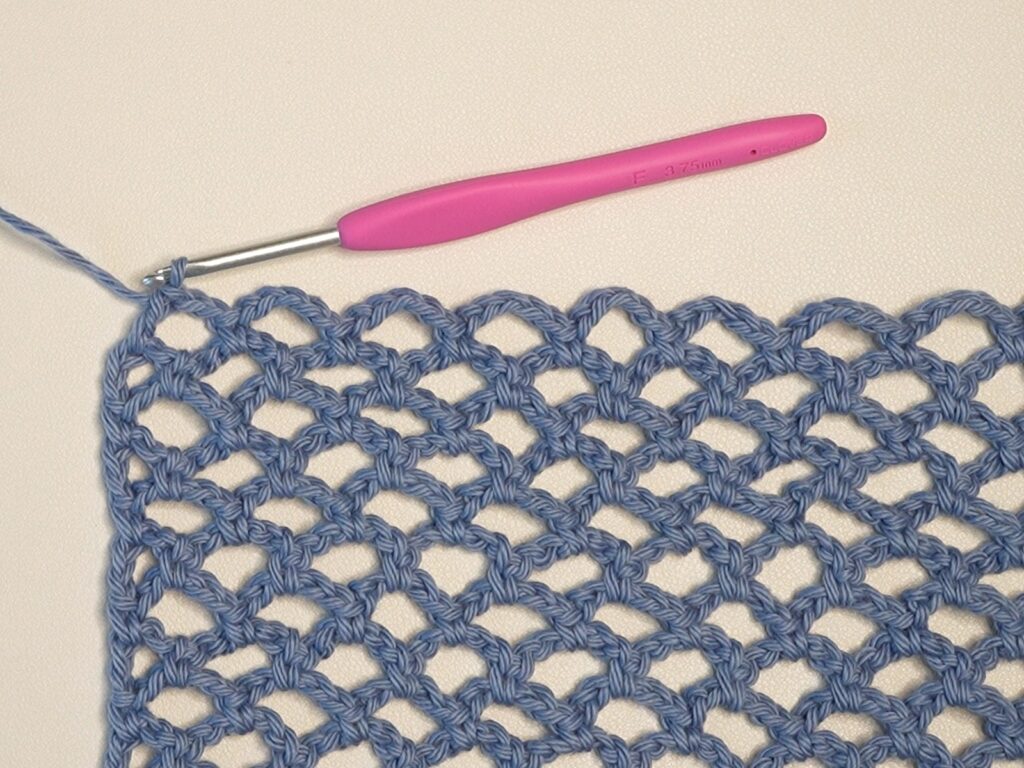
Row 1: ch1, turn, sc, rep[ch5, sc in next ch5-sp] until st marker (8 ch5-sp)
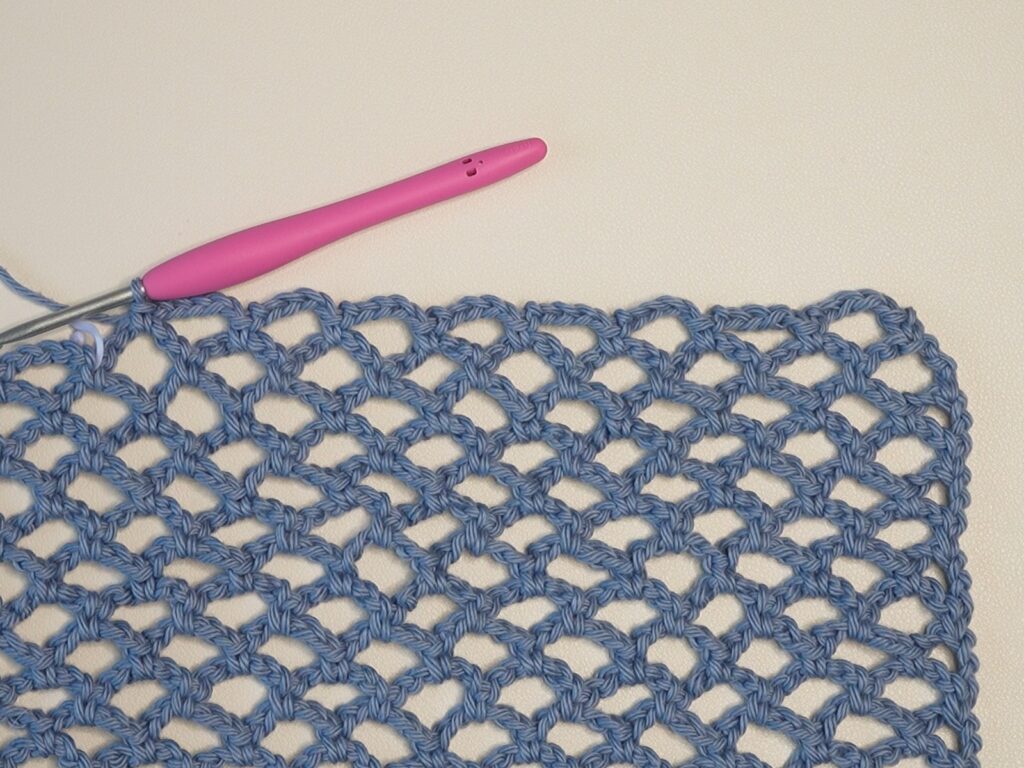
Row 2: ch5, turn, sc in first ch5-sp, rep[ch5, sc in next ch5-sp] until 1 ch5-sp left, ch2, dc in last ch5-sp (7 ch5-sp, 1 ch2-sp)
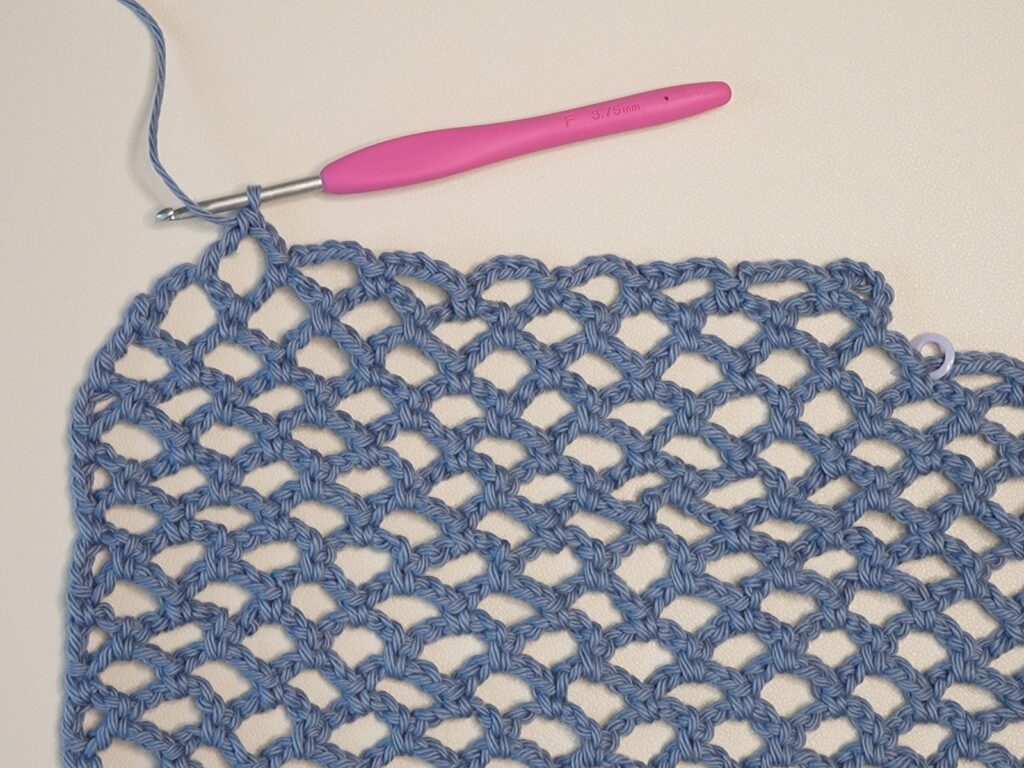
Row 3: ch1, turn, sc, rep[ch5, sc in next ch5-sp] across, ch5, sc in last st (7 ch5-sp)
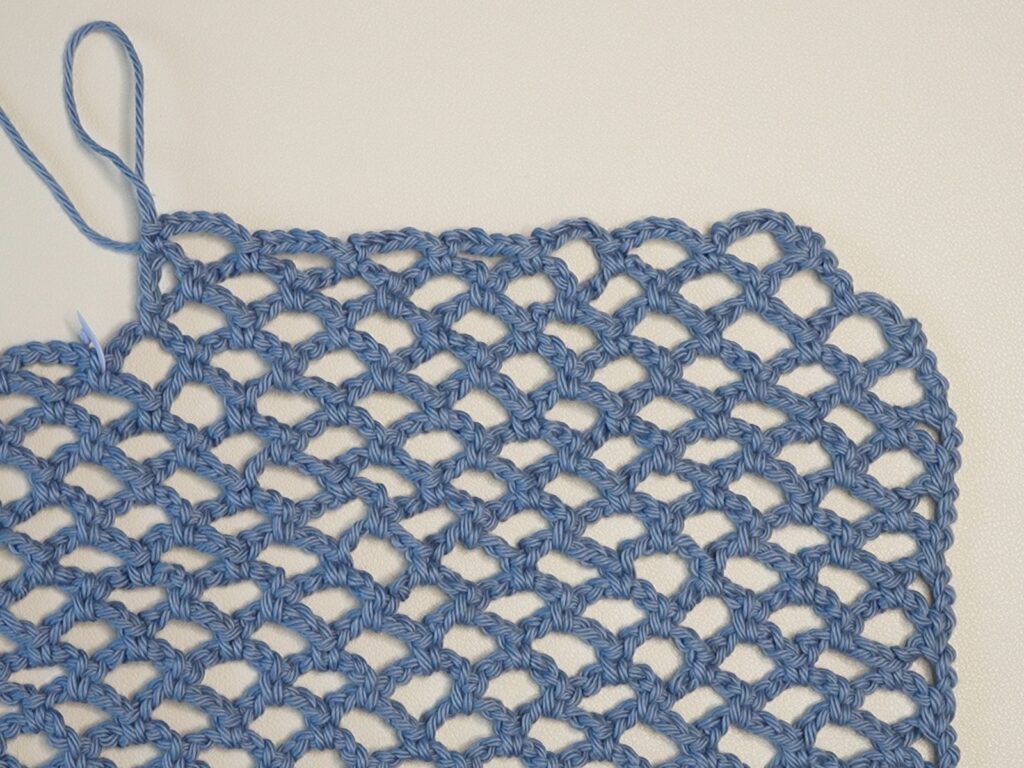
Rows 4-9: rep[Row 2, Row 3] (6 ch5-sp, 1 ch2-sp); (6 ch5-sp); (5 ch5-sp, 1 ch2-sp); (5 ch5-sp); (4 ch5-sp, 1 ch2-sp); (4 ch5-sp)
Note: Do fewer rows for a smaller neck hole or more rows for a larger neck hole. Stop after an odd number of rows.
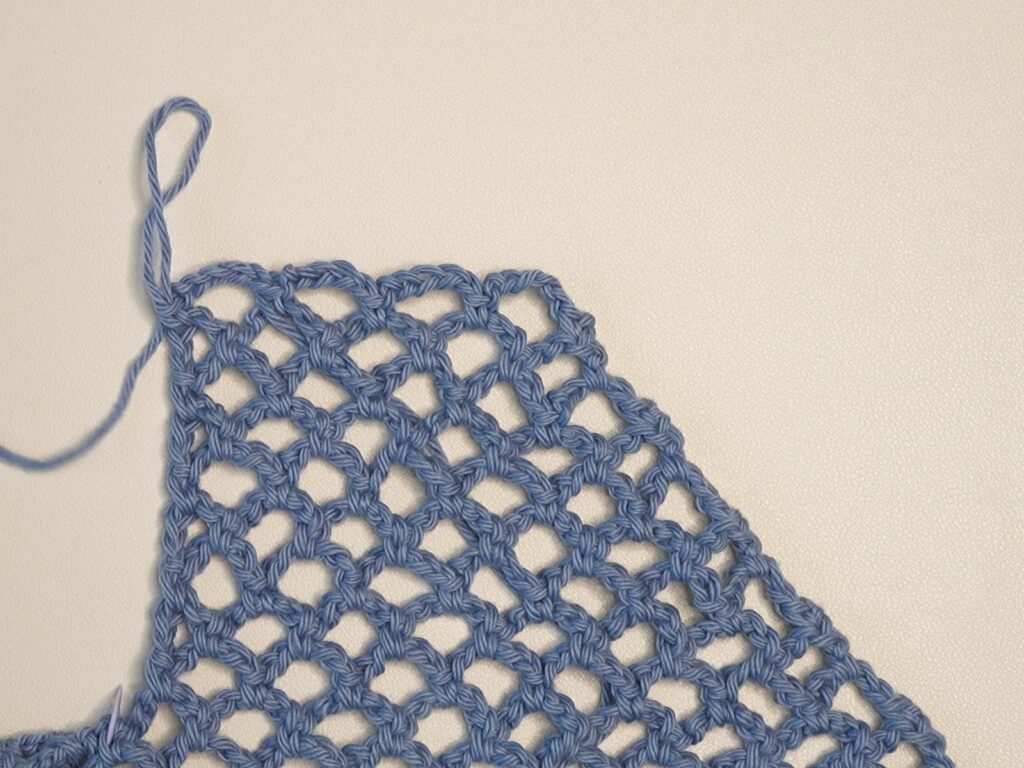
Row 10: ch5, turn, sc in first ch5-sp, rep[ch5, sc in next ch5-sp] across, ch2, dc in last st (3 ch5-sp, 2 ch2-sp)
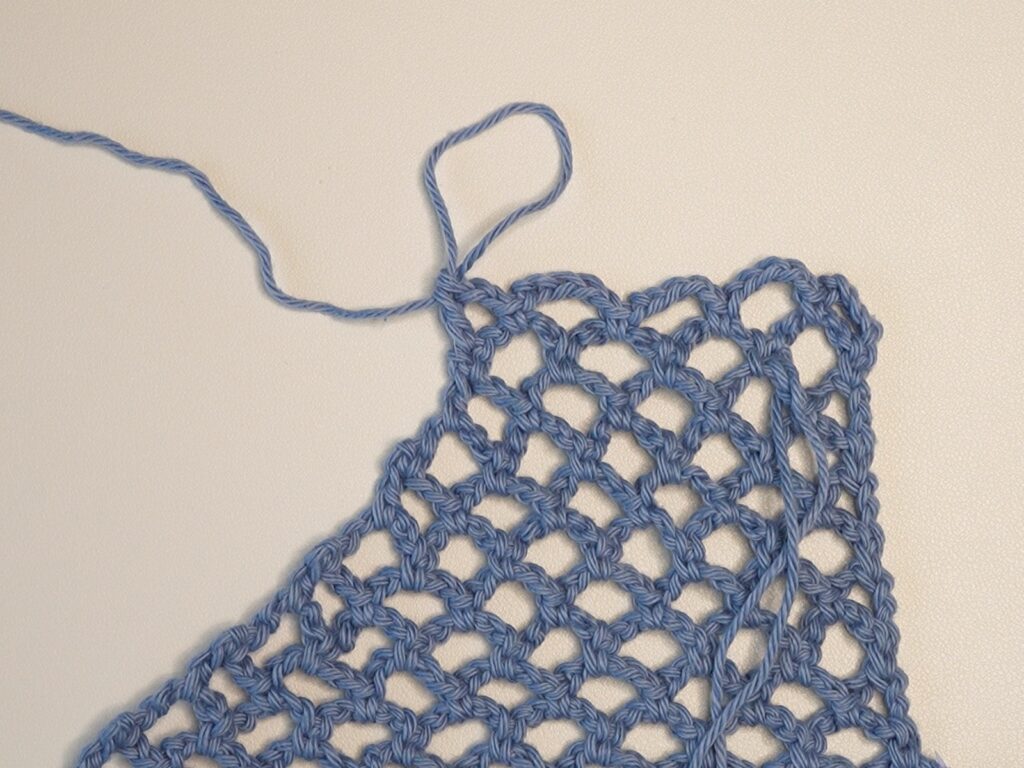
Rows 11-16: rep[Row 3, Row 10] (4 ch5-sp); (3 ch5-sp, 2 ch2-sp)
Note: Do fewer rows for a smaller armhole/shorter top or more rows for a larger armhole/longer top. Stop after an even number of rows.
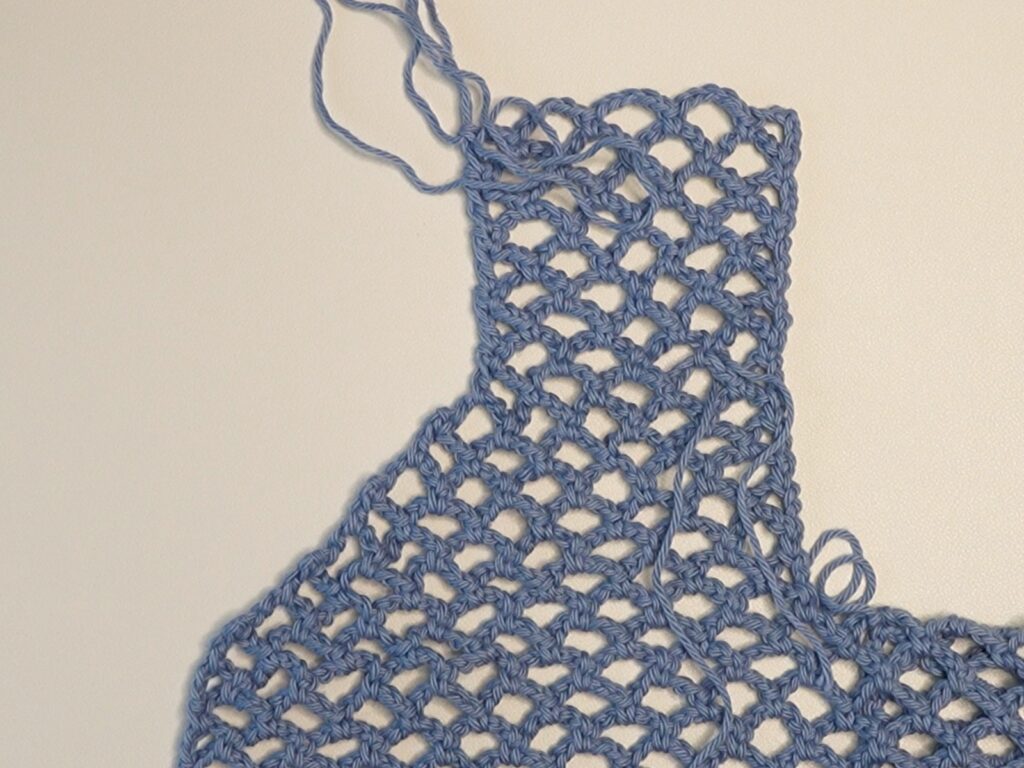
Row 17: ch1, turn, sc, rep[ch3, sc in next ch5-sp] across, ch3, sc in last st (4 ch3-sp)
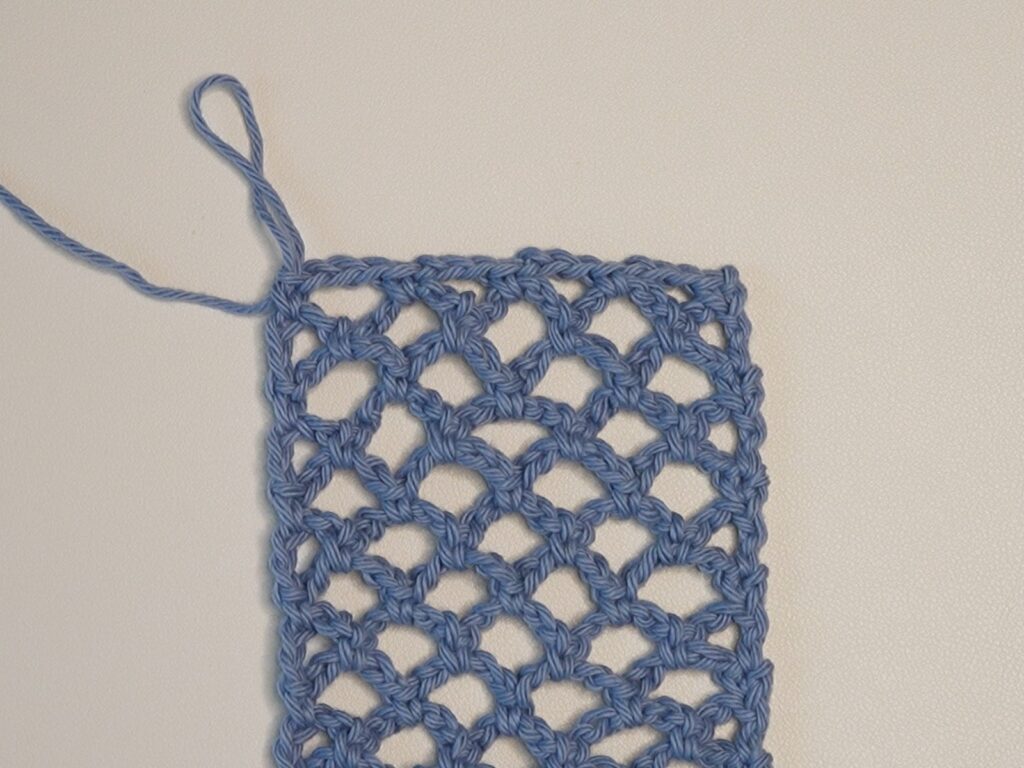
Fasten off with a 30cm/12″ long loose end.
Back Panel
With the finished front panel on the right side, attach your yarn to the space after the stitch marker next to the front panel.
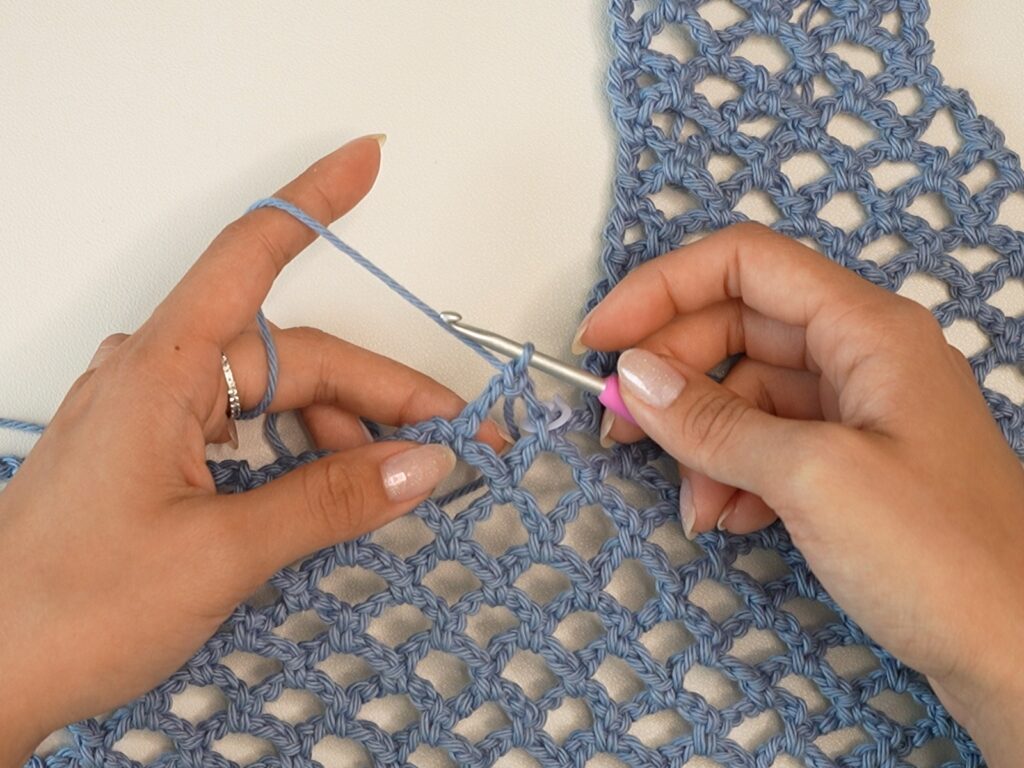
Row 1: ch1, sc in first ch5-sp, rep[ch5, sc in next ch5-sp] until st marker (18 ch5-sp)
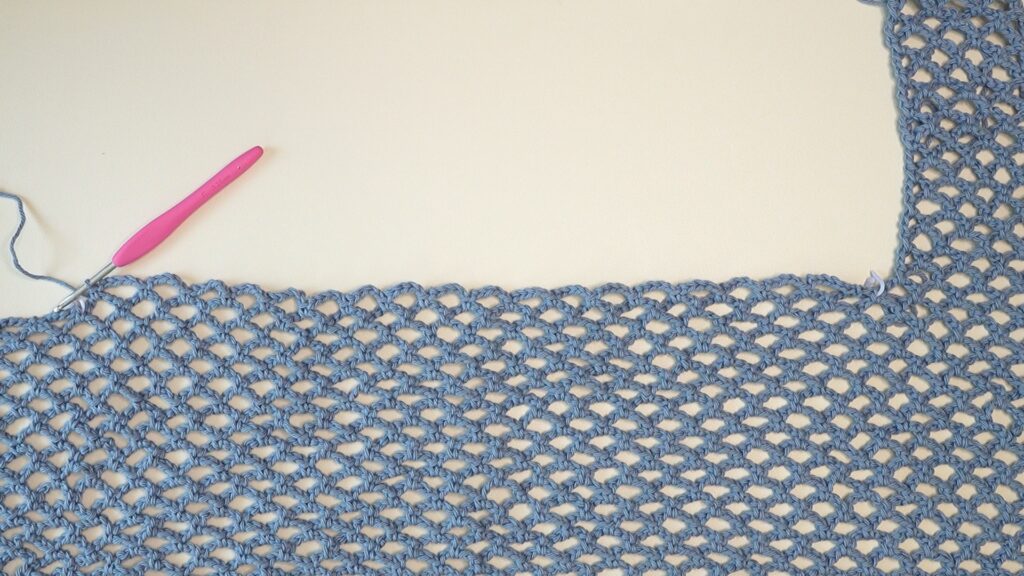
Row 2: ch5, turn, sc in first ch5-sp, rep[ch5, sc in next ch5-sp] across, ch2, dc in last st (17 ch5-sp, 2 ch2-sp)
Row 3: ch1, turn, sc, rep[ch5, sc in next ch5-sp] across, ch5, sc in last st (18 ch5-sp)
Rows 4-16: rep[Row 2, Row 3] (17 ch5-sp, 2 ch2-sp); (18 ch5-sp)
Note: If you did a different number of rows for your front panel (before the final row), do that same number of rows here.
Row 17: ch1, turn, sc, rep[ch3, sc in next ch5-sp] across, ch3, sc in last st (18 ch3-sp)
Your body panel should be the same height as your front panel.
Fasten off.
Second Front Panel
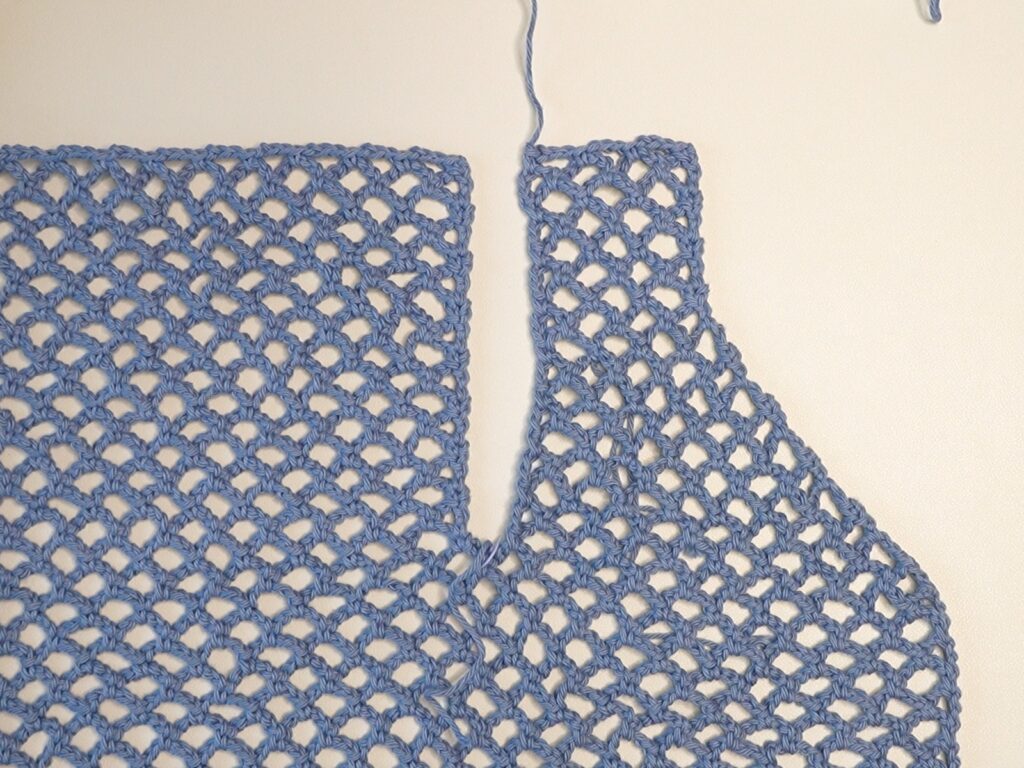
With the finished front and back panel on the right side, attach your yarn to the space after the stitch marker next to the back panel.
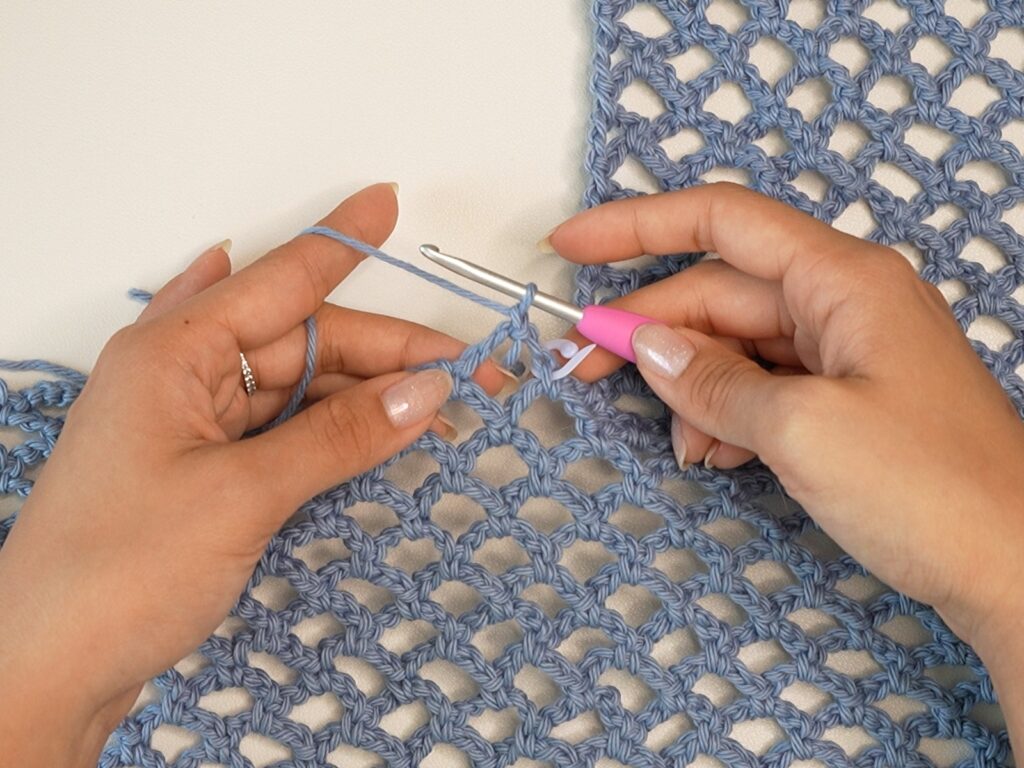
Row 1: ch1, sc in first ch5-sp, rep[ch5, sc in next ch5-sp] until 1 ch5-sp left, ch2, dc in last ch5-sp (8 ch5-sp)
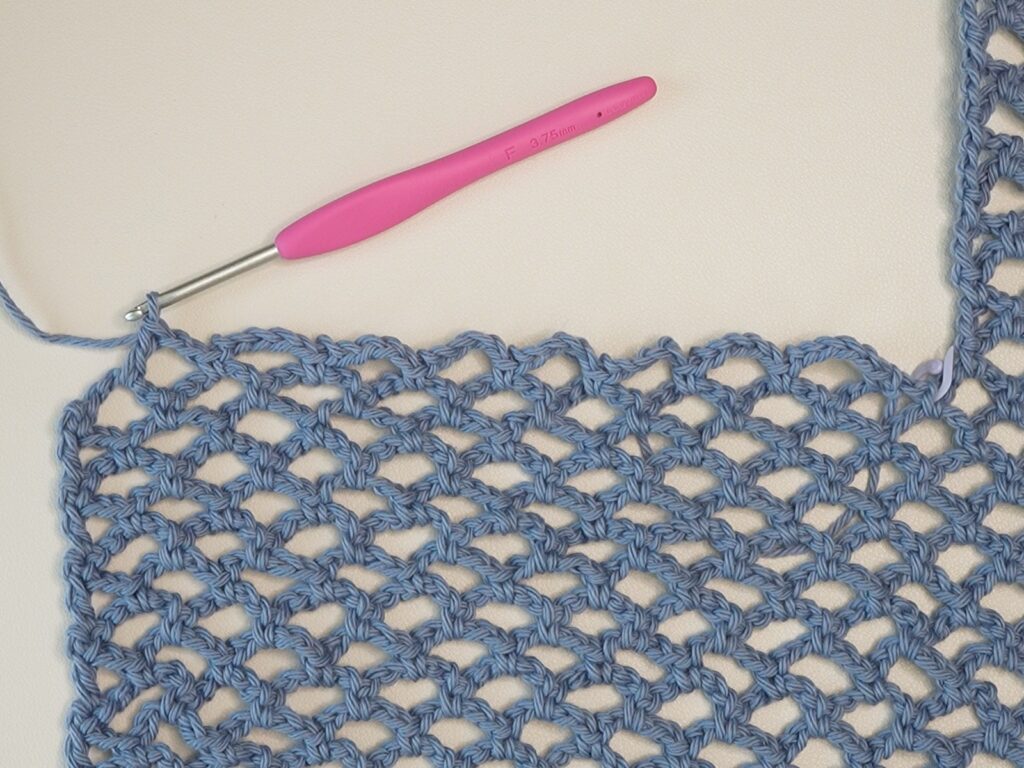
Row 2: ch1, turn, sc, rep[ch5, sc in next ch5-sp] across, ch2, dc in last st (7 ch5-sp, 1 ch2-sp)
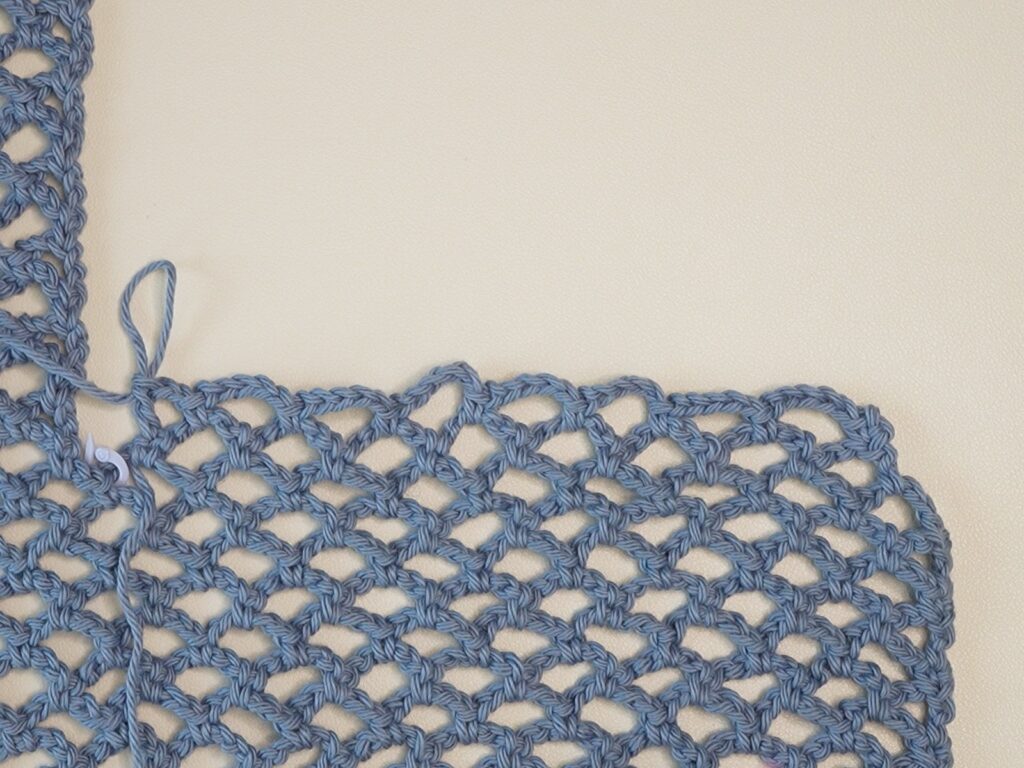
Row 3: ch1, turn, sc, rep[ch5, sc in next ch5-sp] until 1 ch5-sp left, ch2, dc in last ch5-sp (7 ch5-sp)
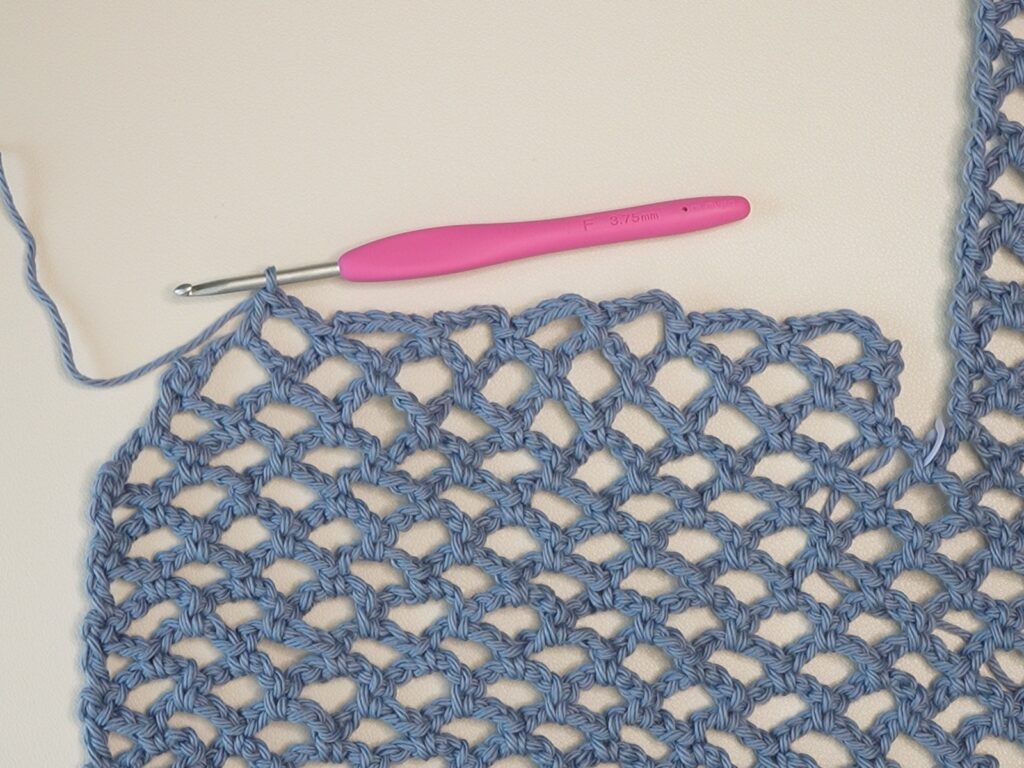
Rows 4-8: rep[Row 2, Row 3] (6 ch5-sp, 1 ch2-sp); (6 ch5-sp); (5 ch5-sp, 1 ch2-sp); (5 ch5-sp); (4 ch5-sp, 1 ch2-sp)
Note: If you did a different number of rows here for your first front panel, do that same number of rows, minus 1. For example, I did 9 rows for this part on my first front panel. For my second front panel, I will do 8 rows.
Row 9: ch1, turn, sc, rep[ch5, sc in next ch5-sp] across (4 ch5-sp)
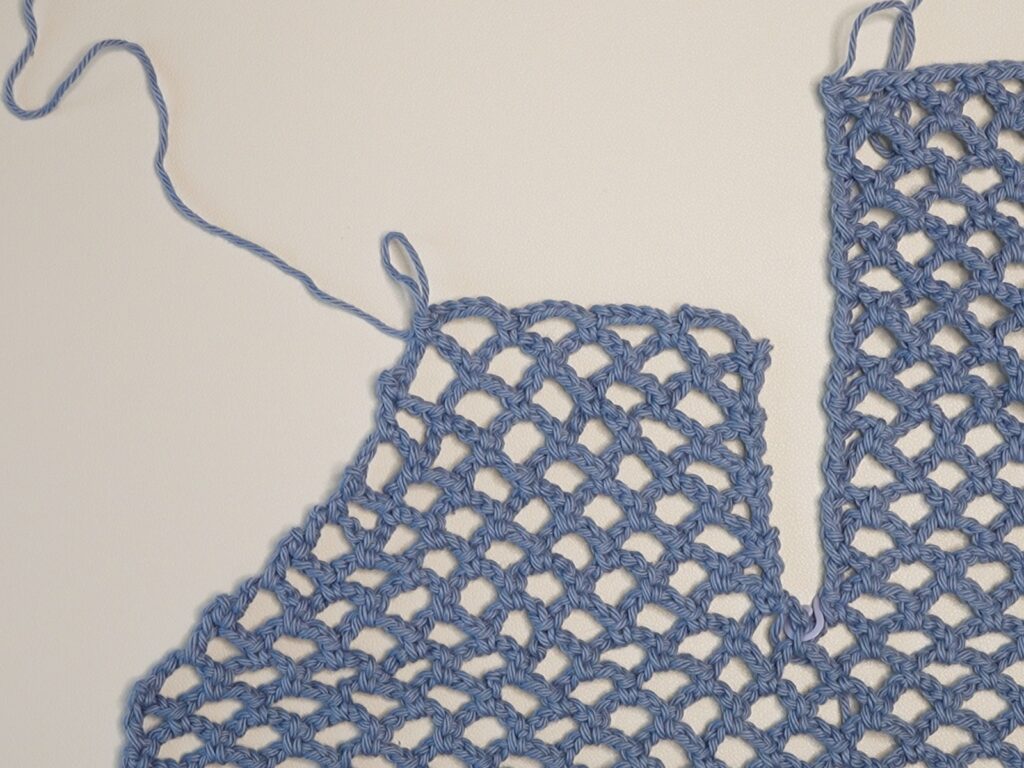
Row 10: ch5, turn, sc in first ch5-sp, rep[ch5, sc in next ch5-sp] across, ch2, dc in last st (3 ch5-sp, 2 ch2-sp)
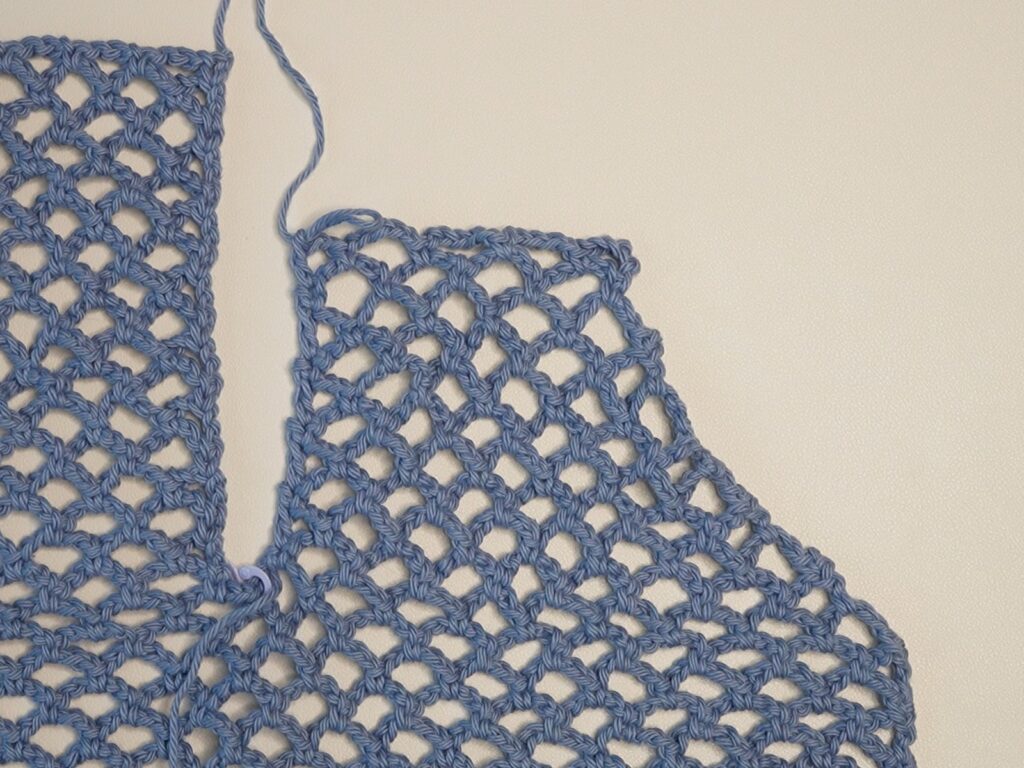
Row 11: ch1, turn, sc, rep[ch5, sc in next ch5-sp] across, ch5, sc in last st (4 ch5-sp)
Rows 12-16: rep[Row 10, Row 11] (3 ch5-sp, 2 ch2-sp); (4 ch5-sp)
Note: If you did a different number of rows for your first front panel (before the final row), do that same number of rows here.
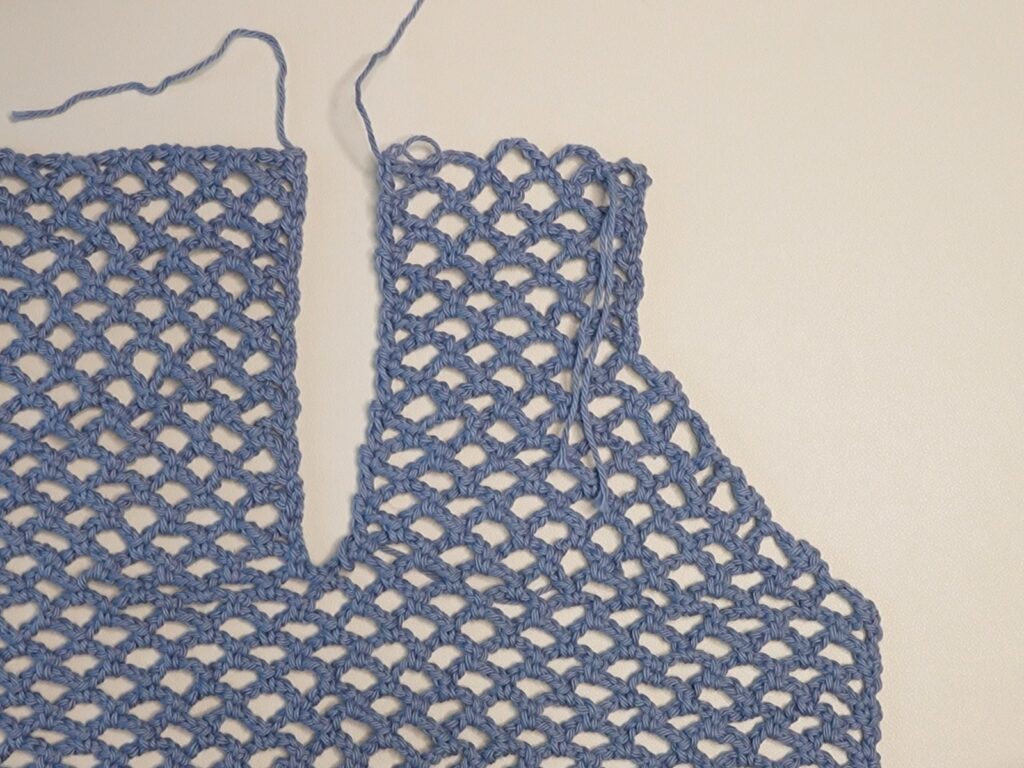
Row 17: ch1, turn, sc, rep[ch3, sc in next ch5-sp] across, ch3, sc in last st (4 ch3-sp)
Tip: Pin the shoulders together and try the top on before fastening off.
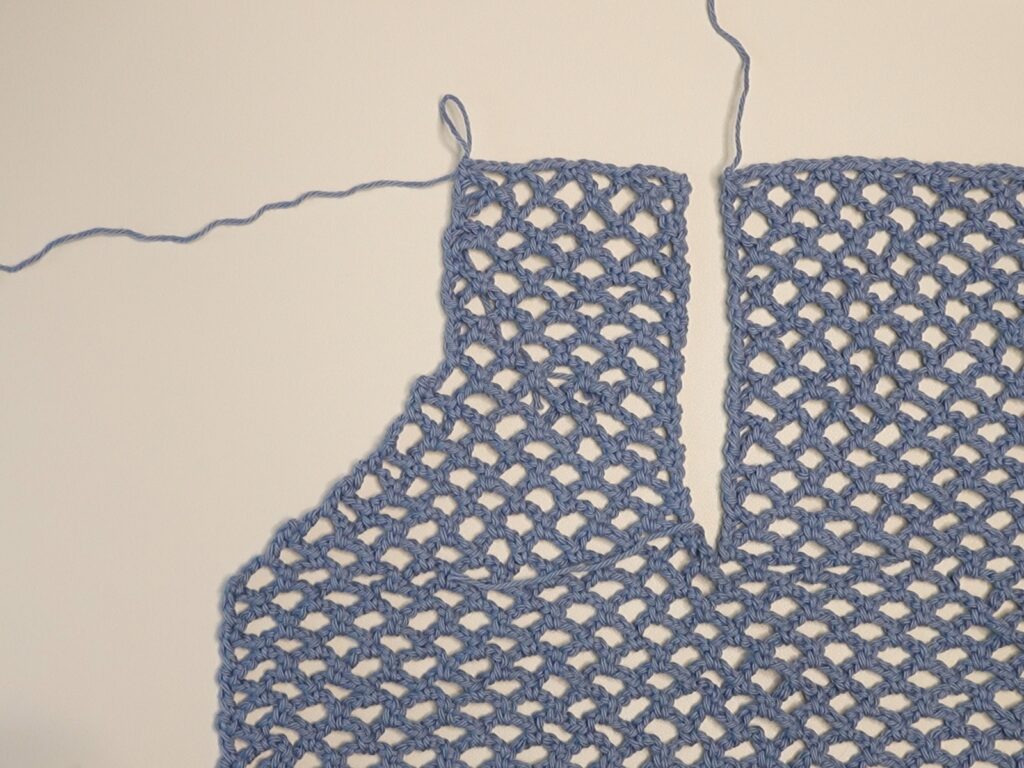
Fasten off with a 30cm/12″ long loose end.
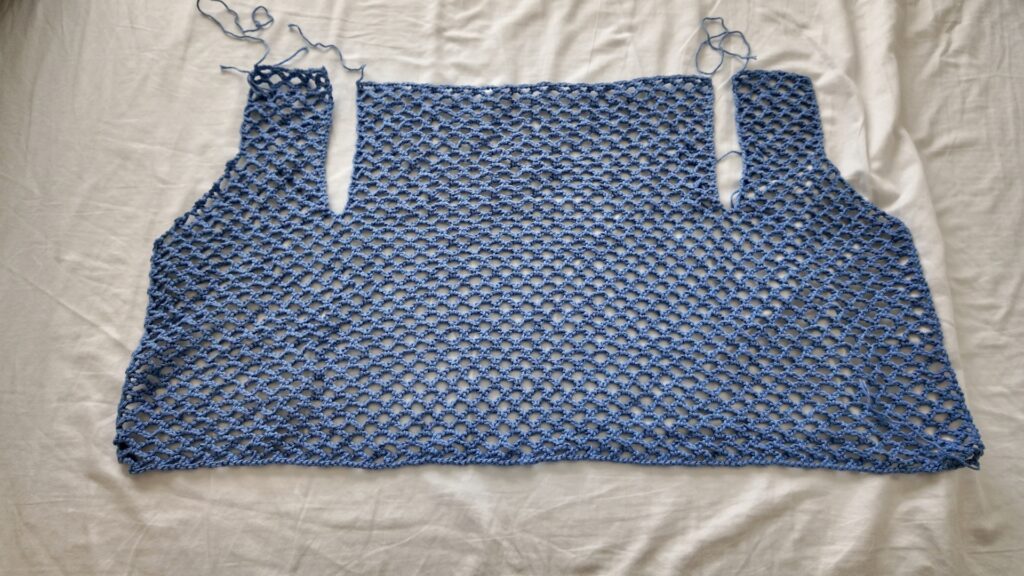
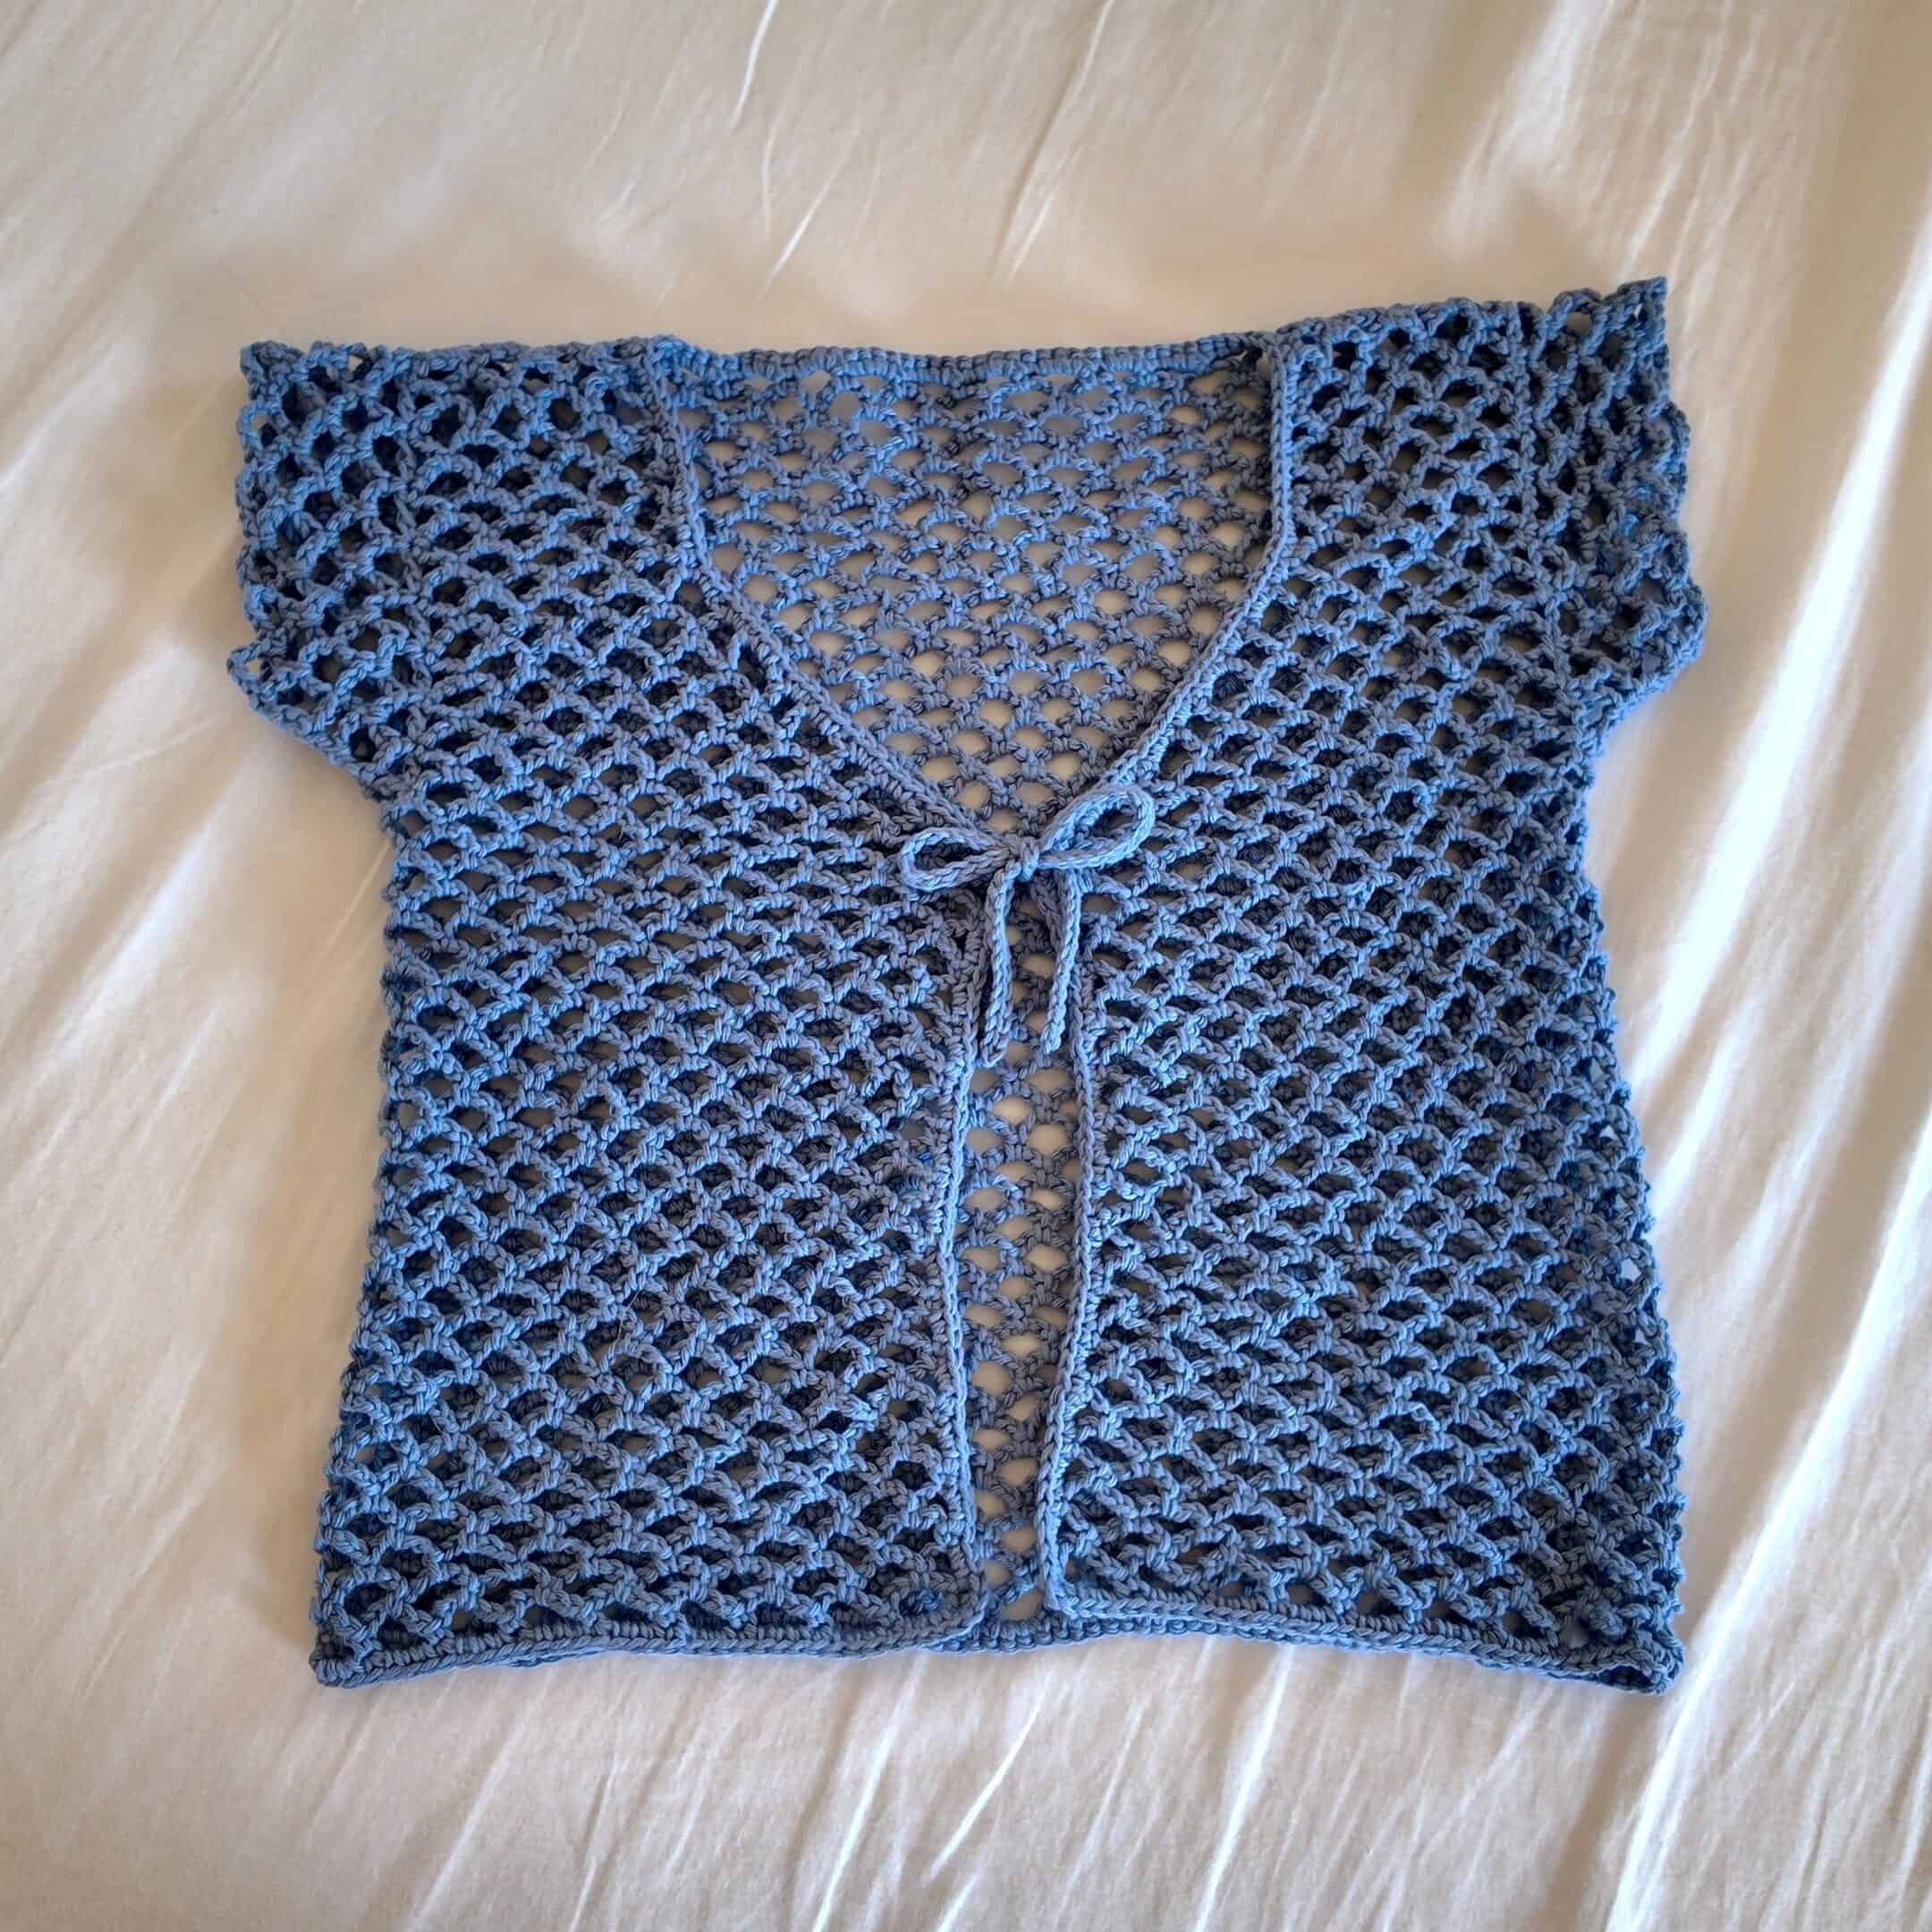
Now, your project should look like this.
Sewing
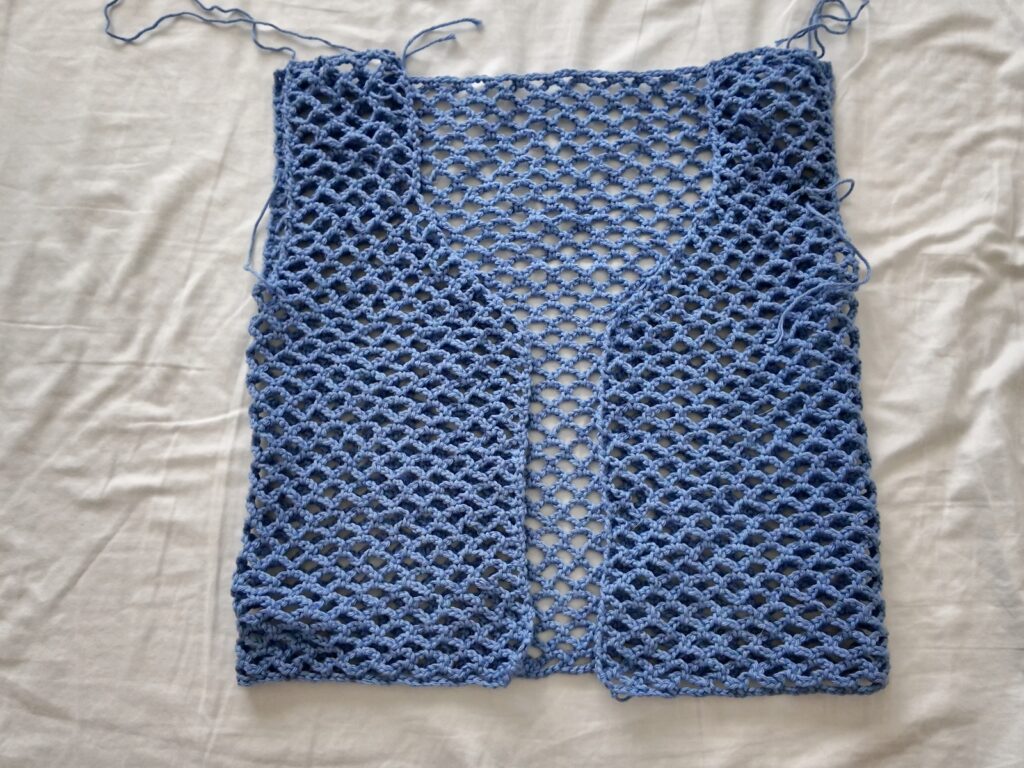
Fold the front panels in to lay on top of the back panel. Next, we will sew the tops of the front panels to the top of the back panel.
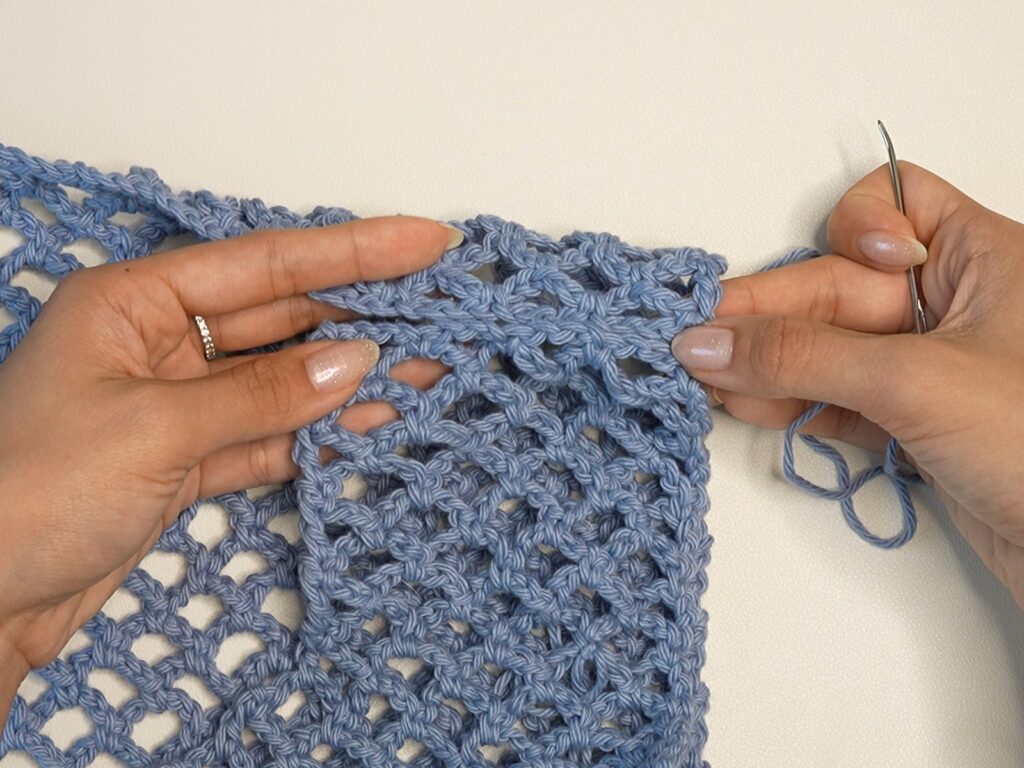
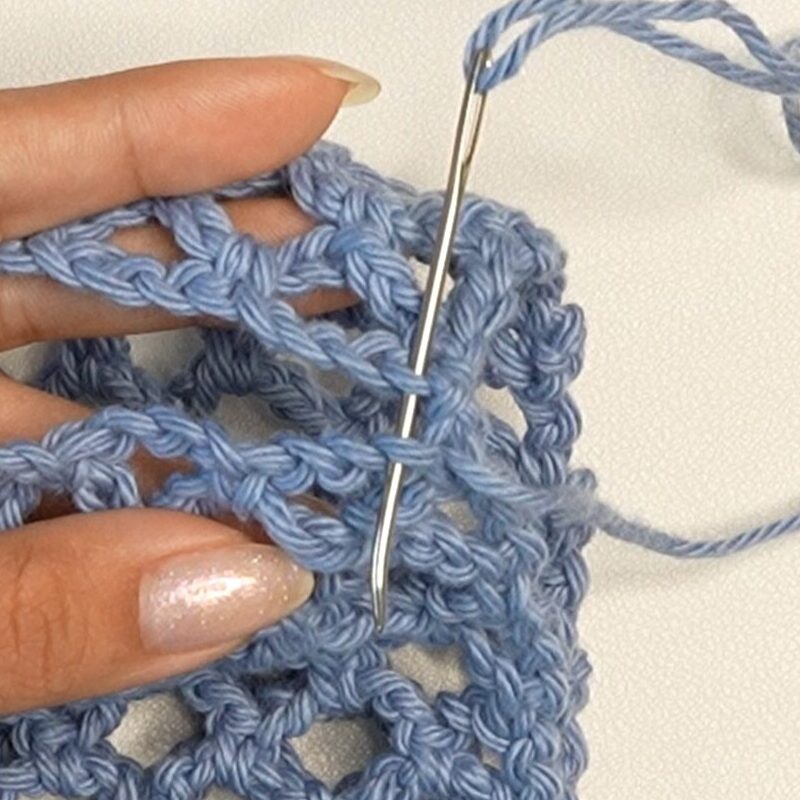
Starting with the right side, thread the long loose end into your yarn needle. Line up the right edge and the last rows of the front and back panel.
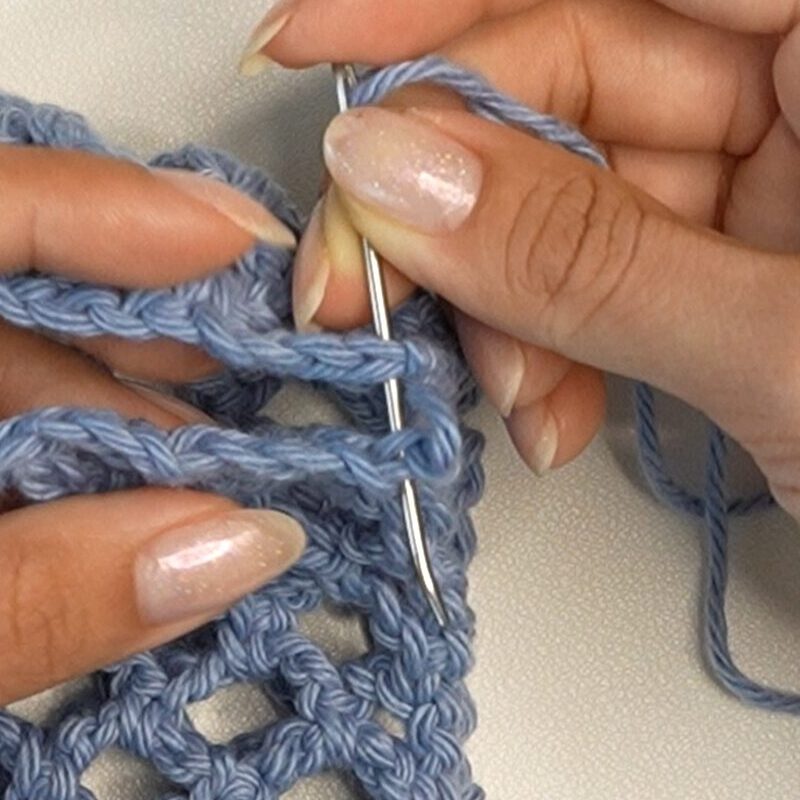
Whip stitch through each stitch and chain across until the end of the front panel. Tie a double knot.
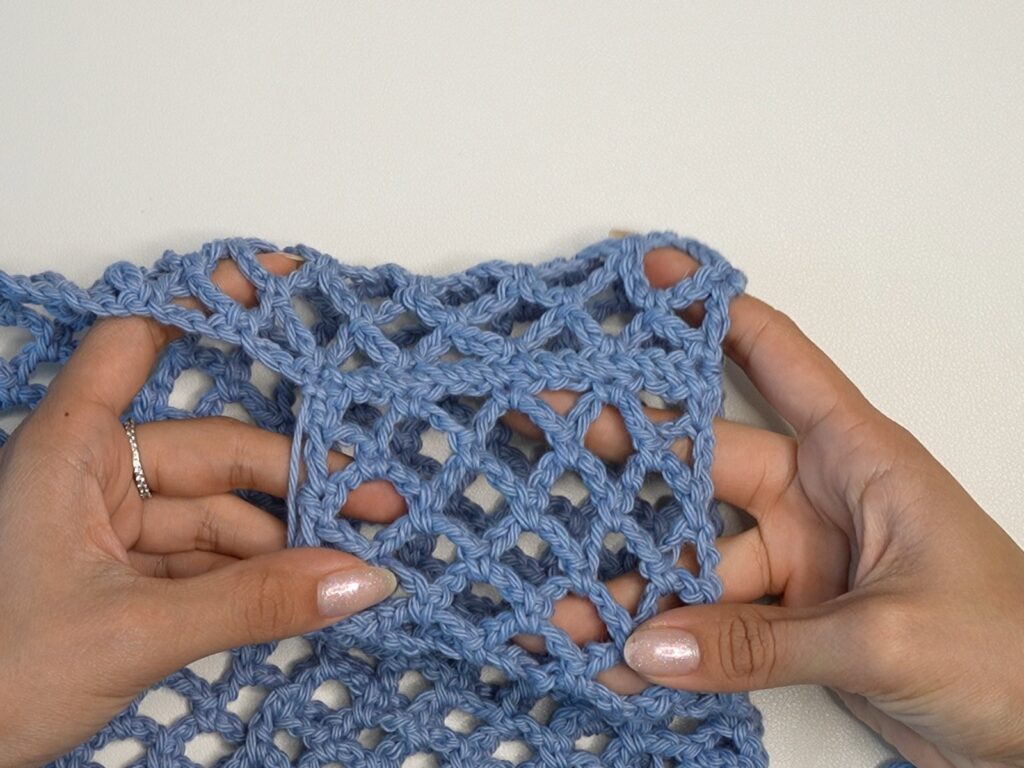
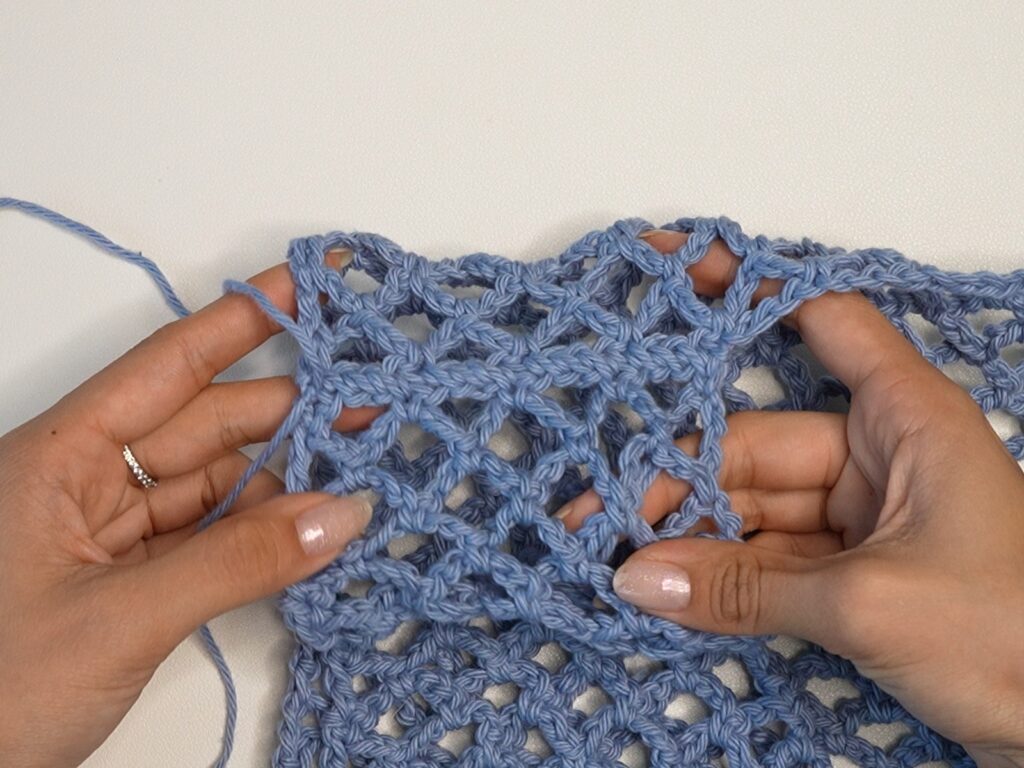
Repeat with the other side. Since you’ll start sewing from right-to-left, make sure to line up the chain spaces properly.
Outline (Optional) and Straps
Next, we’ll outline the top to make the edge look more clean and finished. We’ll also add in straps during the outline.
Flip the top over and upside-down. Attach your yarn to the bottom of the back panel, into any chain with a single crochet in it.
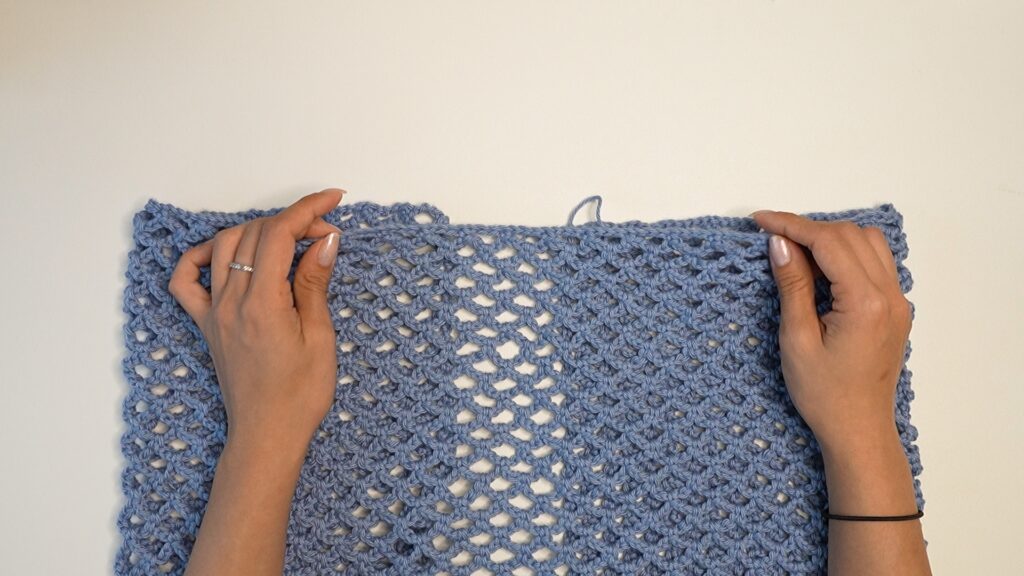
Bottom Outline: ch1, sc in first ch, rep[sc3 in next sp, sc in next ch] until bottom corner of front panel
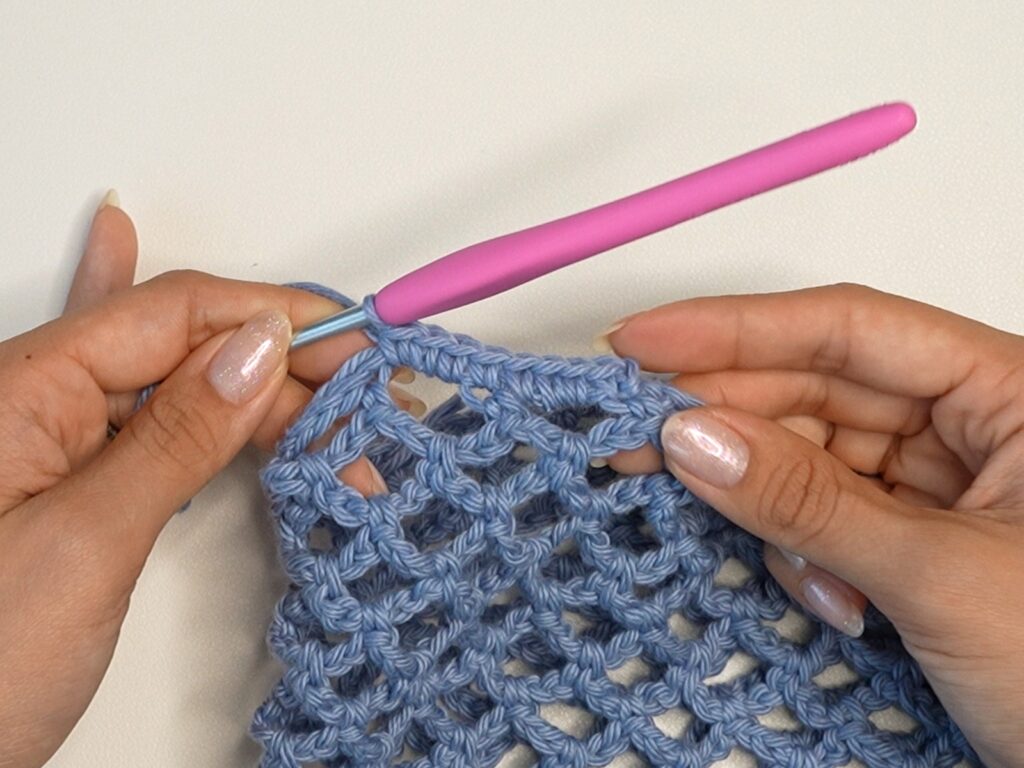
sc3 in corner
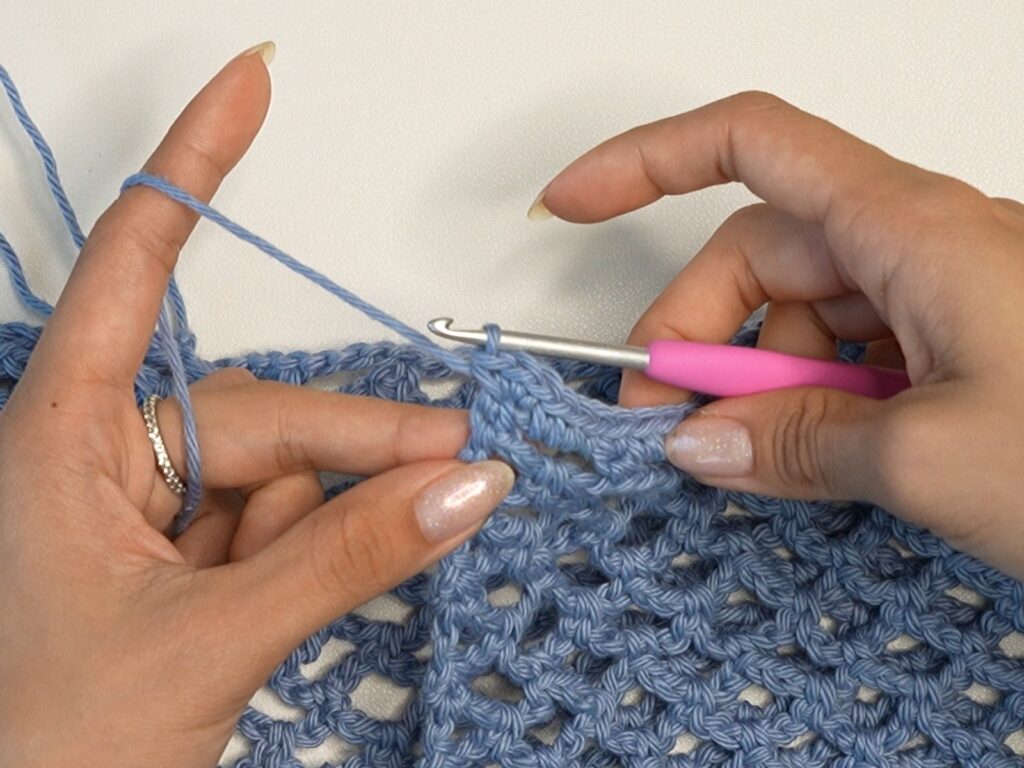
Front Panel Outline: rep[sc in next st, sc2 in next sp] until top corner of front panel
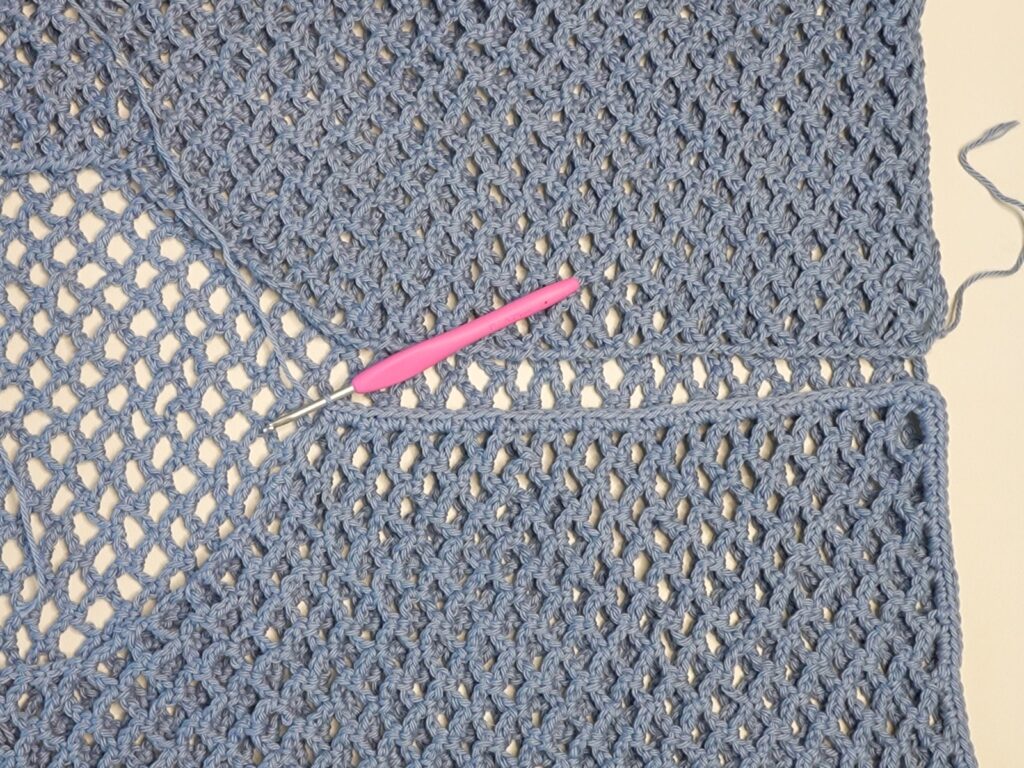
Strap: ch35, sl st in 2nd ch from hook and each ch across
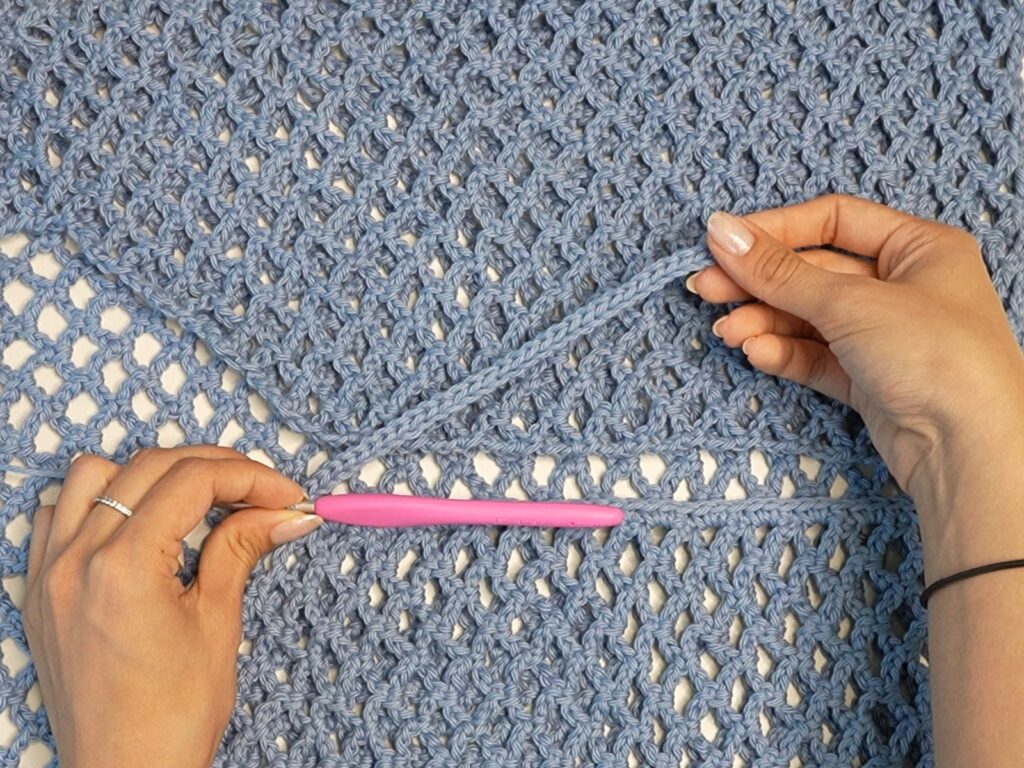
Front Panel Outline: rep[sc2 in next sp, sc in next st] until back panel
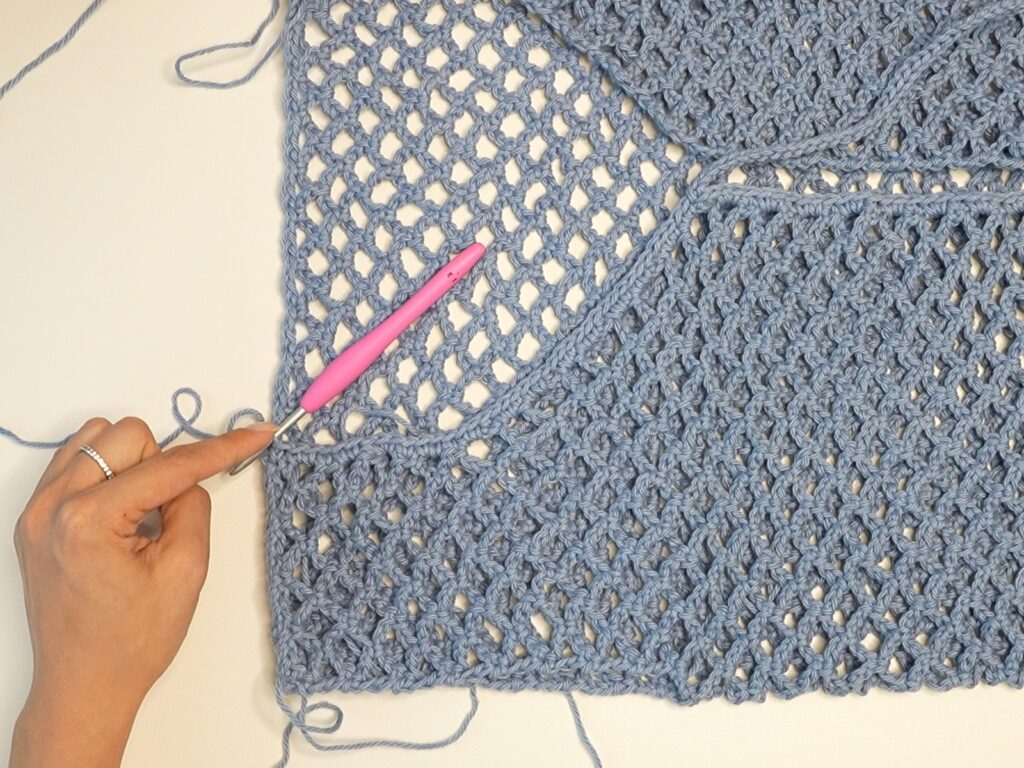
Back Panel Outline: rep[sc3 in next sp, sc in next st] until front panel
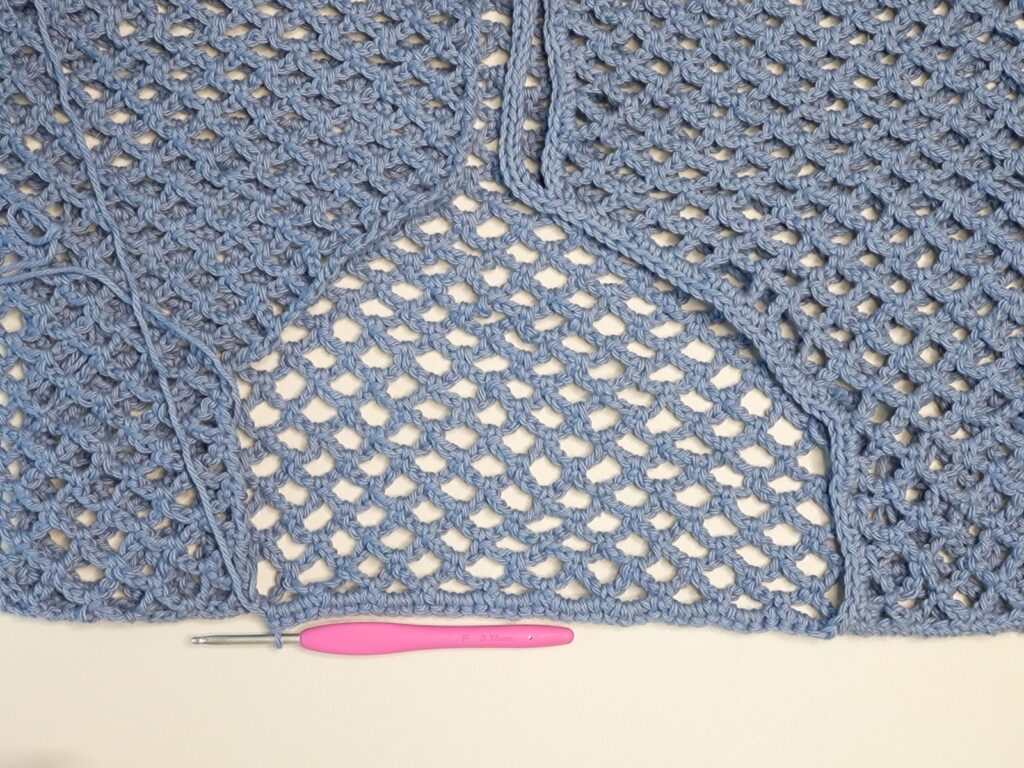
Repeat the front panel outline, straps, and bottom outline until you reach the start, sl st, fasten off
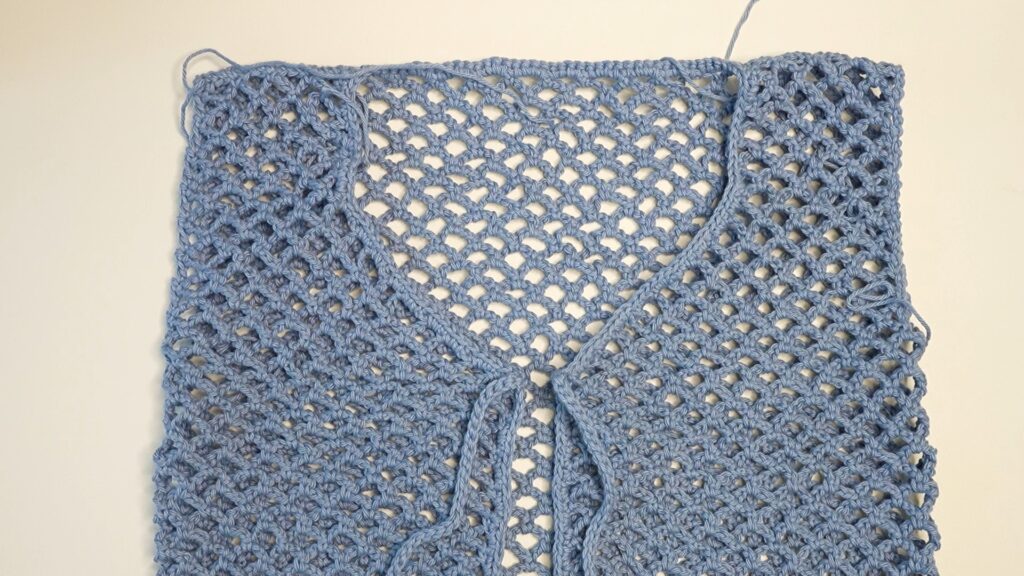
Sleeves (Optional)
Attach your yarn to the side of the first row of the front panel on the right.
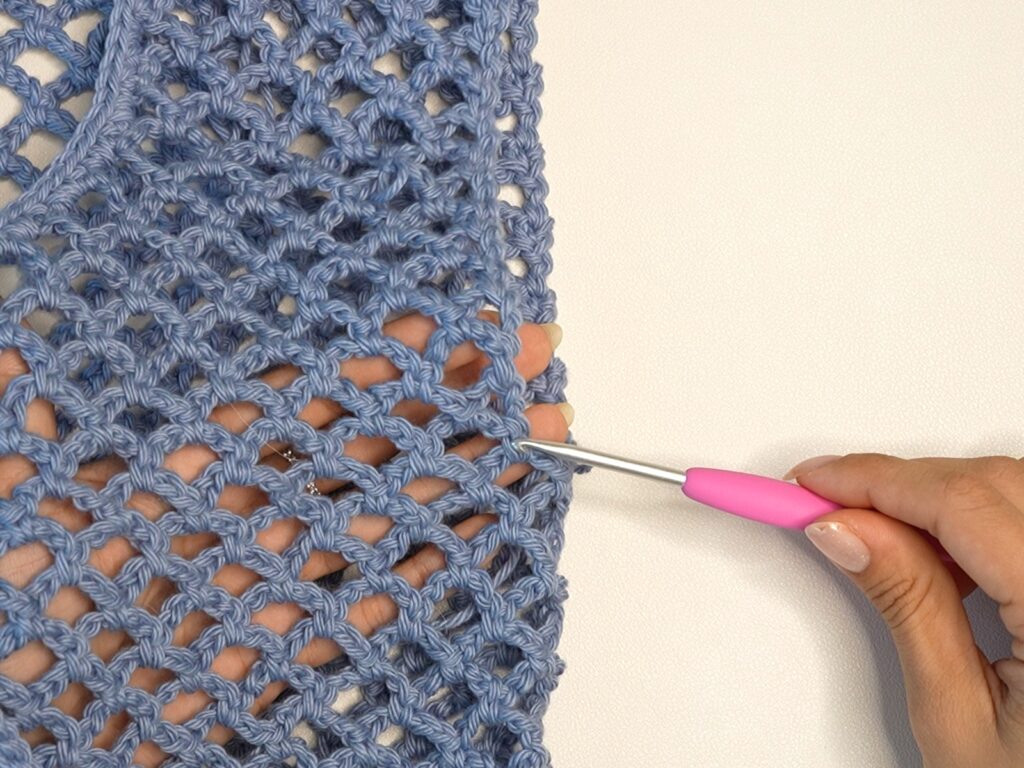
Row 1: ch1, sc in first st, rep[ch5, sc in next st] until 1 st left, ch2, dc in last st (16 ch5-sp)
Tip: The stitches for the sleeves are the sides of the single crochets on the front and back panels.
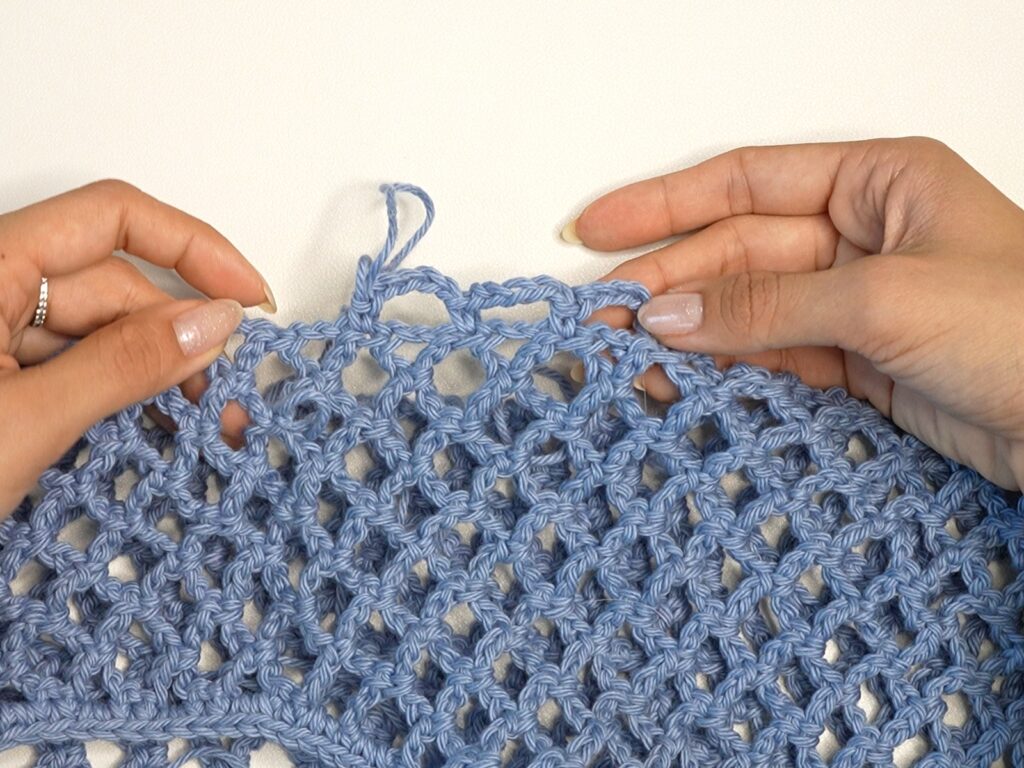
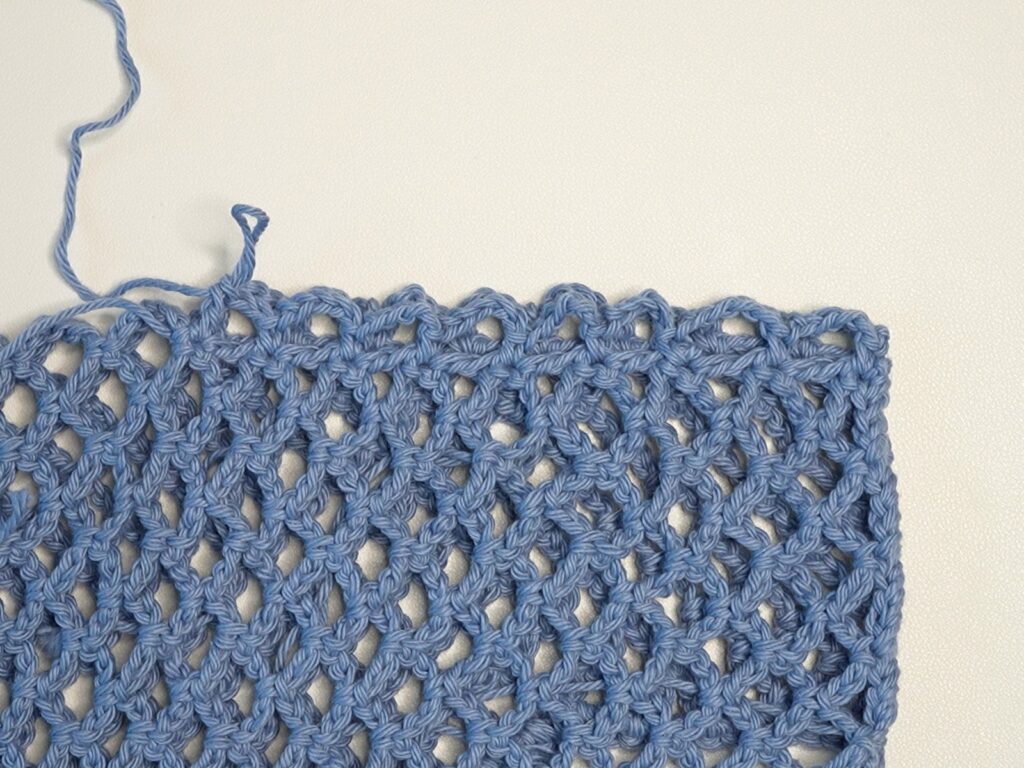
Rows 2-5: ch1, turn, sc in first st, rep[ch5, sc in next ch5-sp] until 1 ch5-sp, ch2, dc in last ch5-sp (15 ch5-sp, 14 ch5-sp, 13 ch5-sp, 12 ch5-sp)
Note: Do fewer rows for a larger/shorter sleeve or more rows for a smaller, longer sleeve.
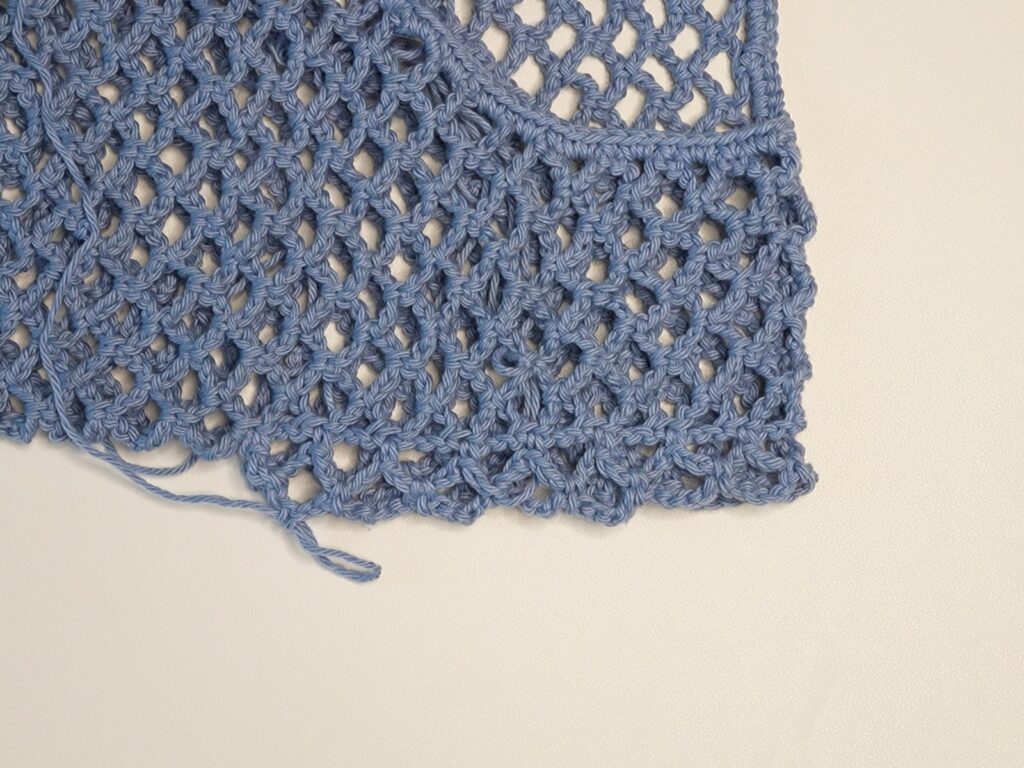
Tip: Try on the top to make sure the sleeve fits and is a good length.
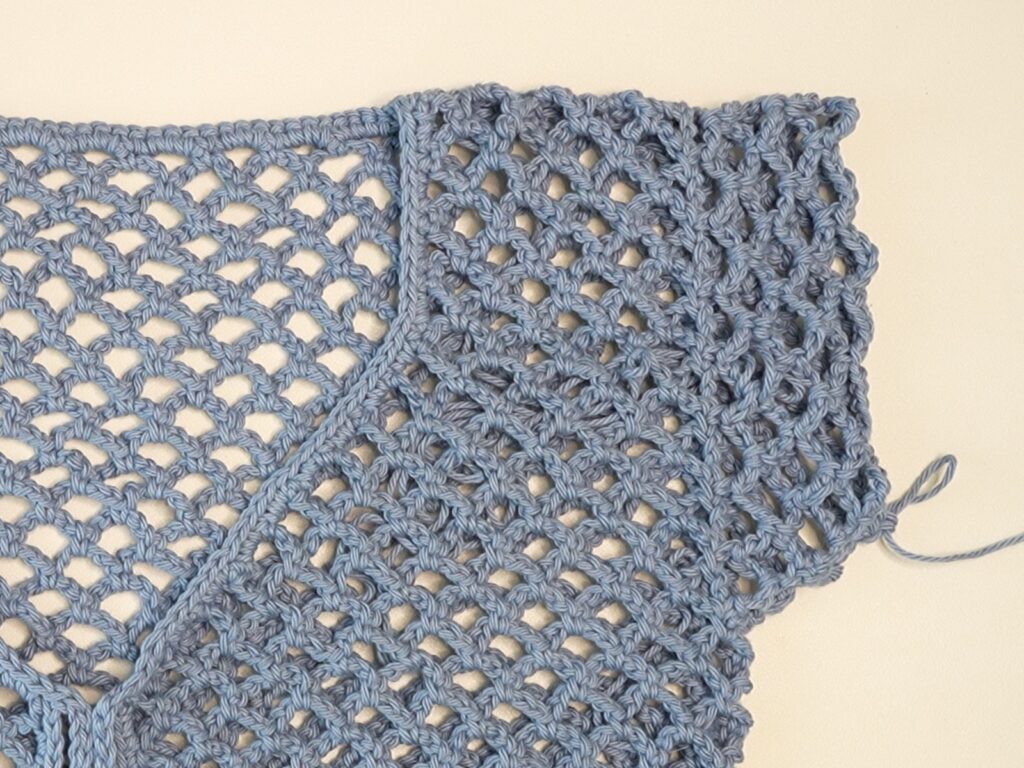
Fasten off with a 25cm/10″ long loose end.
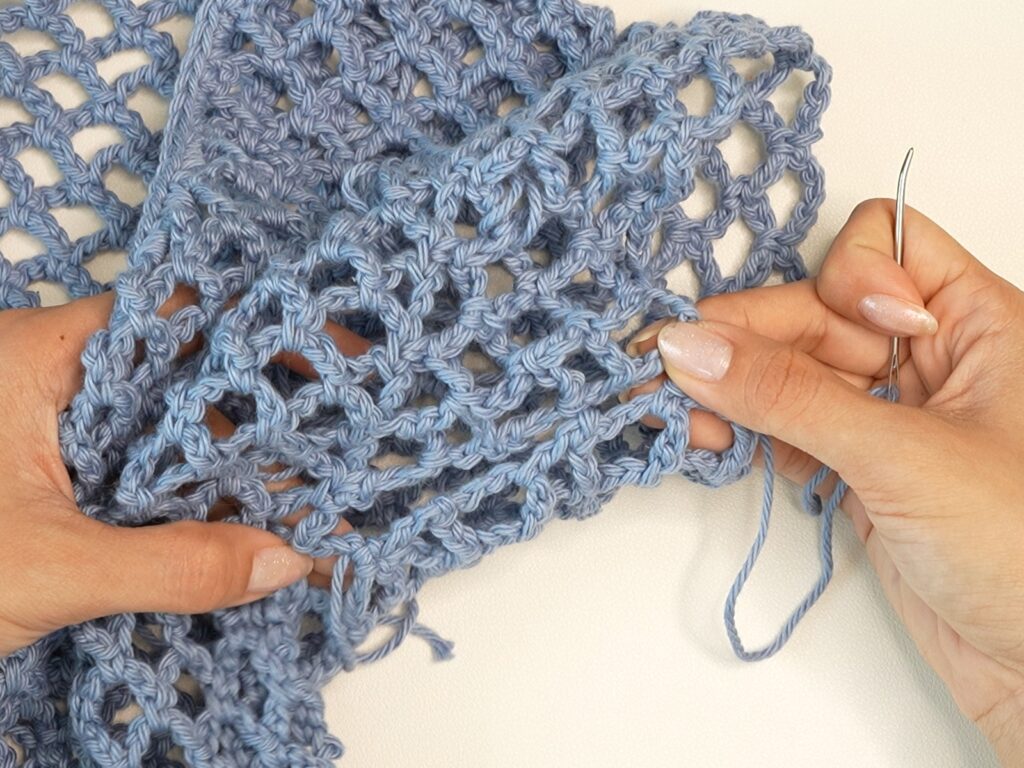
With the long loose end, whip stitch the ends of the sleeve rows together to connect them.
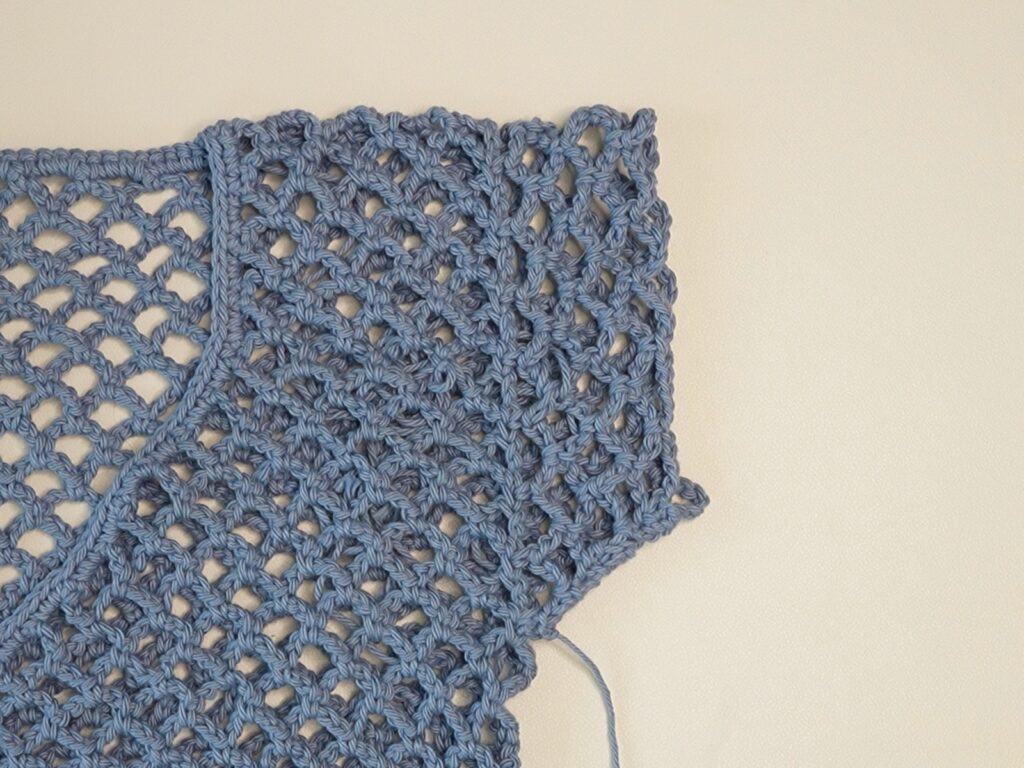
Attach your yarn to the side of the first row of the back panel for the other sleeve.
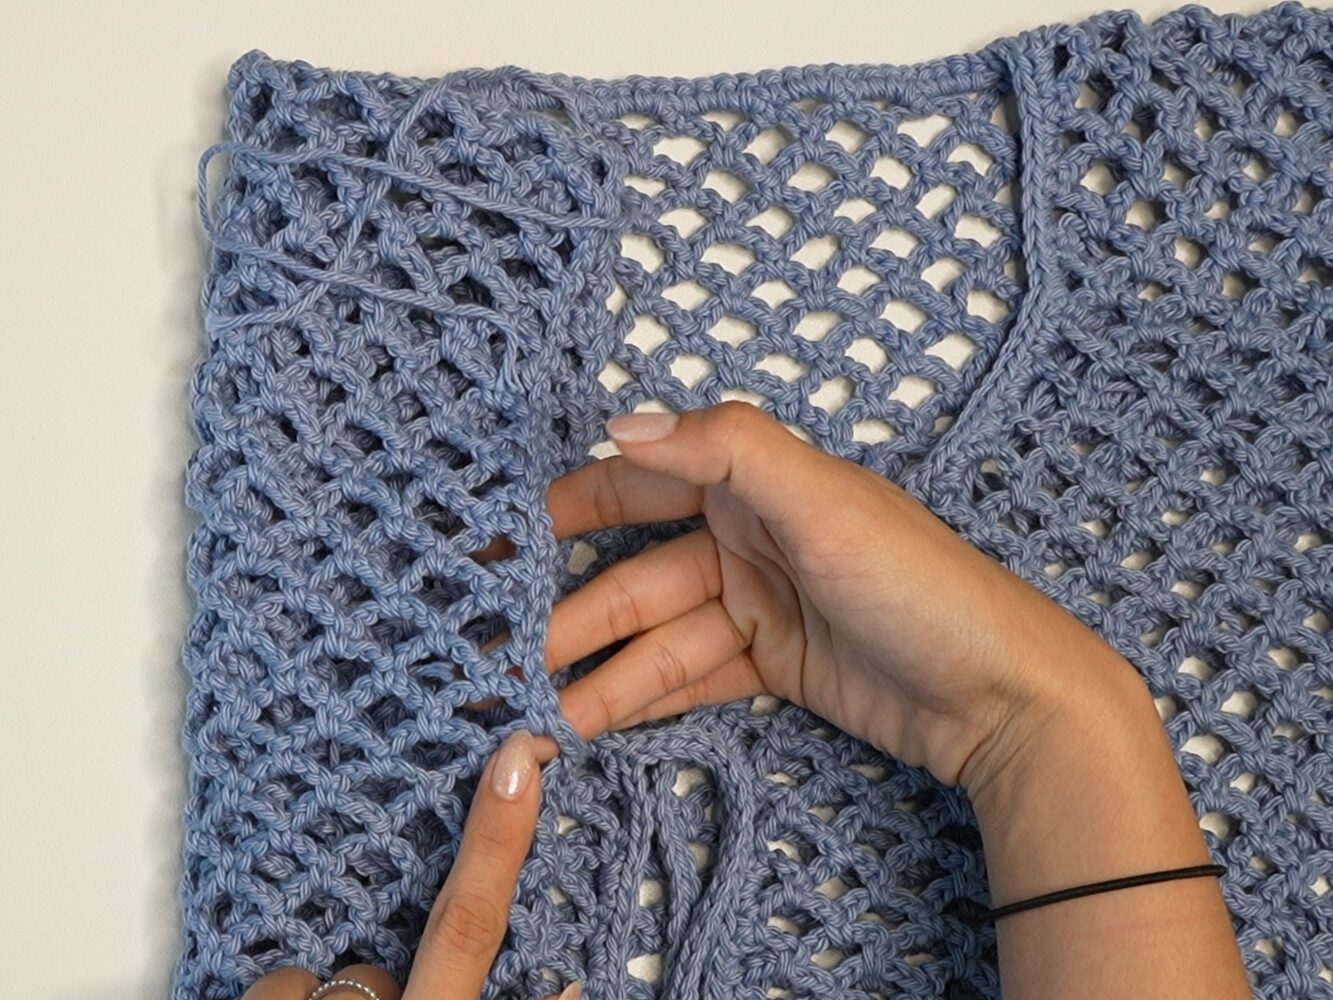
Repeat the same steps as the first sleeve.
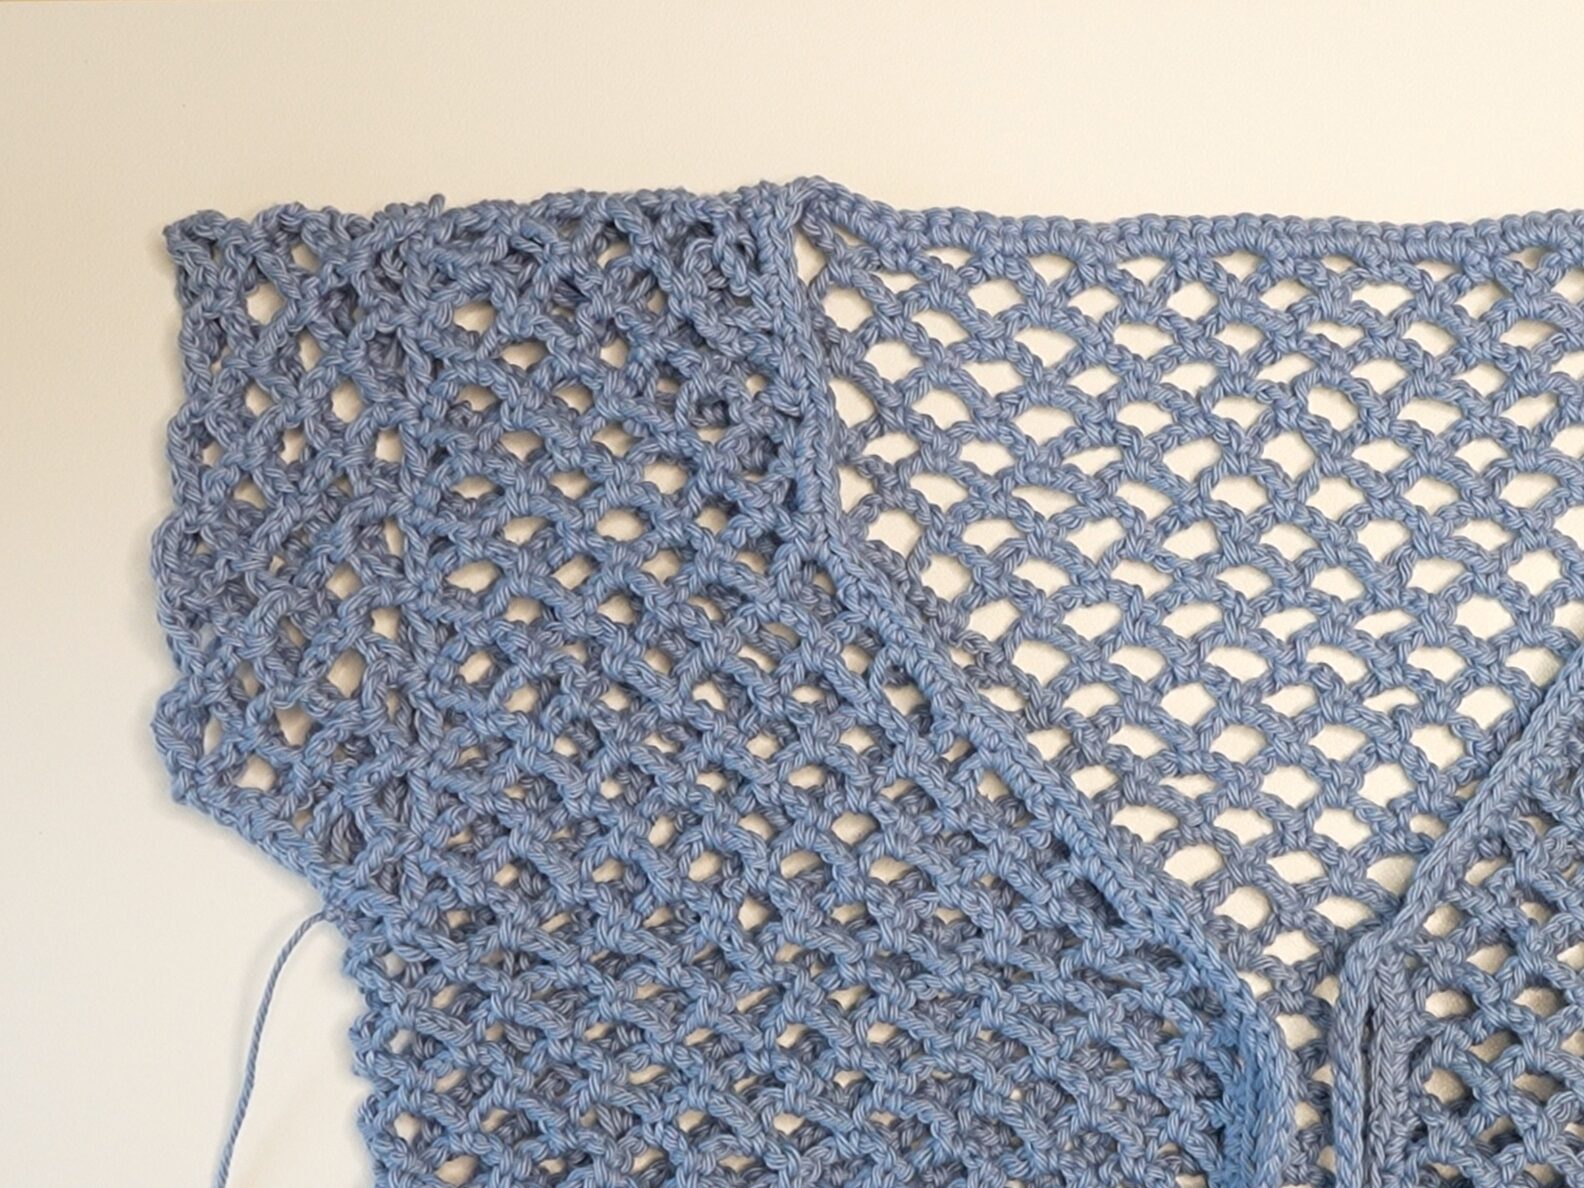
Finished Crochet Mesh Top
Weave in your loose ends and your crochet mesh top is finished!


One Comment