Floral Crochet Mesh Top | Free Pattern & Video Tutorial
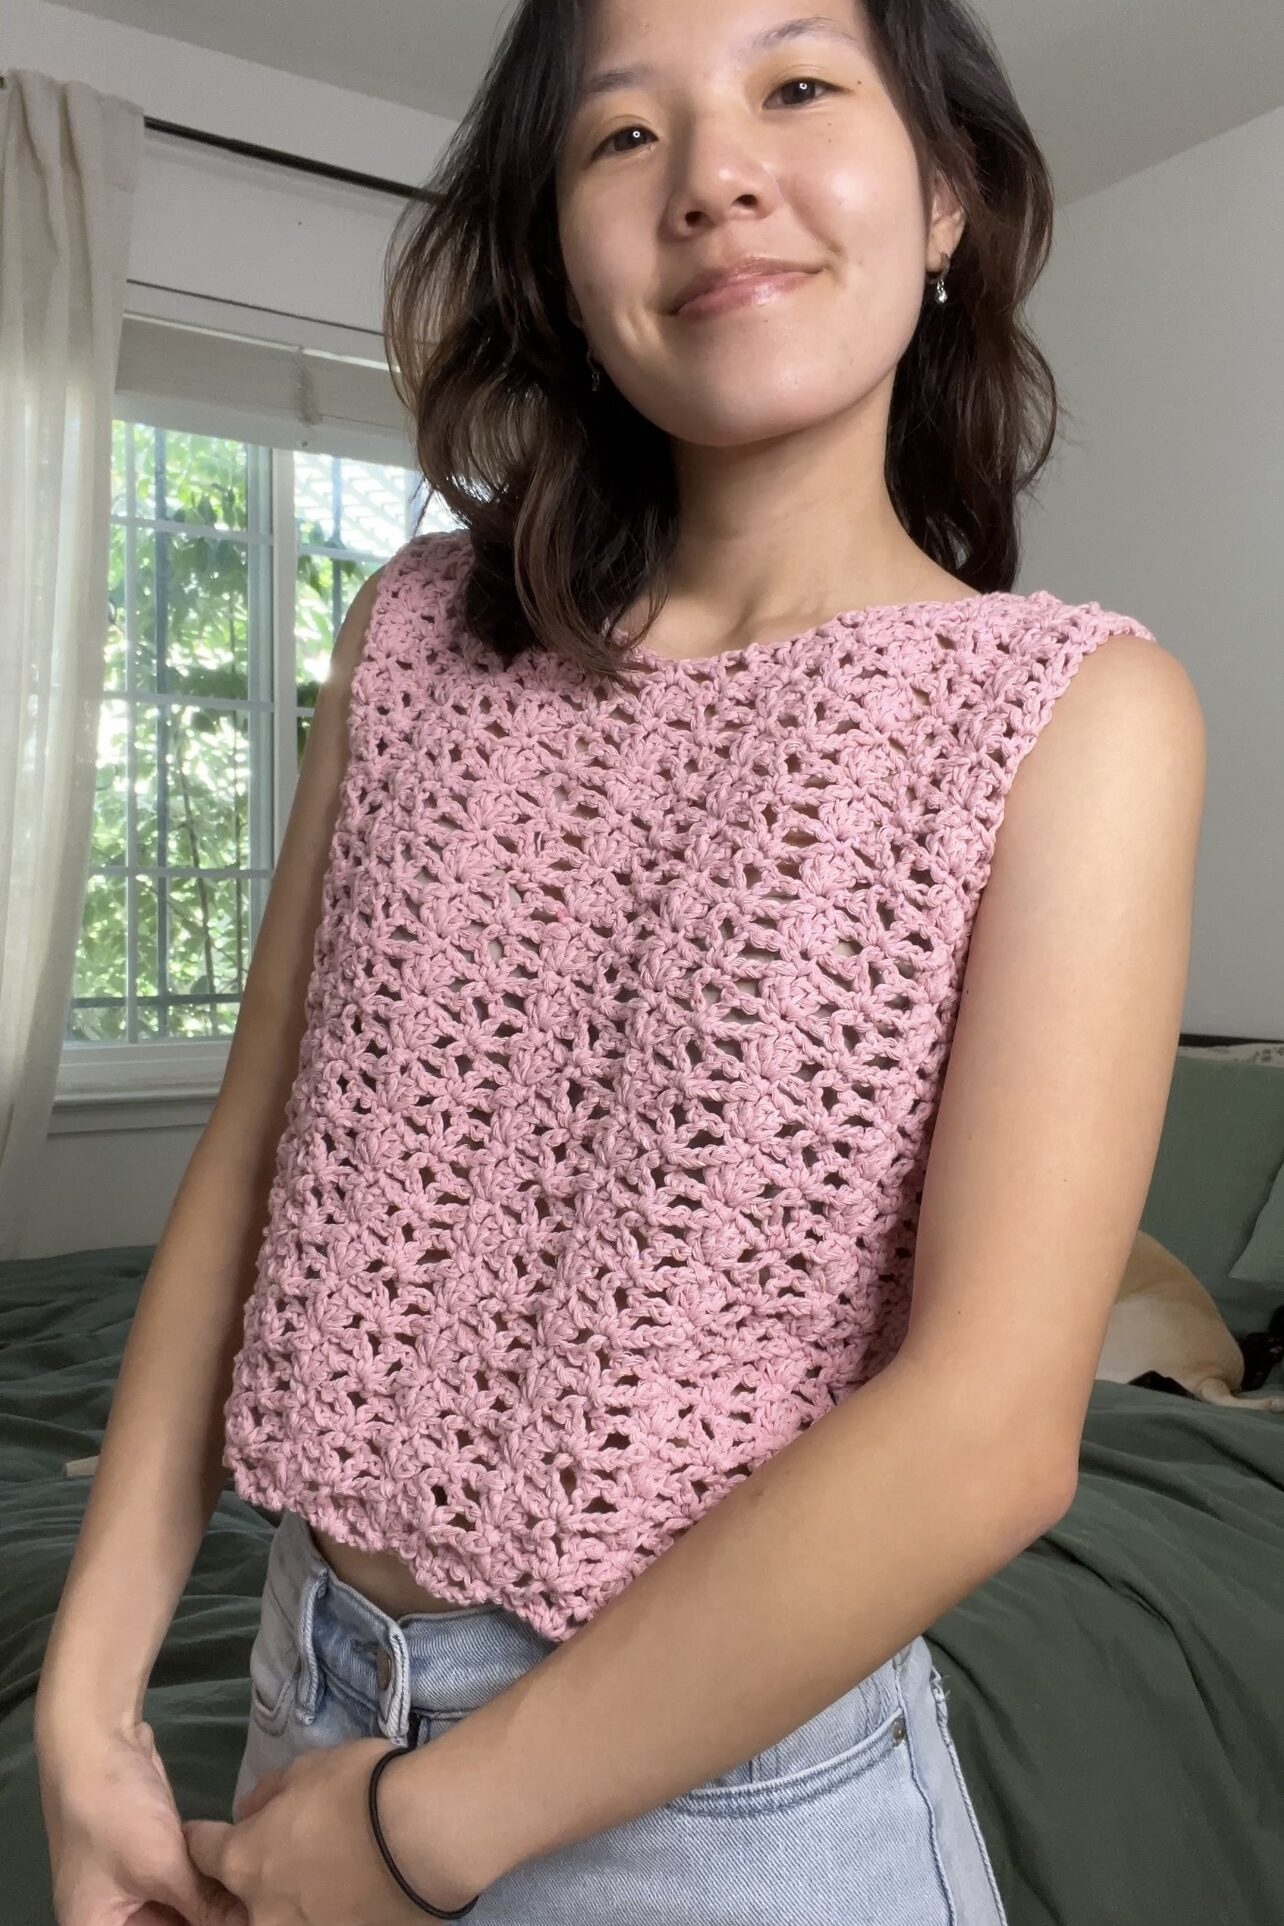
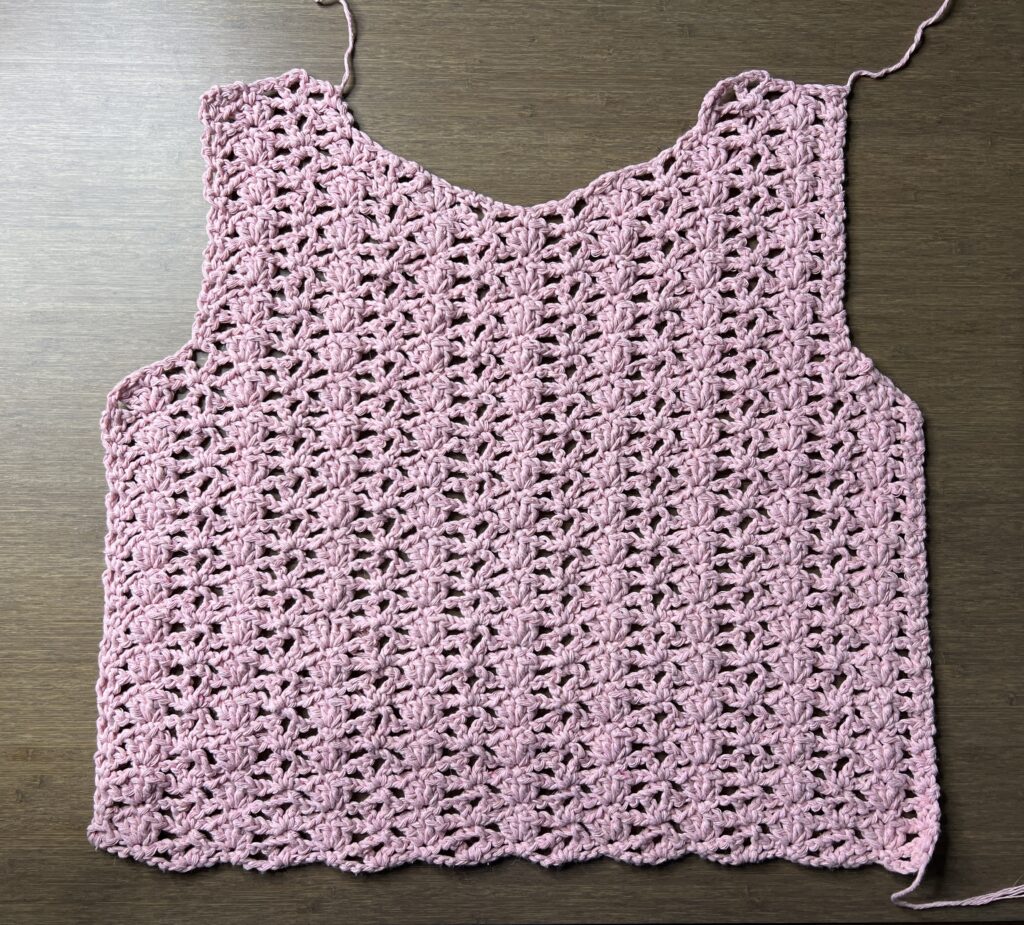
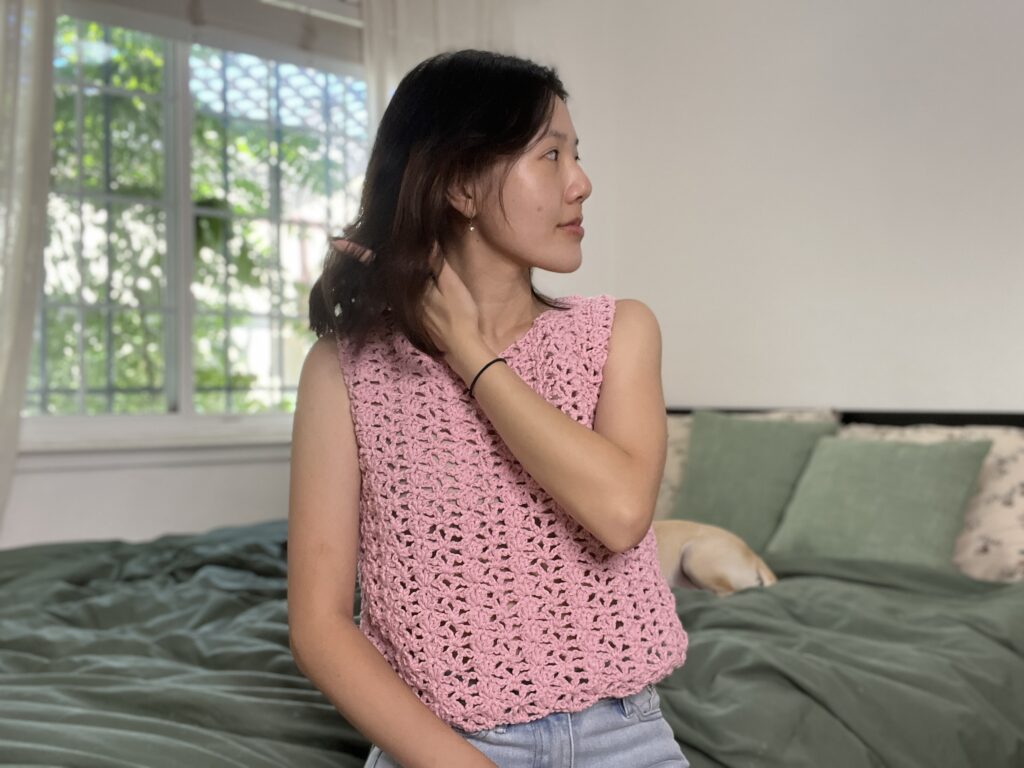
Crochet tops are a staple of summer! This loose-fitting crochet mesh top is great for hot summer days when you need something light and airy. This easy mesh stitch creates little flower patterns for a super cute design.
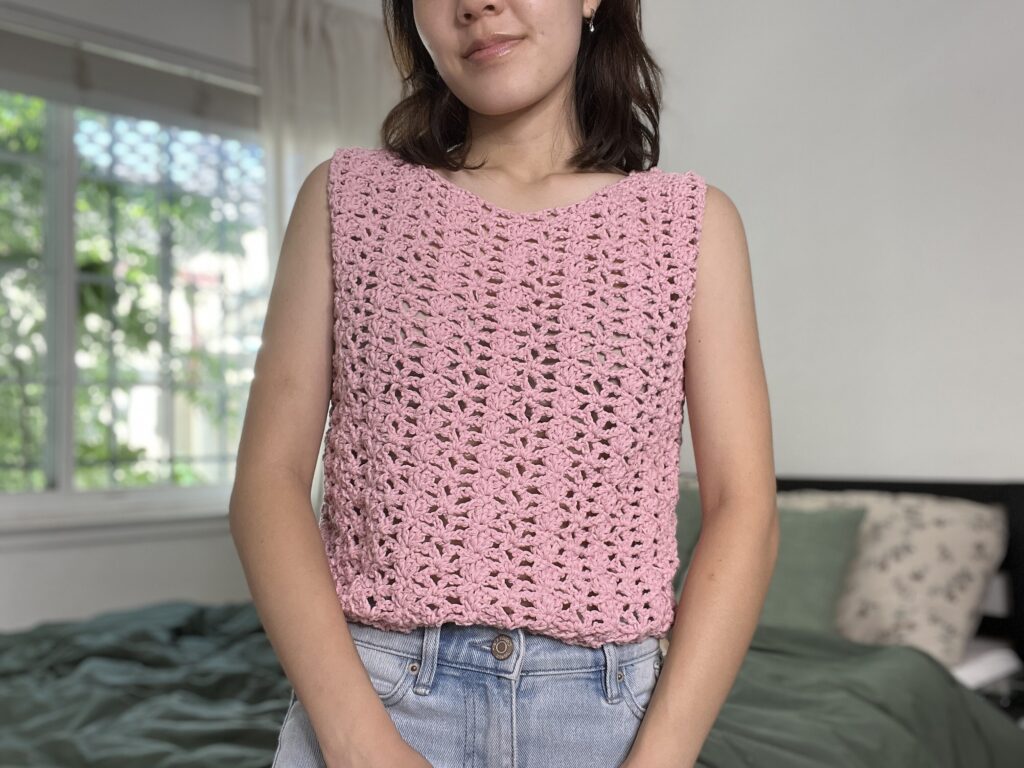
Intermediate Crochet Project
This pattern is most suitable for more advanced crocheters because it uses a special stitch and shaping methods for that stitch. Shaping the armholes and the neck hole makes the top fit a lot nicer. If you want to make the pattern easier, you can skip the shaping, make two rectangles, then sew the shoulders and sides.
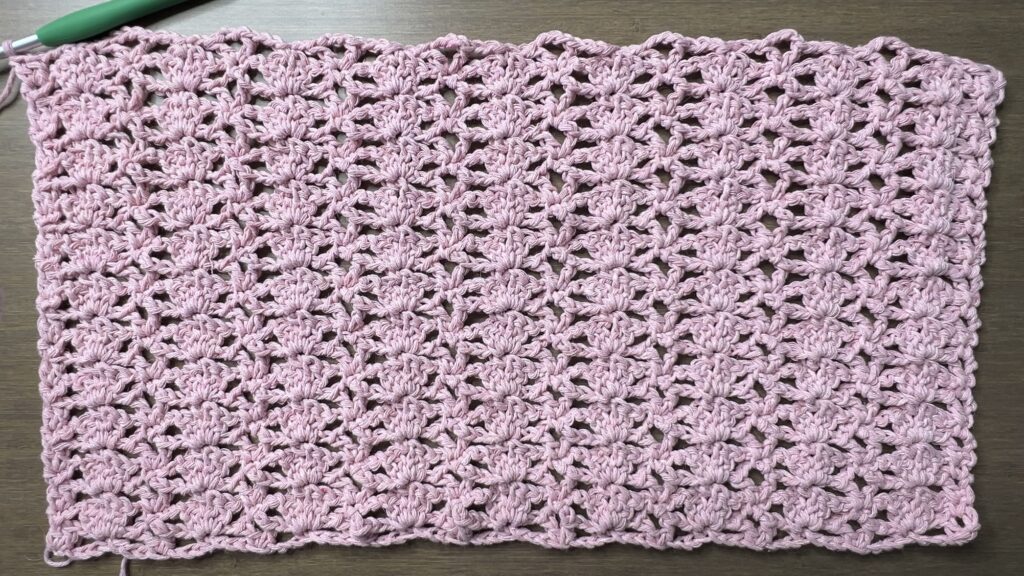
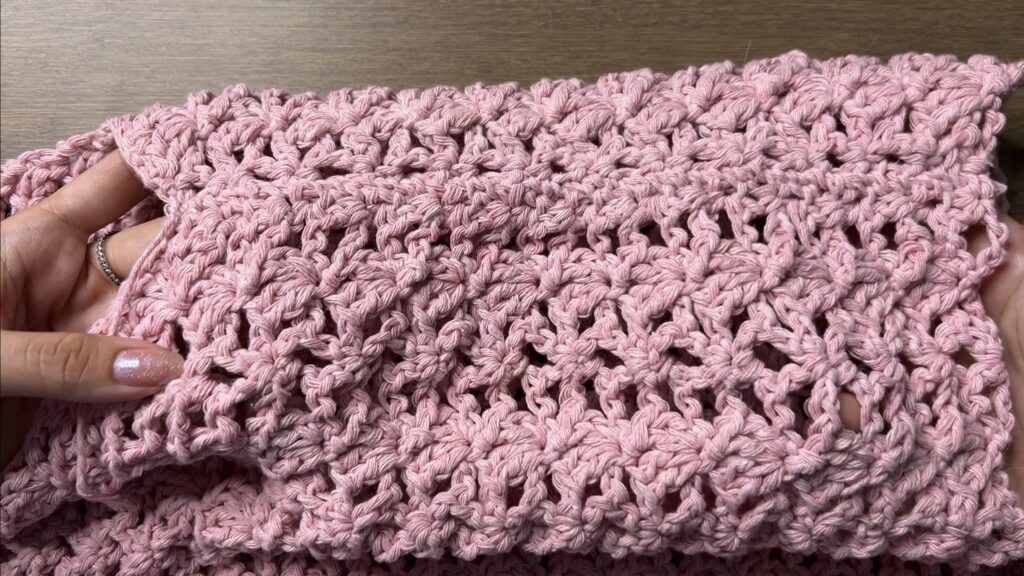
The stitch used in this pattern is much easier than other floral mesh stitches that require you to look at a graph. This stitch repeats two rows to create the flowers and is easier to memorize.
For a top using a mesh stitch perfect for beginners, check out the tie-front mesh vest! For a slightly easier mesh top pattern, try the love knot top!
Sizing
This pattern is written for my measurements, which is an adult small. You can adjust the size by following the italicized notes within the pattern!
Project Overview

Choosing Yarn & Hook Size
Choosing the right yarn is essential for crochet clothing. For clothes you’ll wear in warm weather, you typically want to choose a natural fiber such as cotton. Bamboo and linen are also great choices!
The great thing about this top is that it’s mesh, so it’s okay if the fiber isn’t 100% natural. I used a cotton-polyester blend for mine!
Other Projects You Might Like
Floral Crochet Mesh Top Video Tutorial
Become a member to get early access to new videos!
You can follow along with my YouTube video to make your own floral crochet mesh top! I have timestamps included to section the video and help you jump to any point you need to!
This post may contain affiliate links. I may earn a small commission on qualifying purchases at no additional cost to you!
Materials
- 280 grams of medium weight yarn (Lion Brand’s Re-Up in “Rosewater“)
- 5.5mm Clover Amour crochet hook
- Scissors
- Yarn needle
- Stitch markers (optional)
- Tension ring (optional)
- Yarn bowl (optional)

Dimensions
Armhole: 17.5 centimeters wide (6.9 inches)
Neckhole: 19 centimeters wide x 7 centimeters deep (7.5 x 2.8 inches)
Overall: 44 centimeters wide x 40 centimeters long (17.3 x 15.7 inches)
Notes and Tips
- This pattern is written using US crochet terms
- Rows with straight edges will alternate between 1 single crochet (Row 2 repeat) and 2 double crochets (Row 3 repeat) at the start and end of the row
- Skip over the chain 2’s from the row before. Only work into the single crochets and chain-1- or chain-3-spaces from the row before
- The chain 1 at the beginning of each row does NOT count as a single crochet
- The chain 3 at the beginning of each row DOES count as a double crochet
- If you don’t have stitch markers, bobby pins and safety pins work, too!
- Italicized notes tell you what to change to adjust the size
Abbreviations
bw = between
ch = chain
ch1-sp = chain-1-space
ch3-sp = chain-3-space
dc = double crochet
rep = repeat
sc = single crochet
sk = skip
st = stitch
Body
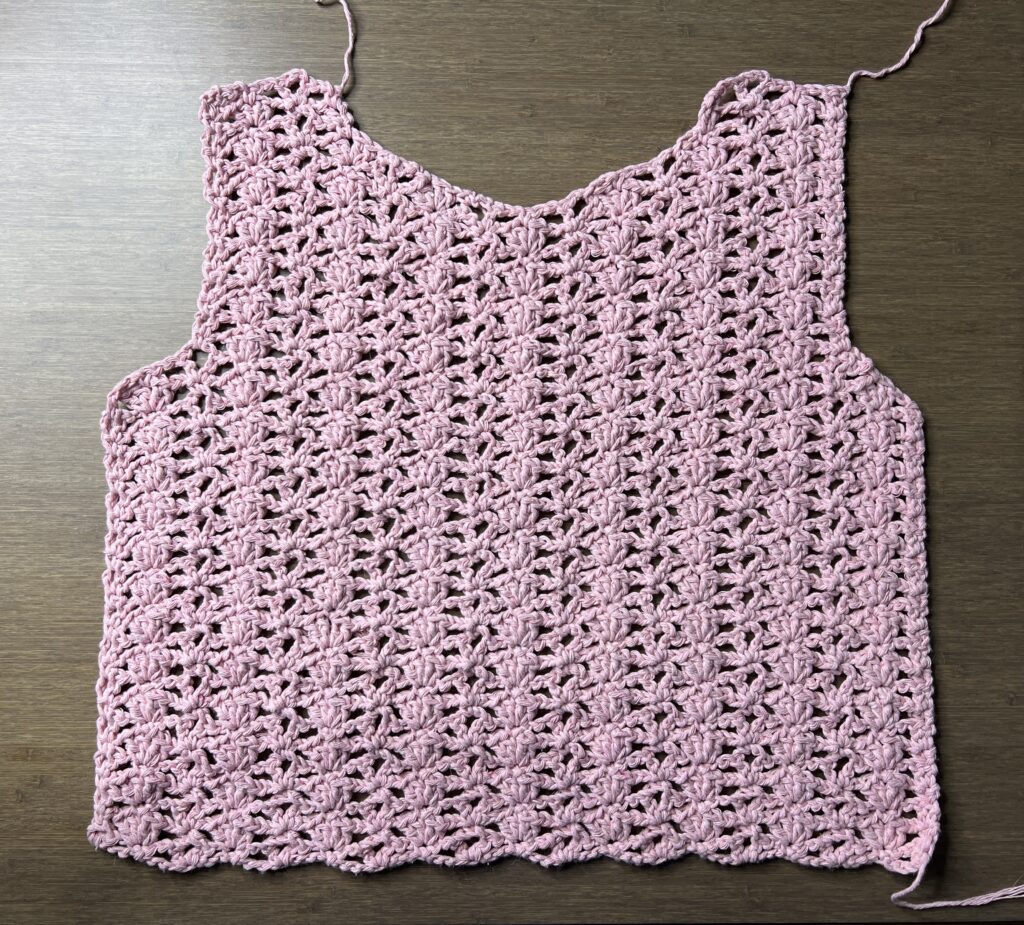
Foundation: Make a slipknot, ch76
Note: Chain less for a narrower panel or chain more for a wider panel. The number of chains you do must be a multiple of 8, plus 4.
Row 1: dc in 4th ch from hook, *ch2, sk3, sc, ch2, sk3,** [dc, ch3, dc], rep from * across, stop at ** on last rep, dc2 in last ch, turn
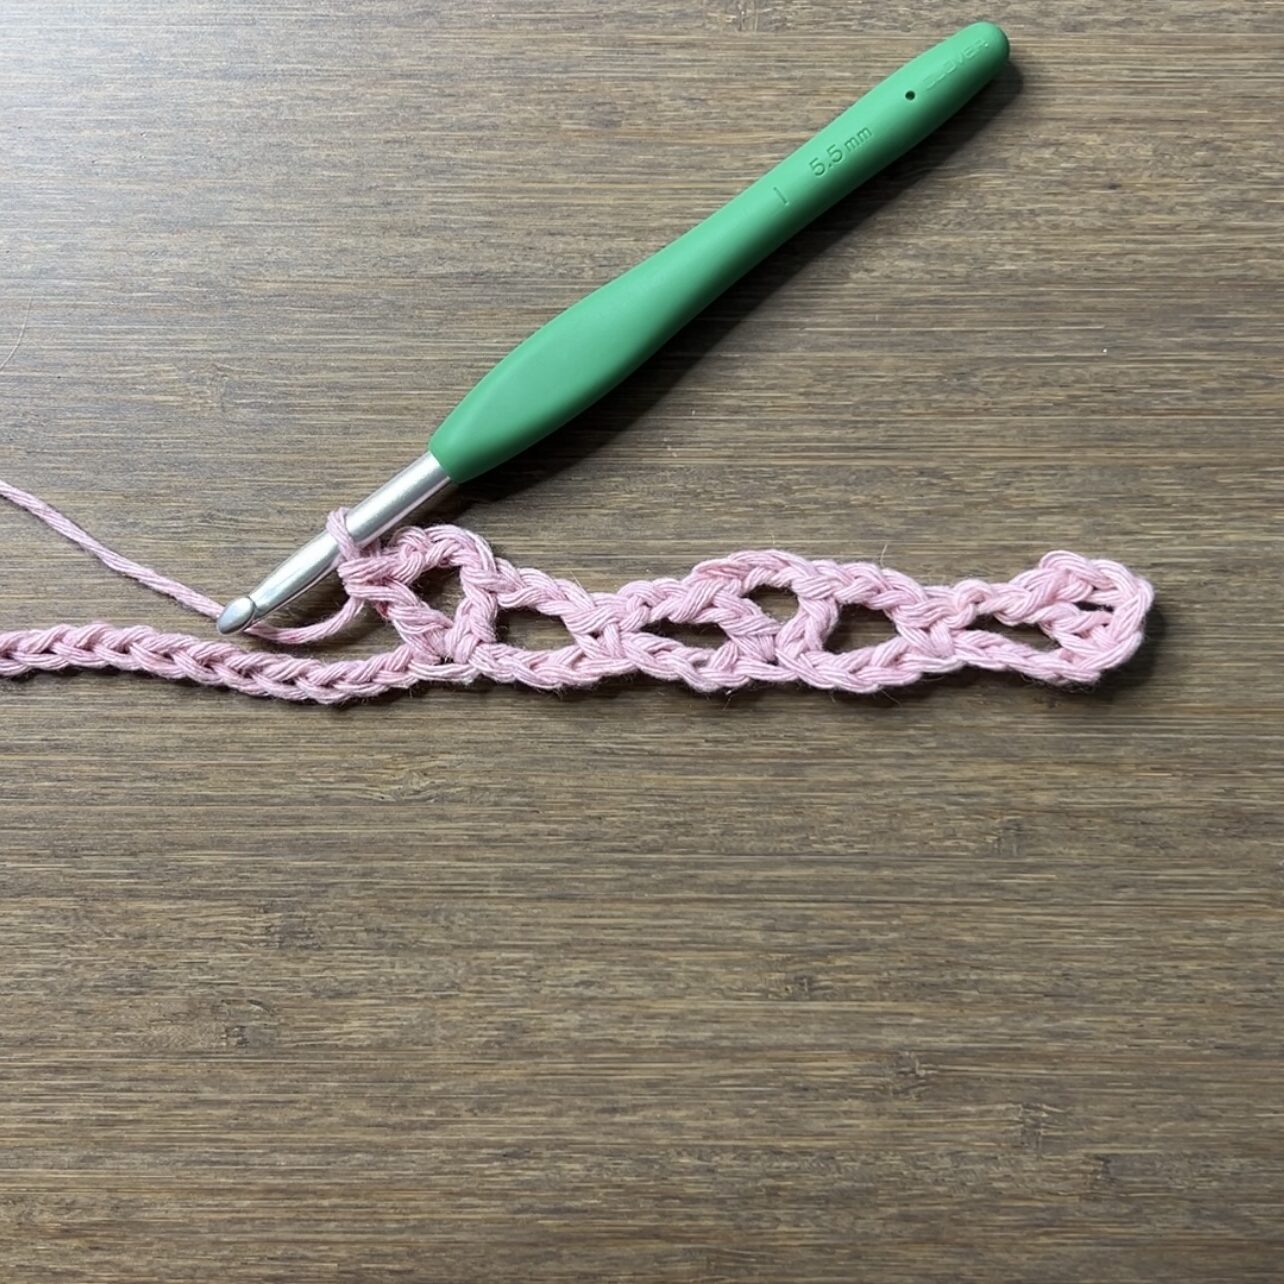
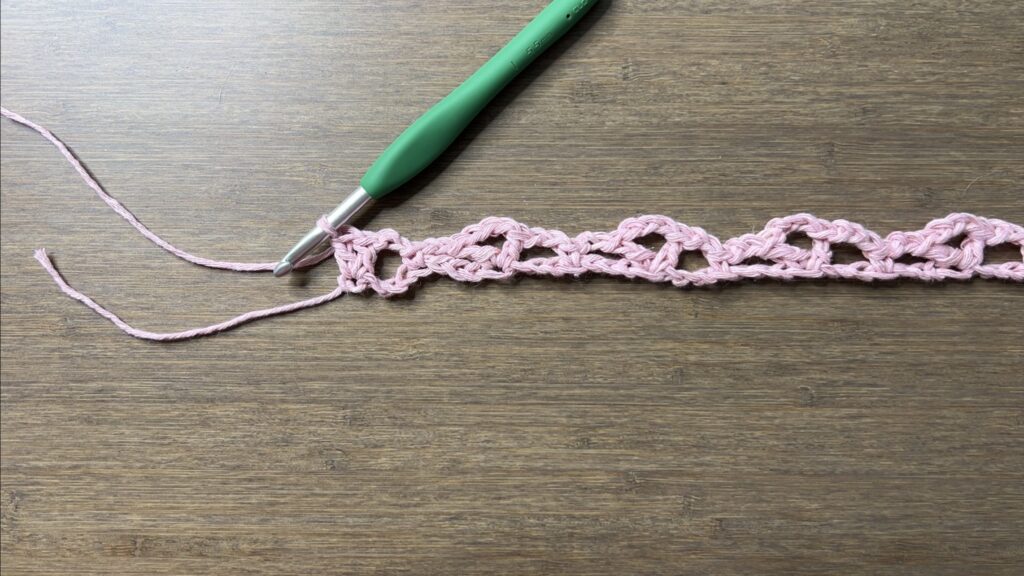
For the next rows, skip over the chain 2’s from the row before. Only work into the single crochets and chain-1- or chain-3-spaces from the row before.
Row 2: ch1, sc, *ch2, [dc2, ch1, dc2], ch2,** sc in ch3-sp, rep from * across, stop at ** on last rep, sc bw the posts of the 2 dc at the end, turn


Row 3: ch3, dc, *ch2, sc in ch1-sp, ch2,** [dc, ch3, dc], rep from * across, stop at ** on last rep, dc2, turn
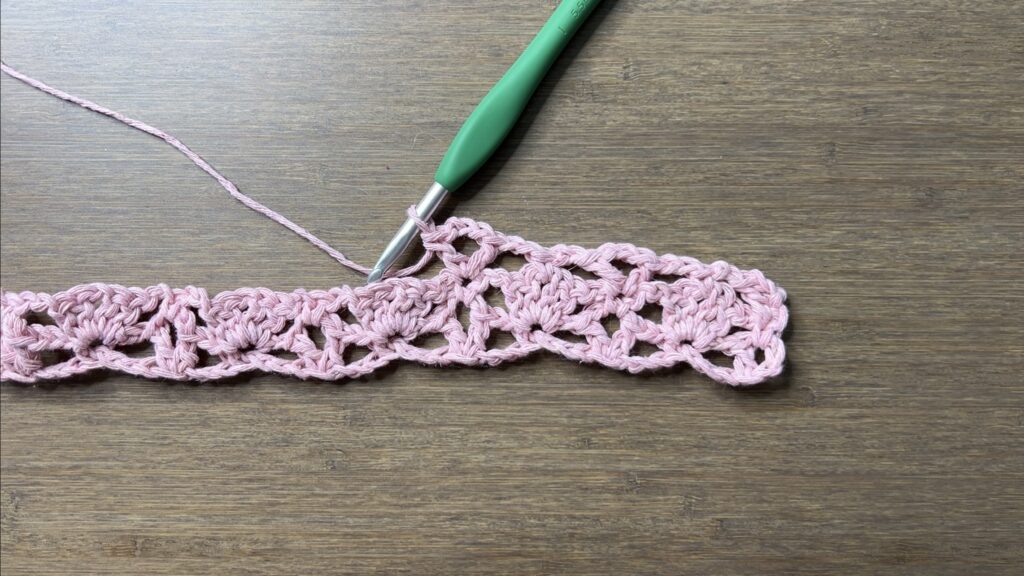
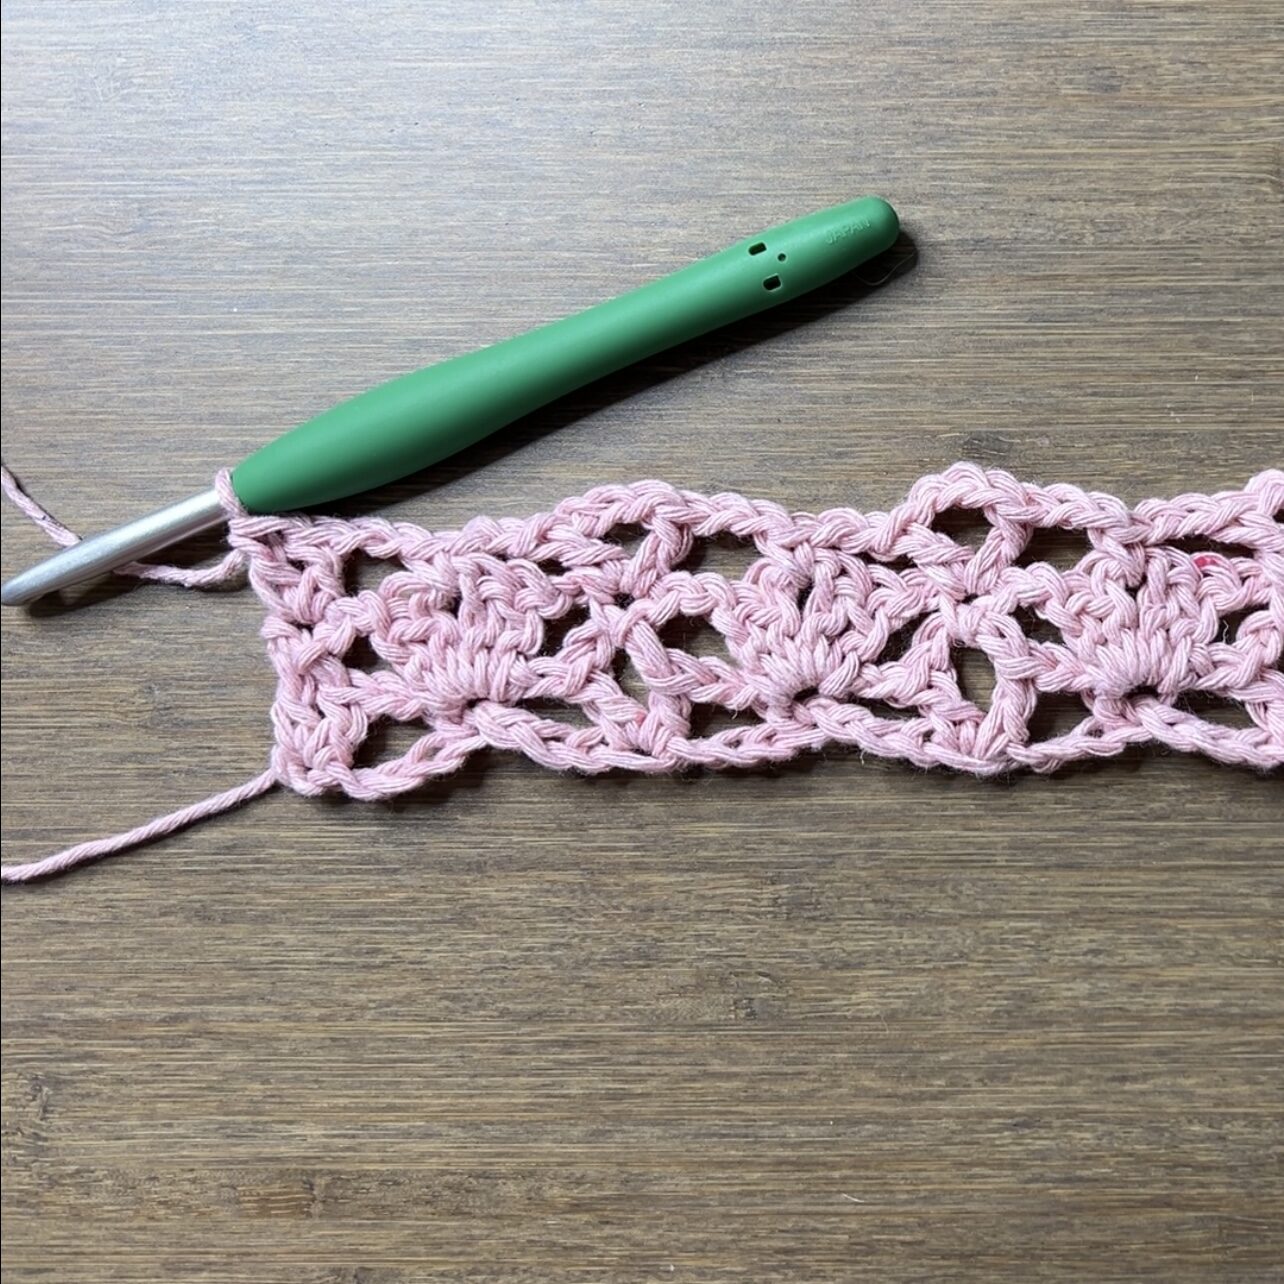
Rows 4-23: rep[Row 2, Row 3]
This means Row 4 is a repeat of Row 2, Row 5 is a repeat of Row 3, and so on. Every even row up until Row 23 is a repeat of Row 2 and every odd row is a repeat of Row 3.
The height of the panel after these rows is the length from where you want the bottom of this shirt to be, up to where you want the bottom of the armholes to be.
Dimensions: 44 centimeters wide x 23.5 centimeters tall (17.3 x 9.3 inches)
Note: Do fewer rows to make that length shorter or more rows to make it longer. Do an odd number of rows.

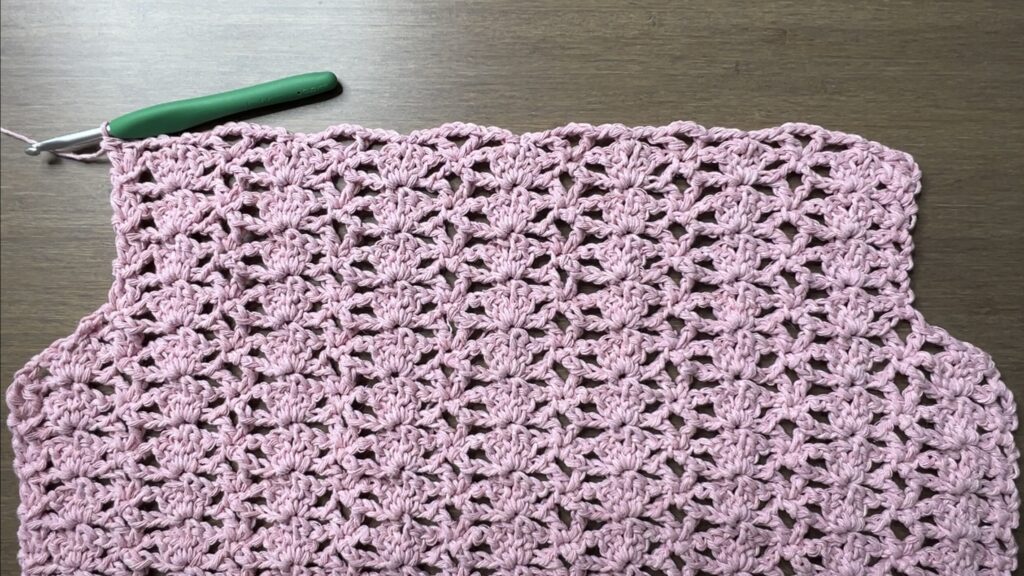
Armholes
Instead of repeating Row 2, we will skip the ch1, sc at the beginning of the row and substitute the ch2, sc with a dc at the end of the row.
Row 24: *ch2, [dc2, ch1, dc2],** ch2, sc in ch3-sp, rep from * across, stop at ** on last rep, dc bw the posts of the 2 dc at the end, turn
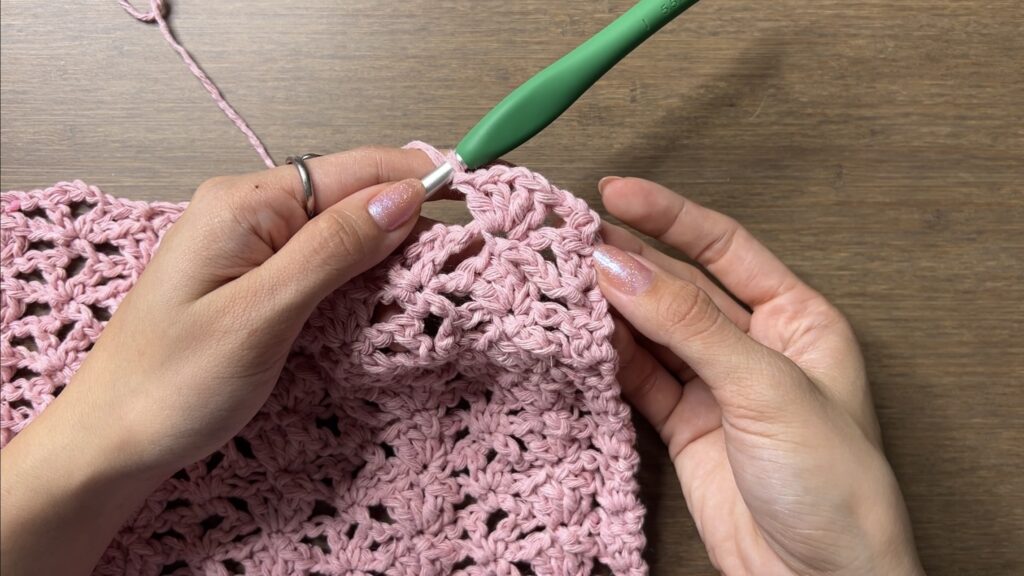

Row 25: ch2, sc in ch1-sp, *ch2, [dc, ch3, dc], ch2, sc in ch1-sp, rep from * across, turn

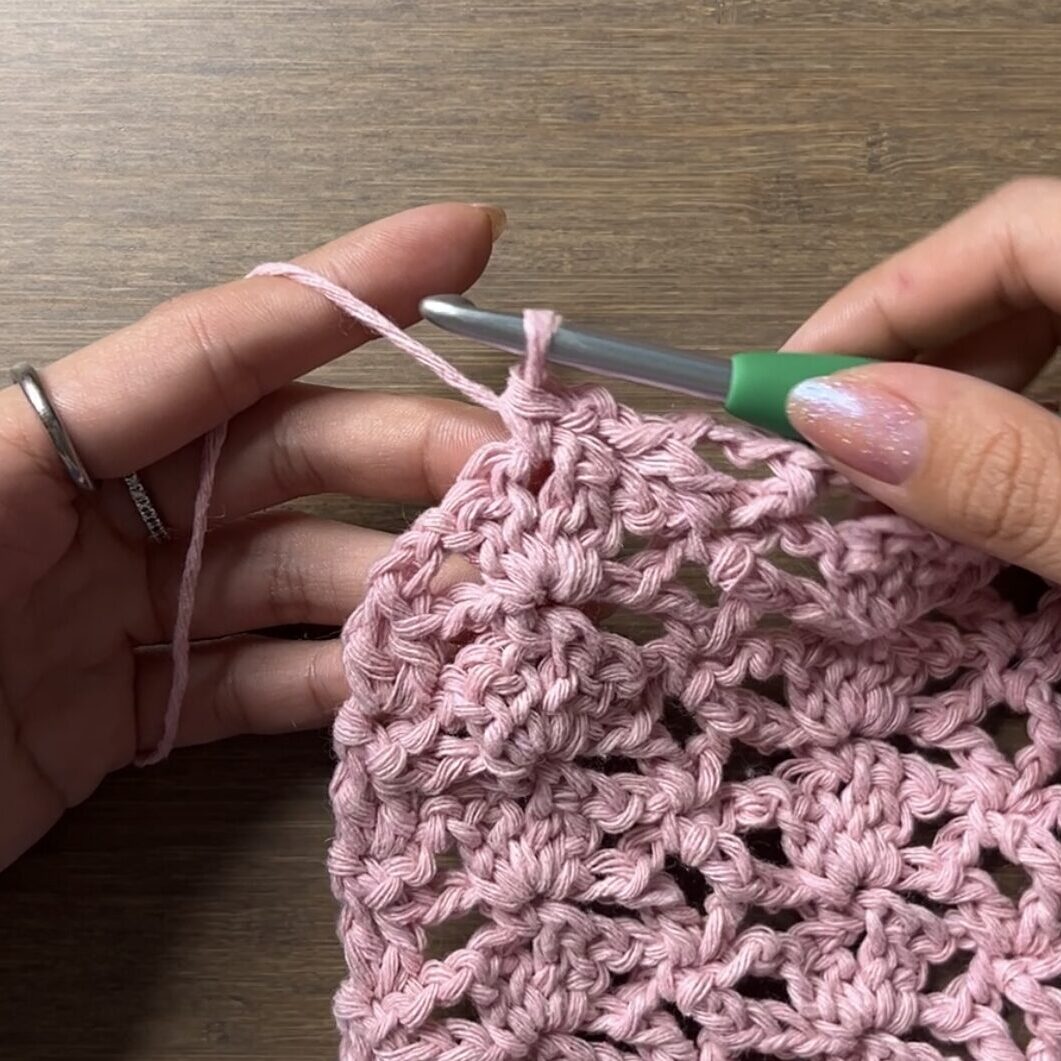
Row 26: ch2, sc in ch3-sp, *ch2, [dc2, ch1, dc2], ch2, sc in ch3-sp, rep from * across, turn
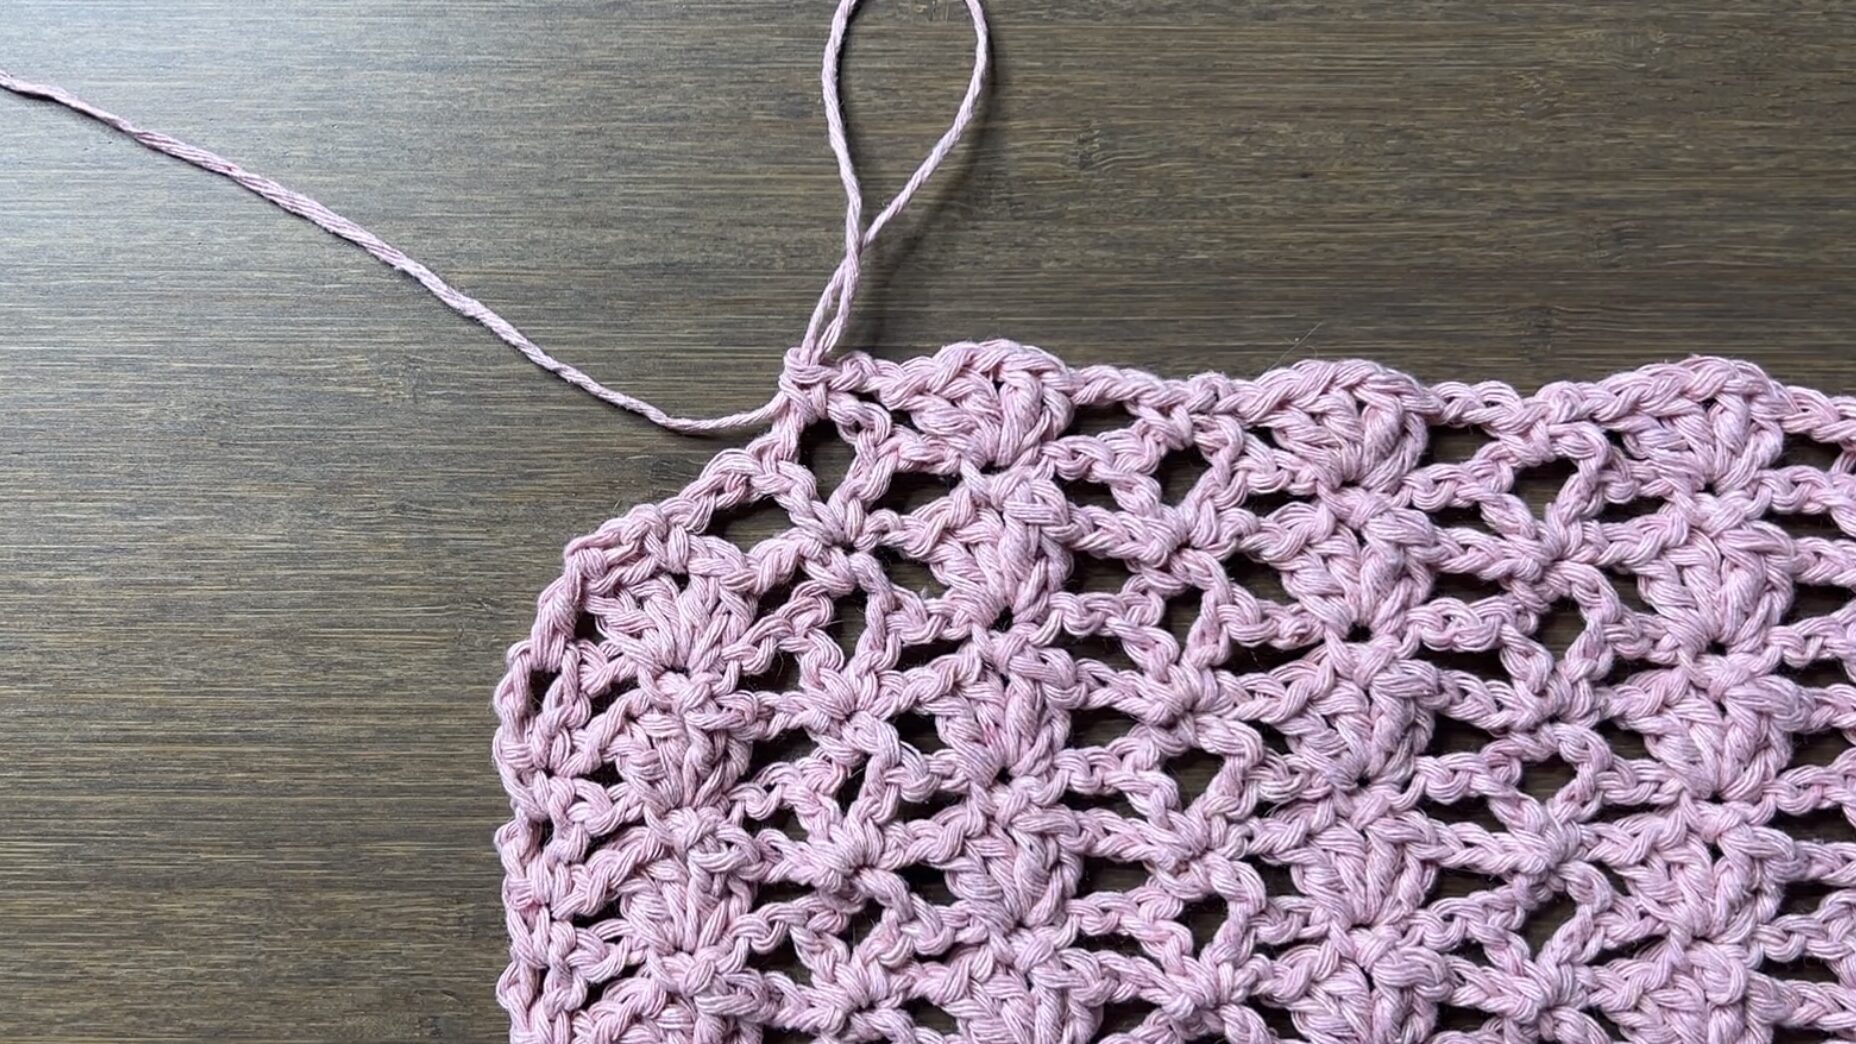
Rows 27-33: rep[Row3, Row 2]
Note: Do fewer rows for smaller armholes or more rows for larger arm holes. Stop after an odd-numbered row.

Mark the 2 middle ch3-sp or whichever ch3-sp where you want to start the neck hole.
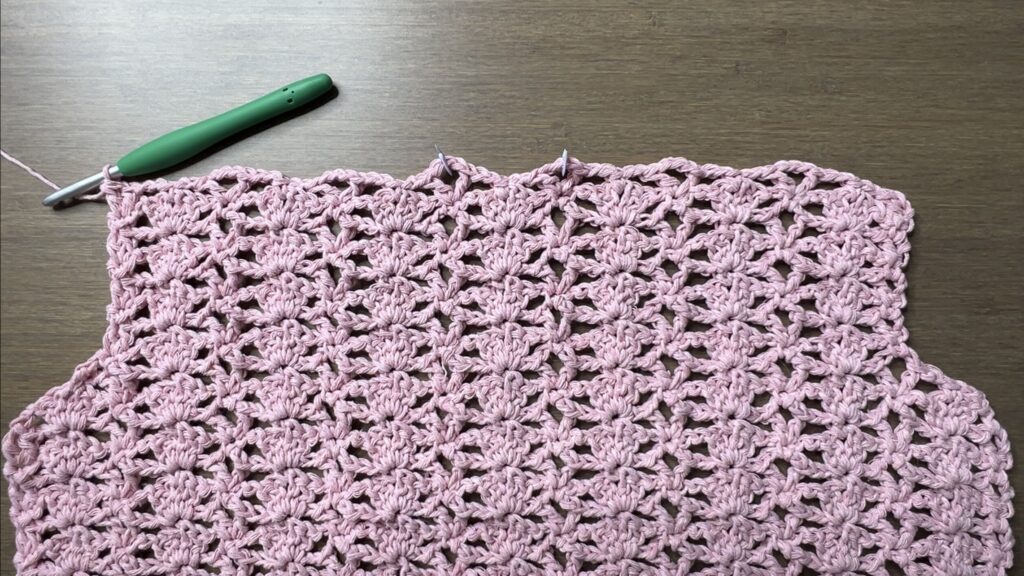
Neckhole
Row 34: ch1, sc, *ch2, [dc2, ch1, dc2],** ch2, sc in ch3-sp, rep from * across, stop at ** on last rep before st marker, sc in ch3-sp, turn
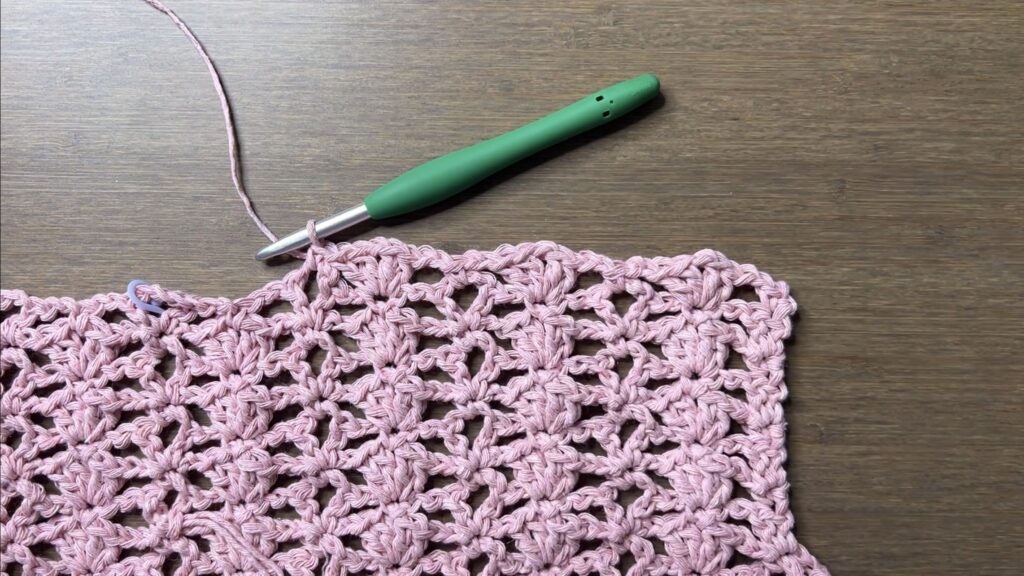
Row 35: *ch2, sc in ch1-sp, ch2,** [dc, ch3, dc], rep from * across, stop at ** on last rep, dc2, turn
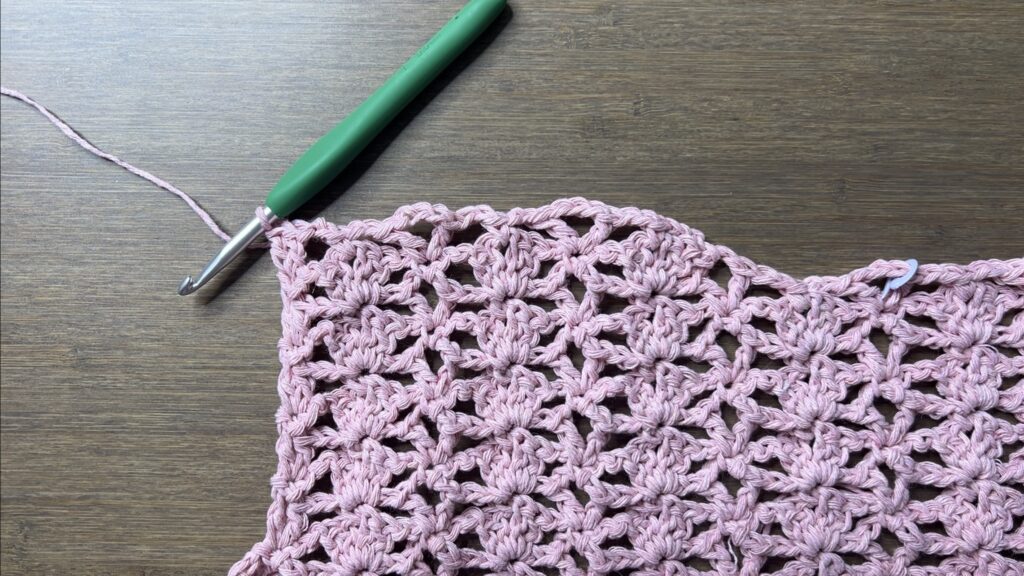
Row 36: rep[Row 34]
Row 37: rep[Row 35]
Row 38: ch1, sc, ch2, [dc2, ch1, dc2], ch2, sc in ch3-sp, ch2, dc2, turn
Row 39: ch1, sc, ch2, [dc, ch3, dc], ch2, sc in ch1-sp, ch2, dc2, fasten off with loose end 3 times the length of this row
Note: Do fewer rows for a higher neckline or more rows for a lower neckline. To continue, alternate Rows 38 and 39.

Flip the panel, so that the finished shoulder is on right side. Attach yarn to st marker.

For the second shoulder piece, I will refer to the rows starting from 1 so there is less confusion.
Row 1: ch1, sc, *[dc2, ch1, dc2], ch2,** sc in ch3-sp, ch2, rep from * across, stop at ** on last rep, sc bw the 2 dc at end, turn
Row 2: ch3, dc, ch2, sc in ch1-sp, *ch2, [dc, ch3, dc], ch2, sc in ch1-sp, rep from * across, turn
Row 3: ch2, sc in ch3-sp, [dc2, ch1, dc2], ch2, sc in ch3-sp, ch2, [dc2, ch1, dc2], ch2, sc bw the 2 dc at end, turn
Row 4: rep[Row 2]
Row 5: ch3, dc, ch2, sc in ch3-sp, ch2, [dc2, ch1, dc2], ch2, sc bw the 2 dc at end, turn
Row 6: ch3, dc, ch2, sc in ch1-sp, ch2, [dc, ch3, dc], ch2, sc in bw the 2 dc at end, fasten off with loose end 3 times the length of this row
Assembly
Place the panel with the extra long loose ends on top of the other panel. Flip it so the long loose ends are in the top-right of each shoulder piece.

Whip stitch across the top of each shoulder, connecting the front panel to the back panel with every stitch and chain. Tie a knot at the end.

Attach yarn and whip stitch along the sides, connecting the rows evenly. Use stitch markers to help align the rows! Tie a knot at the end.
Finished Floral Crochet Mesh Top
Weave in your loose ends and your crochet top is finished!


Love this but wondered if it could be made using a finer cotton to make it a light weight slip over, what adjustments would I need please
Yes, you can use any yarn! A thinner yarn means you’ll need more chains and rows. Follow the italicized notes within the pattern to adjust it for your yarn
Is it possible to make this in the round? In adjusting the size I misunderstood and did it my full bust length – hoping to not have to frog back to the beginning!
Yes, but once you reach the armholes, you’ll have to do the front and back panels separately and in rows
If you do it in the round how many chains do you just double them?
Love the look of this top. I do not see the italicized numbers for larger sizes. Is there another way to get the pattern? Thank you.
Hi Viv
I want to use DK yarn for this project. What hook size would you recommend?
Hi Viv,
I really love this top and looks really good on me. I showed this to my daughter, and she wants me to make one for her but she’s size 10 or medium. Would you please email me the pattern for medium size?
Thank you,
Mel