Easy Crochet Scrunchie | Free Pattern & Video Tutorial
See the free crochet scrunchie pattern and video tutorial below or purchase an ad-free, printable PDF file of this pattern!
Learn how to crochet the perfect scrunchie in any size you like! This beginner-friendly pattern is great for completing your first project or something quick and fun. This is a small and manageable project with basic stitches, making it easy to follow and memorize.

Table of Contents
Customizability
With this crochet scrunchie pattern, you can simply adjust the number of chains or rows you do to change the size of the scrunchie. There will be notes within the pattern that let you know when and what to change to get the exact size you want!
There are three different sizes of scrunchies that I made. The first and third ones are a more common size and I would recommend it for those with thicker hair. The middle one is thinner and is better for those with thinner hair.


Choosing Yarn & Hook Size
I used Upcycle Alpaca Blend for my yarn, but that has since been discontinued. I would recommend using Mighty Stitch instead. They are from the same yarn brand!
Scrunchies tend to be made with thin fabric, so I recommend using a thinner yarn and hook size. The highest yarn weight you should use is #4, but you will get better results the thinner the yarn.
Other Projects You Might Like


Crochet Scrunchie Video Tutorial
Become a member to get early access to new videos!
You can follow along with my YouTube video to make your own crochet scrunchie! I have timestamps included to section the video and help you jump to any point you need to!
This post may contain affiliate links. I may earn a small commission on qualifying purchases at no additional cost to you!
Materials
- 25 grams of light worsted weight yarn (Upcycle Alpaca Blend in “Sage”)
- 4mm Clover Amour crochet hook
- Scissors
- Yarn needle
- Hair Tie
- Tension ring (optional)
- Yarn bowl (optional)

Crochet Abbreviations
ch = chain
dc = double crochet
sl st = slip stitch
Gauge
10 rows of 20 double crochets makes a 10 x 10 centimeter (4″ x 4″) square
Dimensions
Note: Pattern includes instructions to adjust sizing
Tubing: 9cm circumference x 43cm long (3.5 x 16.9 inches)
Overall: 4cm inner diameter x 12.5cm outer diameter (1.6 x 4.9 inches)
*depends on the size and elasticity of the hair tie
Notes and Tips
- This pattern is written using US crochet terms
- Italicized notes tell you what to change to adjust the size
- “Tube” or “tubing” in the context of this pattern means the cylinder tube that we crochet around the hair tie
- The chain 2 at the beginning of each round does NOT count as a double crochet
- The slip stitch at the end of each round goes into the first stitch of that round. Tighten your slip stitch every time you do one
- The first stitch of every new round goes into the same stitch we slip stitched to in the previous round
- Use 2 hair ties instead of just 1 if you want it to be really scrunched/textured and plan to do a lot of rows
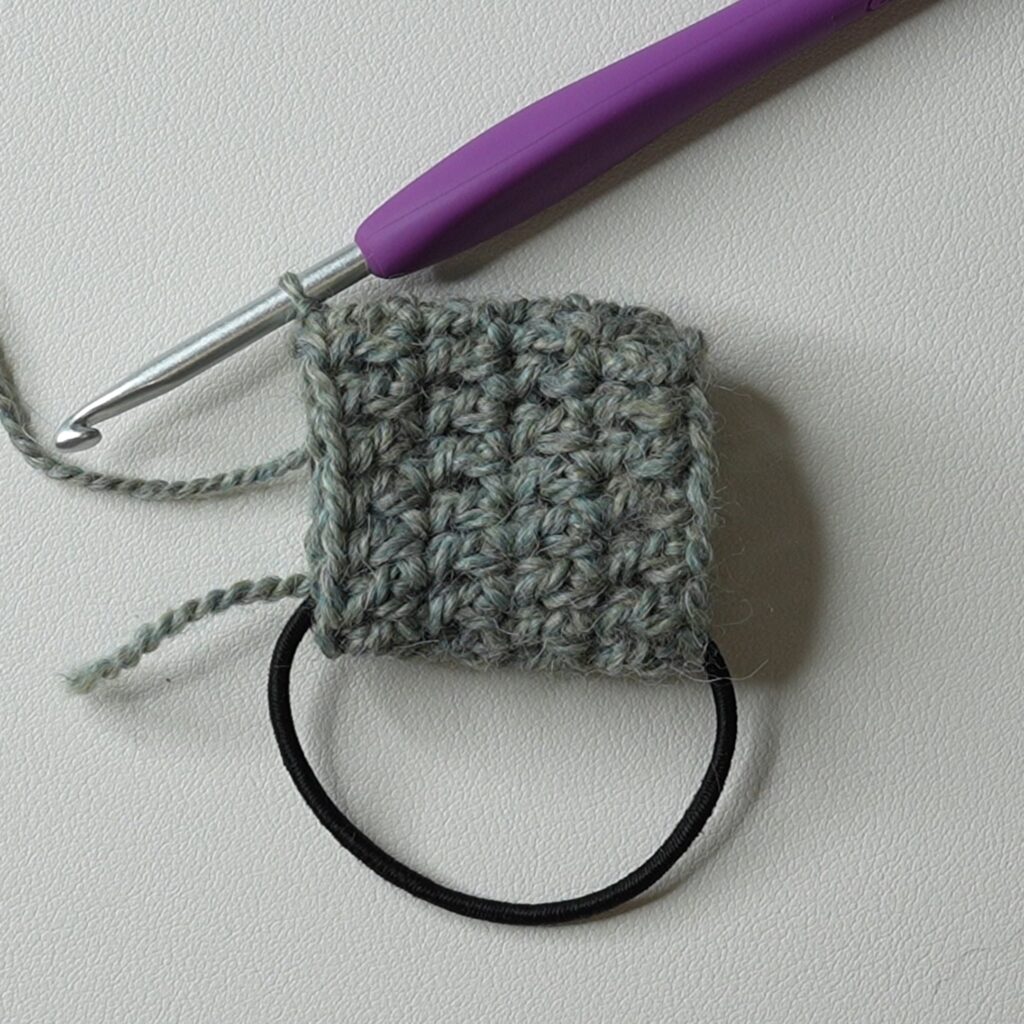
Crochet Scrunchie Pattern
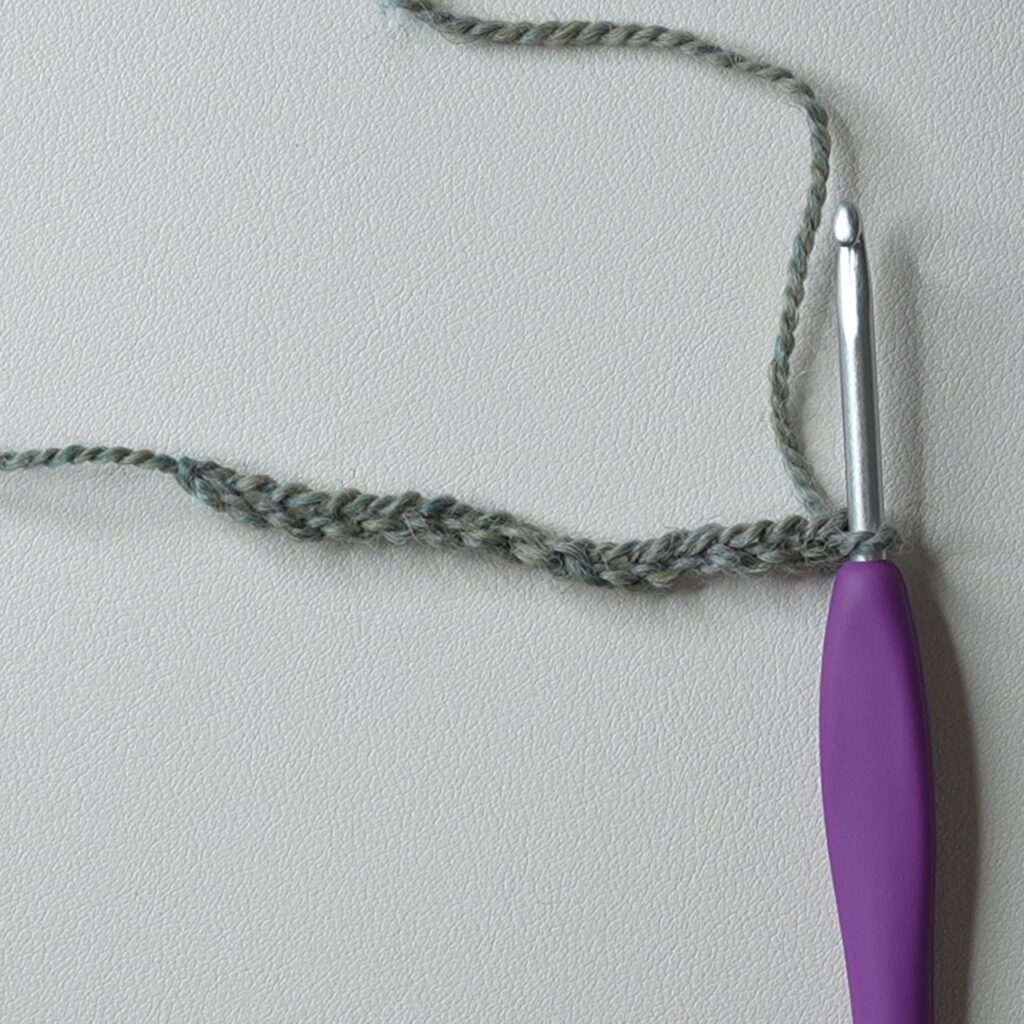
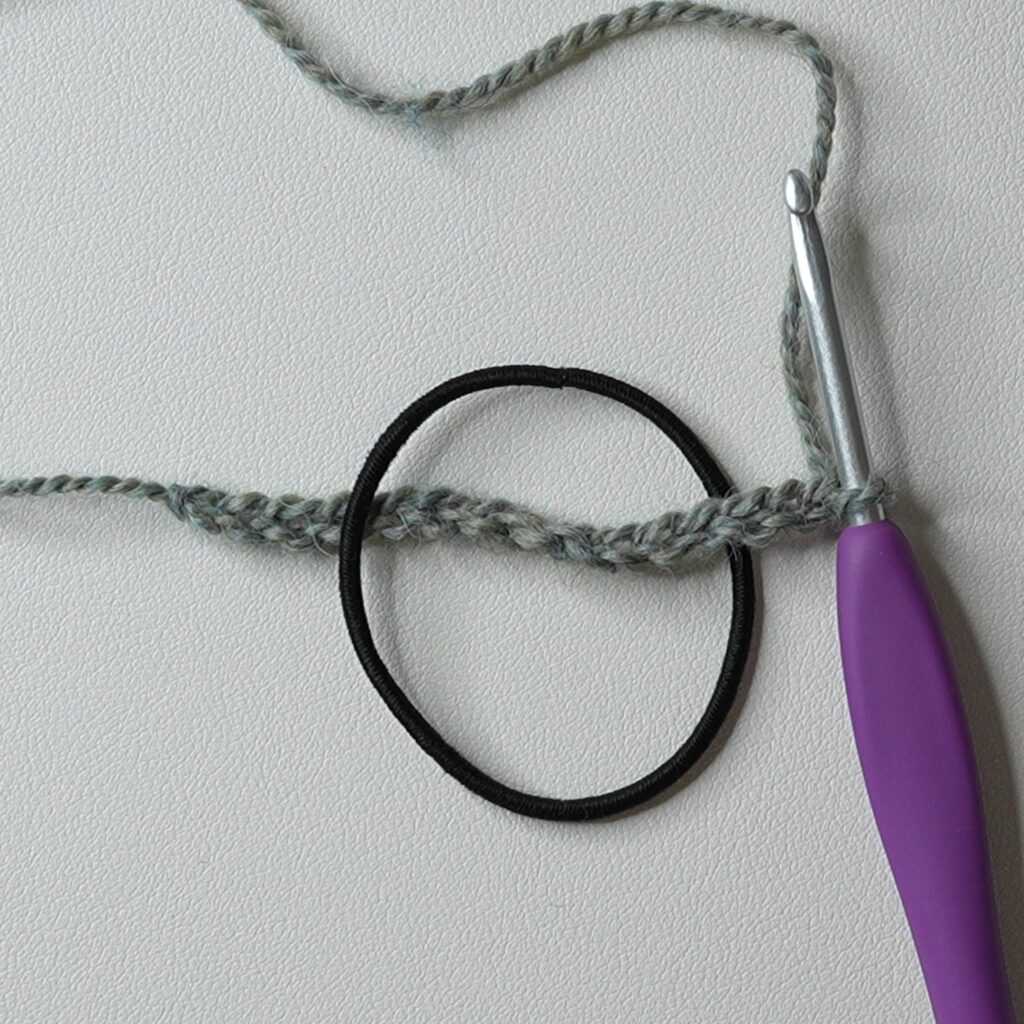
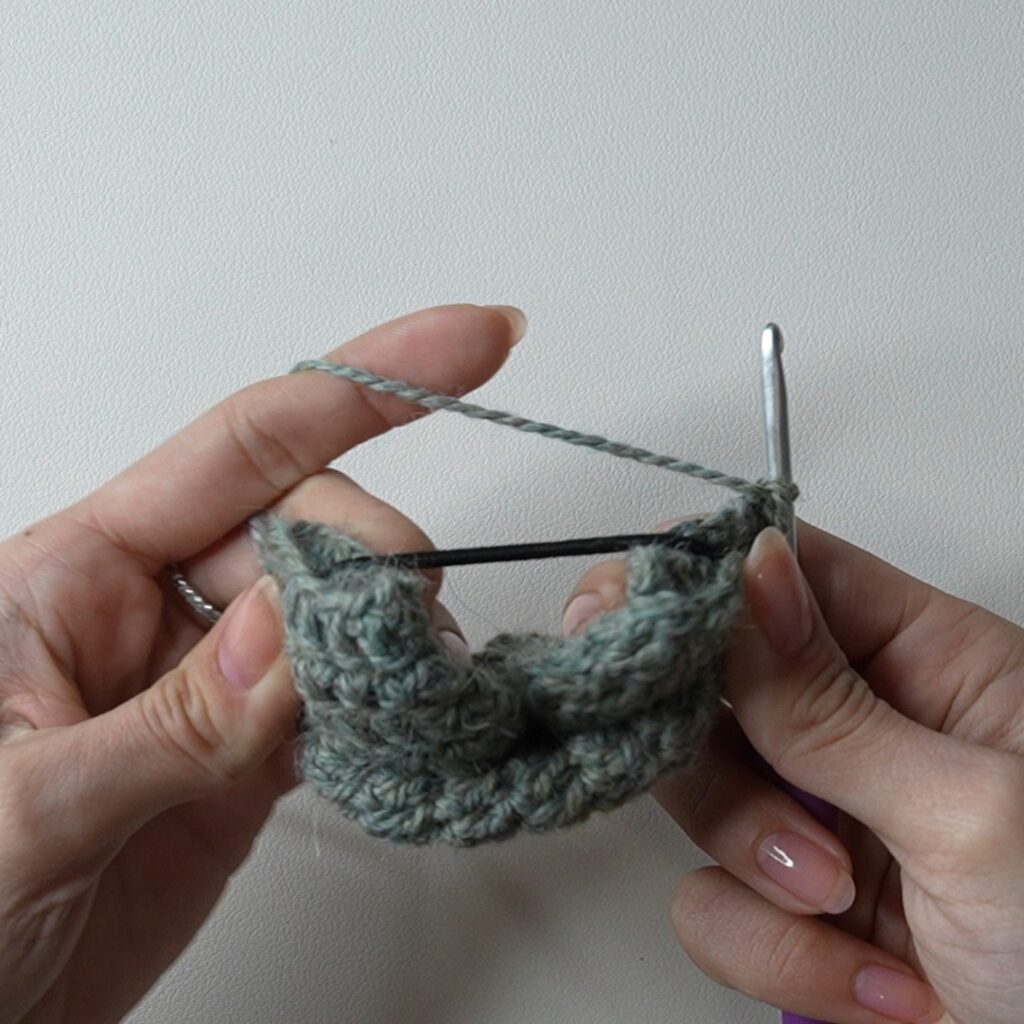
Foundation: Make a slipknot, ch15, pull the chains through the center of your hair tie, sl st to 1st ch to form a loop interlocking with the hair tie
Note: Do fewer chains for a smaller tube circumference or more chains for a larger tube circumference.
I recommend doing fewer chains if you have thinner hair. The scrunchie worn in my hair in the images is ch10 instead of ch15.

Round 1: ch2, dc in same ch and in each ch around, sl st (15)

Rounds 2-43: ch2, dc around, sl st (15)
Once you reach a substantial amount of rounds, the tube won’t be able to twist on its own, so you can flip it inside out to reach the other half of the round.


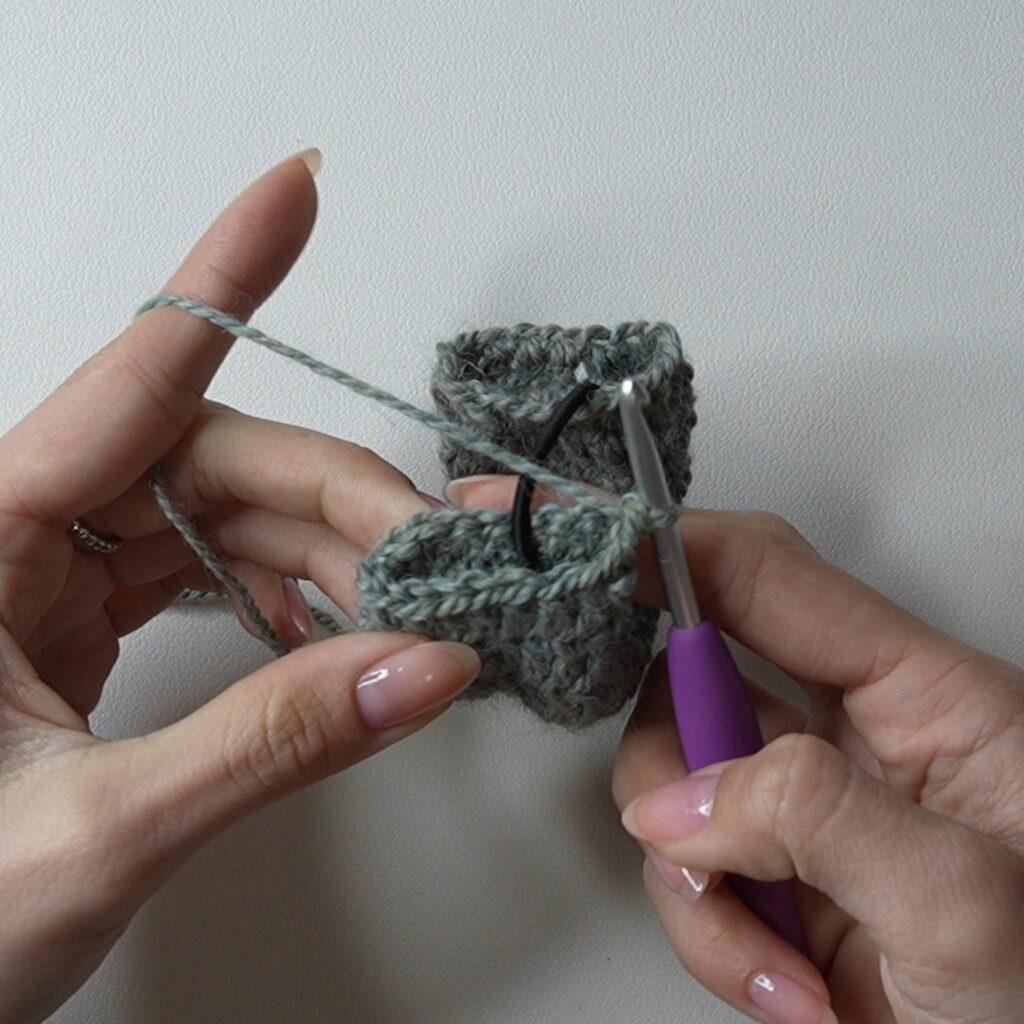
Note: Do fewer rounds for a flatter scrunchie or more rounds for a more scrunched look.


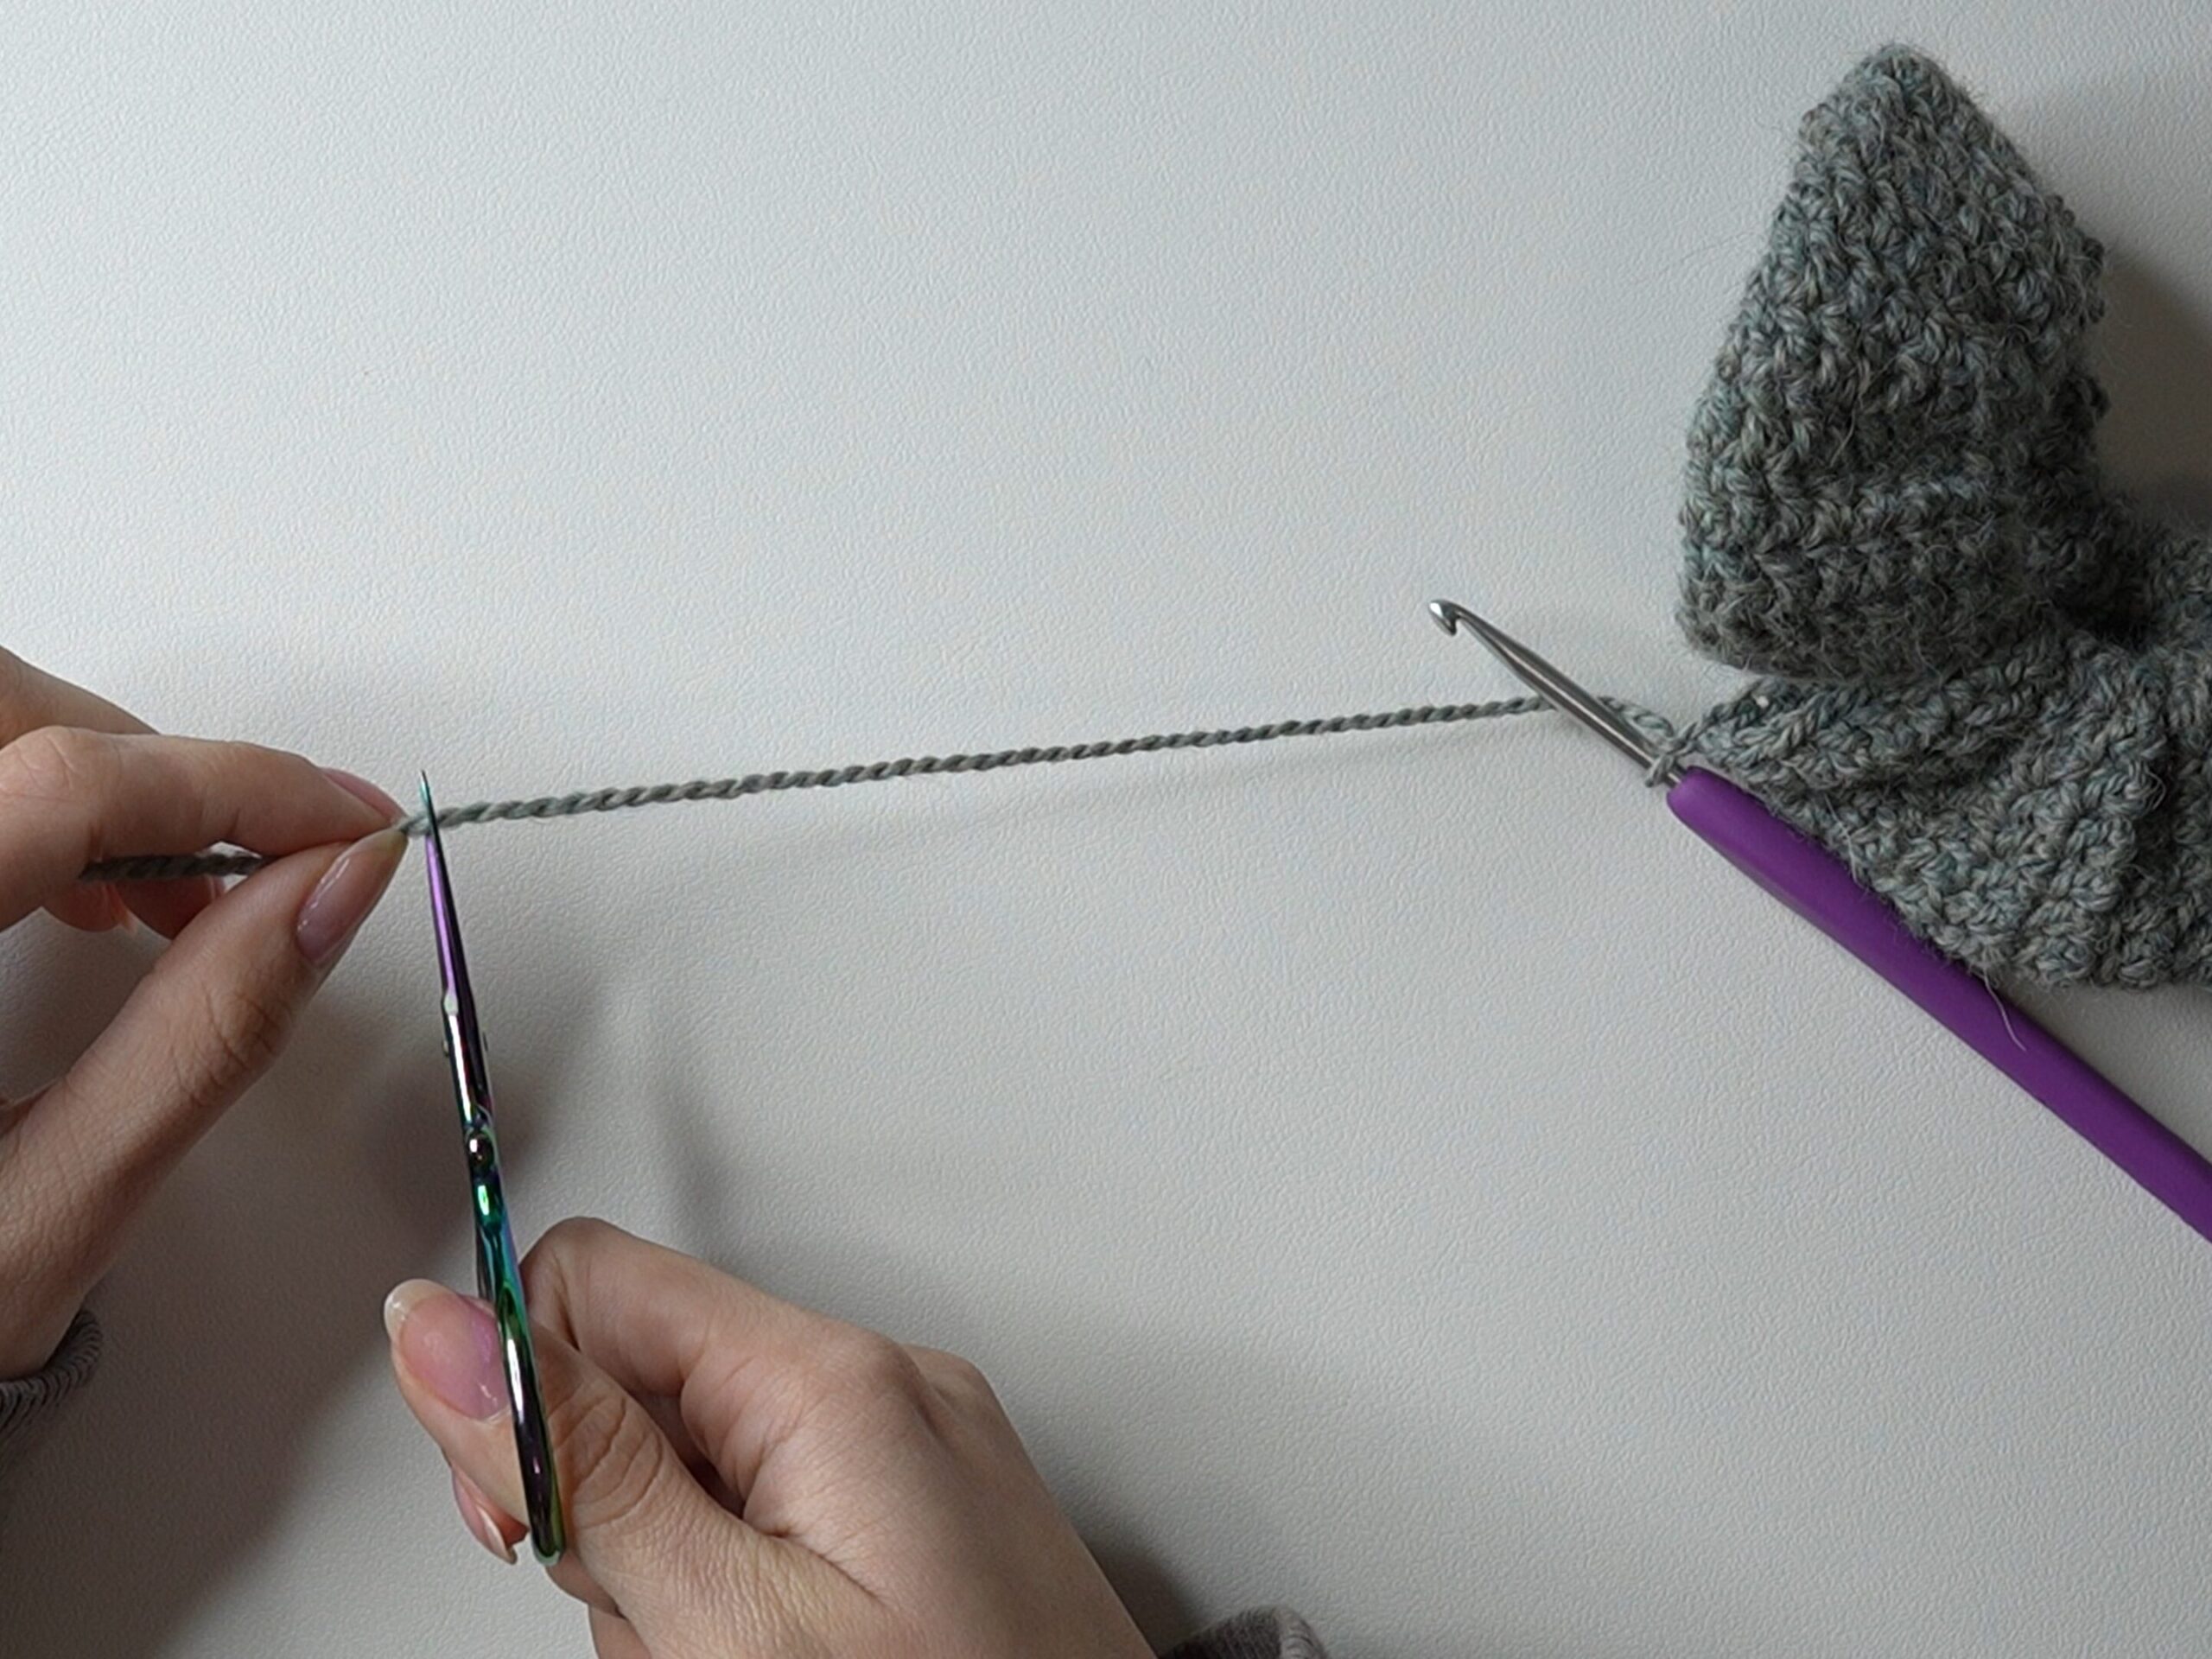
Fasten off with a ~25cm (10-inch) loose end. Leave a longer loose end if you made the tube circumference bigger.
Finishing
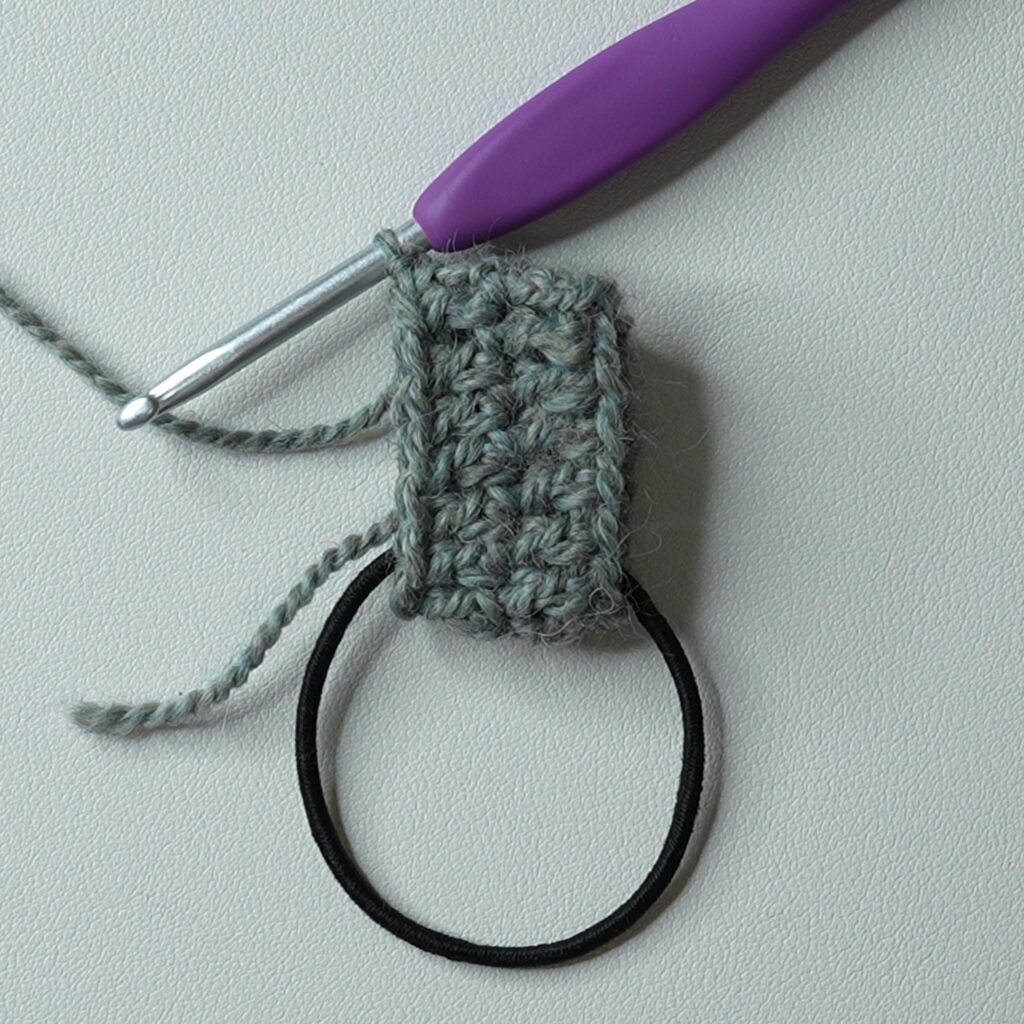
First, fold the tube flat with both loose ends (from the first and last rounds) along the outside. Make sure the tube isn’t twisted.


With the long loose end we left, sew the first and last rounds together. Start with the first stitch to the left of both loose ends and whip stitch each stitch together.


Tie a double knot with the rest of the loose end and the loose end from the first round. Insert your hook into the tubing a few inches from the loose ends and out a space next to the loose ends. Pull both loose ends into the tubing to hide them.


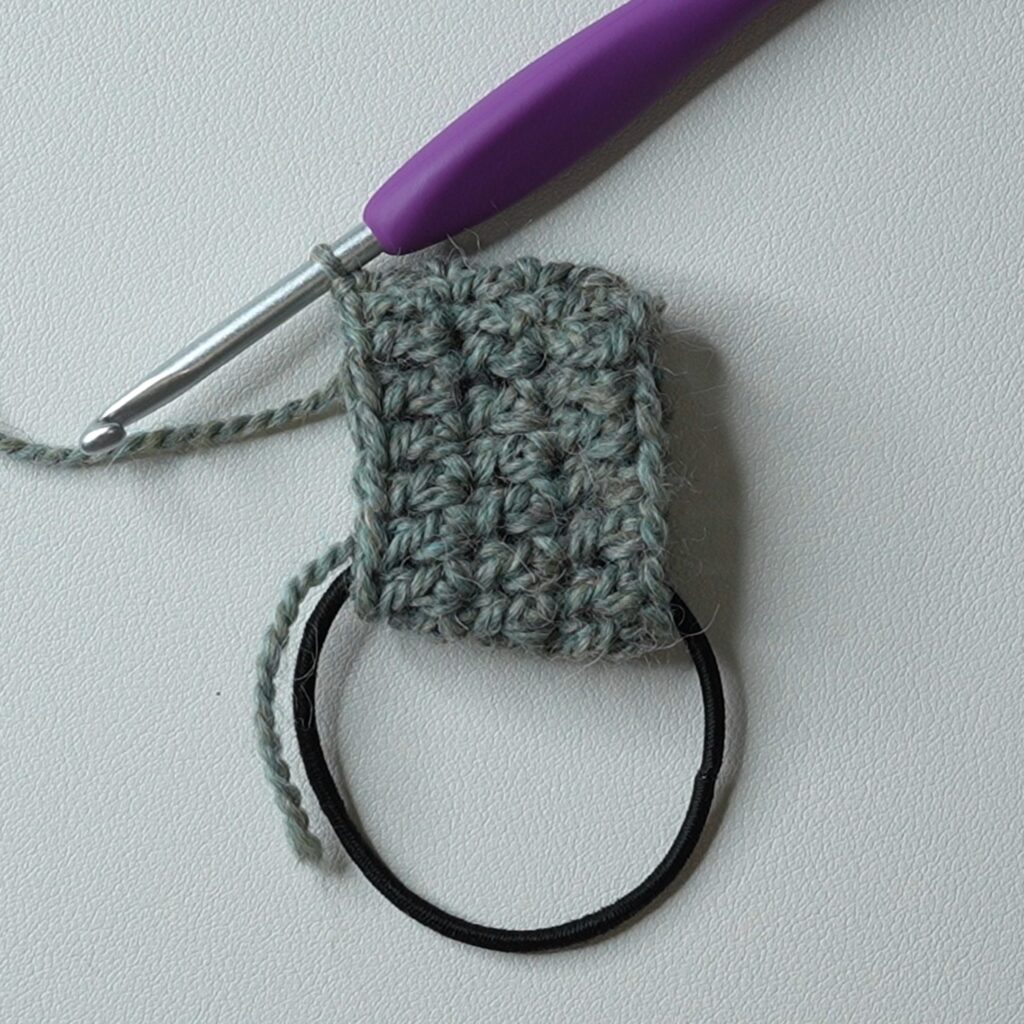
Twist the tubing so the slip stitch seam is on the inside, touching the hair tie. This prevents the scrunchie from being flat and folding when the slip stitch seam is along the outside.
Your crochet scrunchie is finished!


This is so nice
Such a great tut ! I have never seen anyone give such tips . I used to think it was my fault for the scrunchie being all weird lol thanks