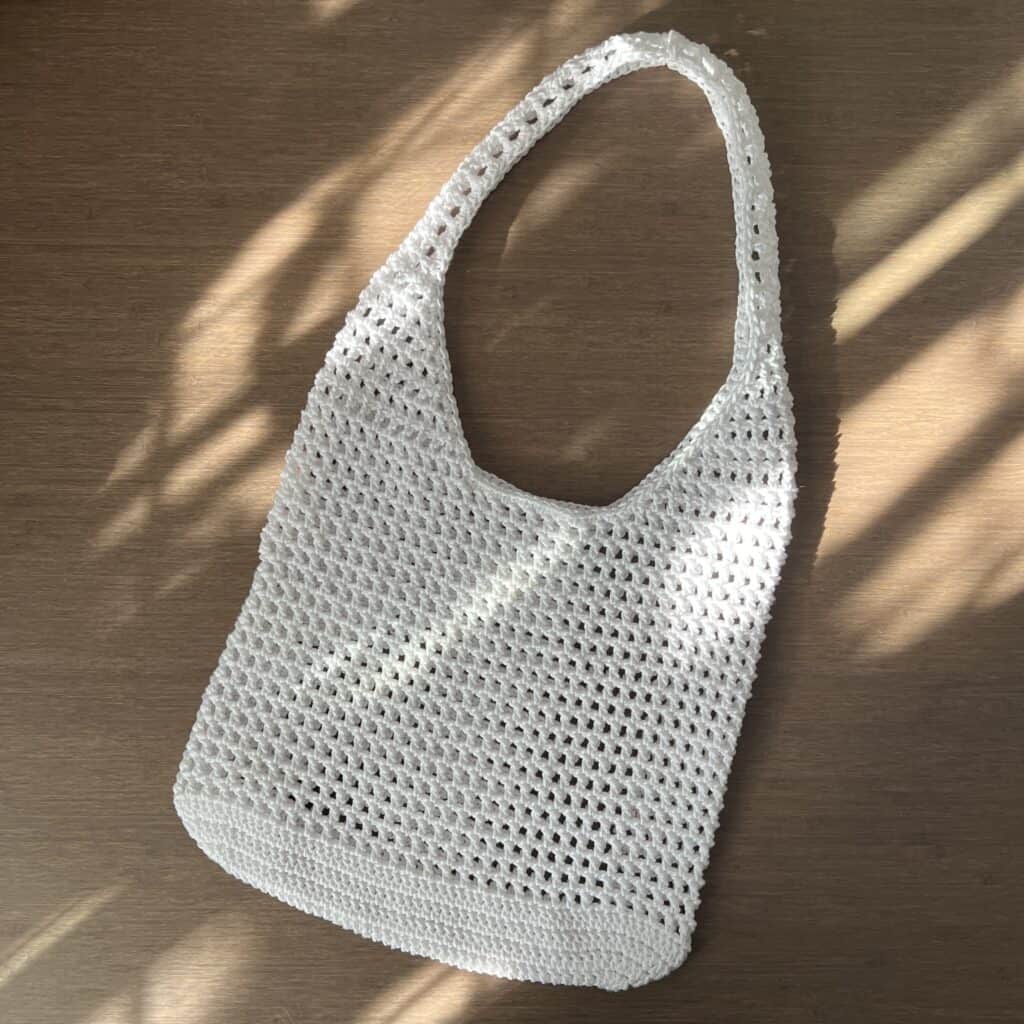
Crochet Mesh Tote Bag | Free Pattern & Video Tutorial
Scroll down for the free crochet mesh tote pattern and video tutorial or purchase an ad-free, printable PDF file!
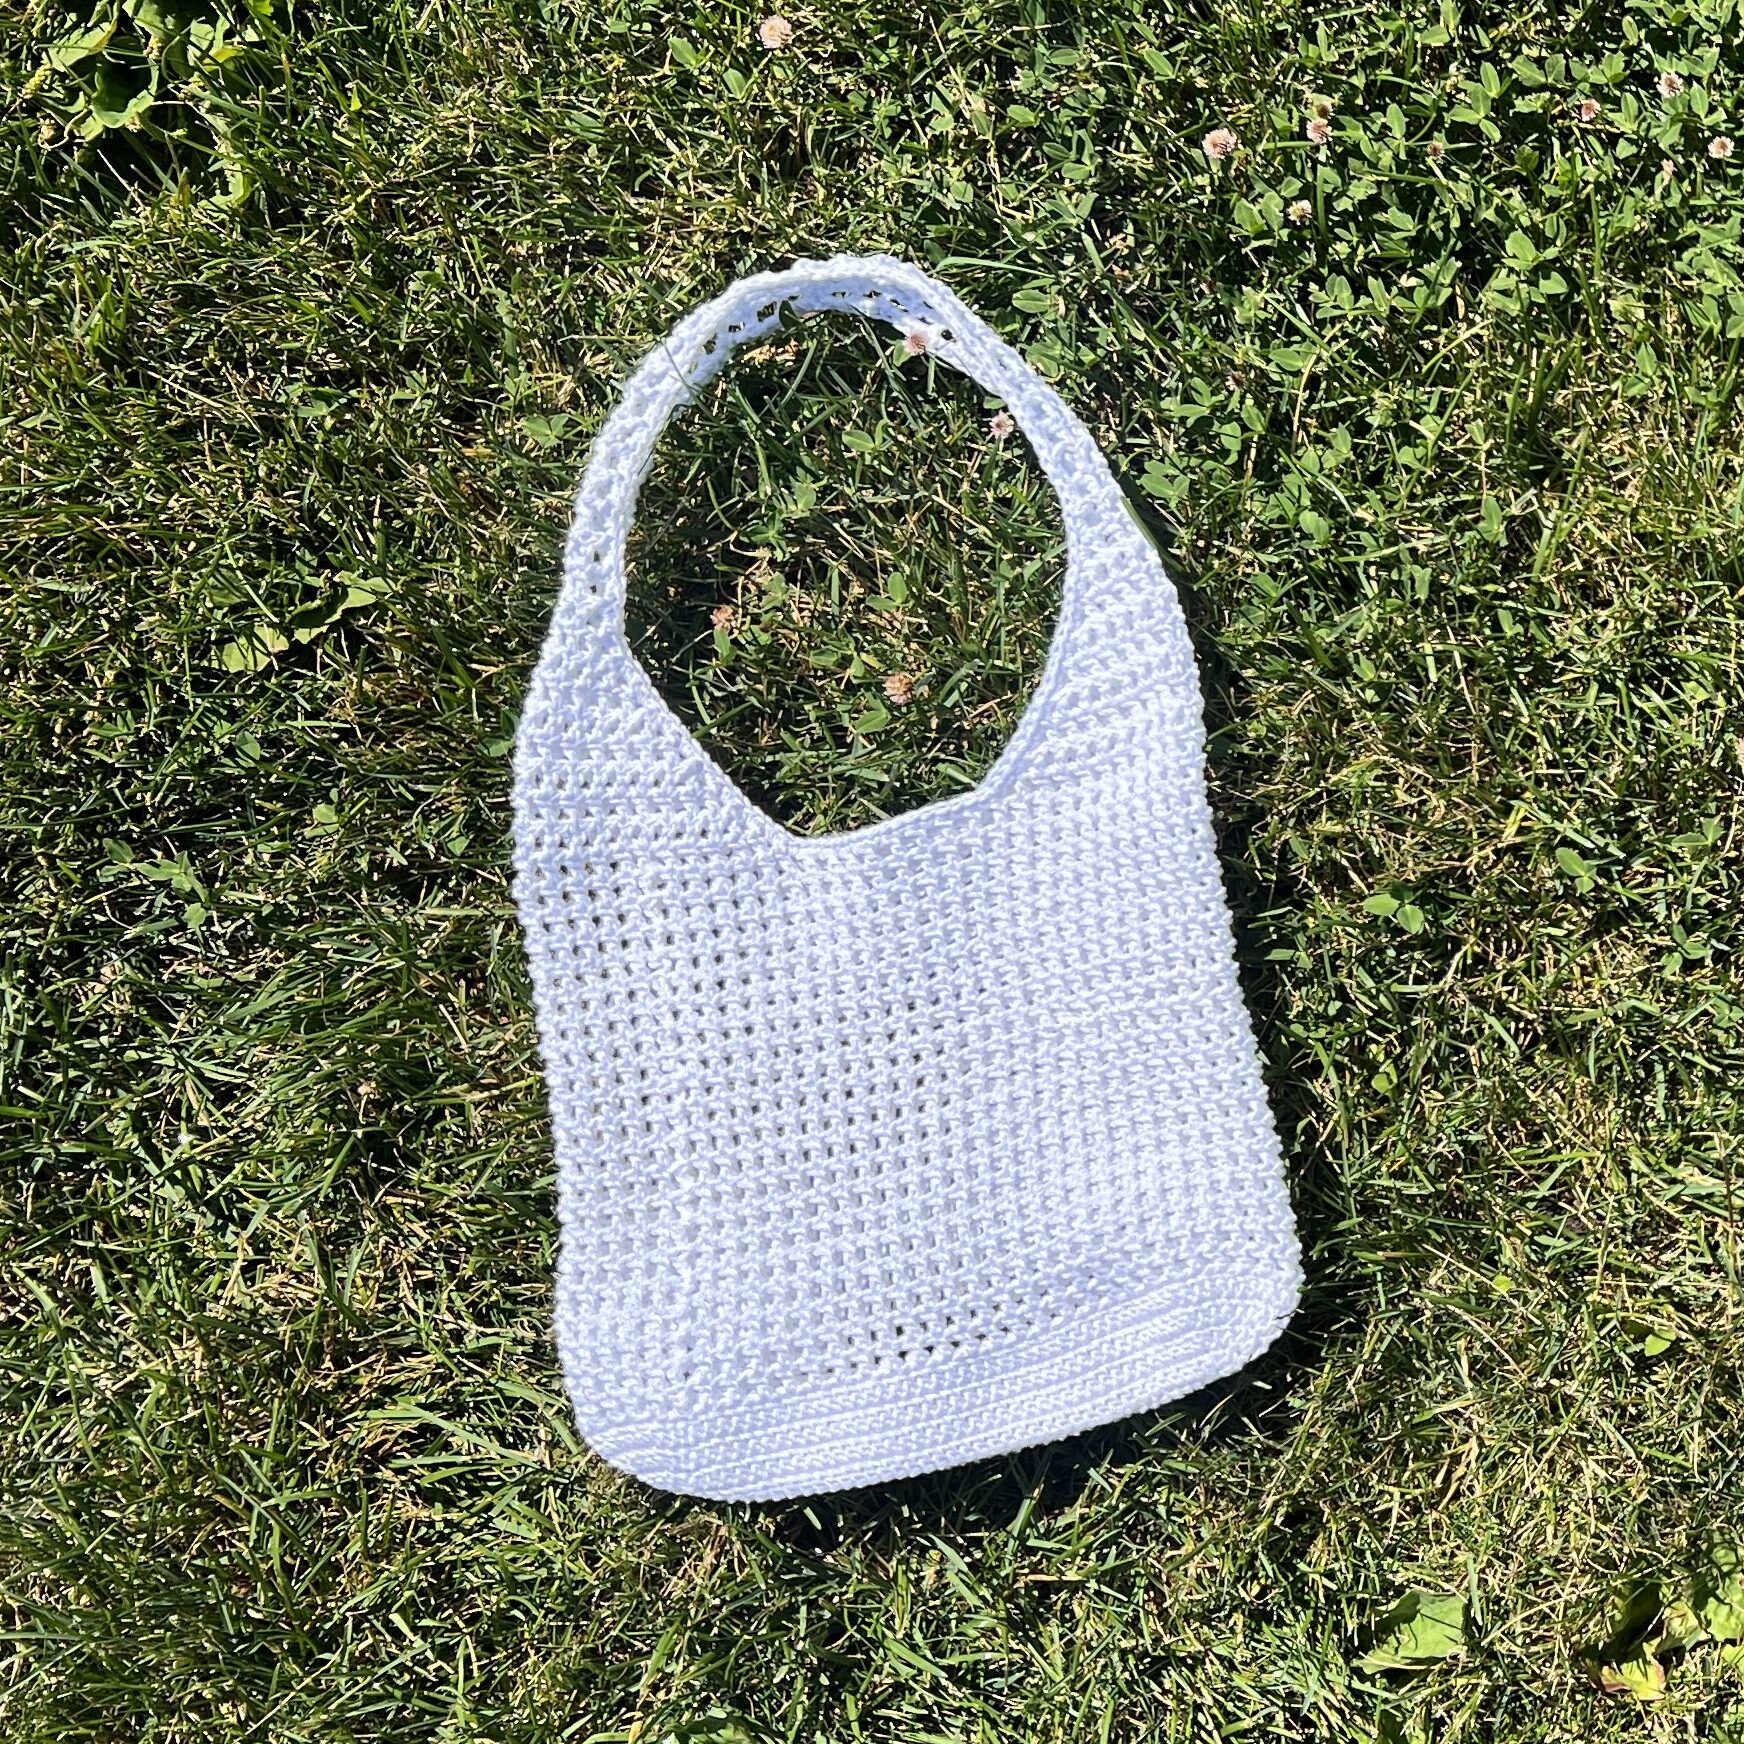
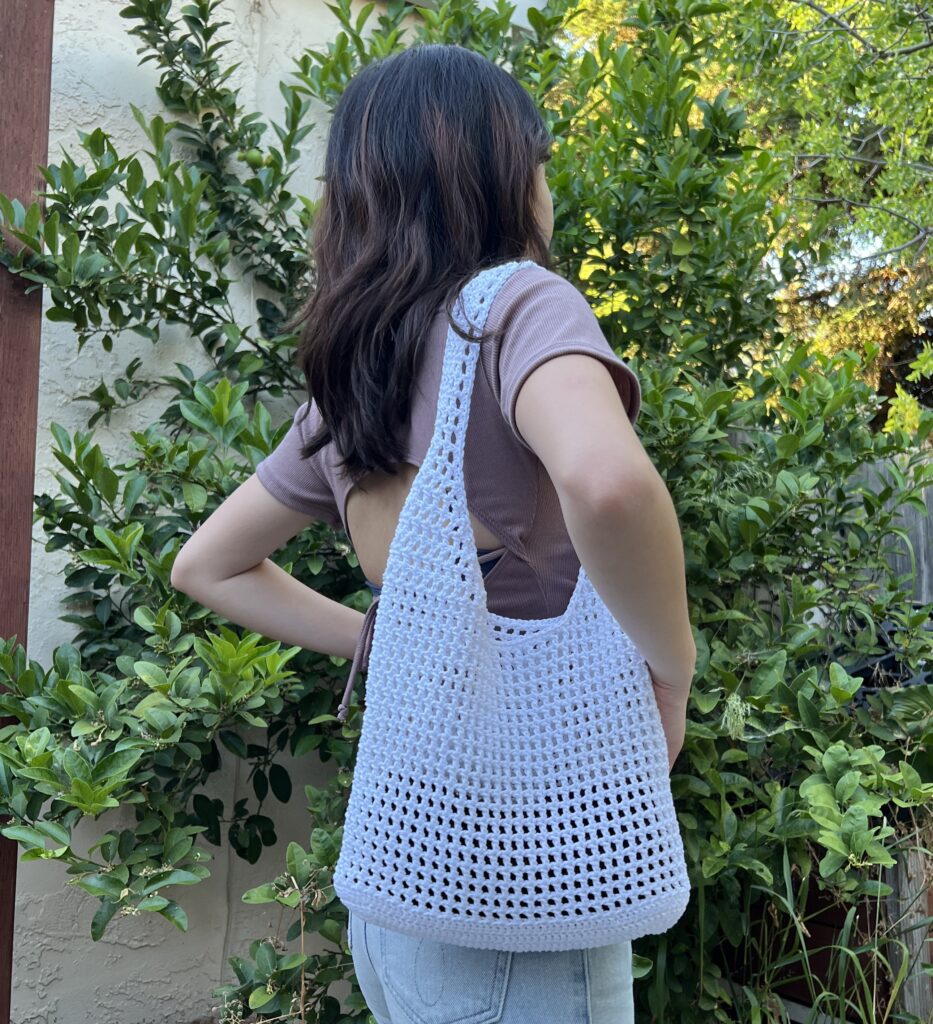
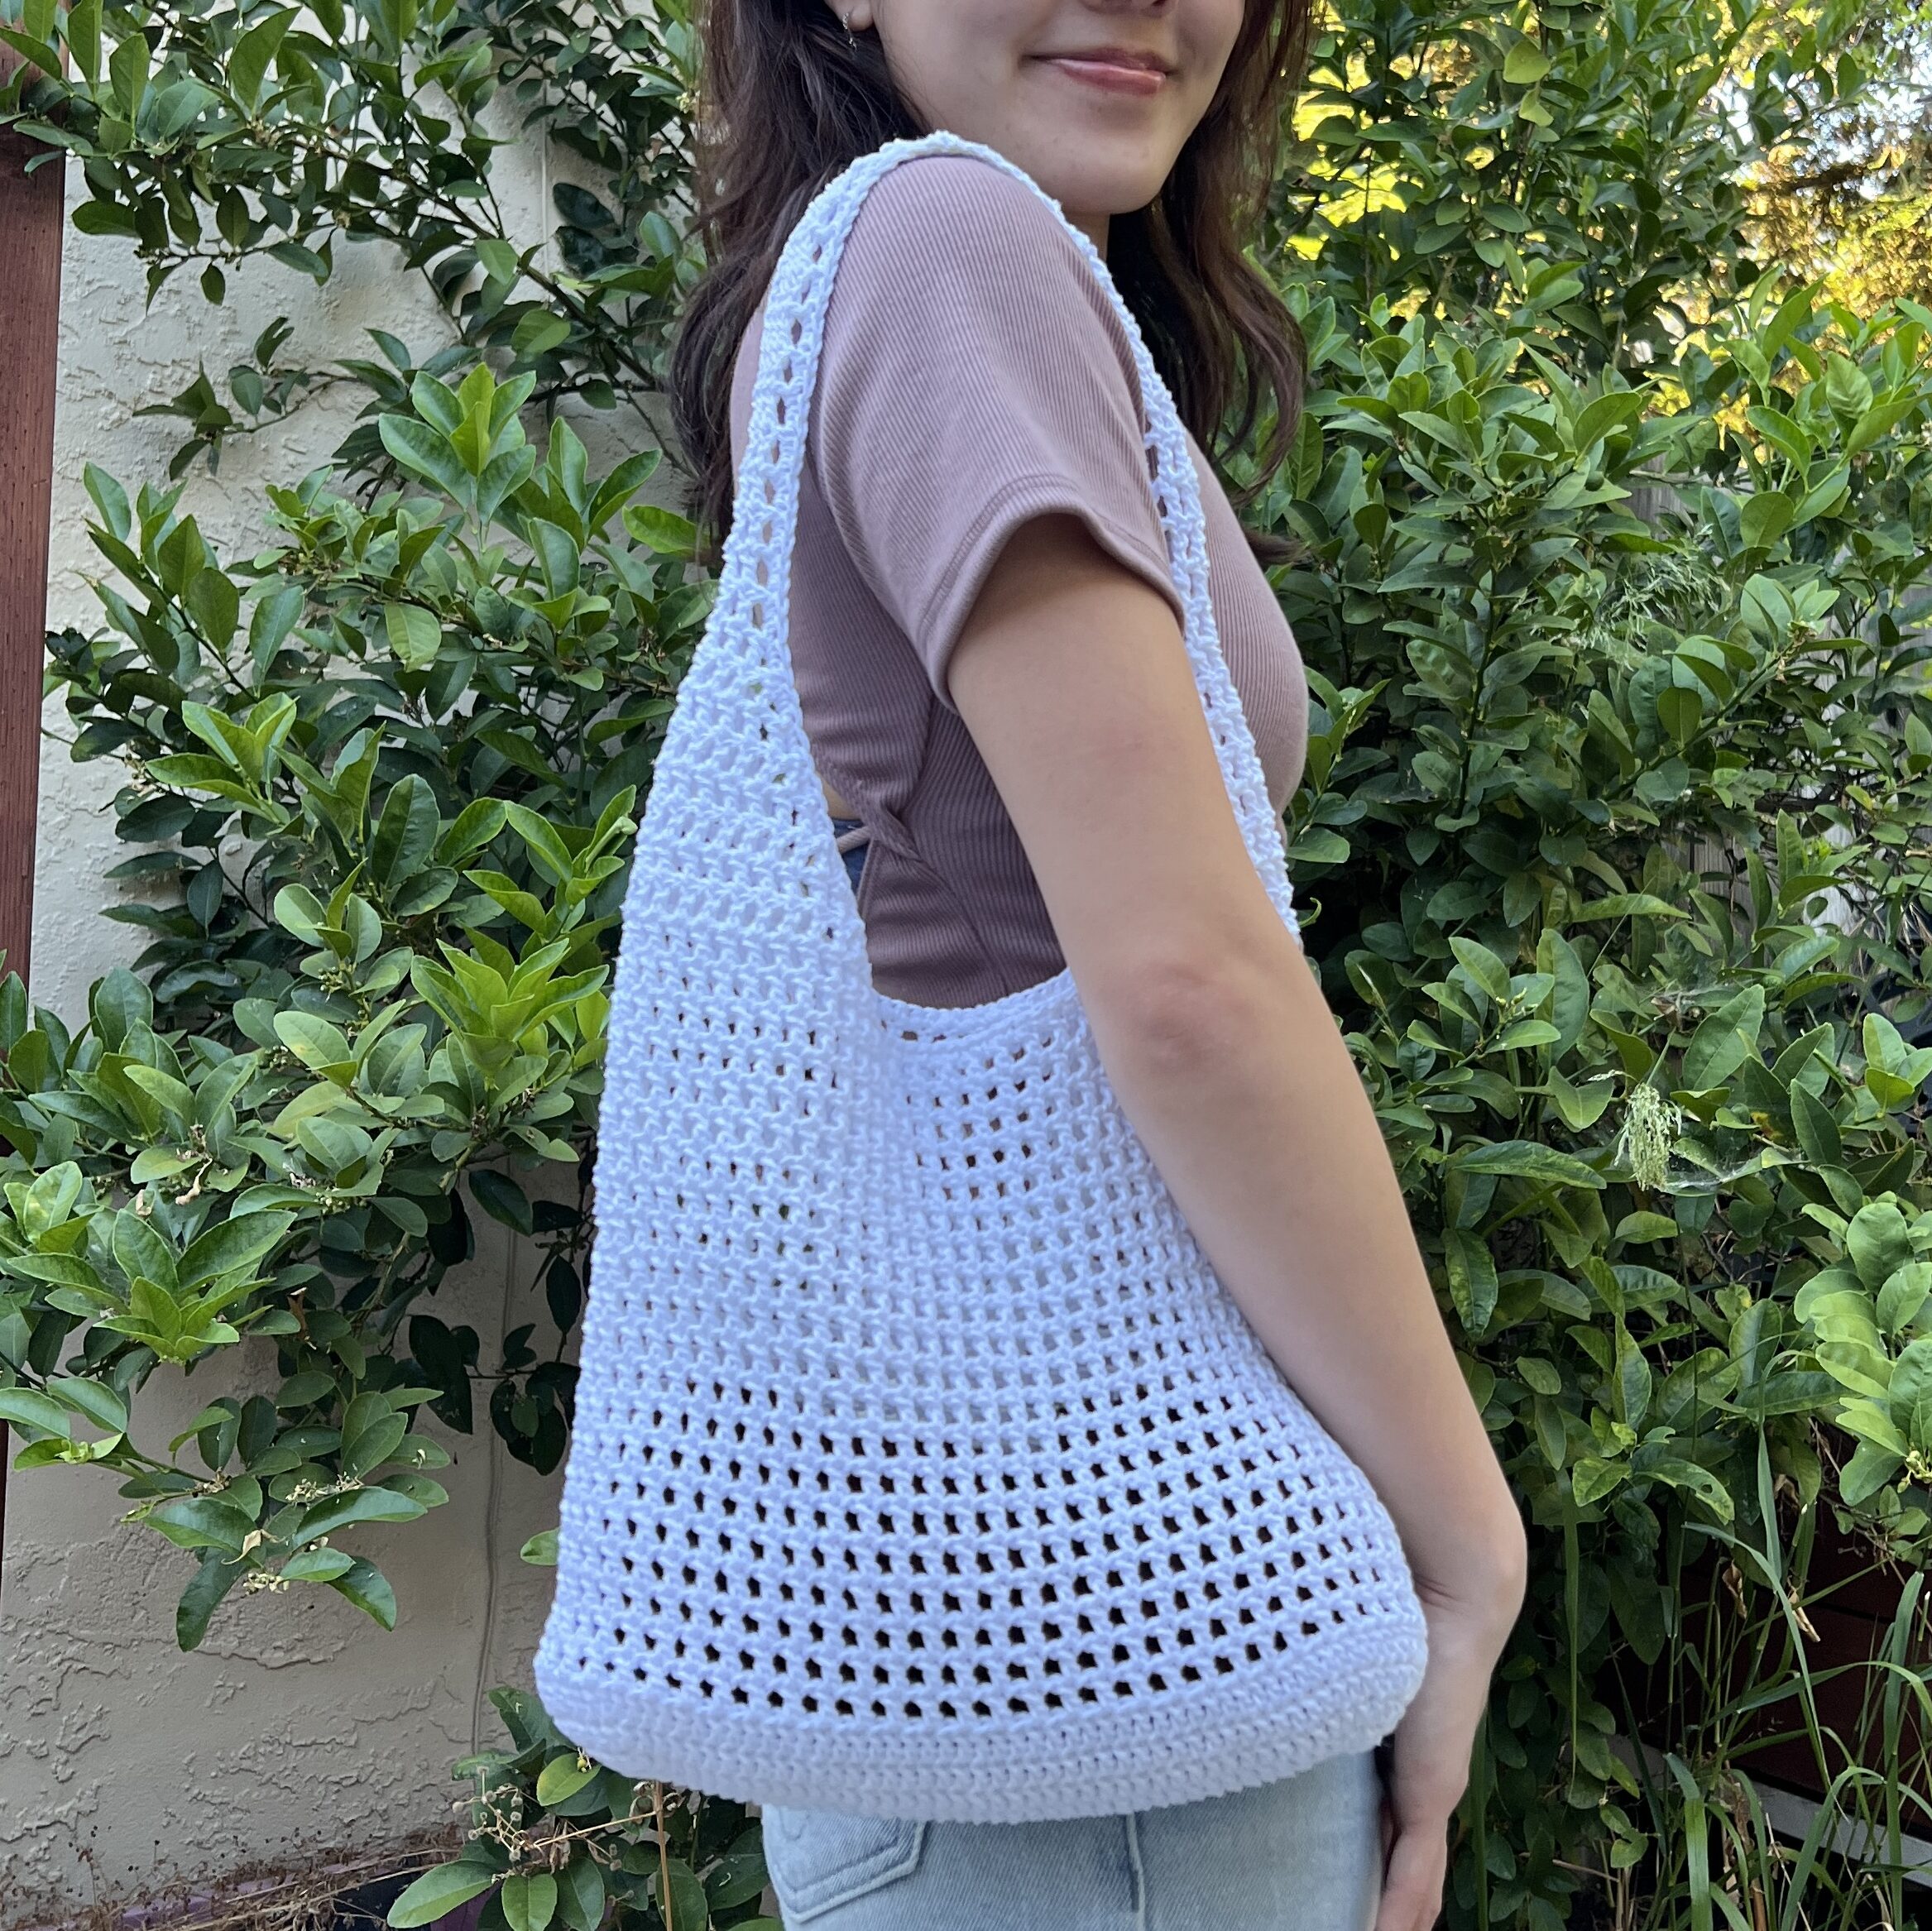
This crochet mesh tote pattern is crocheted in one piece starting with an oval base, then the body, and finally the straps. The crochet mesh in this pattern is not too open, so it can still be used for small things and will provide privacy for the items inside. Crochet this size-adjustable mesh tote for the summer and use it at the beach or a picnic in the park!
Advanced Beginner Crochet Project
This crochet mesh tote pattern is most suitable for advanced beginners, so this might be a good third or fourth crochet project. It is worked in rounds and has increases and decreases. For absolute beginners, check out this bag that’s just a folded rectangle!
However, the great thing about this pattern and all the patterns here at vivcrochets.com is that it comes with the help of a video tutorial and an amazing and helpful community. If you’re unsure of anything, the tutorial should help, or drop a comment and someone is sure to help.
Why Mesh?
Mesh totes are great because they can have many different purposes. For one, they allow circulation for damp things to dry faster. You can take it to the beach and carry your wet swimsuit or towel in it.
Another great thing about crochet mesh totes is being able to see what is inside. You can quickly find your items without having to rummage through the tote. But also, since the mesh doesn’t have super large holes, it still provides enough privacy for what you’re carrying.
Finally, I love the lightweight and summery feel of crochet mesh totes. If you make it in a versatile color like white, beige, or brown, you can bring it anywhere and it’ll match any outfit!
Bag Size
To adjust the size of the crochet tote, you can change the number of chains, the number of rounds for the base, and the number of rows of the body.
- Increasing/decreasing the number of chains will increase/decrease the width of the bag without changing the depth
- Increasing/decreasing the number of rounds for the base will increase/decrease the length and depth of the bag equally
- Increasing/decreasing the number of rounds for the body will increase/decrease the height of the bag
You can also make a specific bag size by calculating the number of chains and rounds.
Project Overview
- Solid oval base
- Mesh body
- Mesh strap #1
- Mesh strap #2
- Straighten rows, stitch straps together, straighten other side of rows


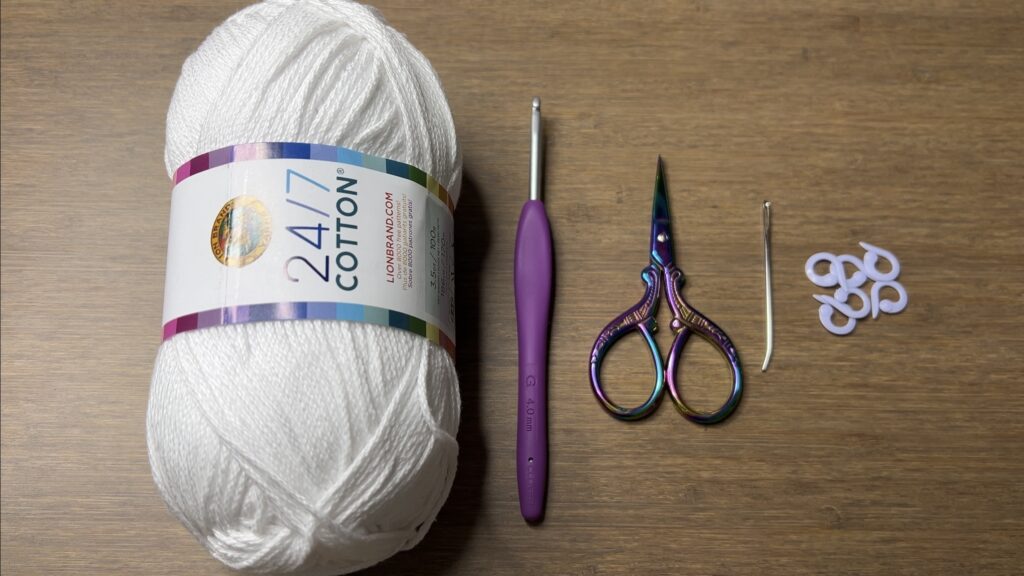
Choosing Yarn and Hook Size
For this project, I used 100% mercerized cotton yarn because it is durable and doesn’t stretch much. If you don’t mind it stretching or plan to line the bag, you can use pretty much any yarn fiber you want.
Hook size isn’t too important for this pattern, so I chose to use the recommended hook size for the yarn I used. If you want a stronger bag with tighter stitches, you might want to use a smaller hook. For a more flexible bag, you can use a larger hook.
Increasing the Size of the Base
Since we will be working in rounds around the foundation chain to make a crochet oval base, make it shorter than what you want the actual width of the bag to be. You can figure out how long to make your foundation chain to make a specific size, but that will require some math.
Each time you add a new round to the base, the depth and the width of the bag will increase by the same length, which is the height of 2 rounds of double crochet.
For a specific bag size, calculate the length of your foundation chain by following the steps below:
- Measure the height of a single double crochet*
- Divide the depth you want by 2, then by your answer in #1, and round to the nearest number
- Multiply your answer in #1 by your answer in #2, then by 2
- Subtract your answer in #3 from the desired length
*To get a more accurate height of a single double crochet, make a gauge swatch. Do however many rows until it’s 10 centimeters/4 inches tall, then divide 10 or 4 by the number of rows to get the height of a single row.
Make your foundation chain the length from your answer in #4 and the number of rounds you’ll do is your answer to #2.
If you would like an easier way to edit the size of the base, check out this simple crochet tote base. Instead of an oval base, it uses a rectangular base, so it’s super easy to customize the size. You can do double crochets instead of single crochets to keep it consistent with the rest of this pattern. Also when you start your first round, you should do one round of just double crochets instead of the mesh stitch to establish the rounds.
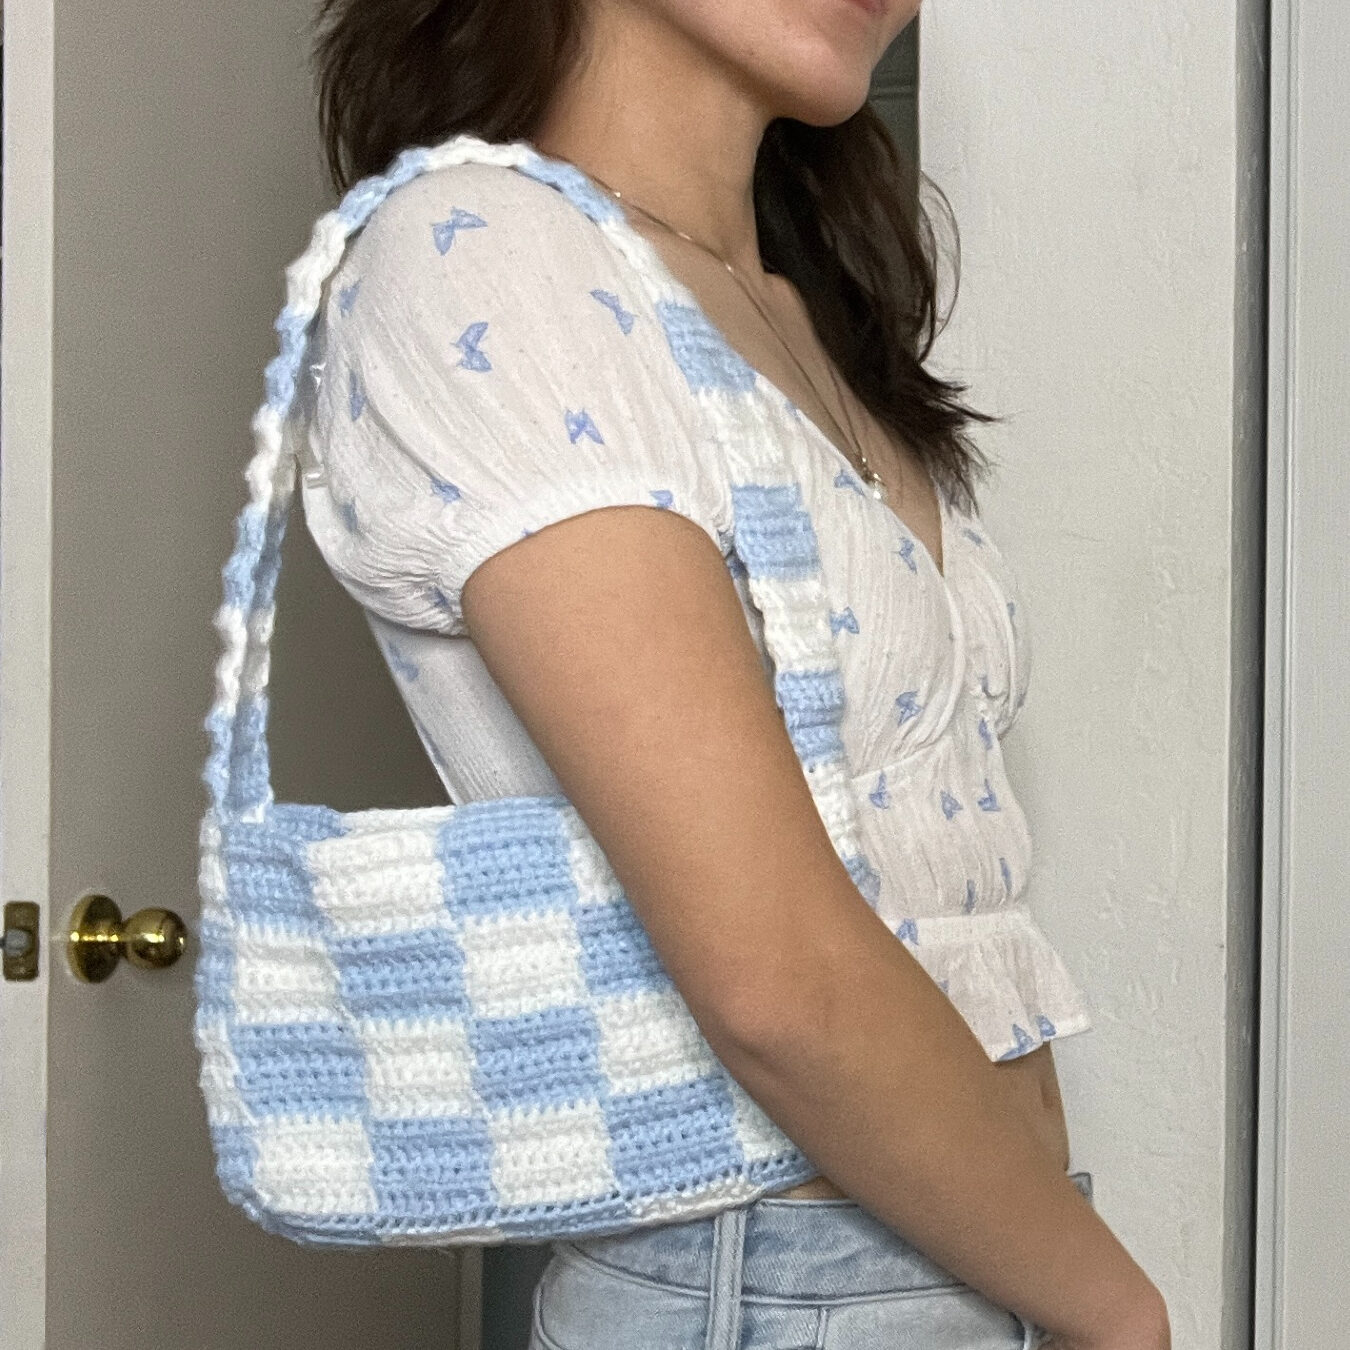
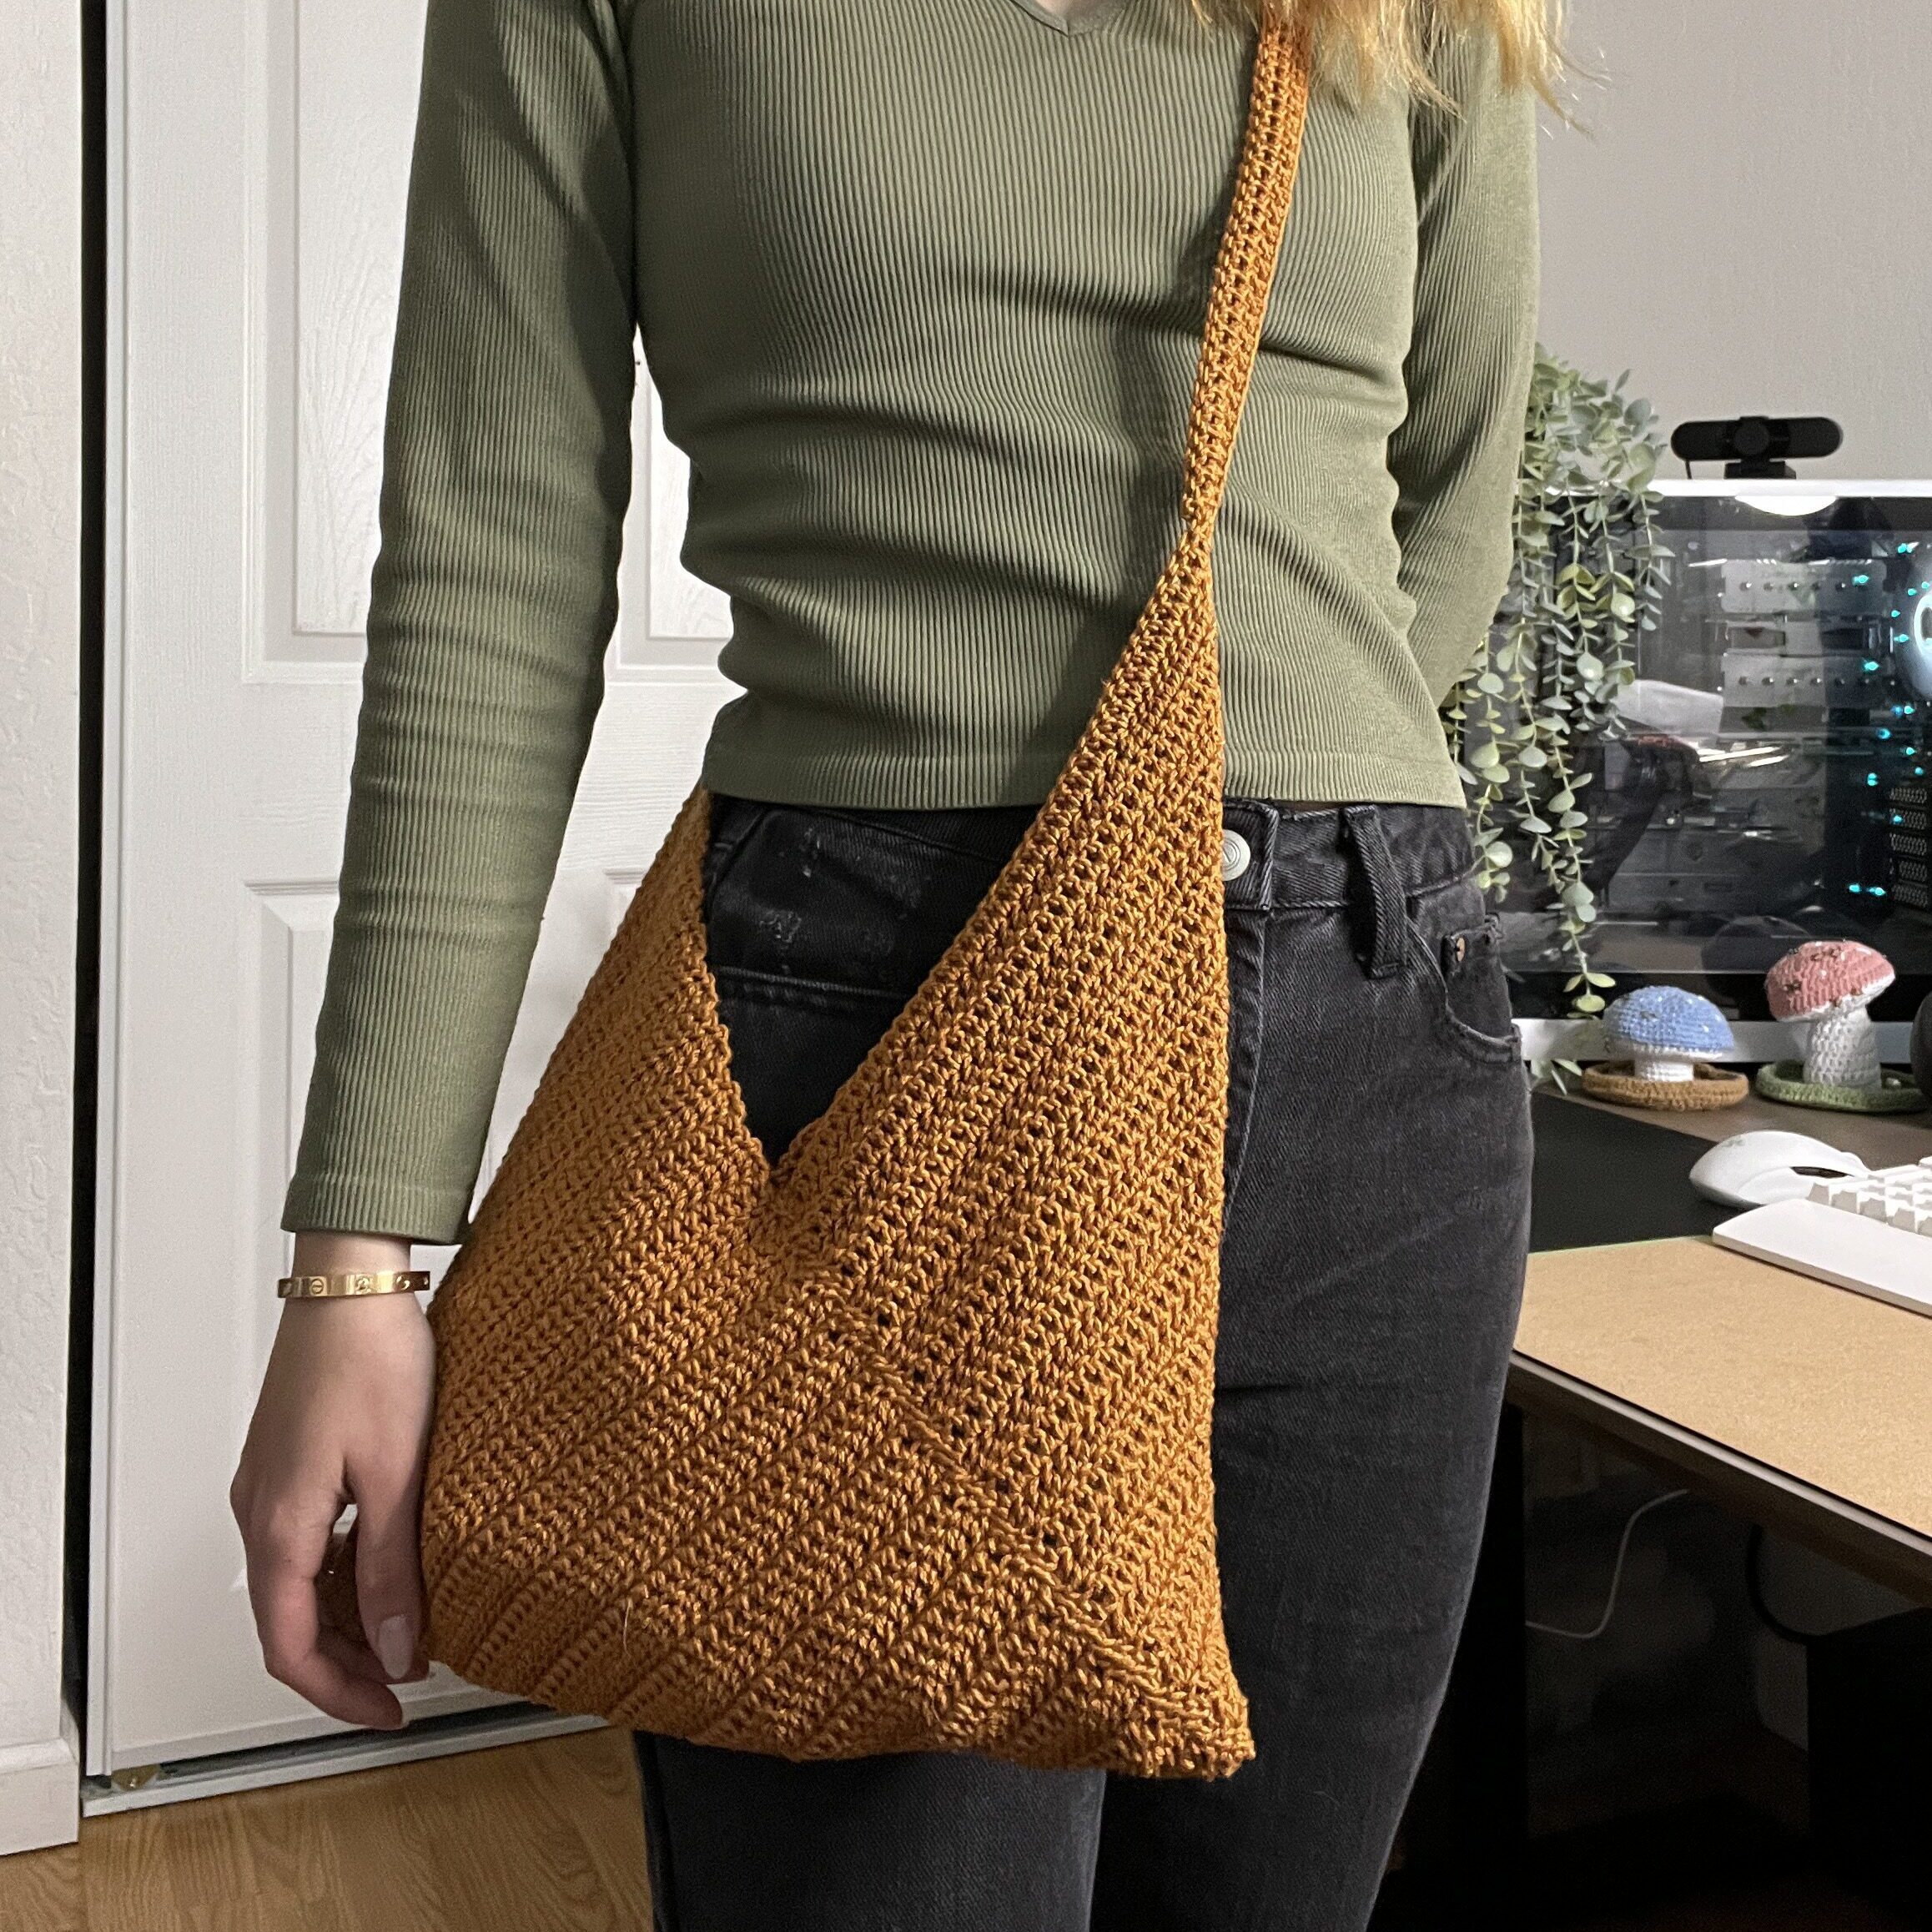
Other Projects You Might Like


Crochet Mesh Tote Bag Video Tutorial
Become a member to get early access to new videos!
You can follow along with my YouTube video to make your own crochet mesh tote bag! I have timestamps included to section the video and help you jump to any point you need to!
This post may contain affiliate links. I may earn a small commission on qualifying purchases at no additional cost to you!
Materials
- 140 grams of medium weight yarn (Lion Brand 24/7 in “White“)
- 4mm Clover Amour crochet hook
- Scissors
- Yarn needle
- Stitch markers
Dimensions
Base: 29.5cm long x 8.5cm deep (11.6 x 3.3 inches)
Body (excluding straps): 27.5cm wide x 20cm tall (10.8 x 7.9 inches)
Total: 27.5cm wide x 8.5cm deep x 46cm tall (10.8 x 3.3 x 18.1 inches)
Notes and Tips
- This pattern is written using US crochet terms
- This pattern is crocheted in joined rounds: the slip stitch goes in the first stitch of the round and the first stitch of the next round goes in the same space
- The chain 2 at the beginning of each round of the base does NOT count as a double crochet
- The chain 4 at the beginning of each round of the body DOES count as a double crochet and 1 chain. The slip stitch for the body goes into the 3rd chain up of the 4 chains
- The chain 1 when outlining the straps does NOT count as a single crochet
- If you don’t have stitch markers, bobby pins and safety pins work, too!
Abbreviations
ch = chain
ch1-sp = chain-1-space
dc = double crochet
dec = decrease
inc = increase
rep = repeat
sc = single crochet
sk = skip
sl st = slip stitch
sp = space
st = stitch
Crochet Mesh Tote Bag Pattern
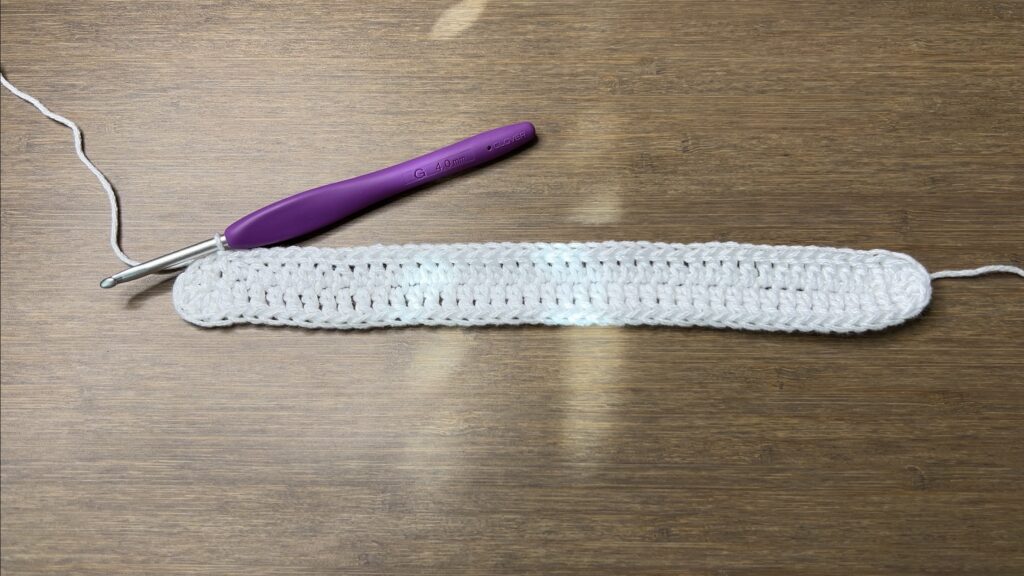
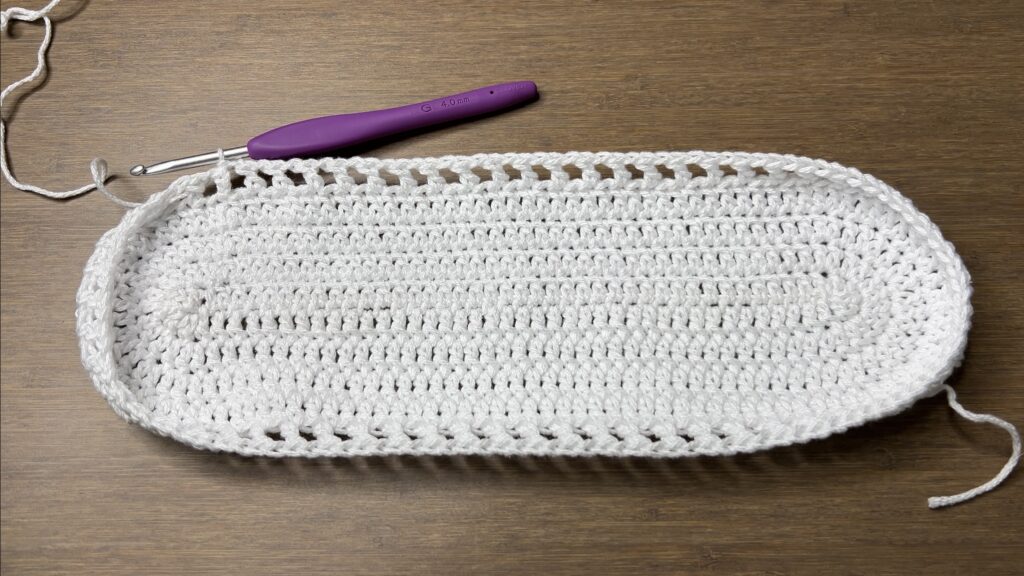
Base
Foundation: Make a slipknot, ch40+2 turning ch
Tighten your first and 40th chains to minimize holes.
Note: If you want a different size, learn how to calculate how many chains you’ll need.
Round 1: dc6 in 3rd ch from hook, dc in next 38 ch, dc6 in last ch, rotate your foundation chain to work along the underside, dc in next 38 ch, sl st (88)
To further minimize the holes from the 6 dc in the first and last ch, see the video tutorial for where to place the 6th dc.
Place your st marker in the first dc into the last ch and move it up every round. You won’t need to count the 38 st.
Round 2: ch2, rep[inc in next 6 st, dc in next 38 st] 2 times, sl st (100)
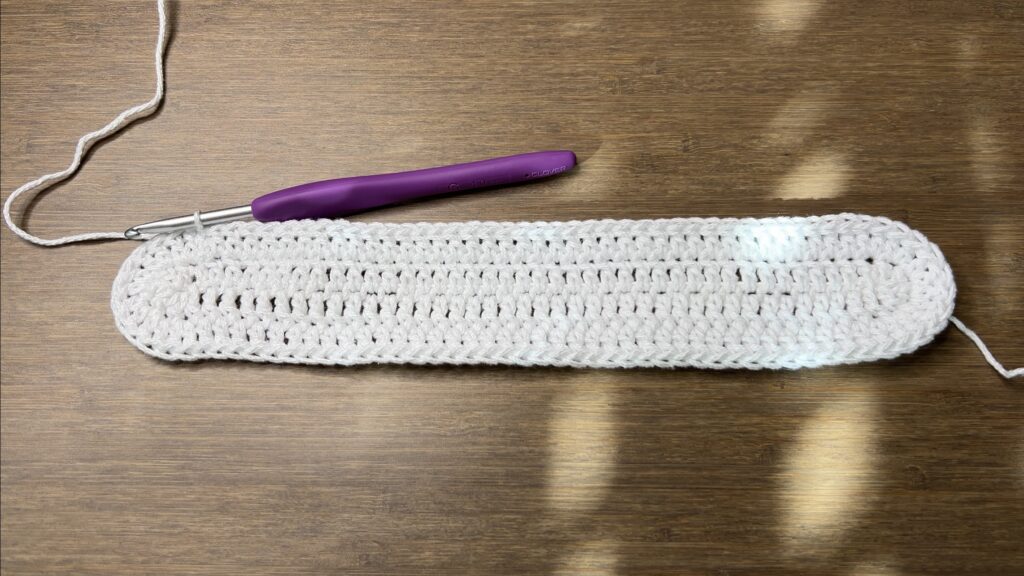
Round 3: ch2, *rep[dc, inc] 6 times, dc in next 38 st,* rep between **, sl st (112)
Round 4: ch2, *rep[dc in next 2 st, inc] 6 times, dc in next 38 st,* rep between **, sl st (124)
Note: For a larger base, continue adding rounds with 6 increases on each side. Round 5 would be rep[dc in next 3 st, inc], dc in next 38 st.
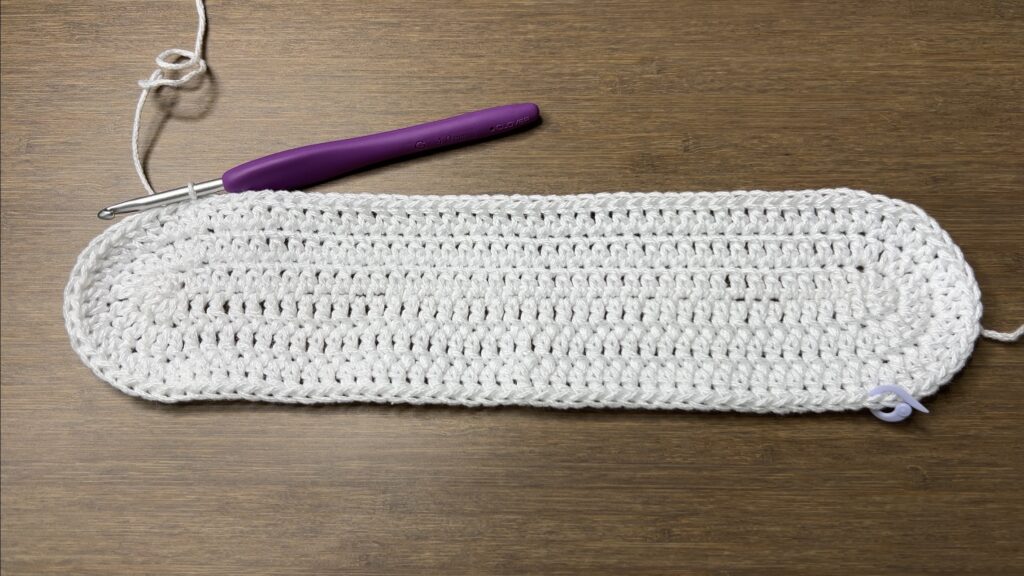
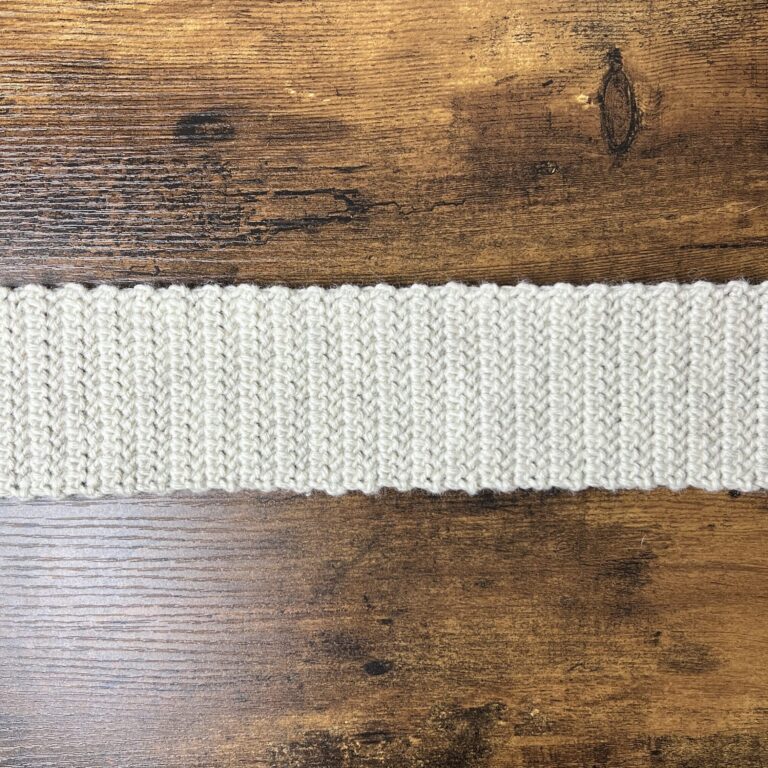
Body
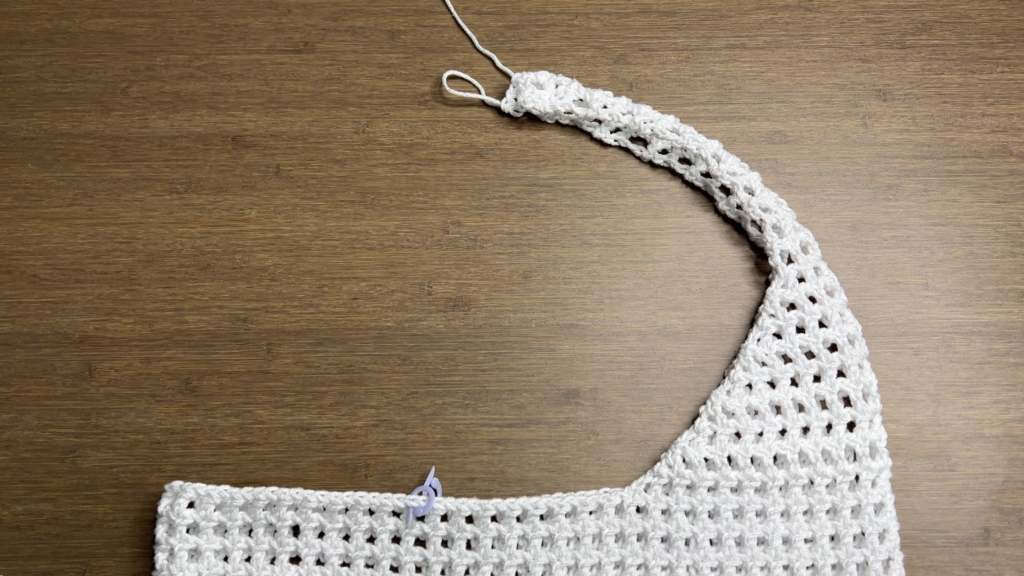
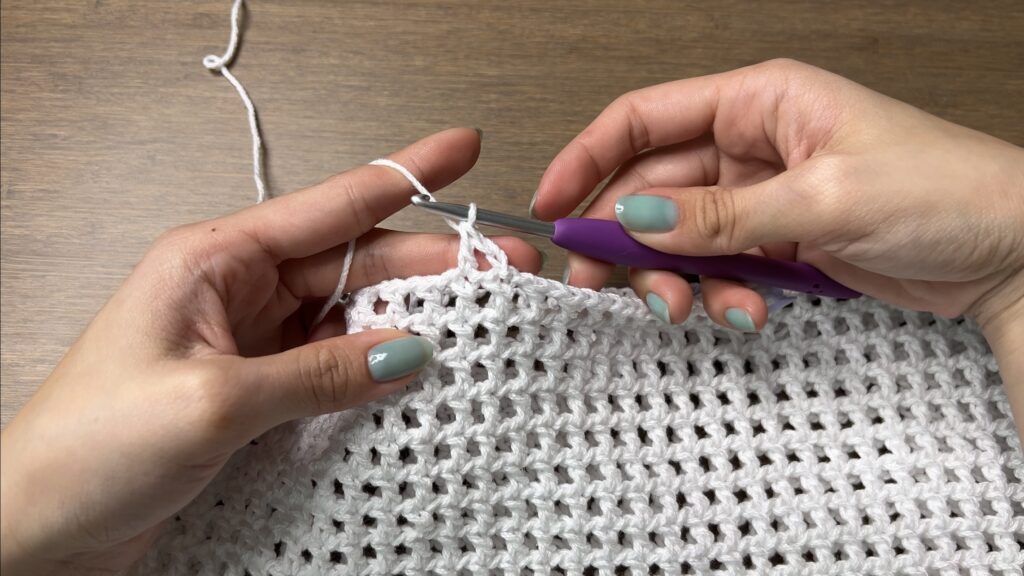
Round 1: ch4, sk2, rep[dc, ch1, sk1] around, sl st (62 dc, 62 ch1-sp)
The ch4 counts as a dc, ch1. The sk2 skips the first and second st of the round (see the image below). Sl st to the 3rd ch up on the ch4.
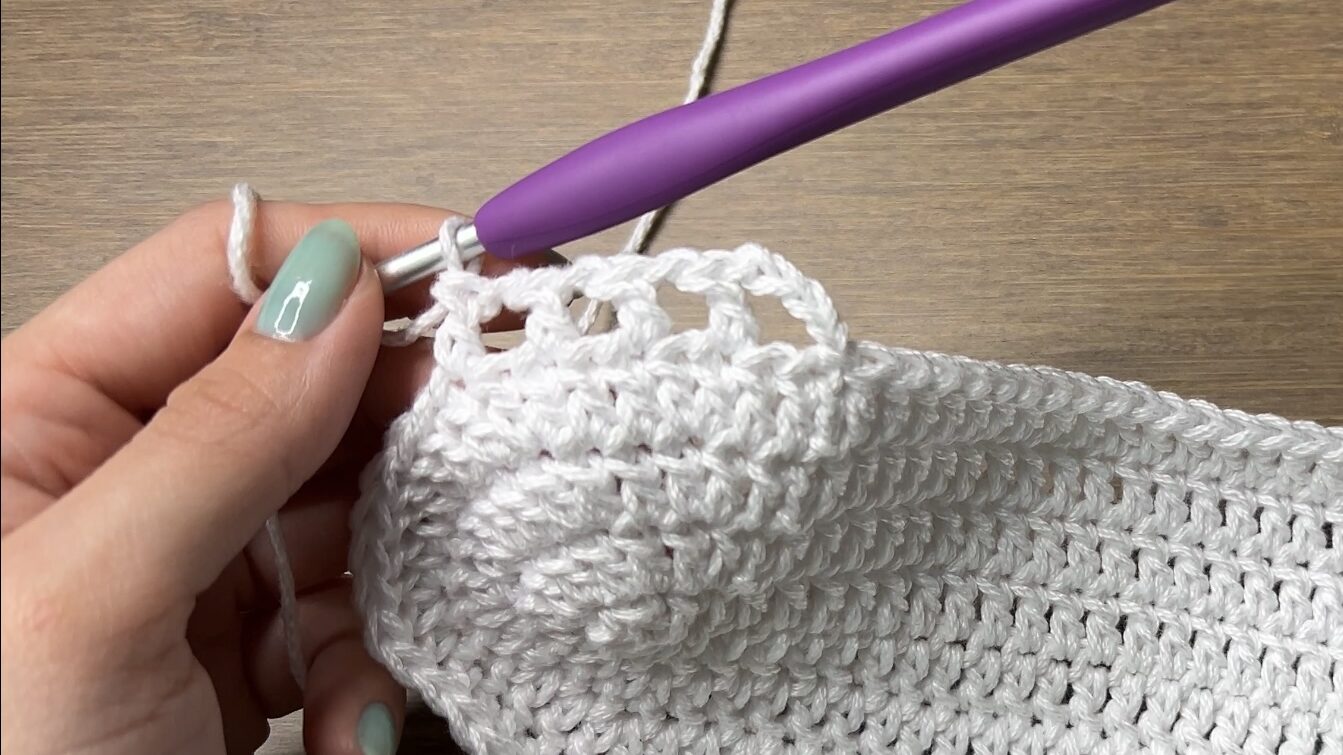
Now, we will be working double crochets on top of the double crochets from the previous round. The first “double crochet” is the first 3 ch of the ch4.
Round 2-20: ch4, rep[dc in next st, ch1] around, sl st
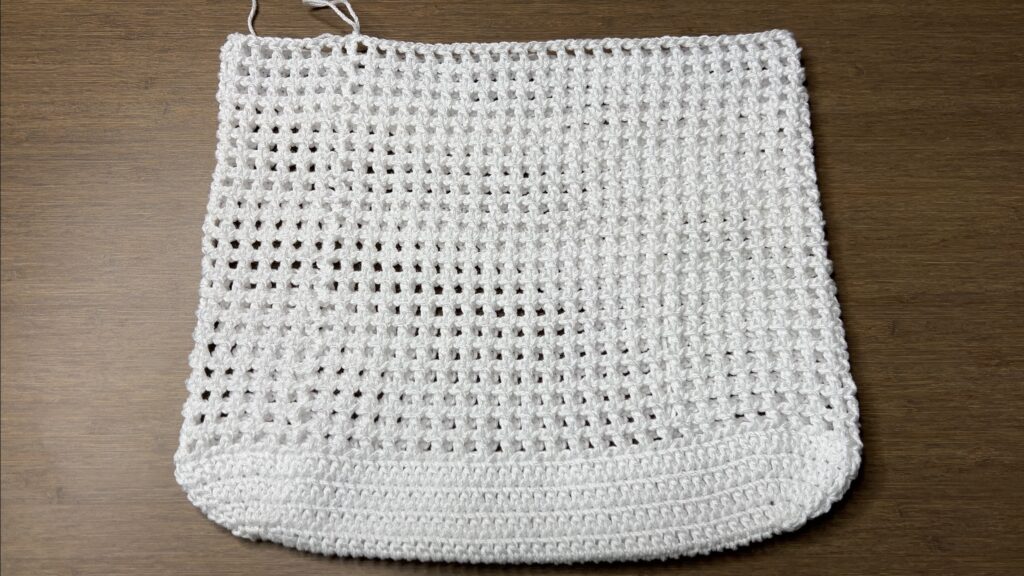
Note: For a shorter bag, do fewer rounds. For a longer bag, do more rounds.
If you want the straps to start where the last round ends, do not fasten off. If you want your straps to start further in or further out, fasten off.
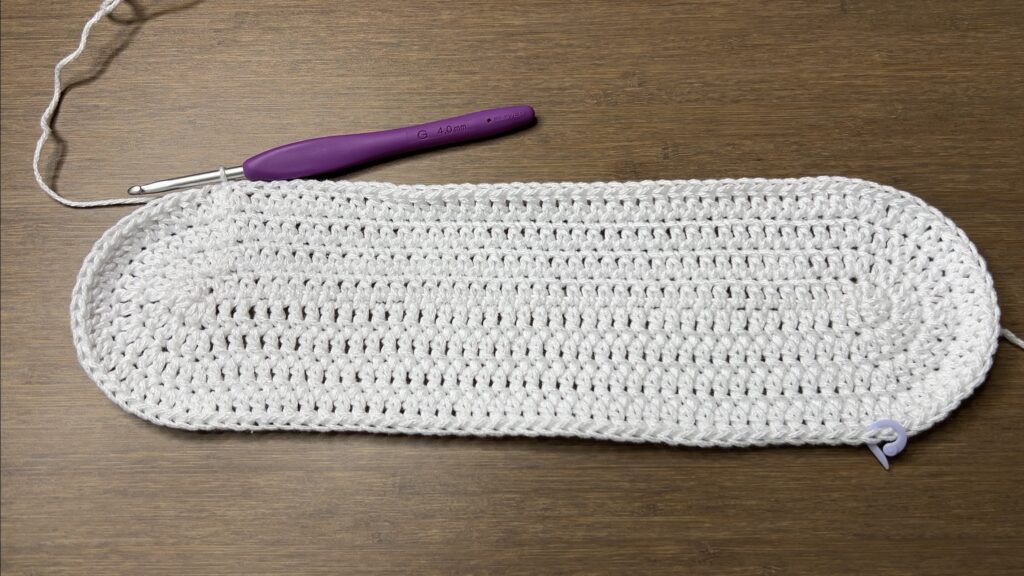
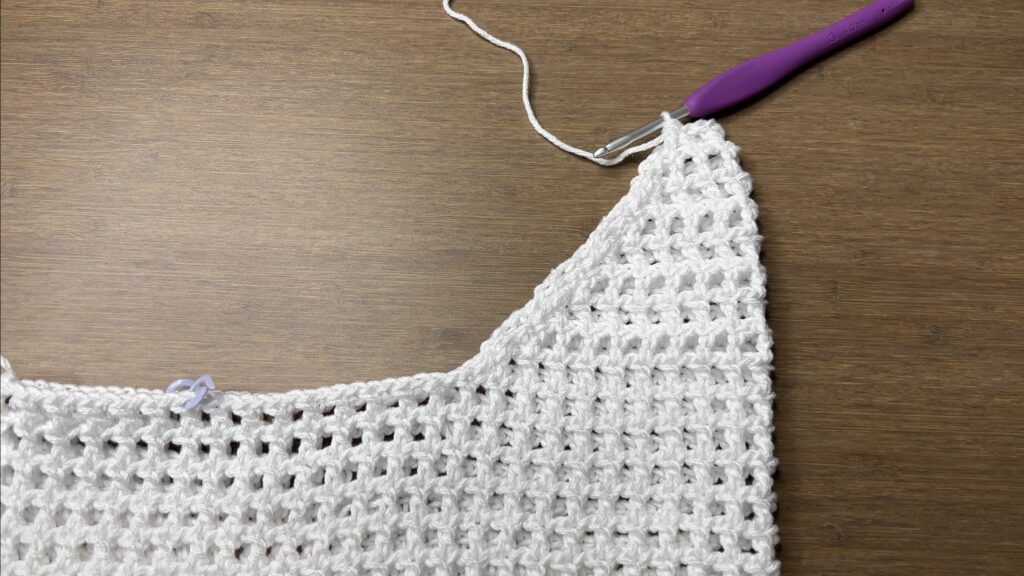
Straps
Mark the left and right edge of the bag: Fold the bag in half along the foundation chain. Trace the stitch on the left edge of the base up to the last round and mark it. Mark the 31st stitch to the right of the stitch marker. These two stitches should be at the left and right edges when the bag is folded.
Mark the start and end of the straps: Mark the 11th stitch to the right and left of each of the two stitch markers on the edges. Remove the two stitch markers on either edge. These four points will be where the first row of the strap starts and ends. The bag straps will be worked one at a time and in rows.
Note: If you want your straps to start further in or further out, mark those stitches. Make sure that the start and end of each strap are an equal number of stitches from the edges.
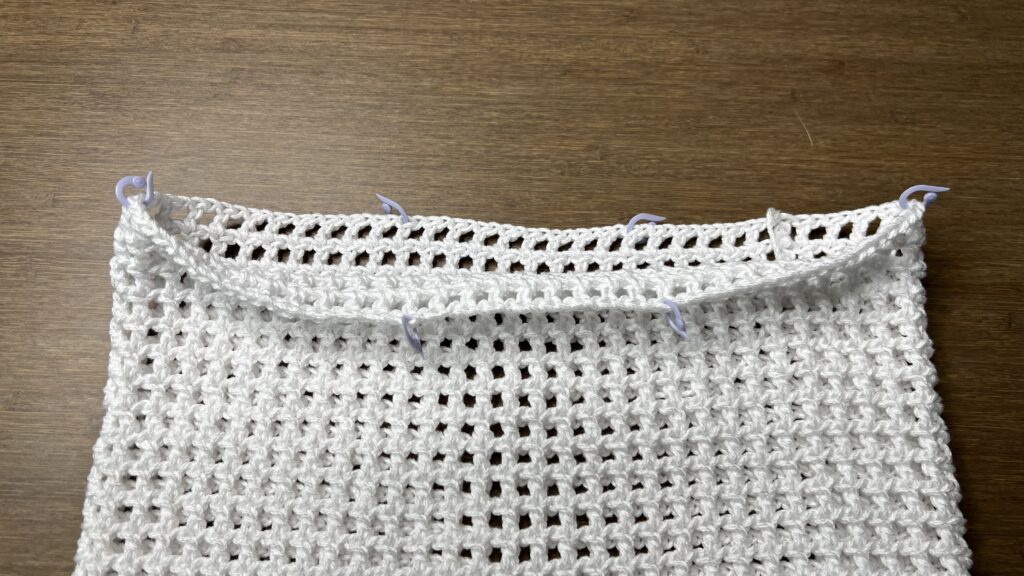
With the bag folded in half, attach your yarn to the left stitch marker. The last stitch of this row will be worked in the next stitch with a stitch marker.
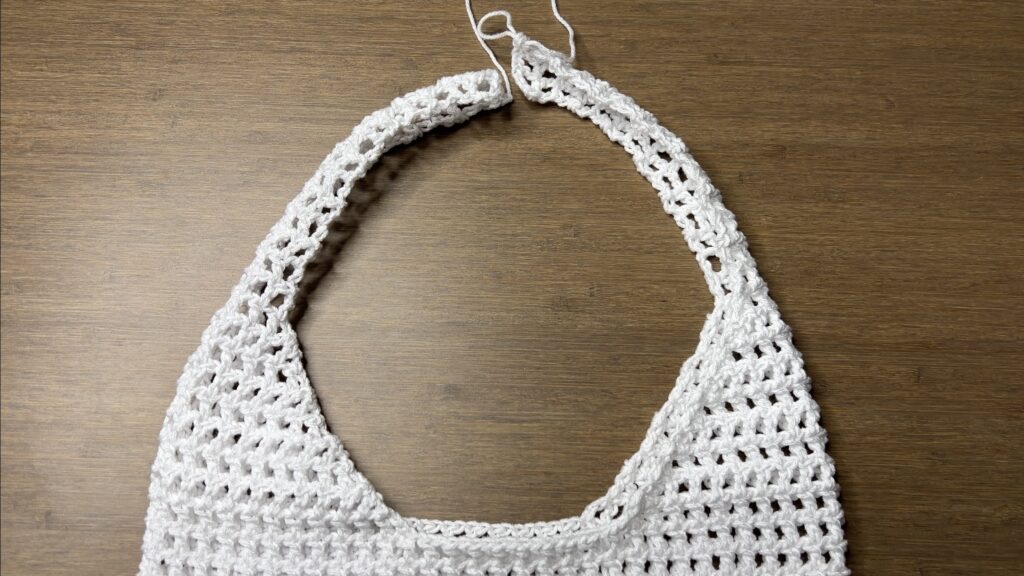
Row 1: ch2, rep[dc in next st, ch1] until 2 st left, dec (21)
The ch2 instead of ch4 mimics a decrease for the first stitch of the round. See the image below or the video tutorial.
Row 2-9: ch2, turn, rep[dc in next st, ch1] until 2 st left, dec (19, 17, 15, 13, 11, 9, 7, 5)
Note: For a wider strap, do fewer rows. For a thinner strap, do more rows.
Row 10-23: ch4, turn, rep[dc in next st, ch1] (5 dc, 4 ch1-sp)
Note: For a shorter strap, do fewer rows. For a longer strap, do more rows.
Fasten off.

Flip the bag so the finished strap is on the right side and attach your yarn to the stitch marker. Repeat rows 1-23 for an identical strap, but do not fasten off.

Finishing Edges and Stitching Straps Together
Now, we’ll line the edges of the straps and stitch the last rows of each strap together without cutting our yarn. You can skip outlining the edges and go right to stitching the straps together if you prefer.
Outline: ch1, sc2 in each sp until last row of strap, rep[sc in next ch1-sp, sc in next st], sc in ch1-sp, sc2 in each sp, sl st to first st (109)

Stitching Straps: sl st Row 23 of each strap together with the inner loops only
Slip stitching through the back loop of the closer strap and the front loop of the further strap will make the seam flatter. You can do the flat slip stitch method for a more seamless look. Or, you can whip stitch it closed, but you’ll have to fasten off and reattach your yarn to outline the other side of the straps.

Outline: rep Outline for other side of rows, fasten off
Finished Crochet Mesh Tote Bag
Weave in your loose ends and your crochet mesh tote is finished! You can bring it with you anywhere because this is the perfect everyday bag!


how long does this take
Can you help me with:
Row 10-23: ch4, turn, rep[dc in next st, ch1] (5 dc, 4 ch1-sp)
Is there part of these row missing? should there be an INC each row (working 2nd side of handle 1).
please disregard. I think I figured it out.