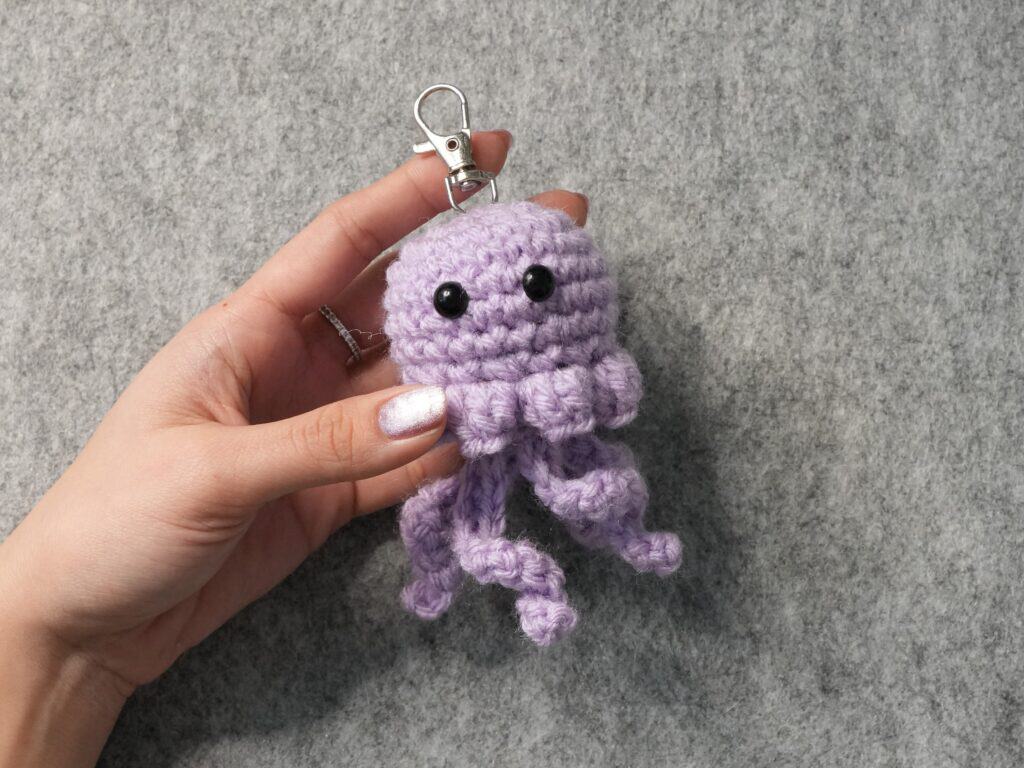
No-Sew Crochet Jellyfish Amigurumi Keychain | Free Pattern & Video Tutorial
This cute crochet jellyfish is easier to make than you might think! Made all in one piece, this no-sew pattern is easy to follow, even for beginners. You can also make it into a keychain to decorate your bag!
Follow along with this free written pattern, or watch the video tutorial to make your very own amigurumi jellyfish!
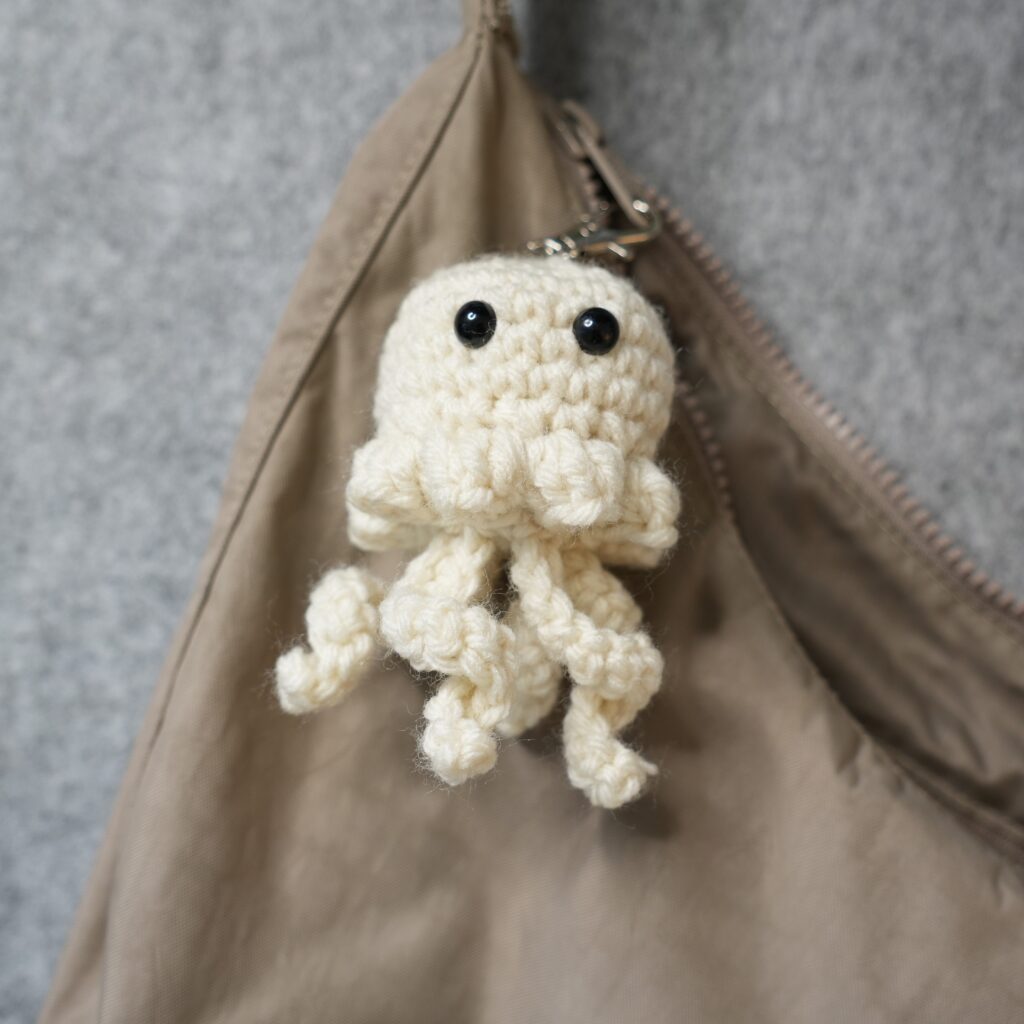
Table of Contents
This post may contain affiliate links. I may earn a small commission on qualifying purchases at no additional cost to you!
Crochet Jellyfish Tutorial
Become a member to get early access to new videos!
You can follow along with my YouTube video to make your own crochet jellyfish! I have timestamps included to help you jump to any point you need to!
Pattern Information
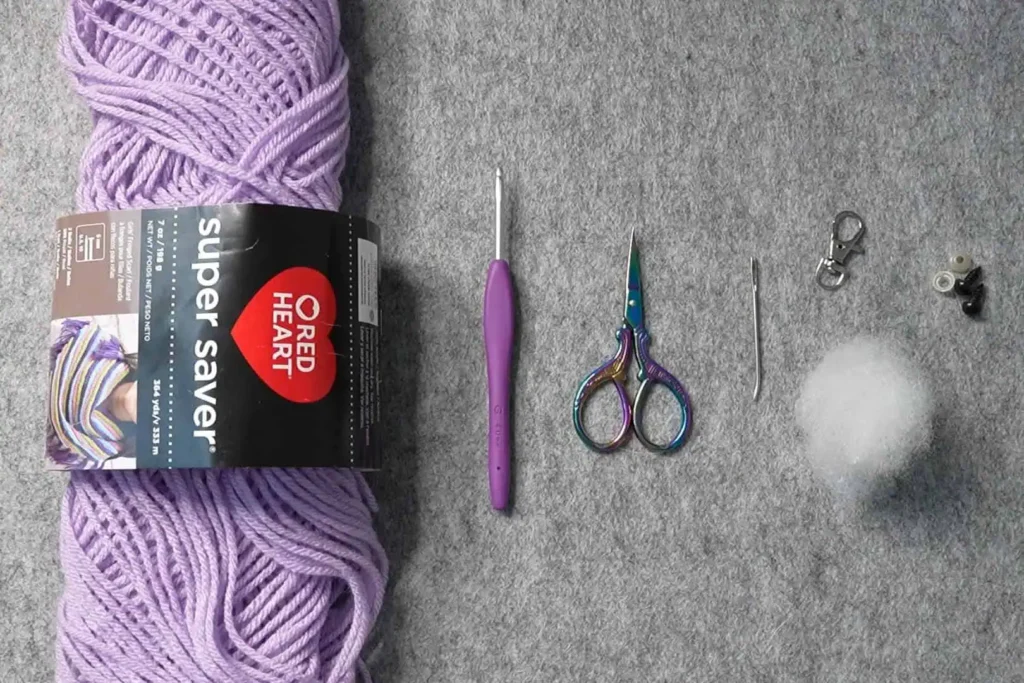
Materials
- 20 grams/37 yards of medium weight yarn (Red Heart Super Saver in “Pale Plum”)
- 4mm Clover Amour crochet hook
- Scissors
- Yarn needle
- Fiberfill
- 8mm Safety Eyes
- Keychain Clasp (optional)
Crochet Abbreviations
ch = chain
dec = decrease (sc2tog)
inc = increase (2 single crochets into 1 stitch)
rep = repeat
sc = single crochet
sl st = slip stitch
st = stitch
Dimensions
Overall: 6 centimeters wide x 10 centimeters long (2.4 x 4 inches)
Notes and Tips
- This pattern is written using US crochet terms
- The number in (parentheses) at the end of each row is the stitch count after finishing that row
- The chain 1 at the beginning of each round does NOT count as a single crochet
- The slip stitch at the end of each round goes into the first stitch of that round
- The first stitch of every new round goes into the same stitch we slip stitched to in the previous round
Crochet Jellyfish Pattern
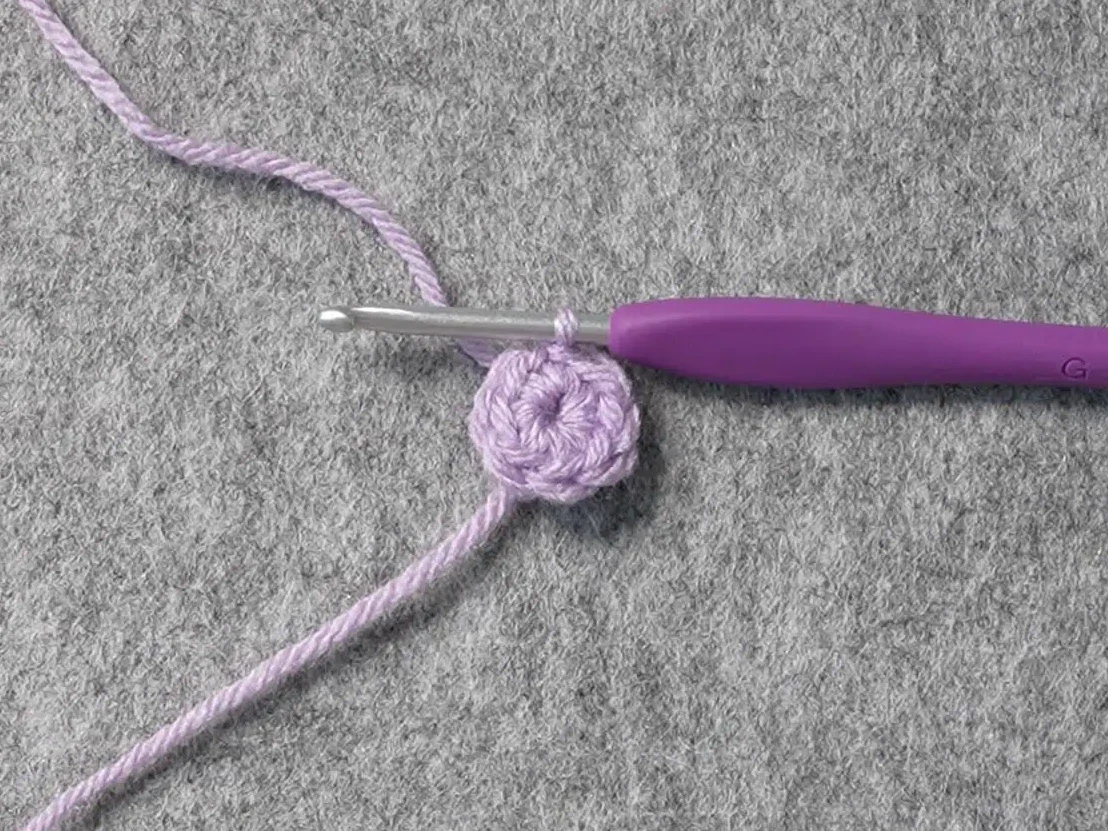
Head
Foundation: Make a slipknot, ch2
Tip: Make your first chain slightly looser.
Round 1: sc8 into 2nd ch from hook, sl st (8)
Round 2: ch1, inc around, sl st (16)
Round 3: ch1, rep[sc, inc] around, sl st (24)
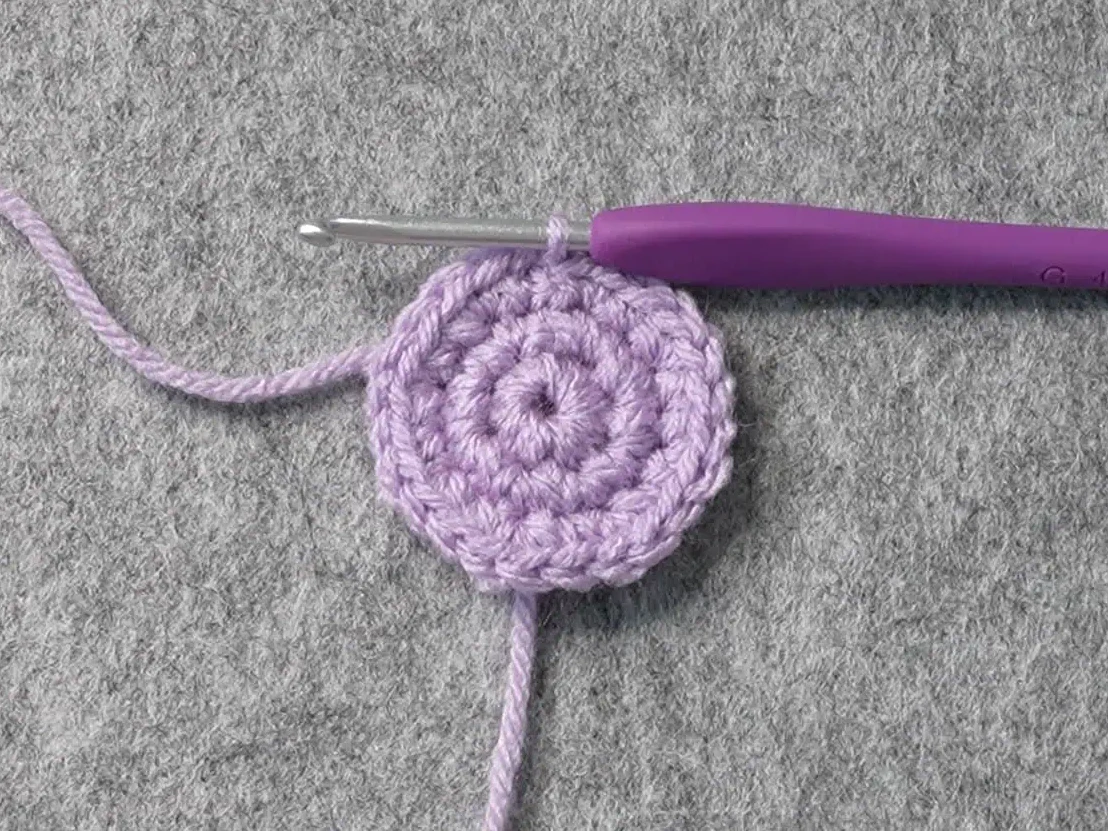
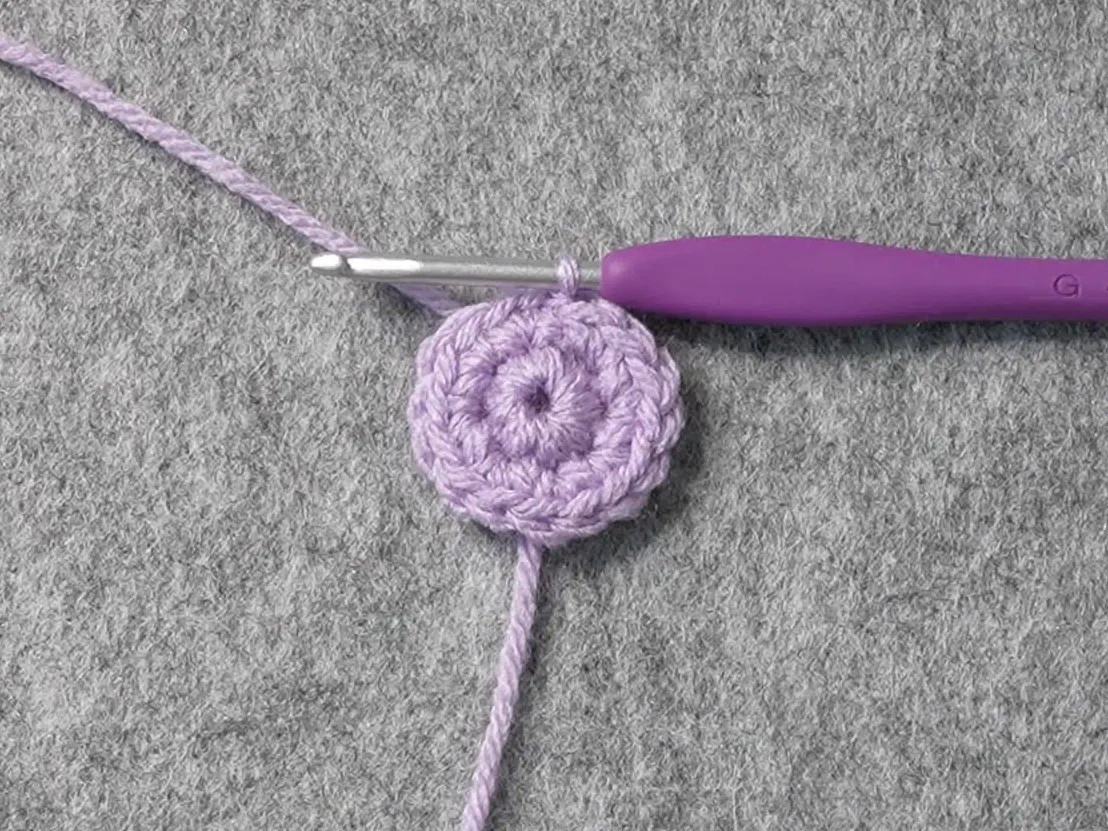
Rounds 4-7: ch1, sc around, sl st (24)

Round 8: ch1, rep[sc, dec] around, sl st (16)
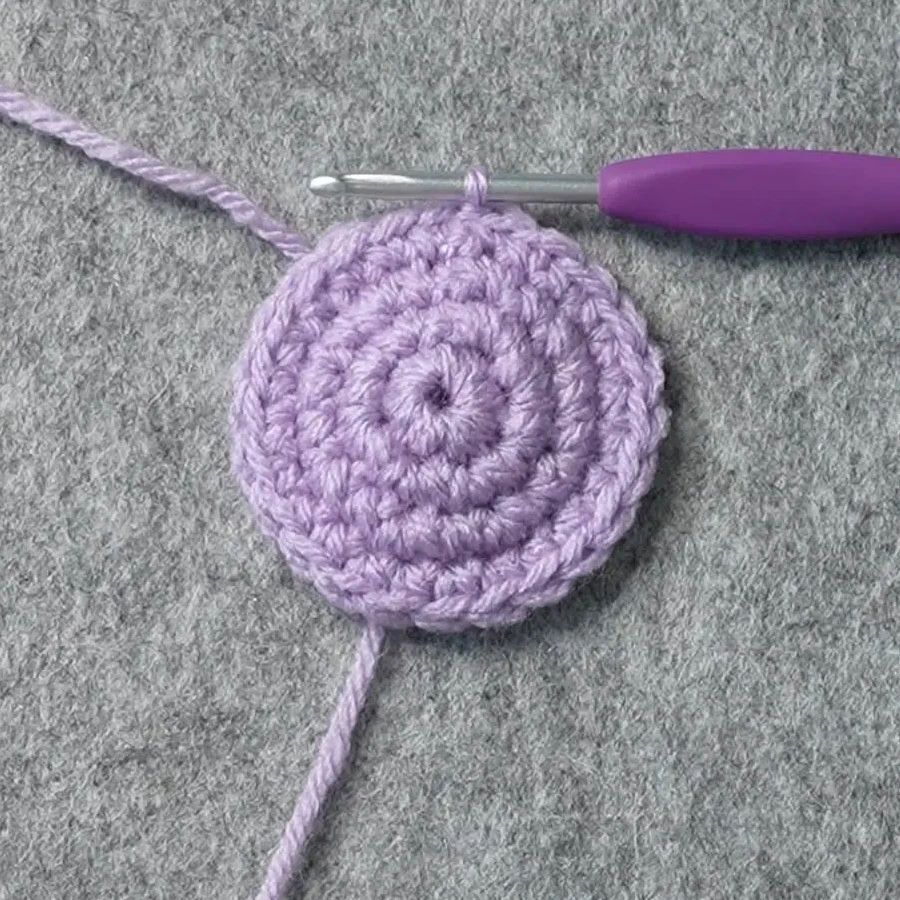
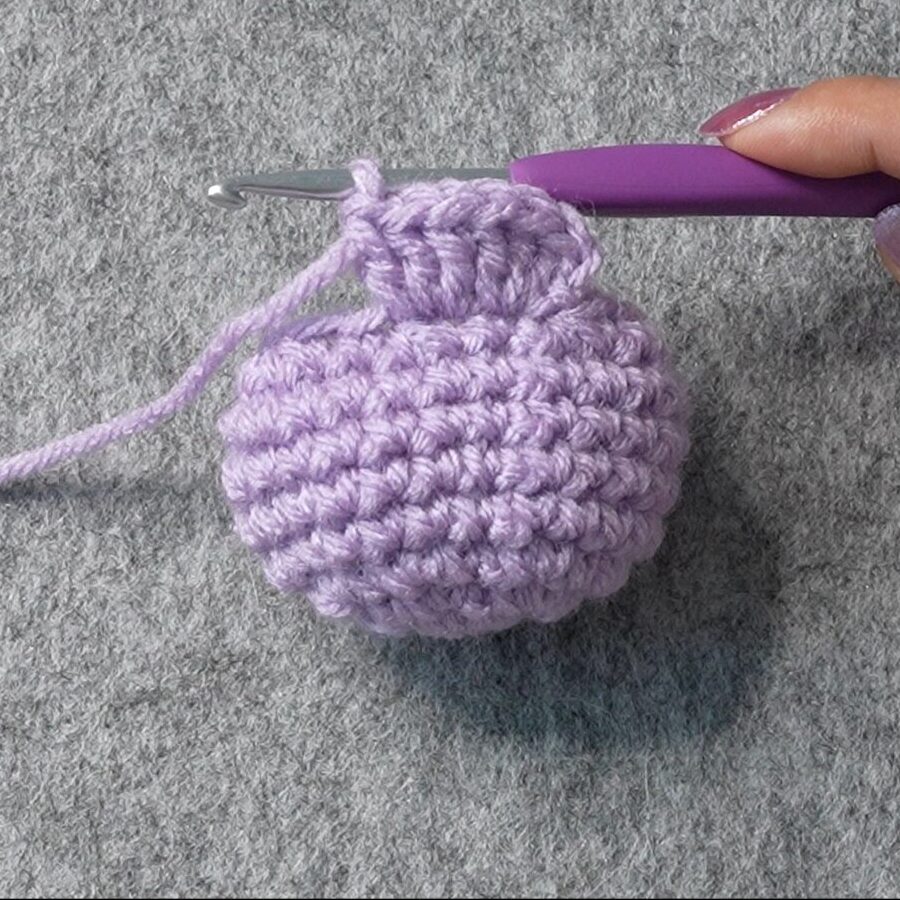
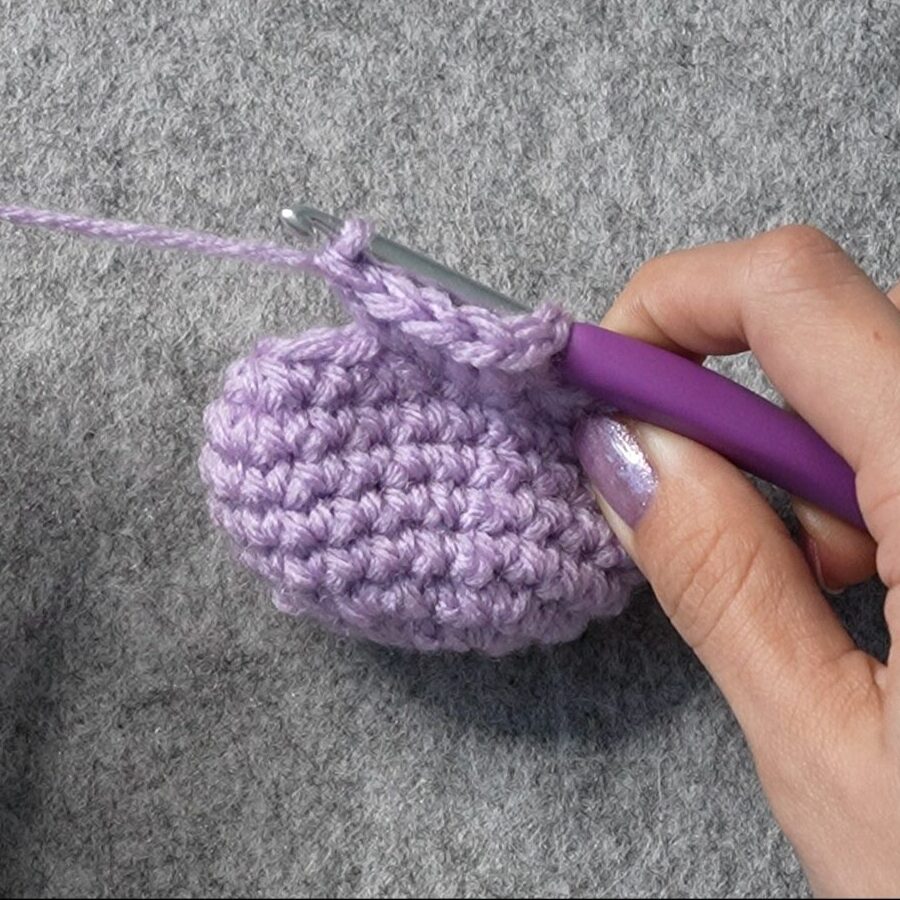
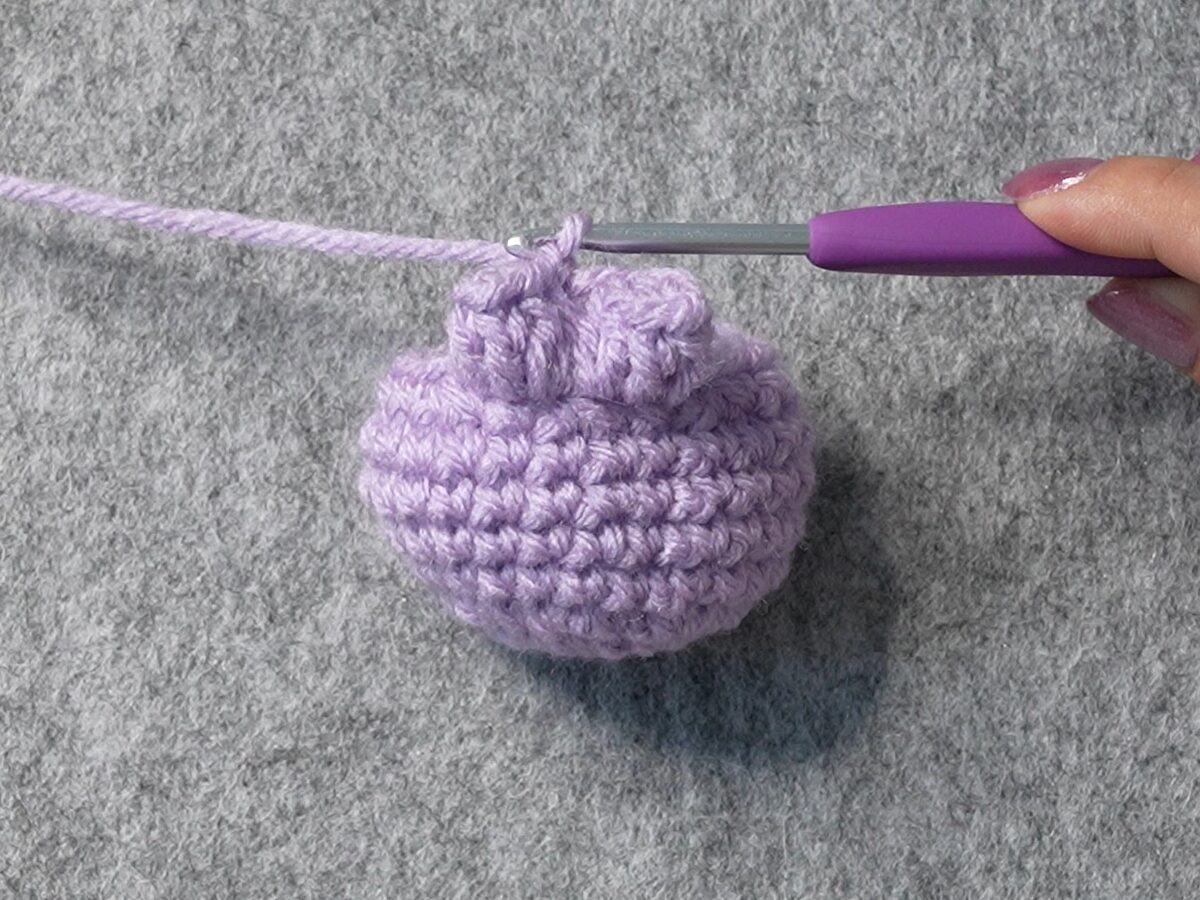
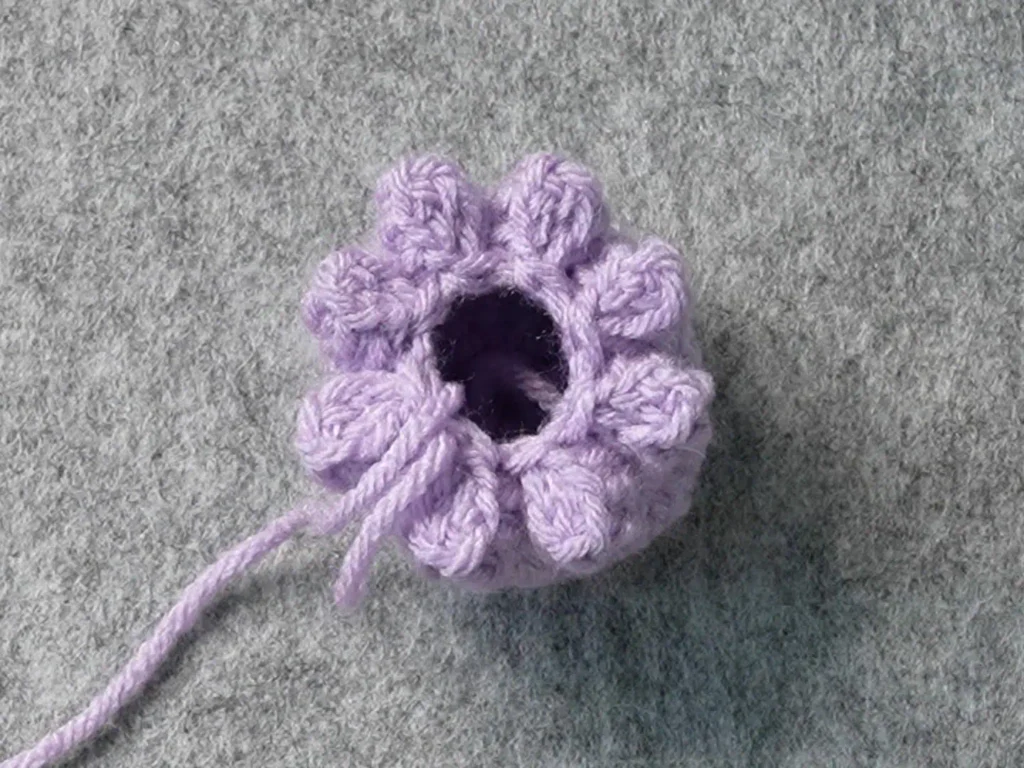
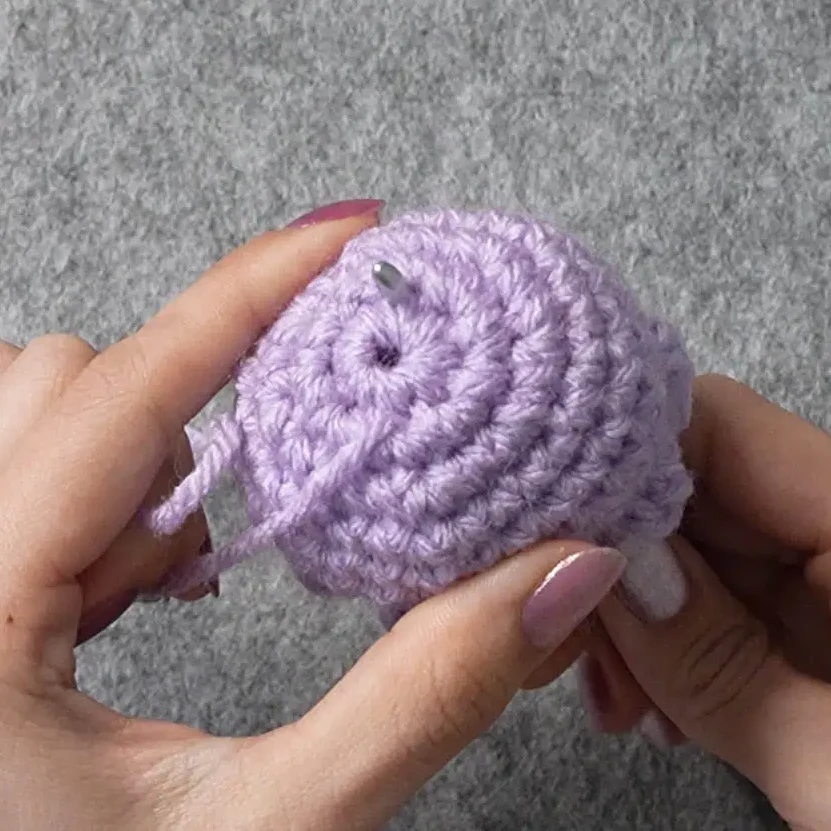
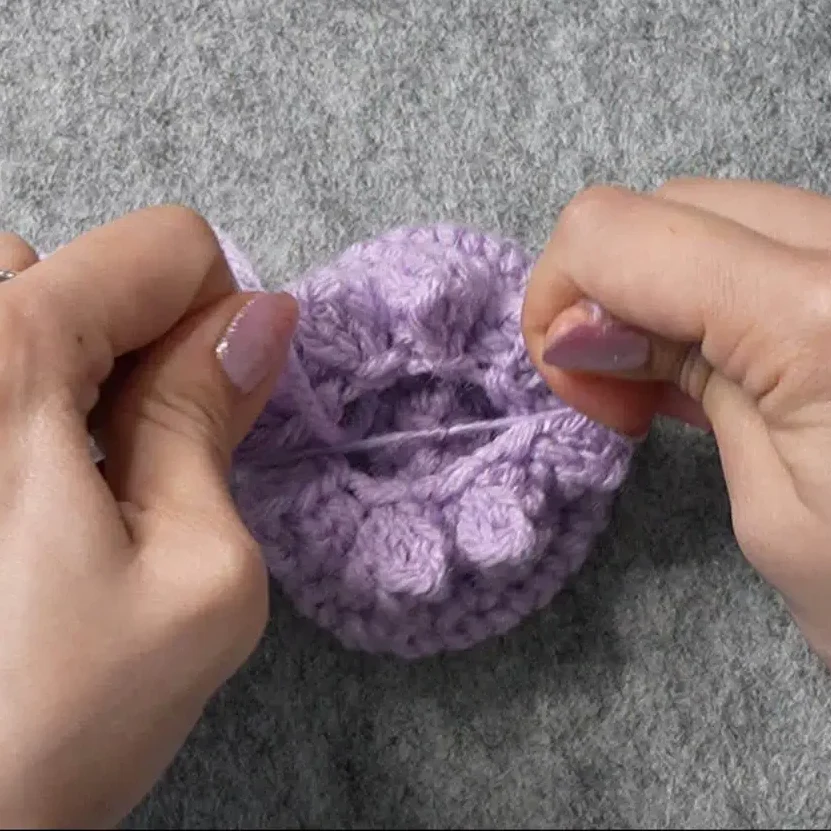
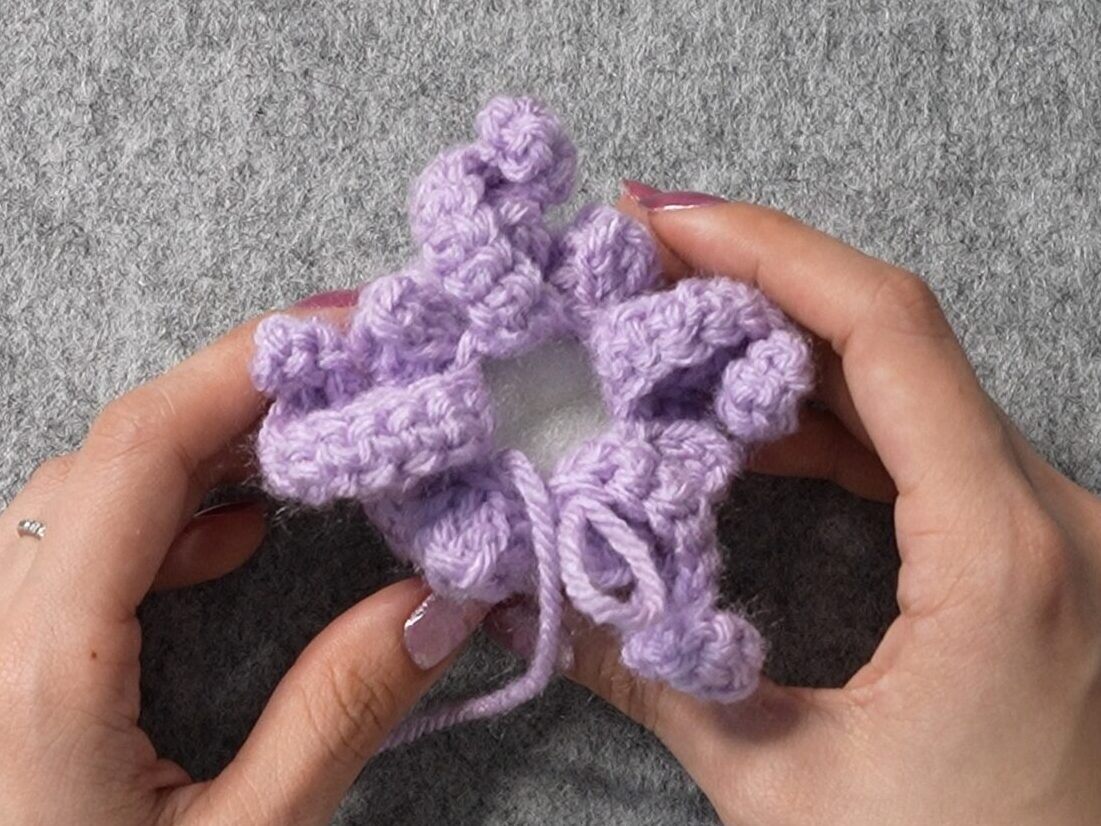
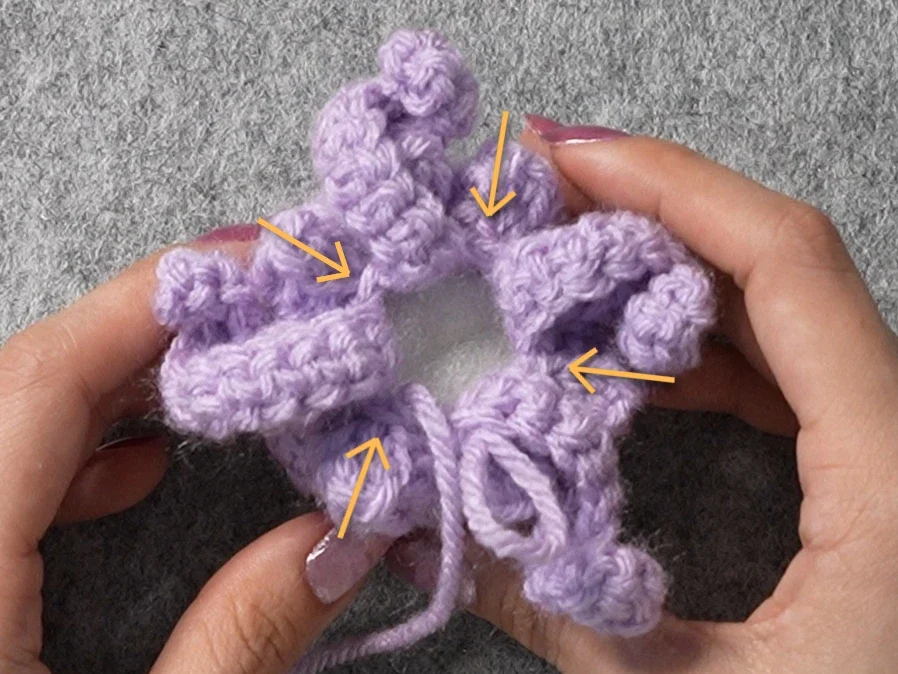
Round 9: ch2, rep[dc3 in next 2 st, make into PC] around, sl st (8 PC)
- Do 3 double crochets into the first stitch and 3 double crochets into the second stitch.
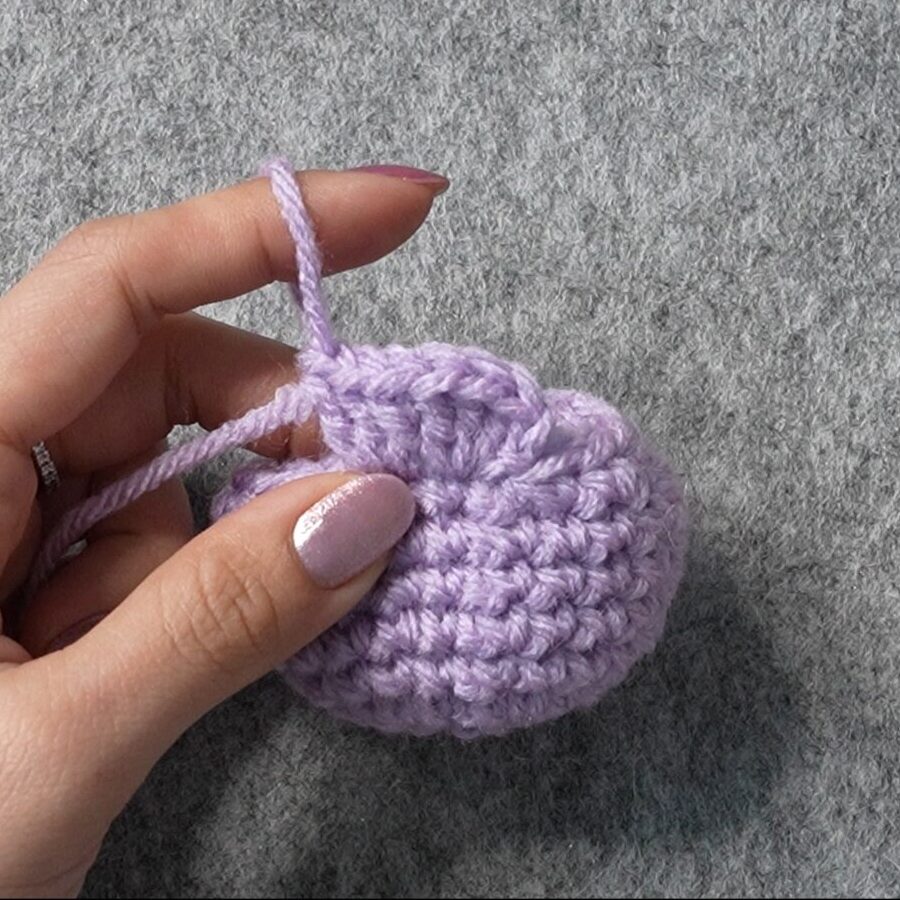
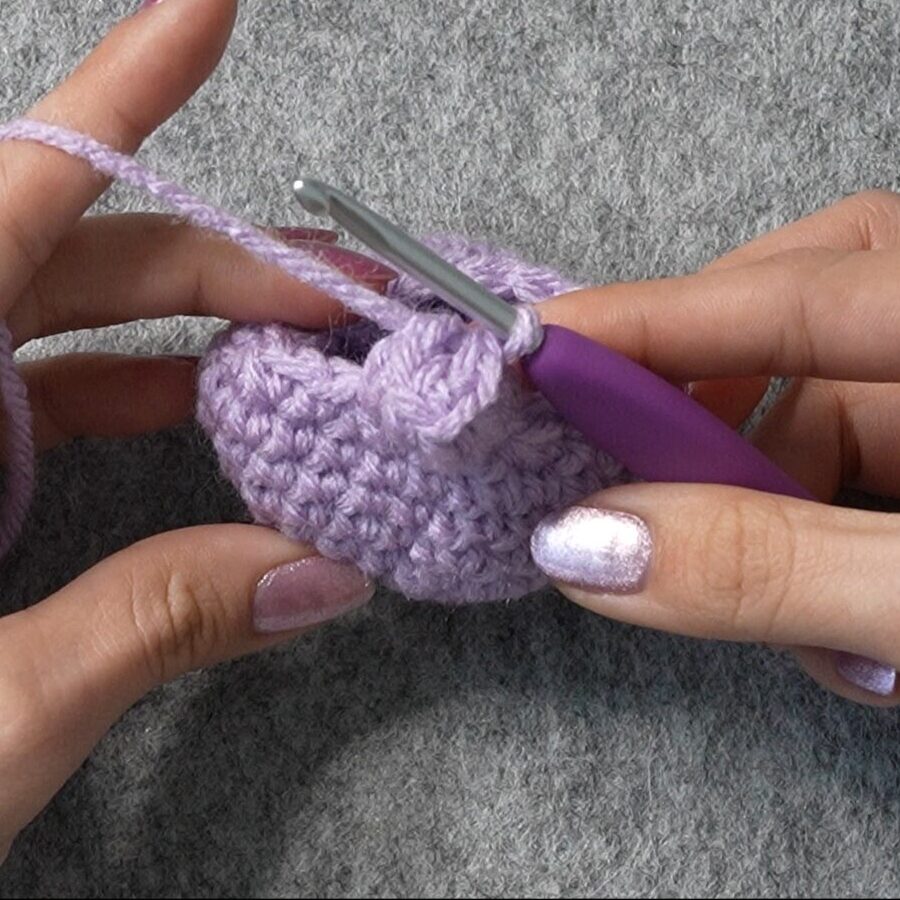
- Remove your hook from the loop (you can hold it on your finger to keep it from unraveling).
- Insert your hook into the first double crochet made.
- Insert your hook back into the loop and tighten it.
- Pull the loop through the first double crochet.
- Chain 1.
Below are some photos to guide you. Or you can view the video tutorial!
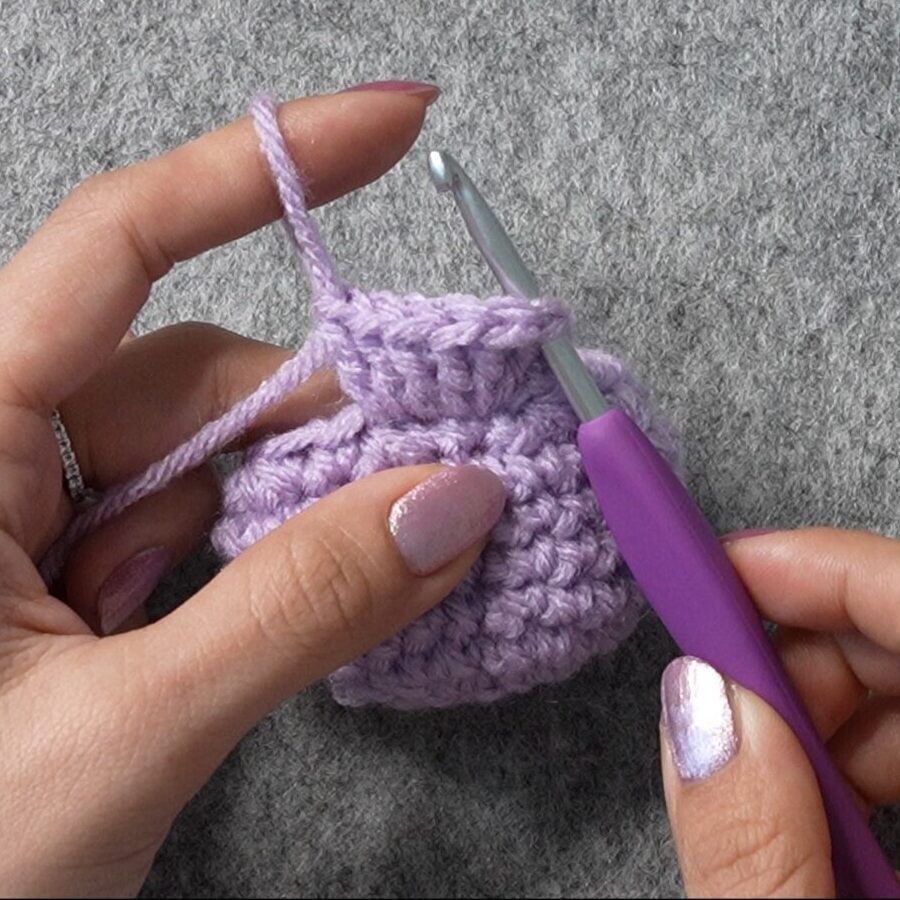
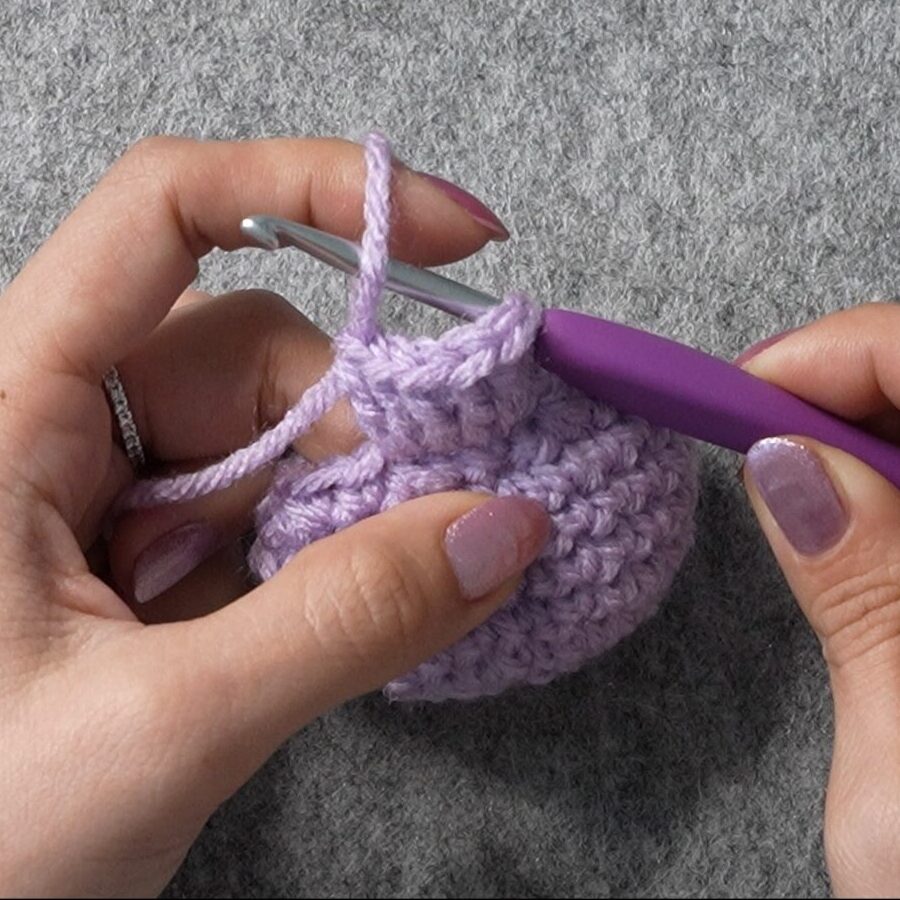
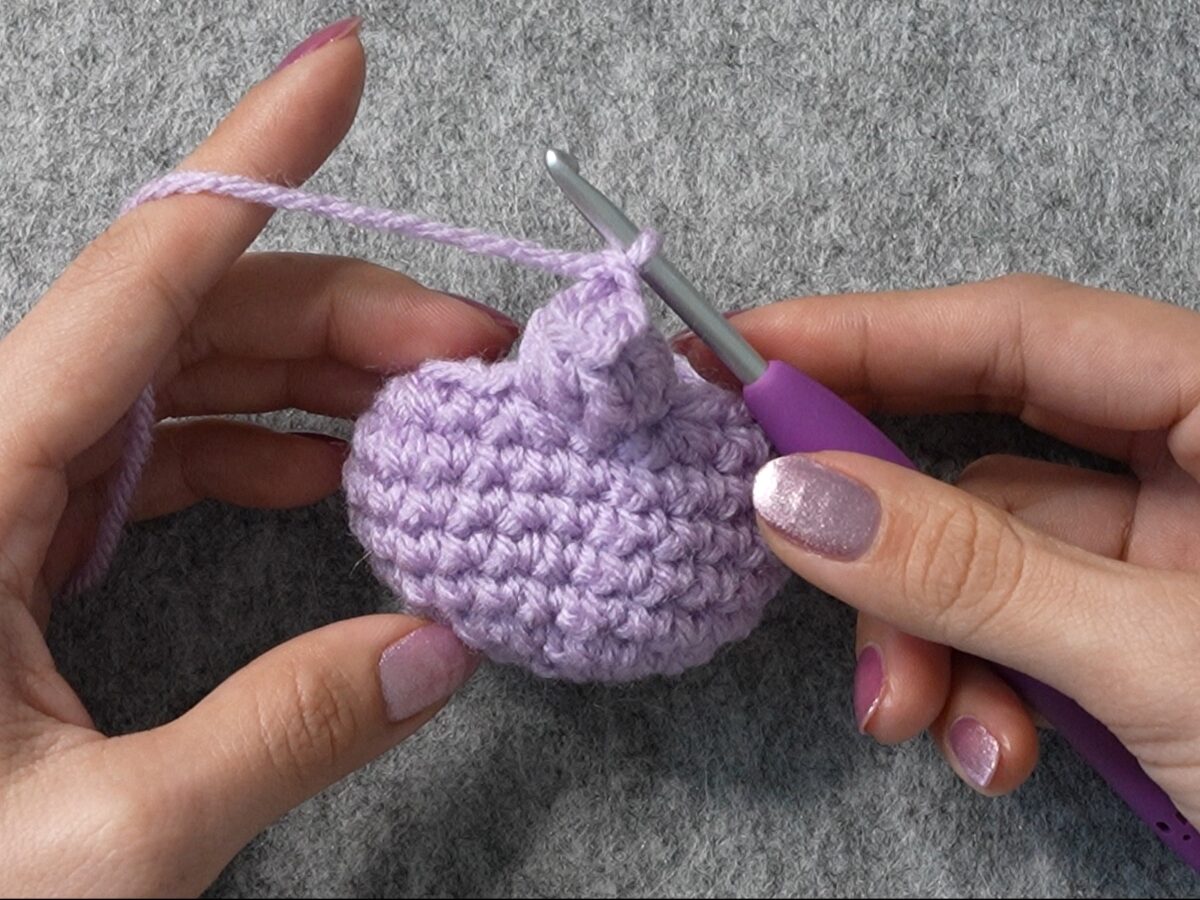
7. Repeat around for 8 total PC, and sl st to the right of the first PC
Attaching Keychain Clasp and Eyes (Optional)
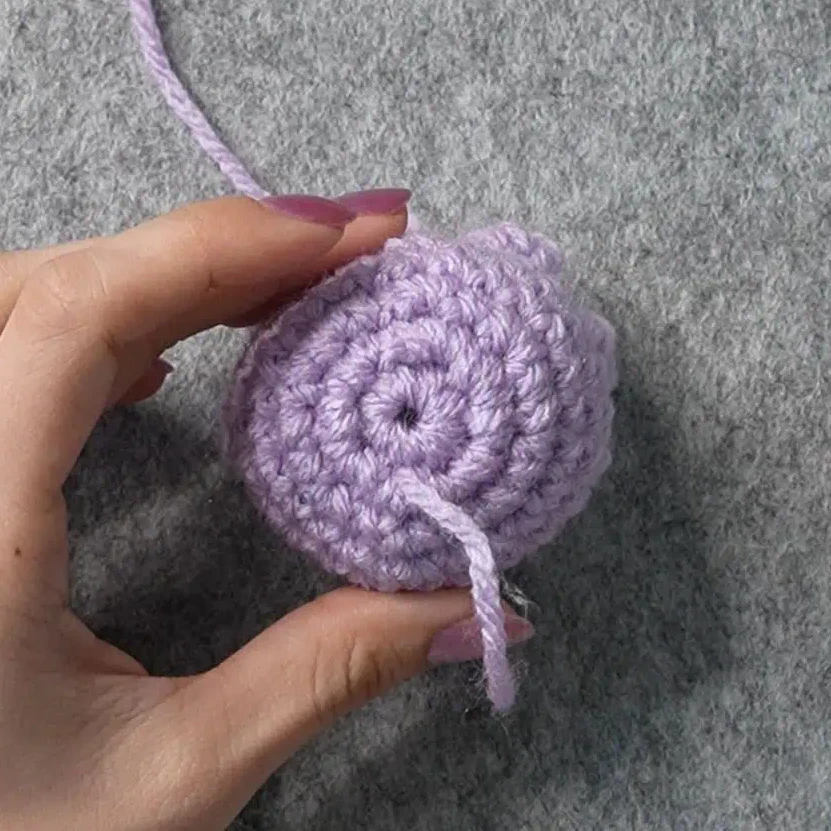
- Cut a 7″/18cm strand of yarn.
- Insert hook into any stitch outside Round 1
- Pull one end of the strand of yarn through
- Thread the strand of yarn through the bottom of the keychain clasp
- Insert hook from the inside, and out the stitch across from the stitch you pulled the yarn through in Step 2
- Pull the end of the strand of yarn through
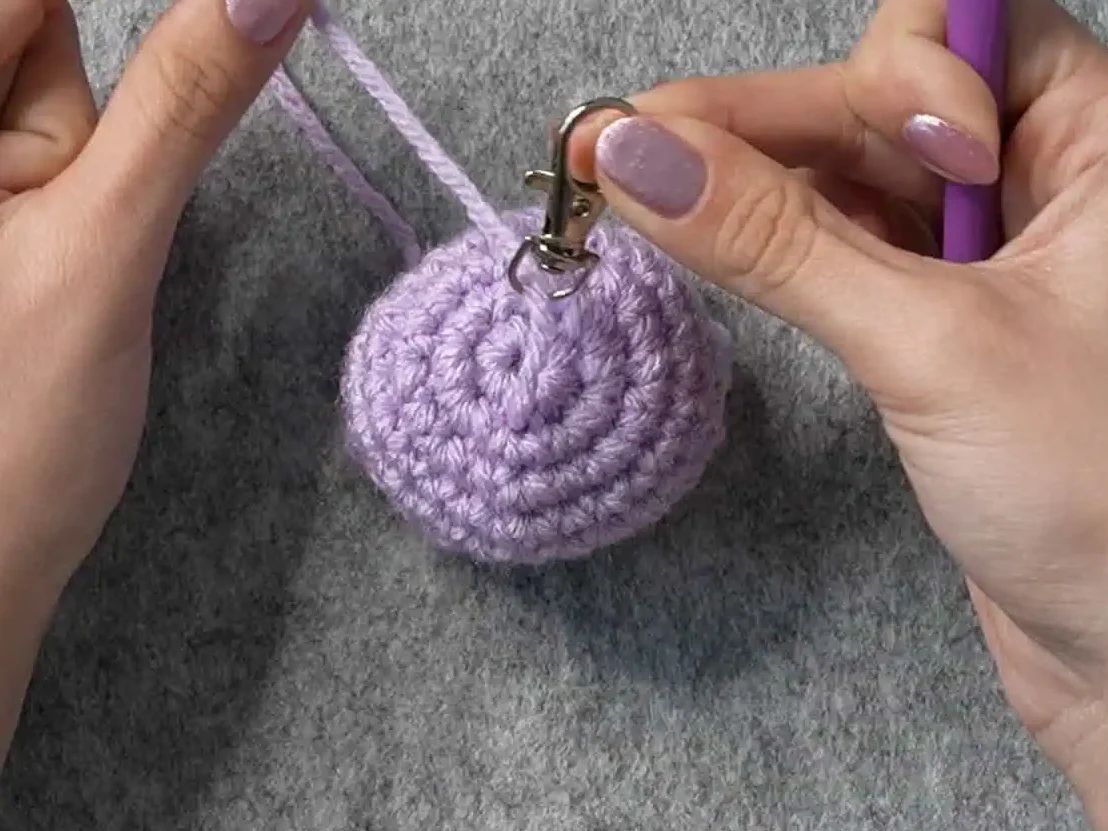
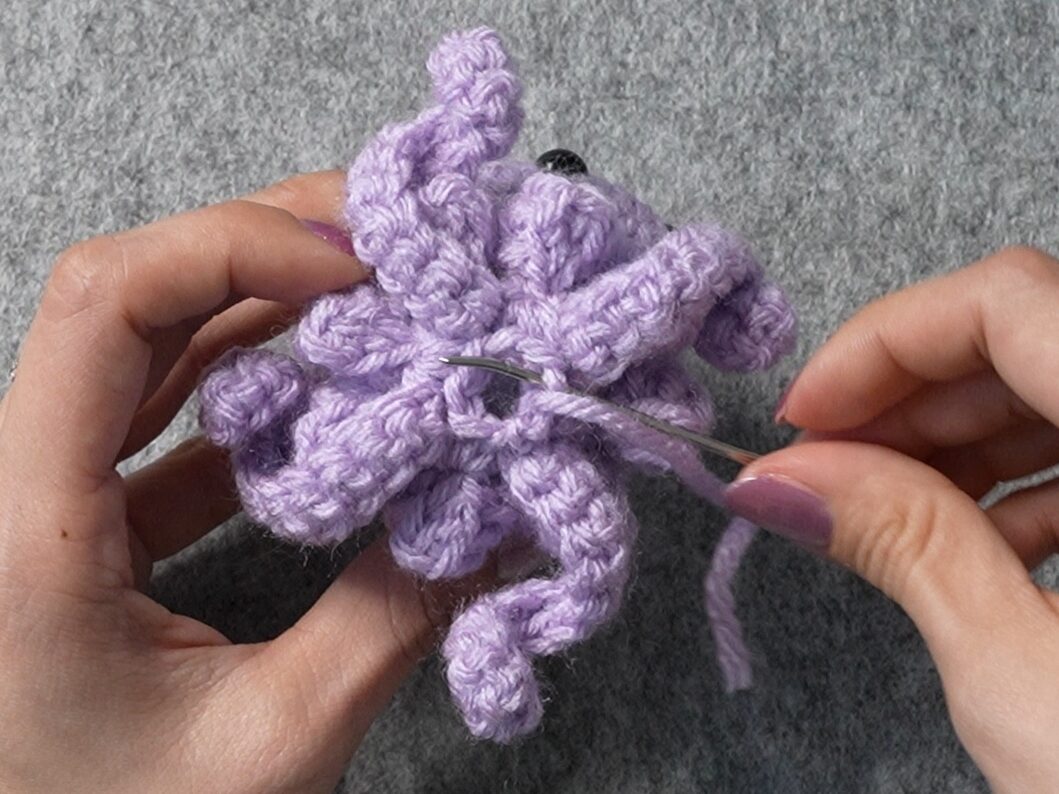
Double knot the ends of the strand of yarn from the inside.
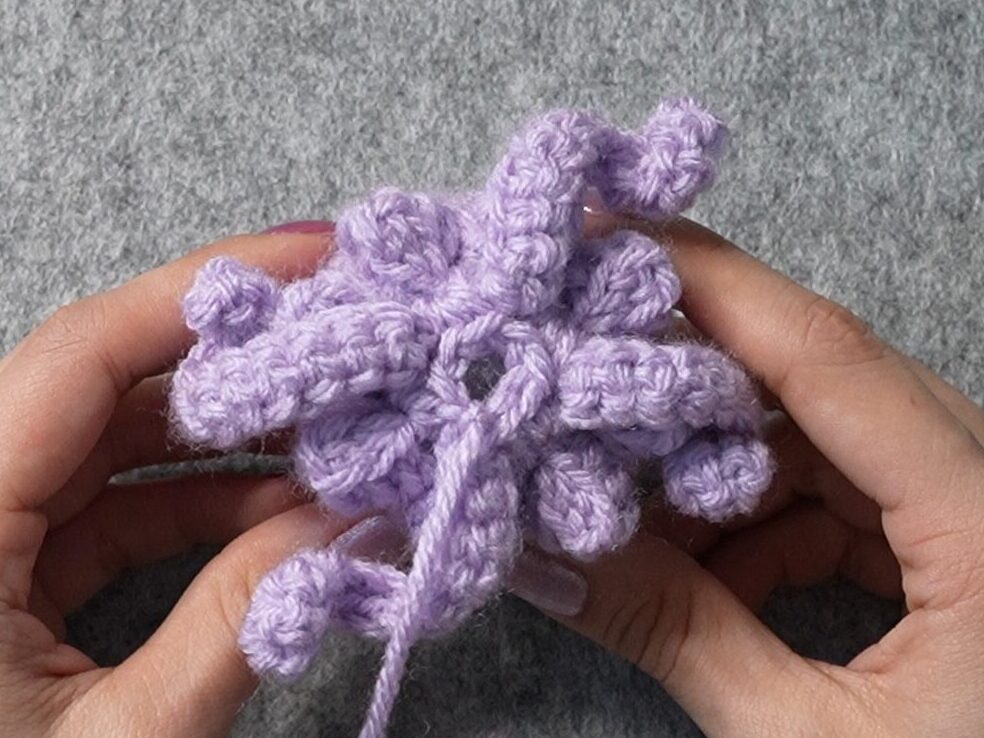
Insert the saftey eyes just above the third round from the bottom of the head, with 2 stitches in between them.
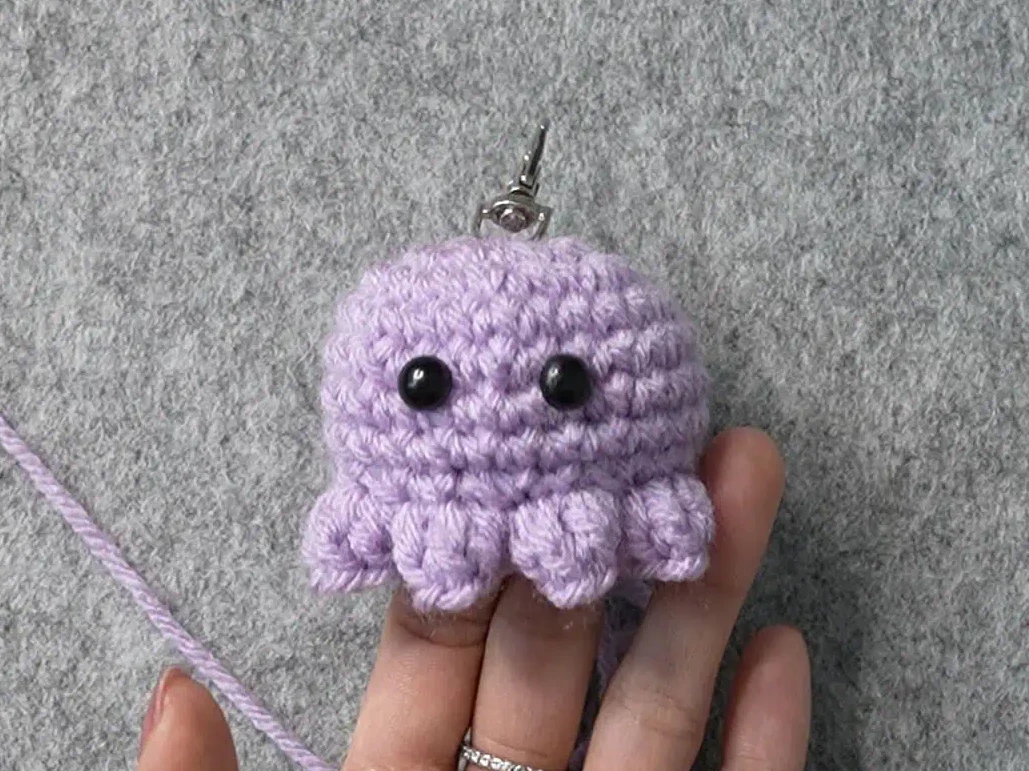
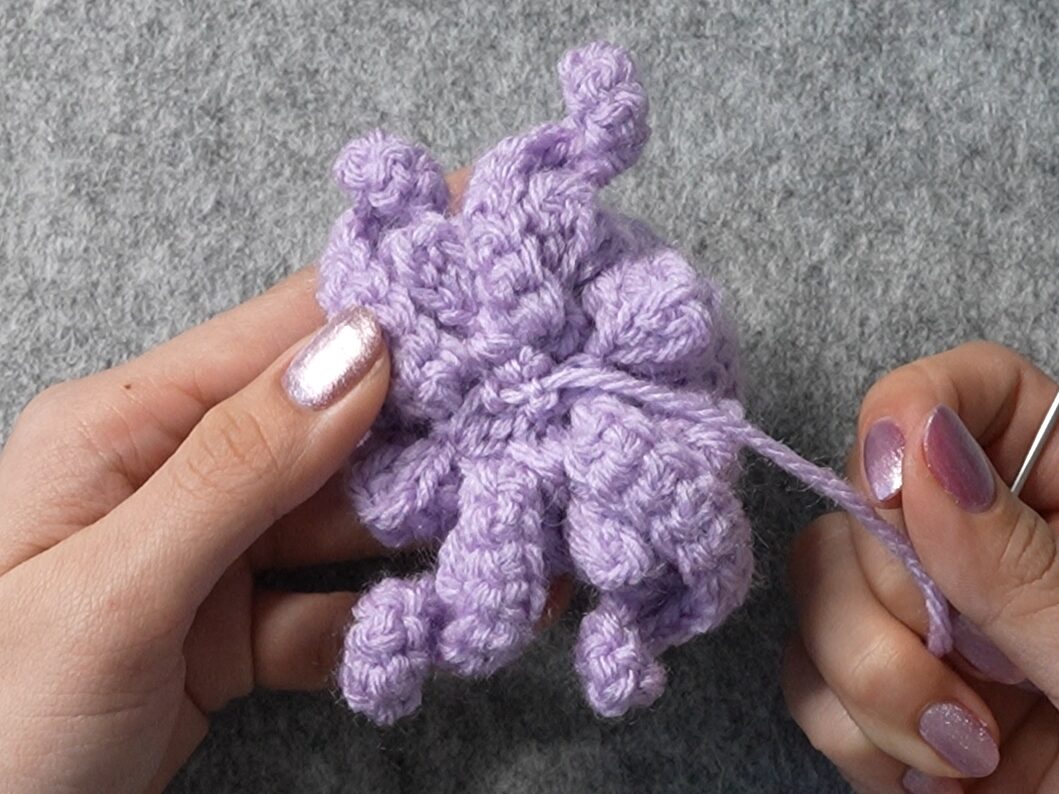
Now, you should have what looks like an octopus! Check out my octopus pattern to finish this project as an octopus instead of a jellyfish.
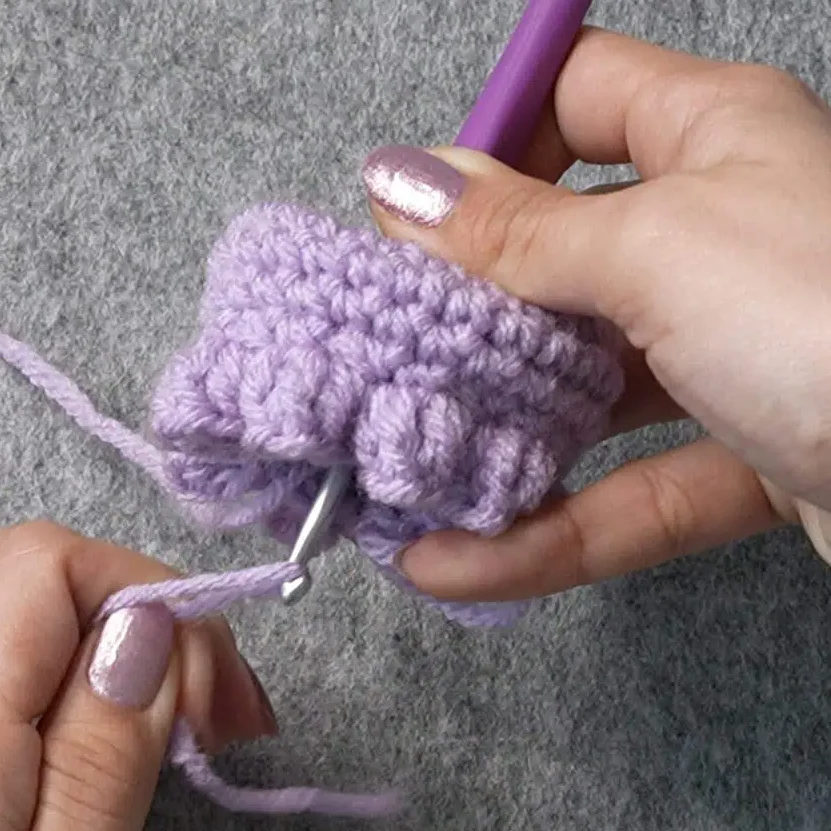
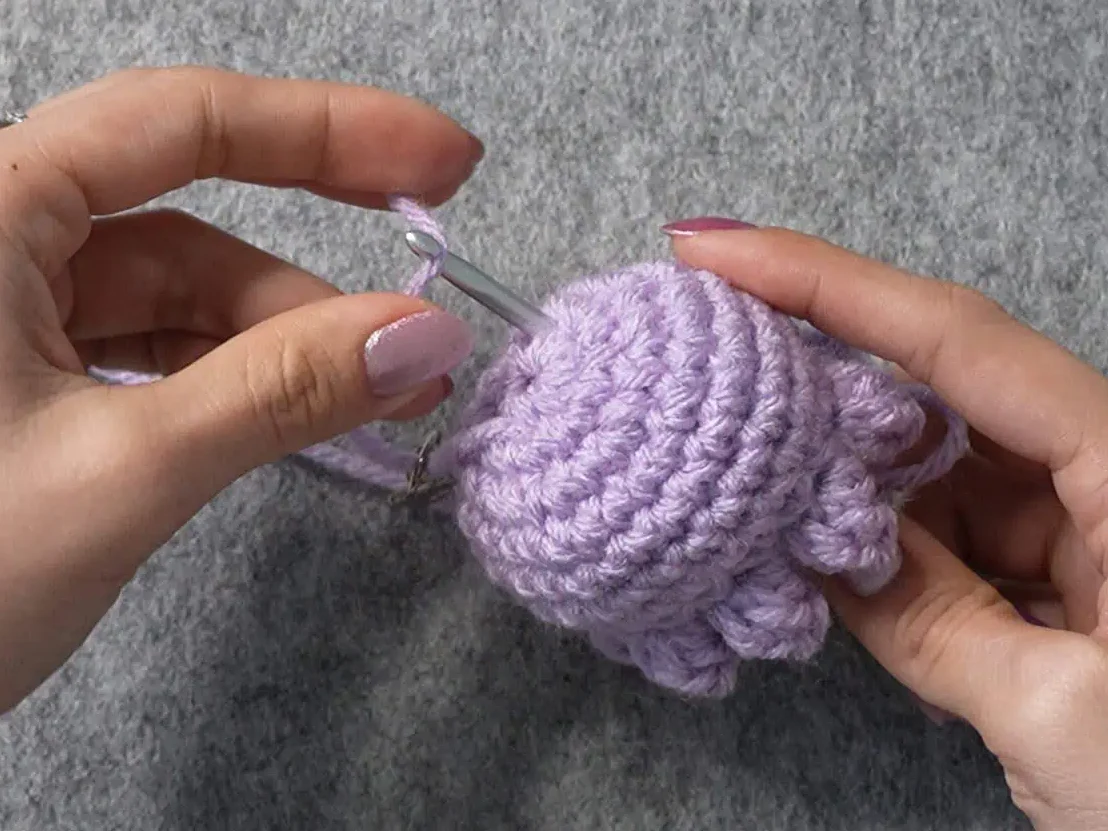
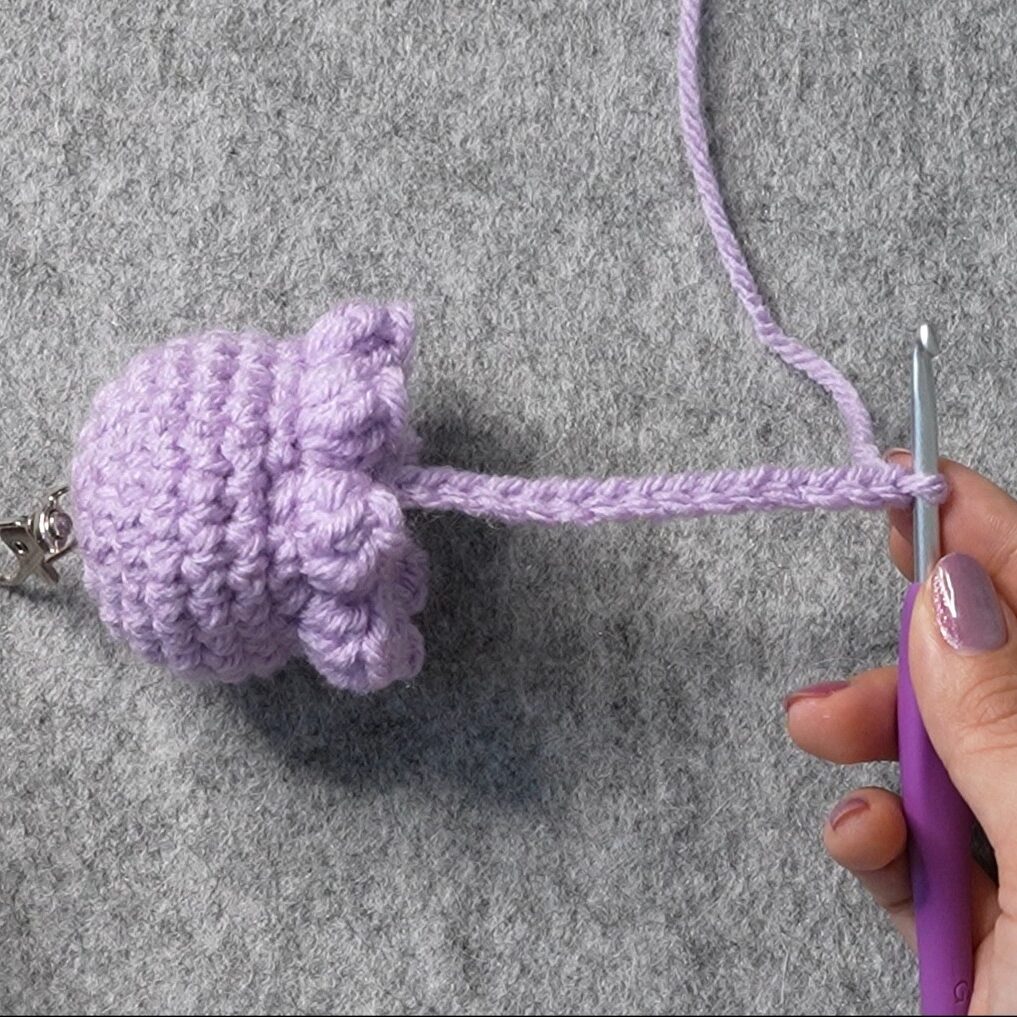
Tentacles
The steps for Round 10 will be broken down with images below.
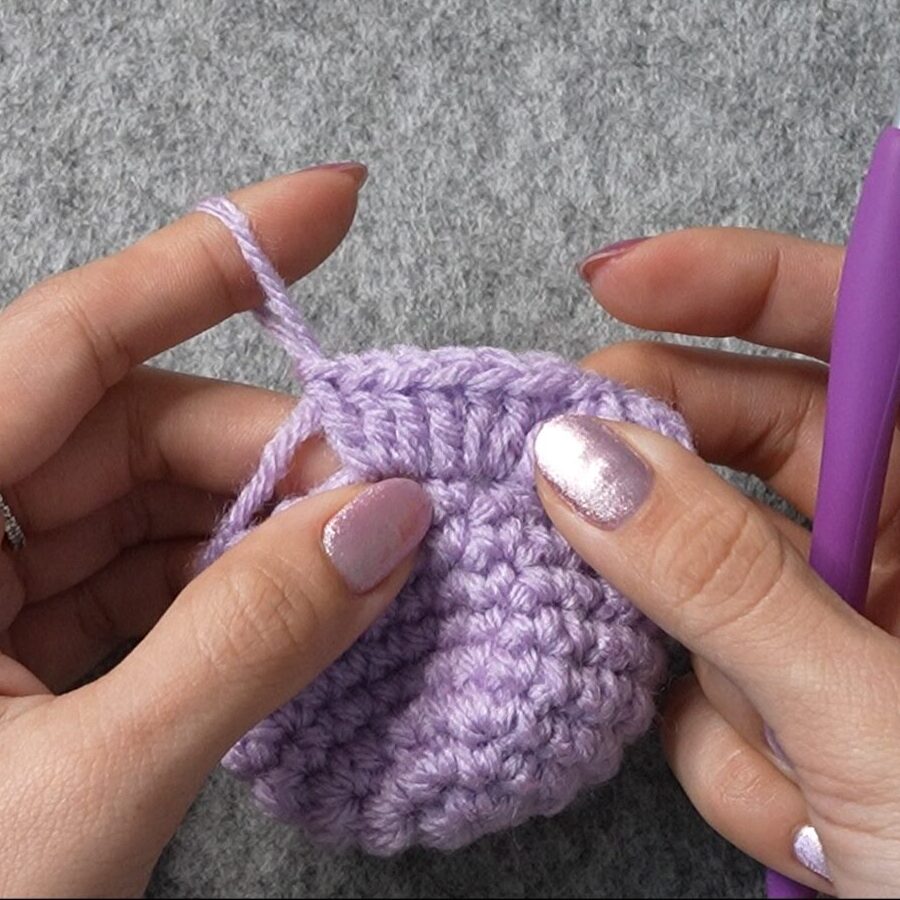
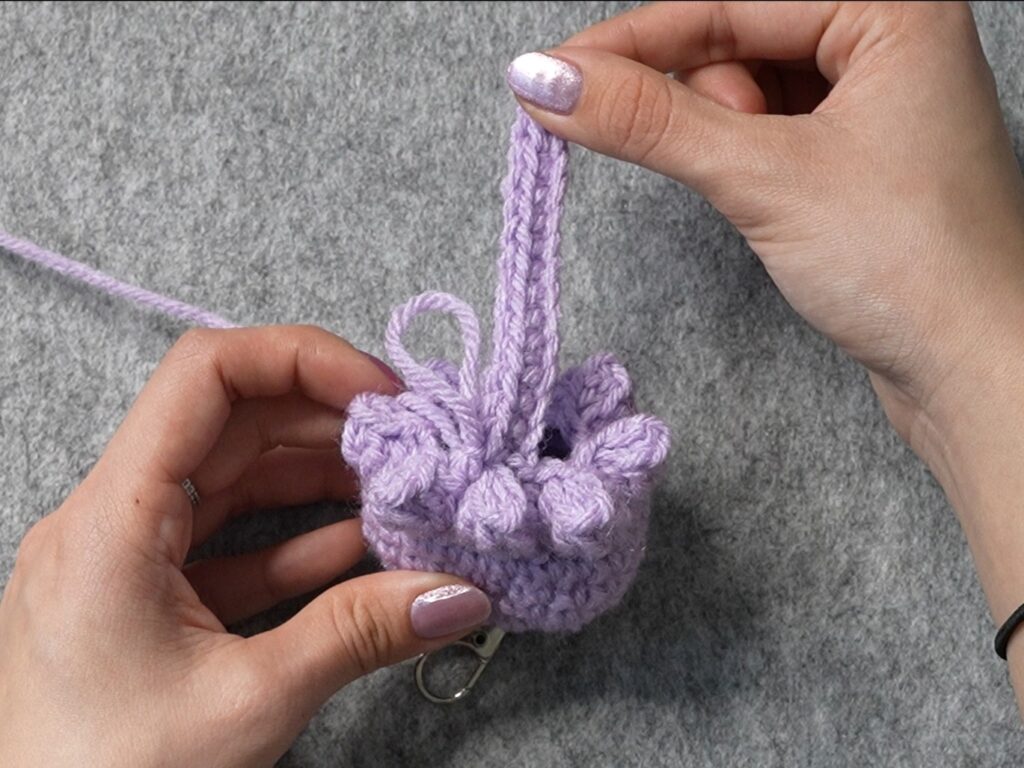
Round 10: rep{ch15, sc in 2nd ch from hook and each ch across, rep[sl st between next 2 PC] 2 times} 4 times around
1. ch15, sc in 2nd ch from hook and each ch across
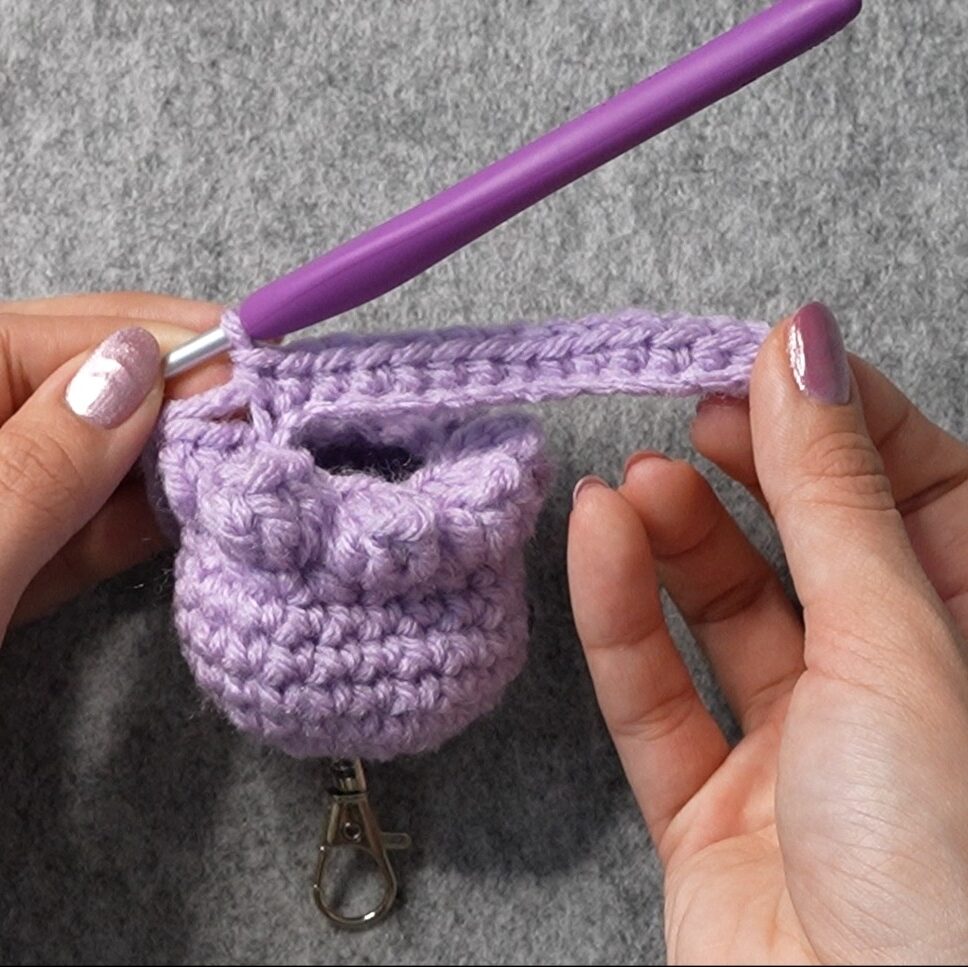
2. sl st between next 2 PC
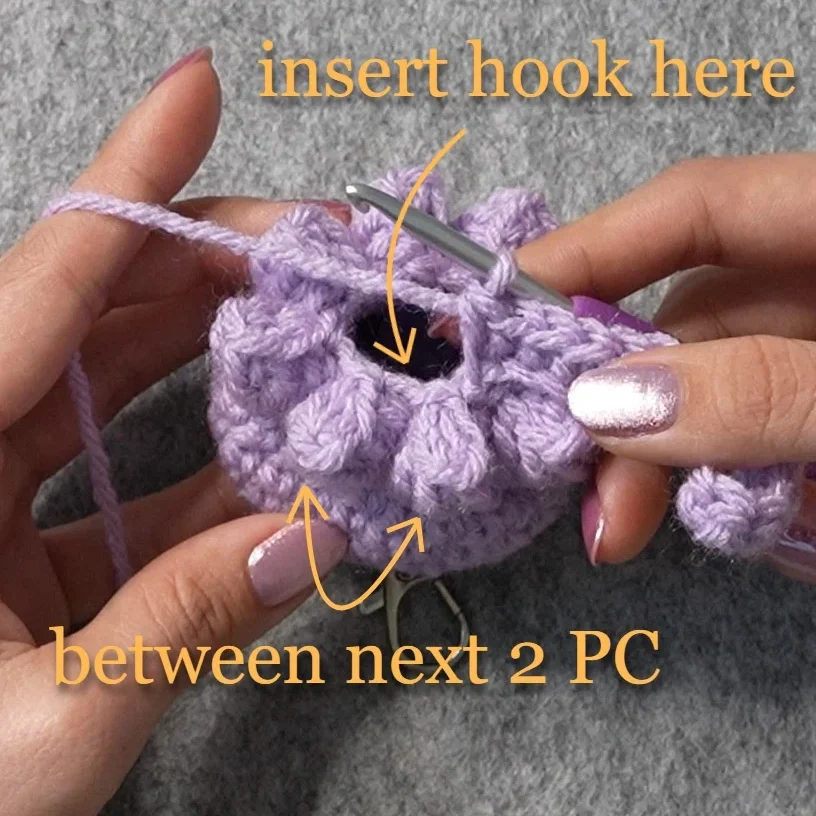

3. sl st between next 2 PC again
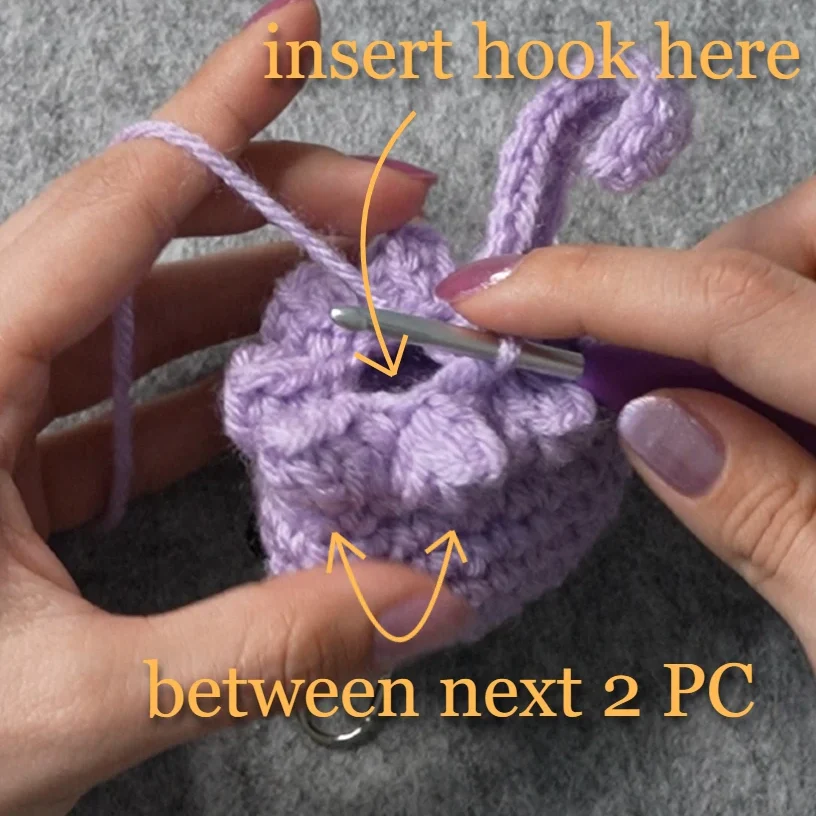
4. repeat around for 4 tentacles

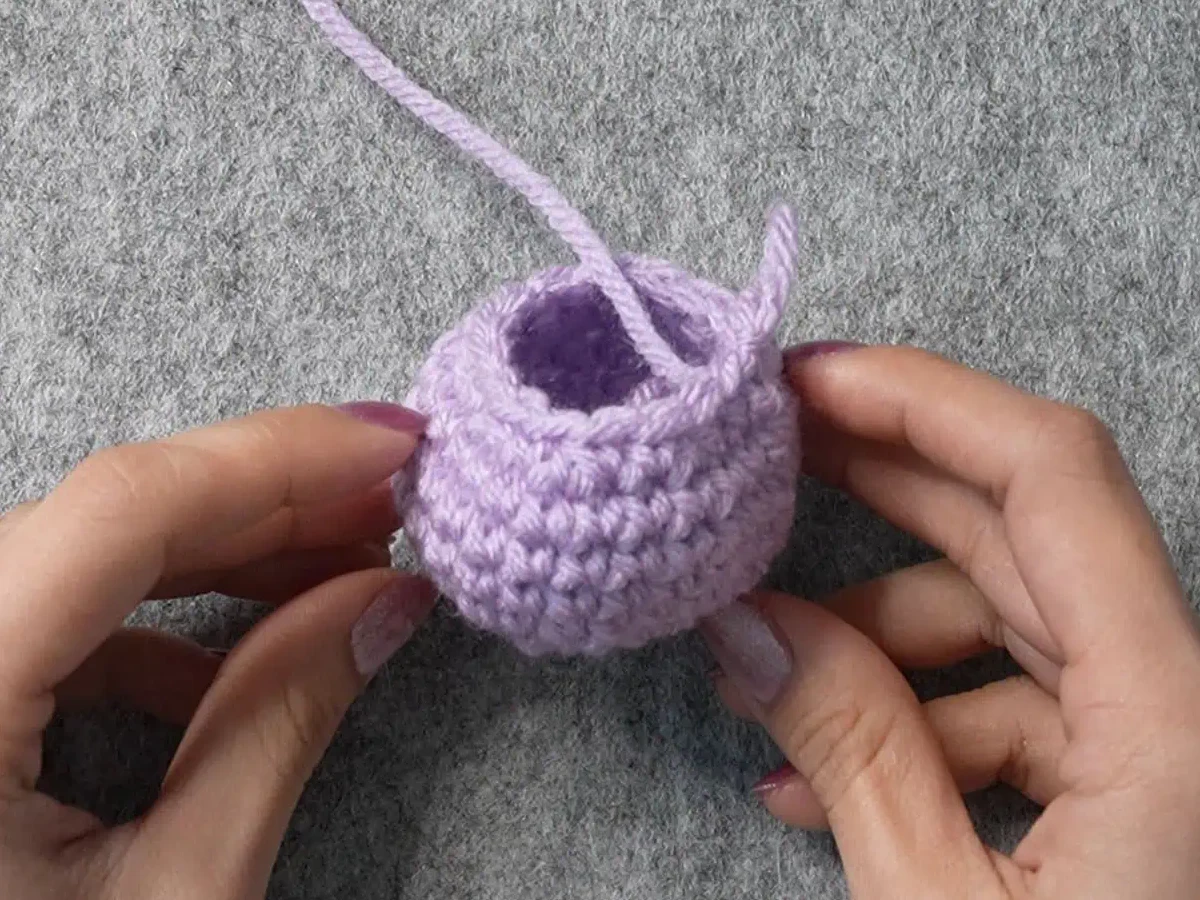
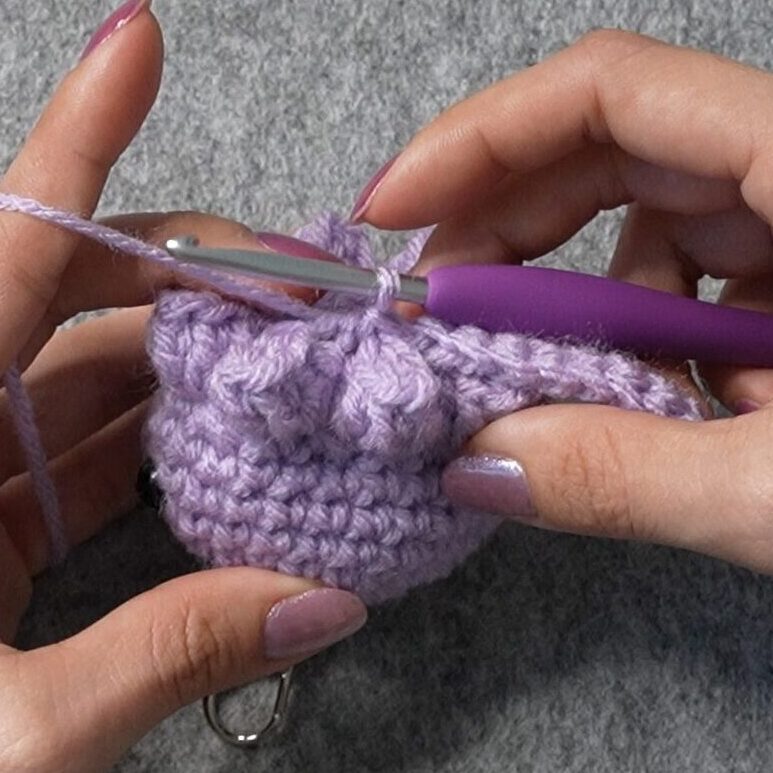
Finishing
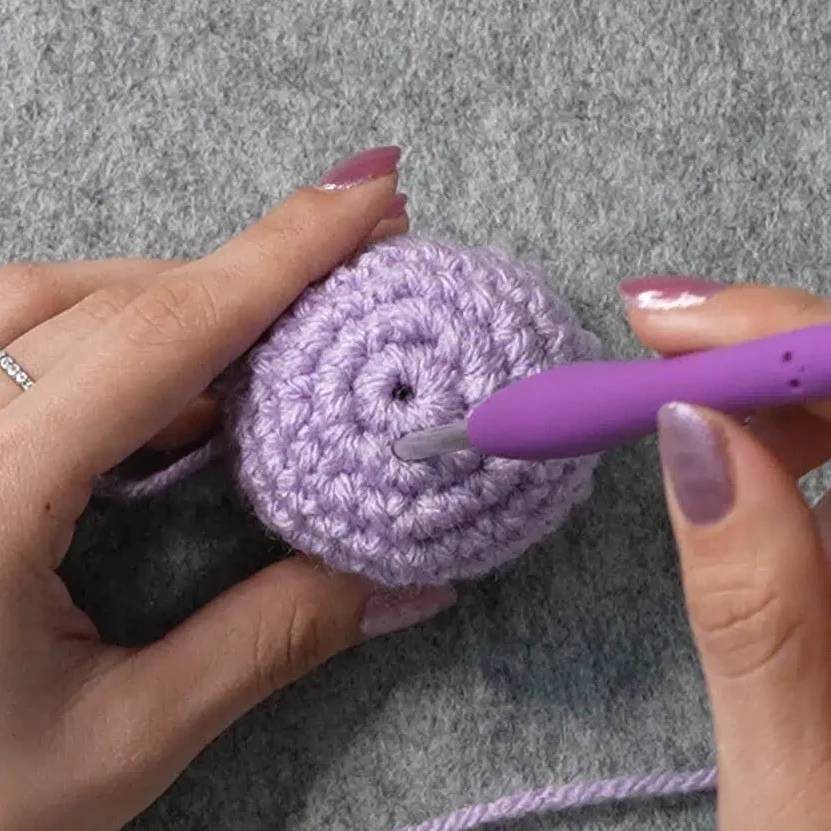
Stuff the jellyfish with fiberfill.
For Round 11, we will work into these four stitches in between each tentacle.
Round 11: ch1, sc2 in each st around, sl st, fasten off with a 4″/10cm tail (8)
With the tail threaded into a yarn needle, run the needle into the outer loop of each stitch of Round 11.
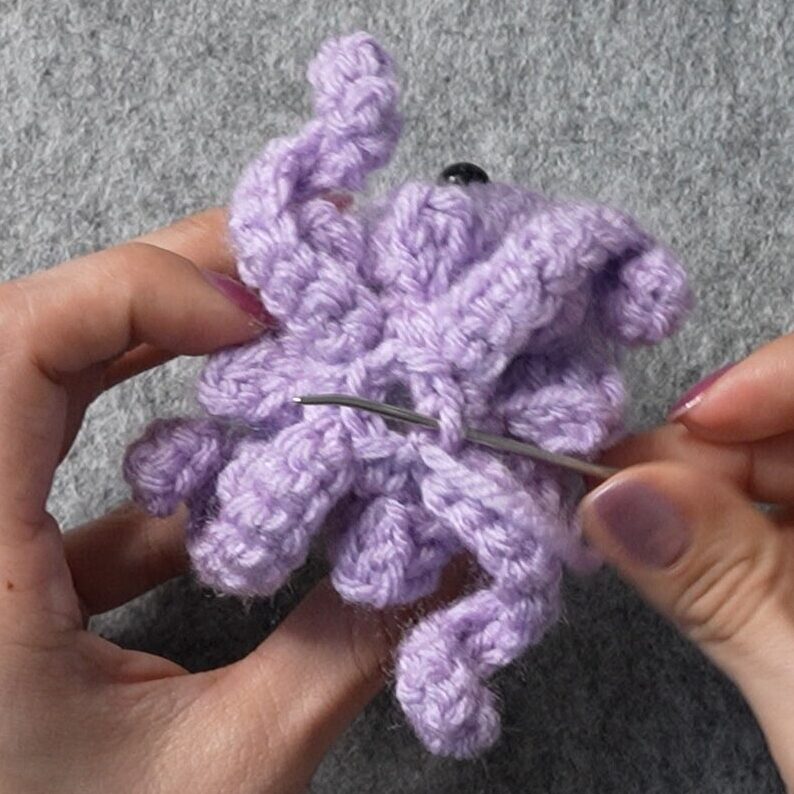
Cinch the hole closed, and tie a double knot.
Finished Crochet Jellyfish
Hide the loose end inside the head, and your crochet jellyfish is finished!