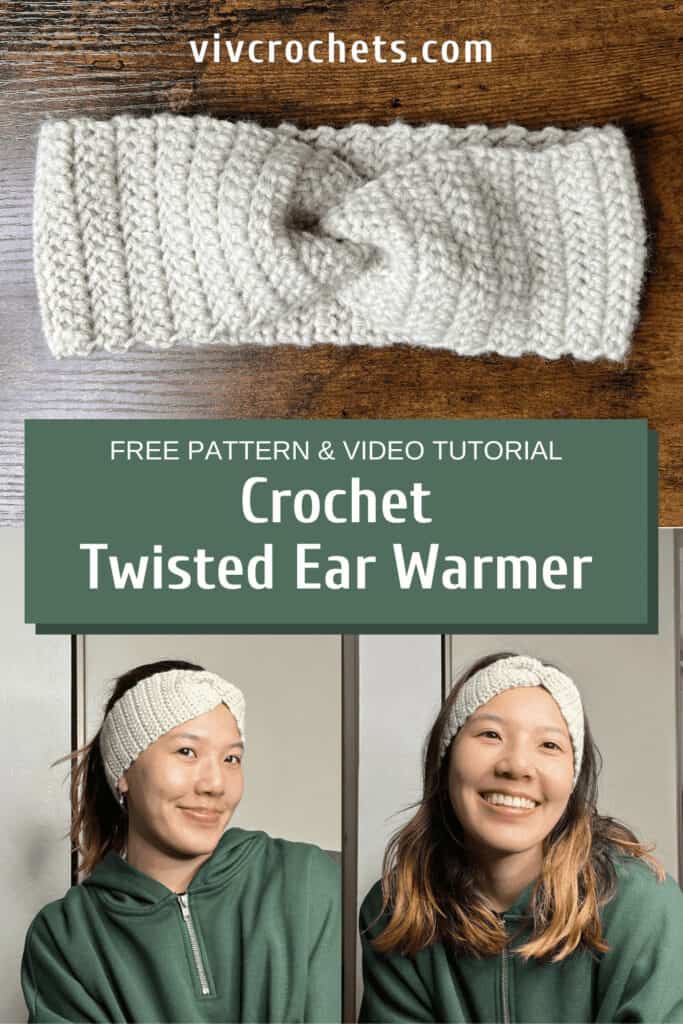
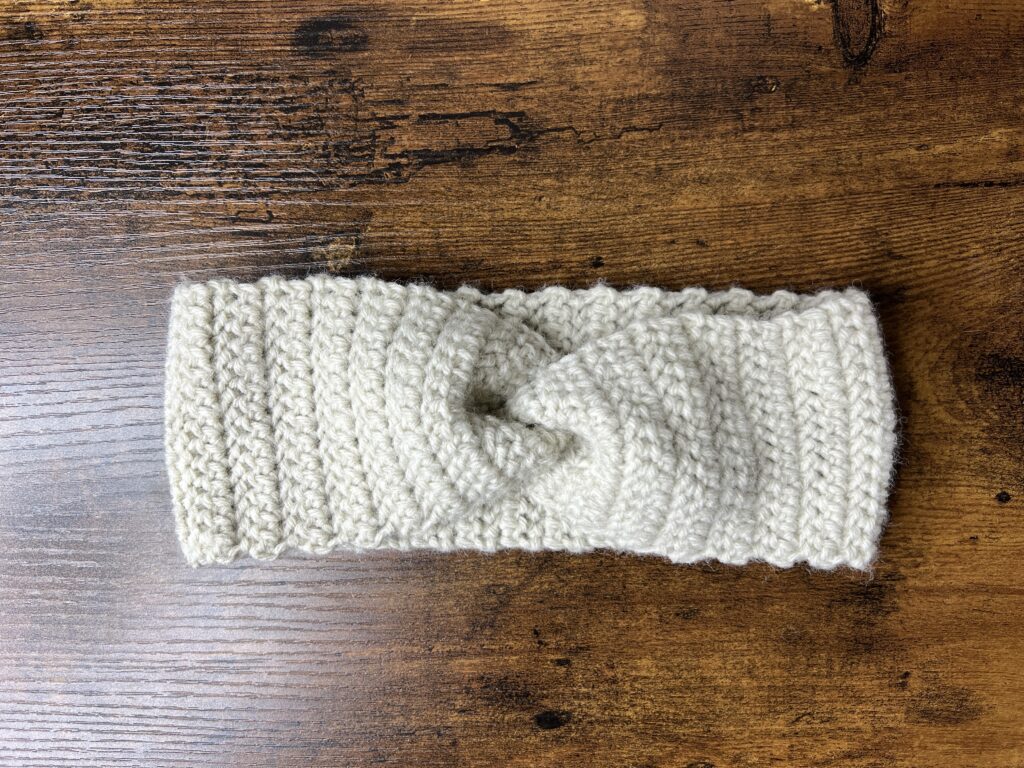
One Hour Crochet Twisted Ear Warmer | Free Pattern & Tutorial
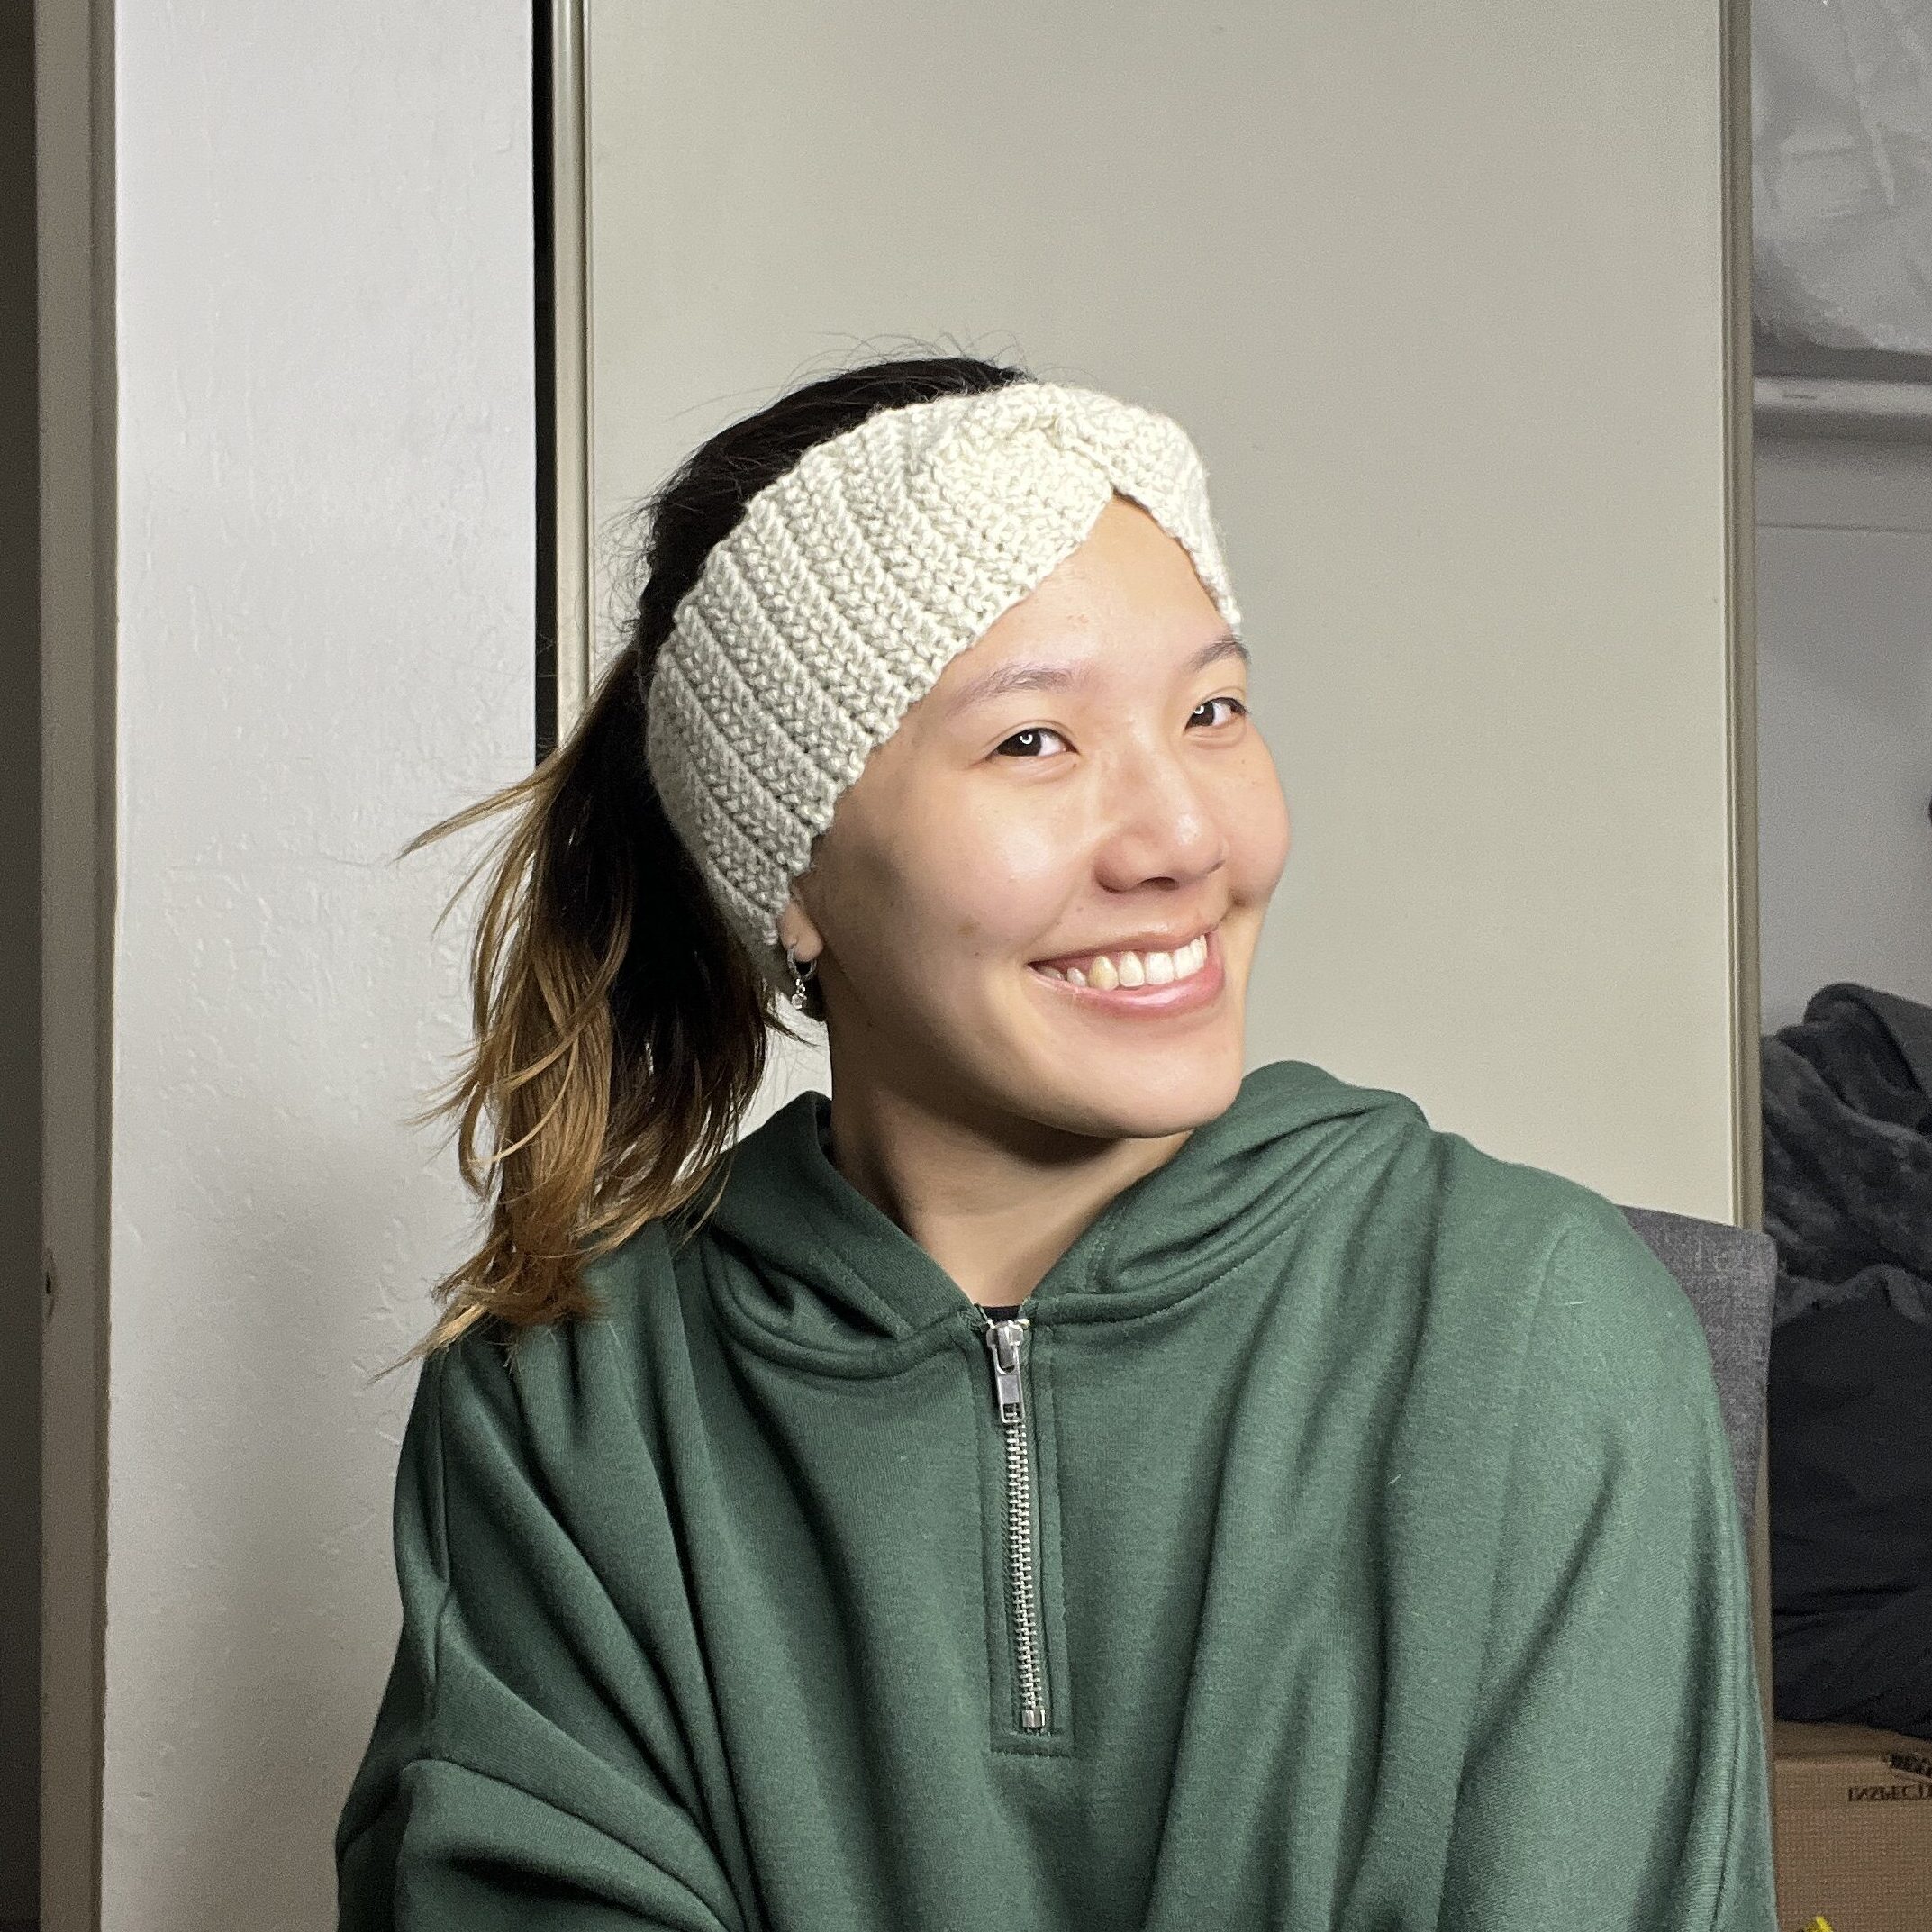
This simple, one hour crochet ear warmer is the perfect crochet accessory for the cold weather! It’s the perfect project for a beginner because it’s a small project, so it’s super quick to make, and it only uses a single stitch.
A crochet ear warmer might be the the best project for an absolute beginner because it’s such a small and simple project. Because it’s small, it can take less than an hour to make! I remember that, as a beginner, I would give up on projects that took too long. Since I was pretty much just practicing, I just needed to finish a project and practice crocheting along the way.
This crochet ear warmer only took me 30 grams of yarn, which was about 1/3 of the skein I bought. So, that means I can make 3 of these ear warmers from just one skein of yarn! I also remember being wary of the amount of yarn I bought and used. I didn’t want to invest too much time and money into something that I wasn’t sure that I liked and could do. That makes this a great first project because you don’t have to invest too much into it!
It’s also very simple, in that this pattern only uses one stitch throughout the whole project. I would classify this project as repetitive because each row is the exact same. This makes it easy to practice one stitch and make sure your rows are even, which is super important to practice as a beginner.
The one part of this pattern that may be slightly more difficult for beginners is the folding and sewing part. That is why, in both the video tutorial and written pattern, I make that part very thorough. In the video tutorial, I go very slow and walk you through each step. For this written pattern, I have included a bunch of photos going through each movement to make when you fold the ear warmer. I’ve tried my best to make this as clear and easy to follow as possible, so hopefully you find it to be just that!
Why Widthwise Instead of Lengthwise?
This pattern is worked in short rows instead of long rows so that it is stretches better. You typically want the ear warmer to snugly wrap around your head rather than hang on loosely.
It also solves a big issue with working lengthwise: the foundation chain does not stretch. So unless you make foundation half double crochets, the bottom of your ear warmer will be tight and end up smaller than the top!
Lastly, it’s much easier to adjust the sizing if you get it wrong the first time! Since the size changes every time you remove or add a row, you can choose the size at the very end of the project instead of in the beginning. Rather than frog your project all the way back to your starting chain, you can just undo a row or add a row to make it tighter or looser!


Yarn Alternative
For this tutorial, I used Wool Ease yarn, but you can pretty much substitute any yarn for this pattern. Just make sure that you do the proper amount of stitches and rows for the size of your yarn!
For example, I crocheted this ear warmer with Loops & Threads Impeccable Yarn, which is slightly thicker than the Wool Ease yarn. Since it is thicker, I needed to do less stitches and less rows to get the same size. I crocheted 13 herringbone half double crochets for 62 rows.
Pin this for later!
Video Tutorial
You can follow along with my YouTube video to crochet a twisted ear warmer headband! I have timestamps included to section the video and help you jump to any point you need to!
This post may contain affiliate links. I may earn a small commission on qualifying purchases at no additional cost to you!
Materials
- 30 grams of Lion Brand’s Wool Ease yarn in “Natural Heather”
- 5mm Clover Amour crochet hook
- Scissors
- Yarn needle
Dimensions
8.5 cm wide x 48 cm long rectangle before sewing
Gauge
14 rows of 20 herringbone half double crochets makes a 10 x 10cm square
Notes and Tips
- This pattern is written using US crochet terms
- The chain 1 at the beginning of each round does NOT count as a herringbone half double crochet
- Make sure that every row has the same number of stitches for a straight edge
Abbreviations
ch = chain
hhdc = herringbone half double crochet
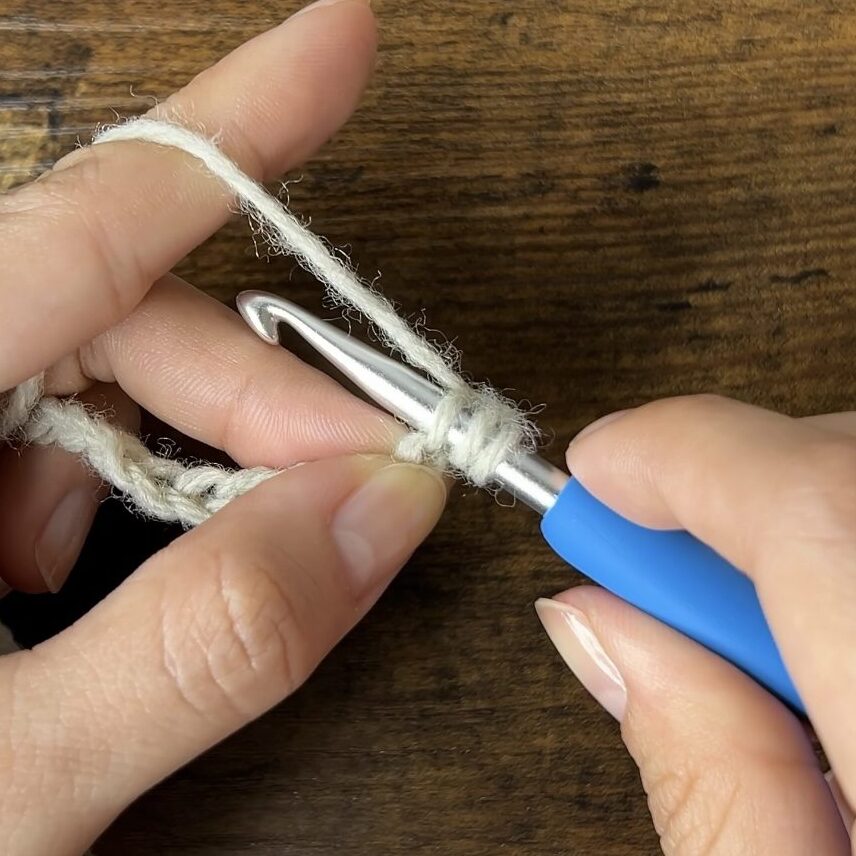
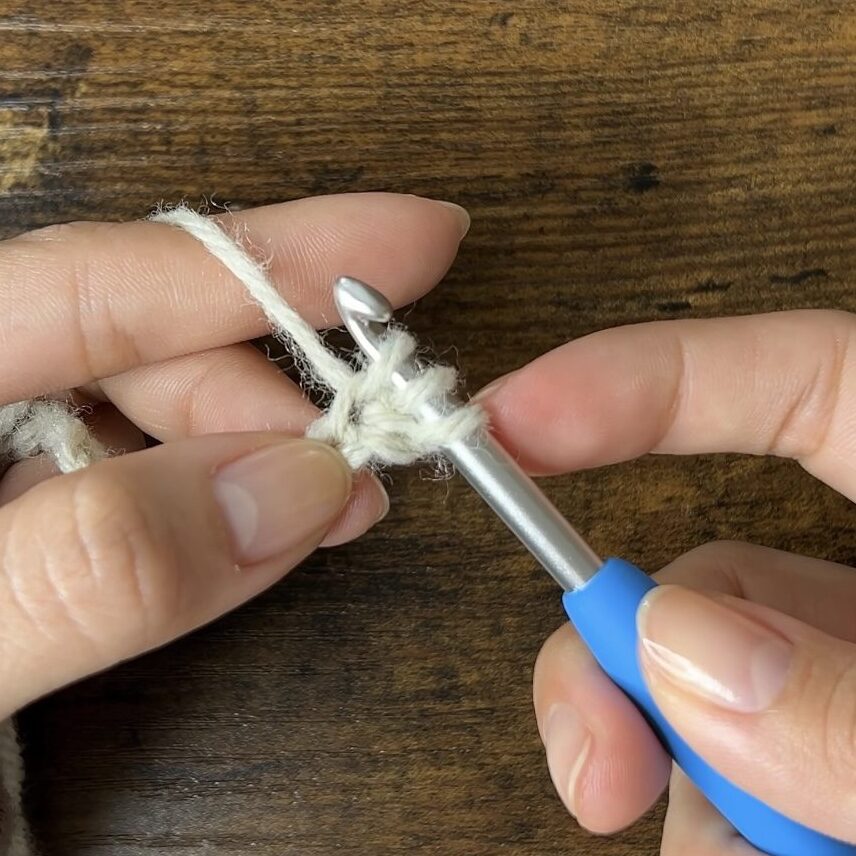
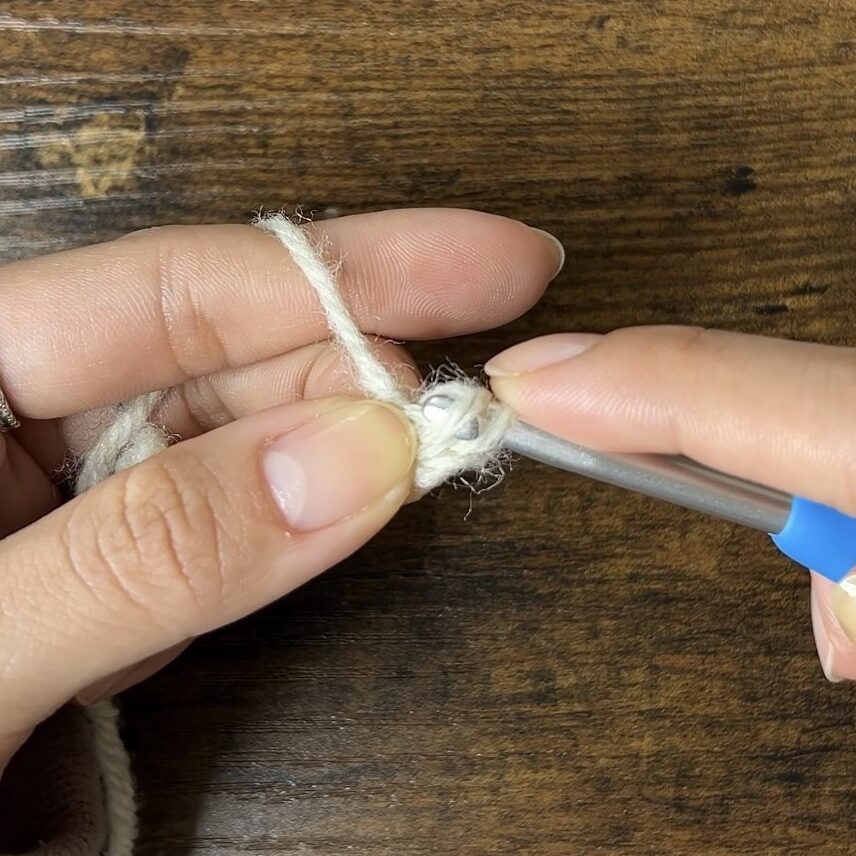
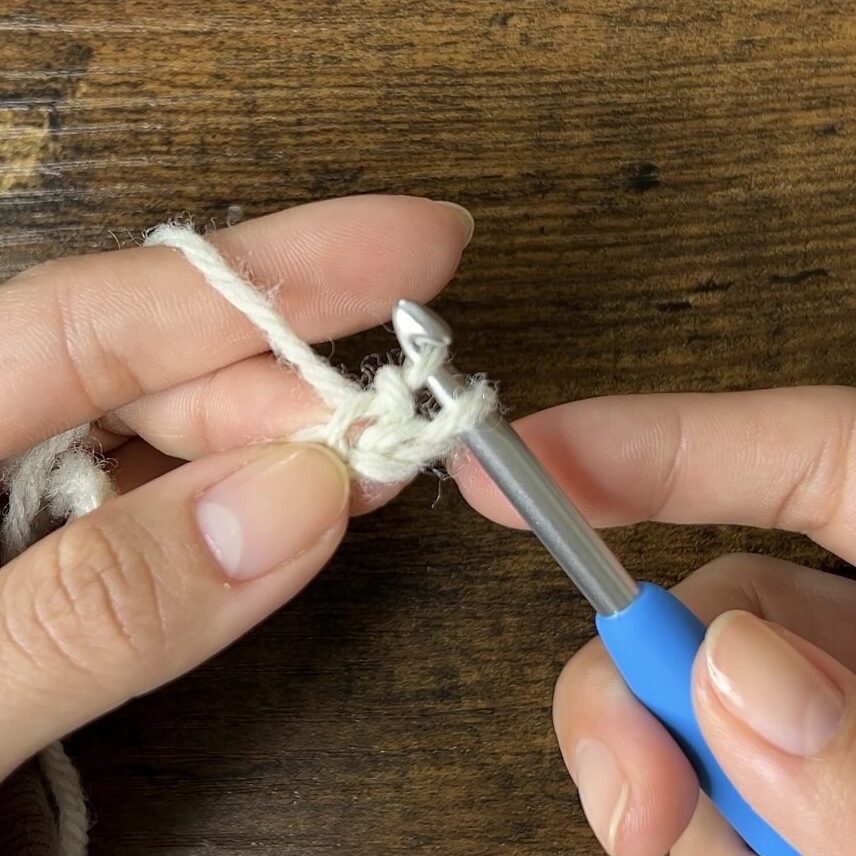
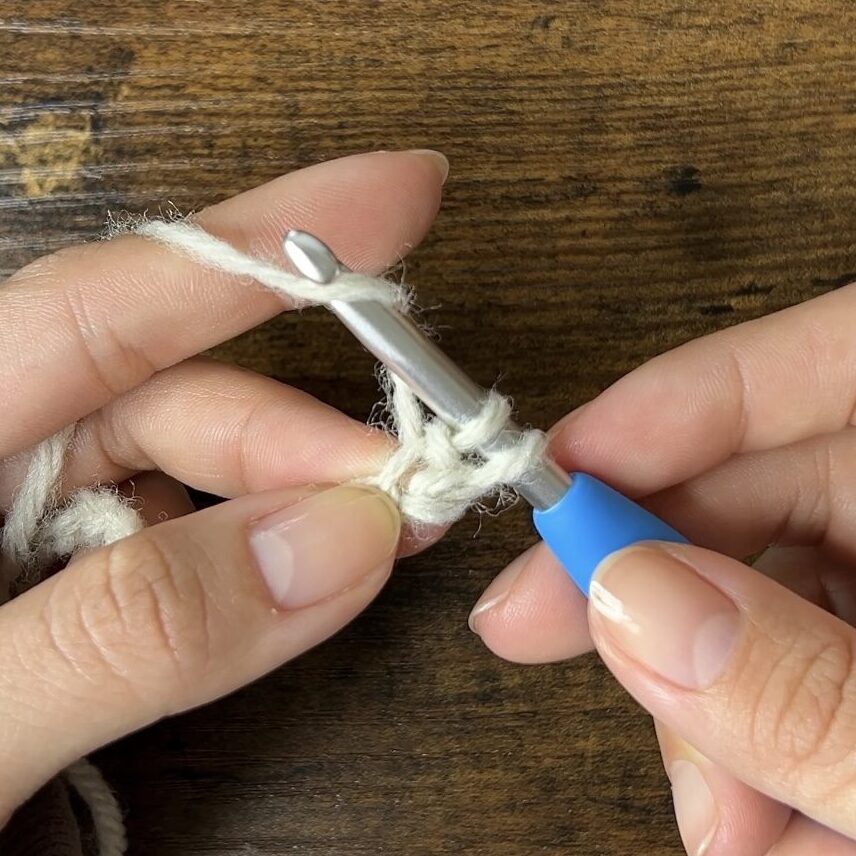
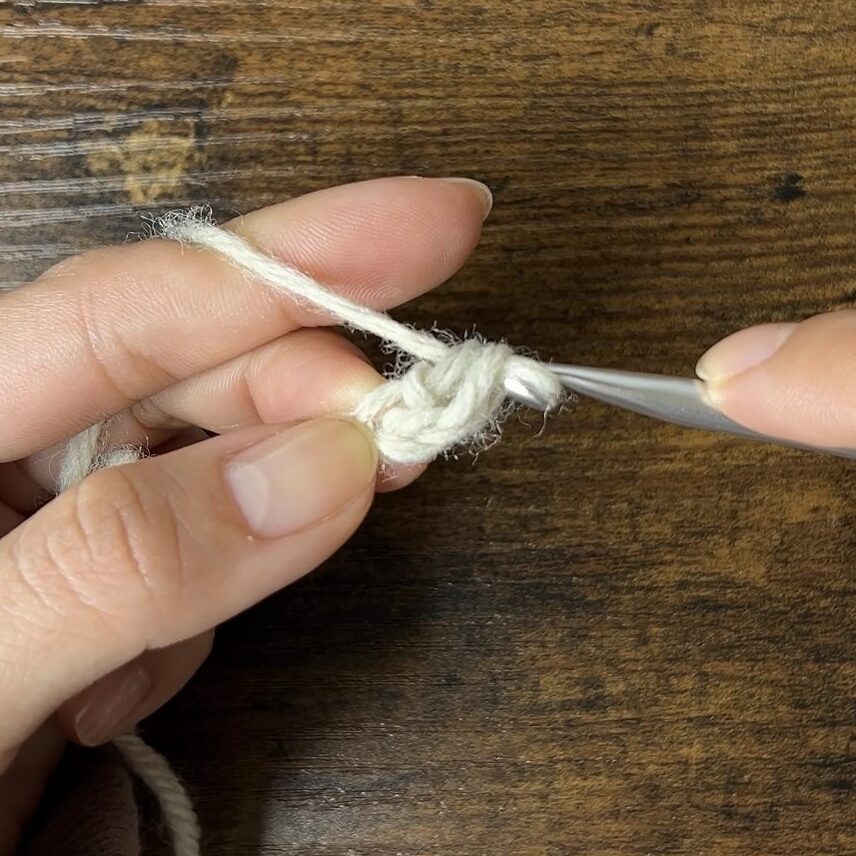
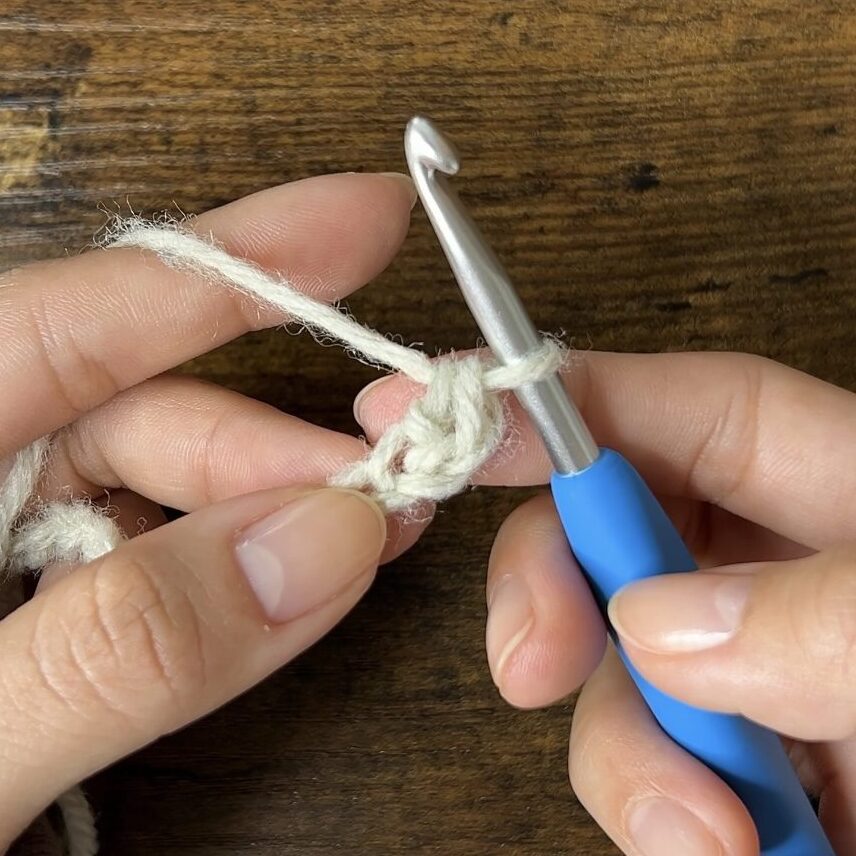
How to Crochet the Herringbone Half Double Crochet Stitch
Follow the steps in the images below to make a herringbone half double crochet. Check out this page for a more in-depth guide to this stitch!


Make a Rectangle
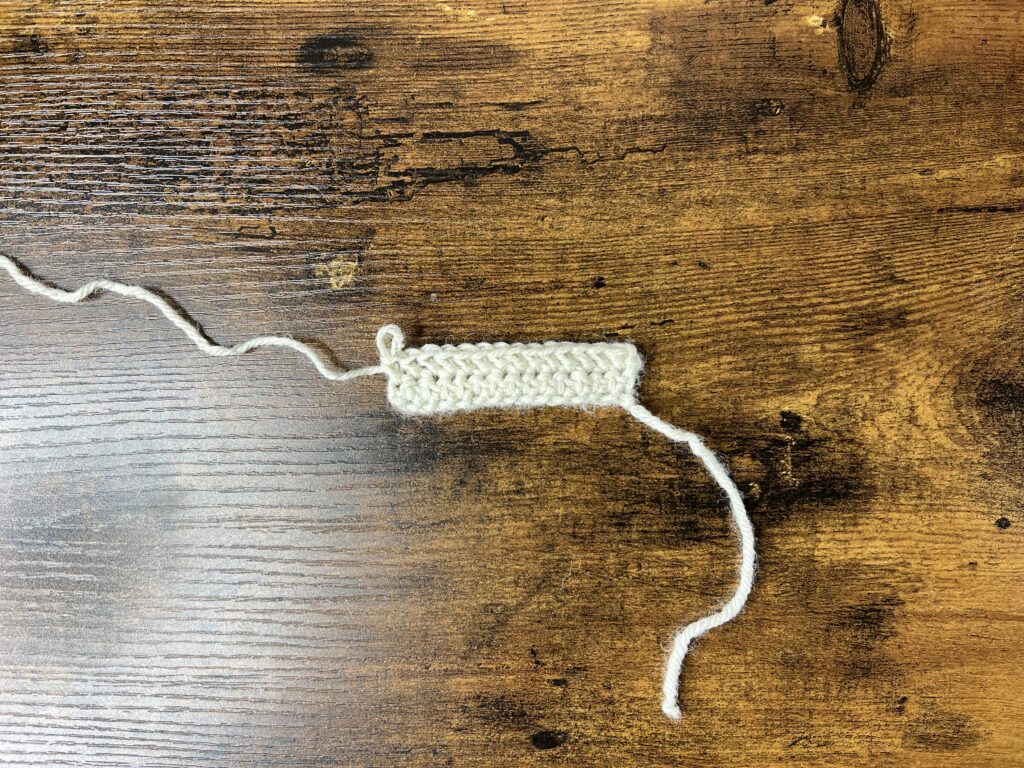
Foundation: Make a slipknot, ch15 (or however long for width of headband)
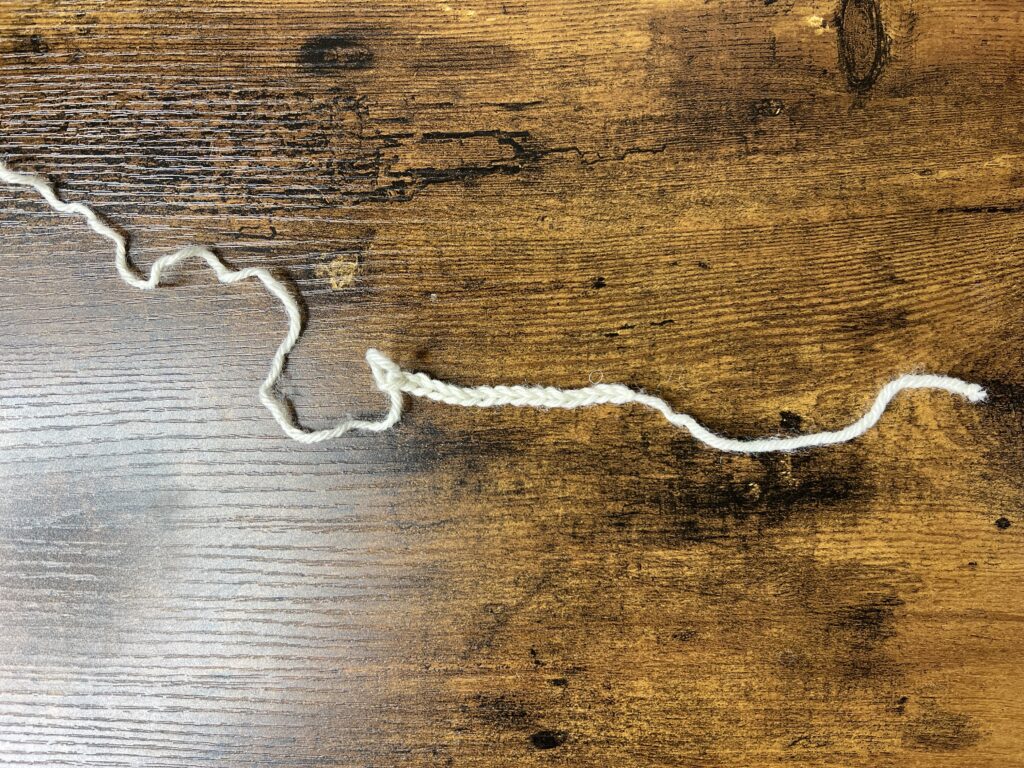
Row 1: hhdc14 starting in 2nd ch from hook
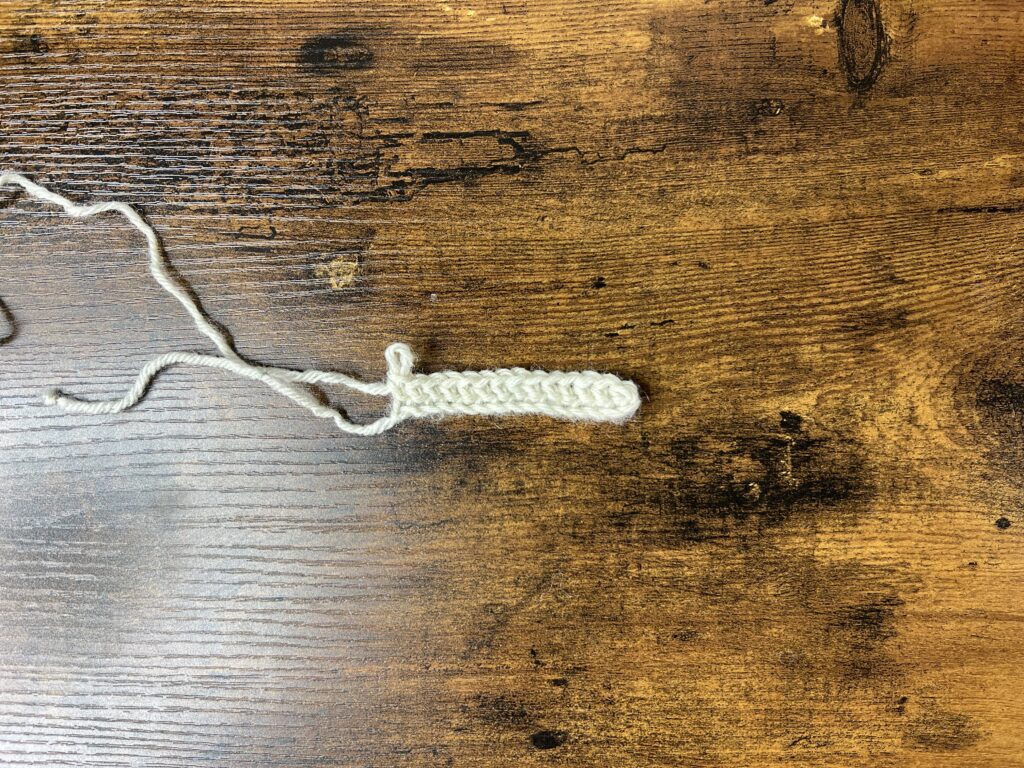
Learn how to crochet the herringbone half double crochet!
Note: If you prefer to use a different stitch, such as a regular half double crochet or single crochet, you can simply use that instead of the herringbone half double crochet!
Row 2 – 66: ch1, turn, hhdc14
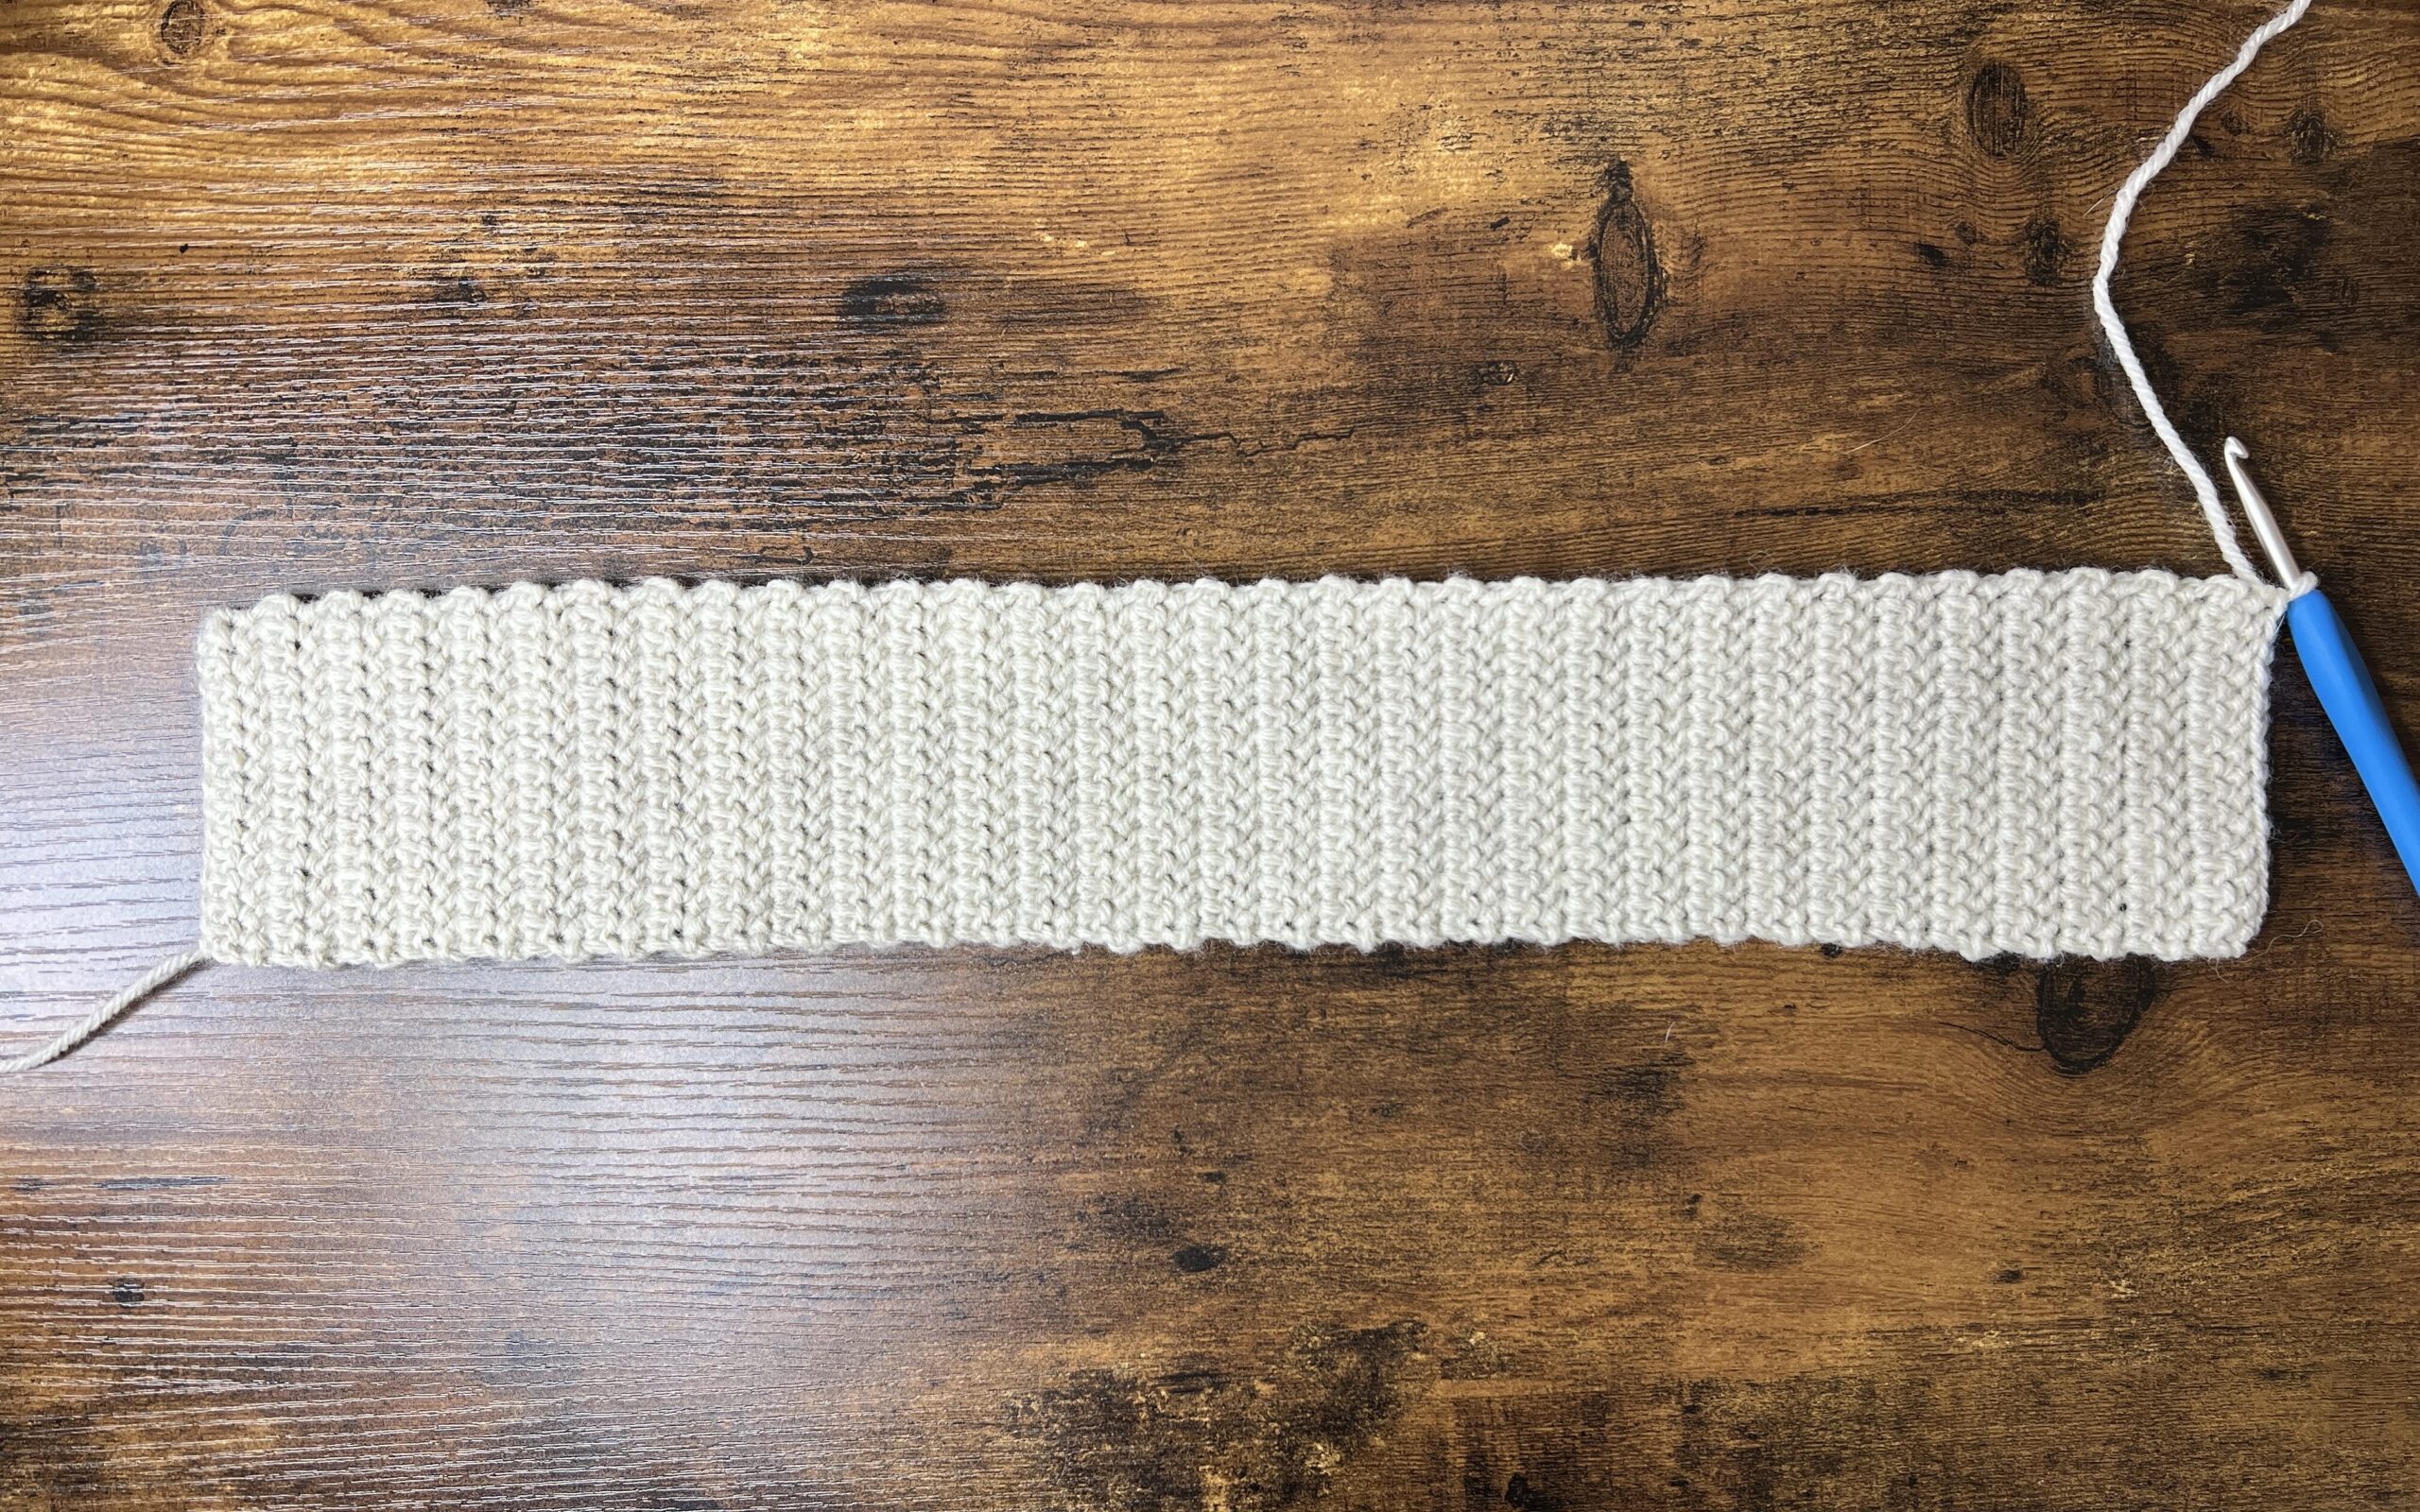
Fasten off, leaving a long tail end for sewing.
Form the Twist
Now, we’re going to connect the ends of the rectangle and form the twist.
1. With the right side facing up, grab the ends of the rectangle.
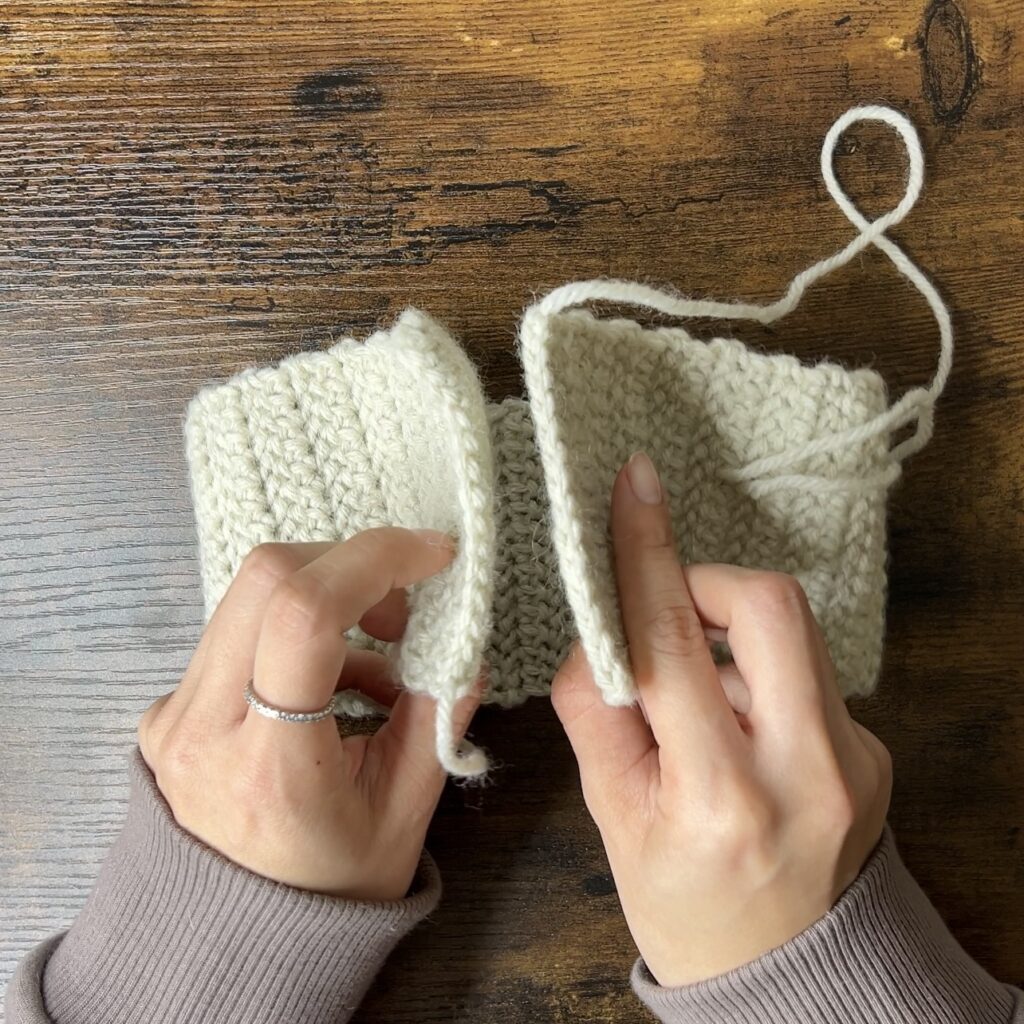
2. Then, stagger the left end halfway down the other like in the image below.
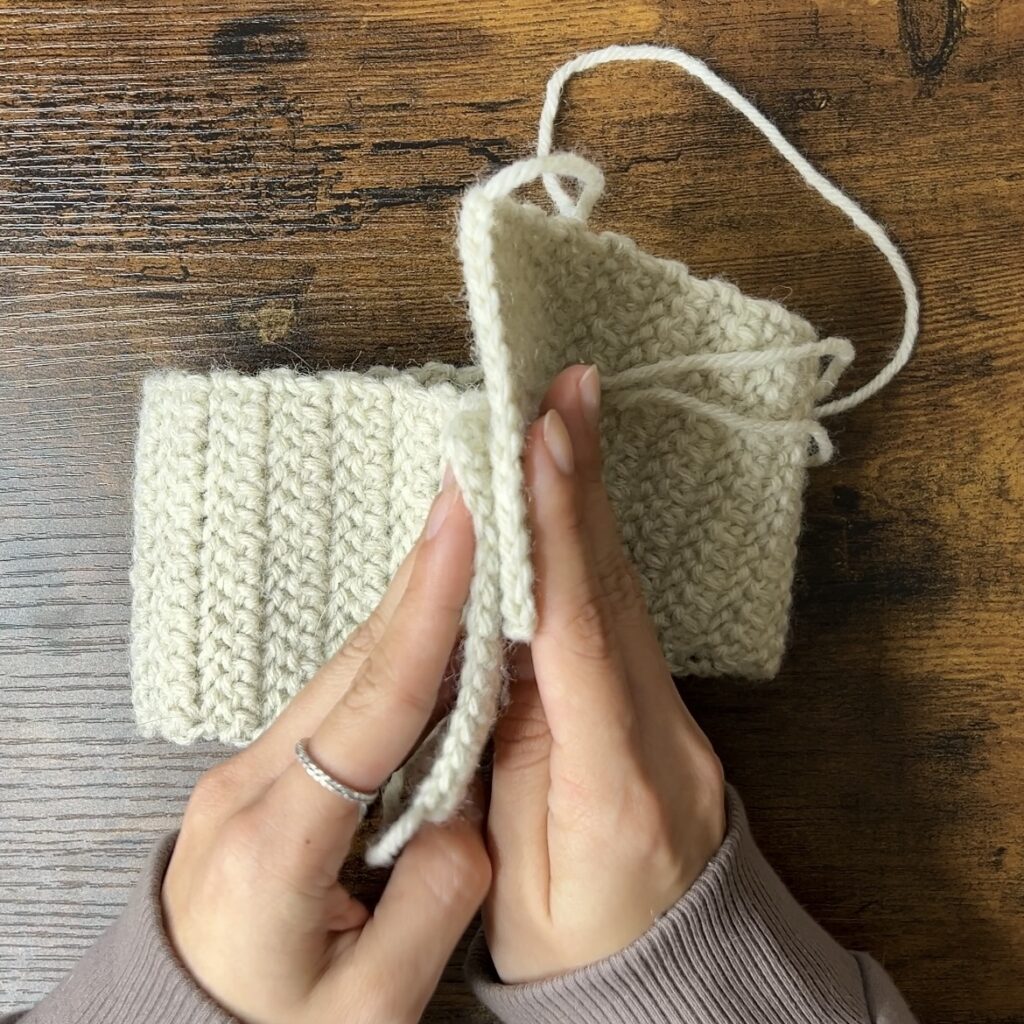
3. Fold the right end in half, over the left end.

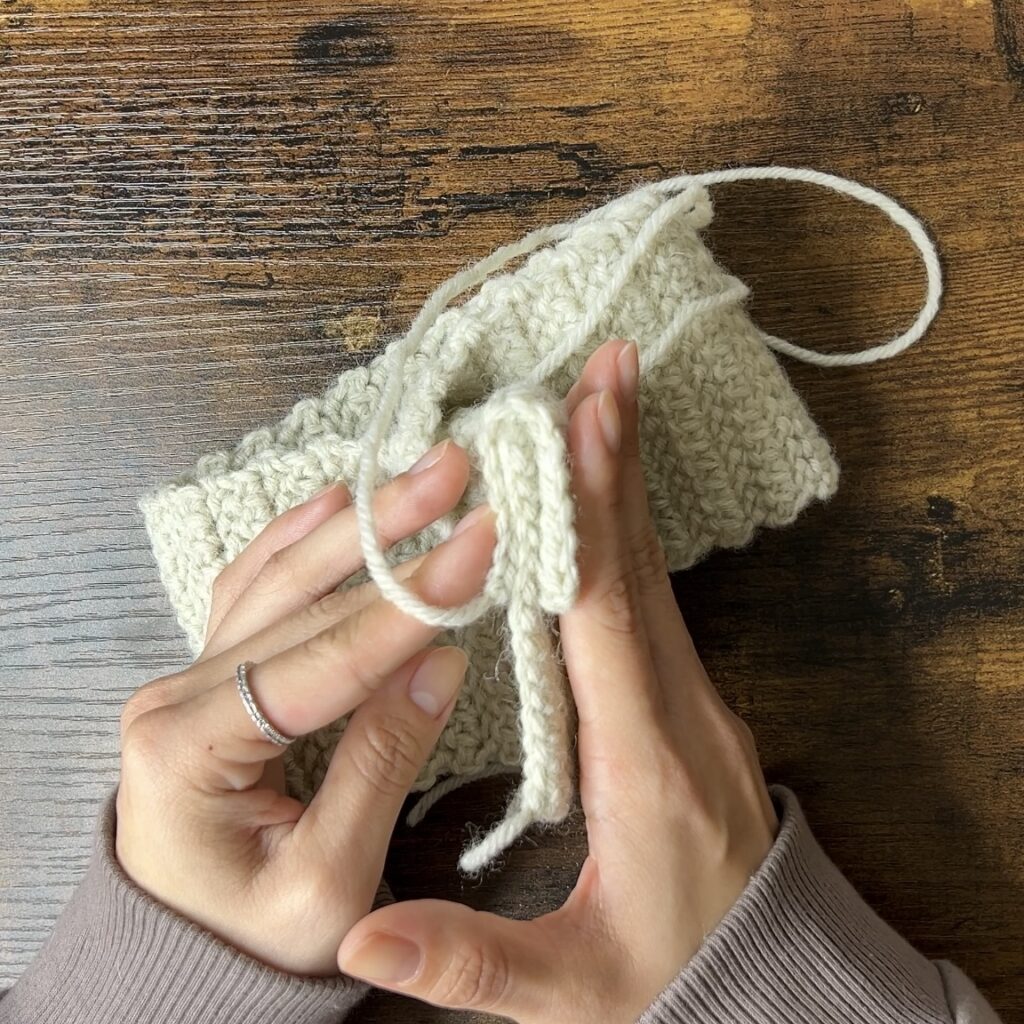
4. Fold the left end in half, over the right end.
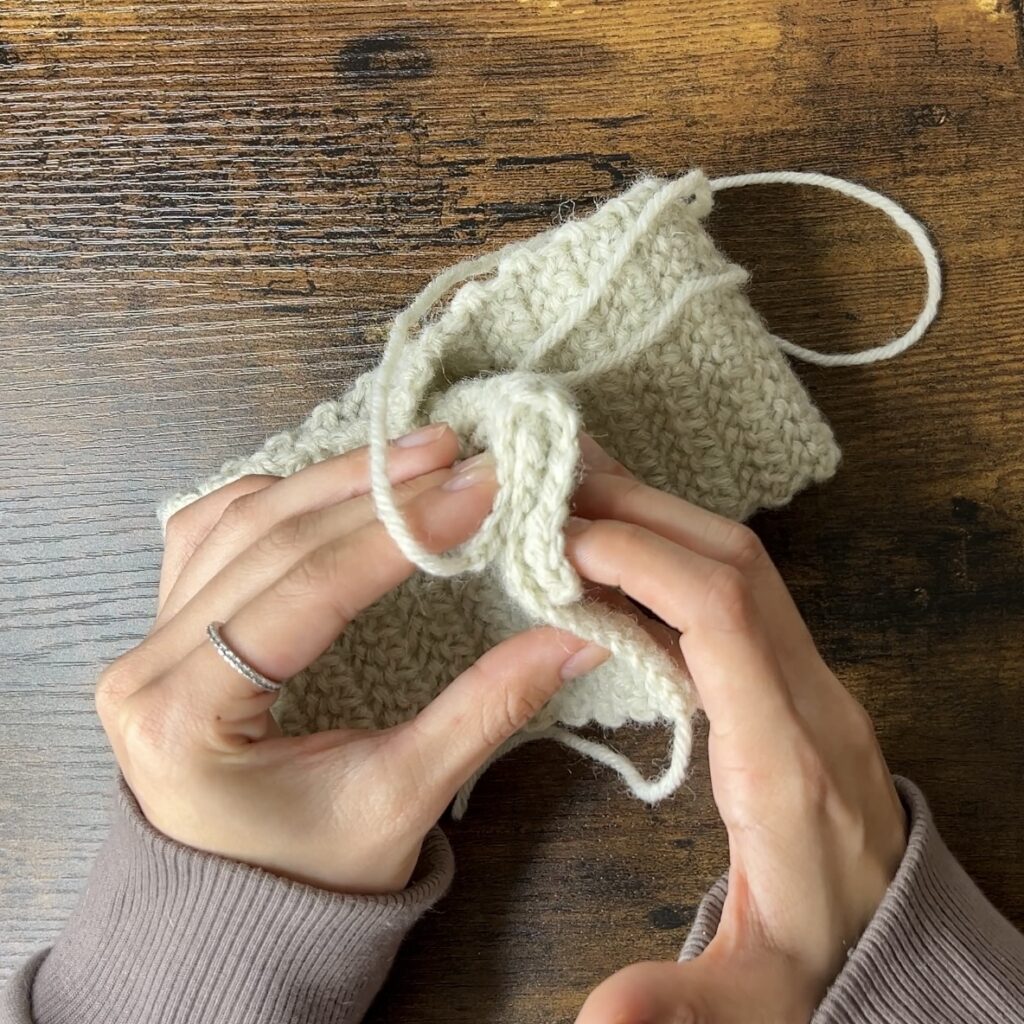
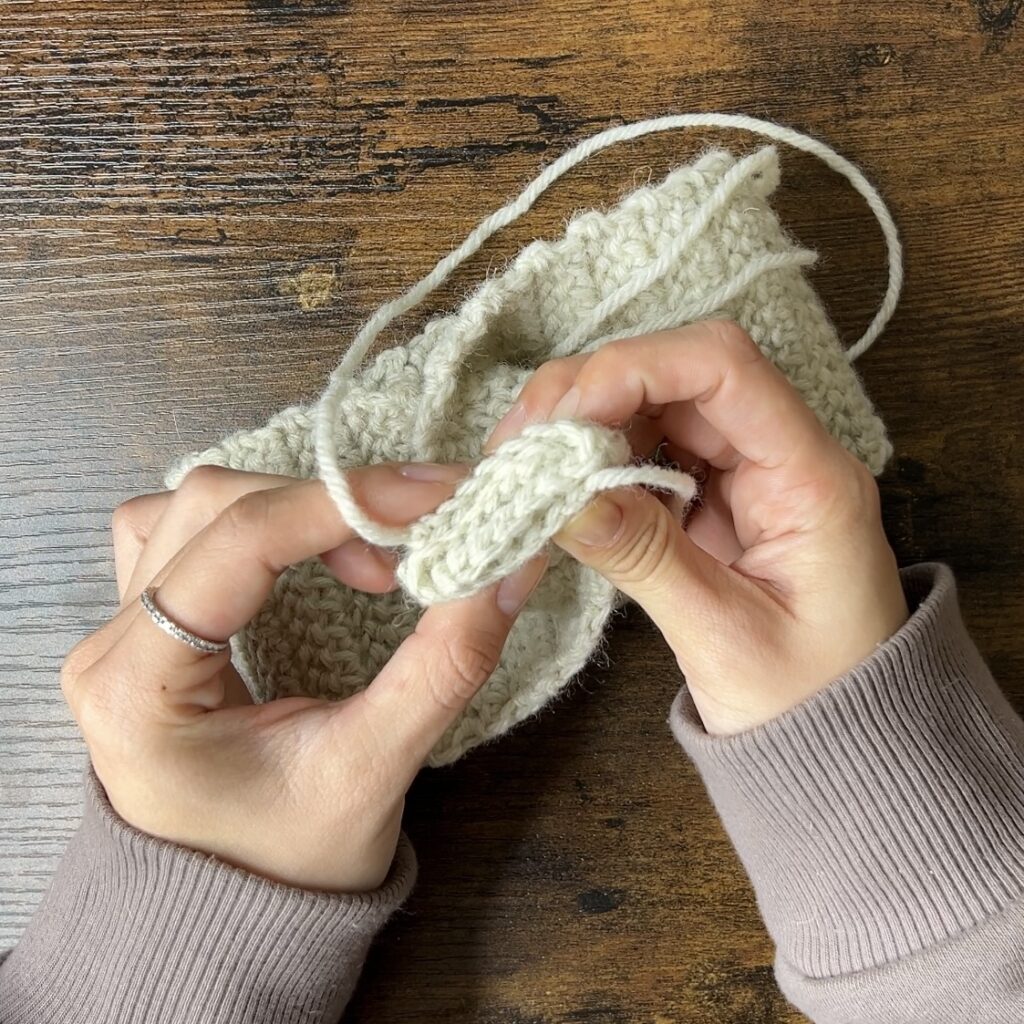
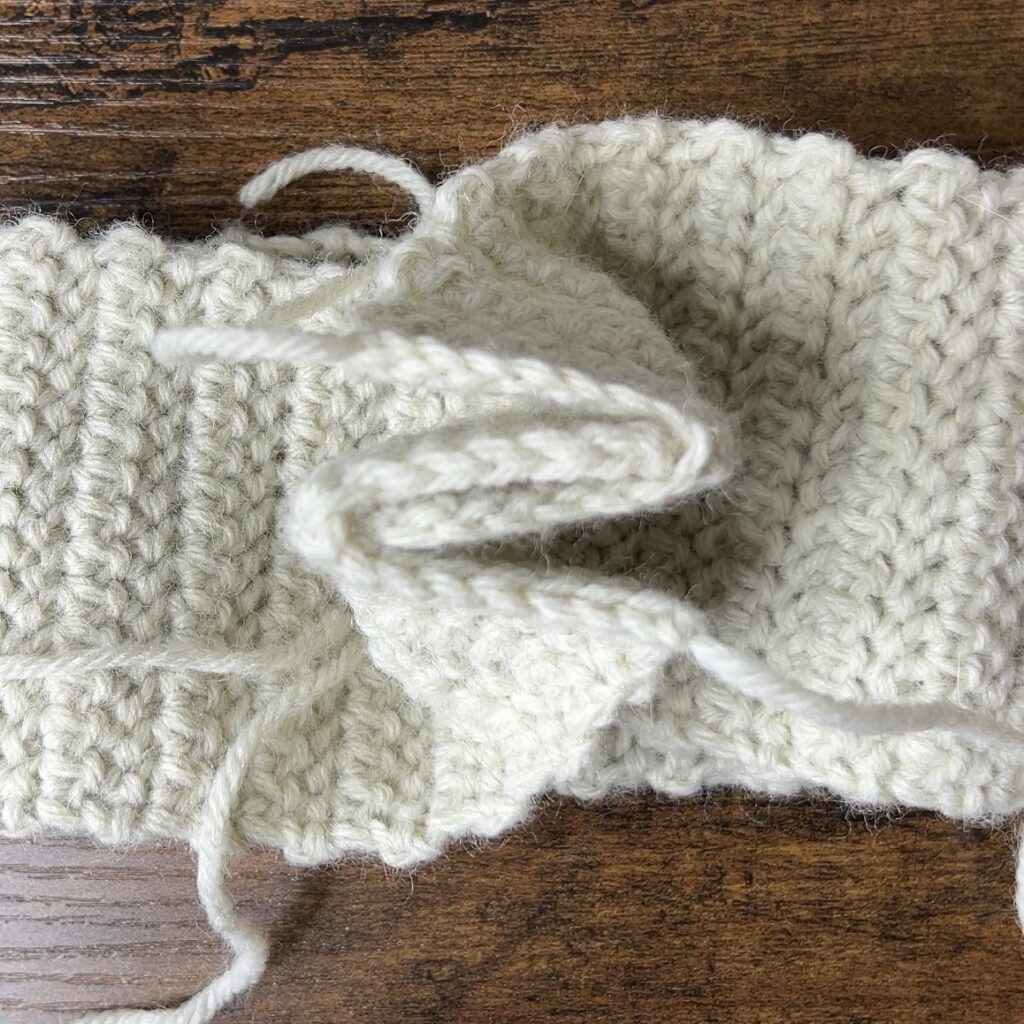
5. Now, the ends should be interlocked like this.
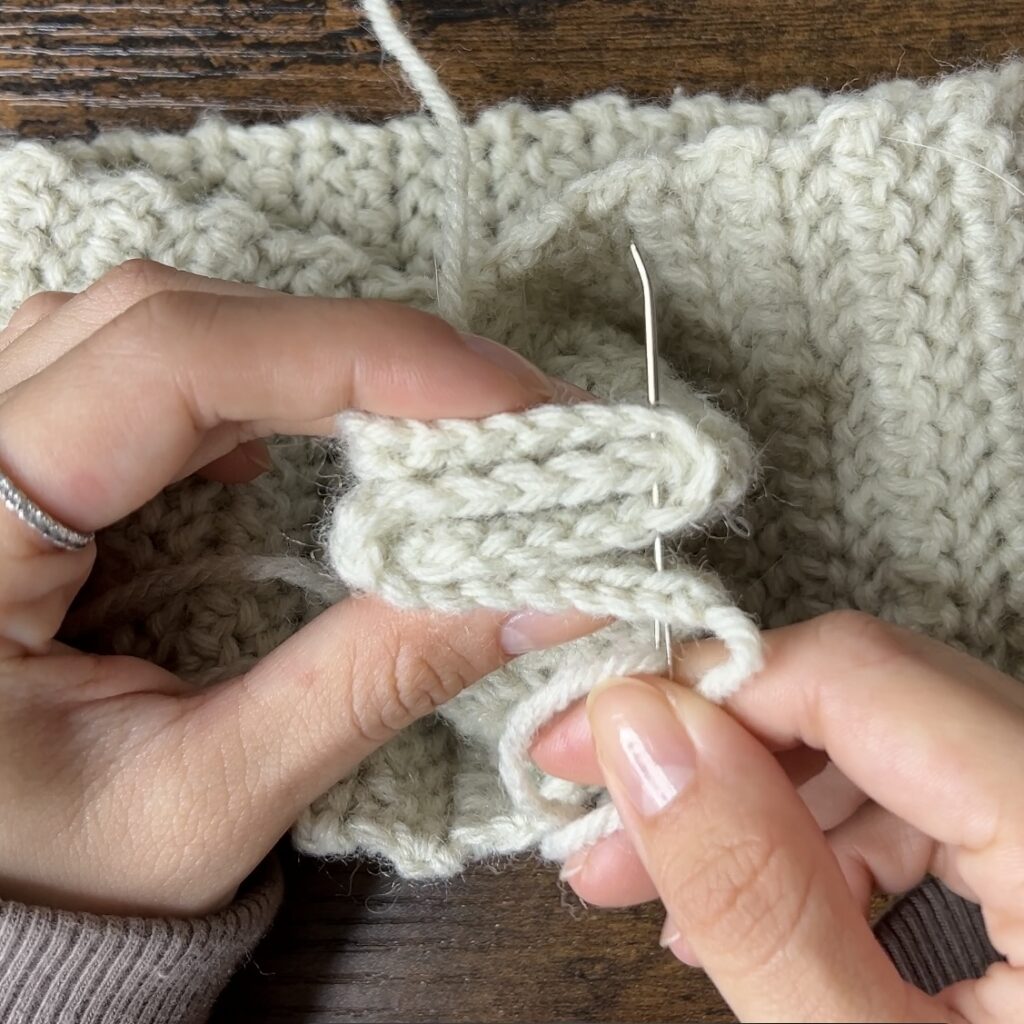
6. Thread the long tail end into your yarn needle and turn your work so you can sew right to left. Insert your needle through all 4 layers on the edge of the right side and pull the yarn through.
7. Insert your needle slightly to the left and back through all 4 layers and pull your yarn through.
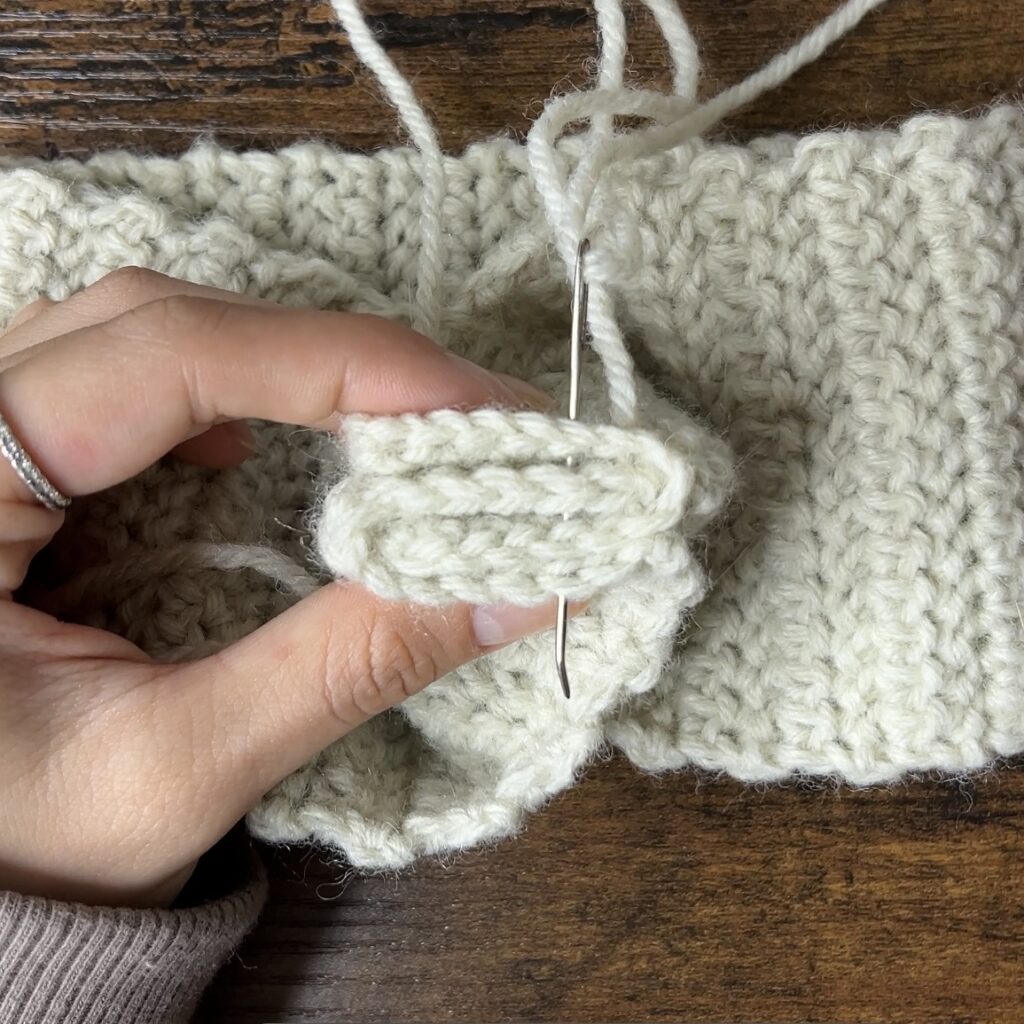
Repeat Steps 6 – 7 until you reach the end. Make sure that you sew the very left side, so the whole thing is secure! Double knot your loose end with the loose end from your slipknot in the very beginning.
Weave in all your loose ends.

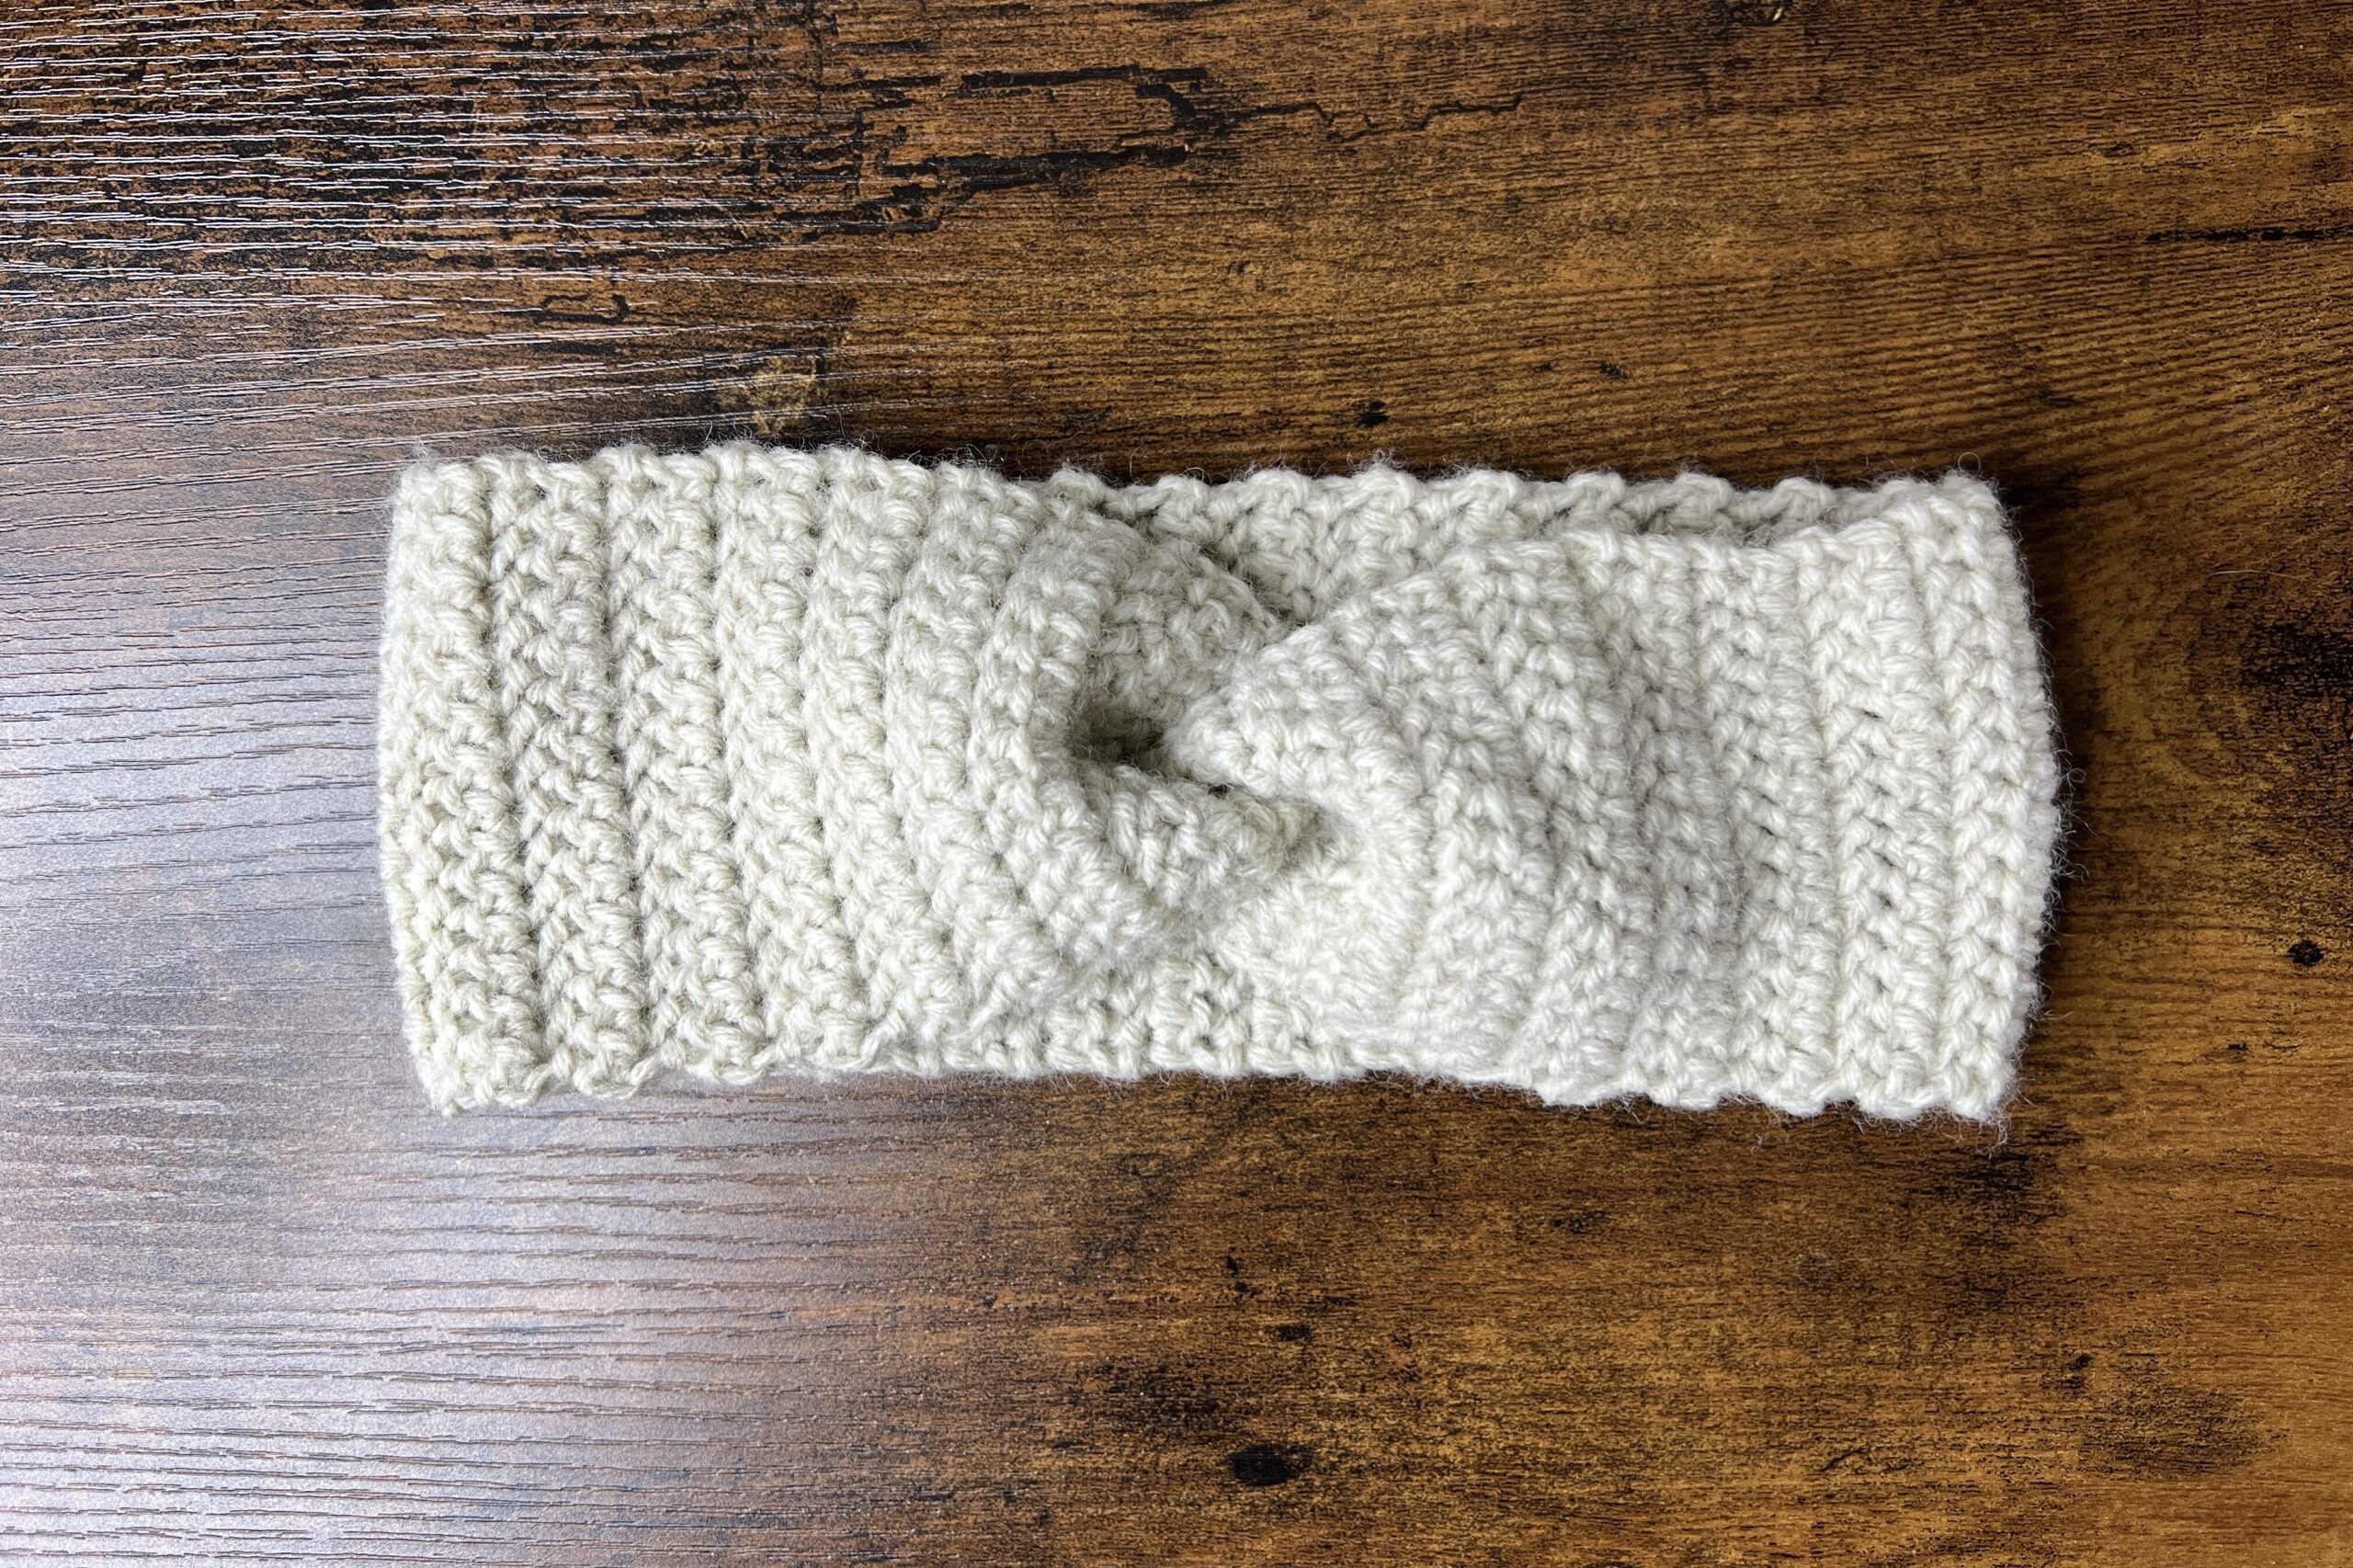
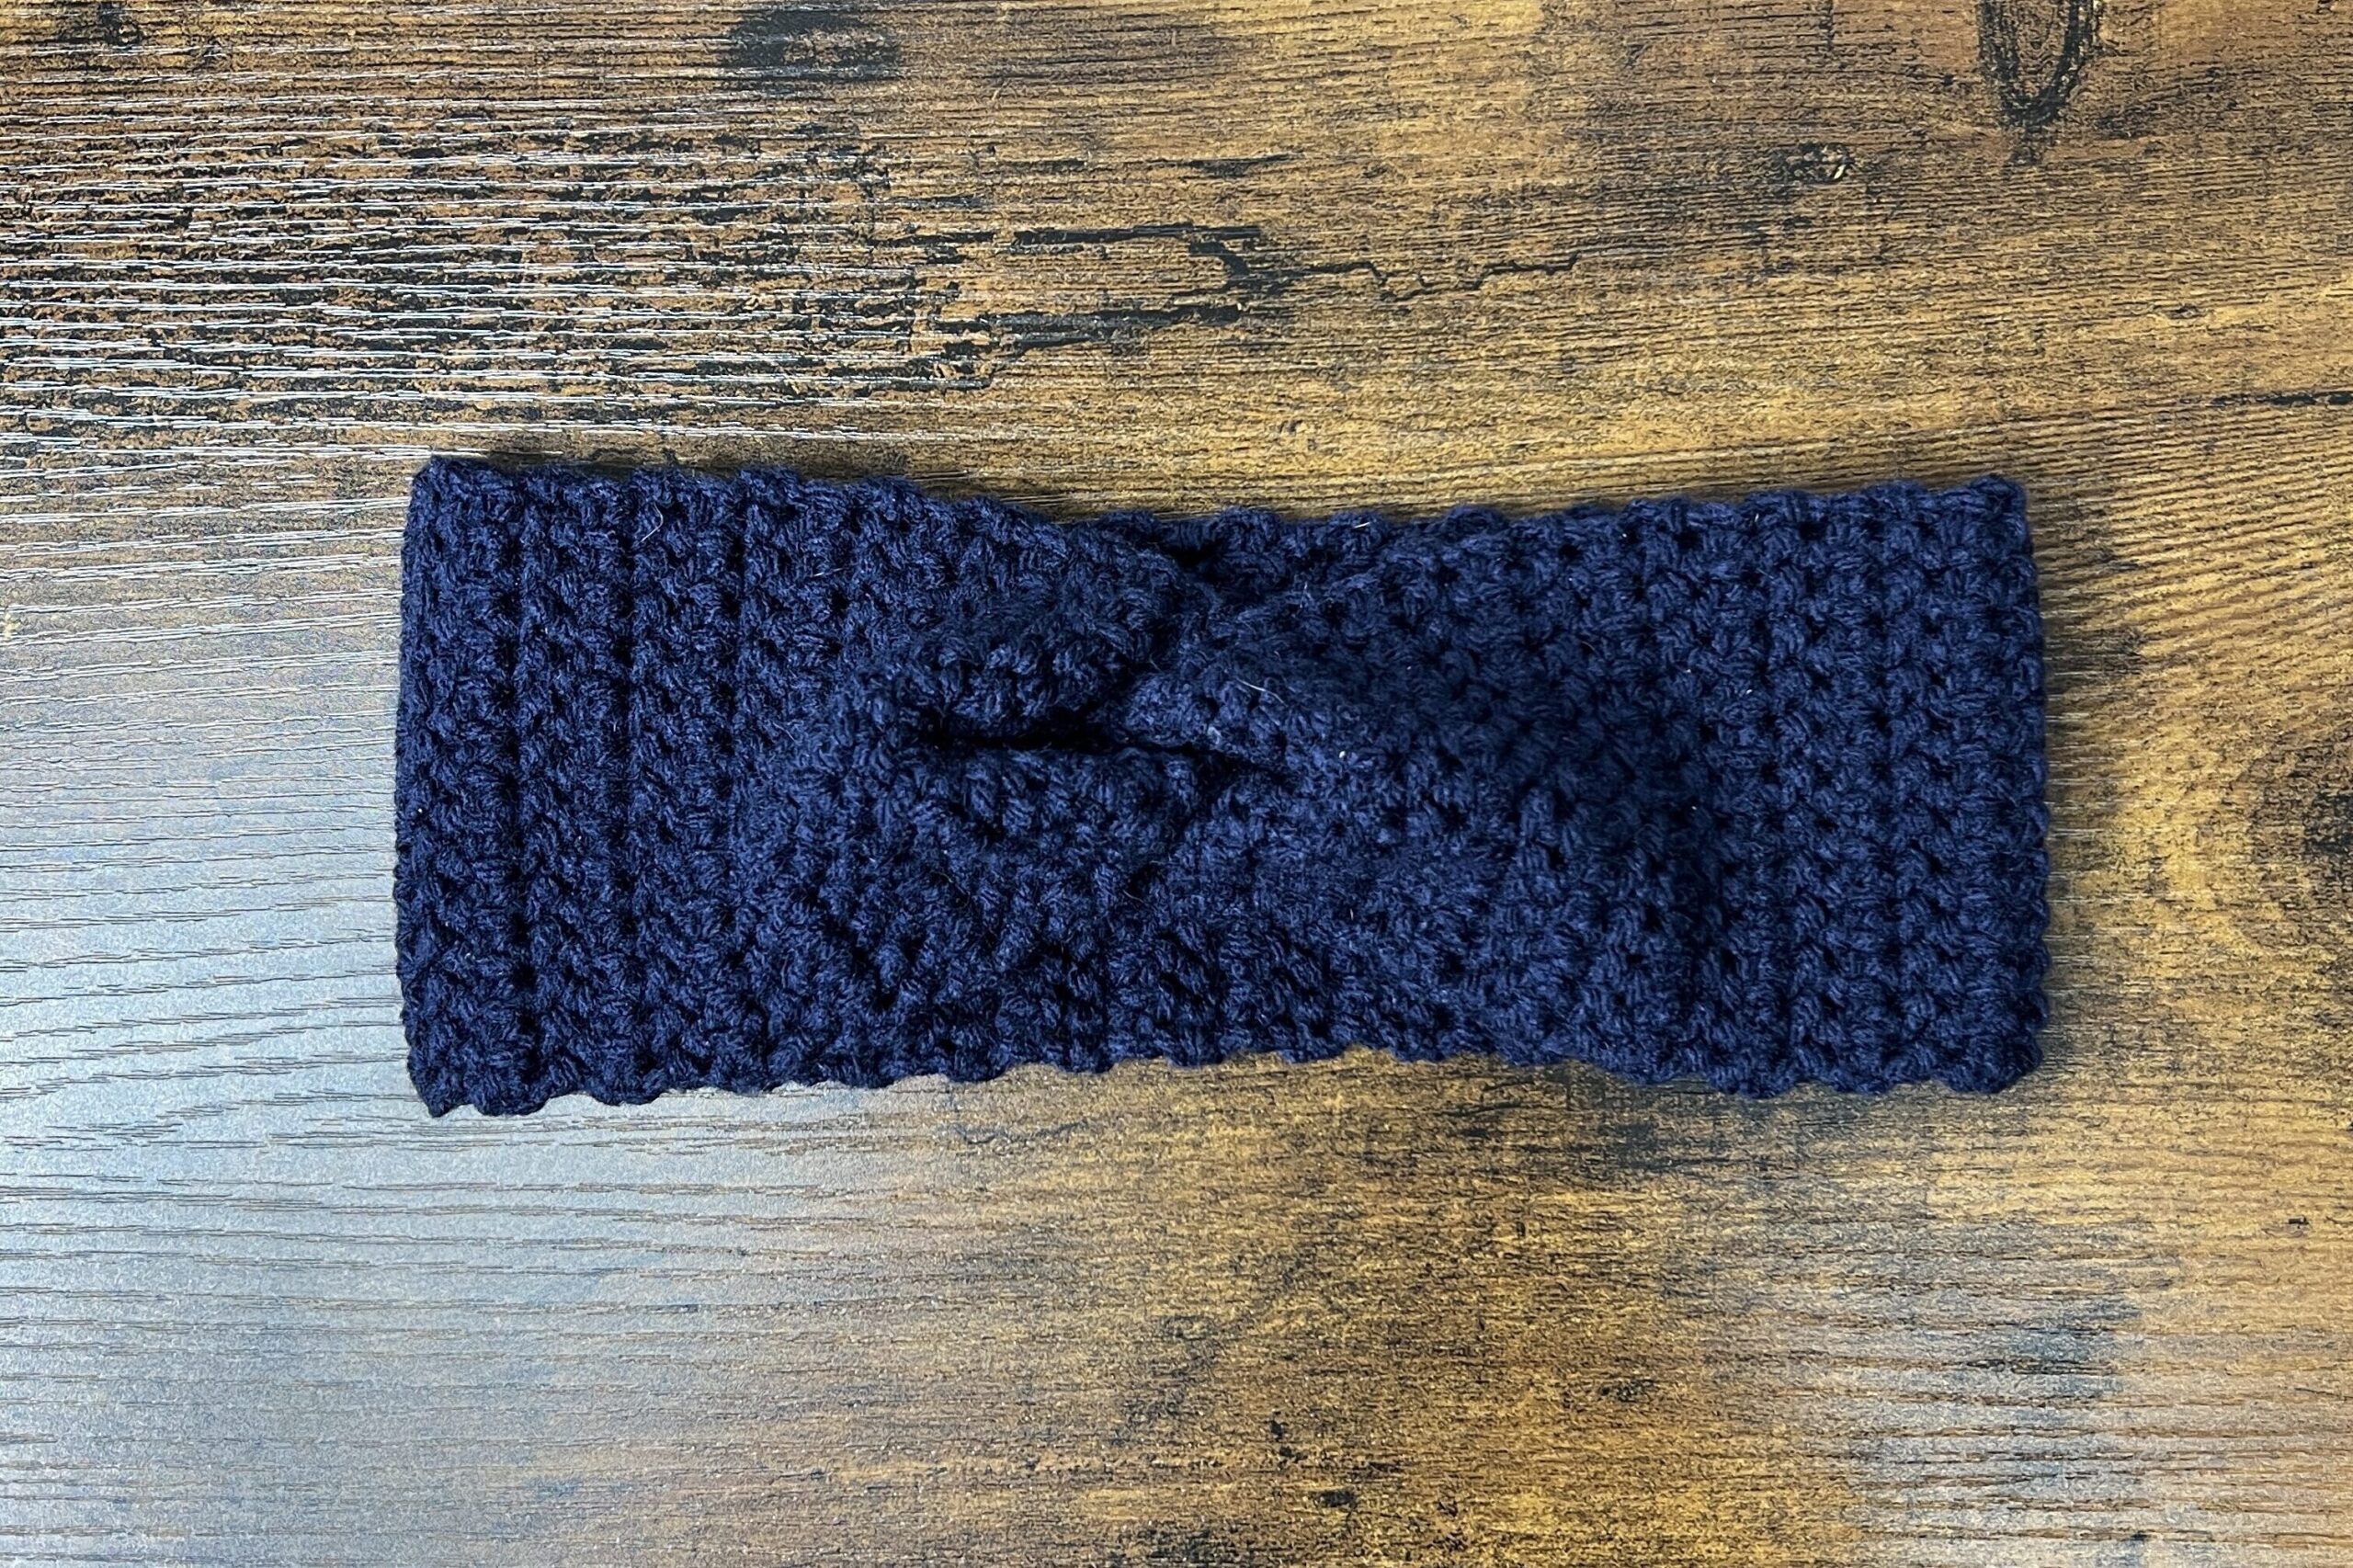
And turn your headband inside out. And here is your finished crochet twisted ear warmer headband!


Hi! Thanks for the cool pattern and video! I tried making this ear warmer, I am a complete beginner, this is my first project. Somehow I managed to have more stitches in the beginning than in the end of the rectangle, no idea how that happened. Do you have any tips on how to avoid this mistake?
Hi! A common mistake I’ve noticed many beginners making is that they’ll miss the very last stitch of the row. After each row, count the number of stitches you have and make sure it’s consistent for every row! You can also mark the last stitch with a stitch marker to keep track of it.
Hi Ria, the best thing is to count your stitches for each row, and use stitch markers so you don’t drop the stitch at the very end. You will get more comfortable as time goes on. I still count rows every now and then to make sure things all get done evenly. I make a lot of blankets and it is so easy to go off count. You can’t depend on the earlier row because that row could be short one or two. You’ll see what I mean. Good luck.
loving this pattern! thank you for sharing it! I had a similar ear warmer that got lost and instead of buying a new one, I thought why not try to make one? I can’t wait to make more as gifts for my sisters and friends!
this is nonsense
rubbish
what a rude comment.
In your pattern notes you say chain 1 and in the written pattern for row 2-66 says ch2. Making sure that its just ch1 for the pattern.
Thanks
Yes, it’s ch1. My mistake! Thank you, I just corrected it!
hi Viv big fan. Love your tutorials can you please share the pattern for earmuffs, the one where it’s only for the ear with a band for the ear only
Hi, thank you! Not sure yet, but I might do one for winter!