Crochet Crescent Bag | Free Pattern & Video Tutorial
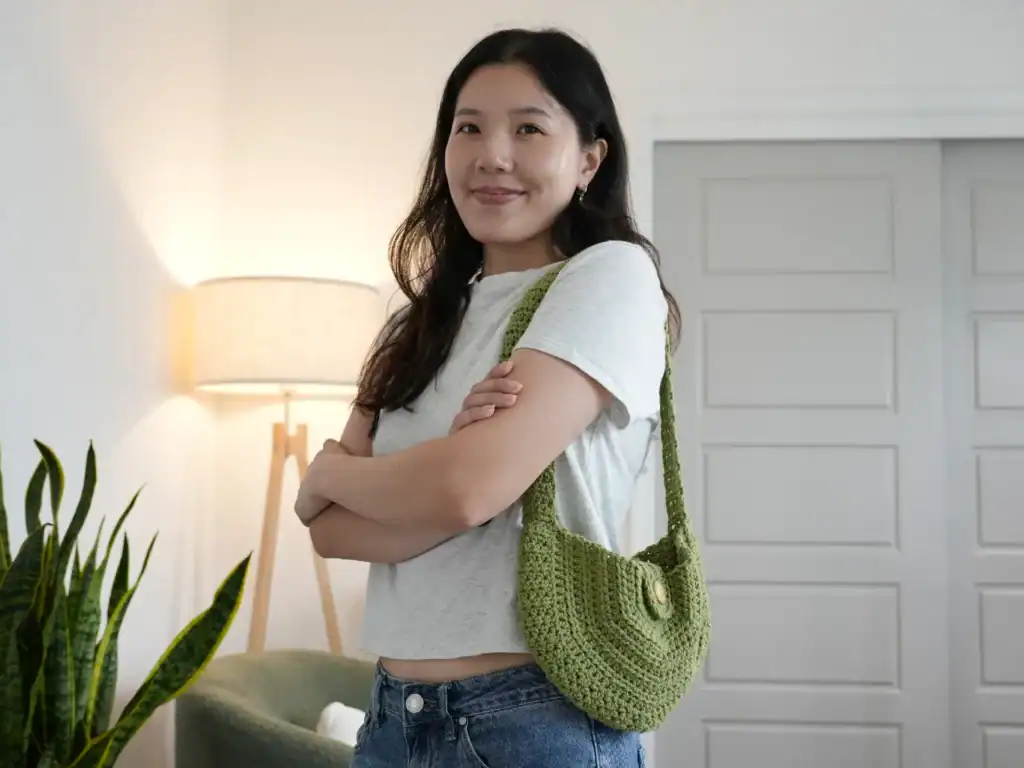
This crochet crescent bag can be worn over the shoulder or across the body like a belt bag. It’s a super cute and convenient everyday accessory! Make it any size you want using the notes provided in the written pattern and video tutorial.

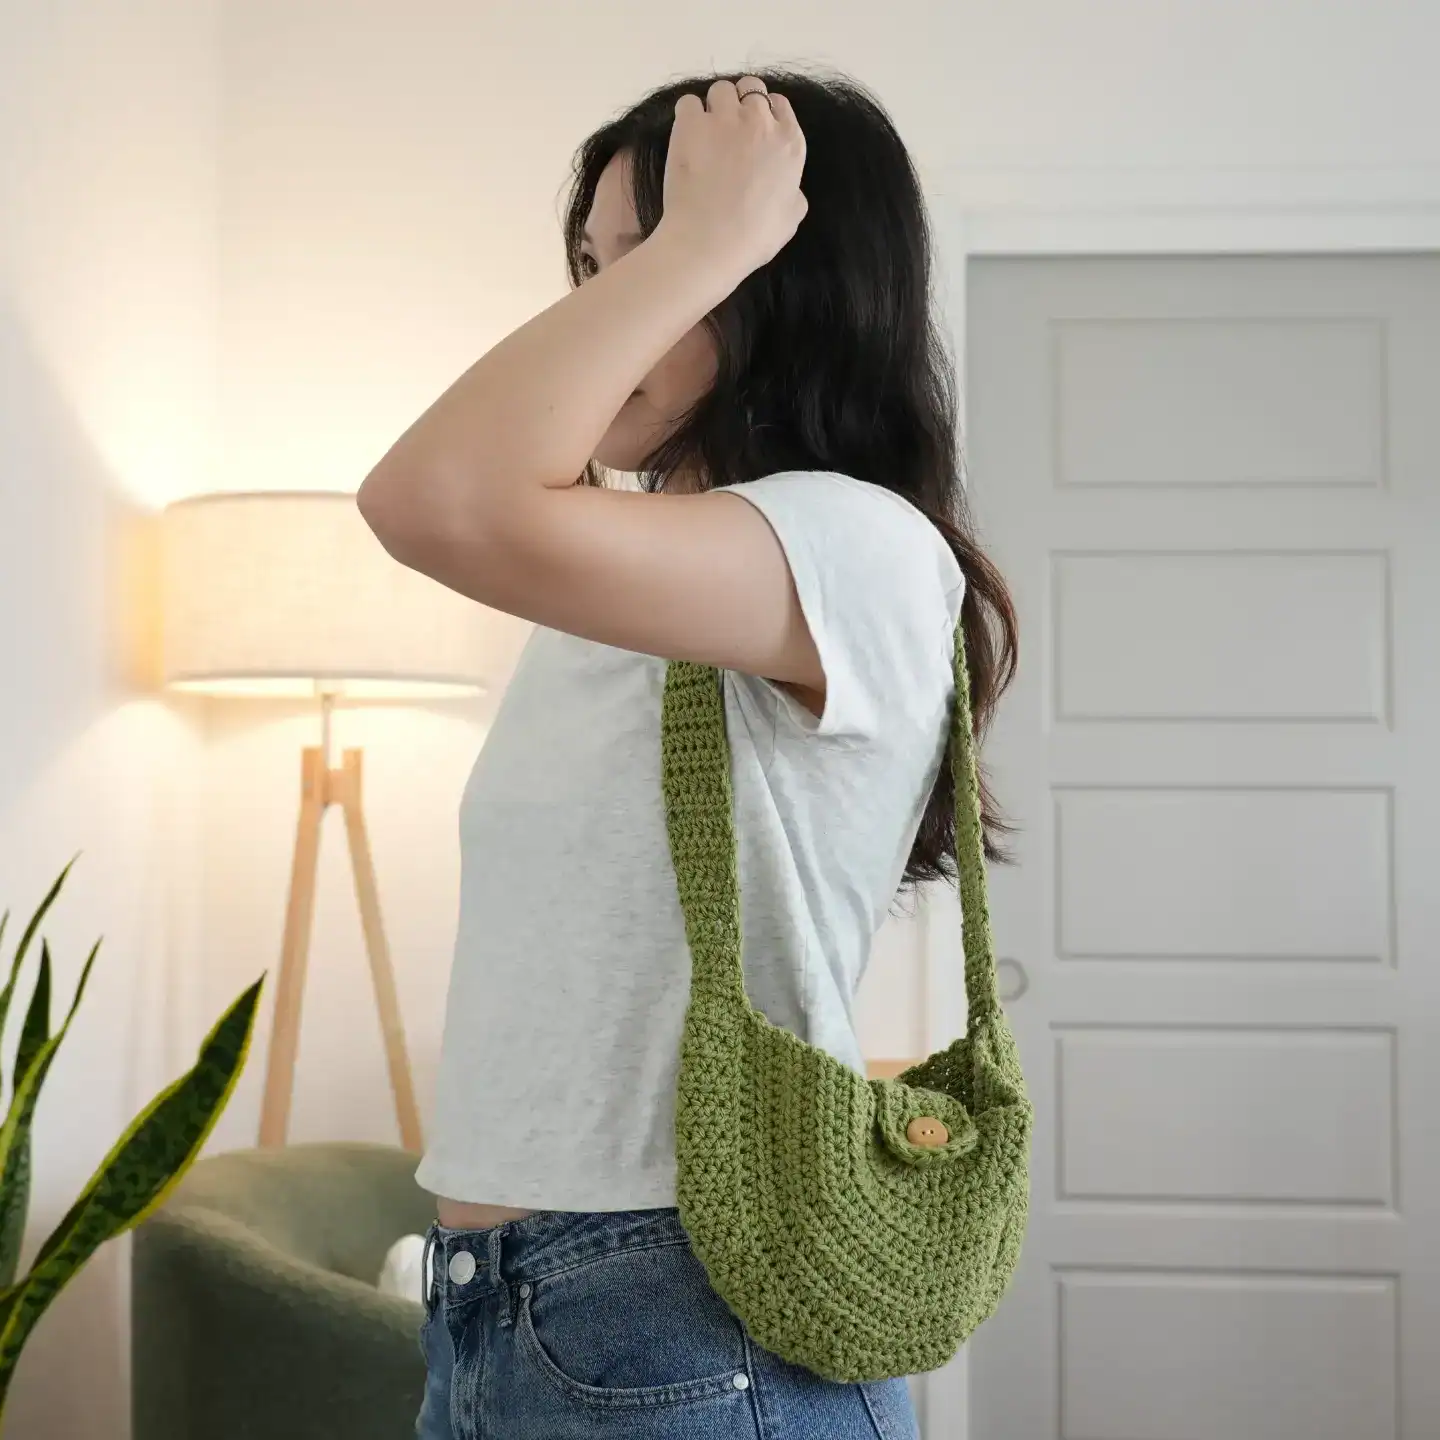
Table of Contents
This post may contain affiliate links. I may earn a small commission on qualifying purchases at no additional cost to you!
Crochet Crescent Bag Video Tutorial
Become a member to get early access to new videos!
You can follow along with my YouTube video to make your own crochet crescent bag! I have timestamps included to section the video and help you jump to any point you need to!
Pattern Information
Materials
- 100 grams of medium weight yarn (Big Twist Favorite Cotton in “Green Olive”)
- 5mm Clover Amour crochet hook
- Scissors
- Yarn needle
- 2cm button, thread, and sewing needle (optional)


Crochet Abbreviations
ch = chain
hdc = half double crochet
inc = increase (2 half double crochets into 1 stitch)
rep = repeat
st = stitch
Gauge
12 rows of 15 half double crochets makes a 10 x 10 centimeter (4″ x 4″) square
Dimensions
*includes instructions to adjust sizing
Side Panels: 25 centimeters wide x 13 centimeters long (9.8 x 5.1 inches)
Strap: 4 centimeters x 91 centimeters long (1.6 x 35.8 inches)
Overall: 29 centimeters wide x 37 centimeters long (11.4 x 14.6 inches)
Notes and Tips
- This pattern is written using US crochet terms
- The number in (parentheses) at the end of each row is the stitch count after finishing that row
- Italicized notes tell you what to change to adjust the size
- The chain 1 at the beginning of each round does NOT count as a half double crochet
Crochet Crescent Bag Pattern
Side Panels
Foundation: Make a slipknot, ch2
Row 1: hdc4 in 2nd ch from hook (4)

Row 2: ch1, turn, inc across (8)

Row 3: ch1, turn, rep[hdc, inc] across (12)

Row 4: ch1, turn, rep[hdc in next 2 st, inc] across (16)

Row 5: ch1, turn, rep[hdc in next 3 st, inc] across (20)
Row 6: ch1, turn, rep[hdc in next 4 st, inc] across (24)
Row 7: ch1, turn, rep[hdc in next 5 st, inc] across (28)
Row 8: ch1, turn, rep[hdc in next 6 st, inc] across (32)
Row 9: ch1, turn, rep[hdc in next 7 st, inc] across (36)
Row 10: ch1, turn, rep[hdc in next 8 st, inc] across (40)
Row 11: ch1, turn, rep[hdc in next 9 st, inc] across (44)
Row 12: ch1, turn, rep[hdc in next 10 st, inc] across (48)
Row 13: ch1, turn, rep[hdc in next 11 st, inc] across (52)
Row 14: ch1, turn, rep[hdc in next 12 st, inc] across (56)
Note: Do fewer rows for a smaller bag, or more rows for a larger bag. If you plan to wear it on your shoulder, don’t make it too big, or it will fold in half while hanging on your shoulder.

Fasten off with a long loose end (double the length of the bottom edge, plus 4 inches for a tail). Make a second, identical side panel.
Strap
Foundation: Make a slipknot, ch7
Note: Do fewer chains for a thinner strap, or more chains for a wider strap.
Row 1: hdc in 2nd ch from hook and each ch across (6)

Rows 2-110: ch1, turn, hdc across (6)
Note: Do fewer rows for a shorter strap, or more rows for a longer strap. Keep in mind that it can stretch!

Fasten off with a long loose end (double the width of the strap, plus 4 inches for a tail).
Assembly
Now that we have the 2 side panels and the strap, we can assemble our bag.

First, place one side panel down with the long loose end on the right side. Place the strap below it, lining the right end of the strap with the long loose end on the side panel.

Sew the bottom edge of the side panel to the long edge of the strap. Line up one stitch with one row. Tie a knot at the end to secure the seam.


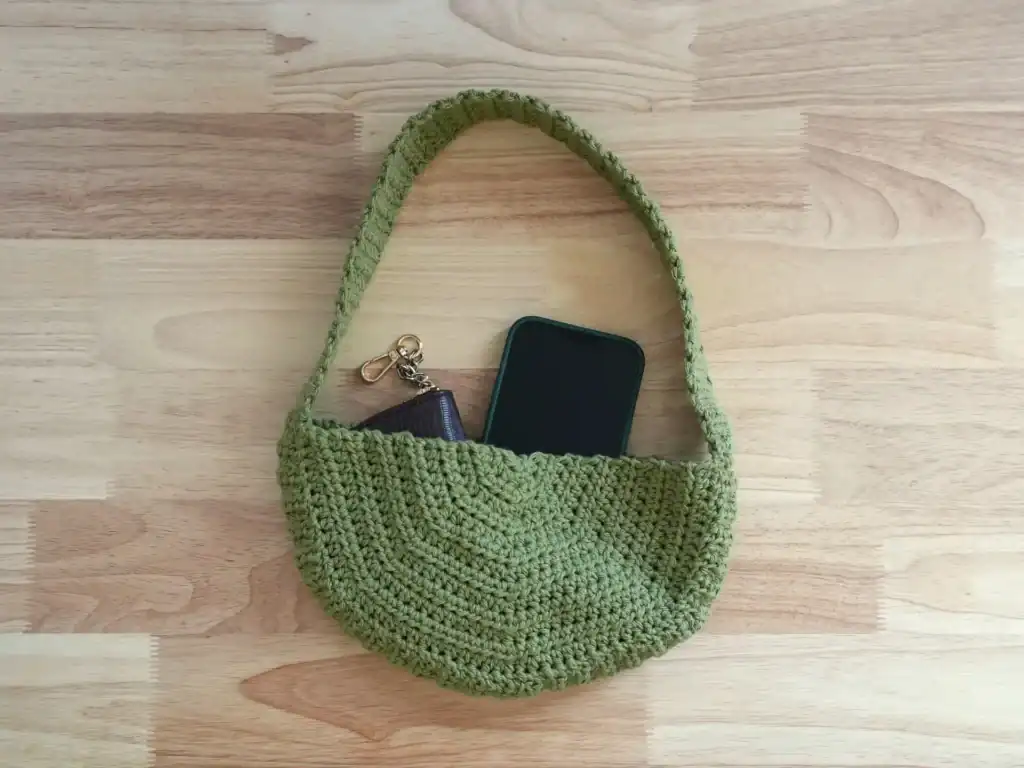
Sew the second side panel to the other long edge of the strap to form the pocket.

Use the long loose end left on the strap to sew the short edges of the strap together.

Now our bag is assembled and we can move on to adding a button. If you prefer it without a button, weave in your loose ends, and your bag is done!
Button Flap
Foundation: Make a slipknot, but loosen it to the diameter of your button, ch6
Note: Do fewer chains for a shorter button flap, or more chains for a longer button flap (bigger space between the side panels).


Row 1: hdc in 2nd ch from hook and each ch until last ch, hdc8 in last ch, rotate your foundation chain to work along the underside, hdc in each ch across (16)

Row 2: ch1, turn, hdc in next 4 st, rep[hdc, inc] 4 times, hdc in last 4 st (20)
Fasten off with a long loose end (double the straight edge of the button flap, plus 4 inches for a tail).

Attaching Button Flap and Button
Flip your bag upside-down, and use the long loose end on the button flap to attach it the center of one of the side panels.

Fold your button flap over the bag to see where you want your button to be. Make sure the button flap isn’t pulled too tight, so there is still some space between the side panels when the bag is buttoned.
Pull the thread through the needle until you have about 12 inches doubled up. Tie multiple knots on the end for a large knot that won’t pull through your yarn. Sew your button on using the button holes. View the tutorial for a more detailed demonstration.


Finished Crochet Crescent Bag
Weave in your loose ends and your crochet crescent bag is finished!