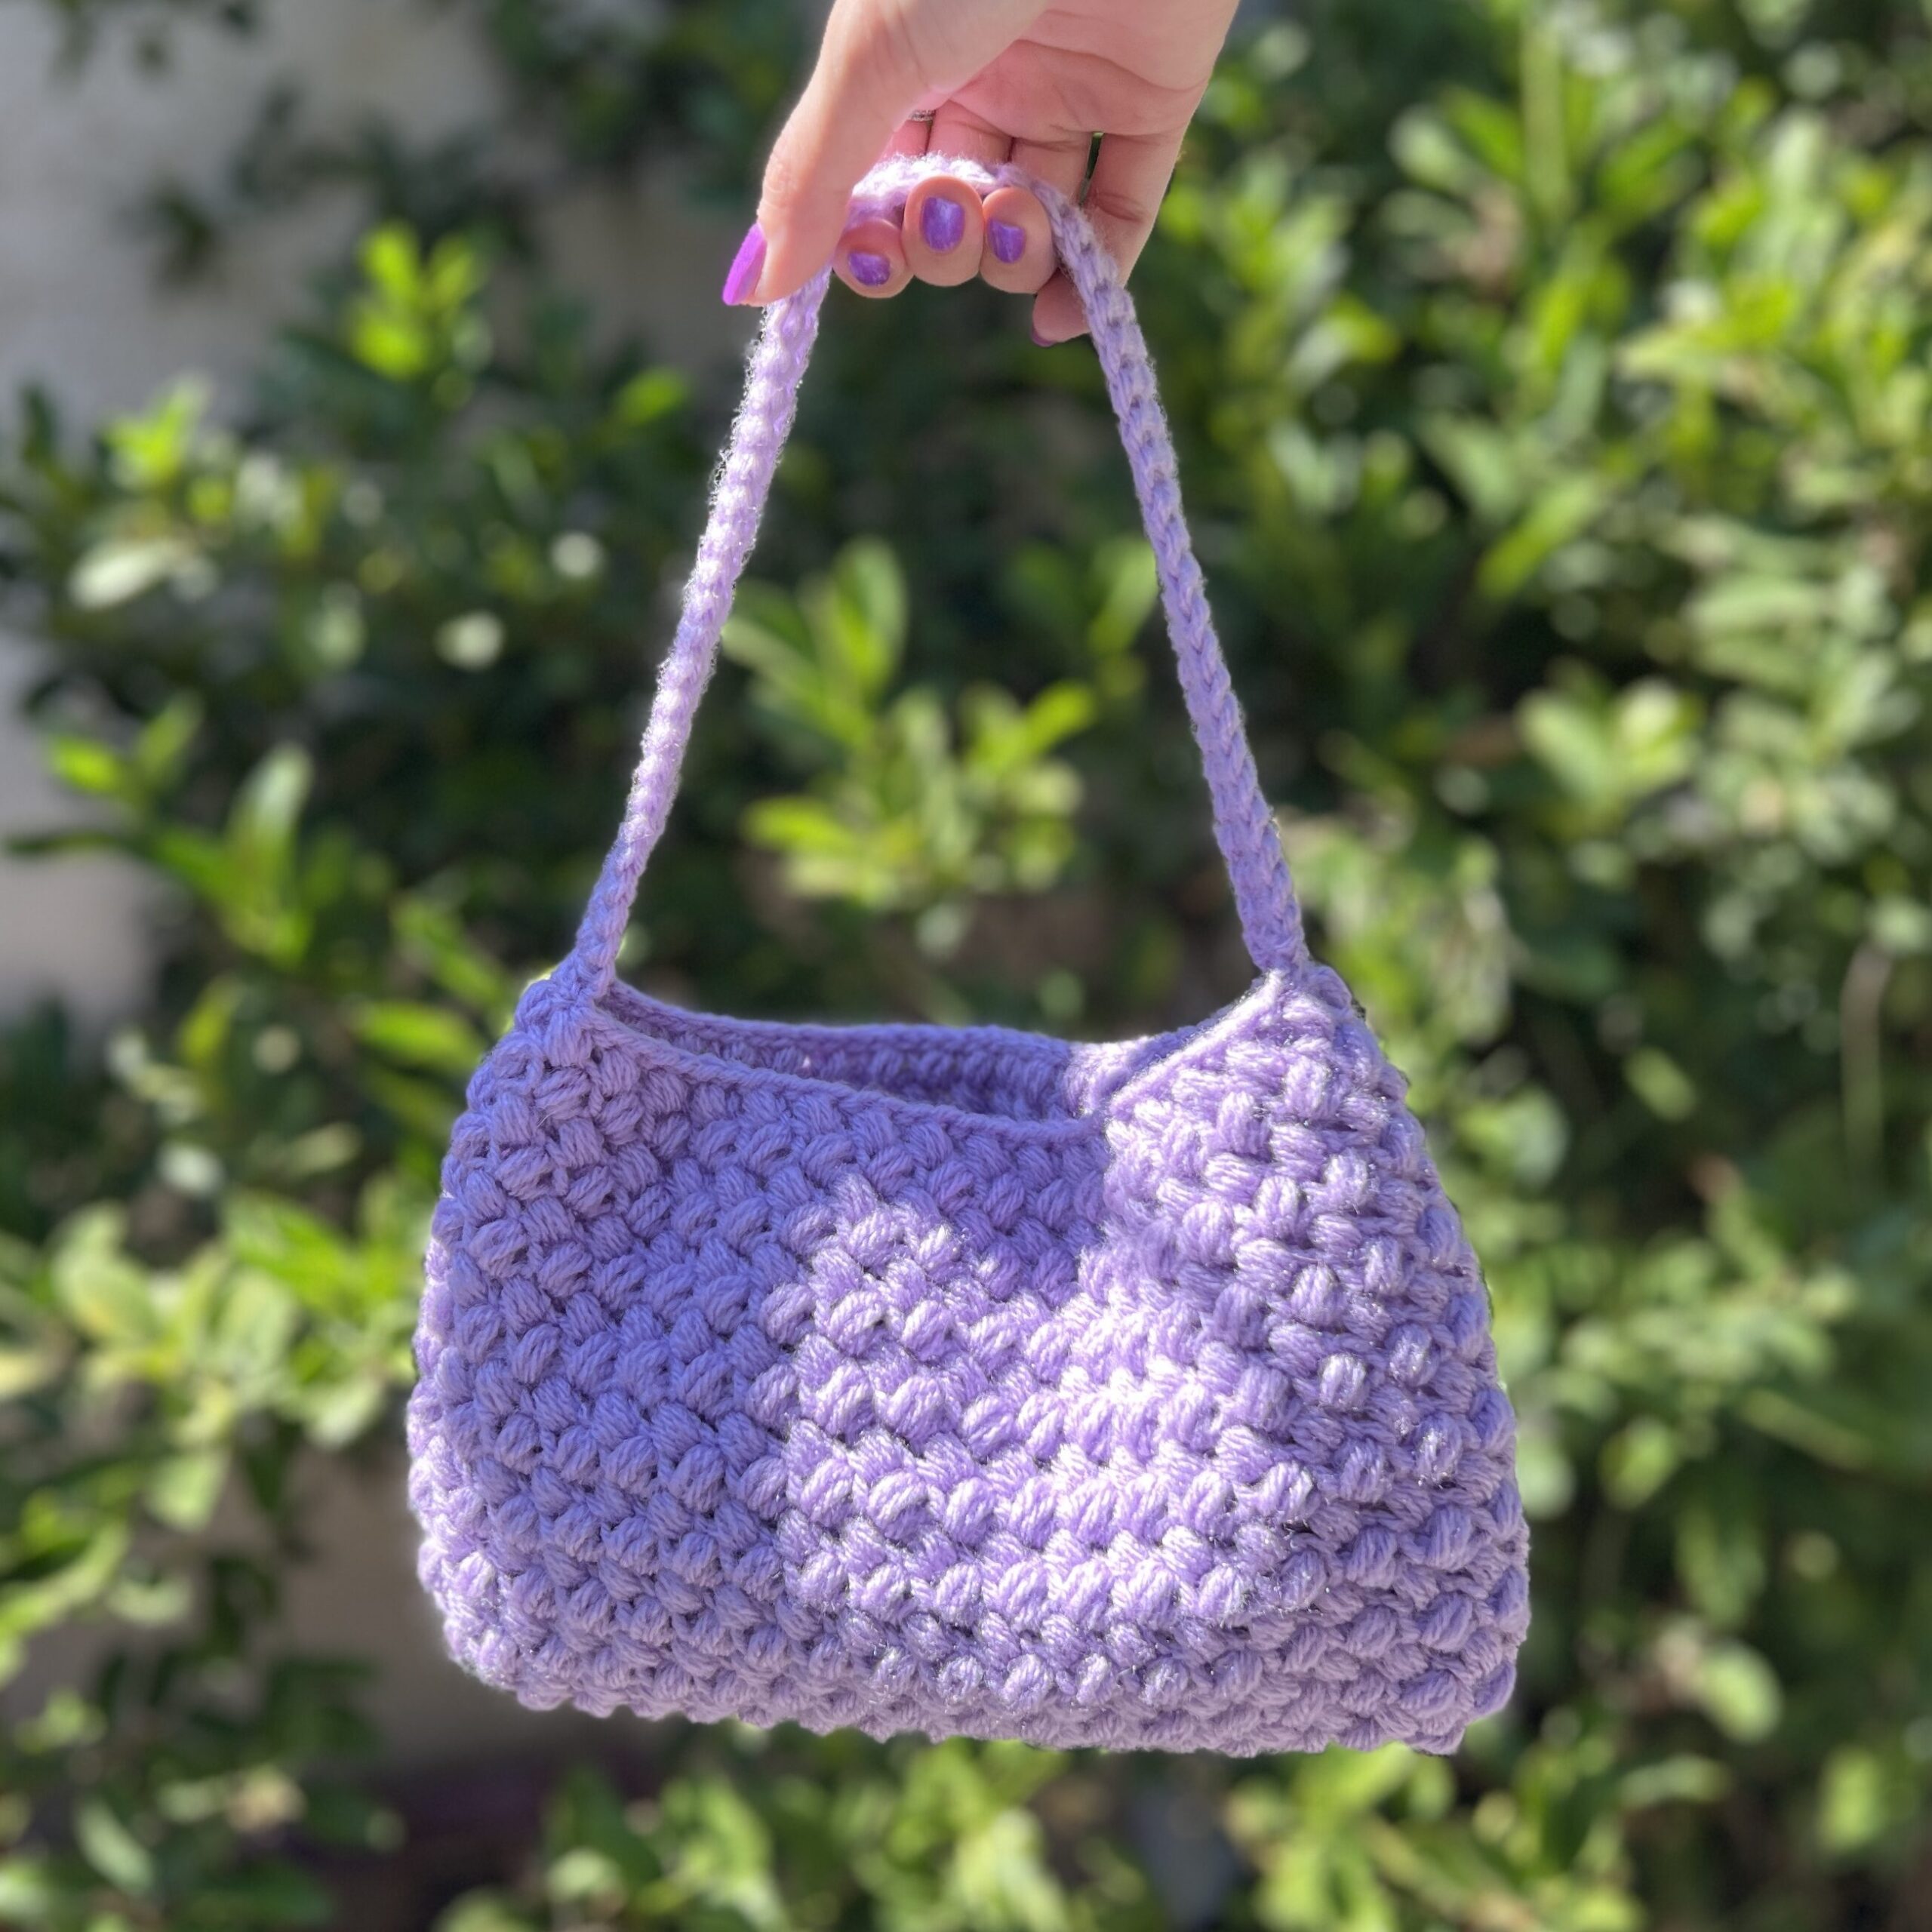
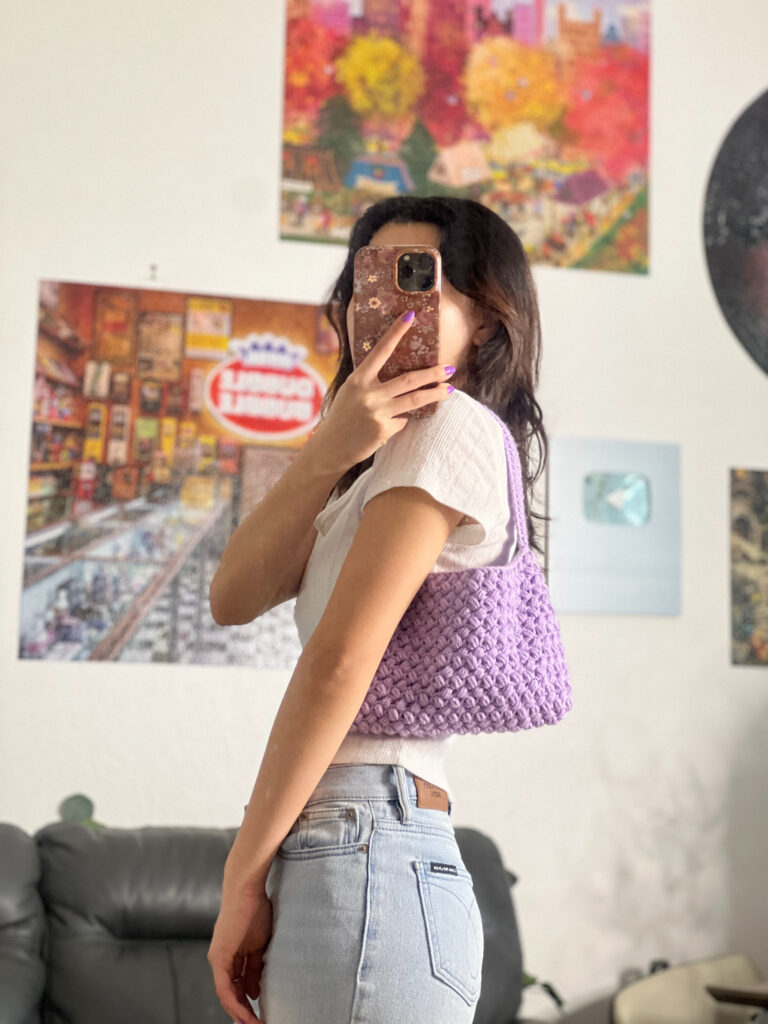
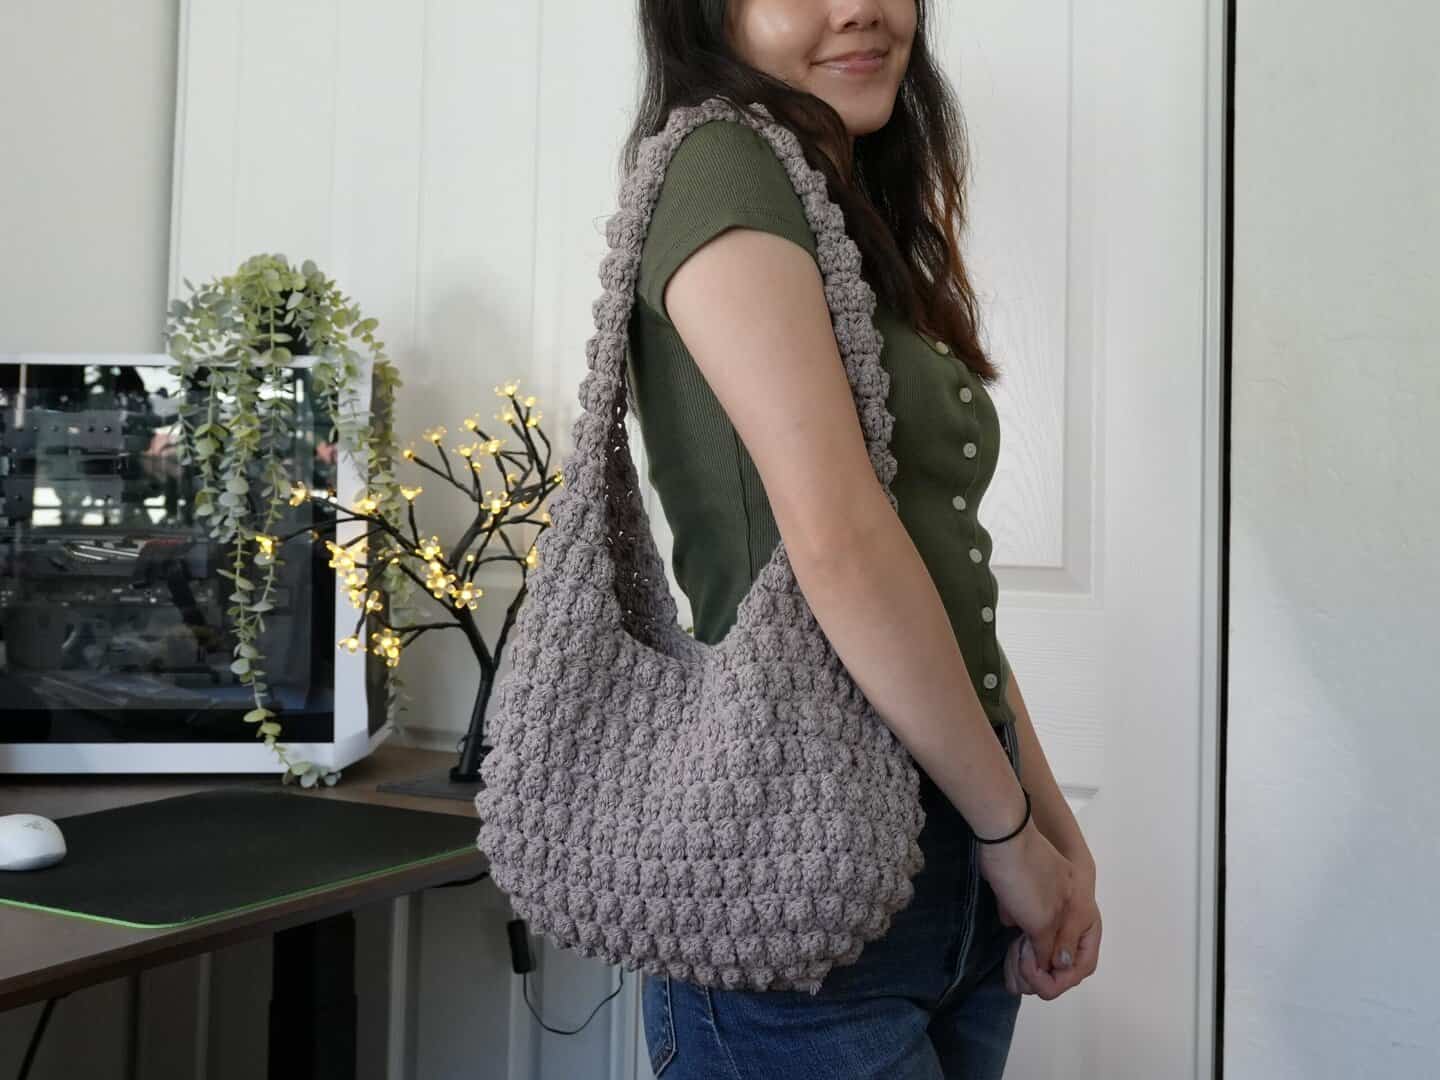
Textured Crochet Shoulder Bag | Free Pattern & Video Tutorial
Crochet a beautiful, textured shoulder bag with the bean stitch! This crochet shoulder bag pattern uses this special stitch and a simple assembly to create this cute little shoulder bag. It’s a great bag pattern for beginners and the size is easy to adjust!
Advanced Beginner Crochet Project
This crochet bag pattern is most suitable for more advanced beginners. The strap uses the beginner-friendly single crochet stitch and the assembly is relatively simple. But, it also uses a special stitch called the bean stitch, which might be difficult for beginners still practicing their tension.
If you’re a beginner and you want to try your hook at this pattern, be sure to watch the video tutorial if you’re ever unsure of anything. Also, leave a comment here or under the video if you have any questions!
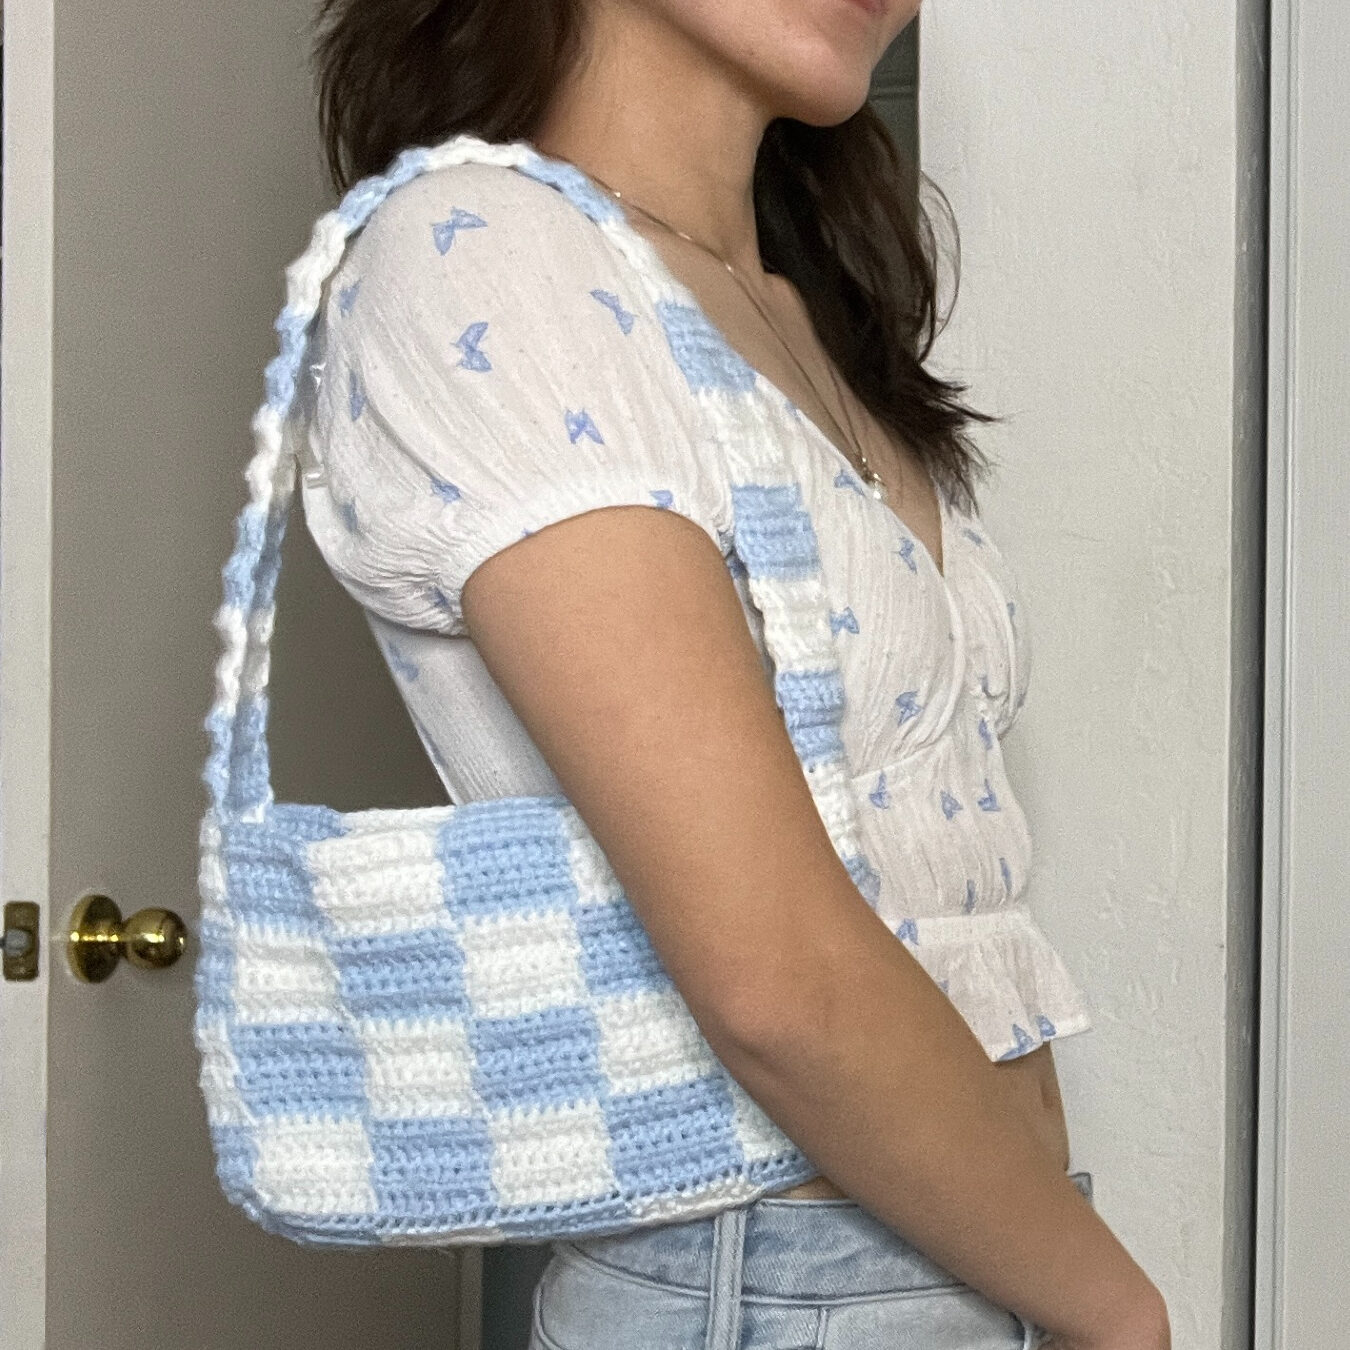
For an even more beginner-friendly crochet bag pattern, check out this basic mini shoulder bag! Or, if you’d like something less monochrome, try the checkered shoulder bag!
Sizing
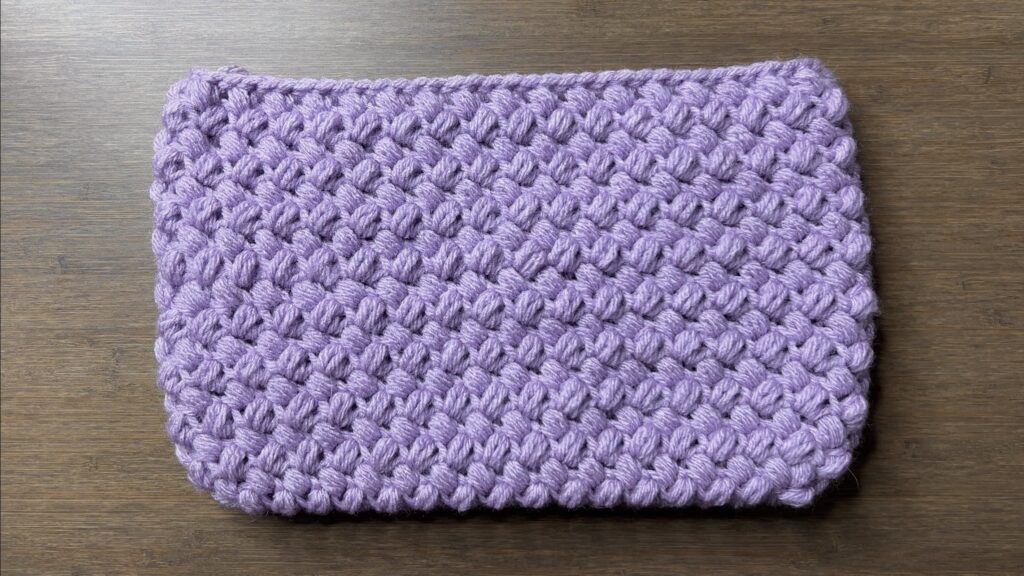
This pattern makes a 26 centimeters wide x 15.5 centimeters tall (10.2 x 6.1 inches) bag. The italicized notes within the pattern let you know what to do to change the size of the bag.
You can very easily adjust the width (horizontal length) of the bag by changing the number of chains in your foundation chain. The depth can be changed by doing more rounds for the base, which is explained in the pattern. You can change the height of the bag by doing more rounds in the body.
The width and length of the strap is very easy to adust with the foundation chain and number of rows.

Project Overview

Choosing Yarn & Hook Size
You can use any yarn and any hook for this pattern! However, using a different weight yarn and/or hook size will change the size of the bag. If you want the same size bag, then you’ll need medium weight yarn and a 5 millimeter hook.
I chose to use acrylic yarn that I already had in my stash, but you can use any fiber you’d like. Cotton yarn is my favorite fiber for bags, especially if it’ll be used for heavy items. Since this is a small bag just to carry on the go, it doesn’t really matter what fiber you use.

Other Projects You Might Like


Crochet Shoulder Bag Video Tutorial
Become a member to get early access to new videos!
You can follow along with my YouTube video to make your own crochet shoulder bag! I have timestamps included to section the video and help you jump to any point you need to!
This post may contain affiliate links. I may earn a small commission on qualifying purchases at no additional cost to you!
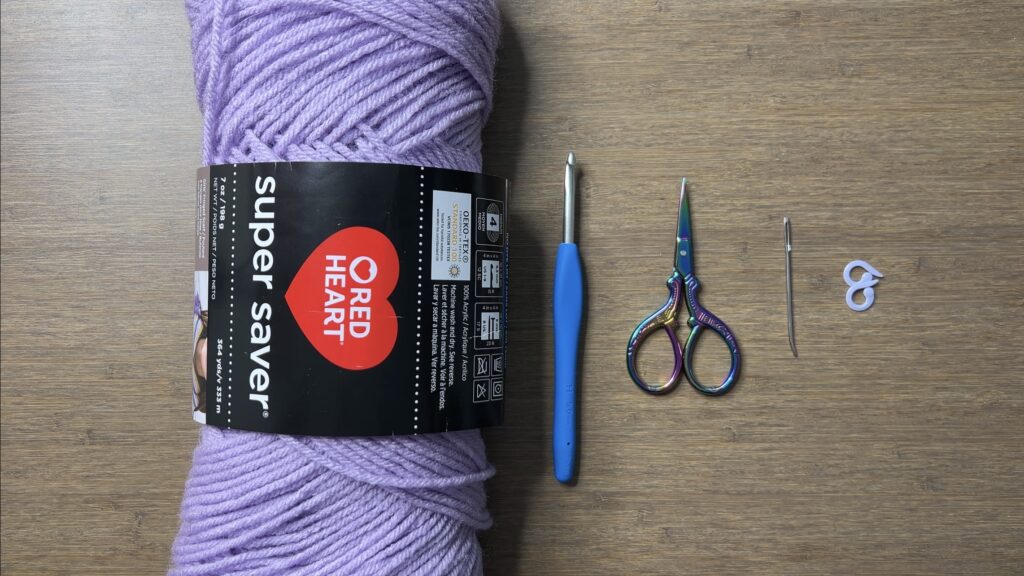
Materials
- 90 grams of medium weight yarn (Red Heart Super Saver in “Pale Plum”)
- 5mm Clover Amour crochet hook
- Scissors
- Yarn needle
- Stitch marker
- Tension ring (optional)
- Yarn bowl (optional)
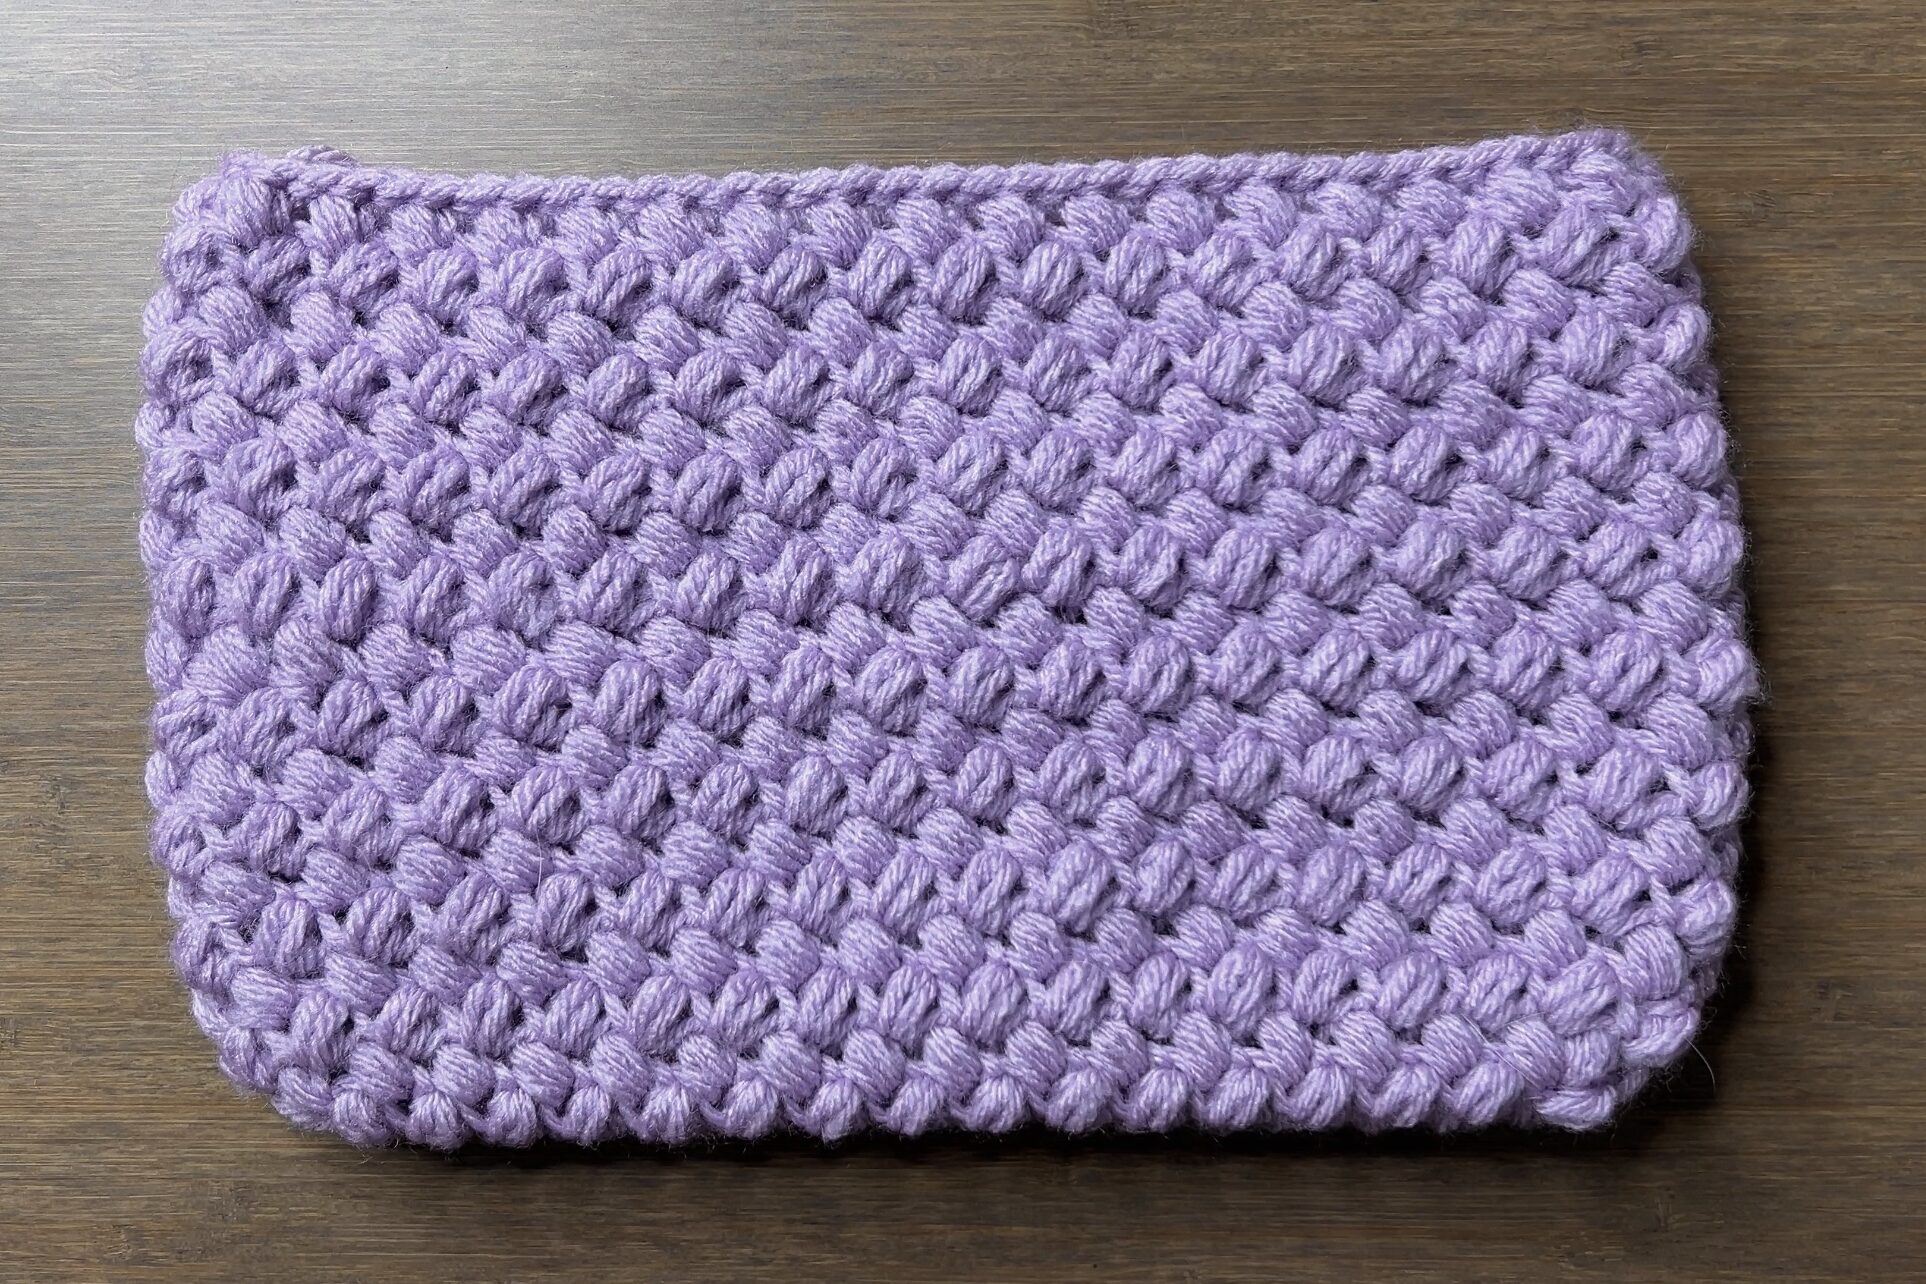
Dimensions
Body: 26 centimeters wide x 15.5 centimeters tall (10.2 x 6.1 inches)
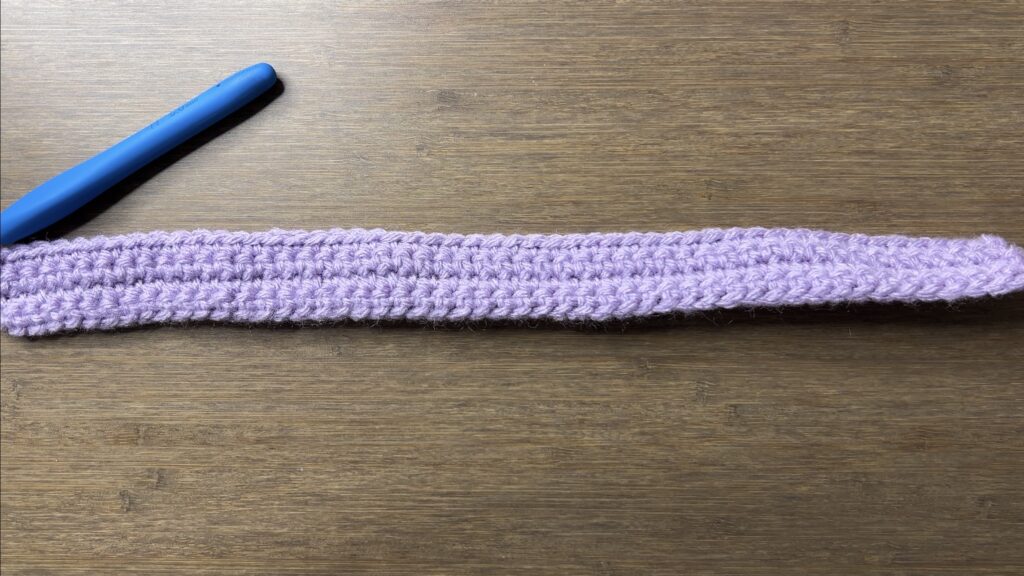
Strap: 2.5 centimeters wide x 36 centimeters long (1 x 14.2 inches)
Gauge
12 rows of 7 bean stitches makes a 10 x 10 centimeter square
Notes and Tips
- This pattern is written using US crochet terms
- The chain at the beginning of each row/round does NOT count as a stitch
- Slip stitches at the end of a round go to the right of the first bean stitch of the round
- Stitches go to the left of the bean stitch
- Turn the bag inside out to always work from the outside
- If you dont have stitch markers, bobby pins and safety pins work, too!
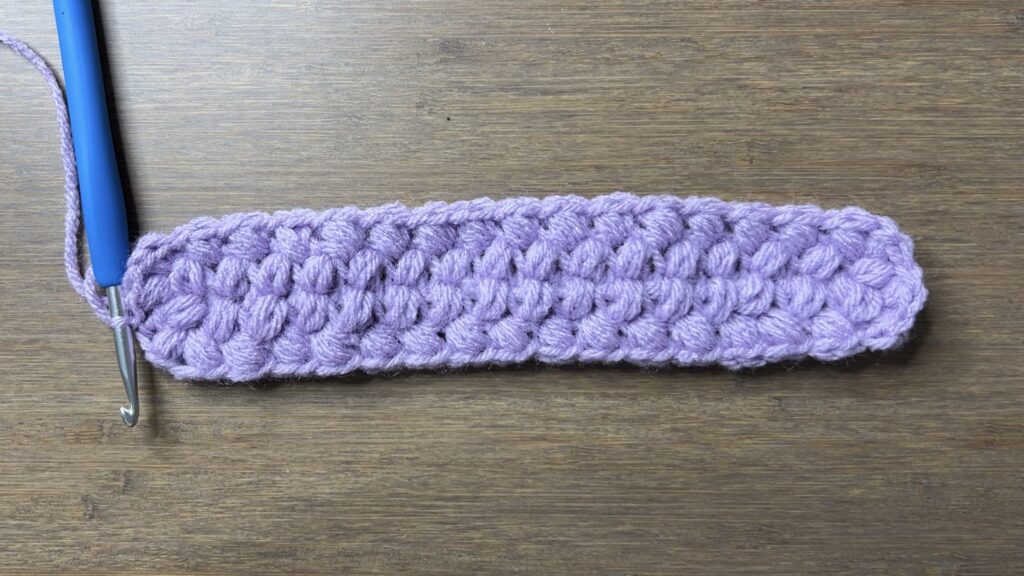
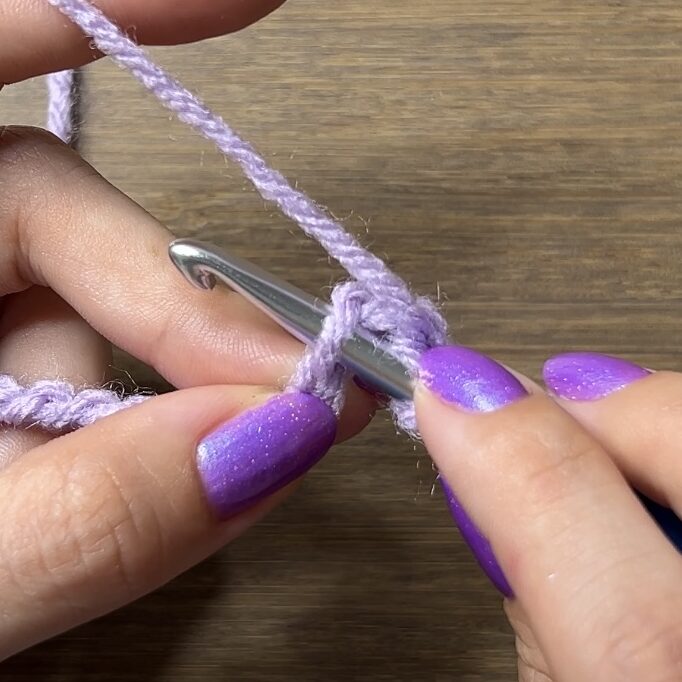
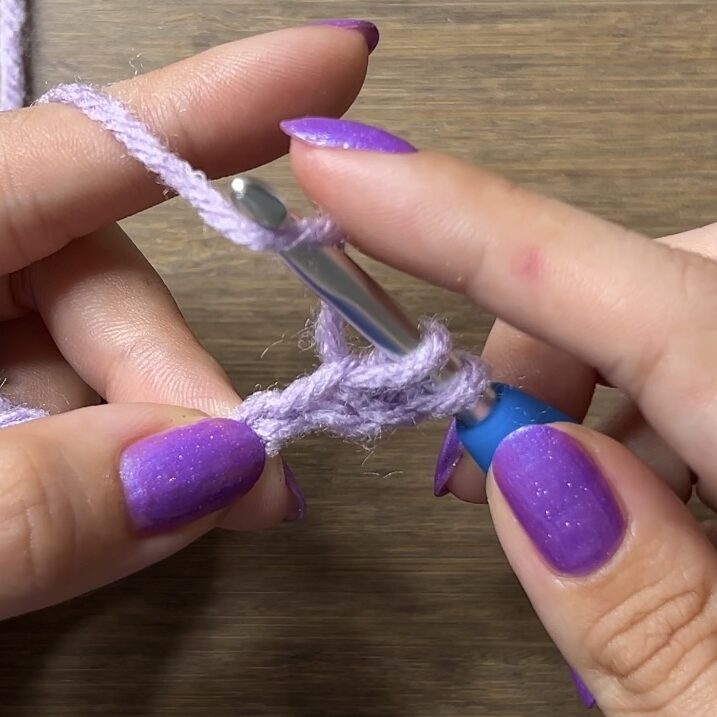
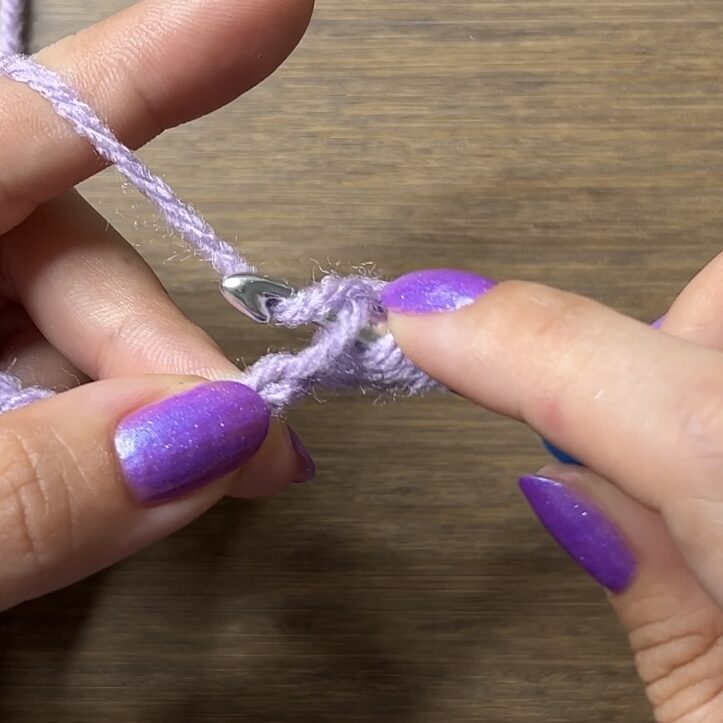
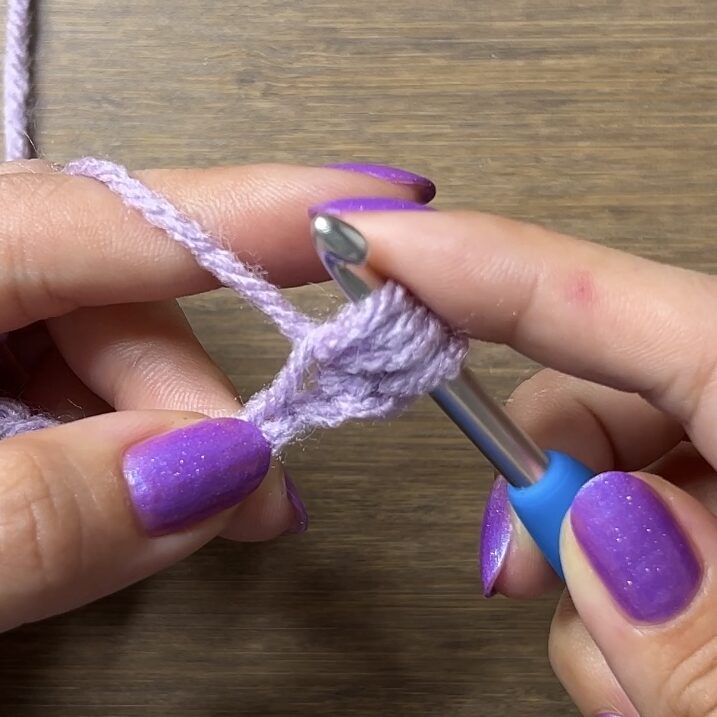
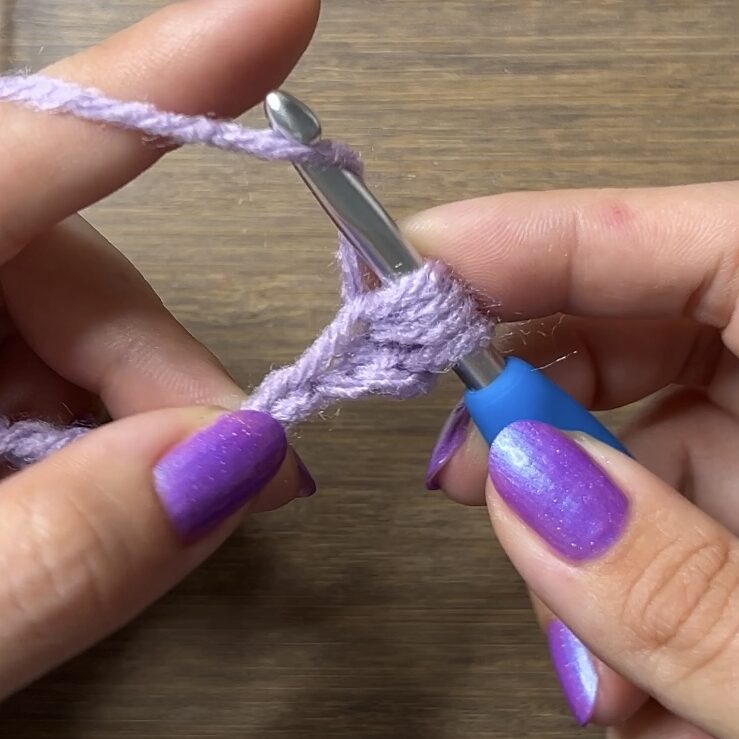
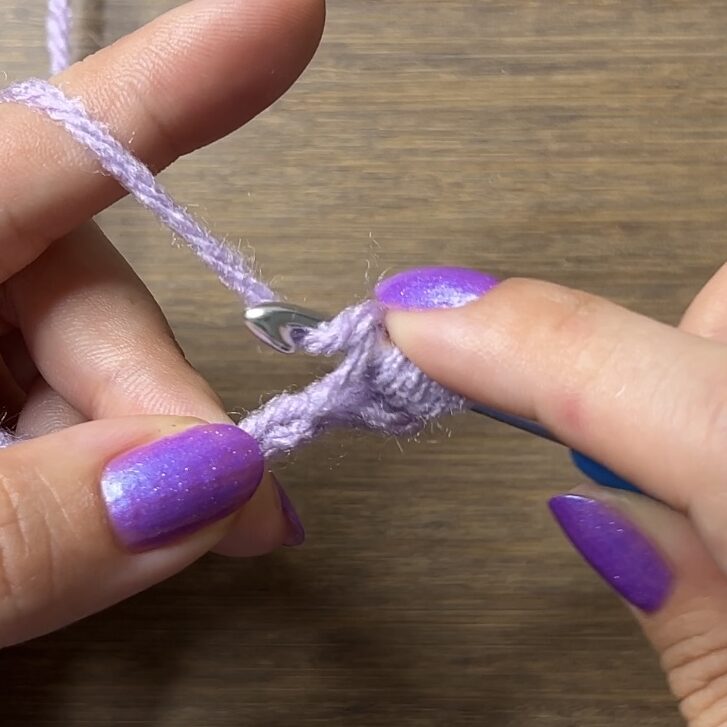
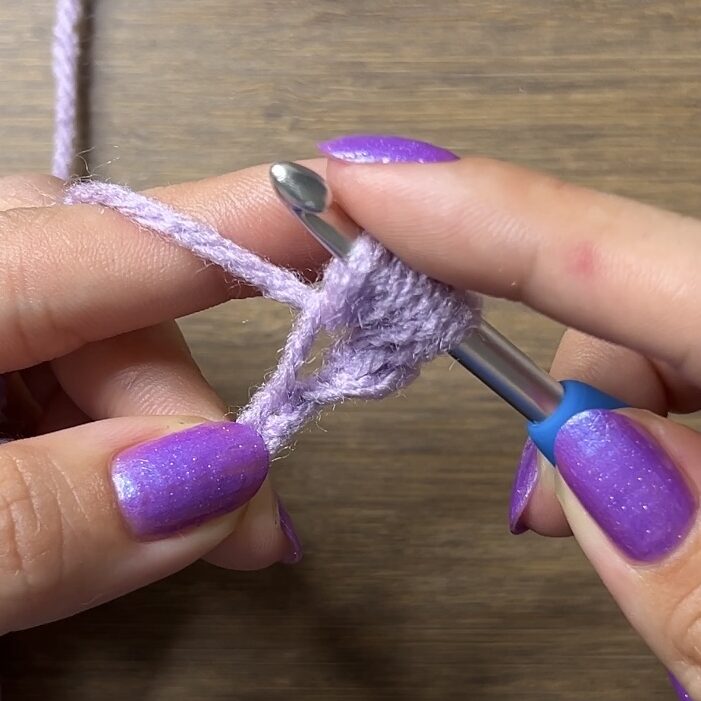
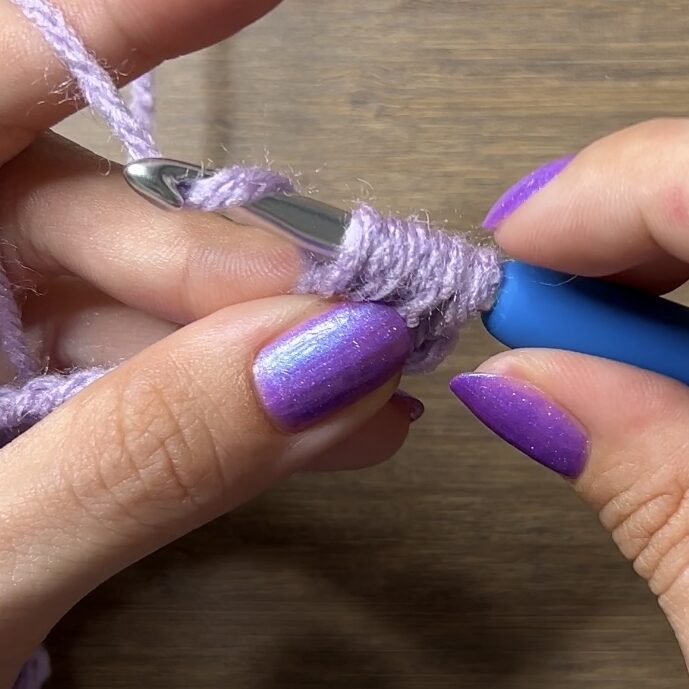
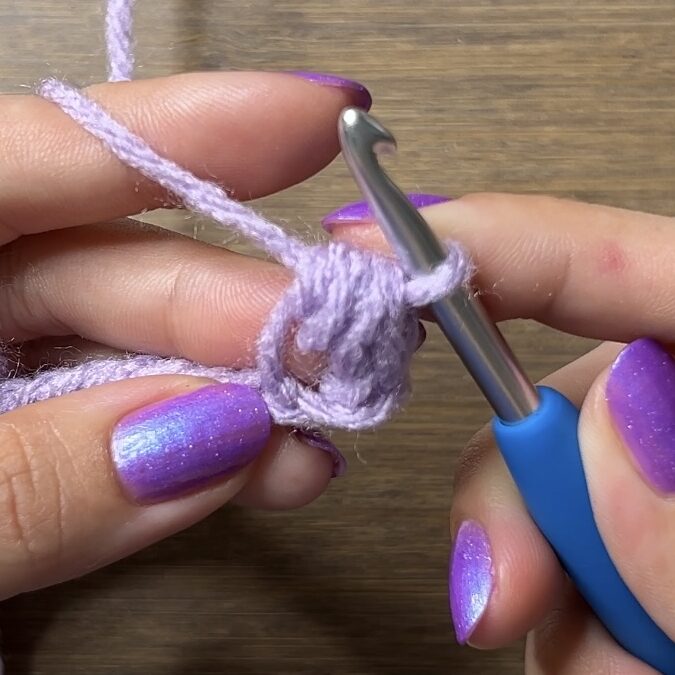
How to Crochet the Bean Stitch
To crochet the bean stitch, pull up a loop, then yarn over and pull up a loop twice, then yarn over, pull through all 6 loops, and chain 1 to lock it in. Below are some photos to guide you. Or you can view the video tutorial!


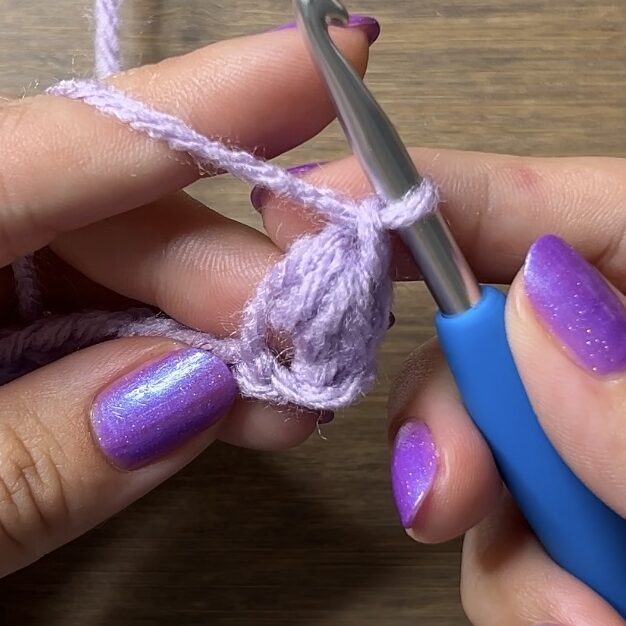
To slip stitch to join a round of bean stitches: Look at the first bean stitch of the round from the top. There should be two V’s at the top of the bean stitch. Slip stitch to the V on the right side of the bean stitch. This is the V made from the chain 1.
To work a bean stitch on top of a bean stitch: Look at the bean stitch from the top; there should be two V’s. Work under the V on the left side of the bean stitch. This is the V made when pulling through all 6 loops, not the chain 1.
Abbreviations
ch = chain
rep = repeat
sc = single crochet
sk = skip
sl st = slip stitch
st = stitch
Base
Foundation: Make a slipknot, ch33
Note: Chain less to make the bag less wide or more to make it wider. You must chain an odd number.
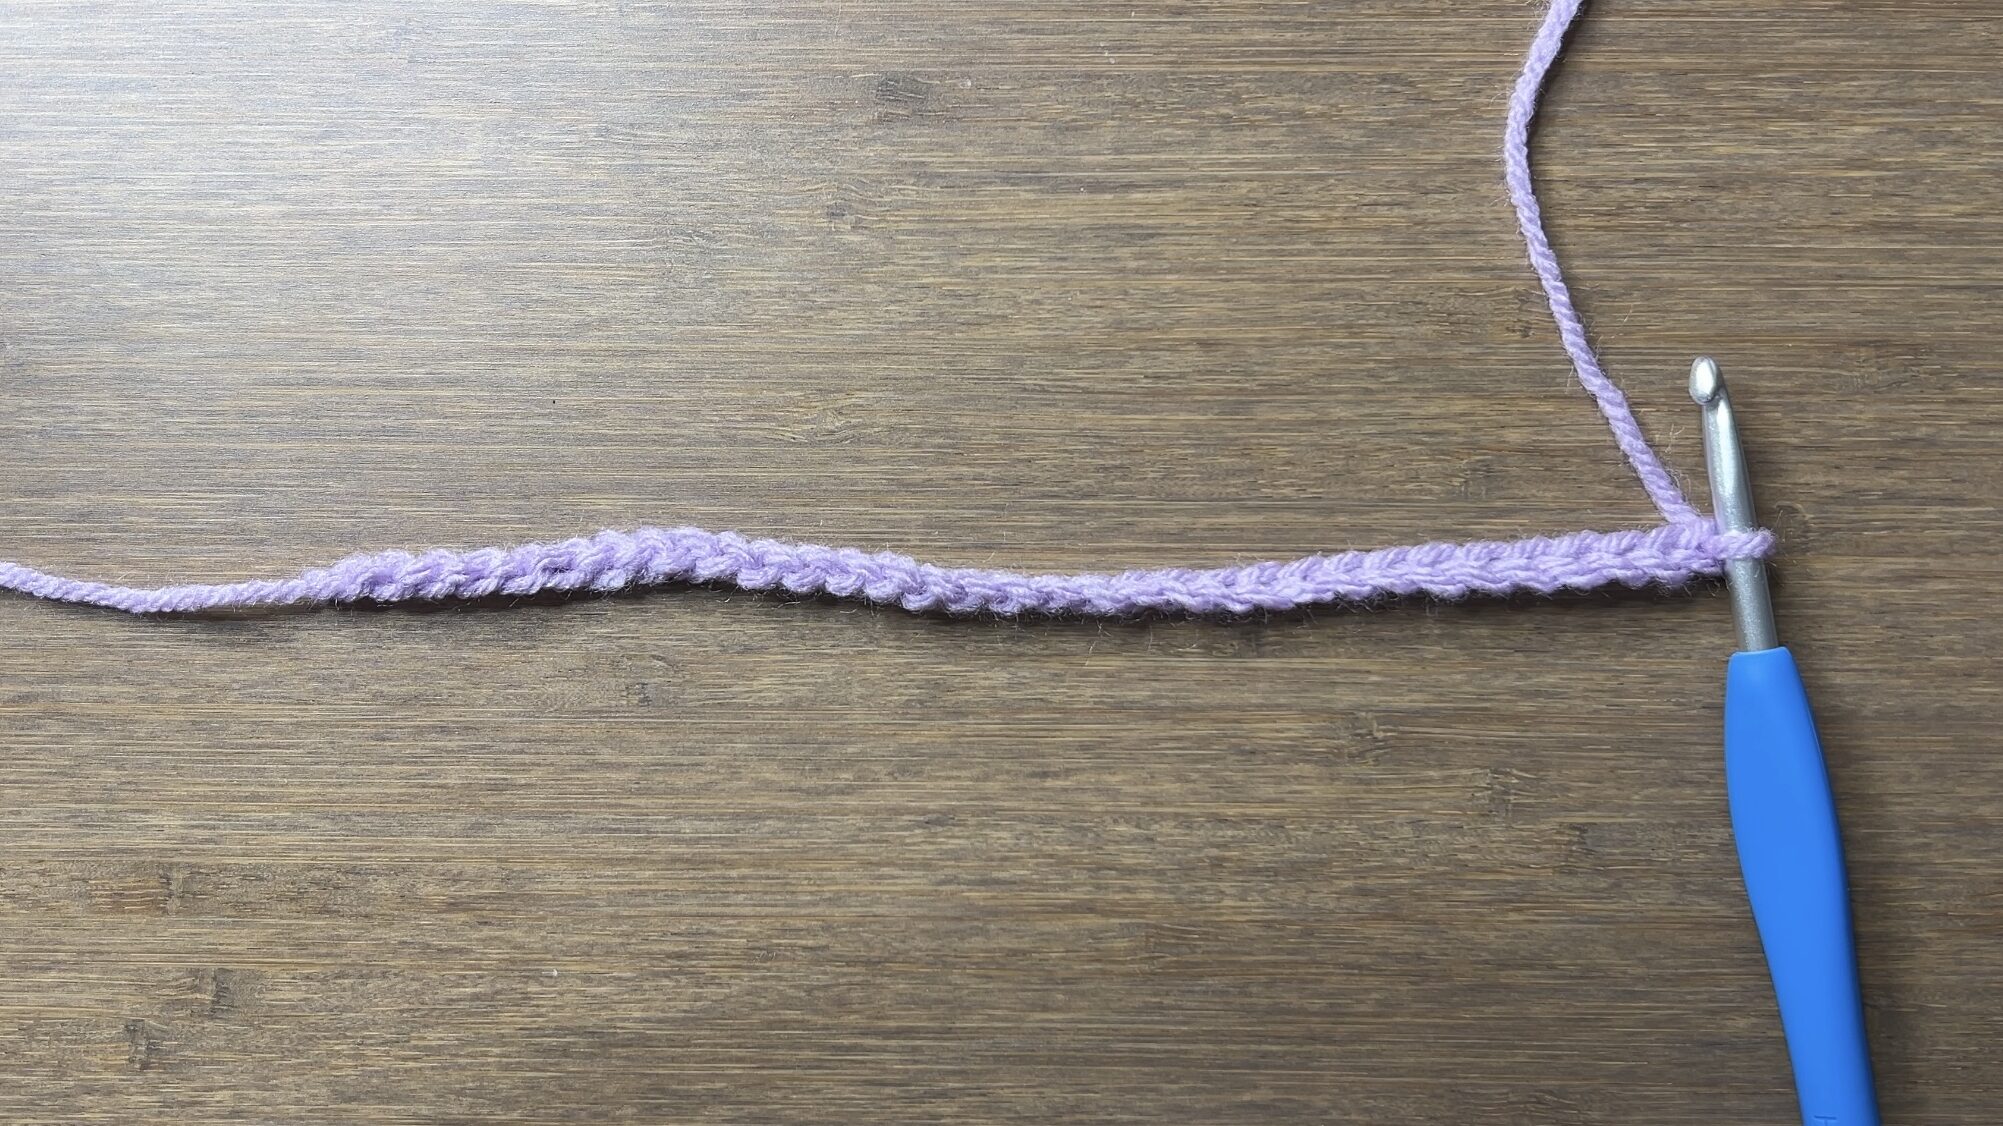
Round 1: bs in 3rd ch from hook, rep[sk1, bs] across, rotate to work along underside of foundation ch, bs in same ch, rep[sk1, bs] across, sl st (32)
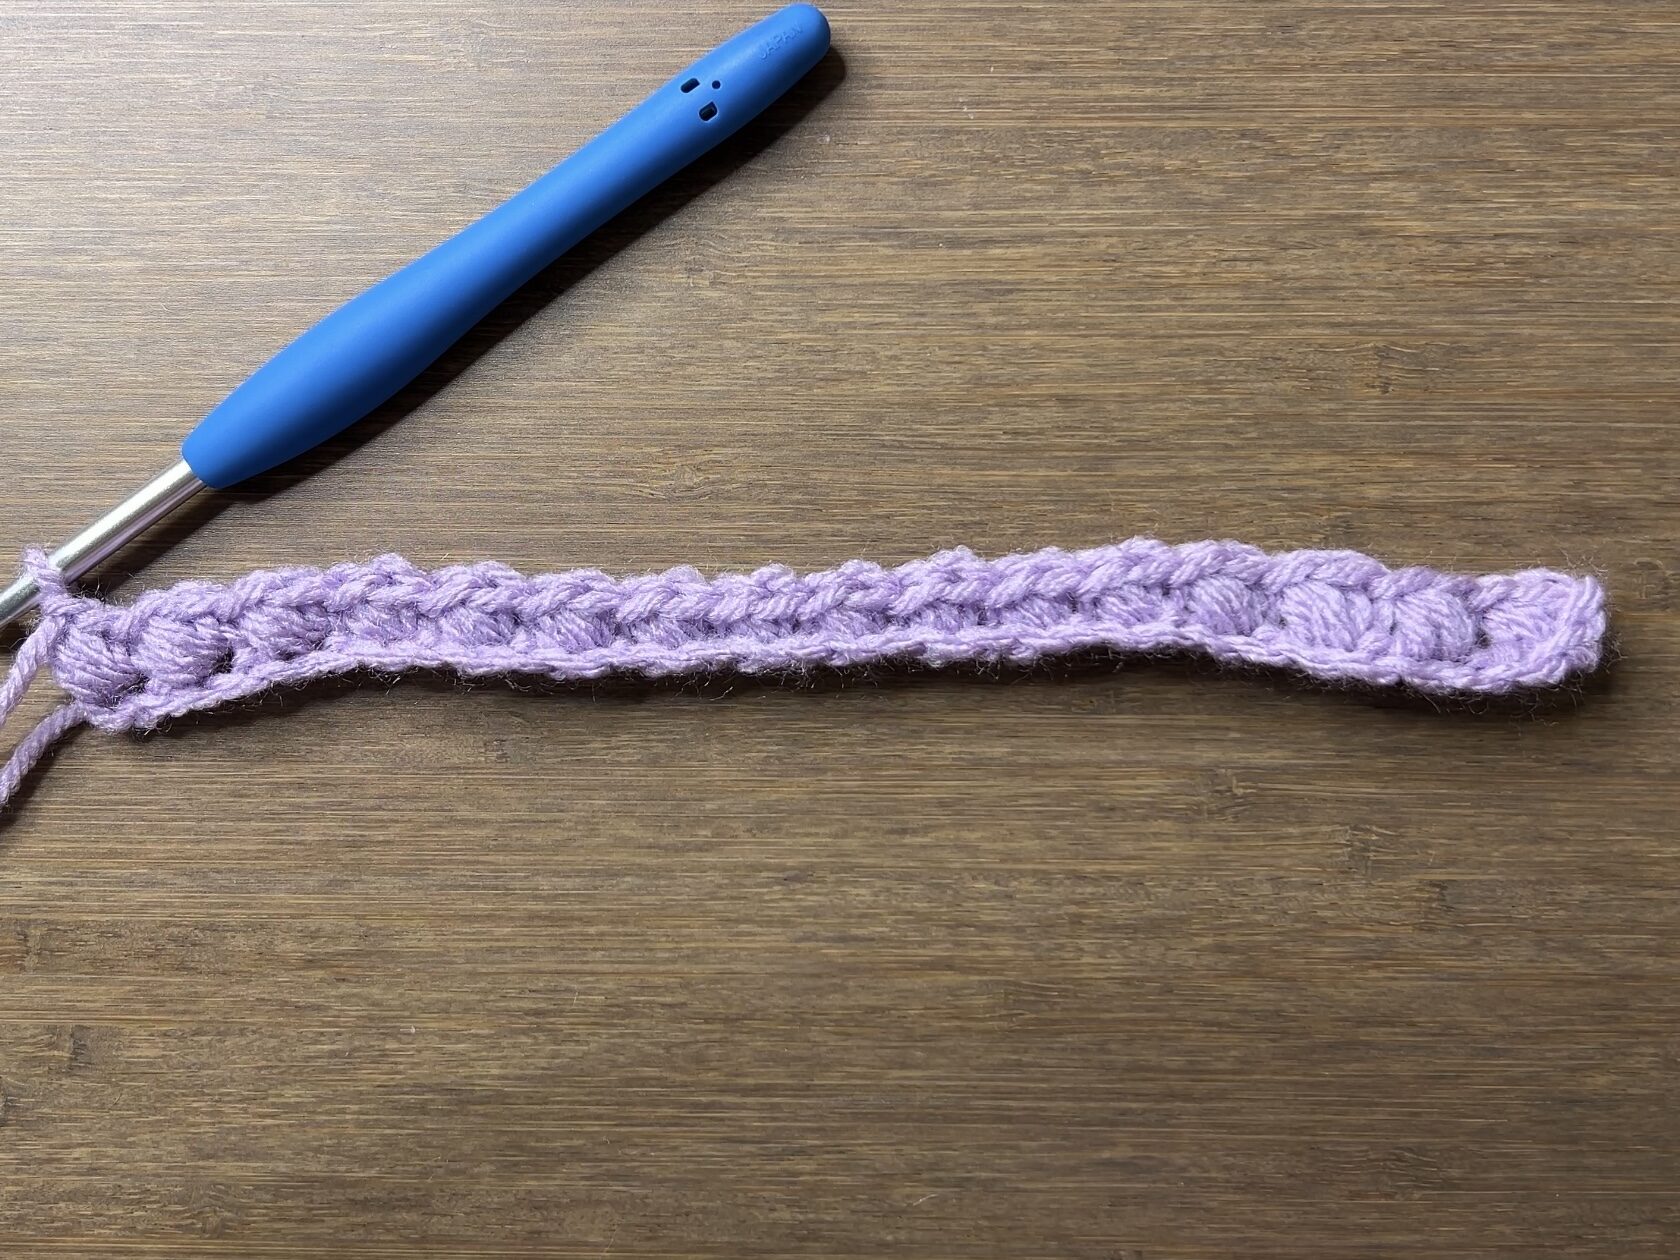
Round 2: ch2, turn, bs2 in first st, bs in next 14 st, bs2 in next 2 st, bs in next 14 st, bs2 in last st, sl st (36)

Note: For a larger base, add more rounds with 2 increases on both ends. For example, round 3 would be ch2, turn, bs2 in first st, bs in next 16 st, bs2 in next 2 st, bs in next 16 st, bs2 in last st, sl st (40).
Body
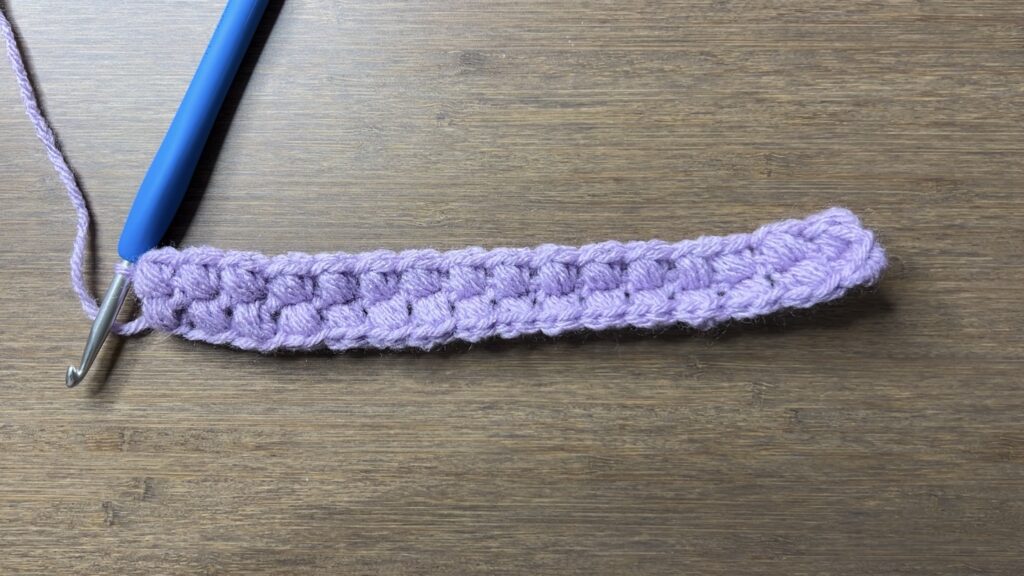
Rounds 3-18: ch2, turn, bs around, sl st (36)

Note: Do less rounds for a shorter bag or more rounds for a longer bag.
Round 19: ch1, turn, sl st in every st and ch around, sl st to first st, fasten off (72)
Strap
Foundation: Make a slipknot with extra long tail end, ch51
This tail end will be used to sew one side of the strap to the bag. This eliminates the need to attach a new strand of yarn and the need to weave in the 2 extra loose ends from it.
Note: Chain less for a shorter strap or more for a longer strap. Remember to account for stretch.
Row 1: sc in 2nd ch from hook and across (50)

Row 2-4: ch1, turn, sc across (50)
Note: Do fewer rows for a thinner strap or more rows for a wider strap. Do an even number of rows or you will need to attach an extra strand of yarn to sew one side of the strap to the bag.
Fasten off with an extra long tail end. This will be used to sew the other side of the strap to the bag. Stretch the strap out to make it slightly longer.

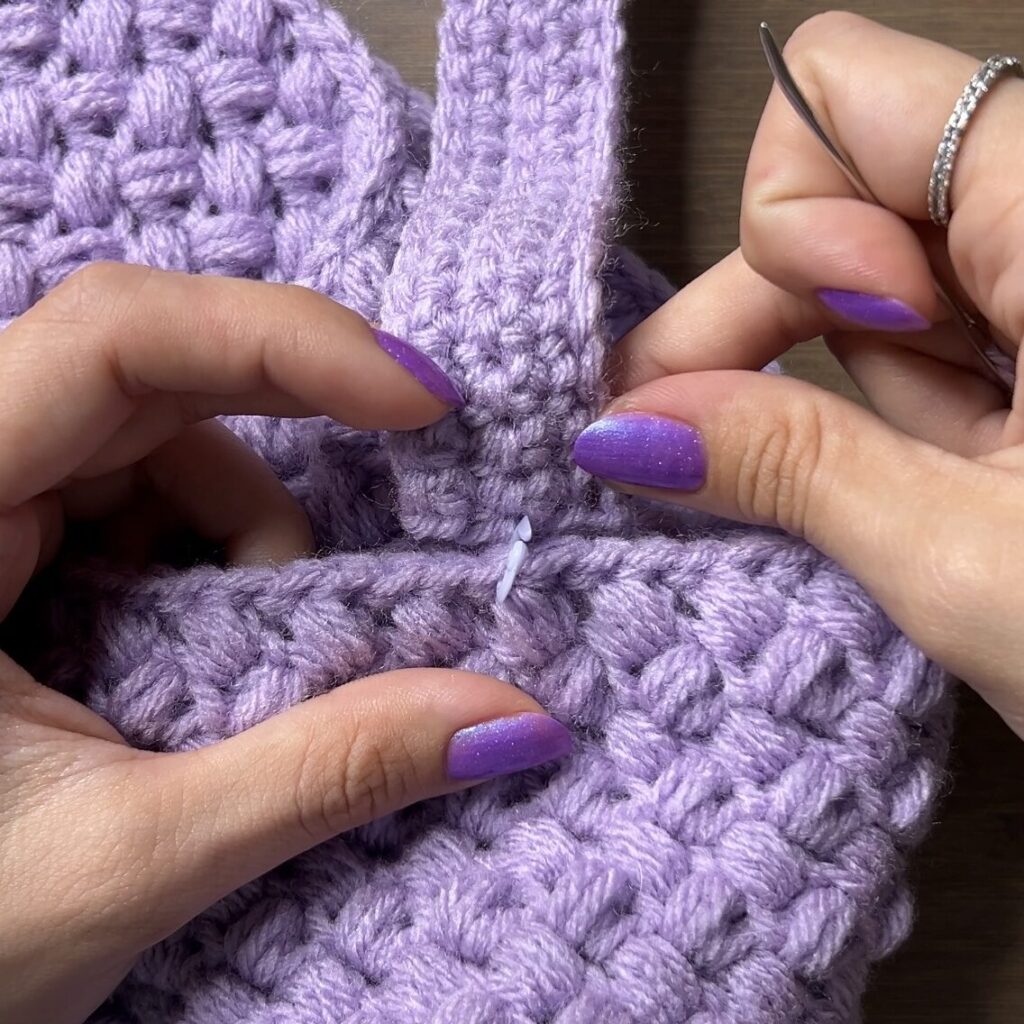
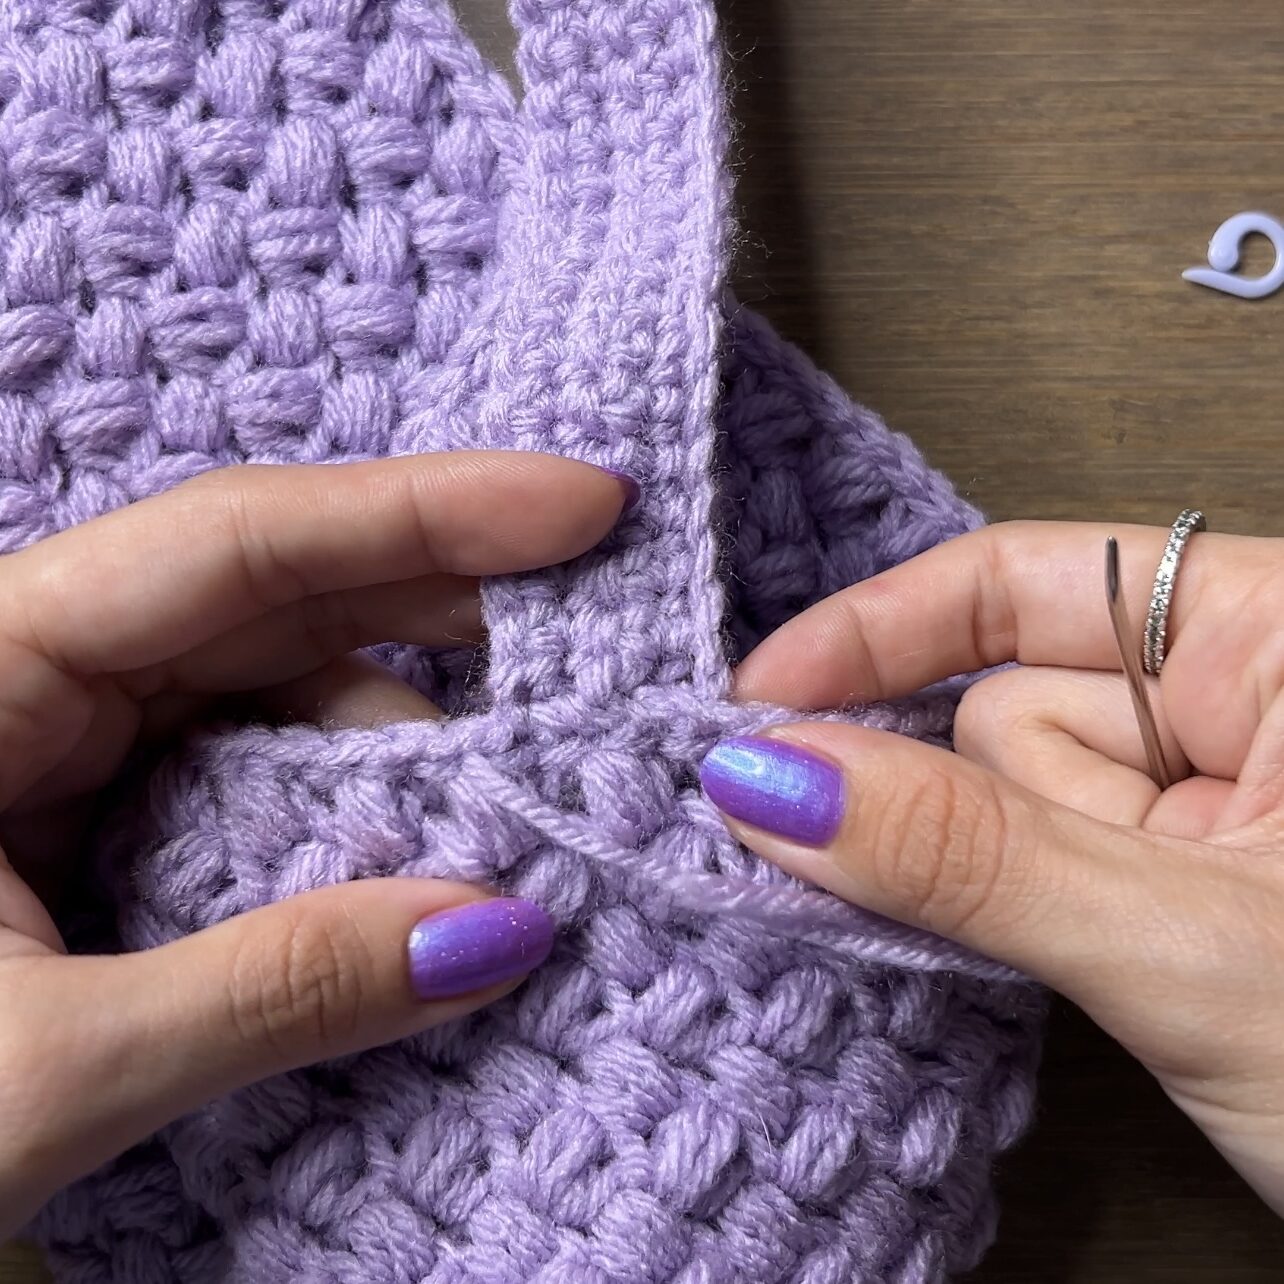
Attaching Strap to Bag
With the bag folded along the foundation chain, mark the stitch on either end with your stitch markers.

Thread one of the loose ends on the strap into your yarn needle. Flip the strap so the loose end is on the right side. Line up the middle of that end of the strap with the stitch marker. Whip stitch across. Tie a knot at the end. Repeat with the other end of the strap.
Finished Crochet Shoulder Bag
Weave in your loose ends and your crochet bean stitch bag is finished!