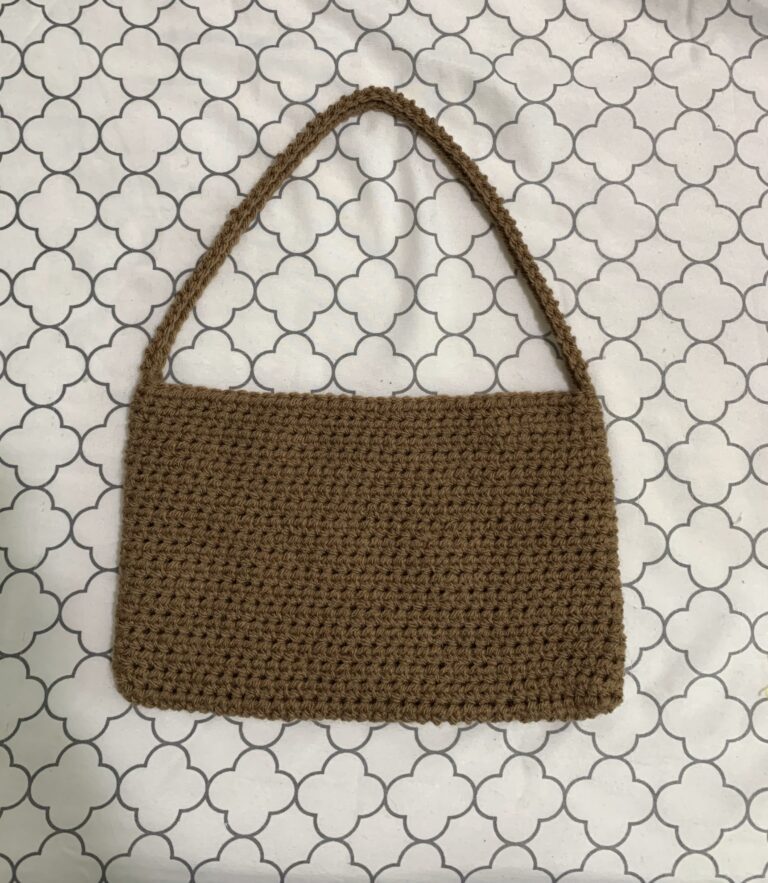
Crochet Bobble Bag | Free Pattern & Video Tutorial
Crochet your new favorite bag! This pattern makes a textured and slouchy bag with a comfortable strap that will make a fun addition to any outfit. This bag is crocheted in one piece with just a tiny bit of sewing. The pattern is intuitive and easy to adjust if you prefer a smaller or larger bag.
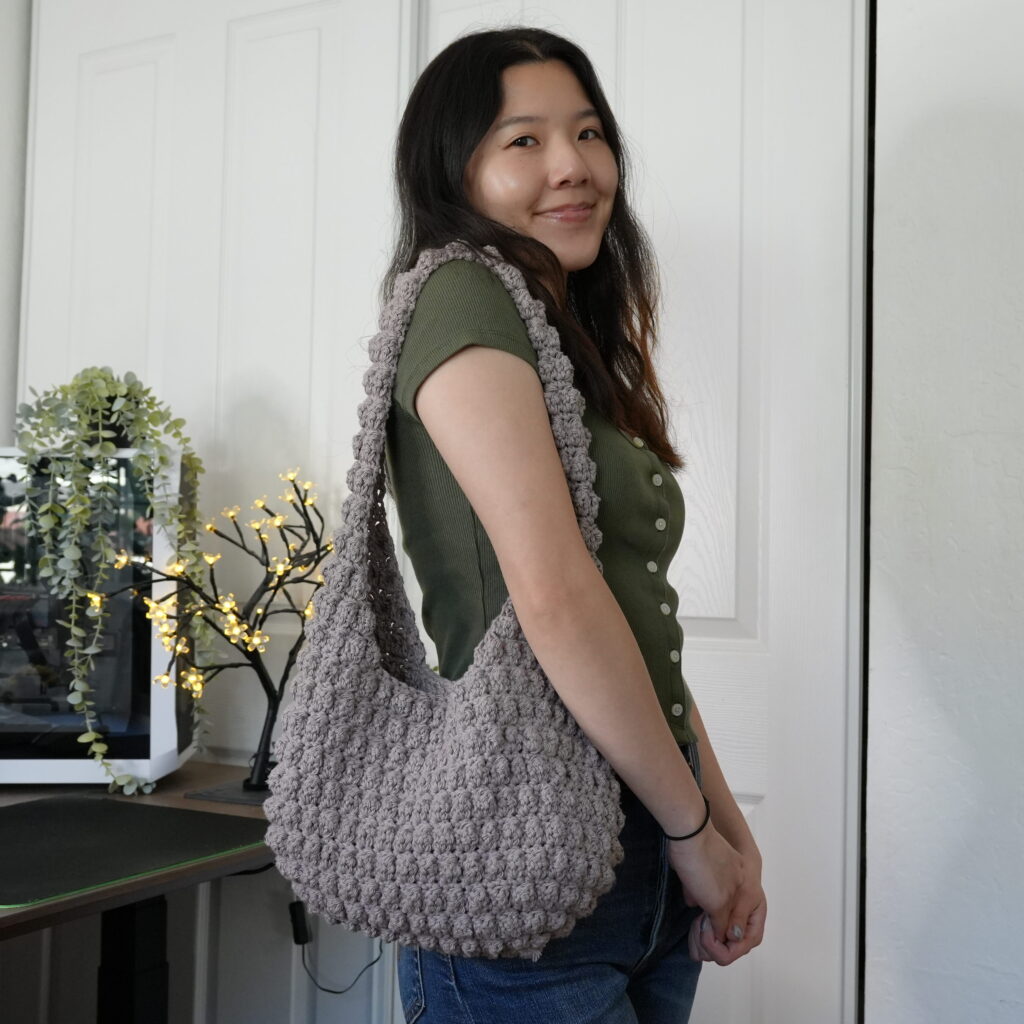
Table of Contents
This post may contain affiliate links. I may earn a small commission on qualifying purchases at no additional cost to you!
Crochet Bobble Bag Video Tutorial
Become a member to get early access to new videos!
You can follow along with my YouTube video to make your own crochet bobble bag! I have timestamps included to section the video and help you jump to any point you need to!
Pattern Information
Materials
- 250 grams of medium weight yarn (Favorite Cotton in “Wild Mushroom”)
- 5.5mm Clover Amour crochet hook
- Scissors
- Yarn needle
- Stitch markers

Crochet Abbreviations
ch = chain
dc = double crochet
rep = repeat
sc = single crochet
sc3tog = single crochet 3 together
sl st = slip stitch
st = stitch
tr3tog = treble crochet 3 together (aka bobble stitch)
Gauge
4.5 rows of 6.25 bobbles makes a 10 x 10 centimeter (4″ x 4″) square
Dimensions
*includes instructions to adjust sizing
Body: 33 centimeters wide x 22 centimeters long (13 x 8.7 inches)
Overall: 33 centimeters wide x 49 centimeters long (13 x 19.3 inches)
Notes and Tips
- This pattern is written using US crochet terms
- The number in (parentheses) at the end of each row is the stitch count after finishing that row
- Italicized notes tell you what to change to adjust the size
- The chain 1/2 at the beginning of each row/round does NOT count as a single/double crochet
- The slip stitch at the end of each round goes into the first stitch of that round
- The first stitch of every new round goes into the same stitch we slip stitched to in the previous round
Crochet Bobble Bag Pattern
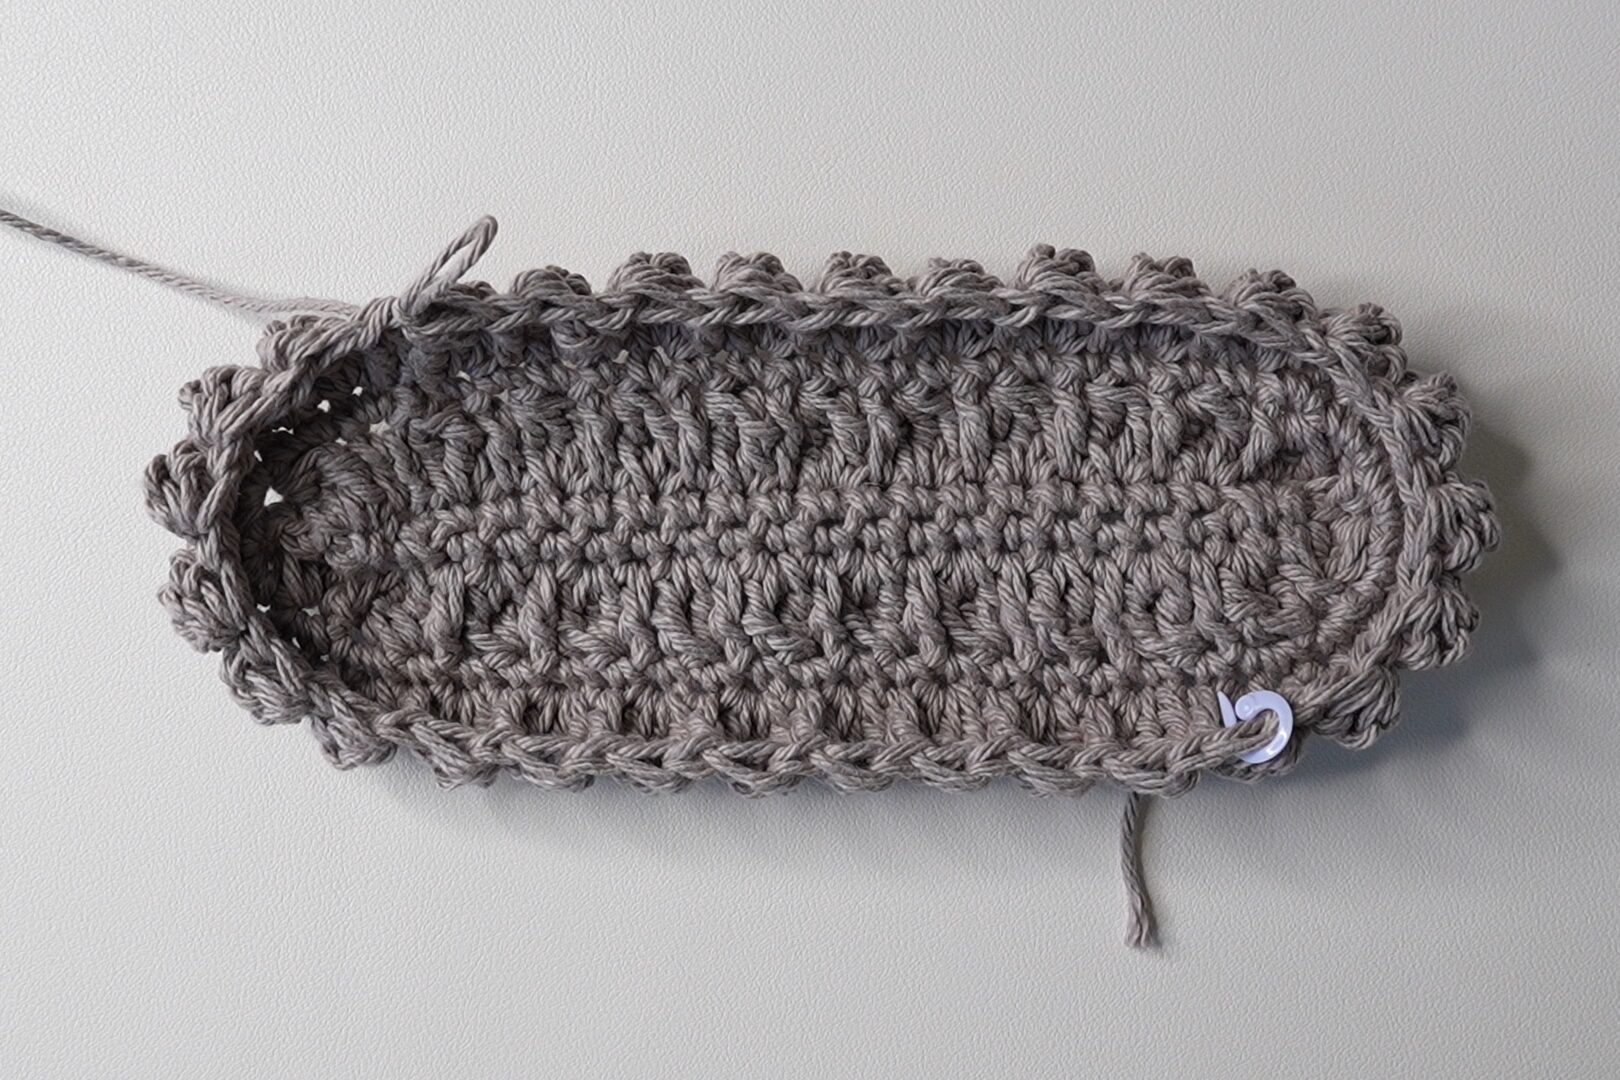
Base
Foundation: Make a slipknot, ch19
In Round 1, place your st marker in the first sc into the last ch and move it up every round.
Tip: To minimize the holes from the 6 sc in the first and last ch, see the video tutorial for where to place the 6th sc.
Round 1: sc6 in 2nd ch from hook, sc in next 16 ch, sc6 in last ch, rotate your foundation chain to work along the underside, sc in next 16 ch, sl st (44)
Round 2: ch2, rep[dc in next st, tr3tog in next st] around, sl st (44)
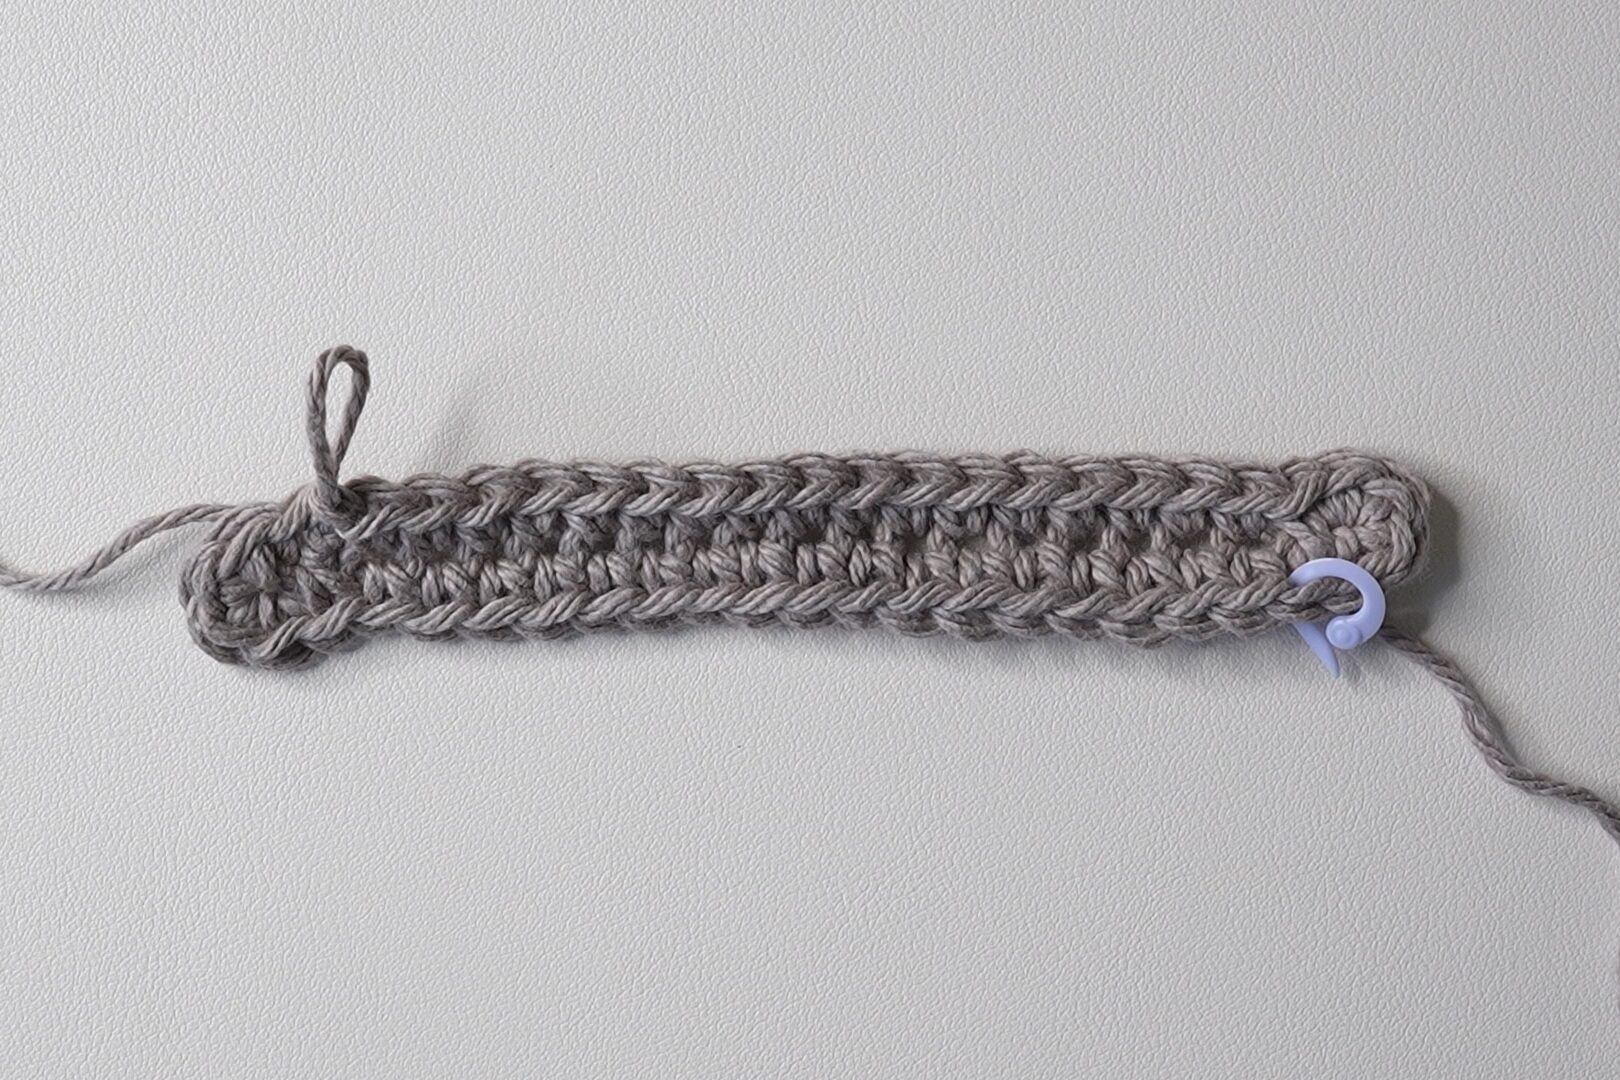
Round 3: ch1, *sc2 in next 6 st, sc across* until st marker, rep between **, sl st (56)
Round 4: rep[Round 2] (56)
Round 5: ch1, *rep[sc in next st, sc2 in next st] 6 times, sc across* until st marker, rep between **, sl st (68)
Round 6: rep[Round 2] (68)
Round 7: ch1, *rep[sc in next 2 st, sc2 in next st] 6 times, sc across* until st marker, rep between **, sl st (80)
Round 8: rep[Round 2] (80)
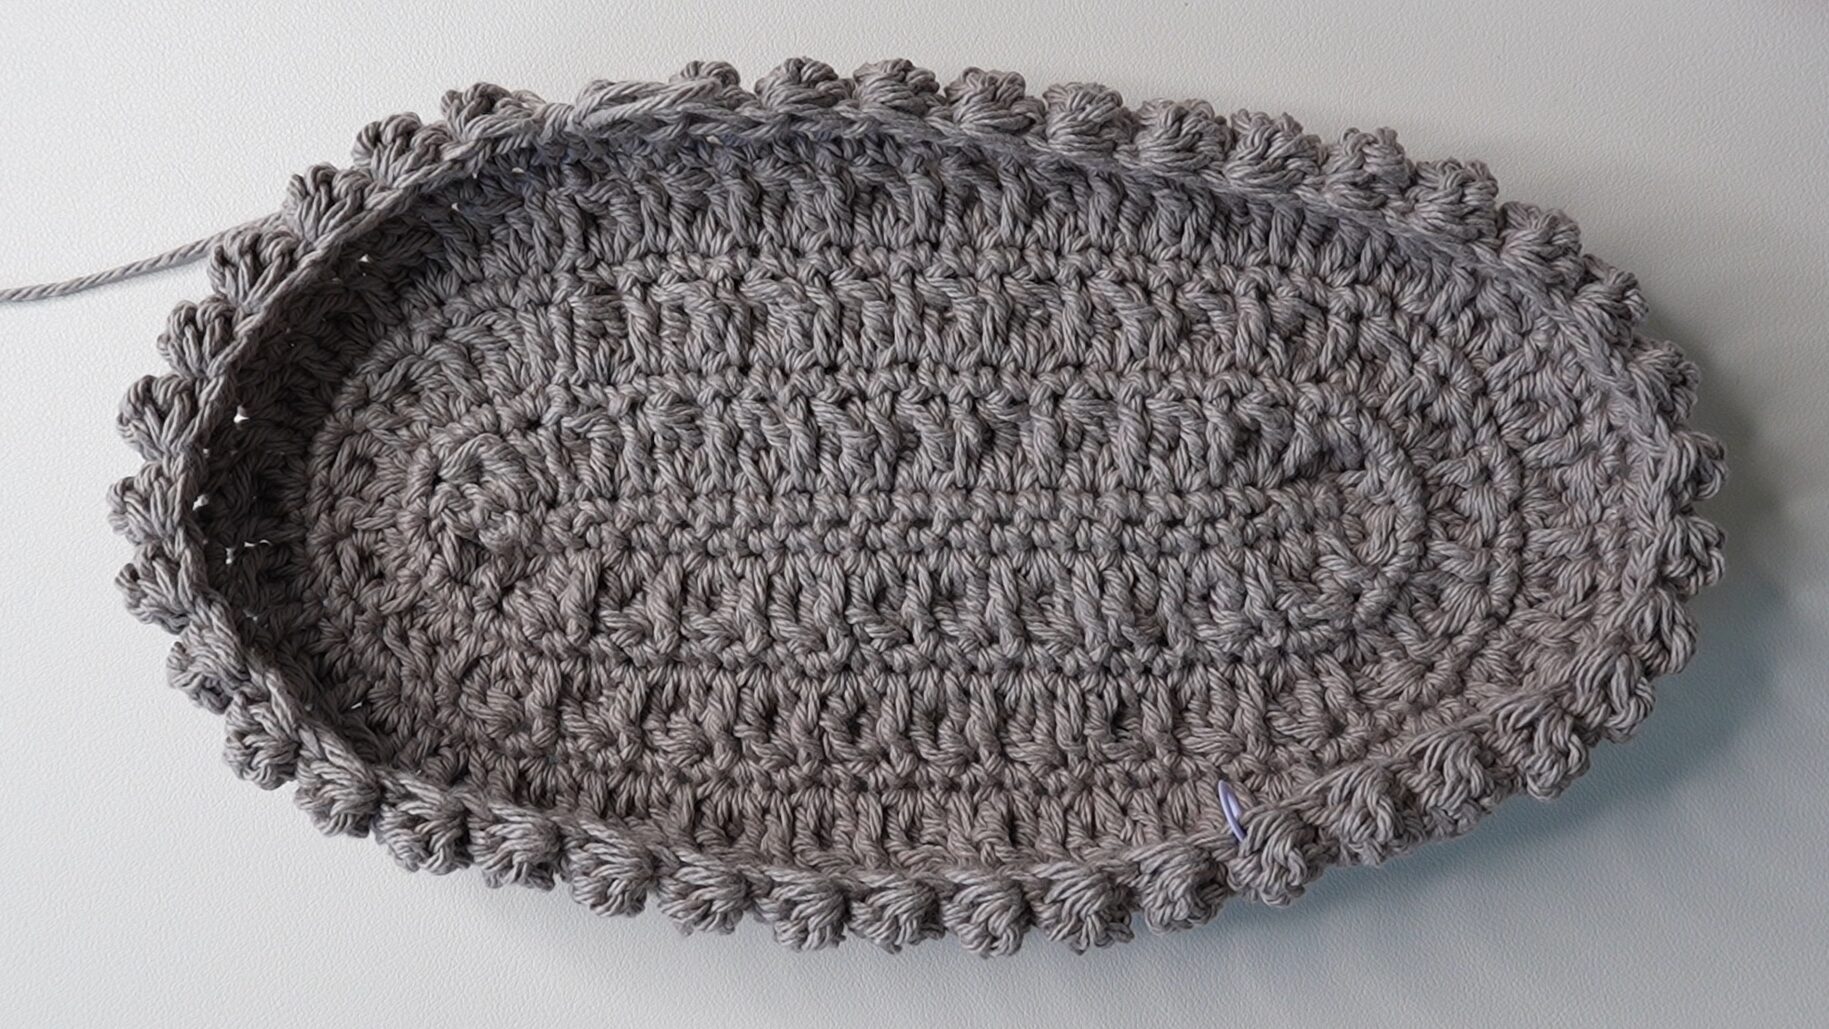
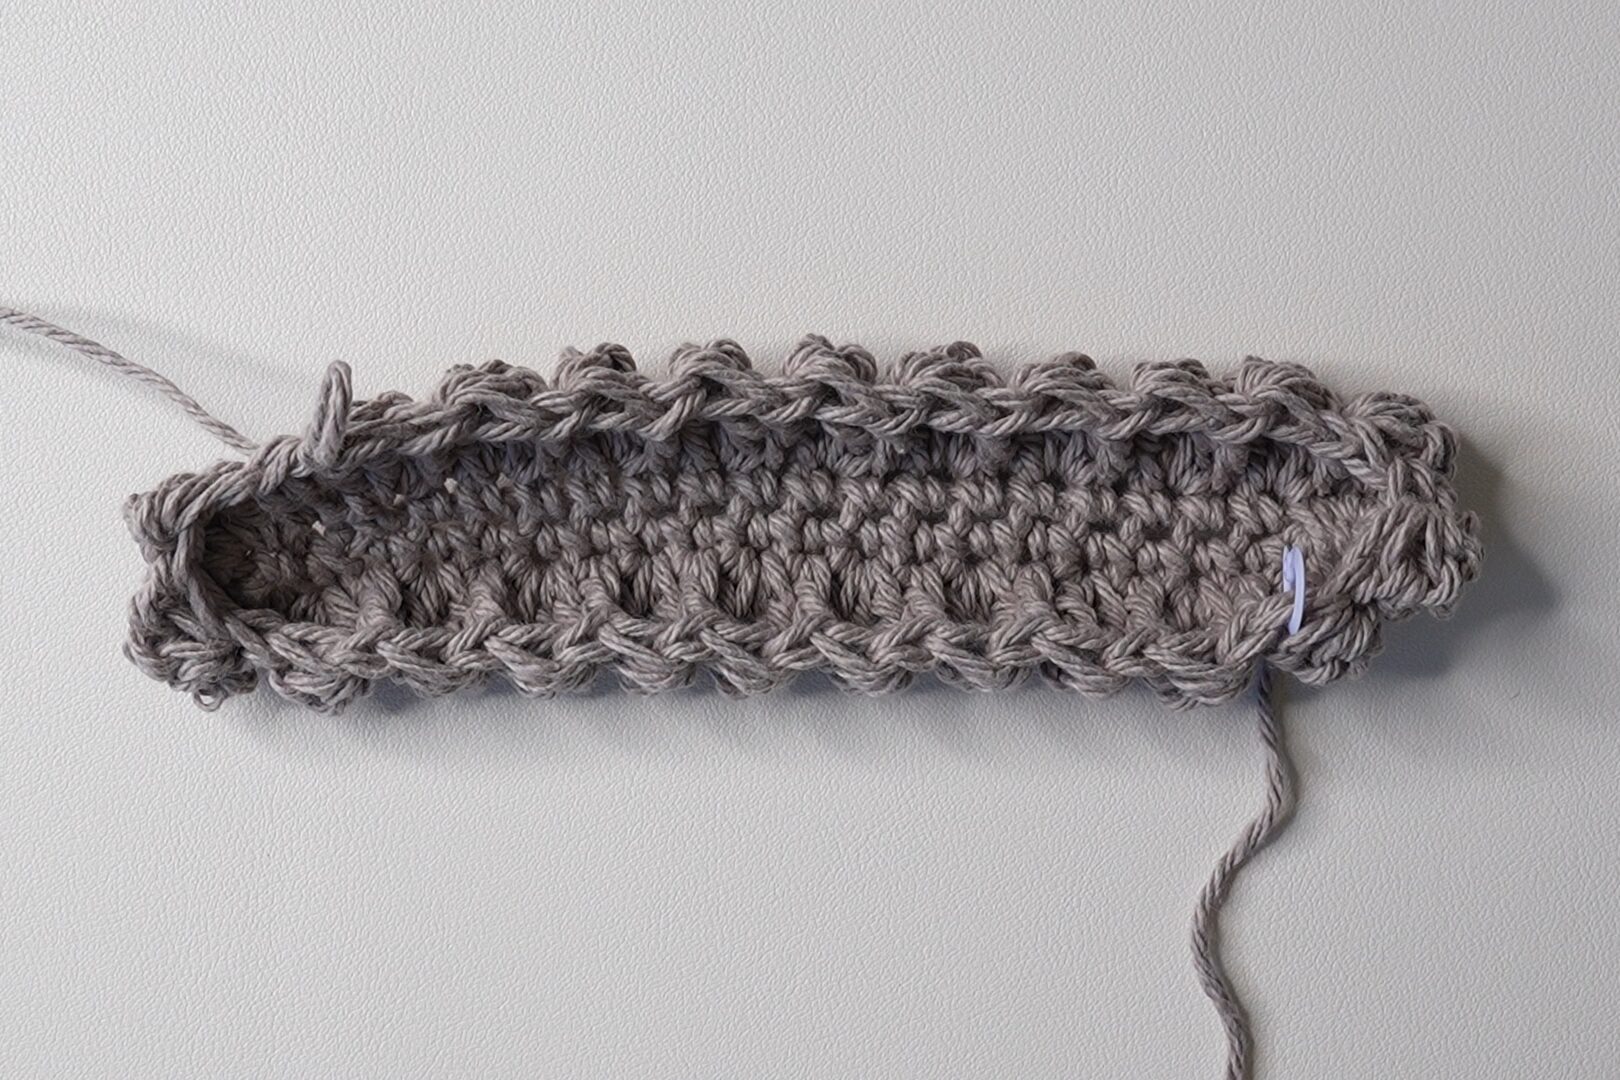
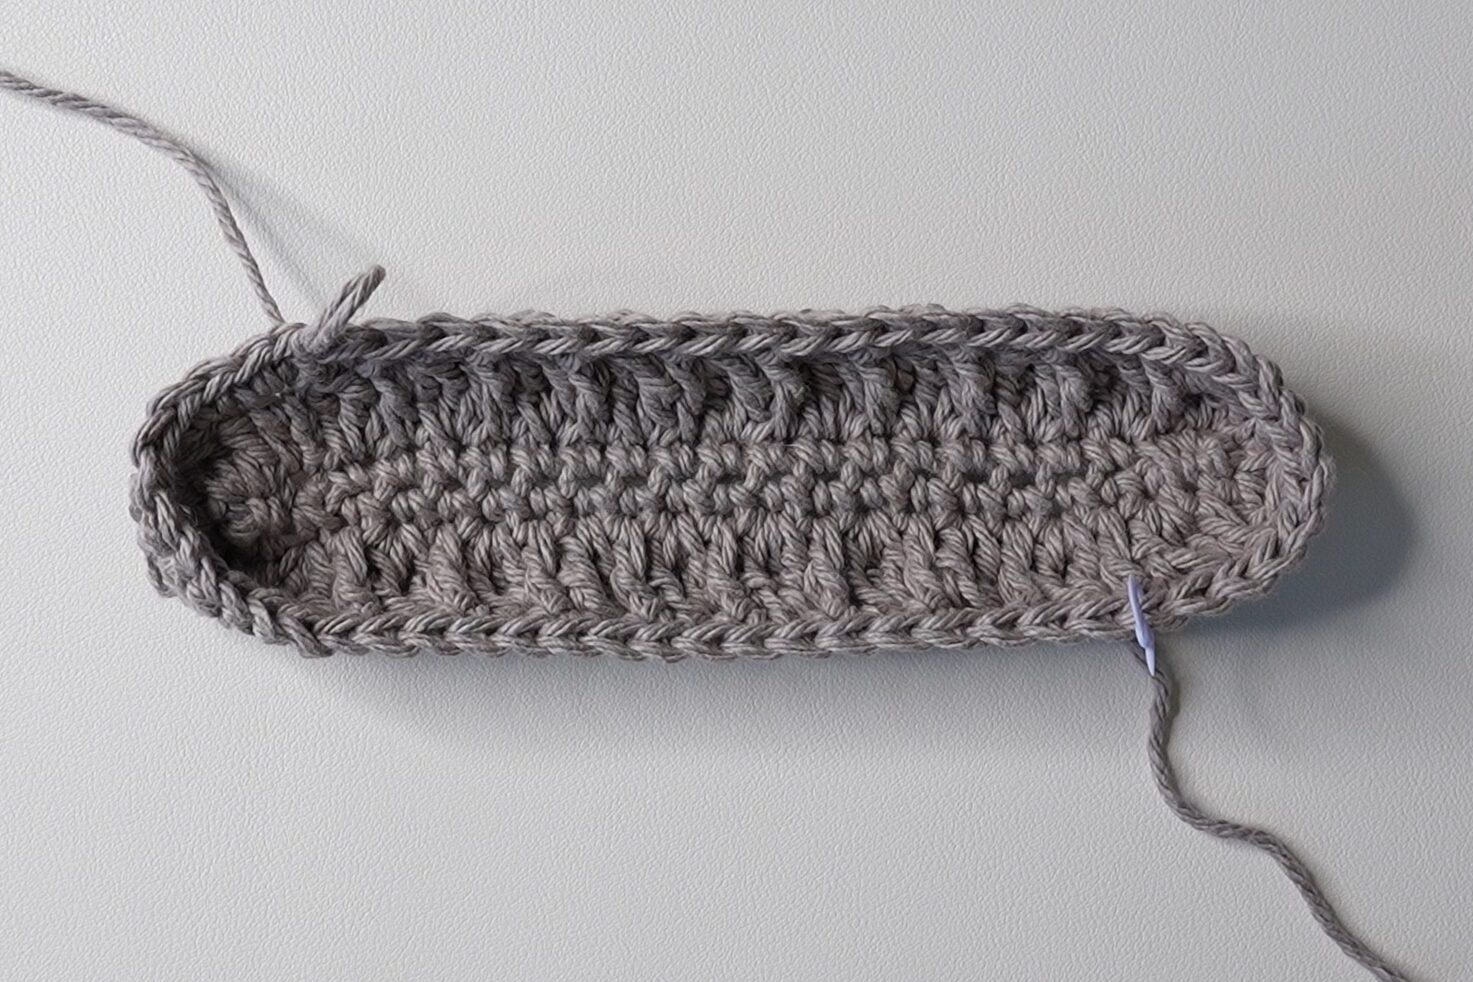
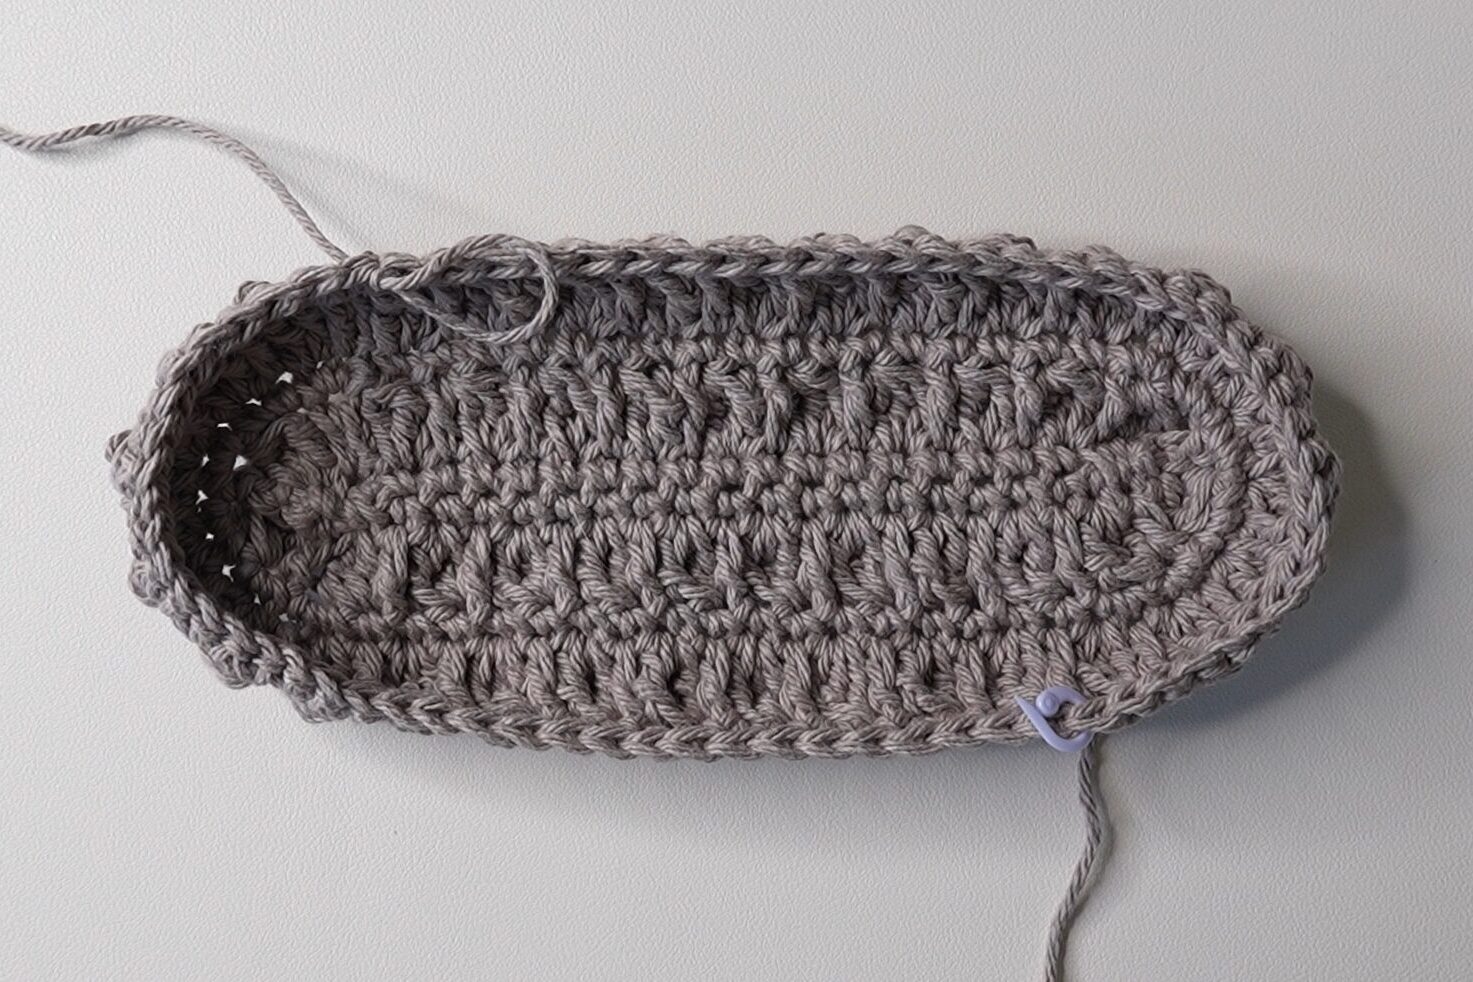
Body
Round 9: ch1, sc around, sl st (80)
Rounds 10-21: rep[Round 2, Round 9] (80)
This means Round 10 is a repeat of Round 2, Round 11 is a repeat of Round 9, Row 12 is a repeat of Round 2, and so on.
Note: Do fewer rounds for a shorter bag or more rounds for a longer bag. Stop after a round of single crochets.
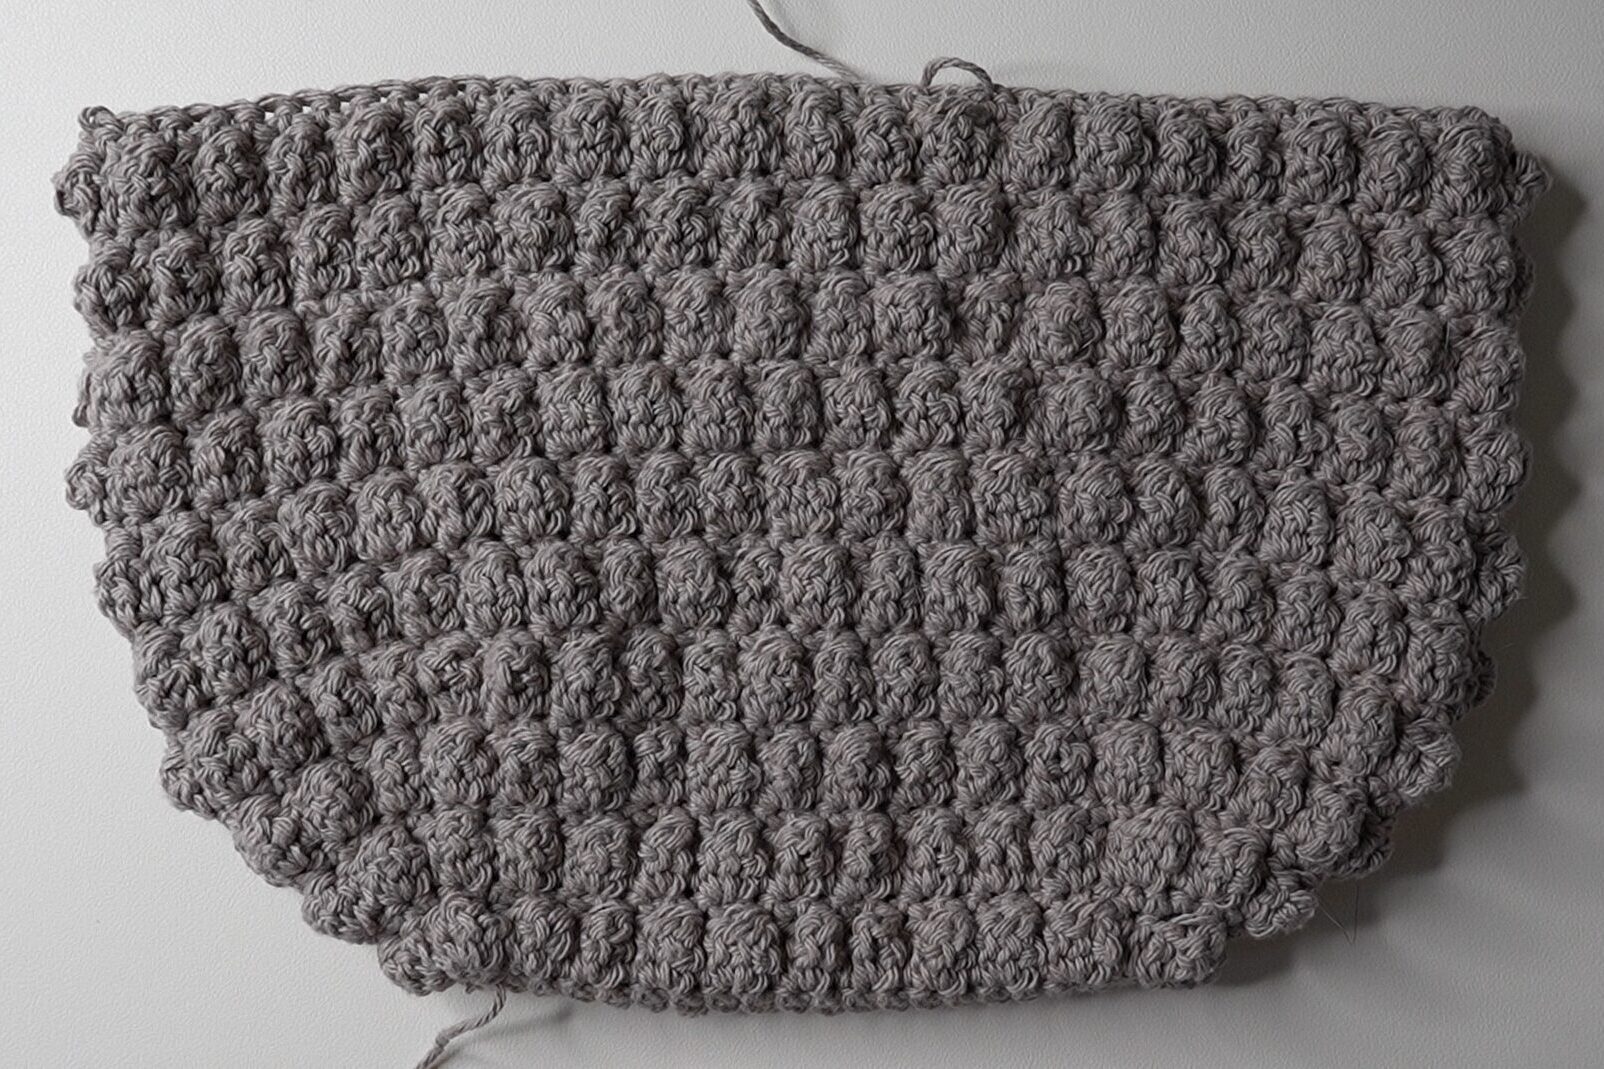
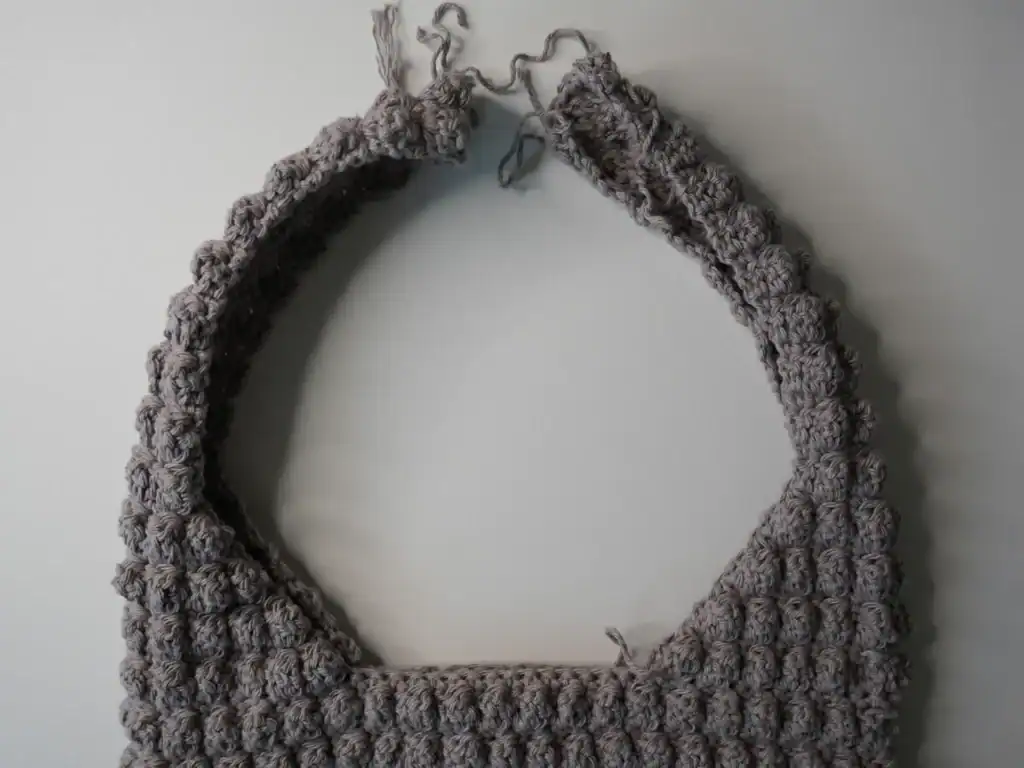
Strap
Flatten the bag along the foundation chain, making sure there are 20 bobble stitches on the bottom layer and 20 on the top layer. Count 6 bobble stitches from each edge and find the double crochet after the 6th bobble stitch. Mark the single crochets above those double crochets. View the tutorial to follow along.
Each strap will be worked separately. (See image below) One will be worked from the back-left stitch marker to the front-left stitch marker. The other will be worked from the front-right stitch marker to the back-right stitch marker.
Attach your yarn to the back-left stitch marker from the inside of the bag.
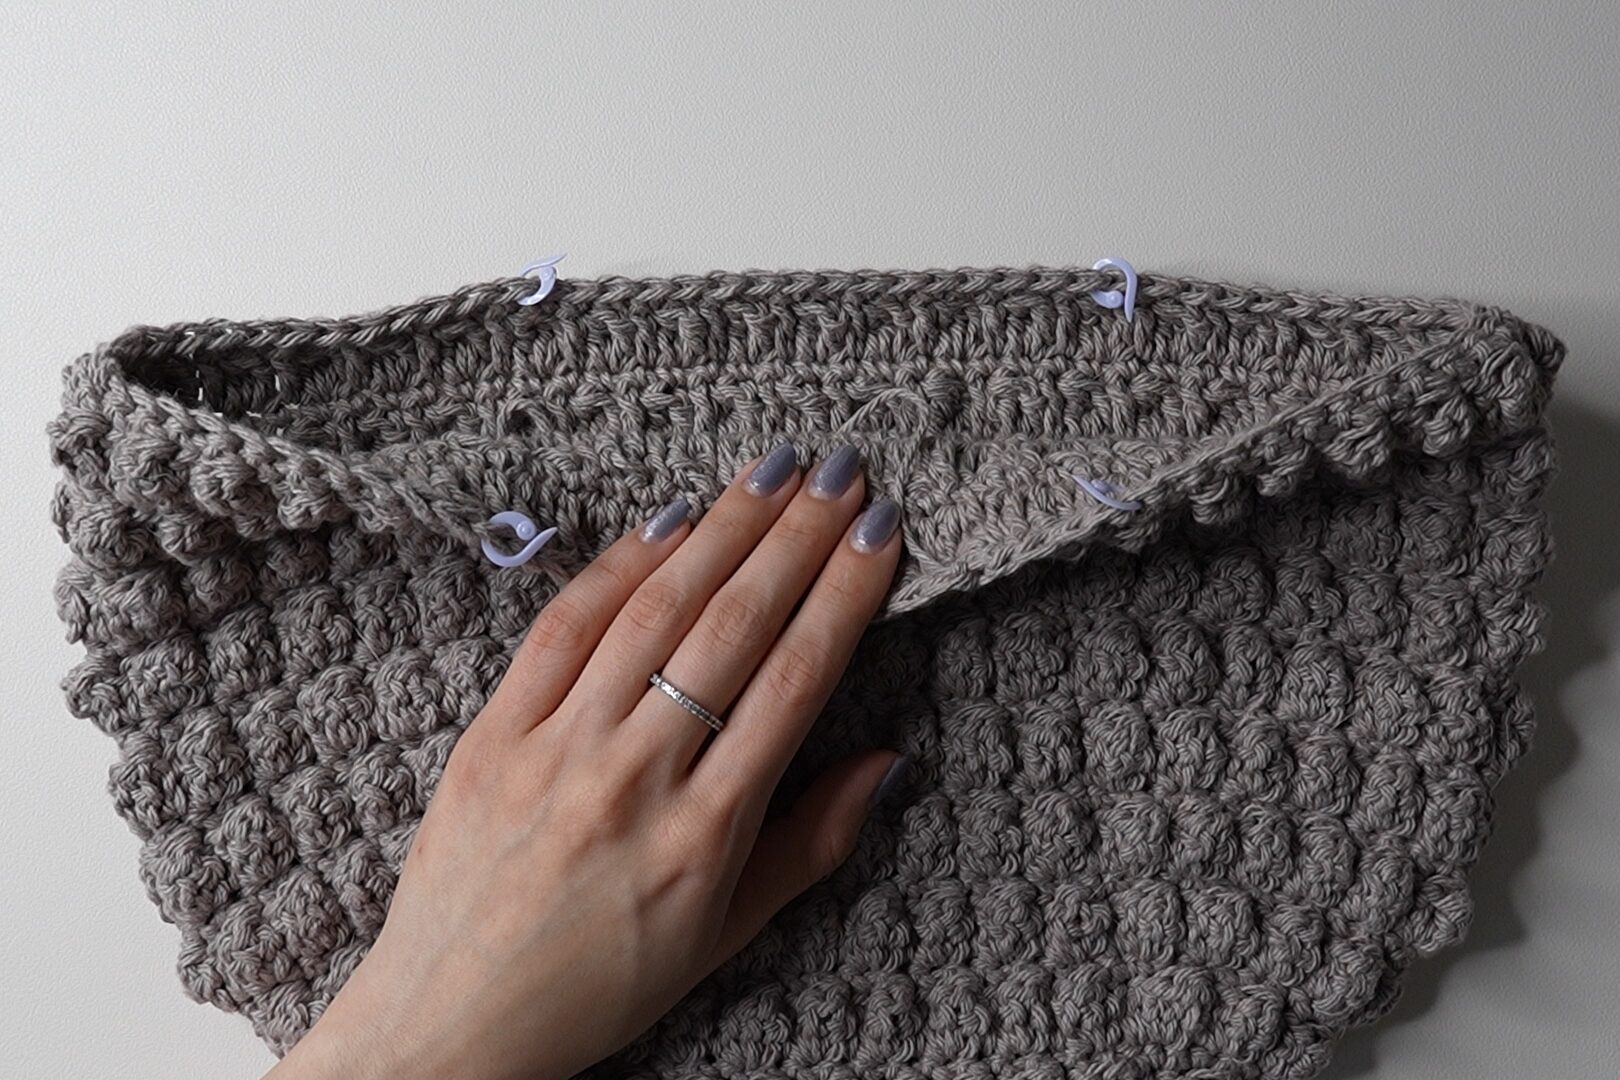
Tip: The first rows of the straps will start and end with the stitch that has the stitch marker. They will start and end with double crochets.
Row 1: ch2, dc in same st, rep[tr3tog in next st, dc in next st] until after next st marker (25)
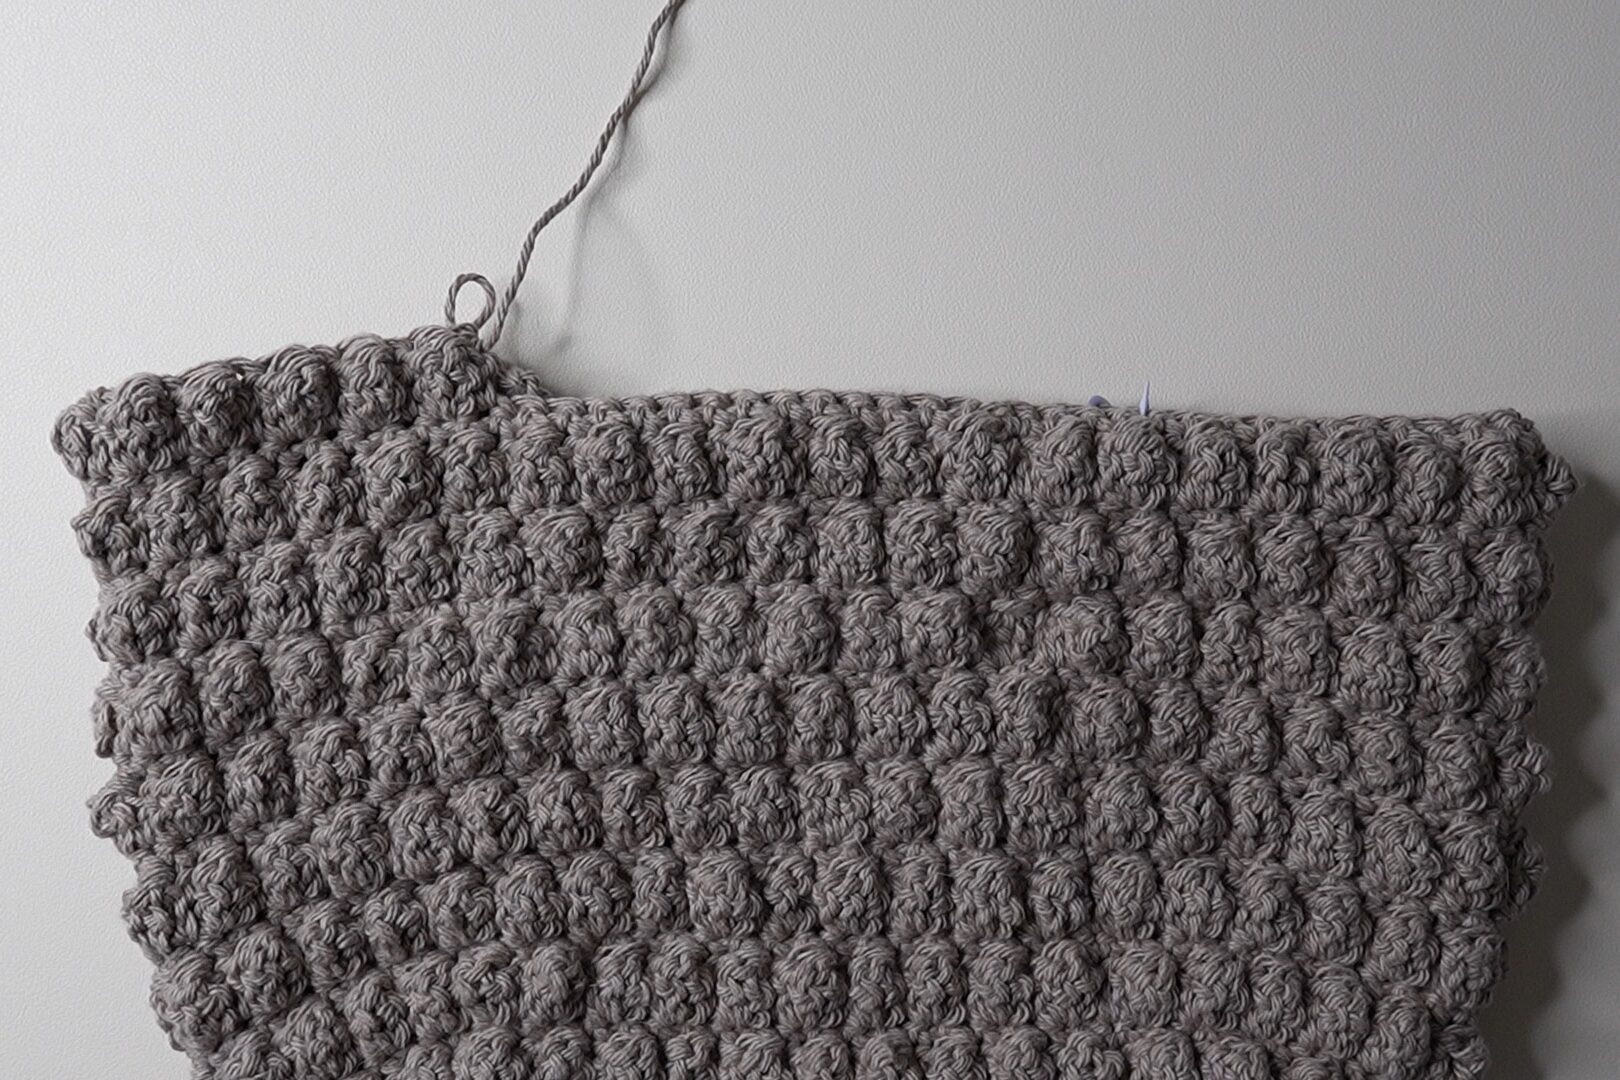
Row 2: ch1, turn, sc3tog, sc across until 3 st left, sc3tog (21)

Row 3: ch2, turn, rep[dc in next st, tr3tog in next st] across (21)
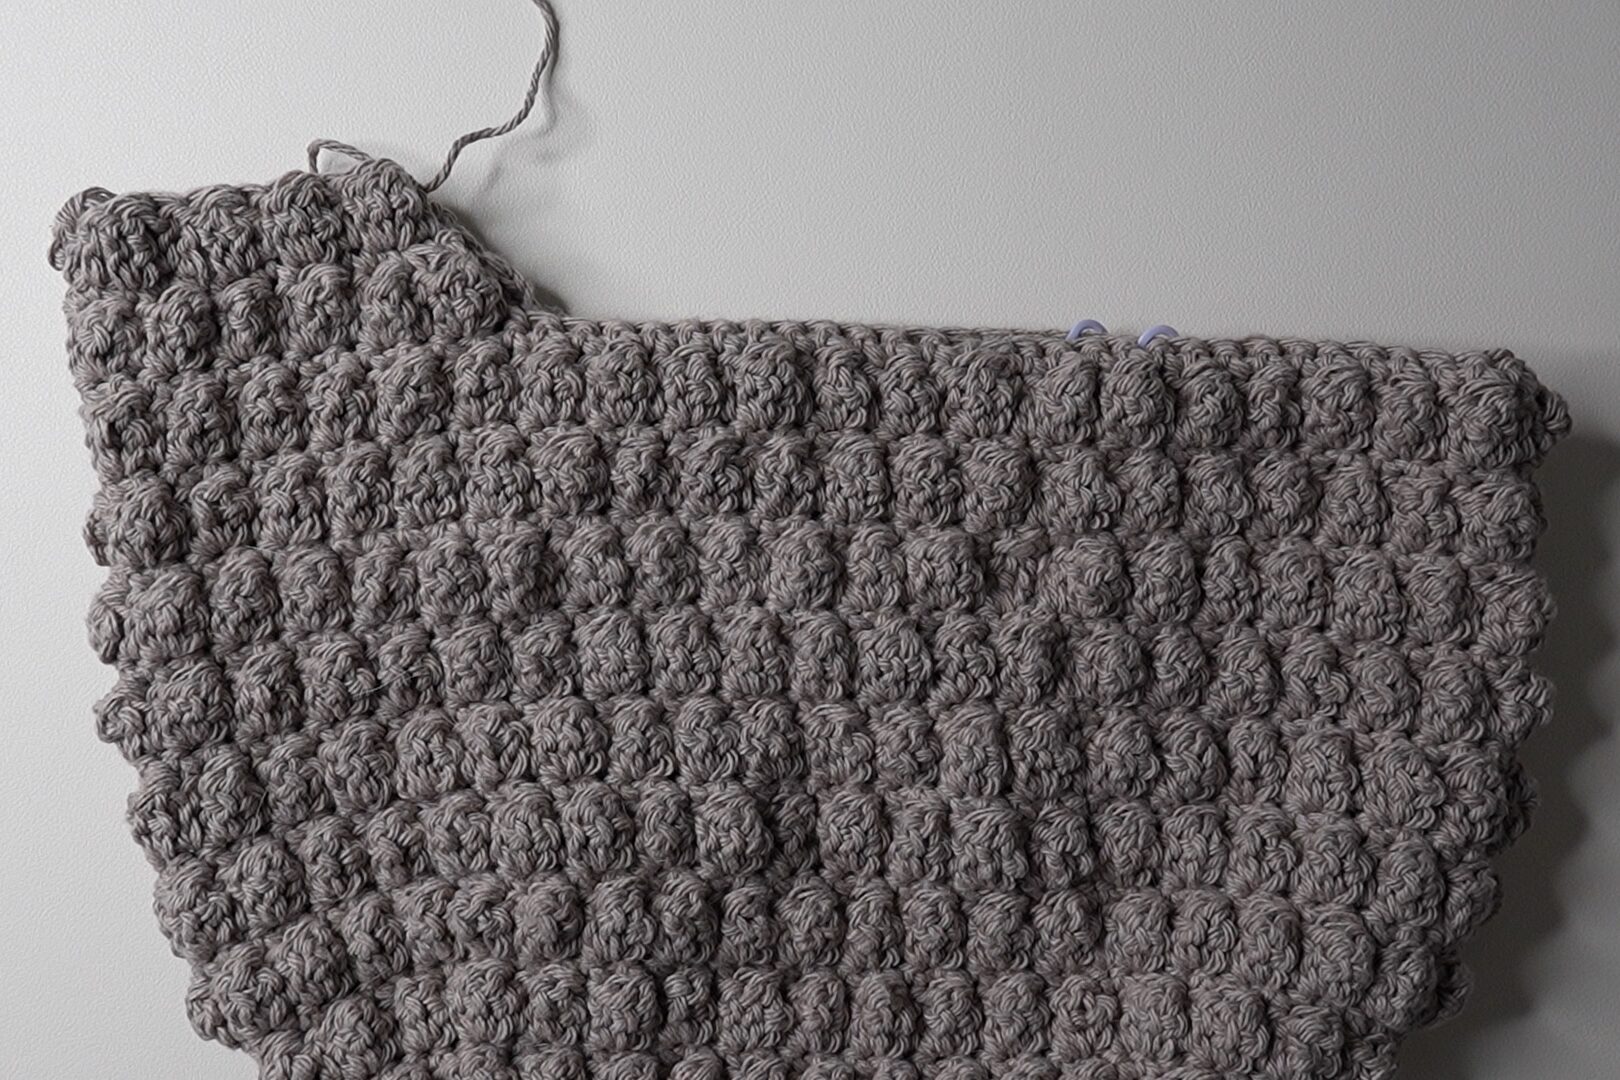
Rows 4-9: rep[Row 2, Row 3] (17, 17, 13, 13, 9, 9)
Row 10: ch1, turn, sc across (9)
Rows 11-27: rep[Row 3, Row 10] (9)
Note: Do fewer row for a shorter strap or more rows for a longer strap. Stop after a row of bobble stitches.
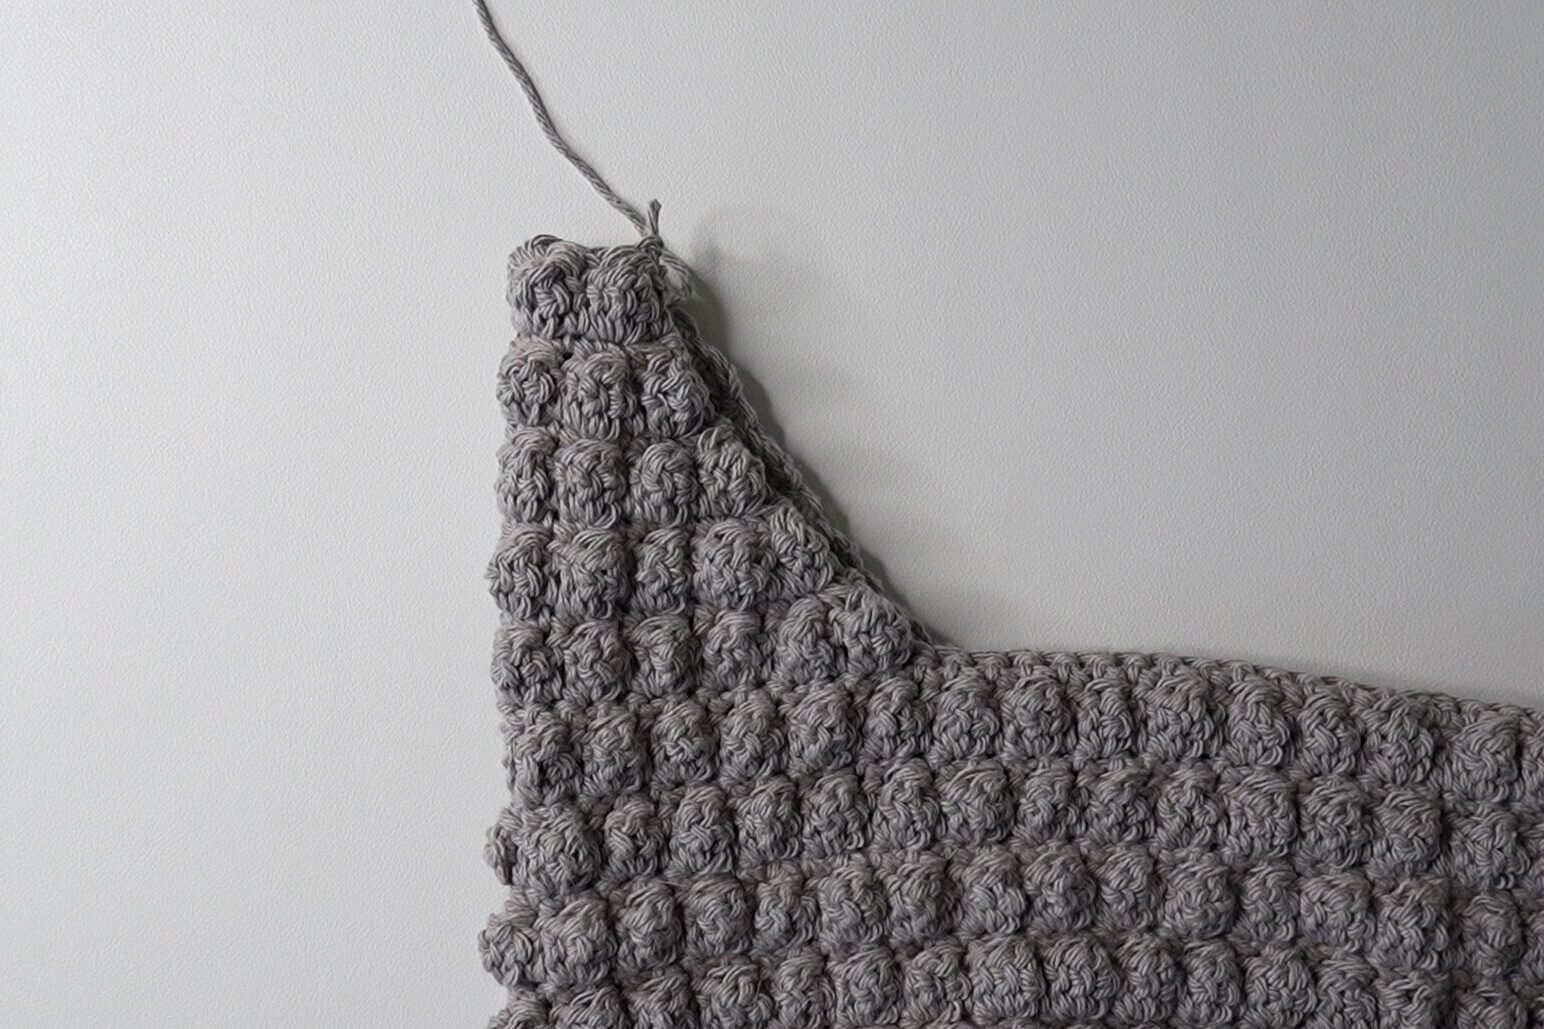
Fasten off with a 25cm (10″) long loose end for sewing the straps together.

Attach your yarn from the inside of the bag to the stitch marker on the right. Repeat Rows 1-27, but fasten off with a normal length loose end.
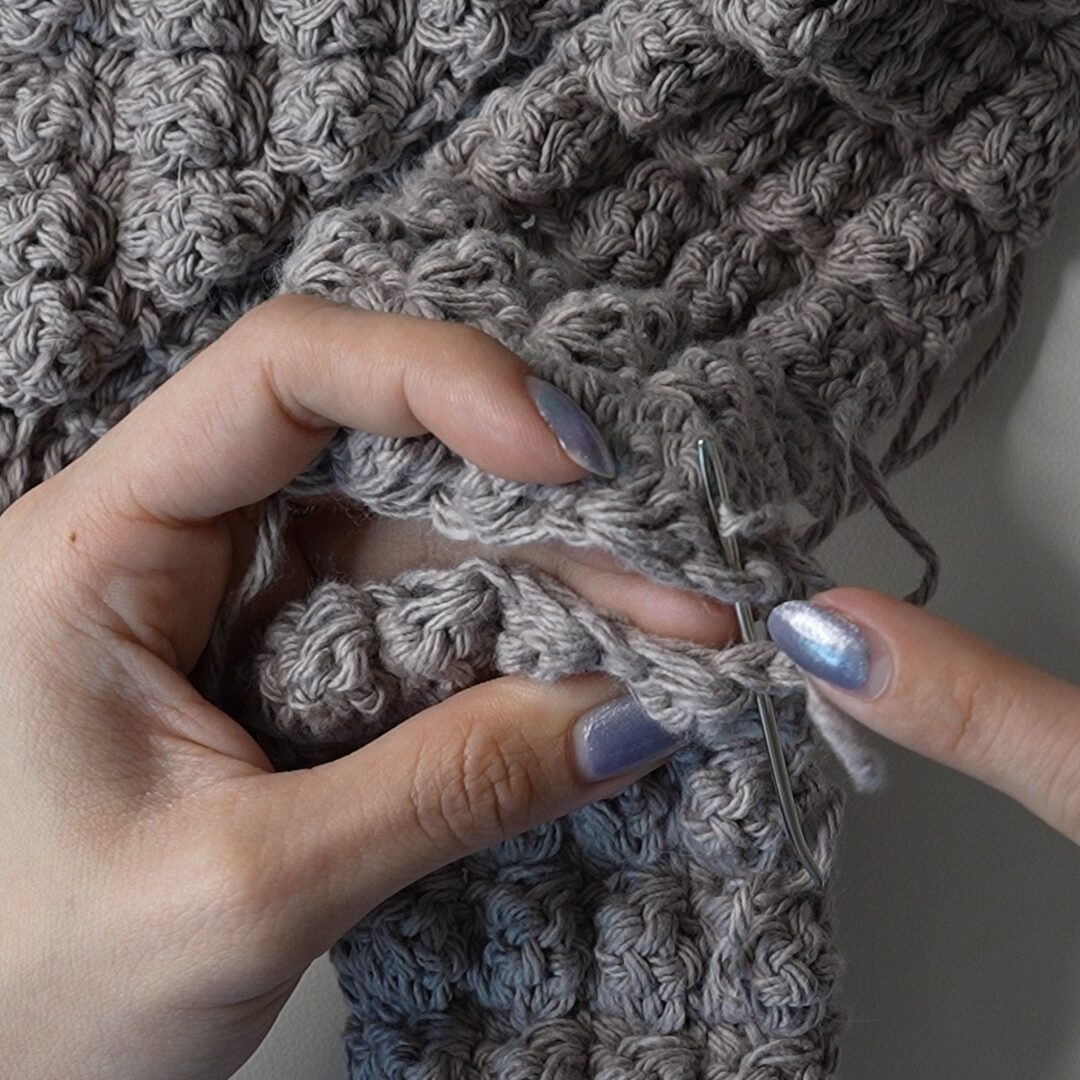
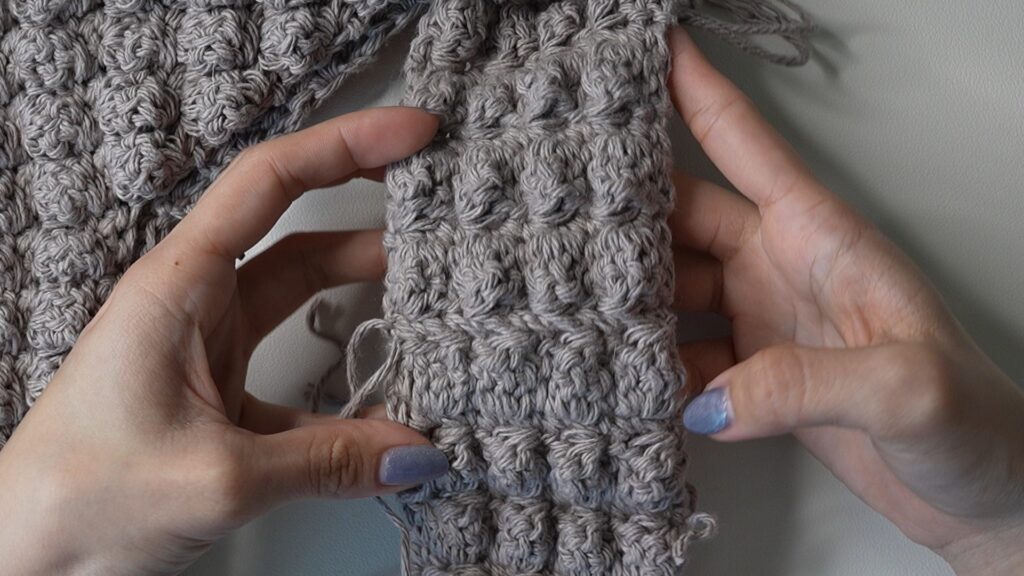
Sewing Straps Together
Line up the straps together and, using the long loose end left on the first strap, sew each stitch of the straps together. Tie the loose end with the loose end left from the second strap.
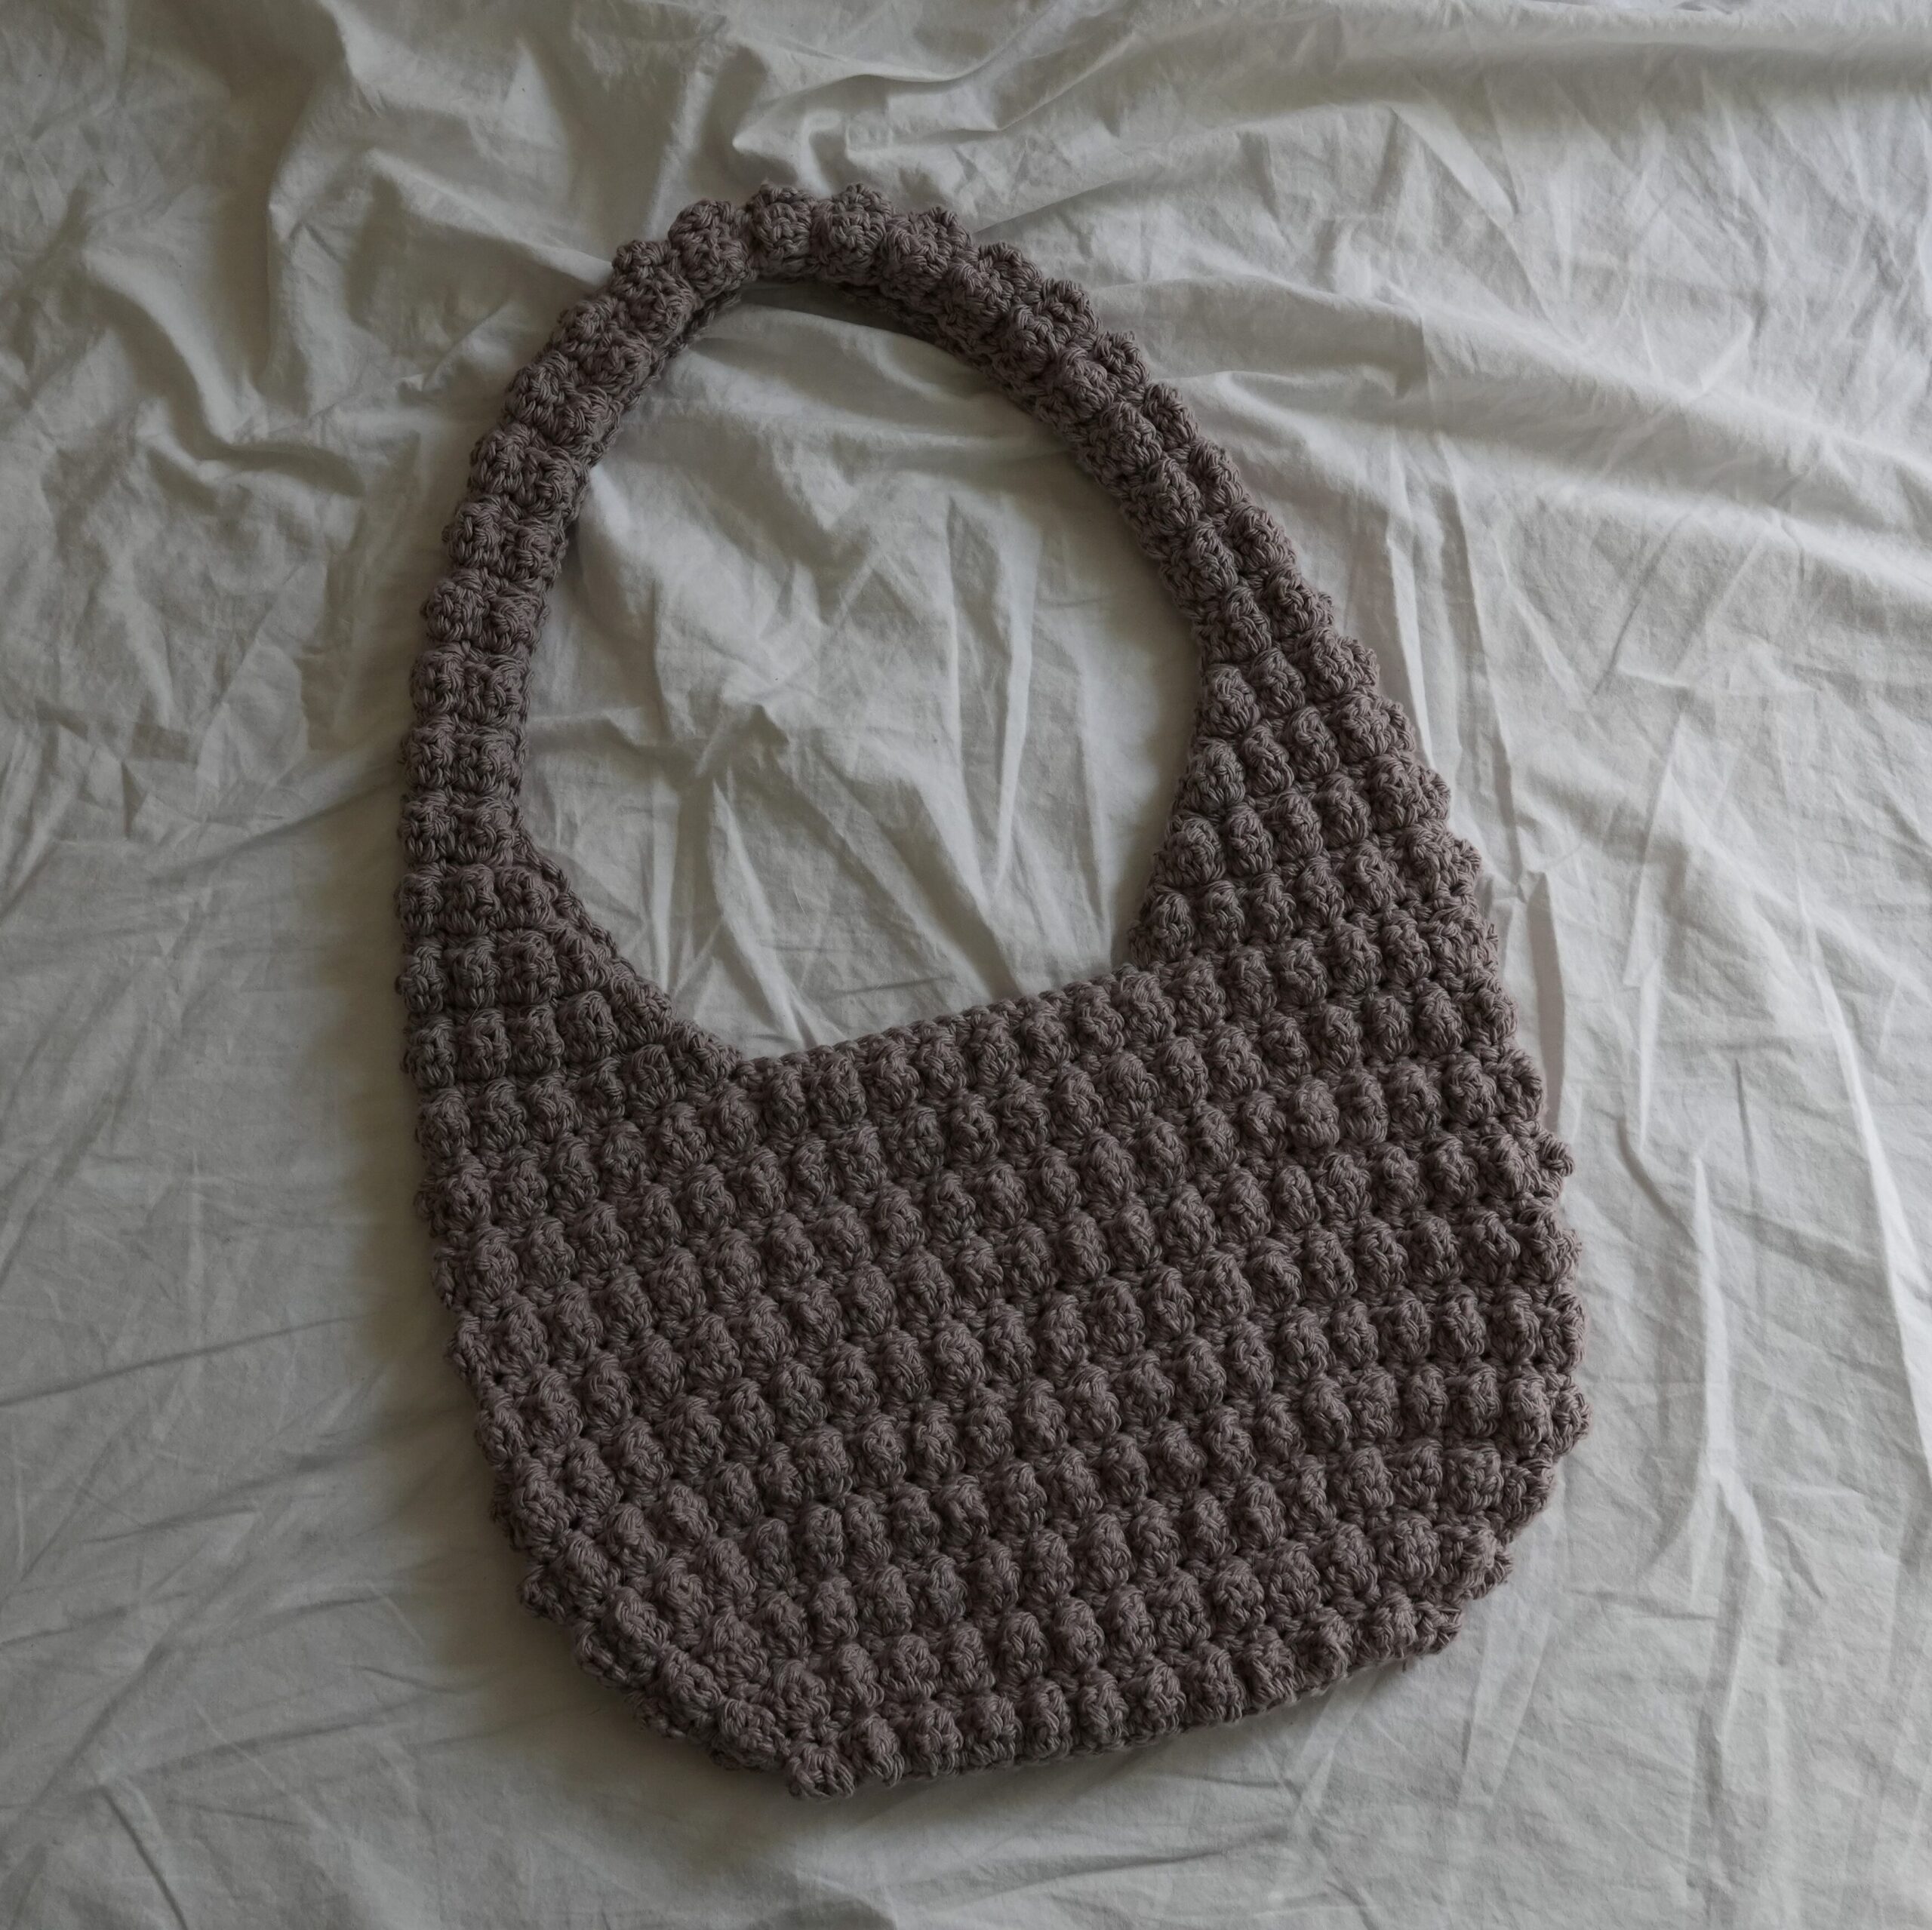
Finished Crochet Bobble Bag
Weave in your loose ends and your crochet bobble bag is finished!
Thank you so much for this free pattern!
I’m having so much trouble with the tr3tog in round 2, every tutorial for the stitch I’ve checked is either an increase or decrease so I’m not sure how to get the same number of stitches (44) between the two rounds?
Terrible pattern instructions. It does not state where stitch markers need to be placed, but each row requires you to know where the phantom stitch markers are supposed to be. There should be a count of how many stitches need to be done and when to transition to increasing stitches (2sts in single stitch) at the end. None of this “until you reach your stitch marker” and the previous row instructions said nothing about where to place them! This is a common practice for professional patterns to state how many of each stitch is needed before and after transitions. This is pure laziness. What a waste of time and yarn.
There is a paragraph before the first row of the strap detailing where to place your stitch markers. I’d appreciate it if you ask nicely for clarification next time. There is no need to be rude!
Looove this tutorial but the ads drive me nuts! Please let me buy an ad free pdf Viv!!!
why do you not specify how many sc at end of higher rows ?
I’ve followed your instructions carefully and checked that im doing everything right but the bobbles just don’t pop out as I expected them to
I had the same problem with the first yarn I chose from Hobby Lobby. This cotton yarn was too soft and the bobbles didn’t pop. I found the perfect cotton yarn similar to the one Viv used. I found it at Michael’s. It’s Loops and Threads classic cotton in Pewter. The difference is night and day between the two yarns. My bobbles with this yarn look just like Viv’s compared to the softer cotton yarn from Hobby Lobby, where the bobbles lay completely flat. I also used a 5.0 hook instead of 5.5.
I’m not finished yet, but it’s coming out perfect.
I want to ask if the width of this bag can be adjusted. I made one and it turned out amazing so I want to make a smaller version. Thank you!
You can! Just do fewer rounds for the base. But, you’ll need to edit the pattern for the straps!
So should I doing 19 foundation chain as the original version or fewer?
Yes, the start of the pattern will be the same. The size of the base will determine the width, so skip to the body once your base is the size you want!
I want to do a bag that is a bit longer at the bottom than the original 19 foundation chain. Do you know what multiple I would need to follow in order to do that? I’m guessing since it is a 2-stitch repeat for the dc and bobble rows, I should do it in a multiple of 2 + however many starting chains I need for the first stitch of the first round? So, for example, maybe 23 chains instead of 19 if I wanted it a bit bigger/longer? Hopefully this makes sense!
I want to make this bag a bit wider. Is that possible after round 8? Or would this mess with the pattern?
Yes, you can keep increasing after round 8 until you get the size you want. For example, round 9 would be ch1, *rep[sc in next 3 st, sc2 in next st] 6 times, sc across* until st marker, rep between **, sl st (92)
And you don’t have to, but you might want to change the pattern for the straps since they will most likely end up being too small.
Thank you so much for all of your patterns. You explain everything so well. You have been a huge part in my crochet journey and I always look forward to seeing what you’re going to post next. I’ve made three of your bag patterns and your beanie patterns and they’ve all came out so great.