Crochet Tulip Pot Amigurumi | Free Pattern & Video Tutorial
This super cute crochet tulip potted plant is a quick and fun amigurumi project for all crocheters! It uses very basic in-the-round crochet techniques and has only 3 different pieces to assemble. Crochet this tulip in a pot in just a couple of hours for a fun spring project.
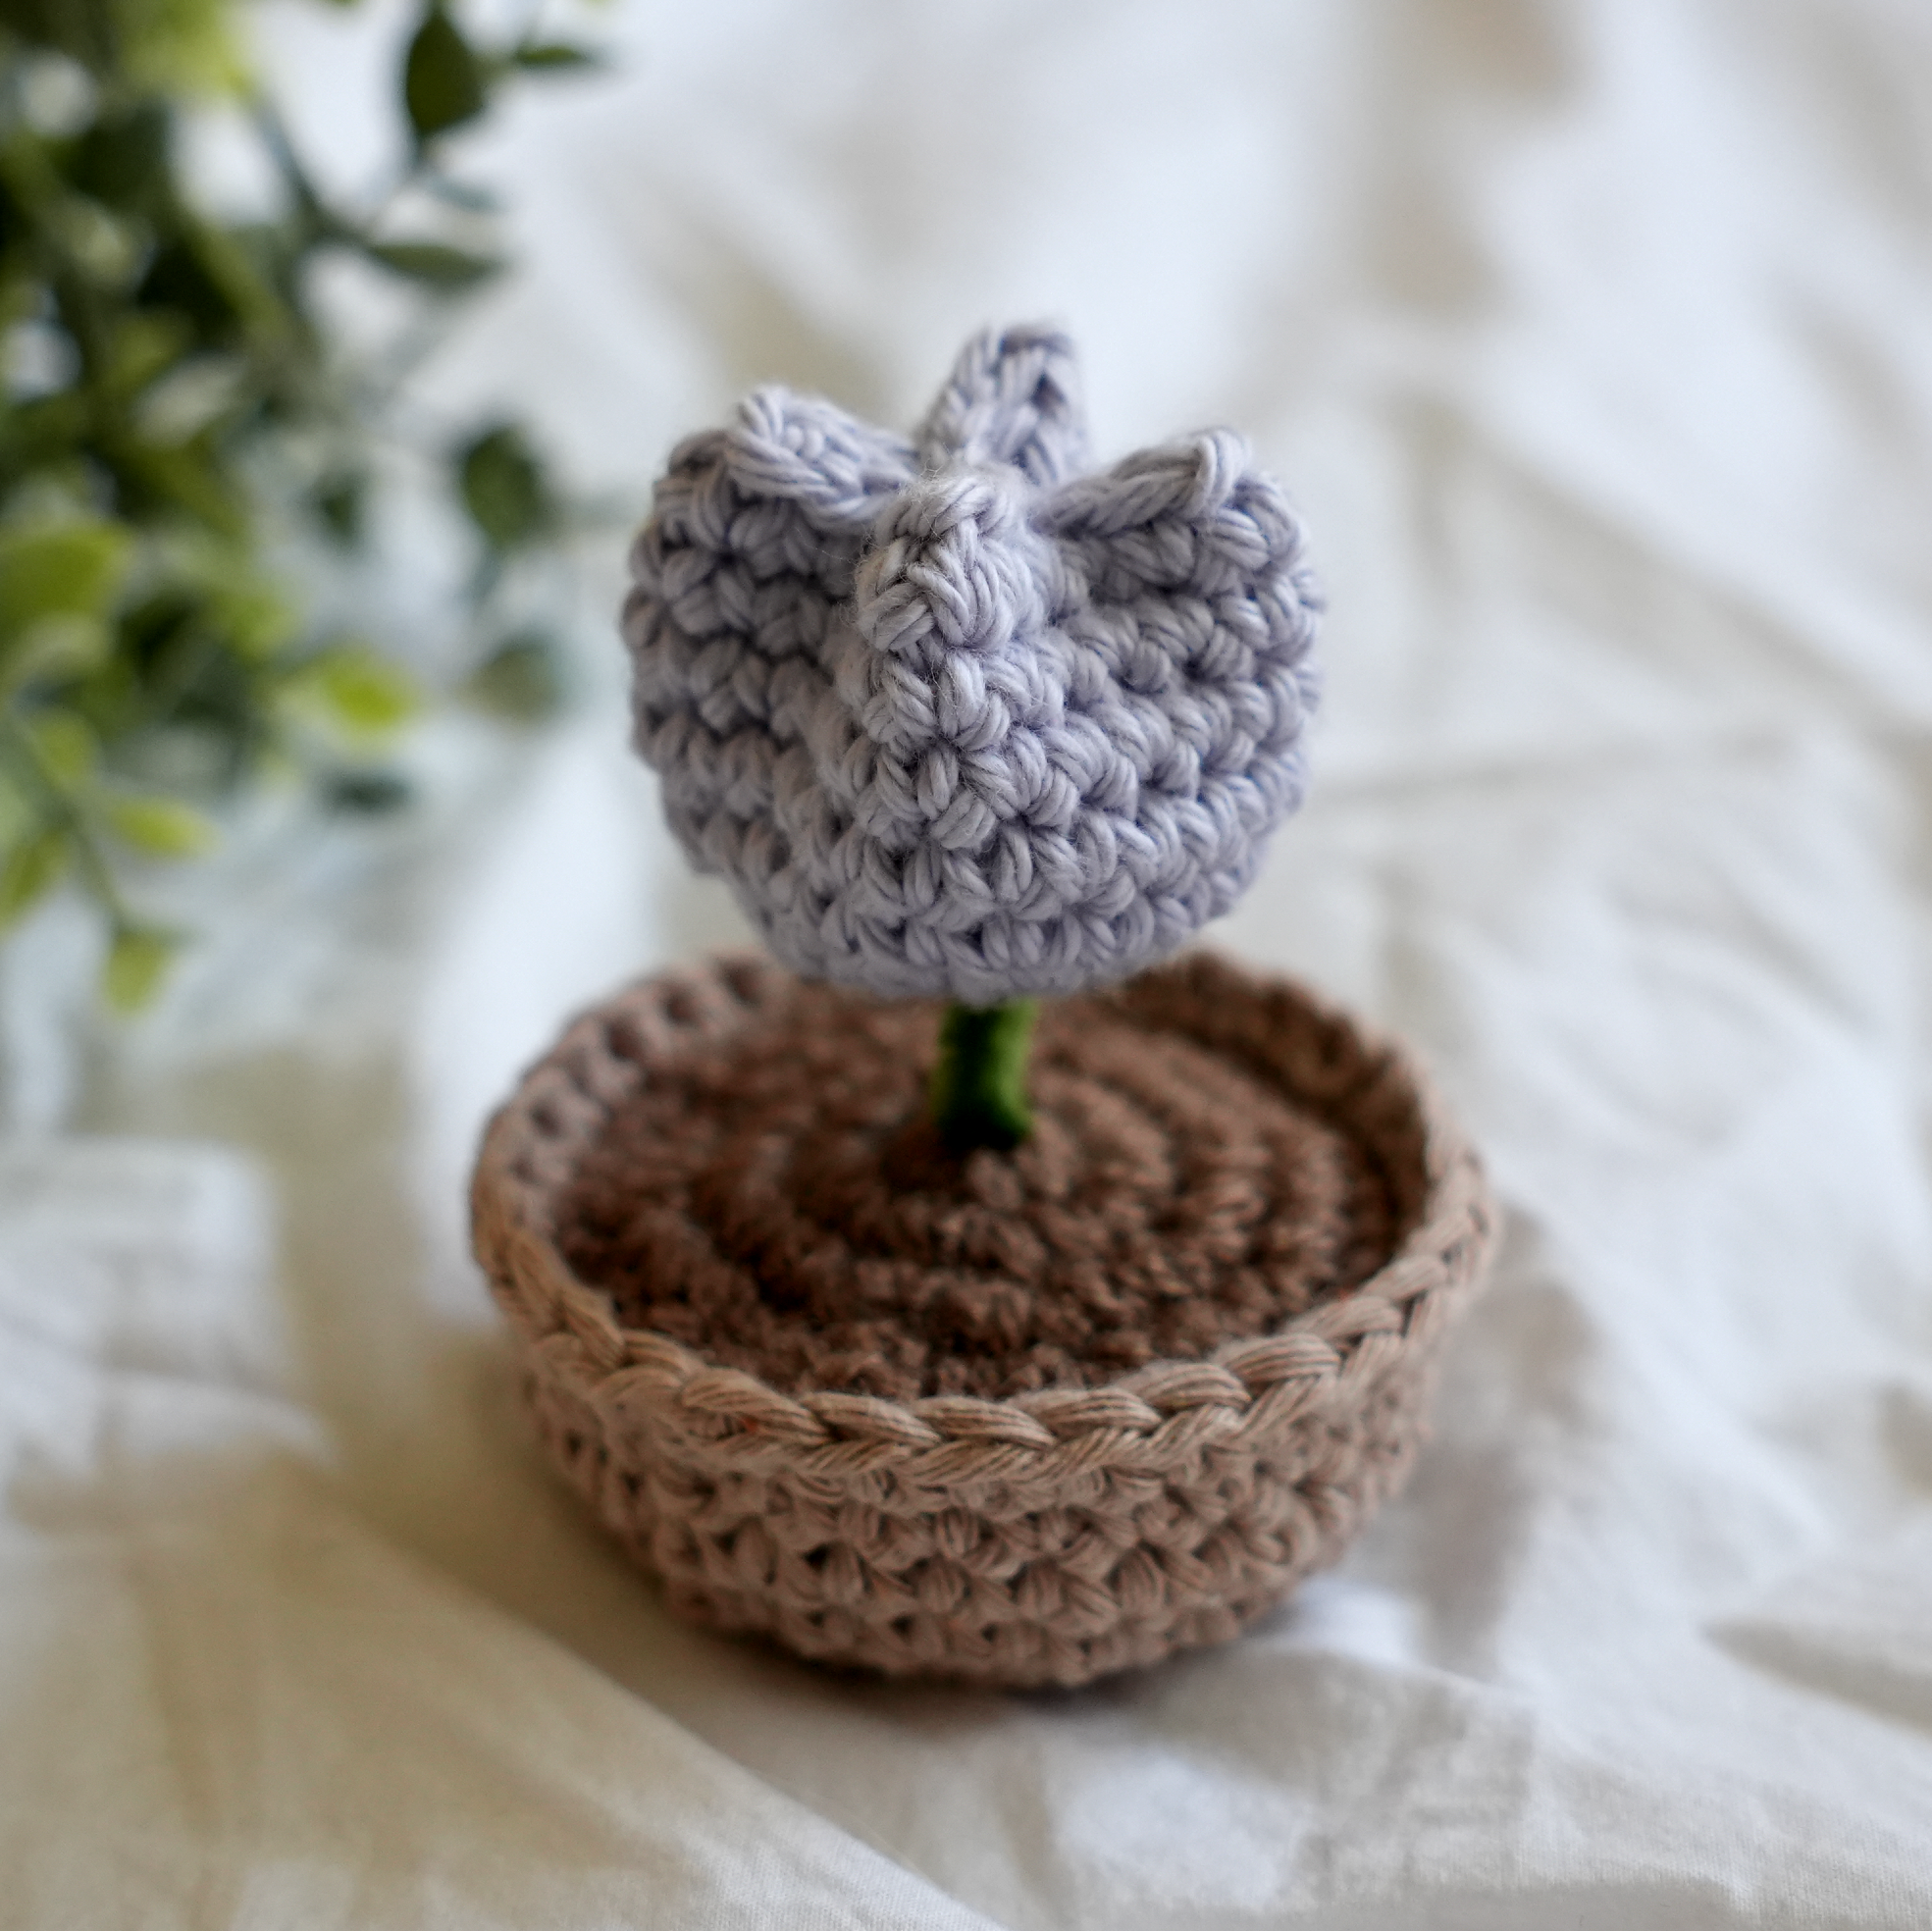
Table of Contents
Crochet Tulip Pot Video Tutorial
Become a member to get early access to new videos!
You can follow along with my YouTube video to make your own crochet tulip in a pot! I have timestamps included to section the video and help you jump to any point you need to!
This post may contain affiliate links. I may earn a small commission on qualifying purchases at no additional cost to you!
Pattern Information
Materials
- Light/Medium weight yarn in tulip color (K+C Essential Cotton in “Lavender Fields”)
- Medium weight yarn in dark brown (Red Heart Super Saver in “Cafe Latte“)
- Medium weight yarn in brown (Red Heart Super Saver in “Buff“)
- 4mm Clover Amour crochet hook
- Scissors
- Yarn needle
- Pipe Cleaner
- Fiberfill

Crochet Abbreviations
ch = chain
inc = increase (2 single crochets into 1 stitch)
rep = repeat
sc = single crochet
sl st = slip stitch
st = stitch
Dimensions
Overall: 6 centimeters wide x 9 centimeters tall (2.4 x 3.5 inches)
Notes and Tips
- This pattern is written using US crochet terms
- The number in (parentheses) at the end of each row is the stitch count after finishing that row
- The chain 1 at the beginning of each round does NOT count as a single crochet
- The slip stitch at the end of each round goes into the first stitch of that round
- The first stitch of every new round goes into the same stitch we slip stitched to in the previous round
Crochet Tulip Pot Pattern
Tulip
Foundation: With the tulip color yarn, make a magic ring or make a slipknot, ch4, sl st to 1st ch to form a ring
Round 1: ch1, sc6 into ring, sl st (6)

Round 2: ch1, inc around, sl st (12)

Round 3: ch1, rep[sc, inc] around, sl st (18)

Round 4: ch1, rep[sc in next 2 st, inc] around, sl st (24)

Rounds 5-8: ch1, sc around, sl st (24)
Fasten off with a long tail end (about 5″ or 13cm).


Soil
Foundation: With the soil color yarn, make a magic ring or make a slipknot, ch4, sl st to 1st ch to form a ring
Round 1: ch1, sc8 into ring, sl st (8)
Round 2: ch1, inc around, sl st (16)
Round 3: ch1, rep[sc, inc] around, sl st (24)
Round 4: ch1, rep[sc in next 2 st, inc] around, sl st (32)
Fasten off with a long tail end (about 20″ or 50cm).

Pot
Foundation: With the pot color yarn, make a magic ring or make a slipknot, ch4, sl st to 1st ch to form a ring
Round 1: ch1, sc8 into ring, sl st (8)
Round 2: ch1, inc around, sl st (16)
Round 3: ch1, rep[sc, inc] around, sl st (24)
Round 4: ch1, rep[sc in next 2 st, inc] around, sl st (32)

Rounds 5-8: ch1, sc around, sl st (32)
Fasten off.

Assembly
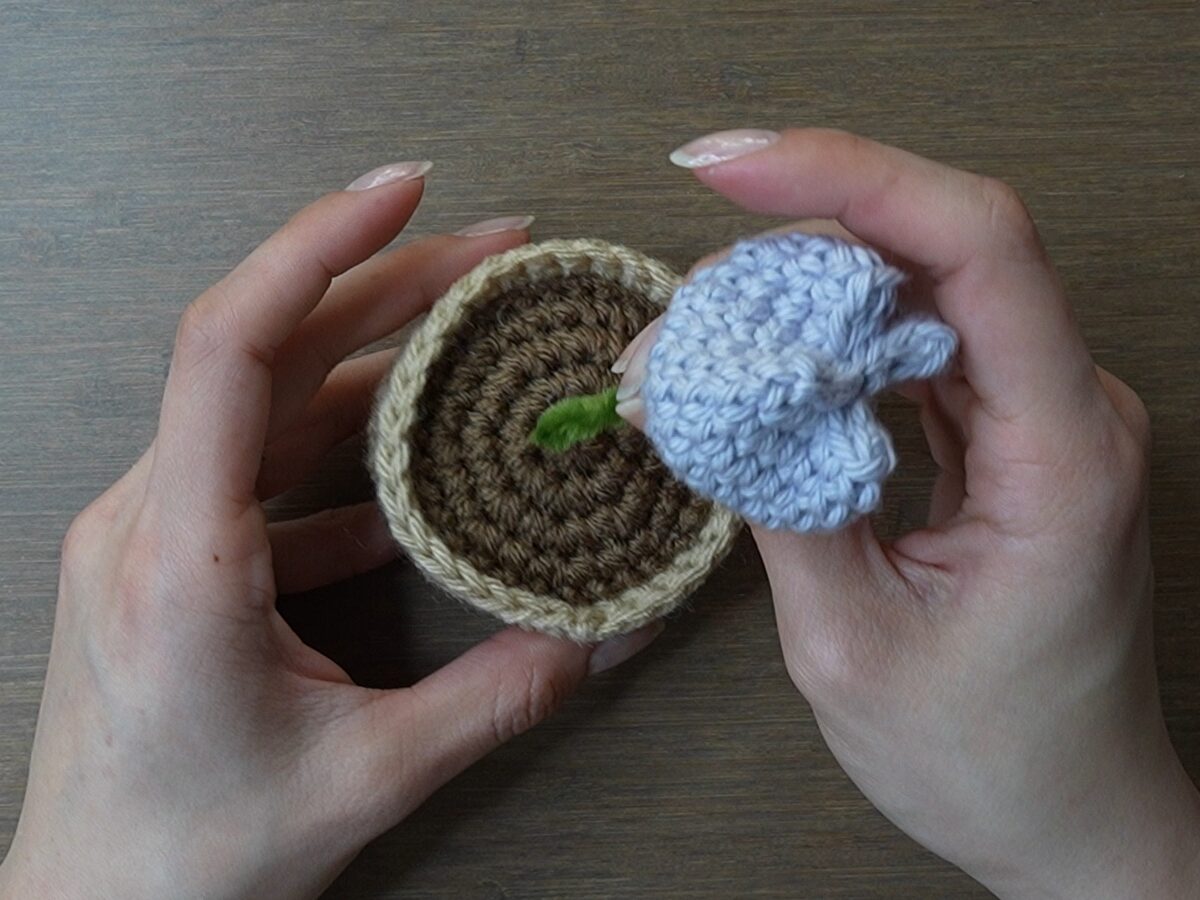
Now, we have all the pieces we need to assemble to tulip pot.

Attach the soil to the pot using the long tail end left when finishing the soil. Sew each stitch in the last round of the soil to the horizontal bar across the back of each stitch of Round 7 on the pot (see slideshow below). Stuff the pot with fiber fill before completely closing it up. Tie a knot to fasten the seam and pull the loose ends to the inside of the pot.


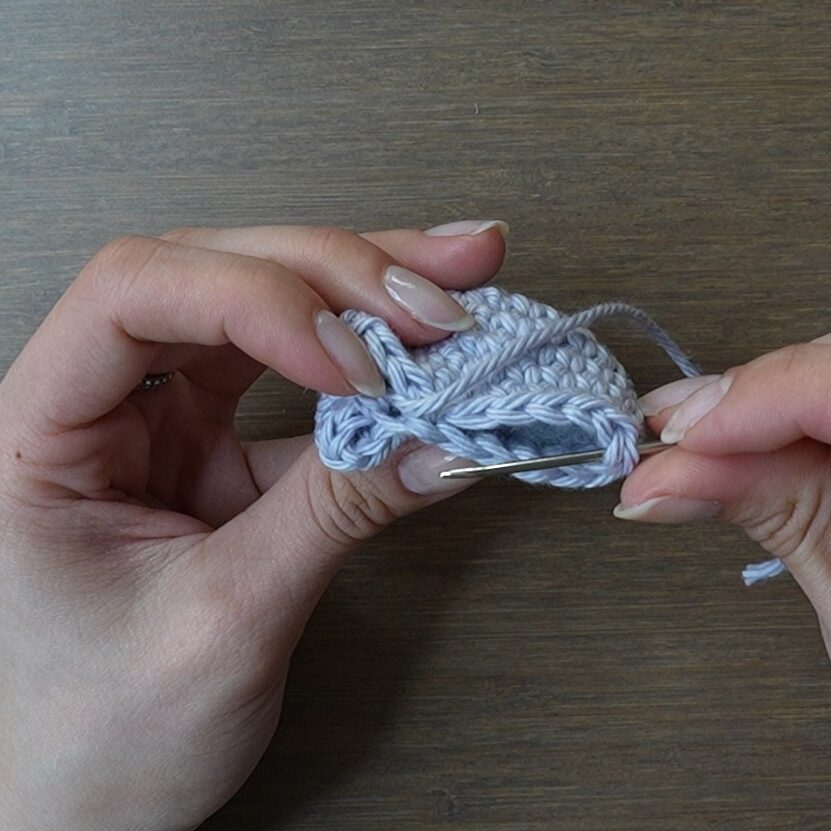
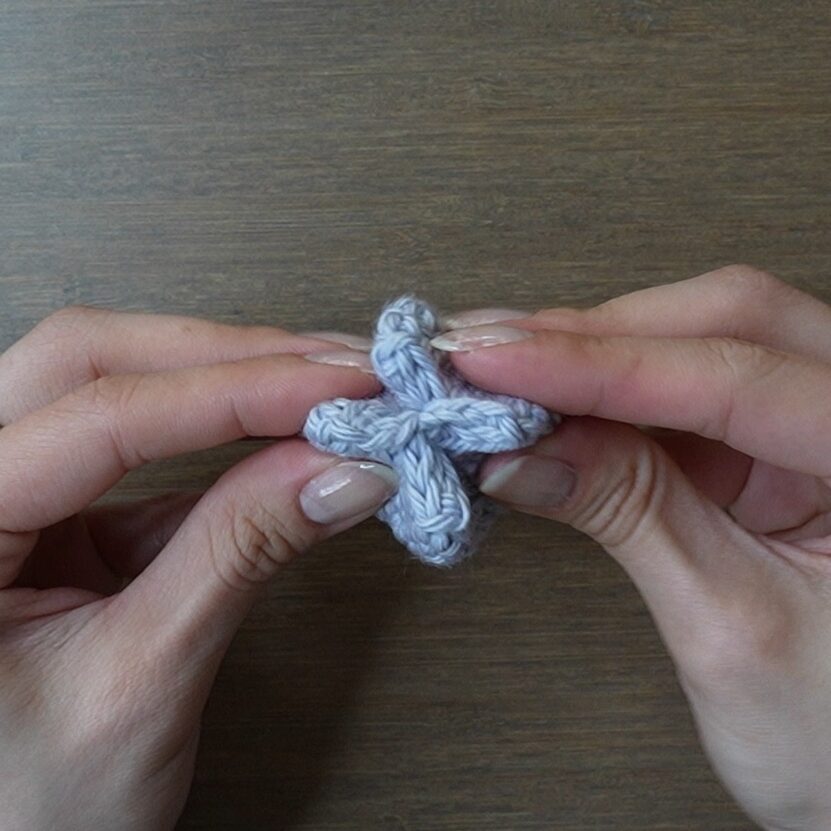
Form the tulip shape using the long tail end left on the tulip. Thread the tail into your yarn needle and fold the last round in half with the final slip stitch in the middle of one side. Go through the stitch opposite the slip stitch, then through the stitch at the end of the flattened round, and finally through the stitch at the other end of the flattened round. Pull it tight, tie a knot, and pull the loose end to the inside of the tulip. The top should look like an x.


Take a pipe cleaner and cut it down to about 3″ or 8cm. Insert one end of the pipe cleaner into the magic ring of the tulip until it hits to top.
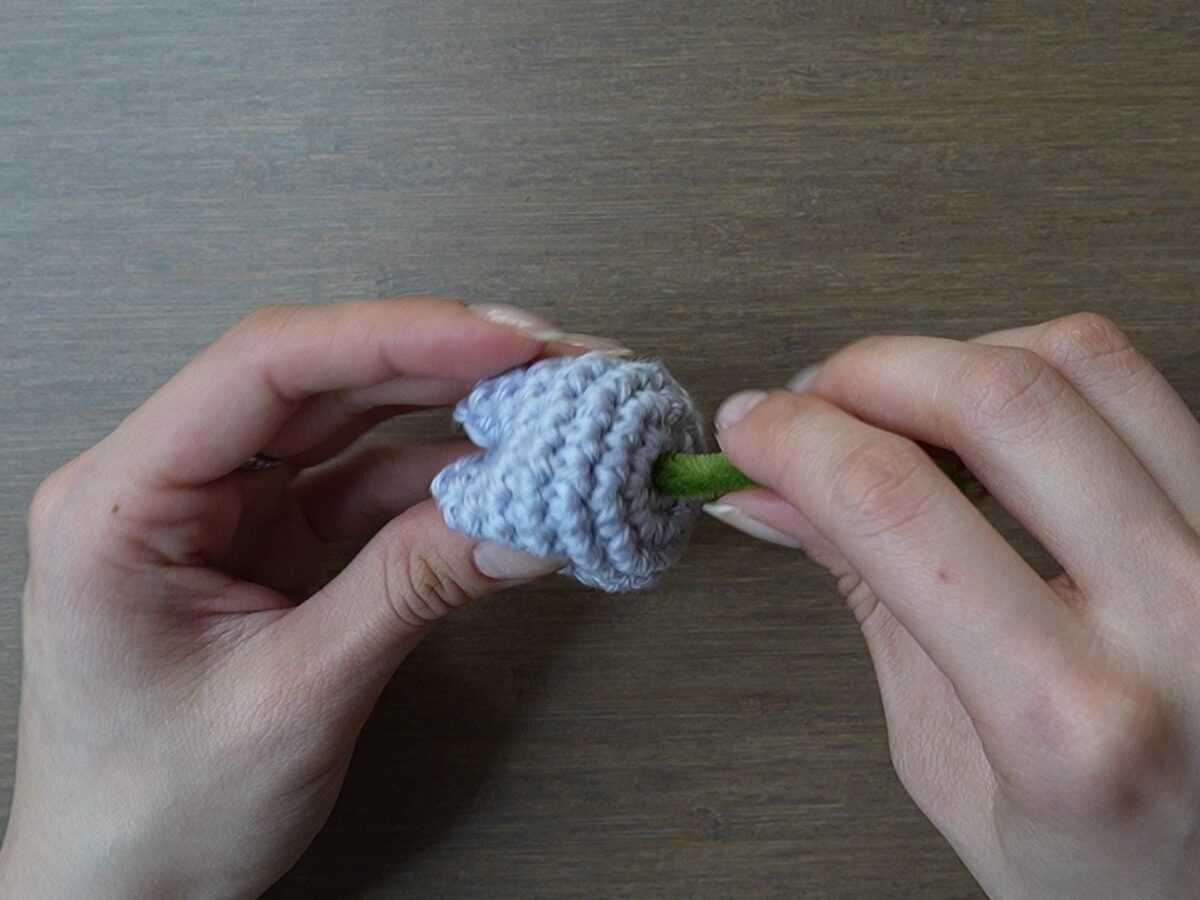
Insert the other end of the pipe cleaner into the magic ring of the pot until it hits the bottom.
Finished Crochet Tulip Pot
And your crochet tulip potted plant is finished!


One Comment