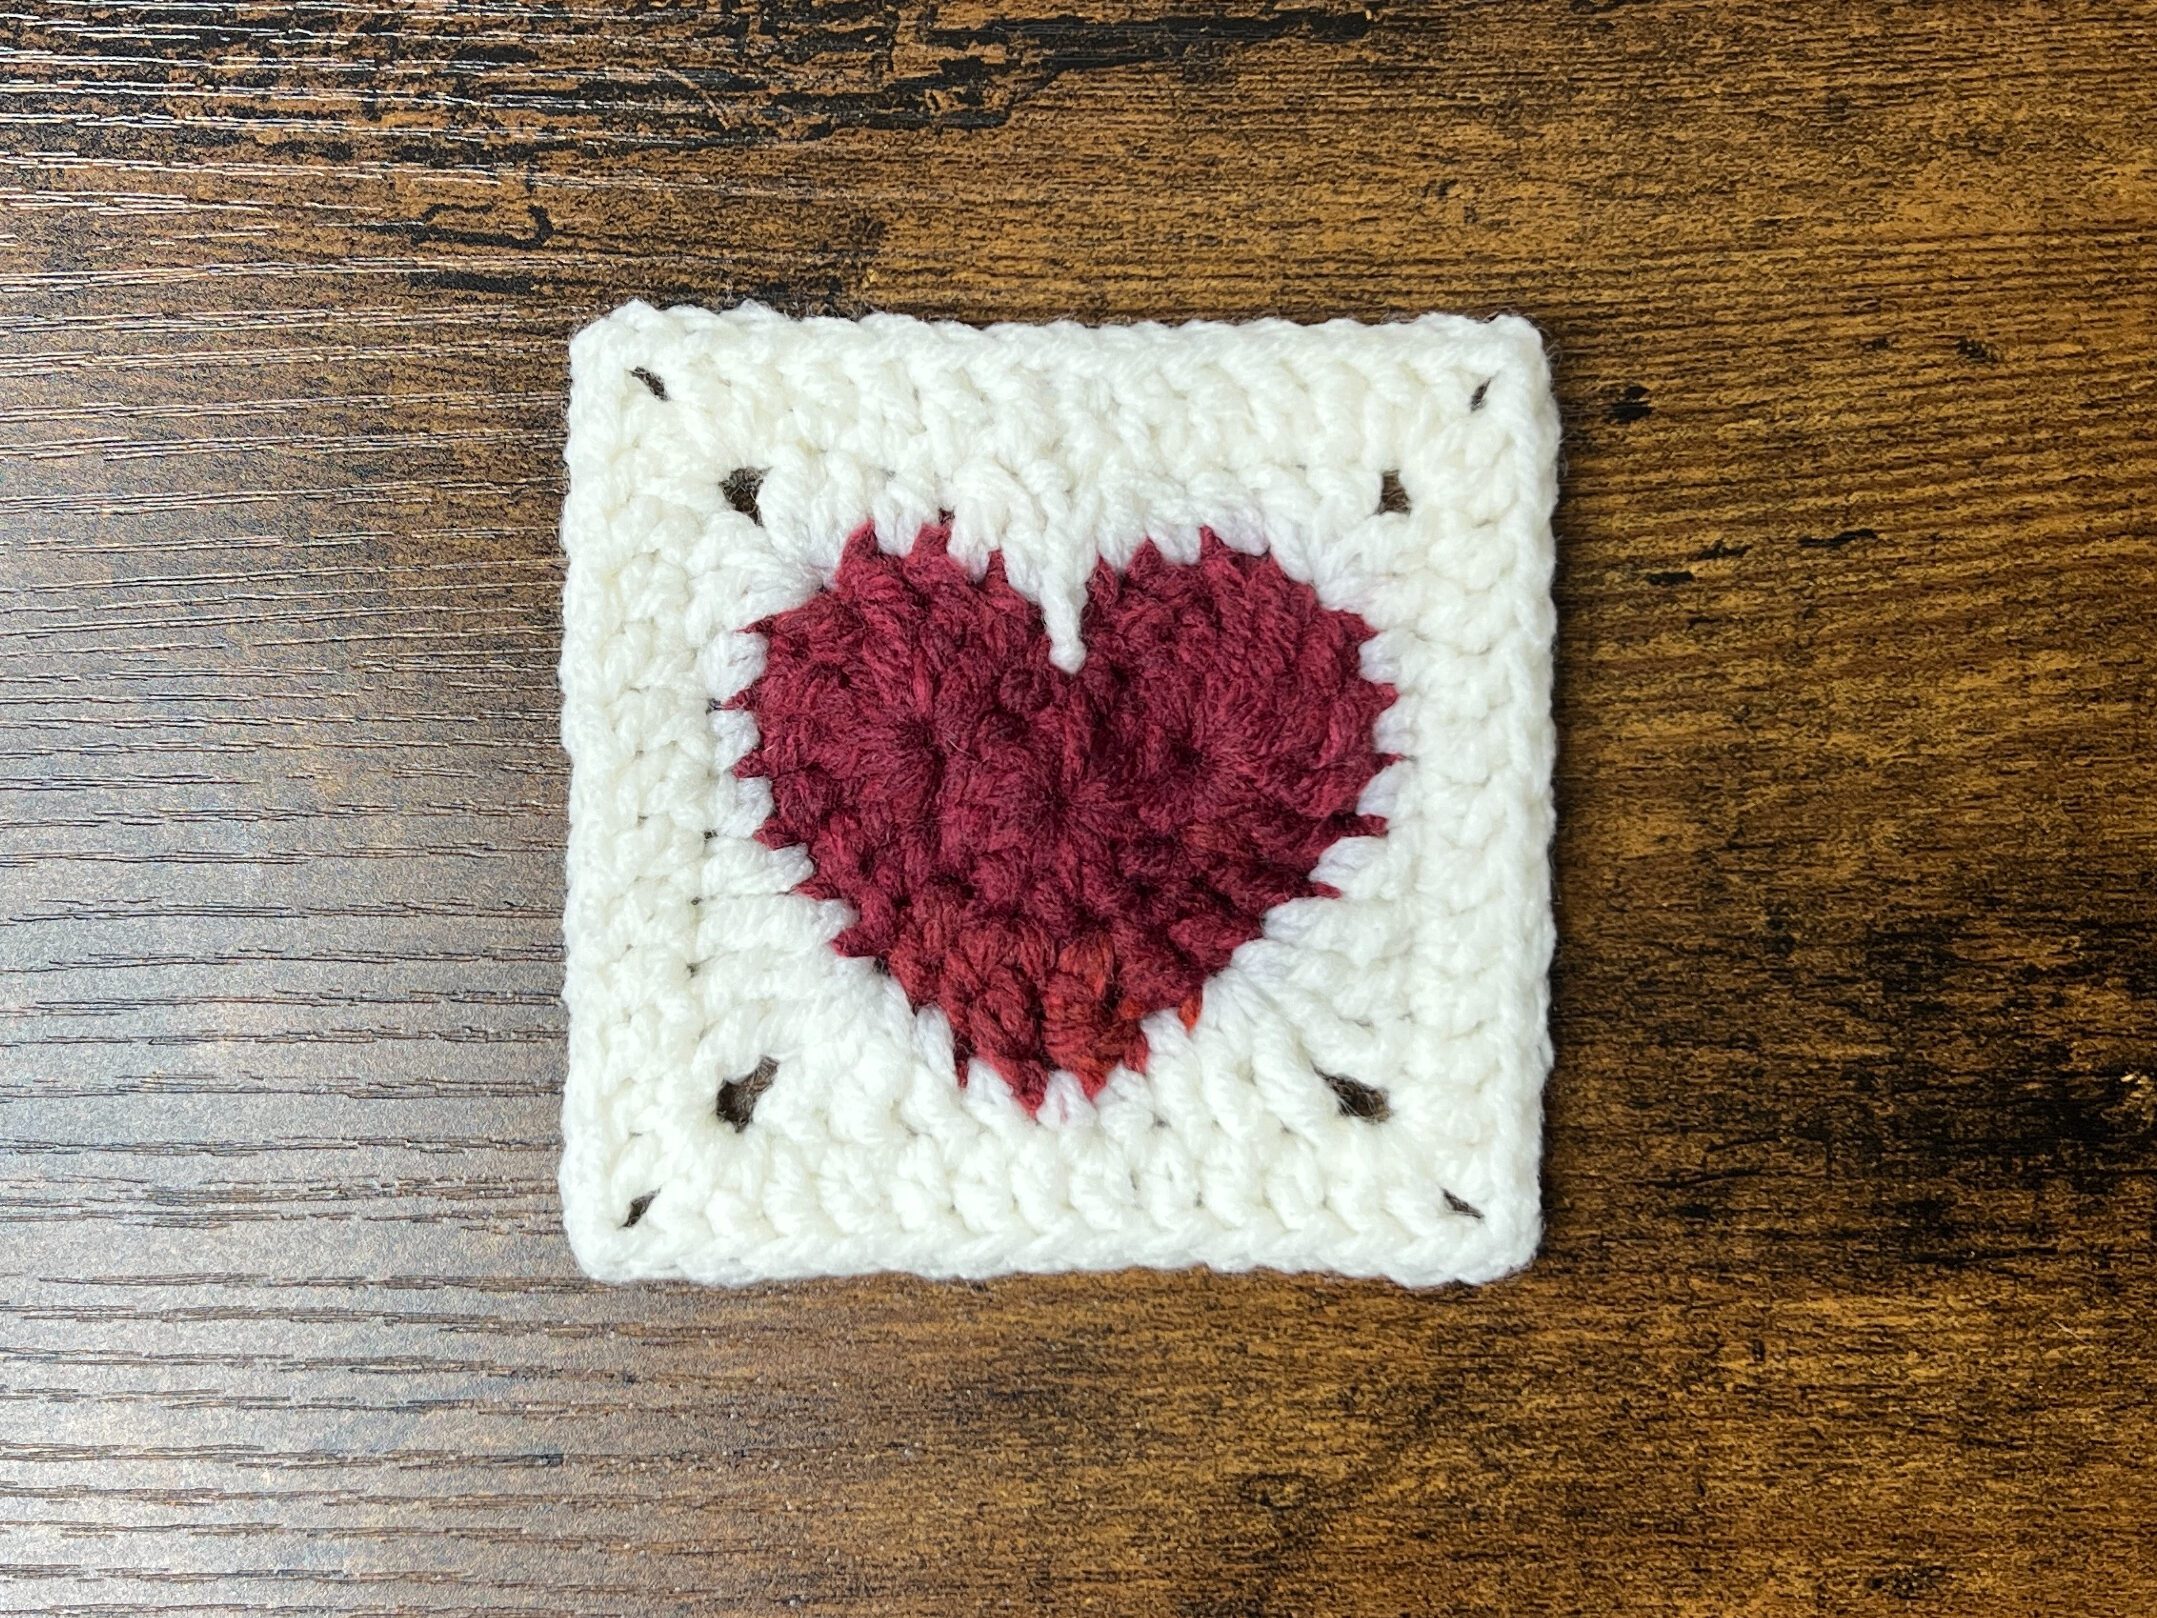
Crochet Heart Granny Square | Free Pattern & Tutorial
Scroll to see the free crochet heart granny square pattern and video tutorial. Or purchase an ad-free, printable PDF file of this pattern!
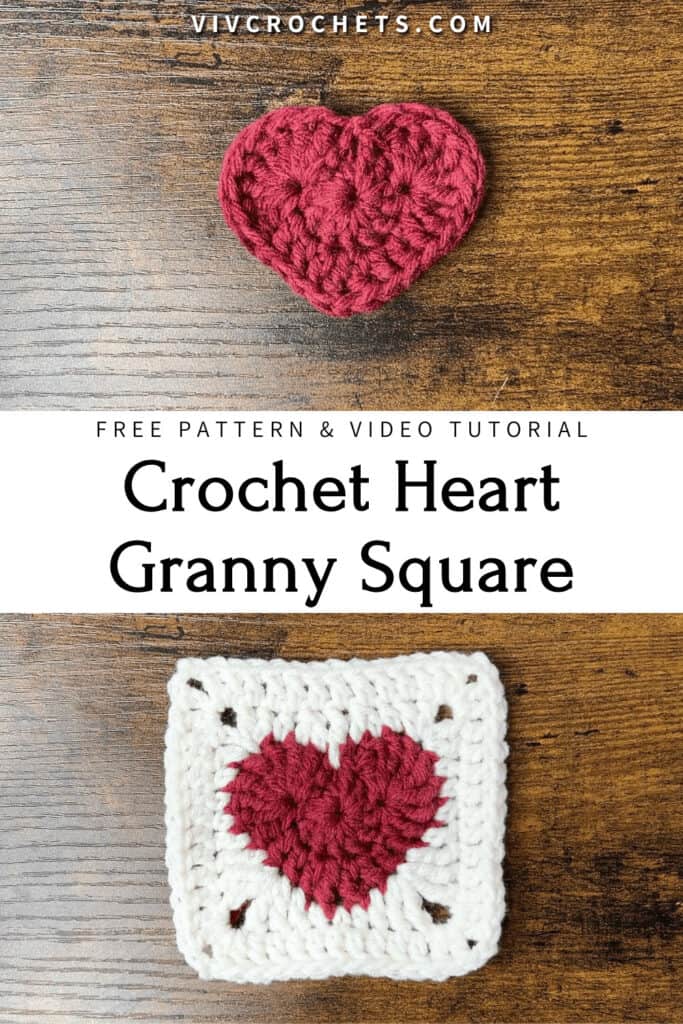
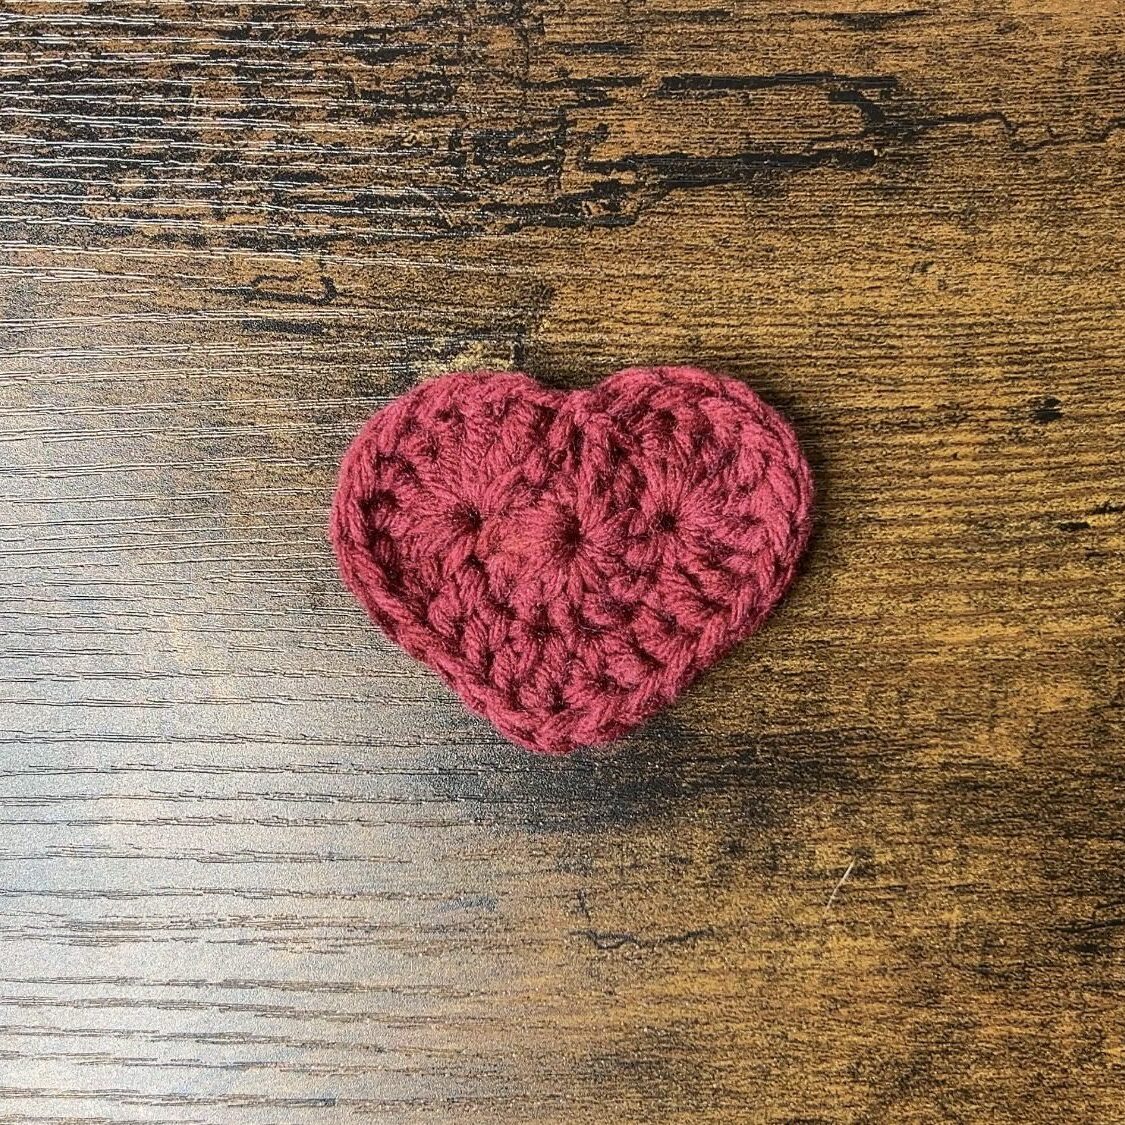
This crochet heart granny square is a cute little square that you can turn into a larger project, such as a tote or a cardigan. It’s also a great way to use up yarn scraps.
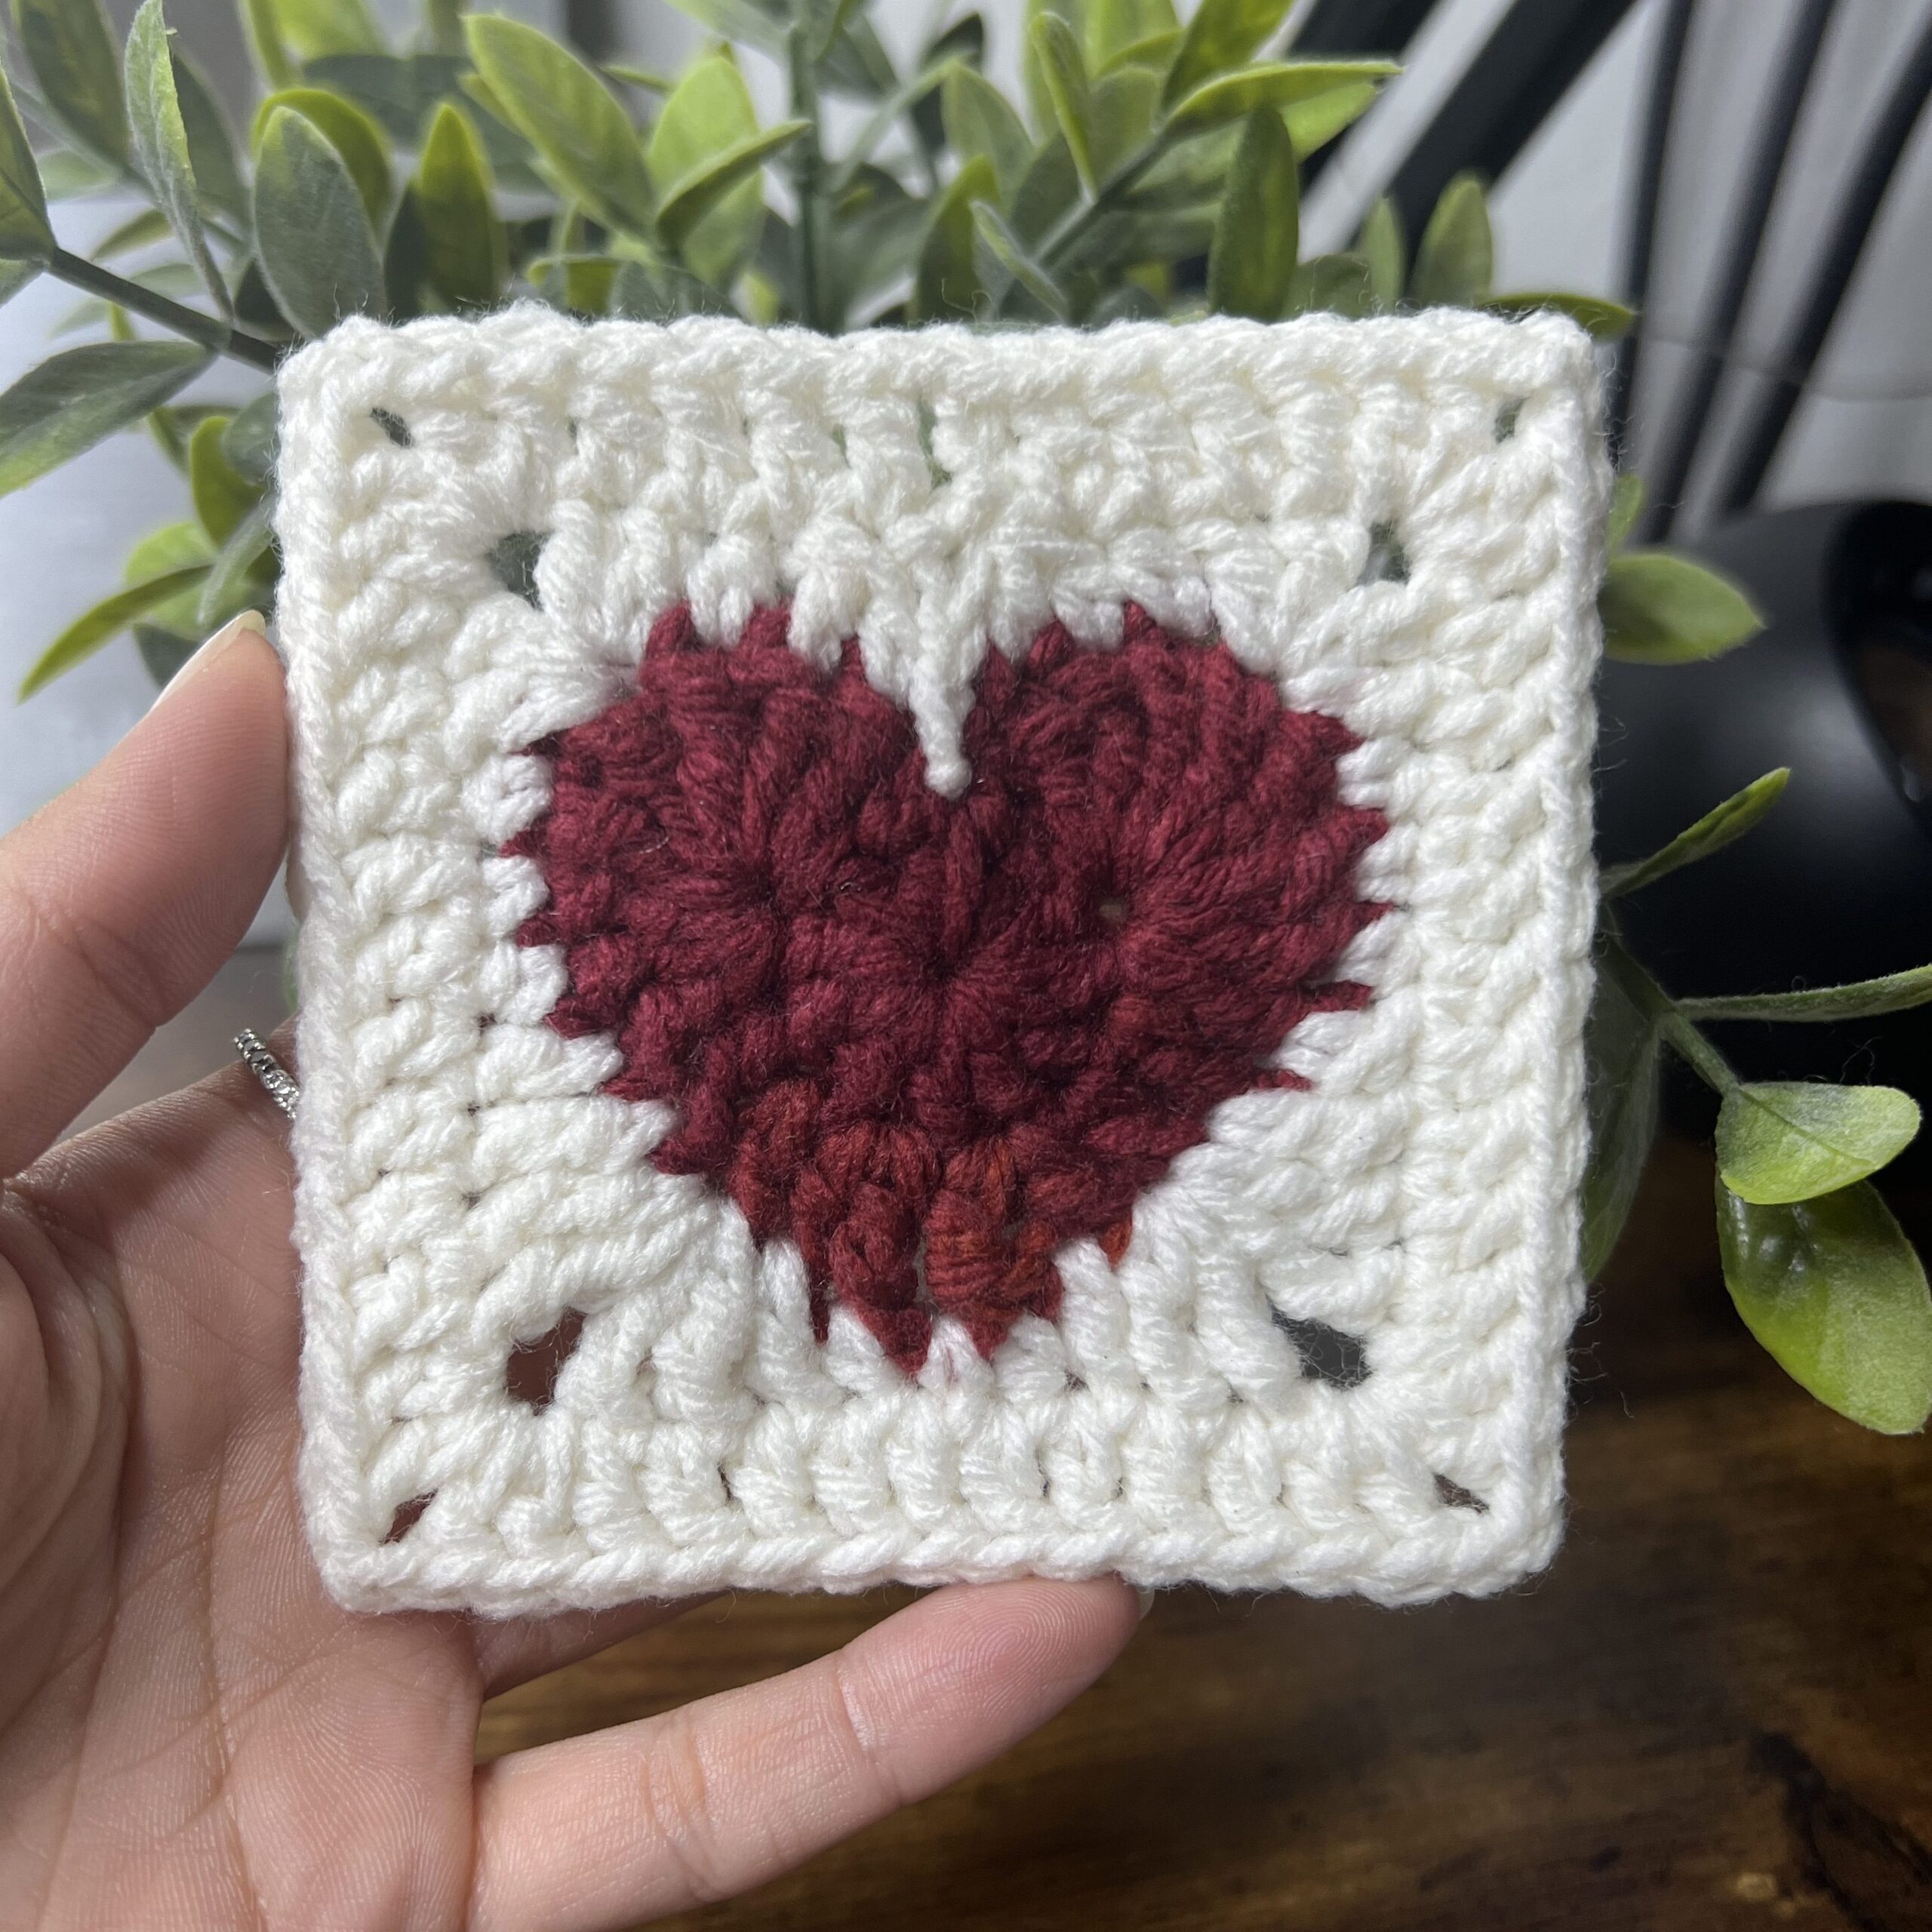
Table of Contents
Heart Granny Square
This pattern isn’t technically a granny square because it doesn’t use the granny stitch, which features clusters of three double crochets. However, I do categorize it as a granny square because it is worked in rounds instead of rows.
I have made this square with the granny stitch around the heart, but I do prefer the solid square look. It makes the heart is more prominent and just looks nicer overall, at least in my opinion. If you would like to see a heart granny square pattern using the actual granny stitch, please let me know in the comments!
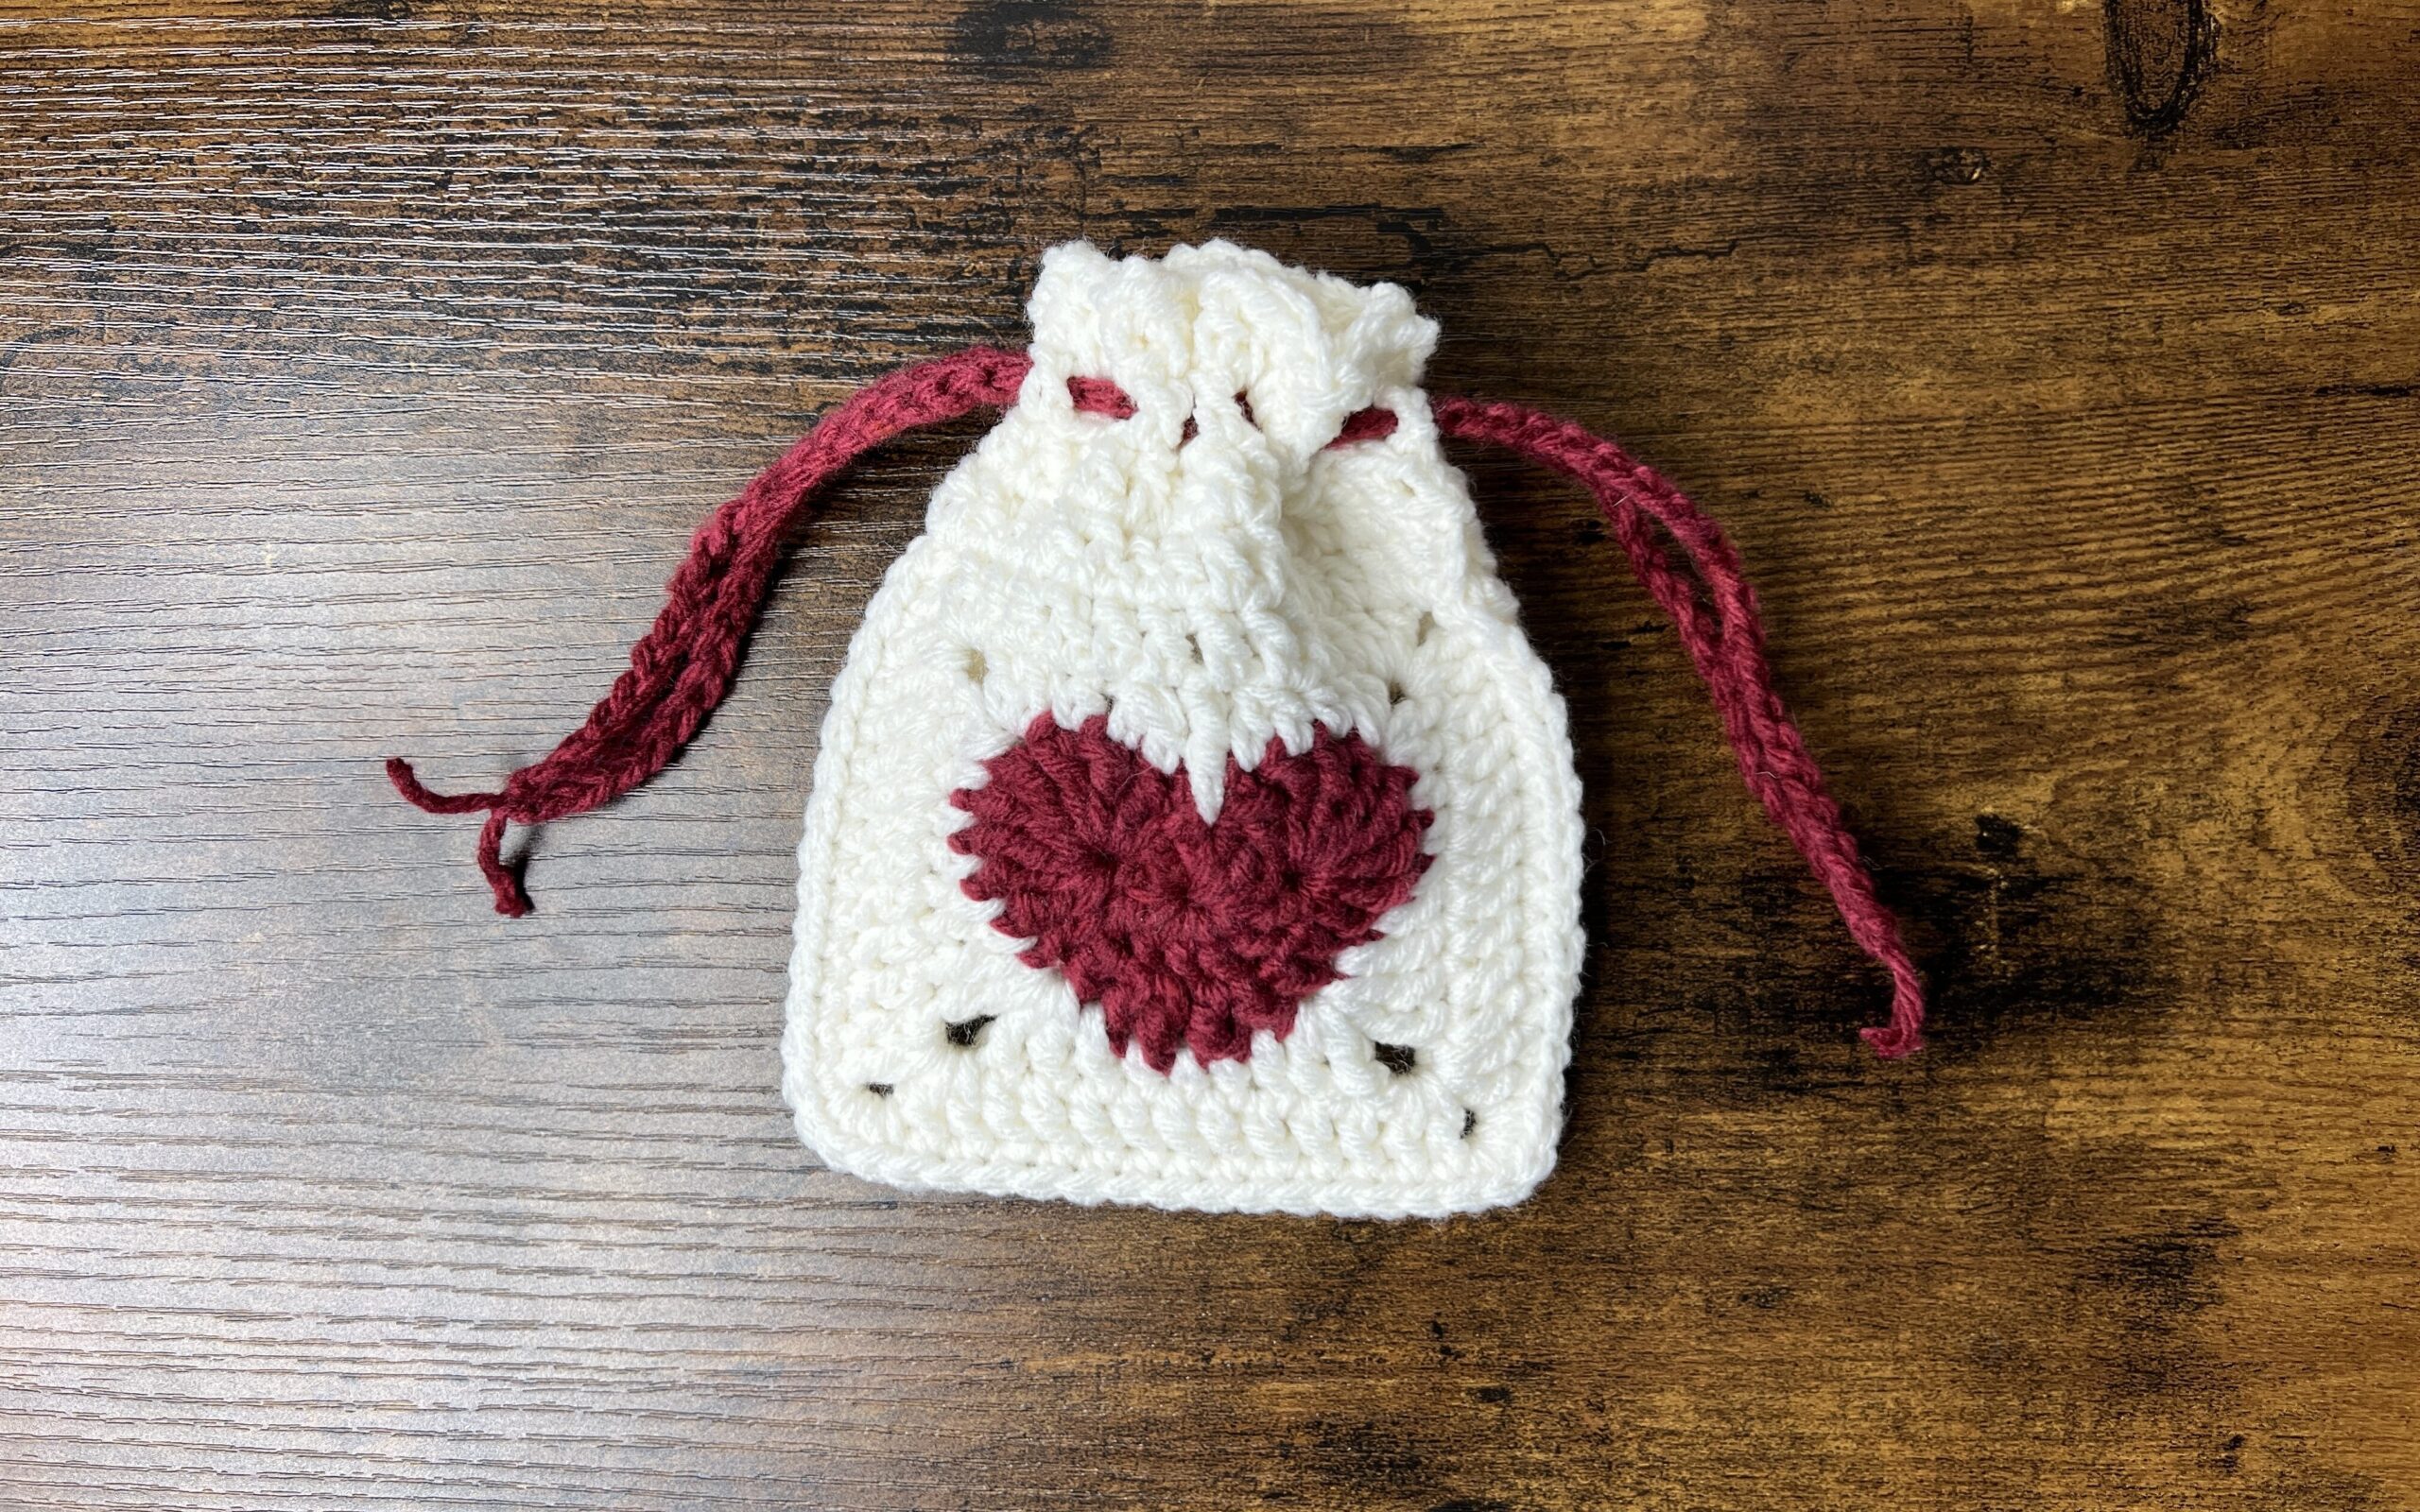
Crochet Heart Pouch
With just two of these crochet heart granny squares, you can make a crochet heart pouch! This drawstring pouch is a super fun and quick project that you can make by stitching two heart granny squares together. I have a free written pattern here on my website and a video tutorial for it.
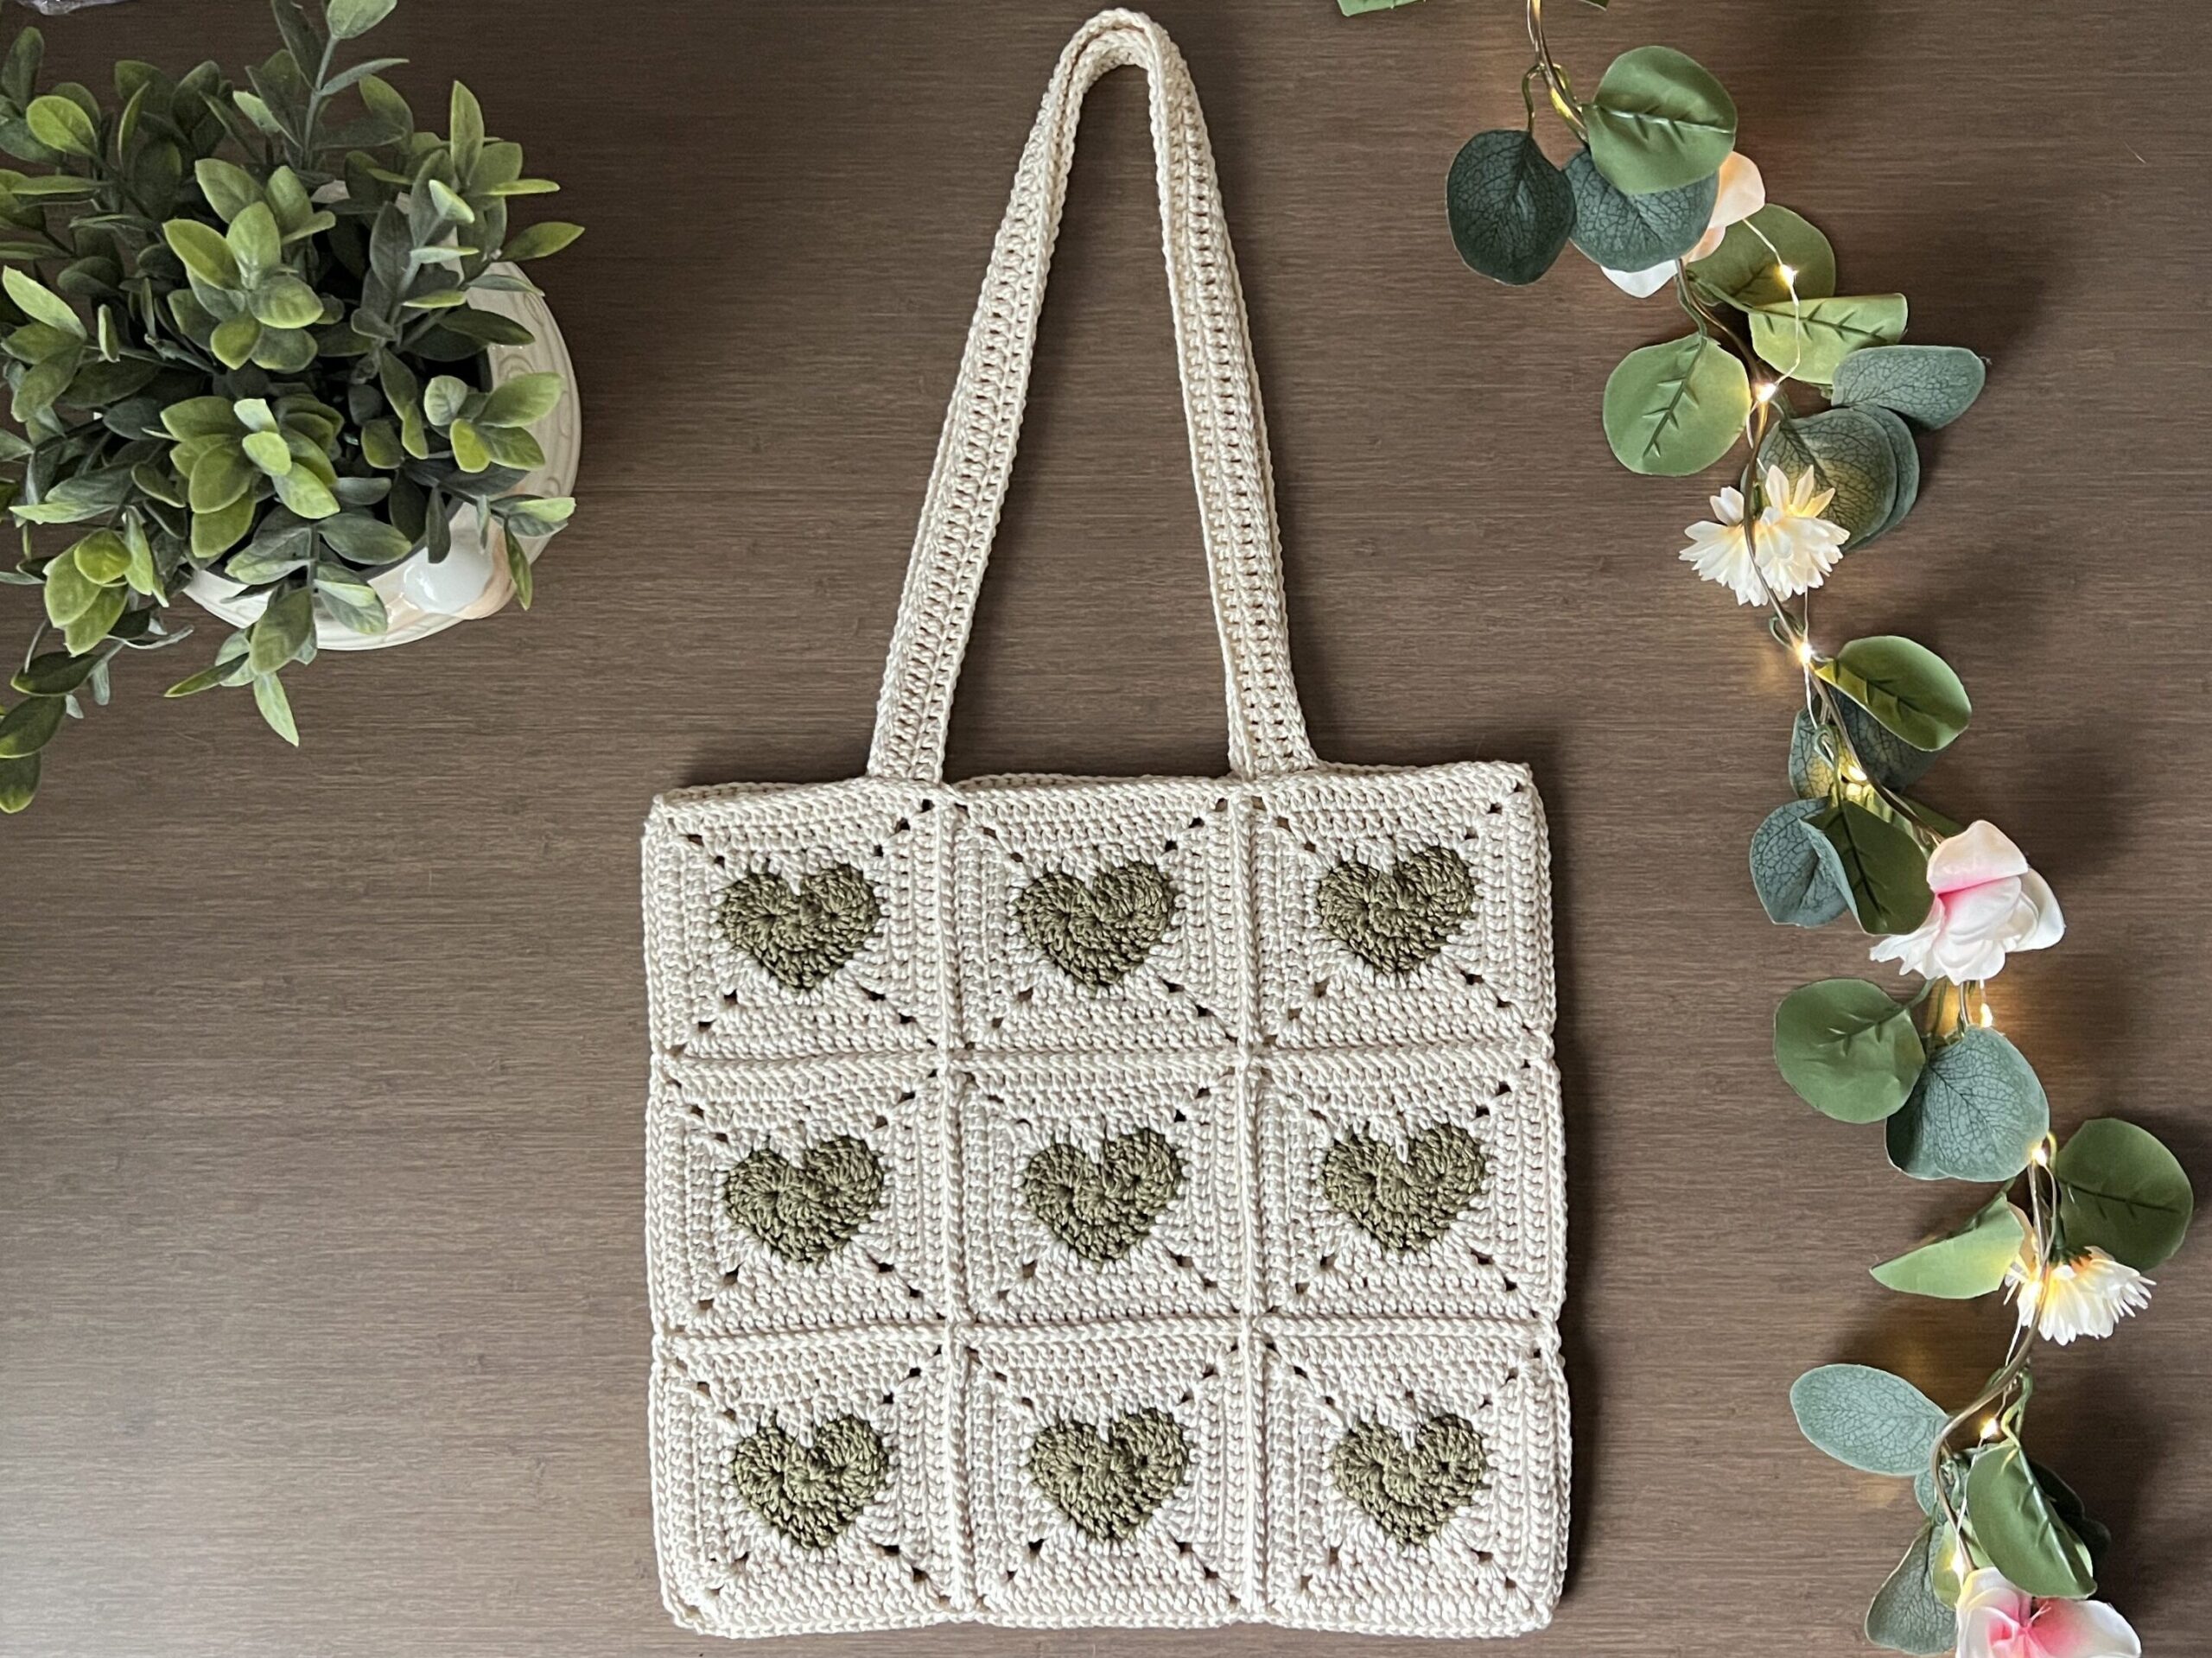
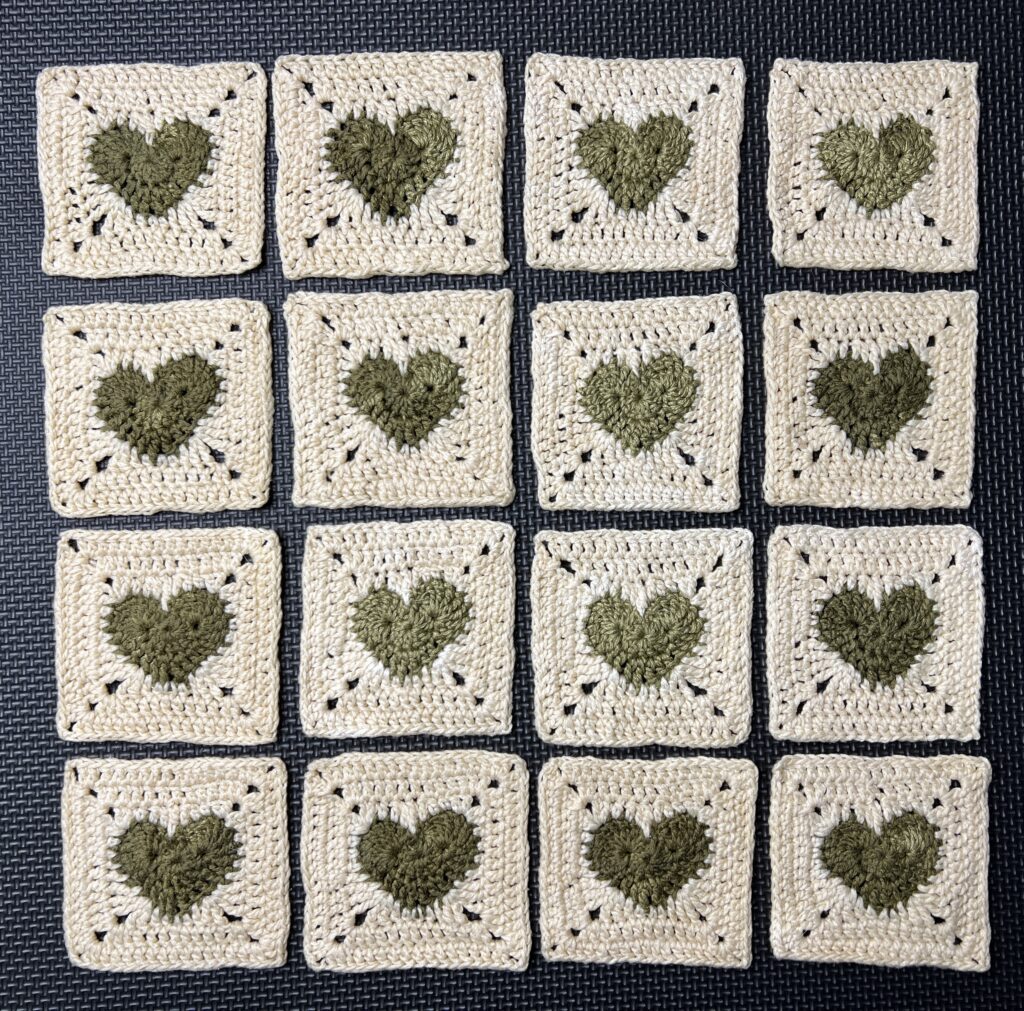
Crochet Heart Tote
Another cute crochet project you can make from these heart granny squares is a crochet heart tote. This tote is made up of 18 of these squares. It’s a much bigger project than the pouch, but it’s so worth it because it’s super pretty and useful! You can make it with my free written pattern or video tutorial, or you can even purchase it!
Great Practice for Beginners
The crochet heart in this pattern as well as the shaping of the square requires using all the basic stitches to create the different shapes. Personally, I believe that it’s a great pattern for beginners to learn the basic stitches.
For more advanced crocheters, it’s also a great way to use up leftover yarn scraps. You’ll find that in all of my patterns, I intentionally make them as easy as possible to remember. For granny square patterns, it’s even more important that they be easy to memorize because most people will be crocheting multiple squares.
This post may contain affiliate links. I may earn a small commission on qualifying purchases at no additional cost to you!
Blocking Heart Granny Squares
Blocking can be an important part of a crochet project. For granny squares specifically, blocking is typically done more often to get that perfect square shape. Not only that, but if your granny square isn’t laying flat, blocking can help relax the stitches.
It is not required to block your squares, but my recommendation is to do so if you are sewing/stitching a lot of these squares together. It will make your project look better overall with cleaner lines.
When blocking a lot of granny squares, it’s much easier to use a crochet blocking board. This is a peg board with long pegs to stack your squares, so they are being blocked uniformly. If you don’t have one (like me), or prefer to lay them out separately so they dry faster, you might want foam boards and T-pins.
Pin this for later!
Heart Granny Square Video Tutorial
You can follow along with my YouTube video to crochet a heart granny square! I have timestamps included to section the video and help you jump to any point you need to!
Materials
- Medium weight heart color yarn (Caron Big Cakes Self Striping Yarn in “Toffee Brickle“)
- Medium weight base color yarn (Red Heart Super Saver yarn in “White“)
- 5mm Clover Amour crochet hook
- Scissors
- Yarn needle
- Blocking board & T-pins (optional)

Crochet Abbreviations
ch = chain
ch1-sp = chain-1-space (the space created by chaining 1)
ch2-sp = chain-2-space
dc = double crochet
dc2tog = double crochet 2 stitches together (a decrease)
hdc = half double crochet
rep = repeat
sc = single crochet
sk = skip
sl st = slip stitch
st = stitch
tr = treble crochet
Gauge
10 rows of 16 double crochets makes a 10 x 10 centimeter square
Dimensions
11 centimeters wide x 11 centimeters long (4.33 x 4.33 inches)
Notes and Tips
- This pattern is written using US crochet terms
- The chain 3 at the beginning of each round DOES count as a double crochet
Heart Granny Square Pattern
Heart
With your heart color yarn, make a slipknot, ch4, and sl st to 1st ch to form a loop
If you have trouble doing all the stitches in the ring for round 1, try chaining 5 instead.
Note: You can substitute this foundation with a magic ring instead.
Round 1: ch3, dc11 into ring, sl st to top of ch3 (12)
The ch3 counts as the first stitch.

Round 2: sk2, tr8 into third st, dc in each of next 2 st, [dc, tr] in next st, ch1, [tr, dc] in next st, dc in each of next 2 st, tr8 into next st, sl st between first and last st of round 1 (24 st, ch1 at bottom point)
Note: The bolded ch1 marks the point at the bottom of the heart. The stitches are mirrored on either side of this ch1.
Fasten off.

Forming Square Around Heart
Attach your base color yarn to the fourth tr you made in round 2
This is the top-left corner of the square. If you want, you can attach the yarn to the top center and start at the treble crochet. I just prefer starting and ending the rounds in the corner because it’s typical of granny squares. Also, if you plan to sew or stitch squares together, you can sew/stitch across one whole side of the square right after completing it.
Round 3: ch3, dc in same st, hdc, sc, hdc, dc, tr, [tr2, ch2, tr2] in next st, dc, hdc, sc in ch1-sp, hdc, dc, [tr2, ch2, tr2] in next st, tr, dc, hdc, sc, hdc, [dc2, ch2, dc2] in next st, hdc, dc2tog, tr between first and last st of round 1, dc2tog, hdc, [dc2, ch2] in next st, sl st (9 st on each side of square, ch2 in each corner)
Note: The bolded sc marks the point at the bottom of the heart. The stitches are mirrored on either side of this sc.
Another note: The “ch3, dc in same st” in the very beginning of round 3 creates only part of the top left corner. The first 3 groups of stitches in parentheses in round 3 are the other corners and the last group of stitches complete the top left corner.
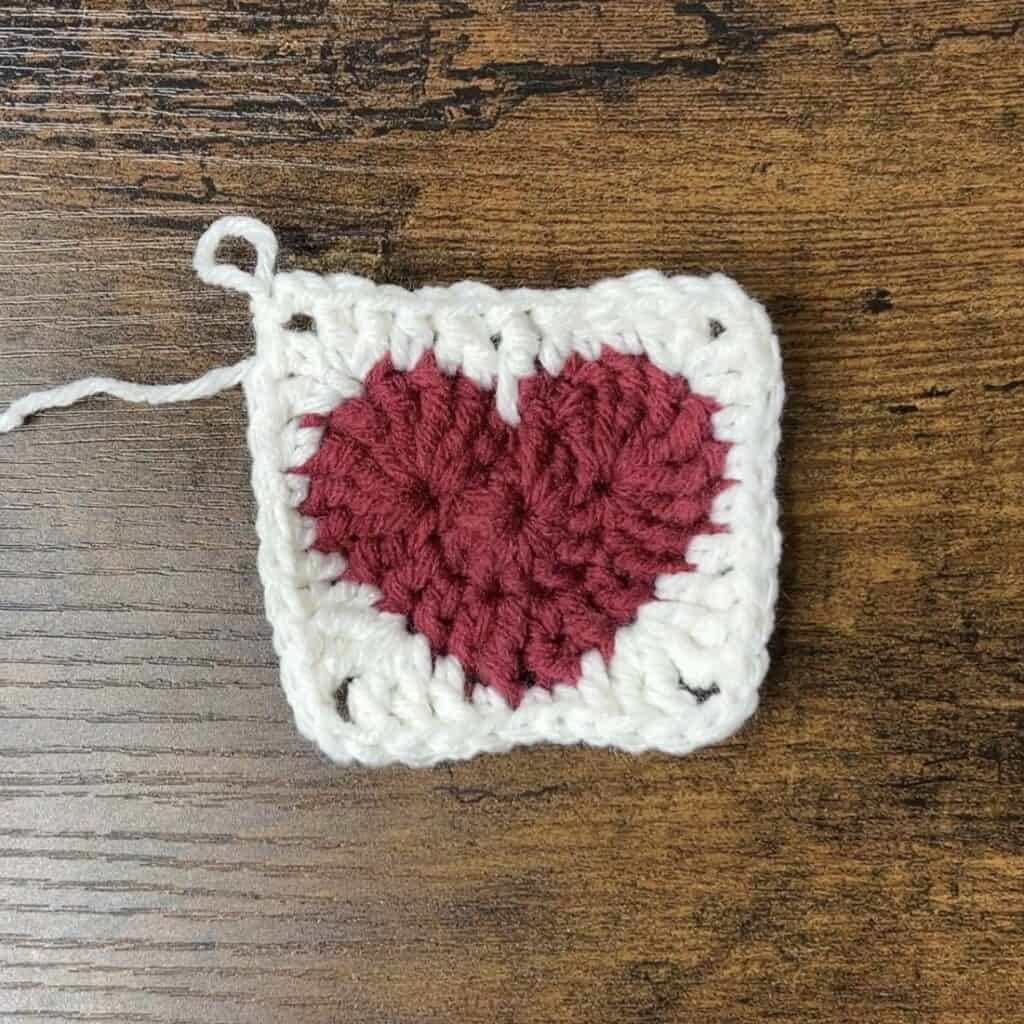
Round 4: ch3, dc in ch2-sp below, *dc in each of next 9 st, [dc2, ch2, dc2] in ch2-sp,* rep between ** 3 more times, but only [dc2, ch2] in last ch2-sp, sl st (13 st on each side of square, ch2 in each corner)
Fasten off and now you have a crochet heart granny square!
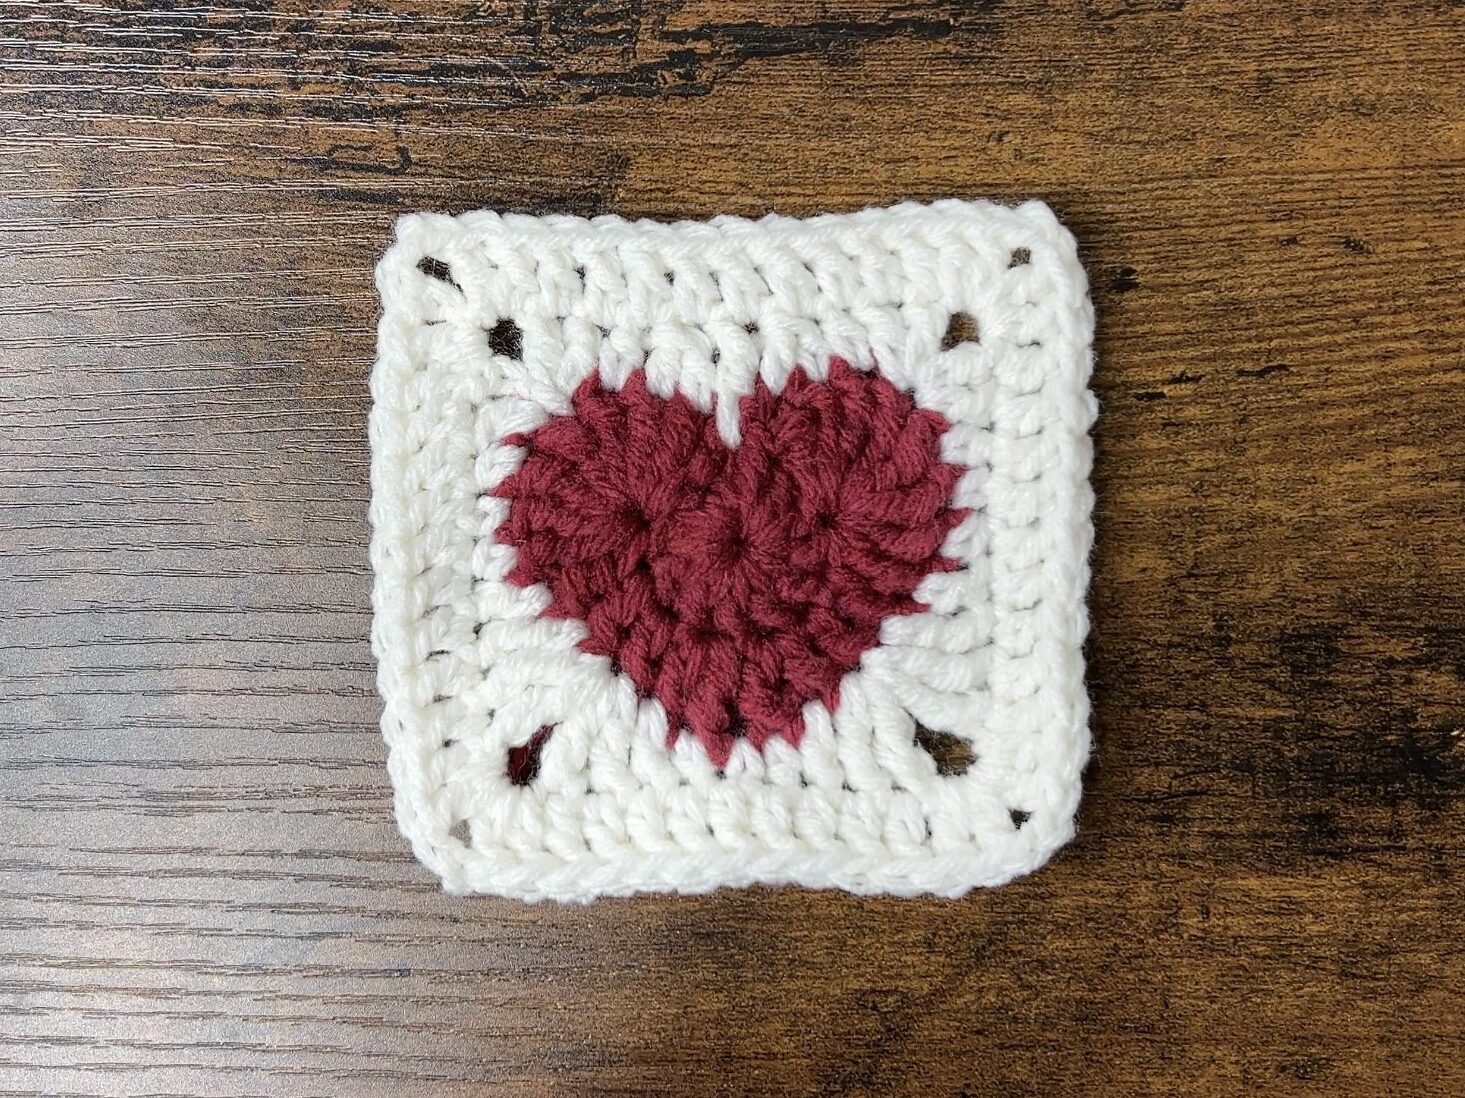
And if you block it, it can look like this! I wet the square, squeezed out the excess water, and shaped the square.
You can add round 5 to make a slightly larger square.
Round 5: ch3, dc in ch2-sp below, *dc in each of next 13 st, [dc2, ch2, dc2] in ch2-sp,* rep between ** 3 more times, but only [dc2, ch2] in last ch2-sp, sl st (17 st on each side of square, ch2 in each corner)
You can continue adding rounds for the square by doing [dc2, ch2, dc2] in each of the four ch2-sp and dc around each side.


I love this pattern! My first crochet project. I was hoping to make a cardigan (I’ve done 3 rounds so 17 stitches on each side), but I was wondering how many squares I need/ if you have a pattern for a granny square cardigan please!
I don’t understand round 3 when I do it it seems like there aren’t enough steps to fully reach the end of the heart
Love it
I used this pattern to make a balancet, hopefully will be finished next month 🥳
Congratulations
Please help 🙁
I’ve restarted this multiple times because I kept thinking I was doing something wrong but every time I follow the instructions for round 3 I end up with only 8 st on the vertical sides of the heart but 9 on the other 2. So it looks more like a rectangle than a square.
This first part of Round 3 is the left side of the square: ch3, dc in same st, hdc, sc, hdc, dc, tr, [tr2
Don’t forget the ch3 counts as the first stitch. If that’s not it, maybe you’re doing only 1 tr instead of 2?
And this is the right side of the square: tr2] in next st, tr, dc, hdc, sc, hdc, [dc2
There are 9 stitches here, so I’m not sure which, but you’re missing one of them.
It cuts off
She has also put the YouTube video so maybe take help from the video.