Everyday Crochet Hobo Bag | Free Pattern & Video Tutorial
Learn how to crochet the perfect everyday bag! This crochet hobo bag is slouchy, relaxed, and a great addition to any casual outfit. Use this streamlined pattern with minimal sewing for your next quick and fun project!
Follow along with this free written pattern, or watch the video tutorial to make your very own hobo bag!
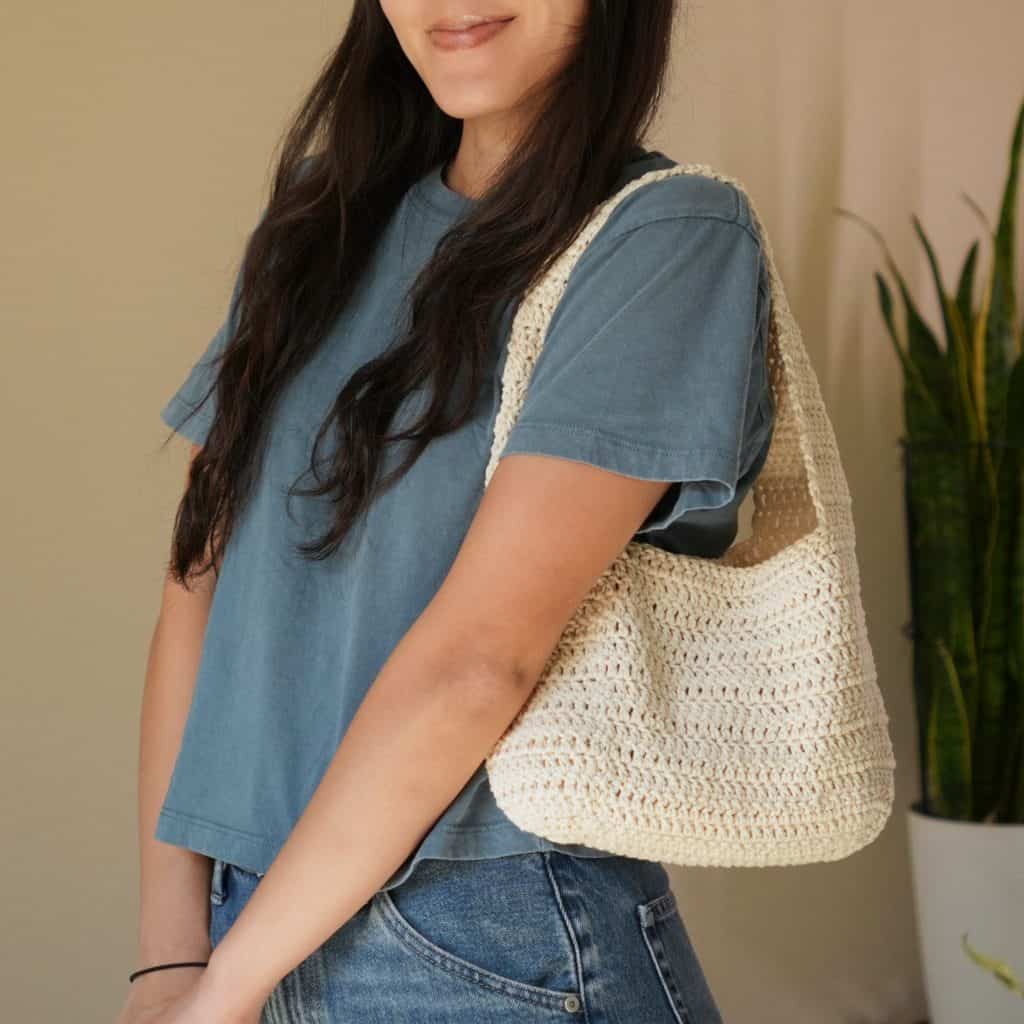
Table of Contents
This post may contain affiliate links. I may earn a small commission on qualifying purchases at no additional cost to you!
Everyday Crochet Hobo Bag Tutorial
Become a member to get early access to new videos!
You can follow along with my YouTube video to make your own crochet hobo bag! I have timestamps included to help you jump to any point you need to!
Pattern Information
Materials
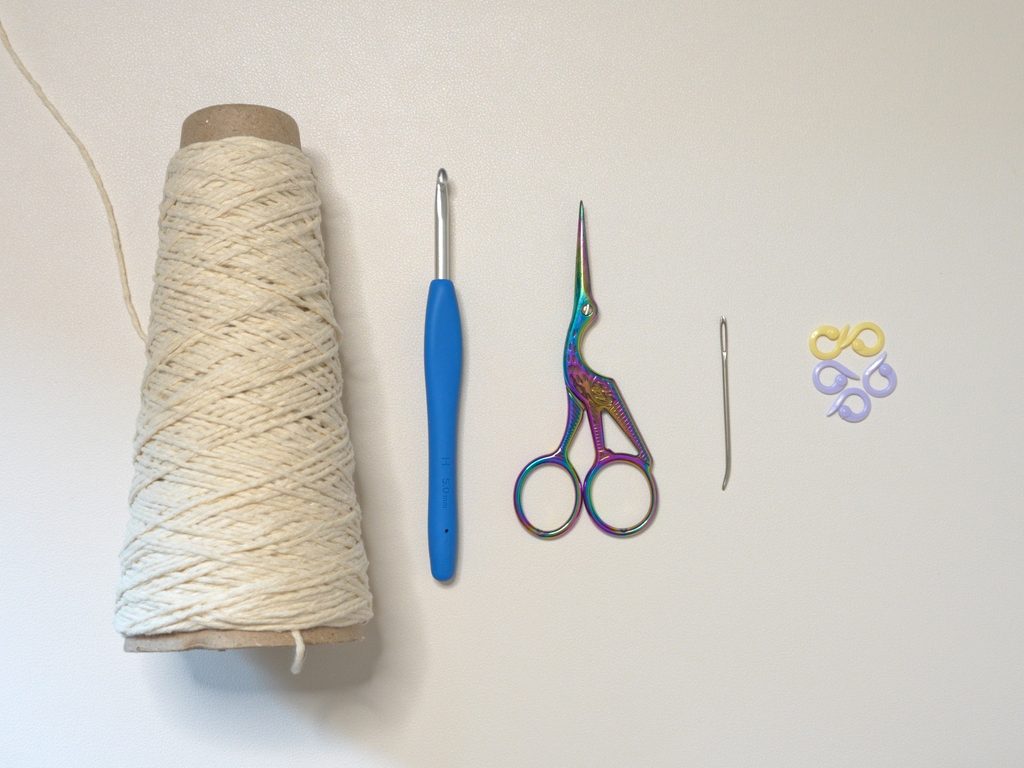
- 120 grams/197 yards of medium weight yarn (Re-Up Bonus Bundle in “Full Moon“)
- 5mm Clover Amour crochet hook
- Scissors
- Yarn needle
- Stitch markers
Crochet Abbreviations
ch = chain
dc = double crochet
dec = decrease (sc2tog)
inc = increase (2 single crochets into 1 stitch)
rep = repeat
sl st = slip stitch
st = stitch
Gauge
8.5 rows of 14 double crochets makes a 10 x 10 centimeter (4″ x 4″) square
Dimensions
*includes instructions to adjust sizing
Bag Excluding Straps: 27.5 centimeters wide x 19 centimeters long (10.8 x 7.5 inches)
Straps: 4 centimeters wide x 21.5 centimeters long (1.6 x 8.5 inches)
Overall: 27.5 centimeters wide x 37.5 centimeters long (10.8 x 14.8 inches)
Notes and Tips
- This pattern is written using US crochet terms
- The number in (parentheses) at the end of each row is the stitch count after finishing that row
- Italicized notes tell you what to change to adjust the size
- The chain 2 at the beginning of each round does NOT count as a double crochet
- The slip stitch at the end of each round goes into the first stitch of that round
- Turn every round to keep the slip stitch seam straight and to keep it consistent with the straps
- The first stitch of every new round goes into the same stitch we slip stitched to in the previous round
Everyday Crochet Hobo Bag Pattern
Base
Foundation: Make a slipknot, ch25
Note: Do fewer chains for a smaller bag or more chains for a larger bag. Note that you might have to adjust the pattern for the straps if you adjust the base of your bag.
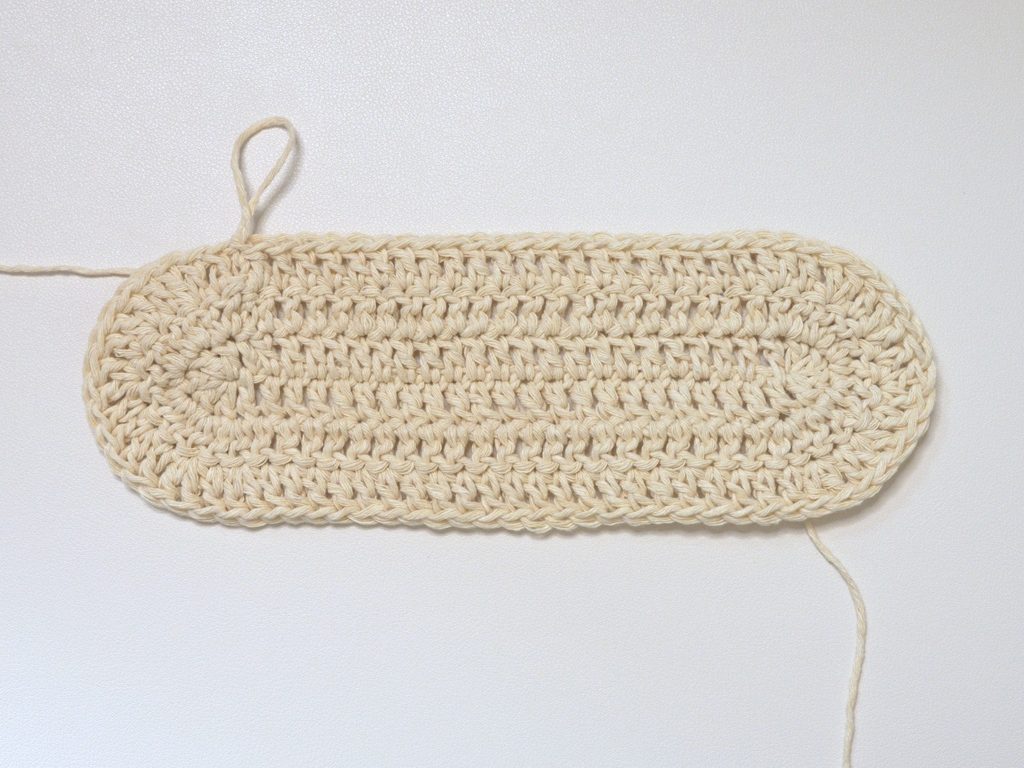
Round 1: dc6 in 3rd ch from hook, dc in next 21 ch, dc6 in last ch, rotate your foundation chain to work along the underside, dc in next 21 ch, sl st (54)
To minimize the holes from the 6 dc in the first and last ch, place the last dc into a space below the ch. See the video tutorial.
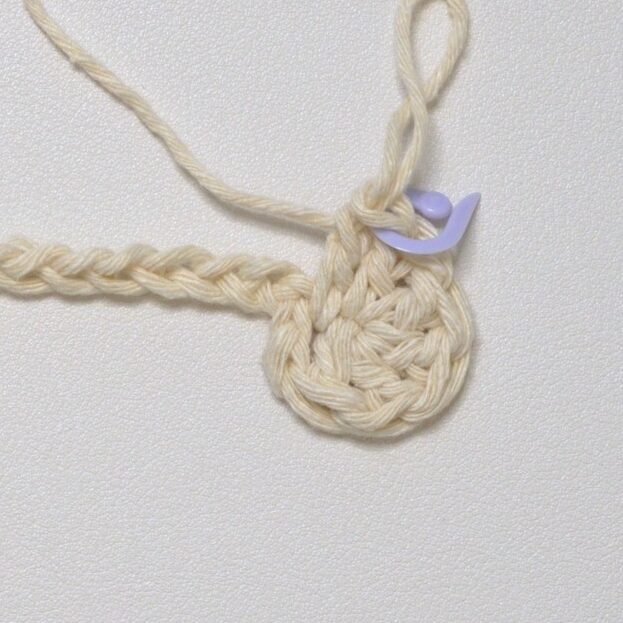
Place a stitch marker in the last dc into the first and last chains. You won’t need to count the 21 stitches next round.
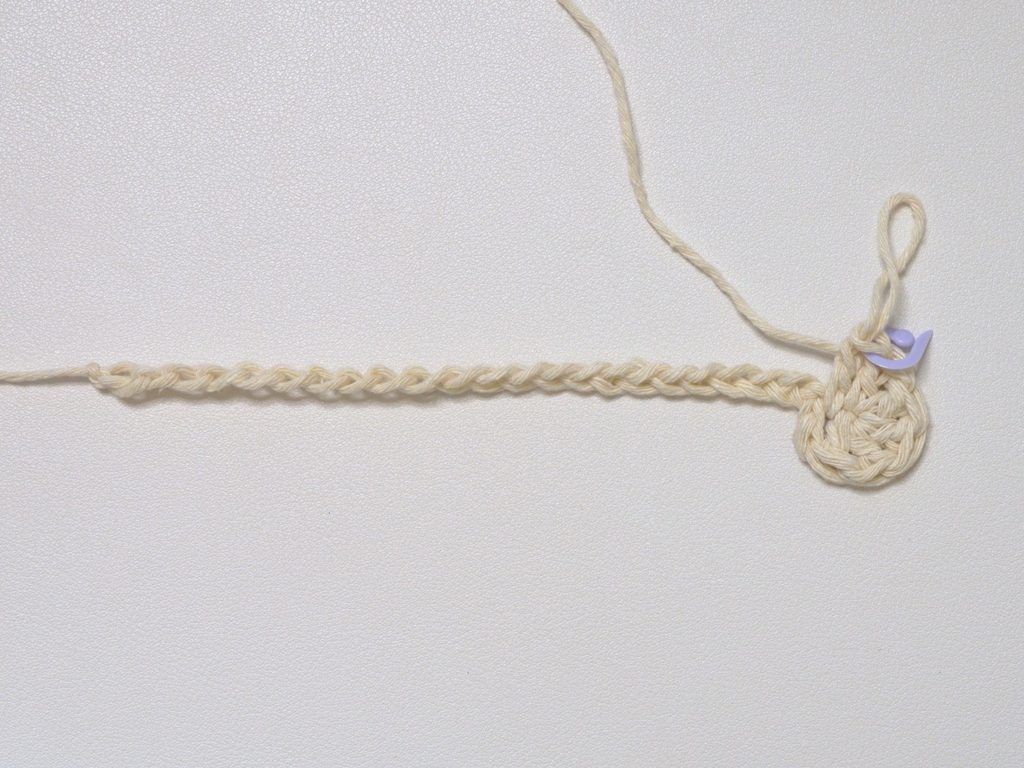
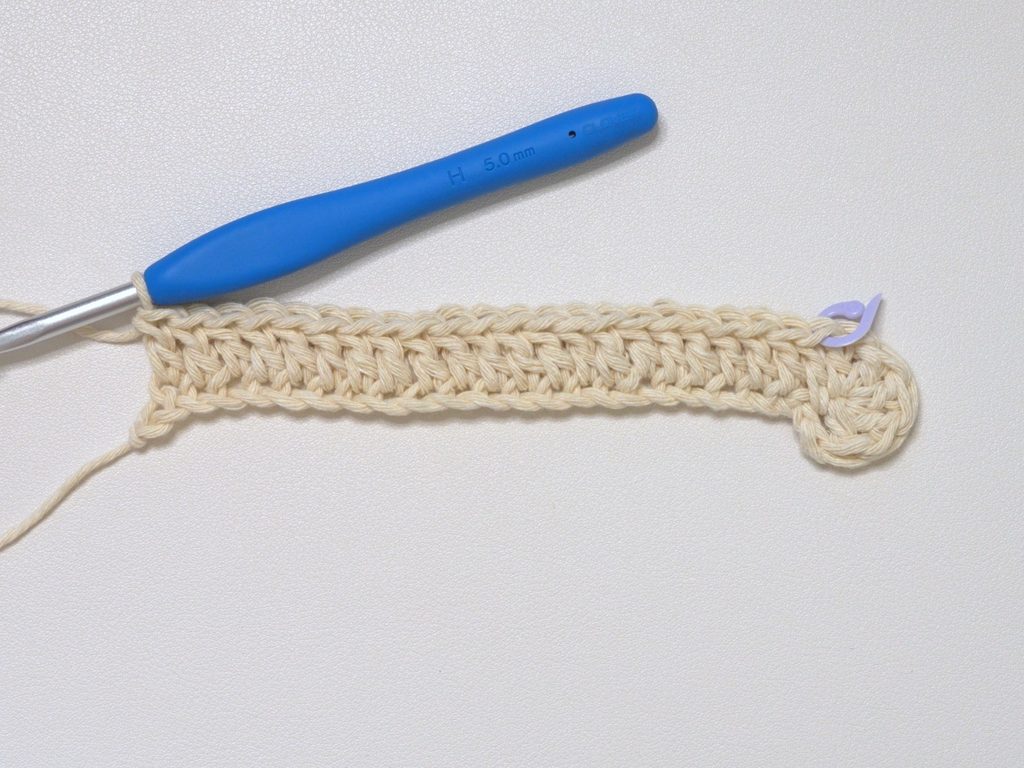
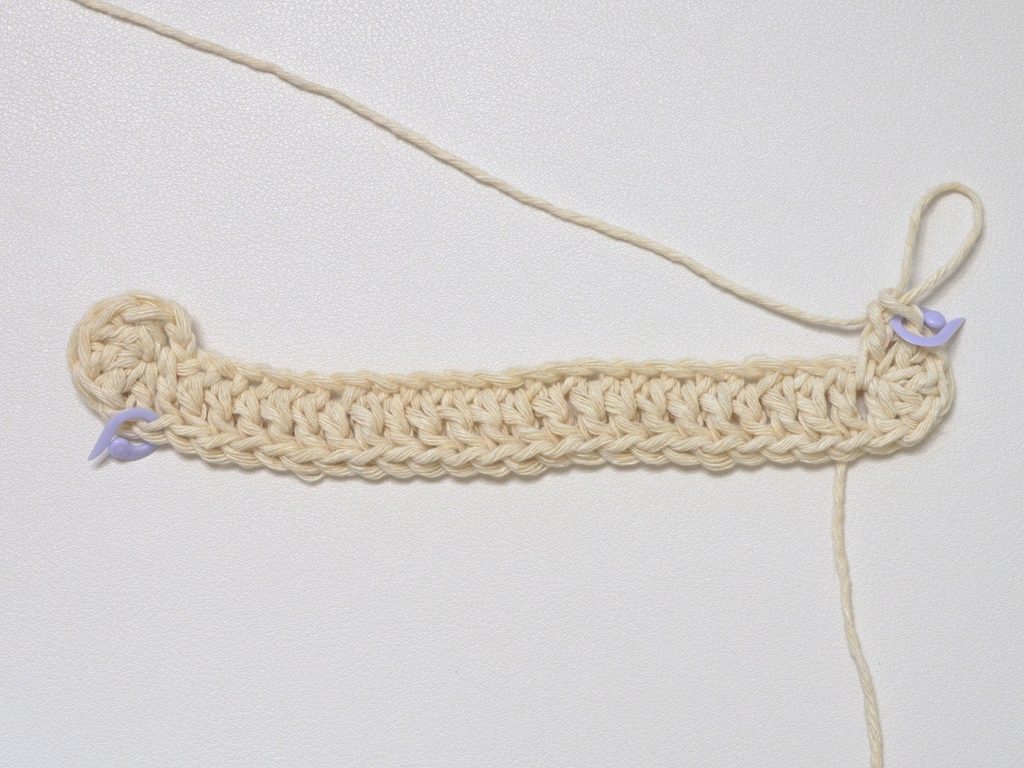
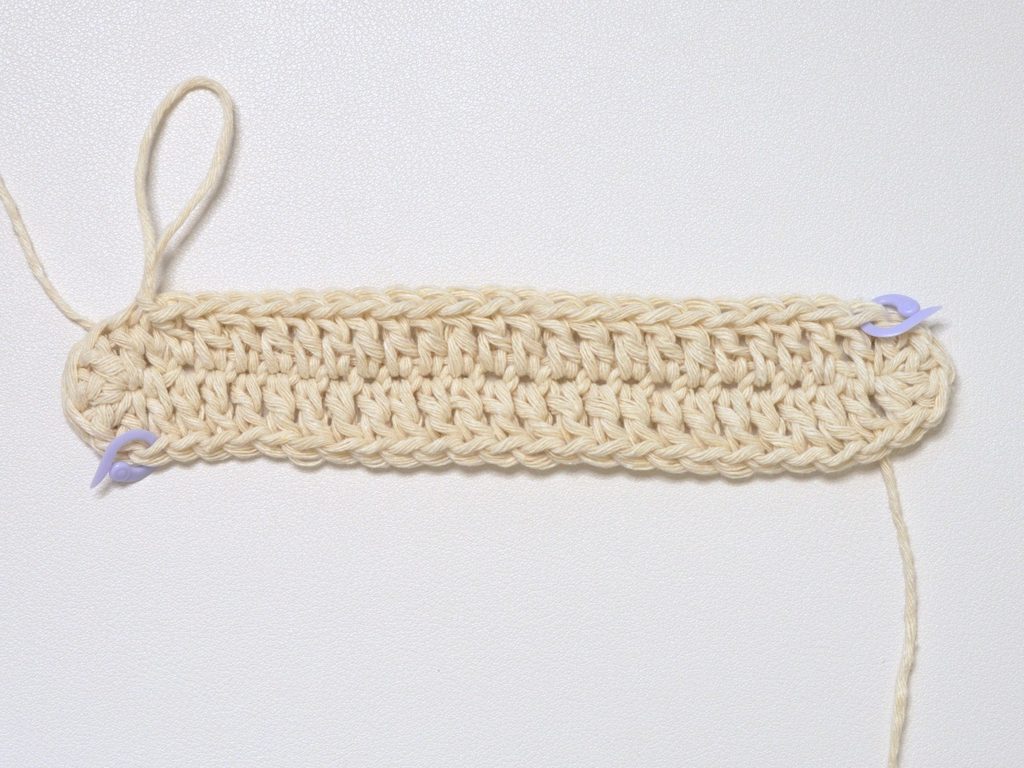
Round 2: ch2, turn, rep[dc in next 21 st, inc in next 6 st] 2 times, sl st (66)
Place a stitch marker in the last dc of the first rep. You won’t need to count the 21 stitches next round.
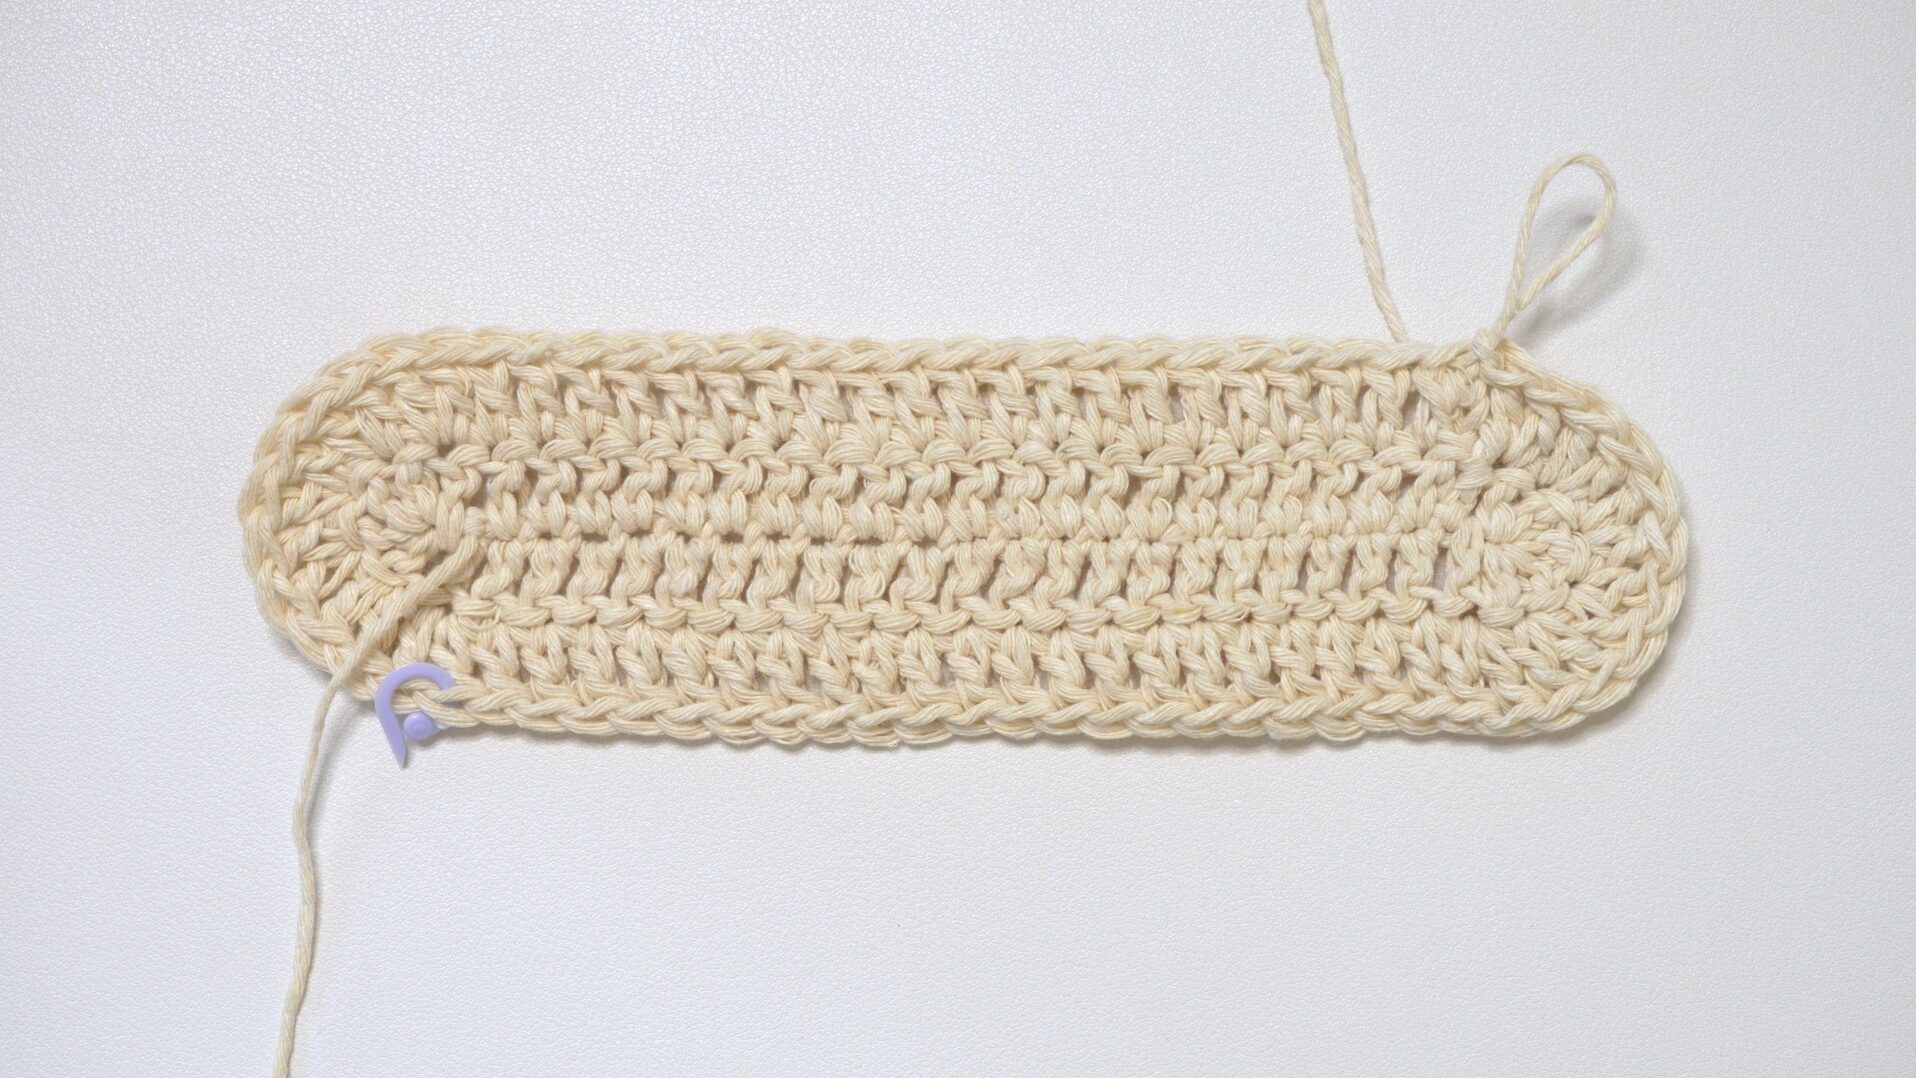
Round 3: ch2, turn, *rep[dc, inc] 6 times, dc in next 21 st,* rep between **, sl st (78)
Note: Add more rounds to increase the depth of your bag. The next round will be the same as Round 3, except you rep[dc in next 2 st, inc]. Continue adding a dc before the inc for every new round of the base. Note that you might have to adjust the pattern for the straps if you adjust the base of your bag.
Body
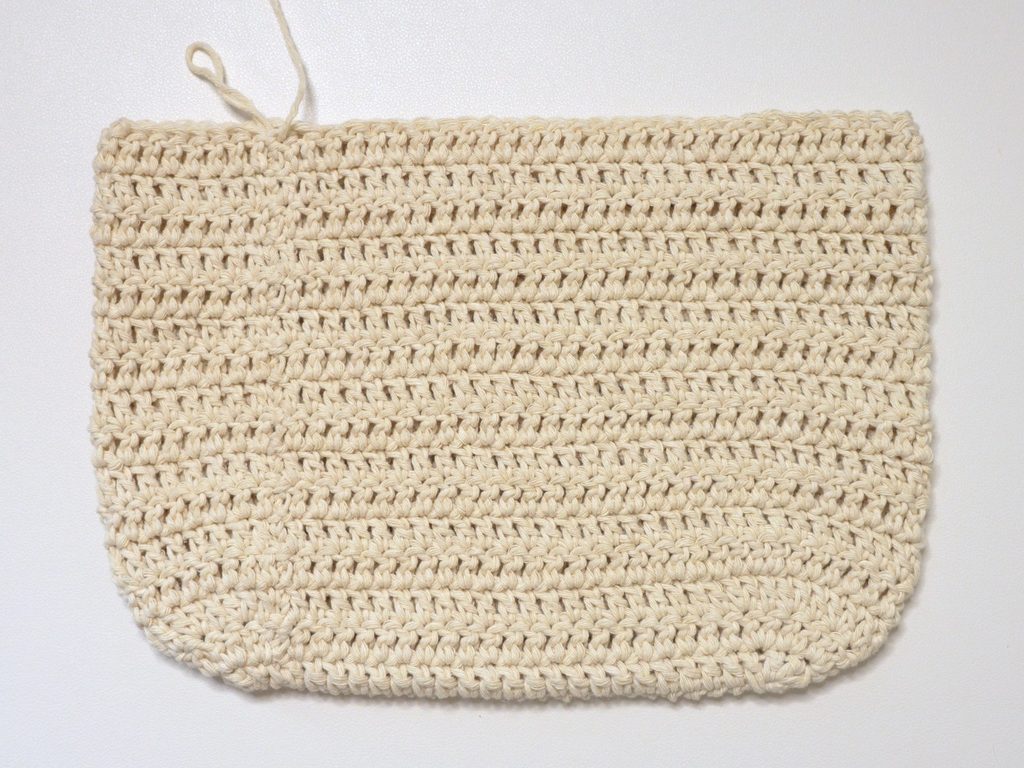
Rounds 4-16: ch2, turn, dc around, sl st (78)
Note: Do fewer rounds for a shorter bag or more rounds for a longer bag. Do an even number of rows.
Marking Straps
Mark the stitches on the sides of the bag (yellow stitch markers). Make sure there are an equal number of stitches between these stitch markers on either side. If you have 78 stitches like me, there should be 38 stitches in between the yellow stitch markers.
Count the number of stitches the slip stitch is from the closest side stitch marker (8 for me). Mark that number of stitches on either side of each side stitch marker.
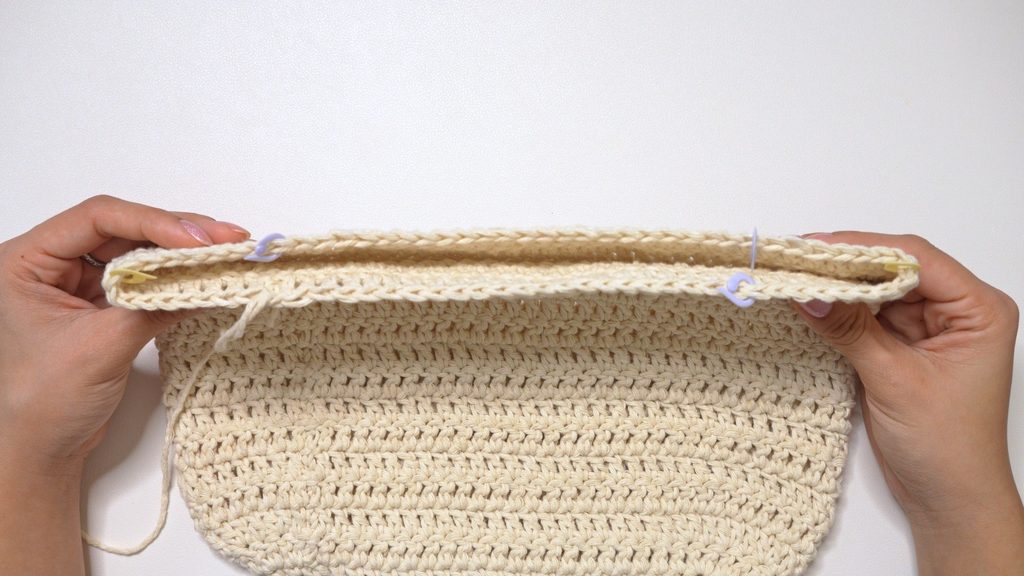
Comfirm that the inner stitch markers are where you want the first row of your straps to start and end. You can move them closer to the middle or further out, but you’ll have to fasten off and attach your yarn to where you want it to start.
Remove the side stitch markers.
Straps
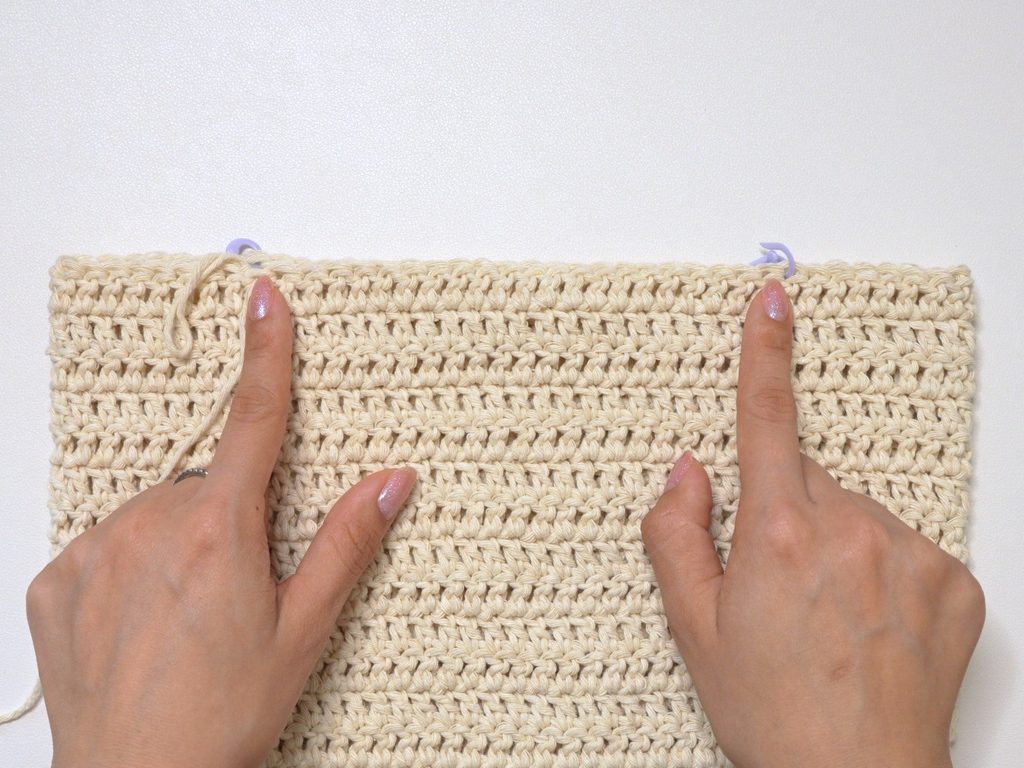
Note: If you adjusted the placement of your stitch markers, fasten off and attach your yarn to the left stitch marker.
Note: If your stitch marker is not the 17th stitch, dc until your stitch marker instead for Row 1.
Row 1: ch2, turn, dc in next 17 st (17)
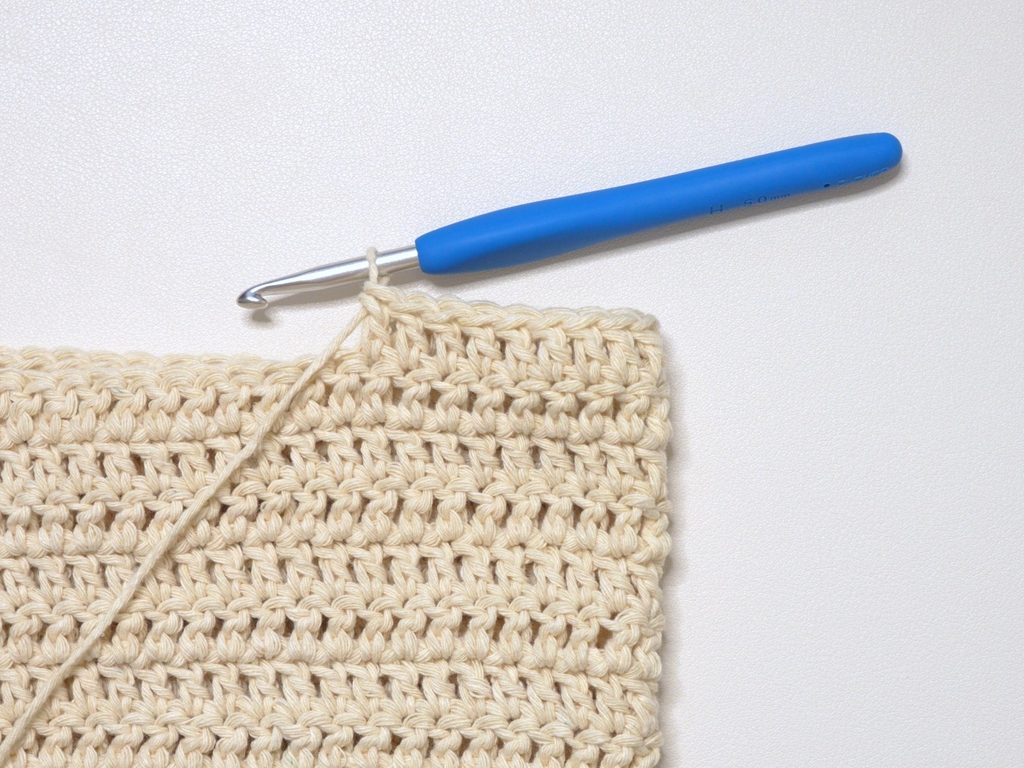
Note: If you don’t have 17 stitches in the first row of your strap, you’ll need to adjust Row 2. Take your stitch count from Row 1, divide it by 2, and round down. You’ll dc that number, dec, then dc for the rest of the row.
Row 2: ch2, turn, dc in next 8 st, dec, dc in next 7 st (16)
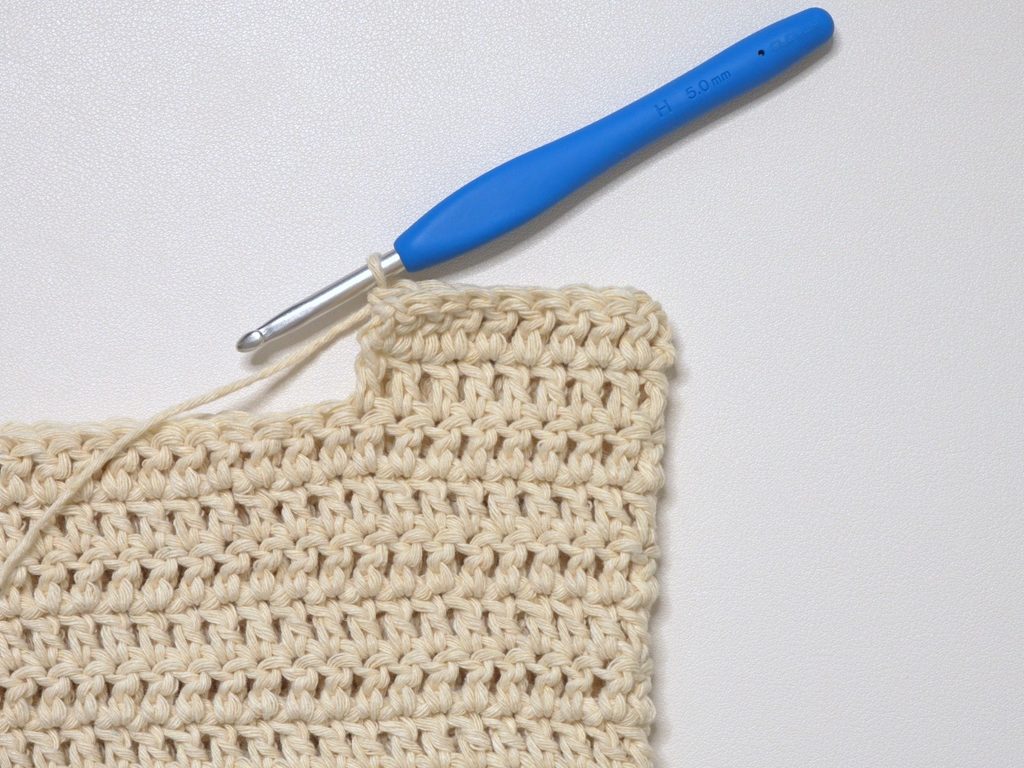
Next, we’ll continue to decrease the width of the strap by doing decreases at the middle of the row.
Rows 3-11: ch2, turn, dc until dec from previous row, dec, dc across (15, 14, …, 8, 7)
Note: Do fewer rows for a wider strap or more rows for a thinner strap.
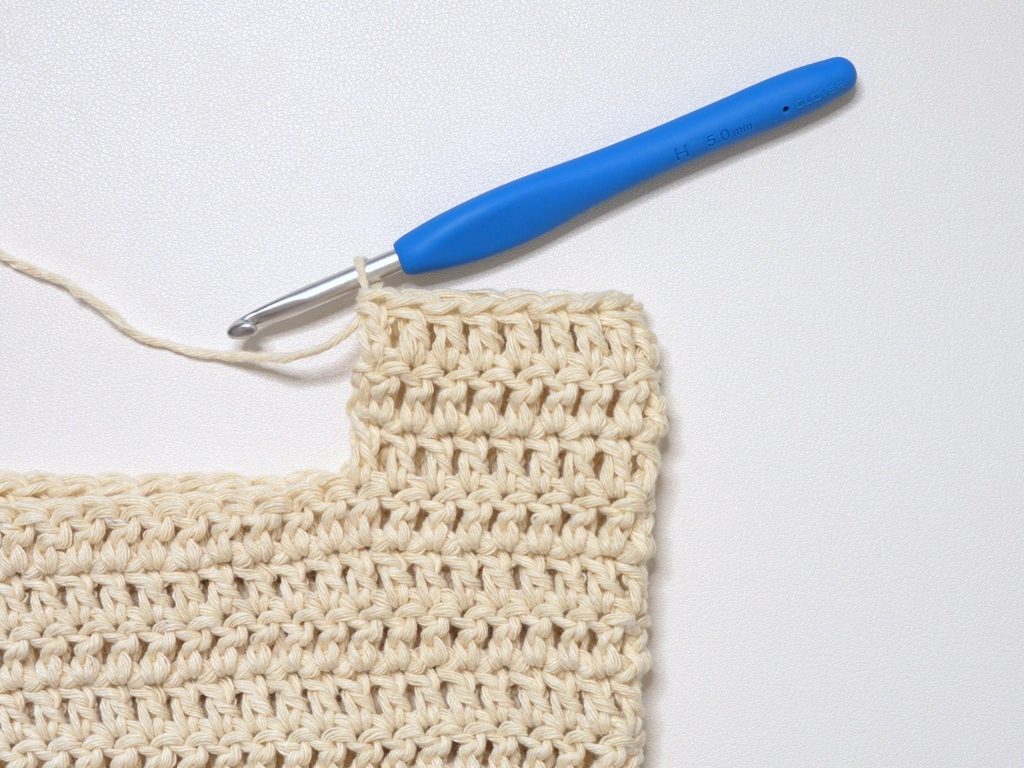
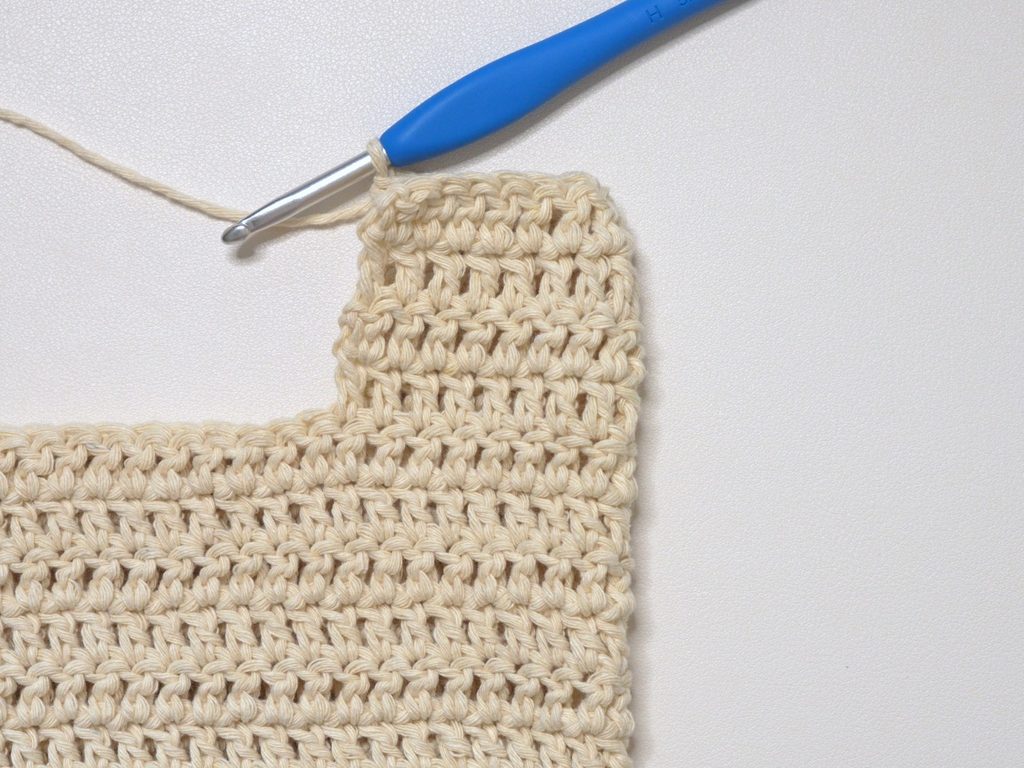
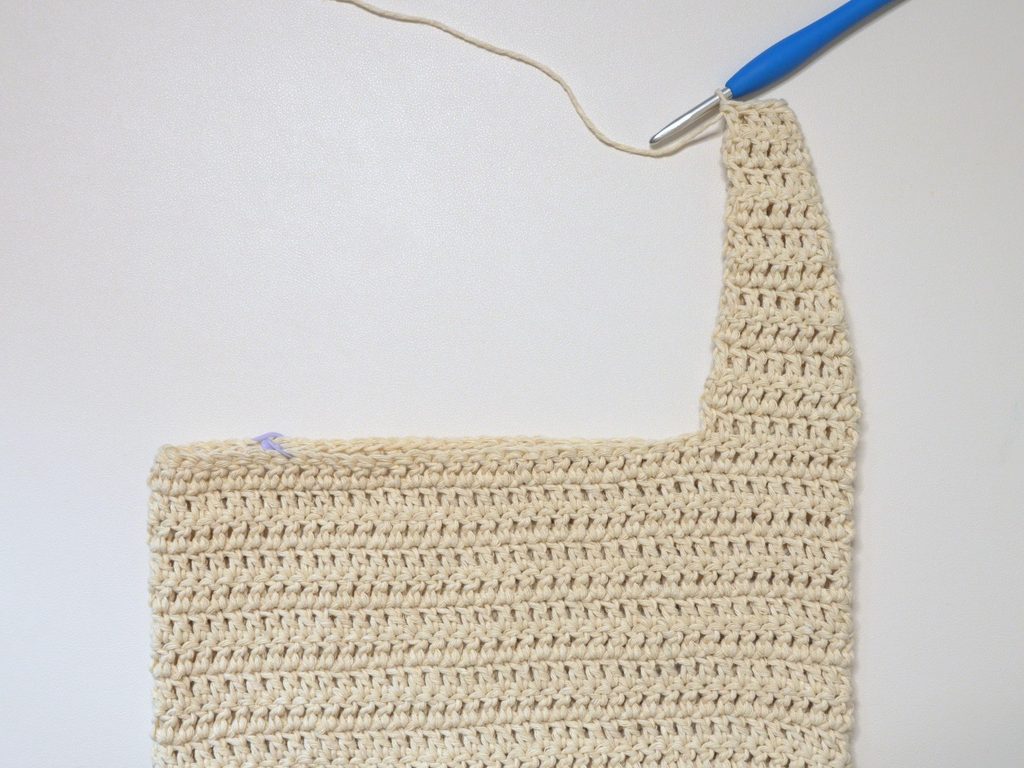
Below, I have the rows written out in case you prefer that!
Row 3: ch2, turn, dc in next 7 st, dec, dc in next 7 st (15)
Row 4: ch2, turn, dc in next 7 st, dec, dc in next 6 st (14)
Row 5: ch2, turn, dc in next 6 st, dec, dc in next 6 st (13)
Row 6: ch2, turn, dc in next 6 st, dec, dc in next 5 st (12)
Row 7: ch2, turn, dc in next 5 st, dec, dc in next 5 st (11)
Row 8: ch2, turn, dc in next 5 st, dec, dc in next 4 st (10)
Row 9: ch2, turn, dc in next 4 st, dec, dc in next 4 st (9)
Row 10: ch2, turn, dc in next 4 st, dec, dc in next 3 st (8)
Row 11: ch2, turn, dc in next 3 st, dec, dc in next 3 st (7)
Now, we’ll stop decreasing the width of our strap.
Rows 12-16: ch2, turn, dc across (7)
Note: Do fewer rows for a shorter strap or more rows for a longer strap.
Fasten off with a 25cm/10″ long loose end.
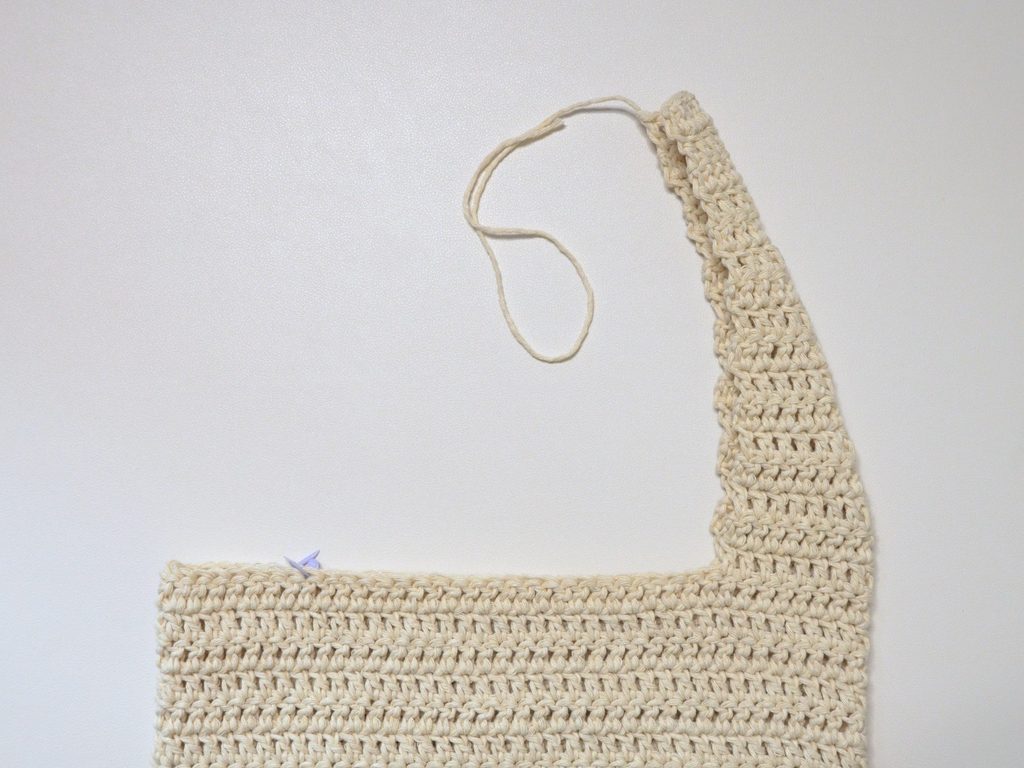
Second Strap
With your bag flipped so the finished strap is on the right side, attach your yarn to the stitch marker on the top layer.
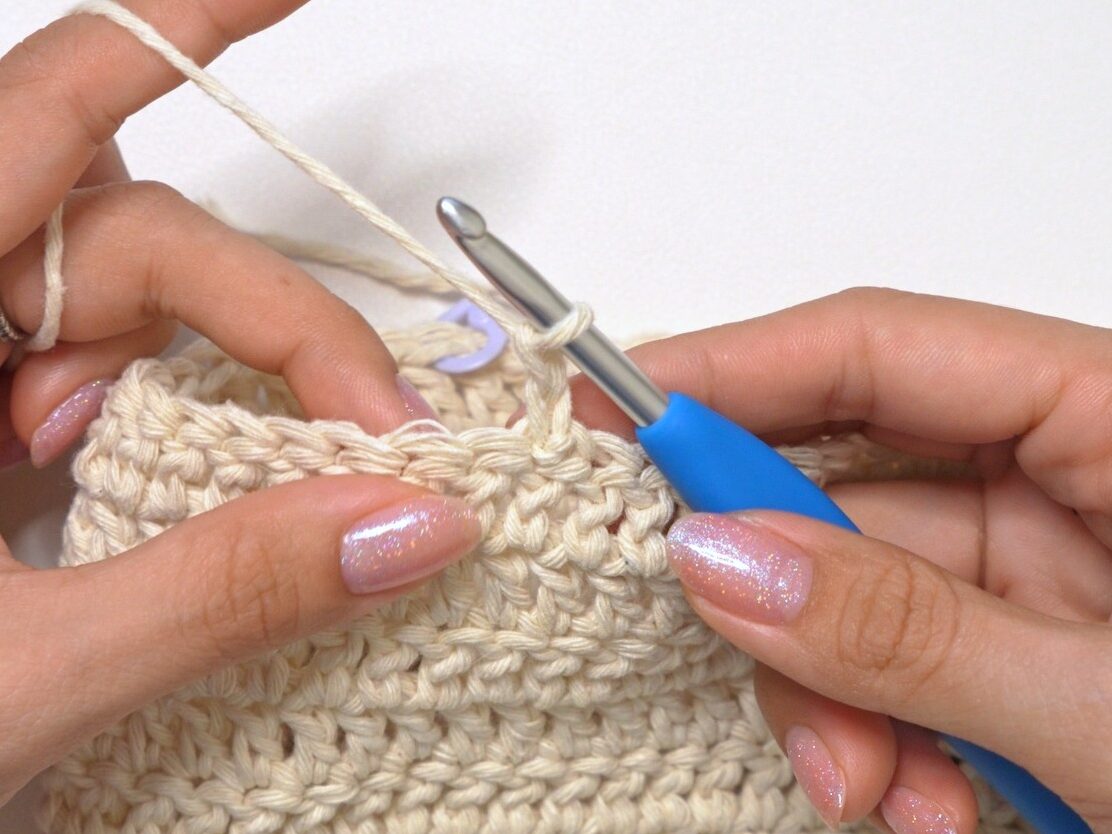
Row 1: ch2, dc in next 17 st (17)
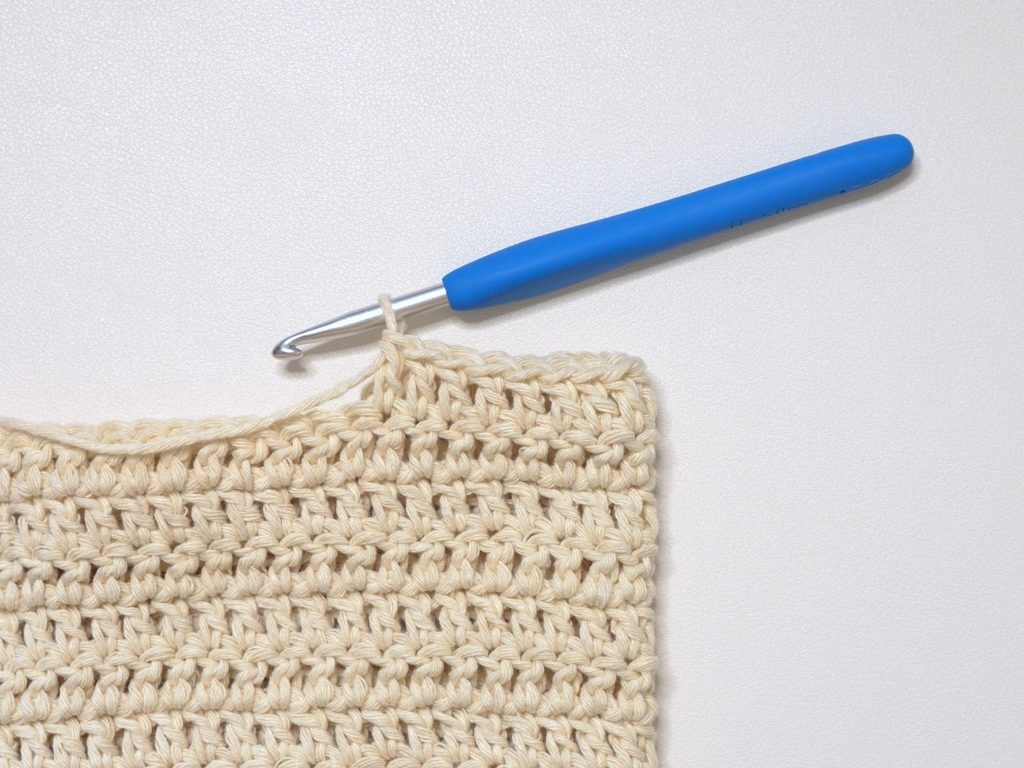
Repeat Rows 2-16 of your first strap.
Fasten off with a regular loose end.
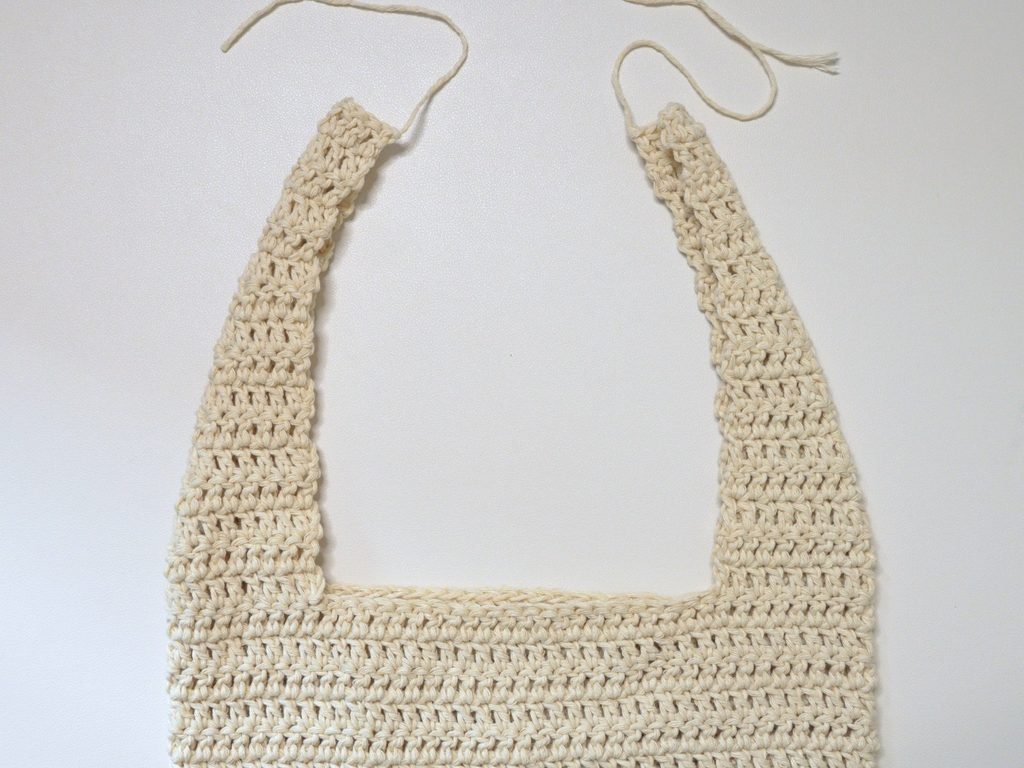
Sewing Straps
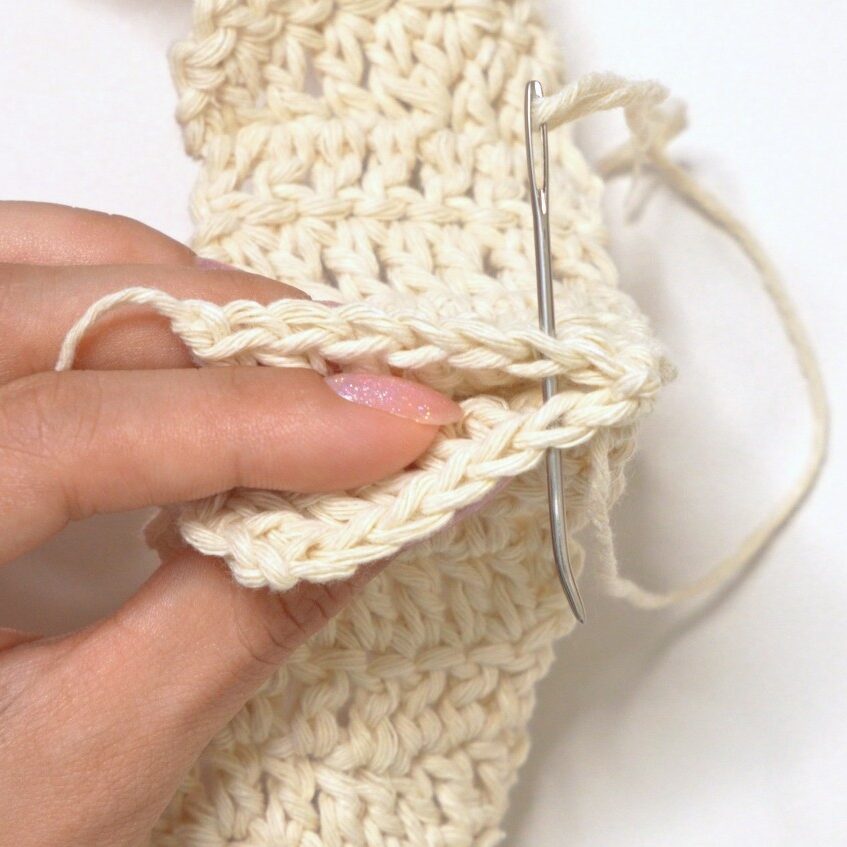
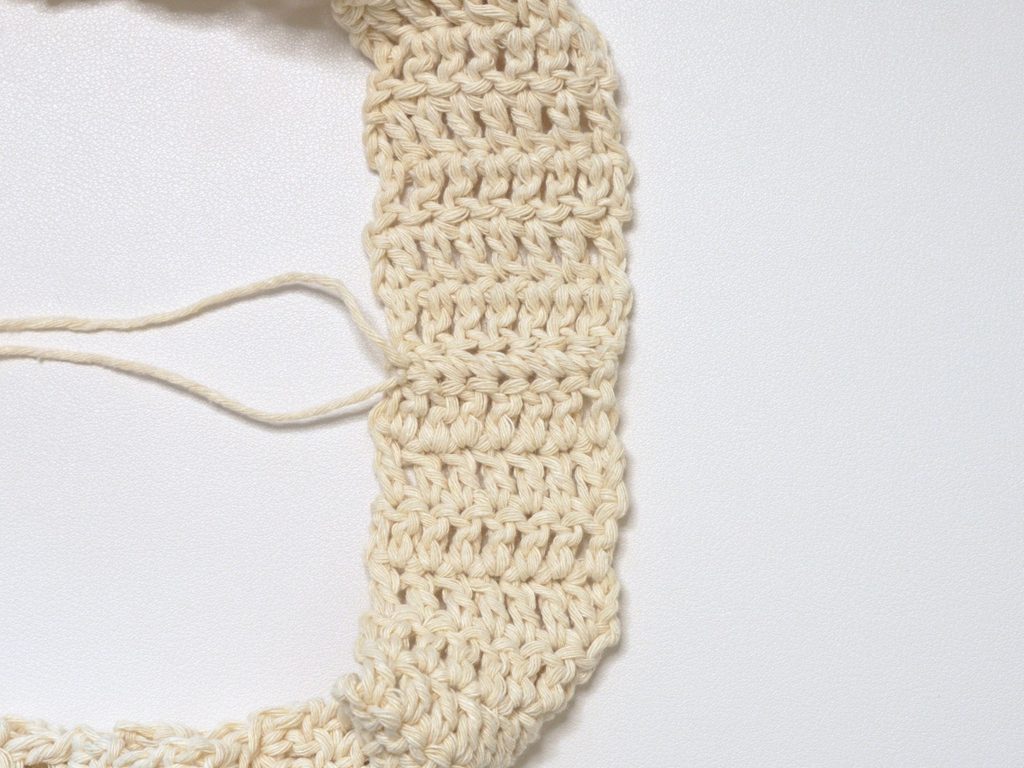
With the long loose end, whip stitch the last rows of the straps together. Tie a double knot with the other loose end to secure the seam.
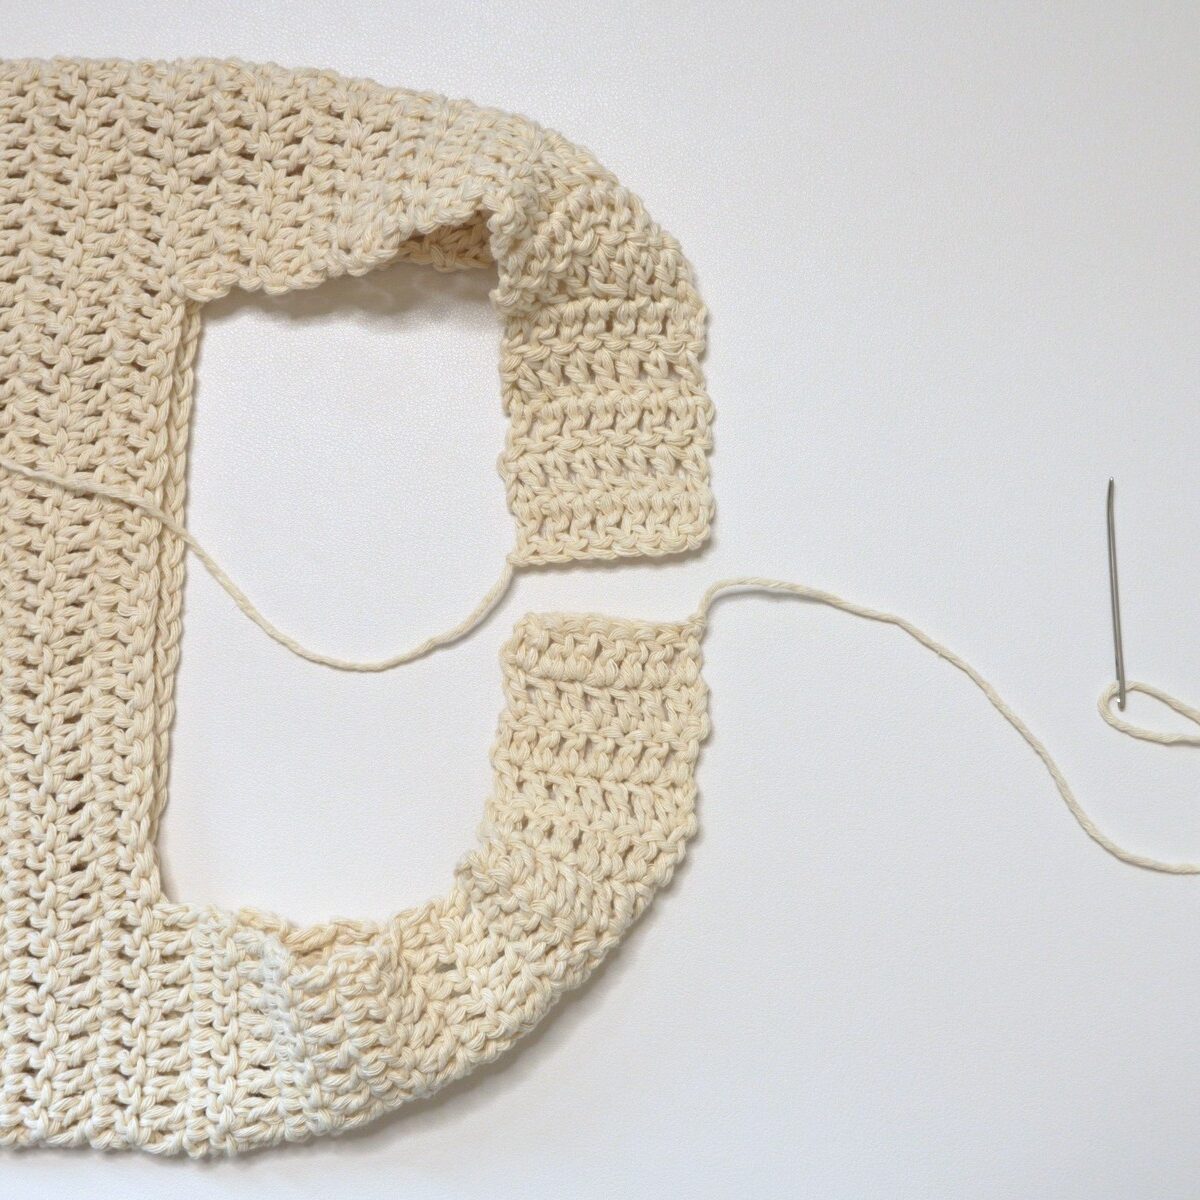
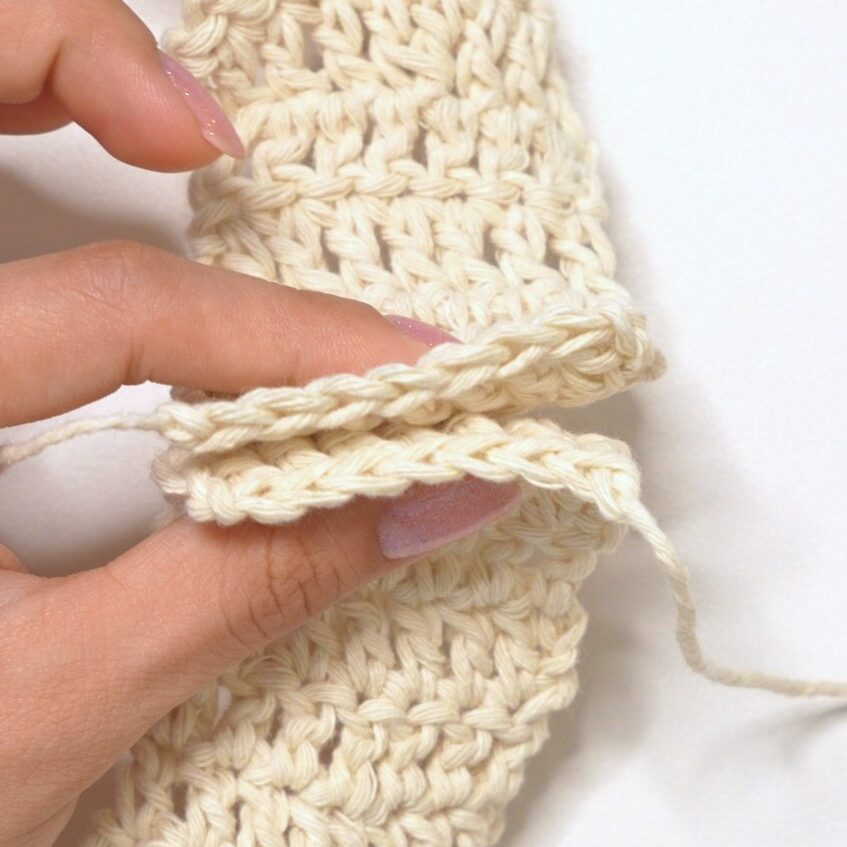
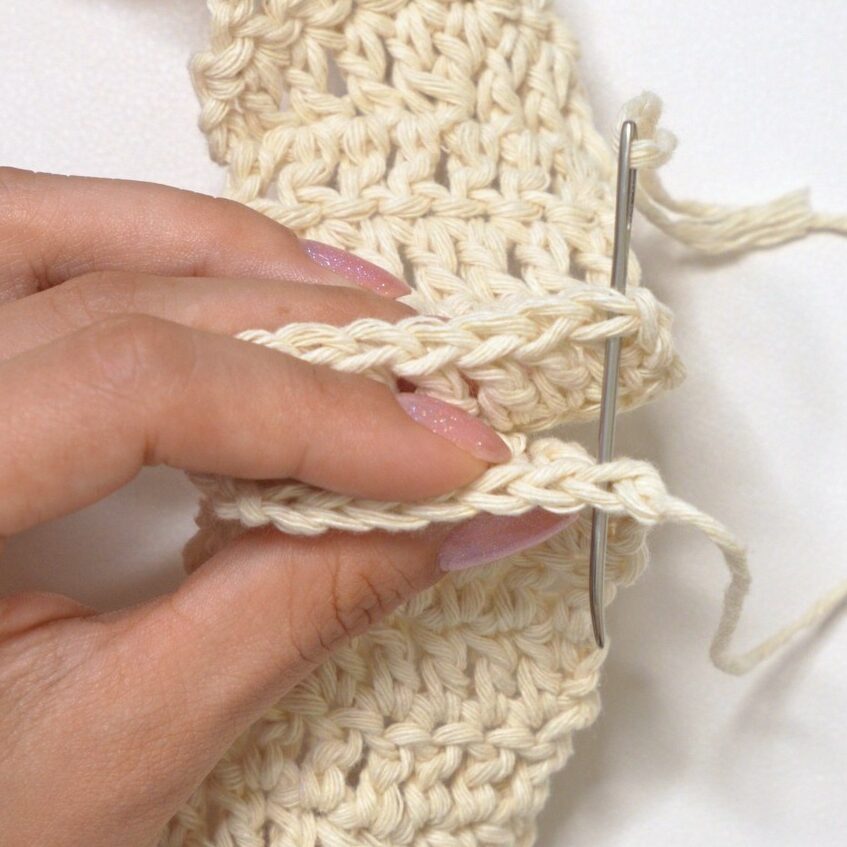
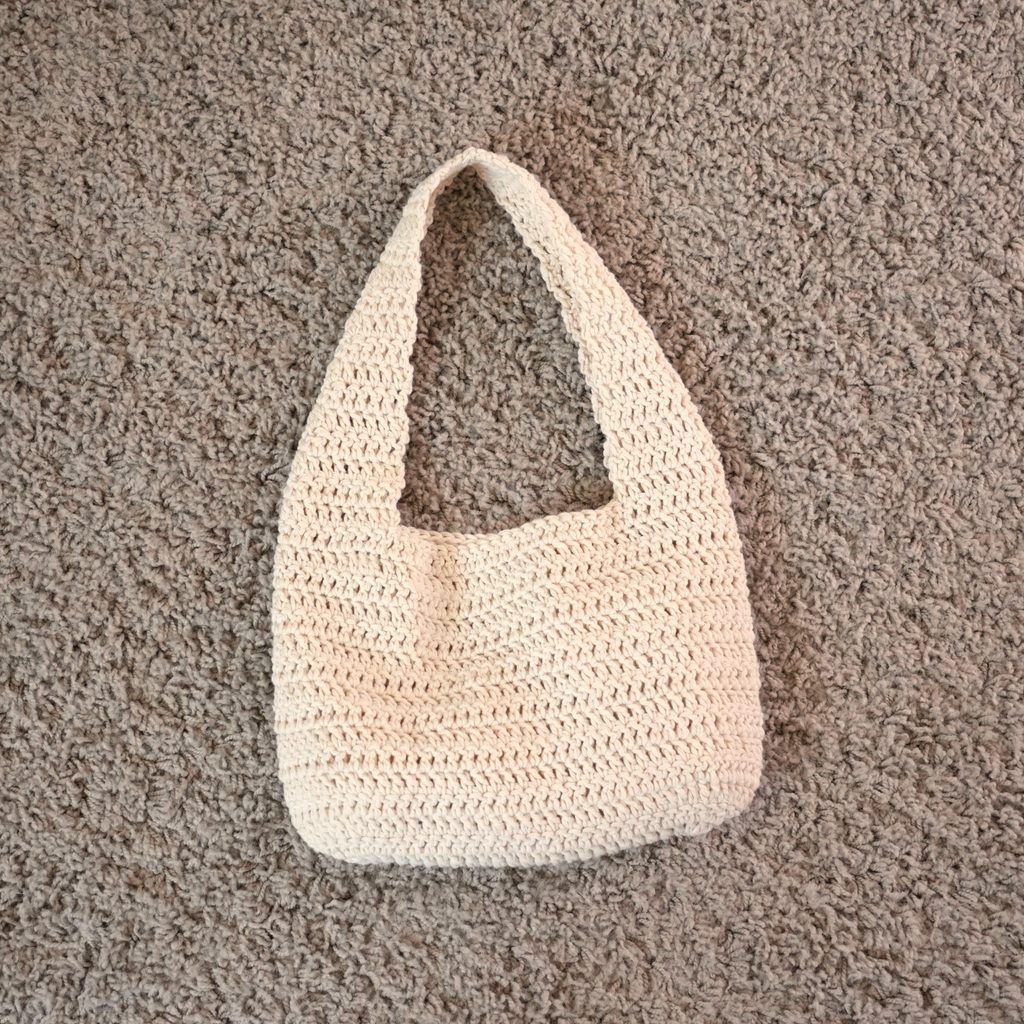
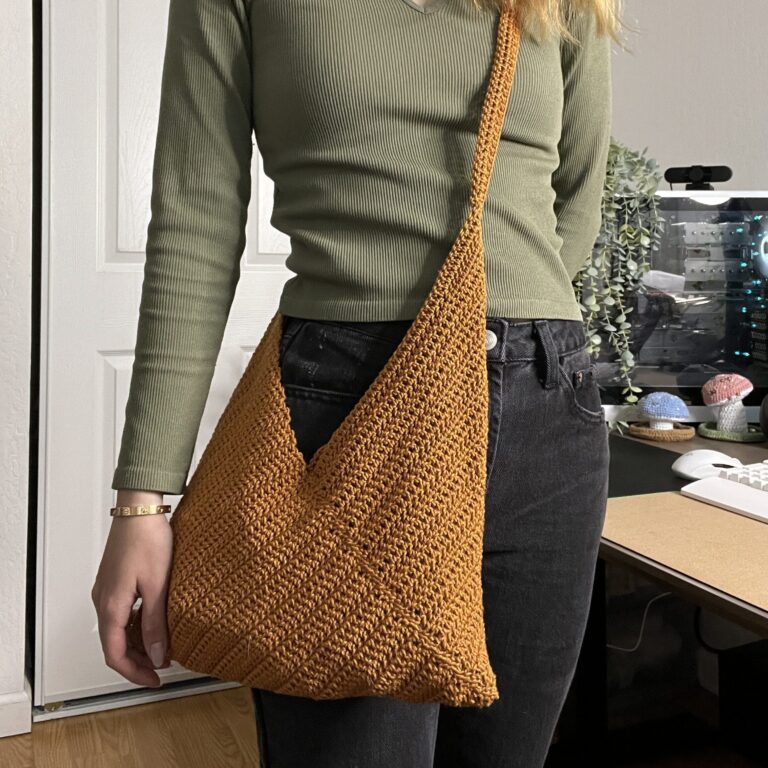
Finished Everyday Crochet Hobo Bag
Weave in your loose ends and your crochet hobo bag is finished!

2 Comments