Flower Granny Square Tote Bag | Free Pattern & Video Tutorial
This granny square tote bag pattern will go over the assembly of 13 granny squares and a basic strap. Any granny square will work; I’ll be using my flower granny squares. The method I will use to join the squares will leave you with only 2 loose ends after assembling!
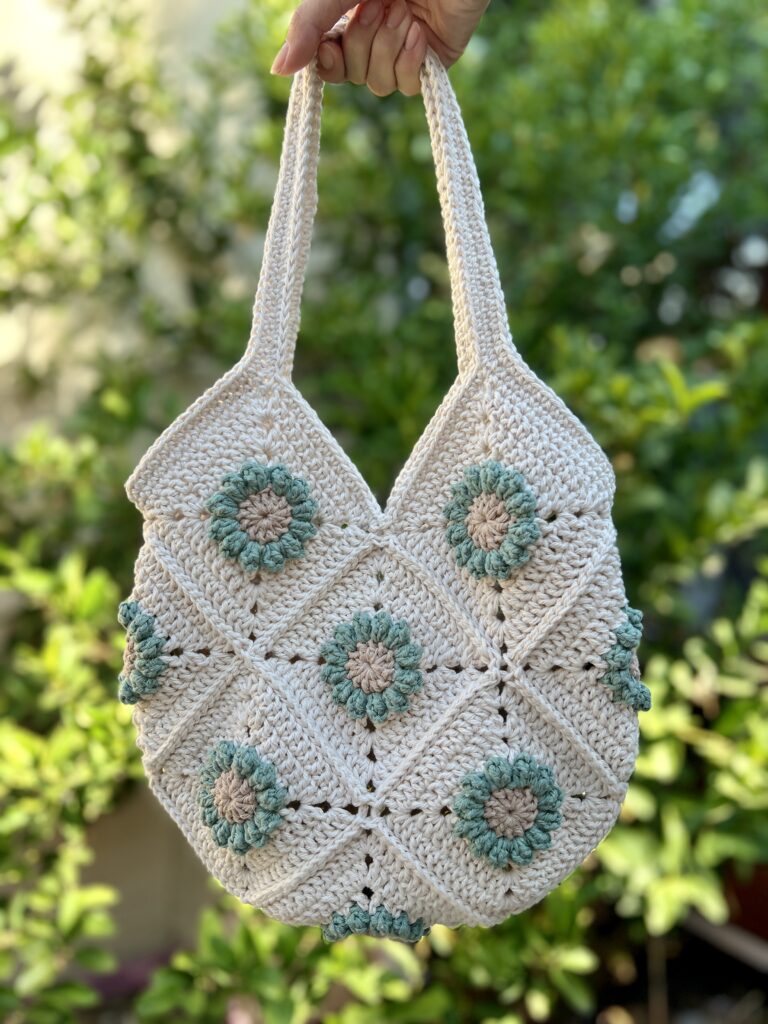
Advanced Beginner Crochet Project
The assembly of the granny square tote mainly uses the slip stitch. And the strap is made of single crochets, so every stitch is very beginner-friendly.
The assembly can seem a bit overwhelming, but you should be fine if you refer to the diagrams. And it is definitely worth it to take the extra time to learn this method so we have fewer loose ends to weave in later!

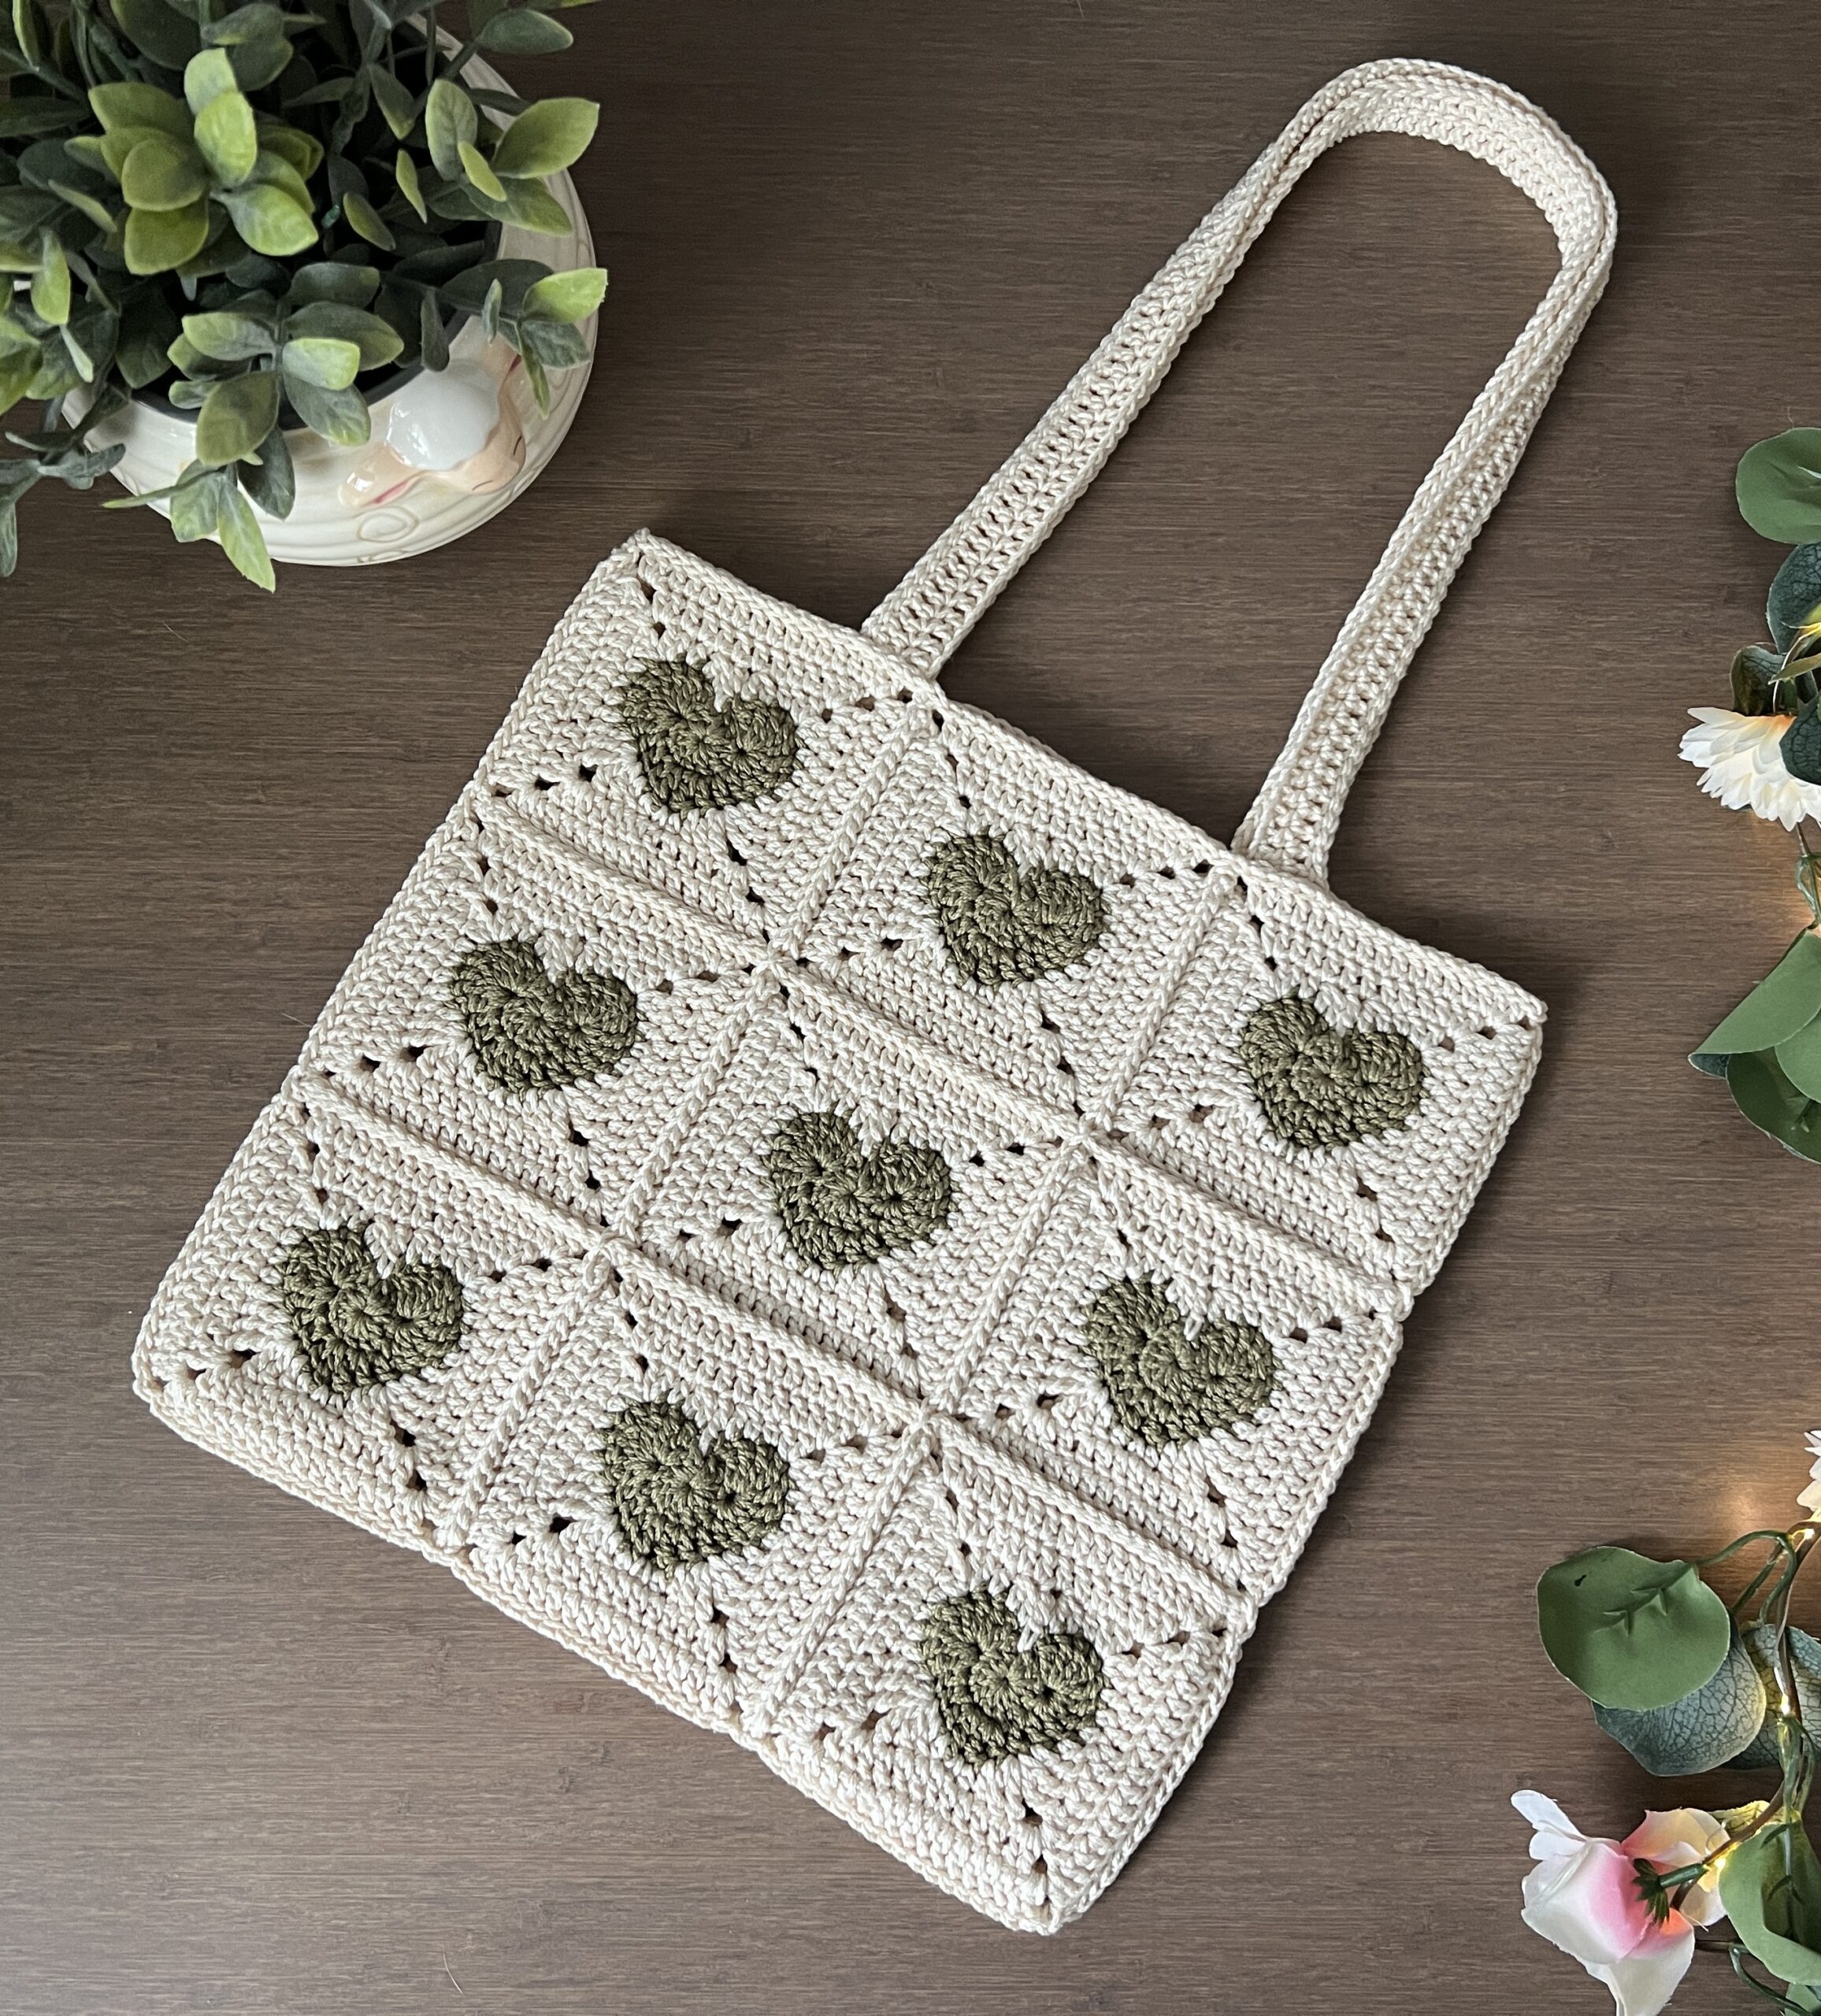
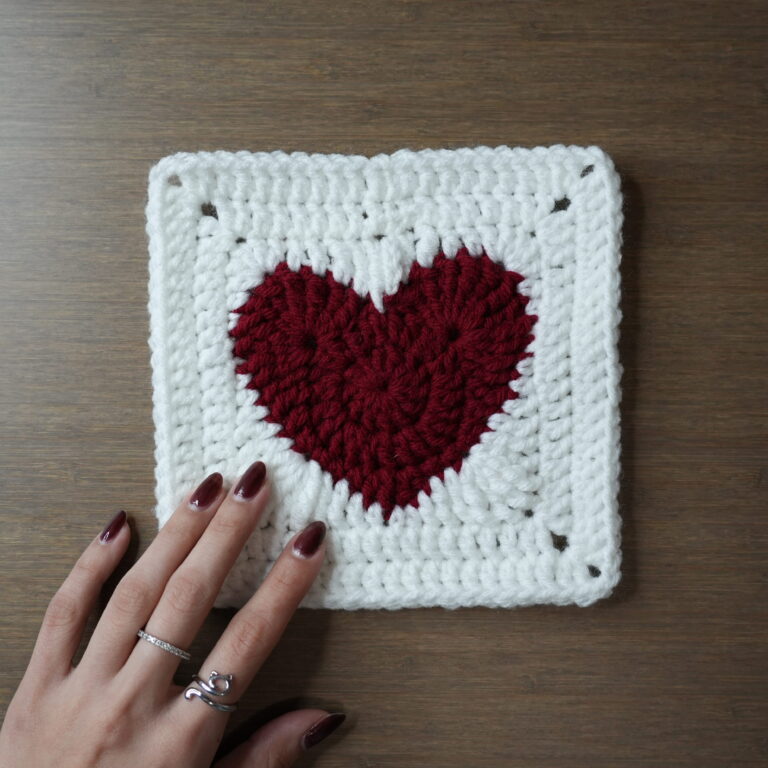
For a simpler, 3×3 granny square tote, check out my heart granny square tote pattern!
Sizing
My flower granny squares are 10.5 centimeters by 10.5 centimeters. This makes my tote 28 centimeters wide and 28 centimeters tall (excluding the straps, whose length is adjustable). For a smaller bag, make smaller granny squares and for a larger bag, make larger granny squares. You can change the size of your granny square by changing the number of rounds you do.
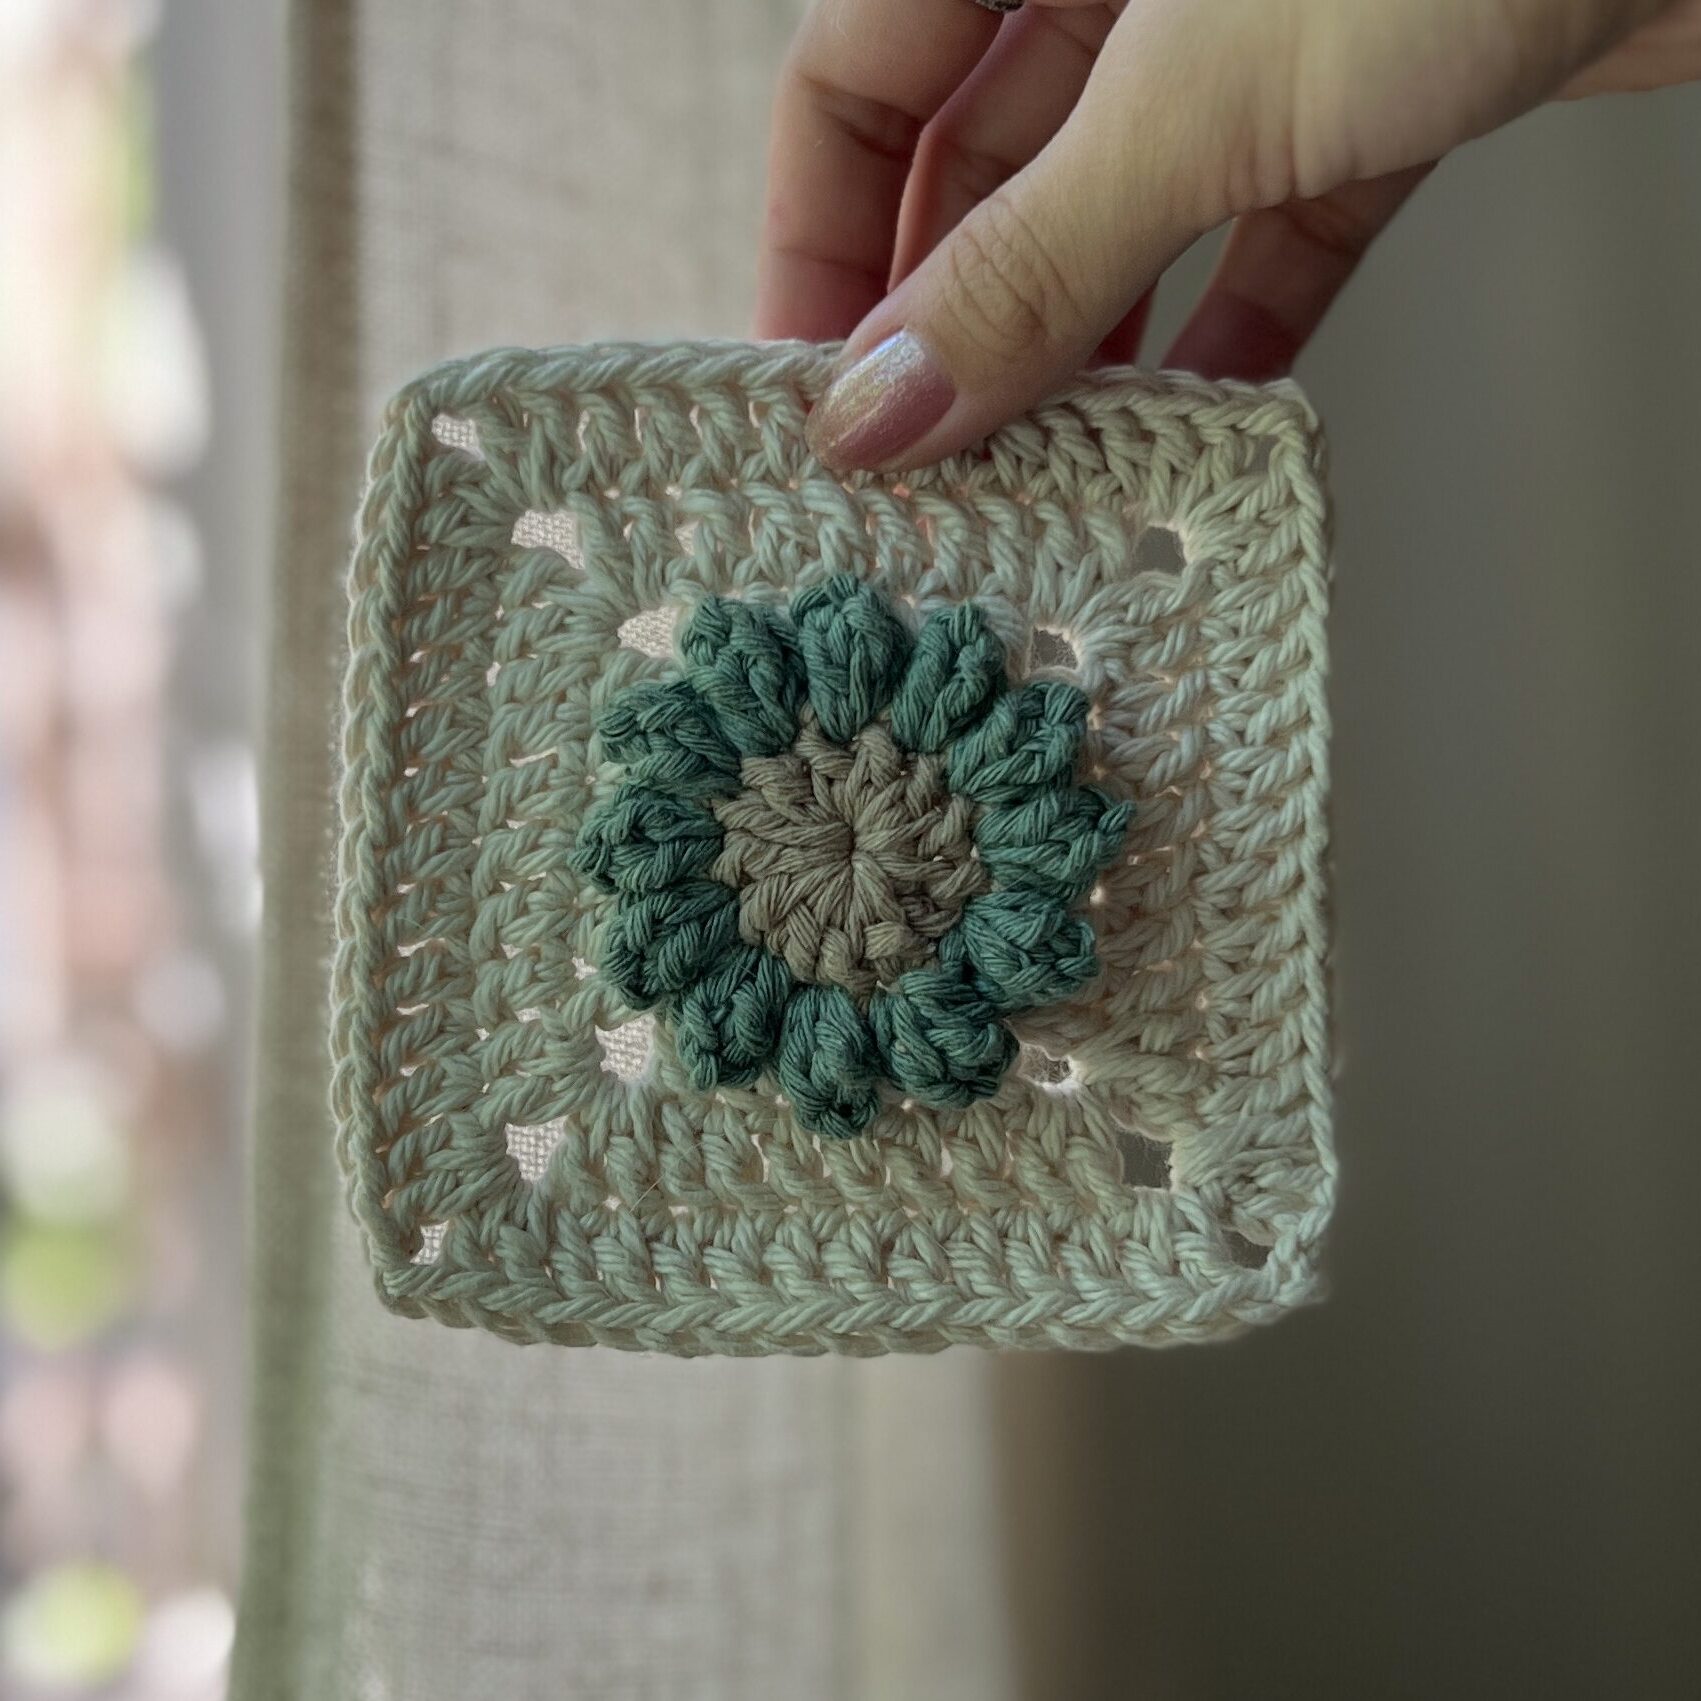
Project Overview


Other Projects You Might Like
Crochet Flower Tote Video Tutorial
Become a member to get early access to new videos!
You can follow along with my YouTube video to make your own crochet flower tote bag! I have timestamps included to section the video and help you jump to any point you need to!
This post may contain affiliate links. I may earn a small commission on qualifying purchases at no additional cost to you!
Materials
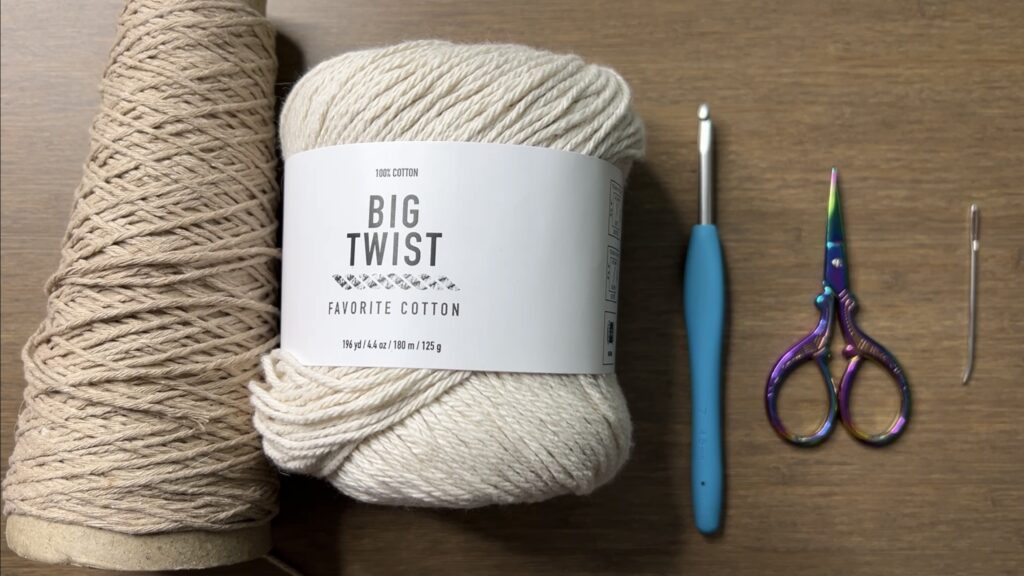
- 215 grams of medium weight yarn (Re-Up in “Mineral Springs” & “Surf Spray” and Big Twist Favorite Cotton in “Cream“)
- 4.5mm Clover Amour crochet hook
- Scissors
- Yarn needle
- Tension ring (optional)
- Yarn bowl (optional)
Dimensions
Each Square: 10.5 centimeters wide x 10.5 centimeters long (4.1 x 4.1 inches)
Straps: 35 centimeters long (13.8 inches)
Total: 28 centimeters wide x 44 centimeters tall (11 x 17.3 inches)
Notes and Tips
- This pattern is written using US crochet terms
- Leave the yarn attached to two squares to reduce the number of loose ends
- Slip stitch with the outer loops of the stitches to make the seam smaller
- To fully connect the side of a square to the side of another square, start with a slip stitch in the first chain spaces and end with a slip stitch in the last chain spaces
- Chain 1 every time you jump to a new set of squares
- Carry the loose ends in your stitches to avoid having to weave them in later on
Abbreviations
ch = chain
ch-sp = chain-space
rep = repeat
sc = single crochet
sl st = slip stitch
st = stitch
Before Assembling
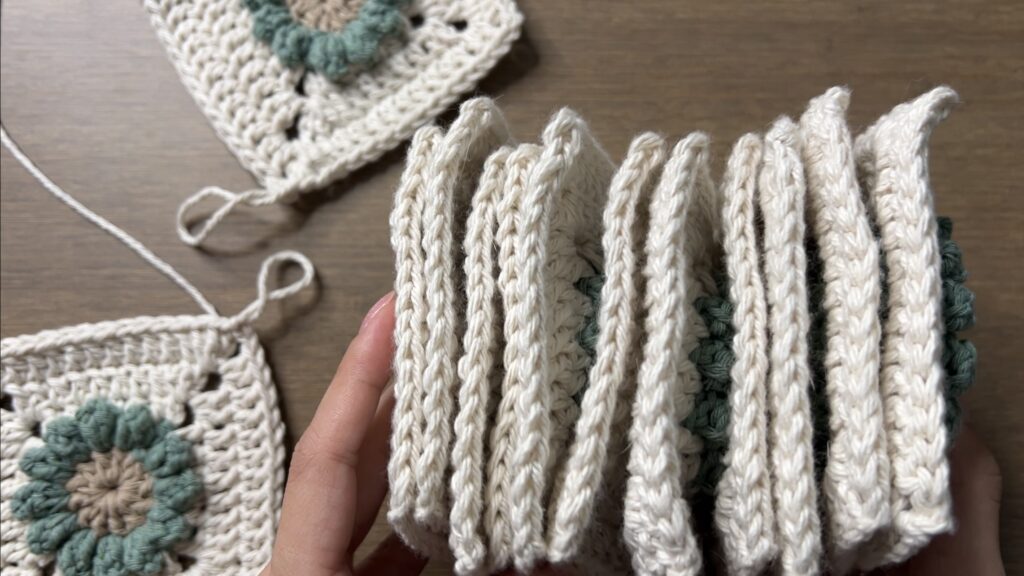
For this particular tote assembly, we need a total of 13 granny squares:
- 11 granny squares with the yarn cut
- 2 granny squares with the yarn attached
If you cut your yarn already, it’s fine! You will just have to attach your yarn back and will end up with 4 loose ends instead of 2.
Weave in all your loose ends before assembling the bag because it’s easier to do so before the squares are put together.
Granny Square Assembly
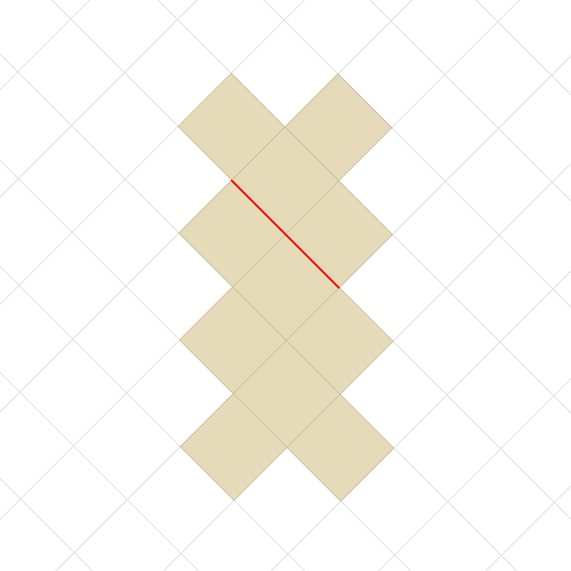
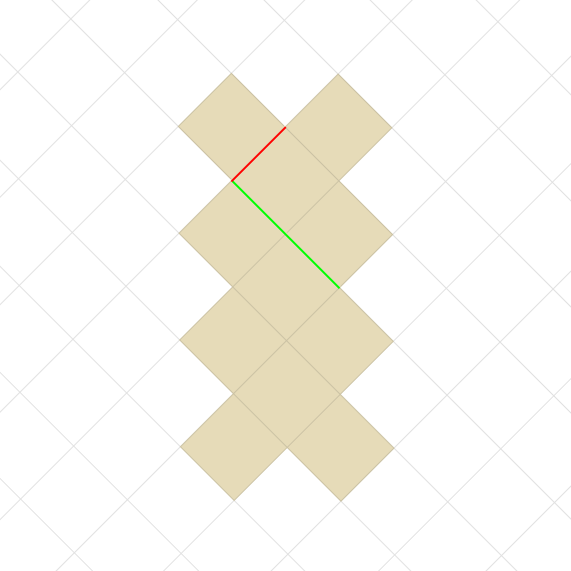
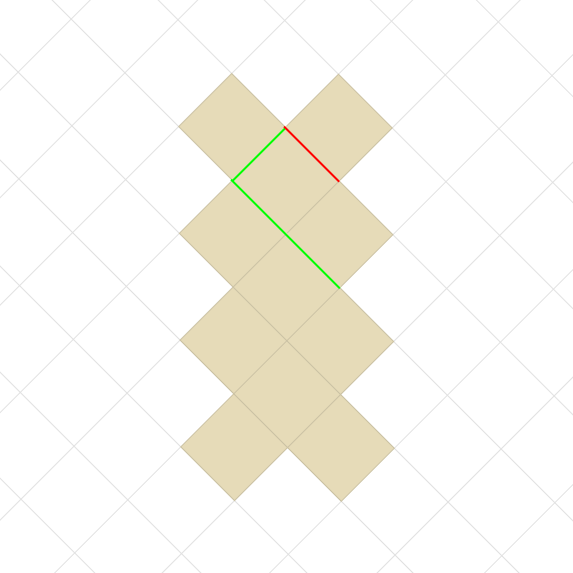
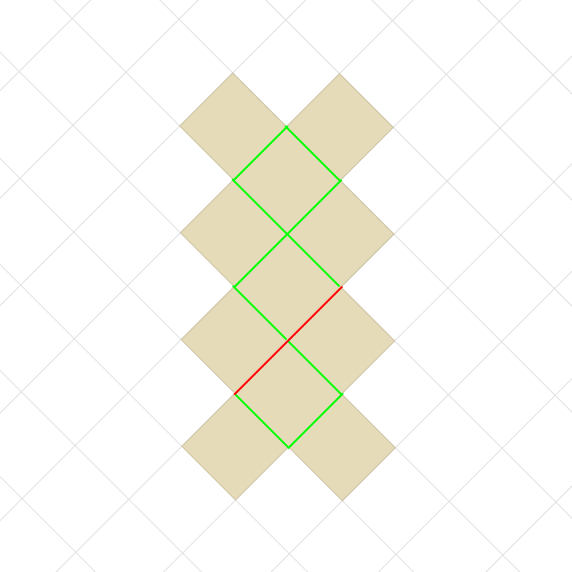
Lay 11 of your squares like the image below: a column of 4, then 3, then 4. The square in the center is one of the squares with the yarn still attached. The corner with the attached yarn will point to the right.

How to join: rep[ch1, sl st in ch-sp and across, sl st in ch-sp] for every side you connect
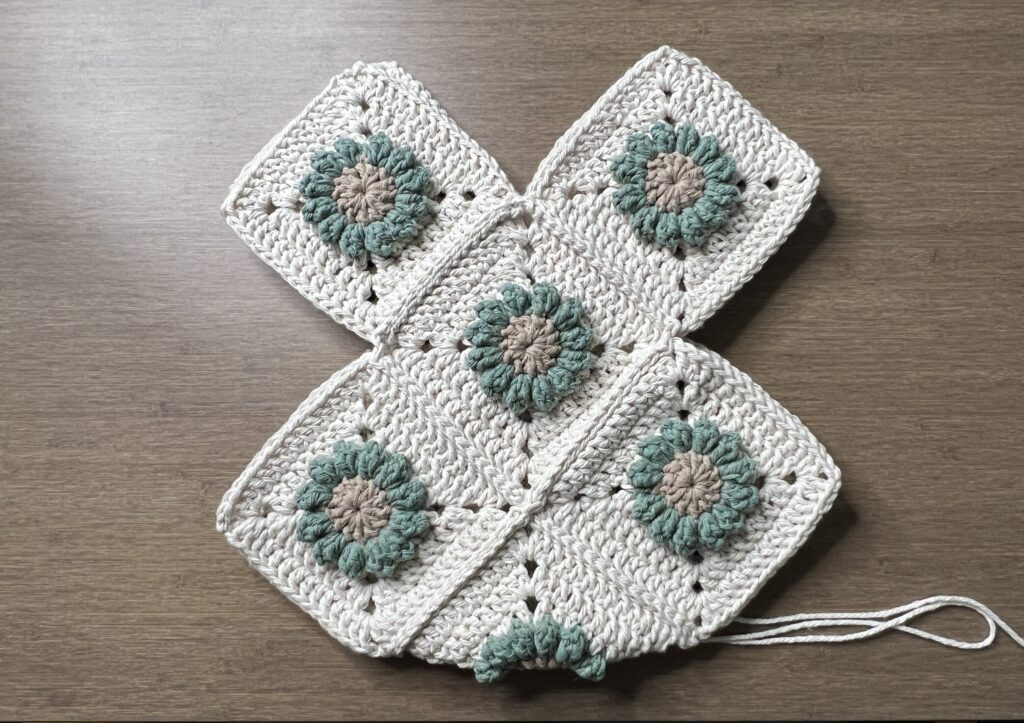
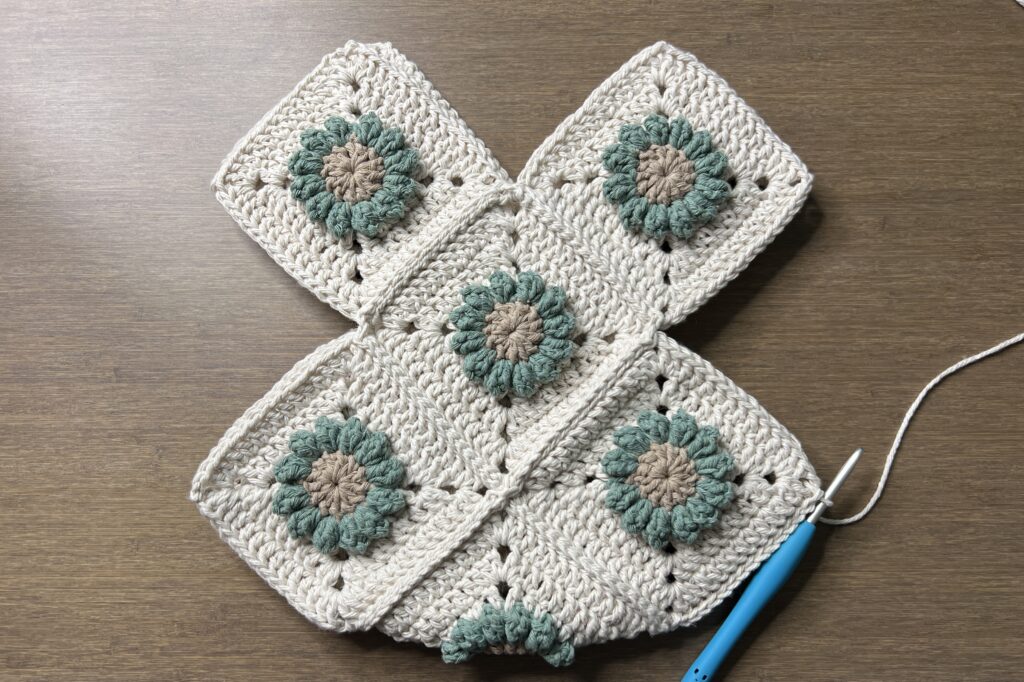
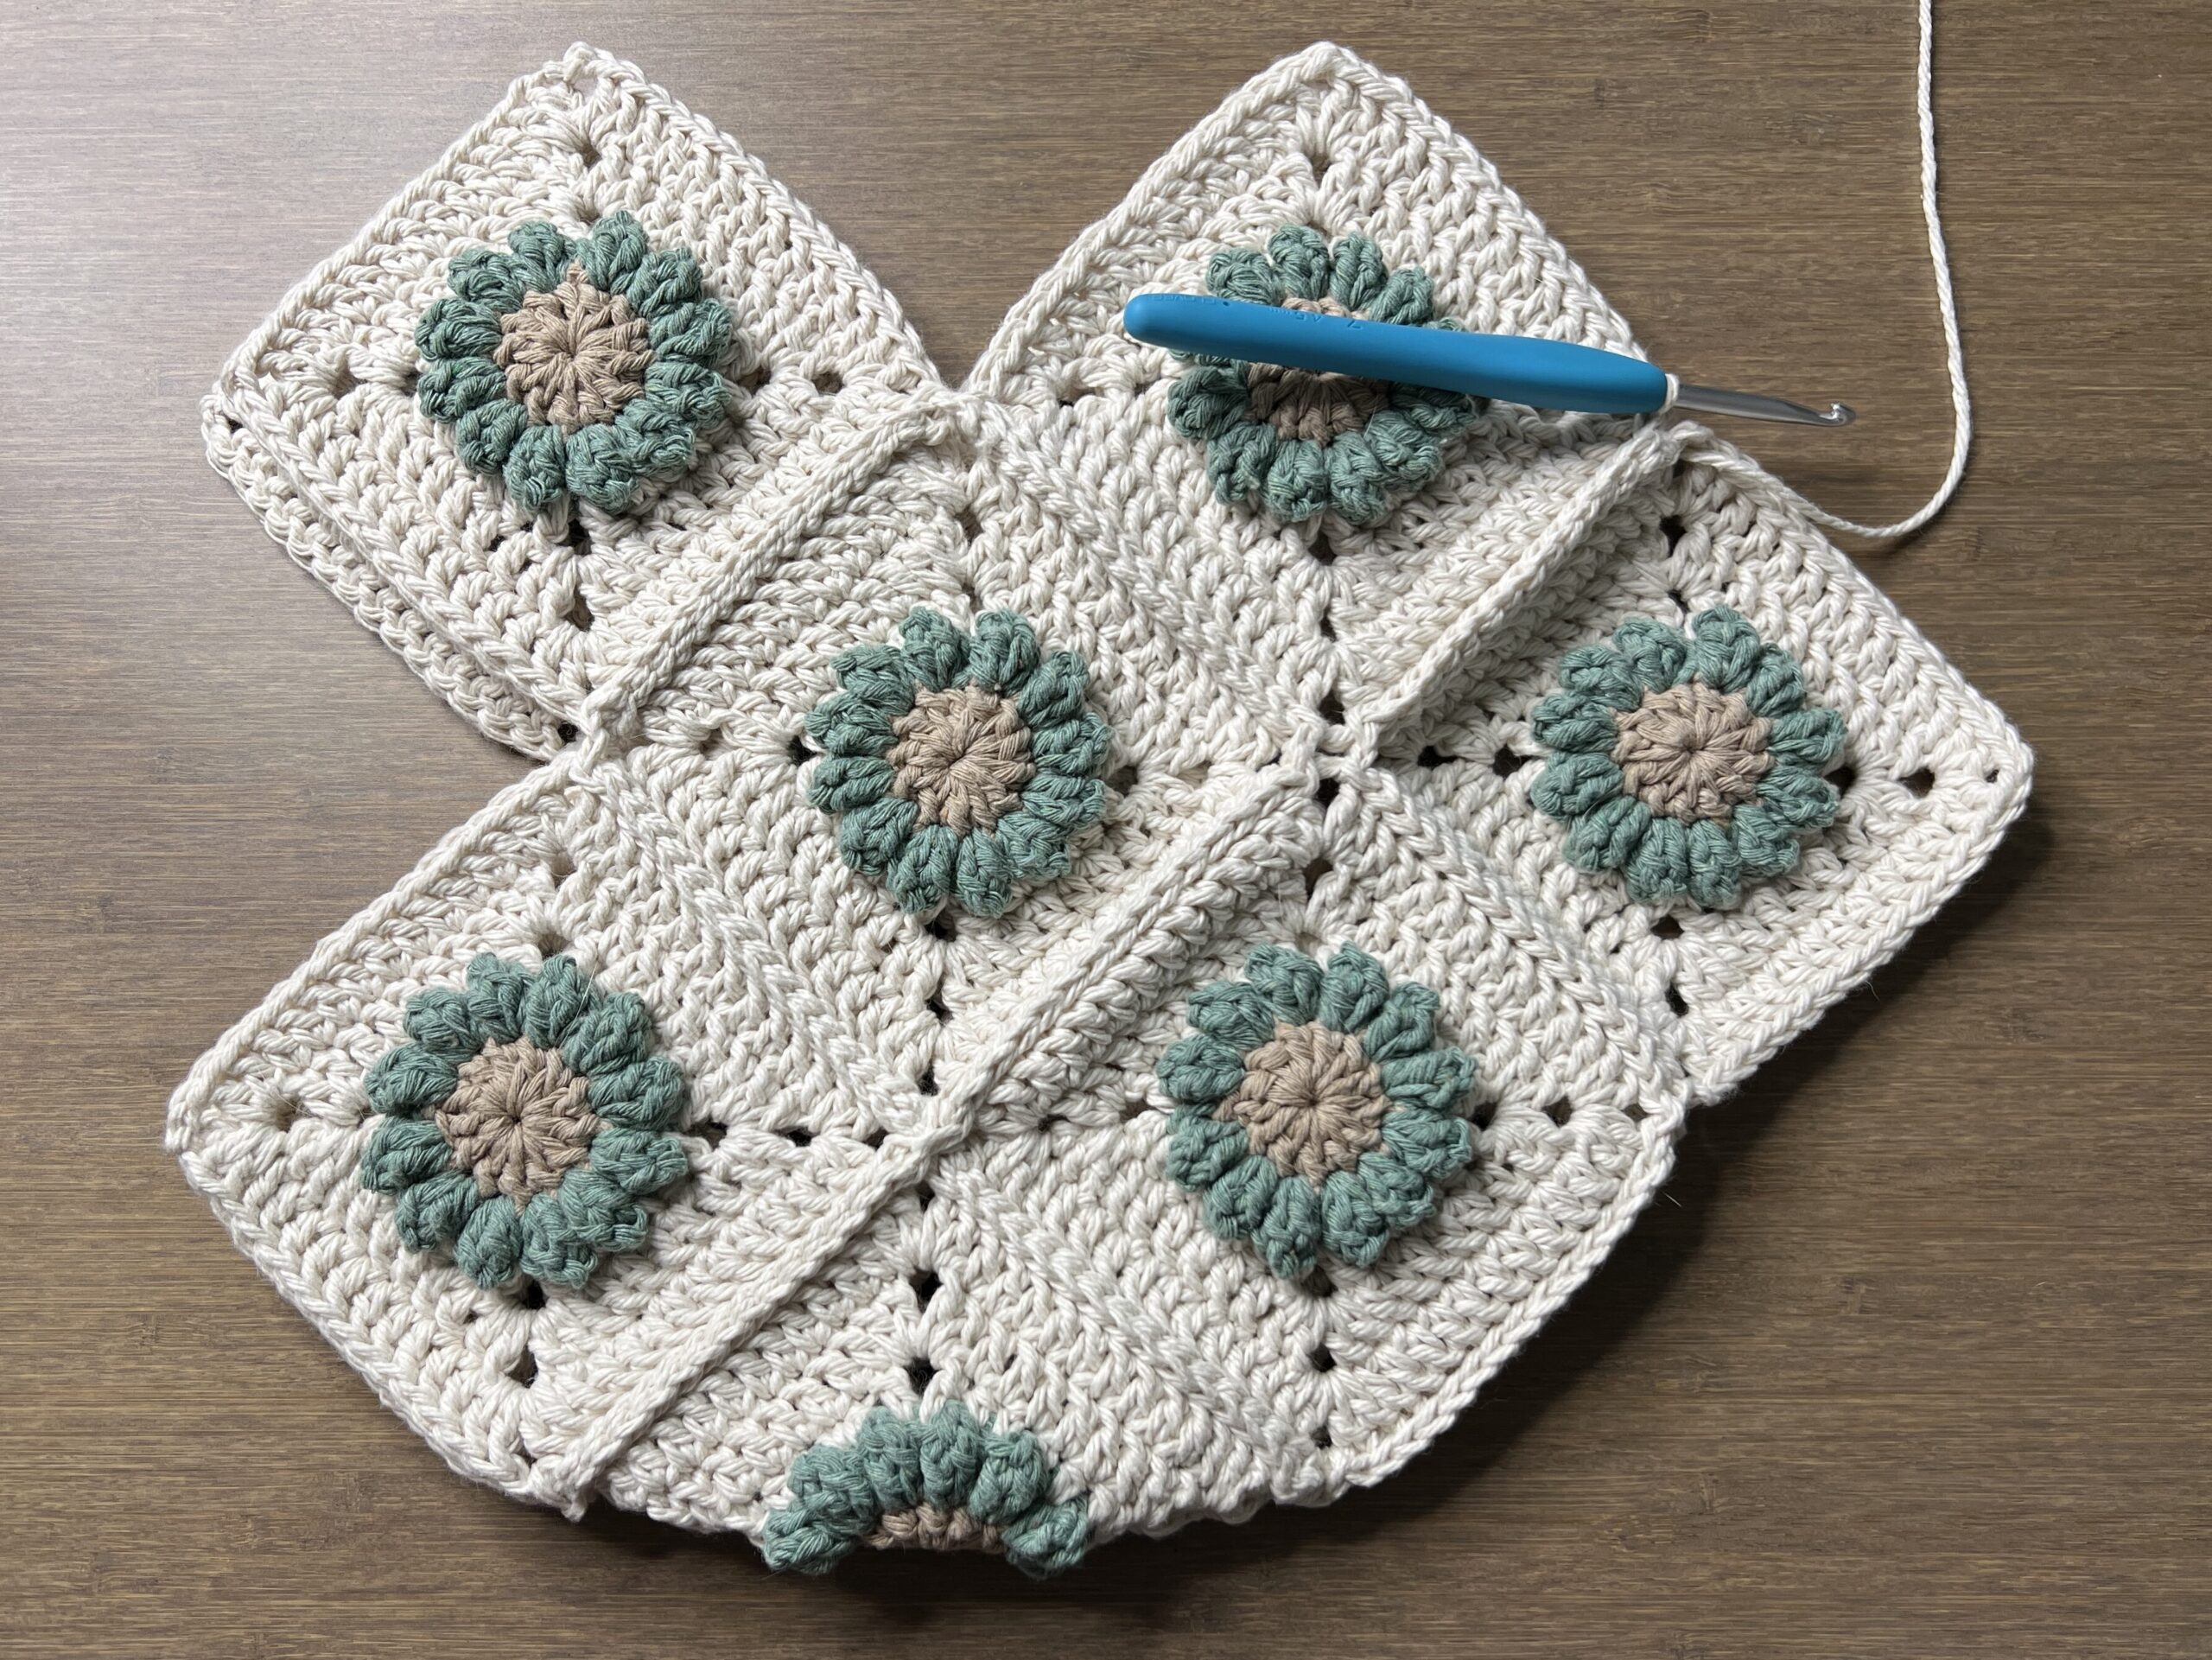
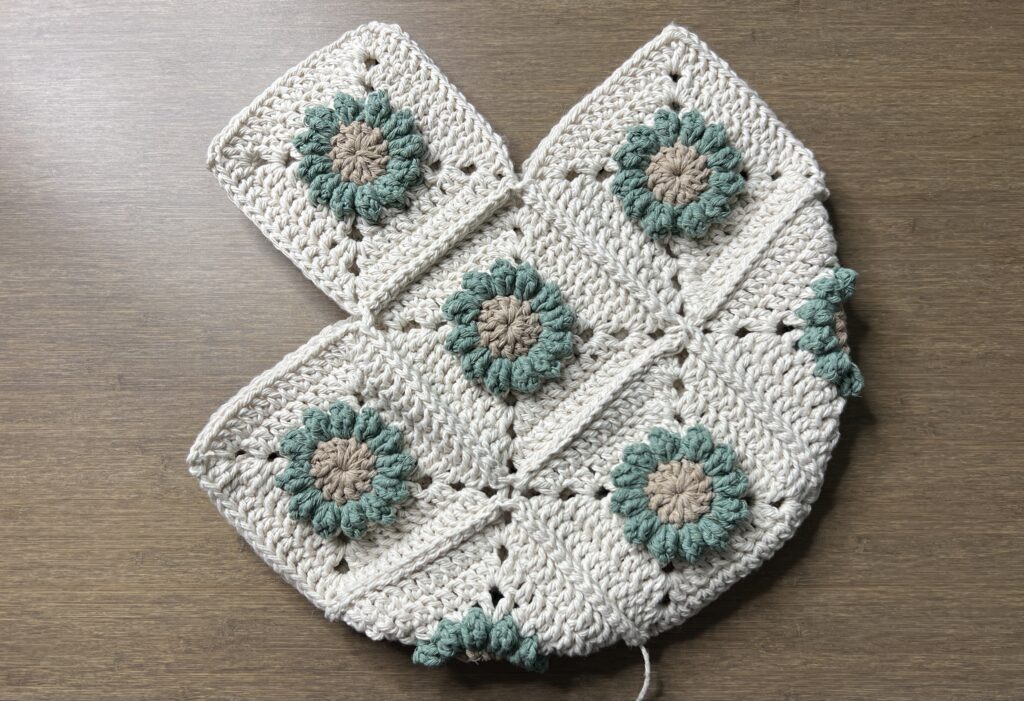
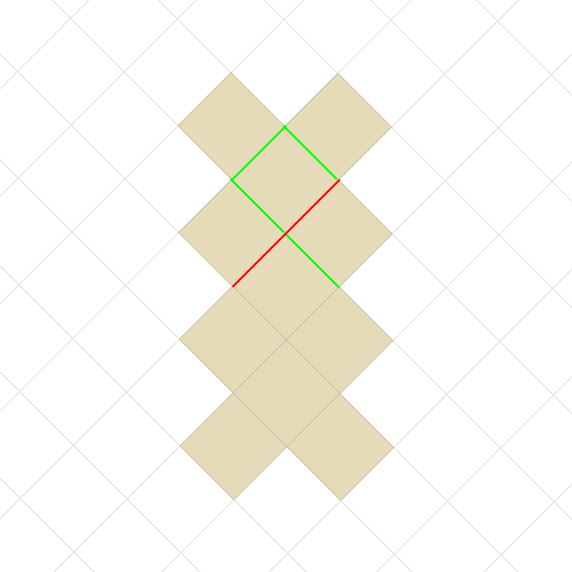
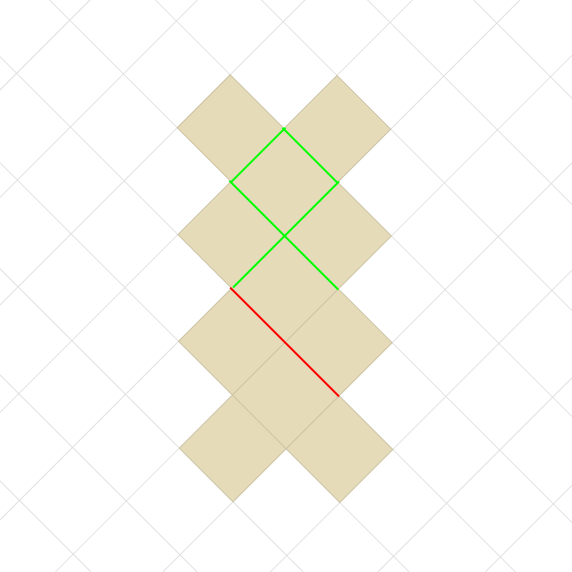
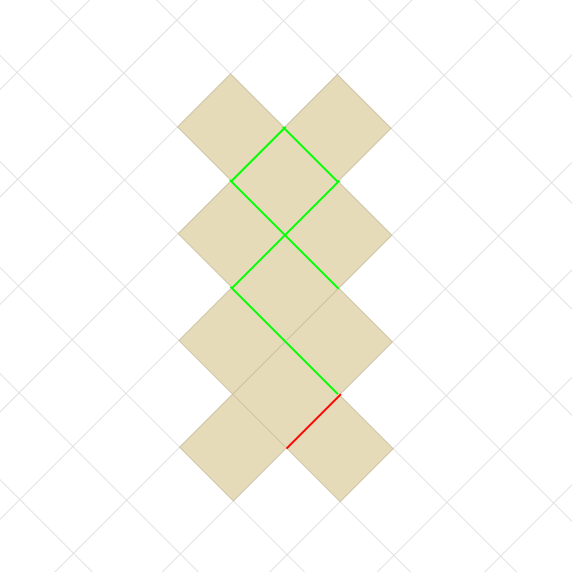
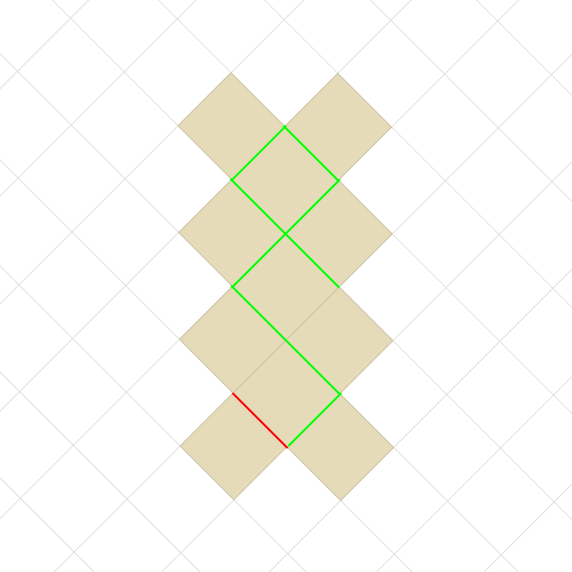
Slip stitch all the squares together using the slideshow below to guide you.
- Fold the bag in half along the center square with the right side out.
- Stitch the bottom-right edge together.
- Add in a new square and connect two of its sides.
- Flip the bag over, fold that square in half, connect the other two sides, and fasten off.
- Place the last square with the attached yarn in the last empty spot with the attached yarn corner pointing down. Connect all four edges of the square.
- Stitch the bottom-left edge together and fasten off.
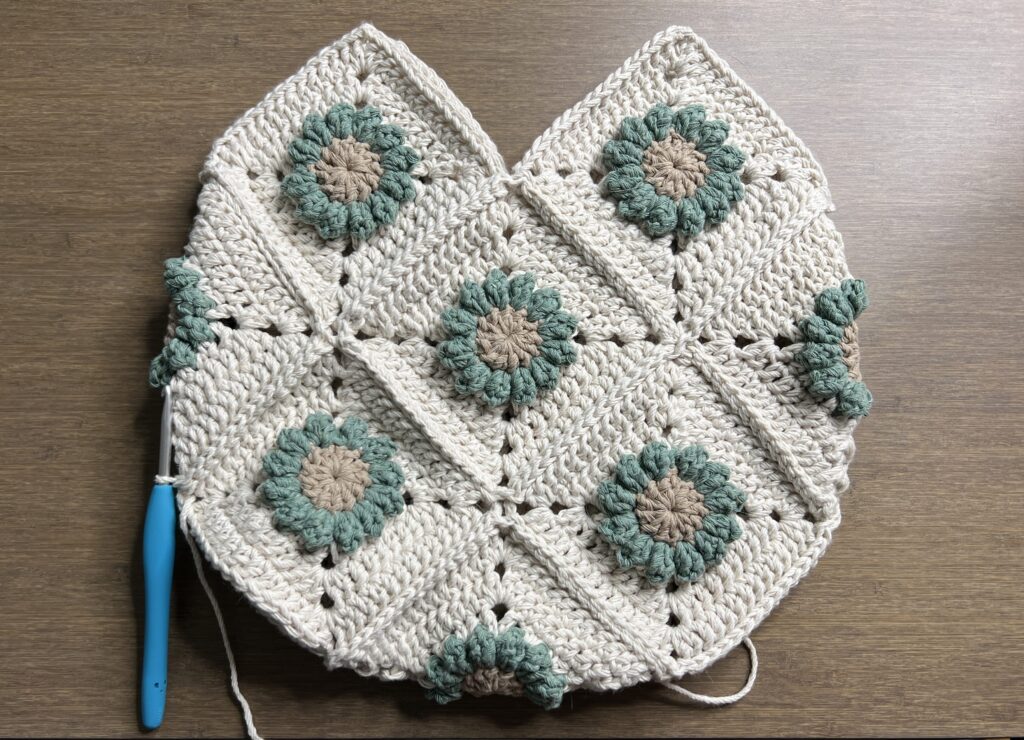
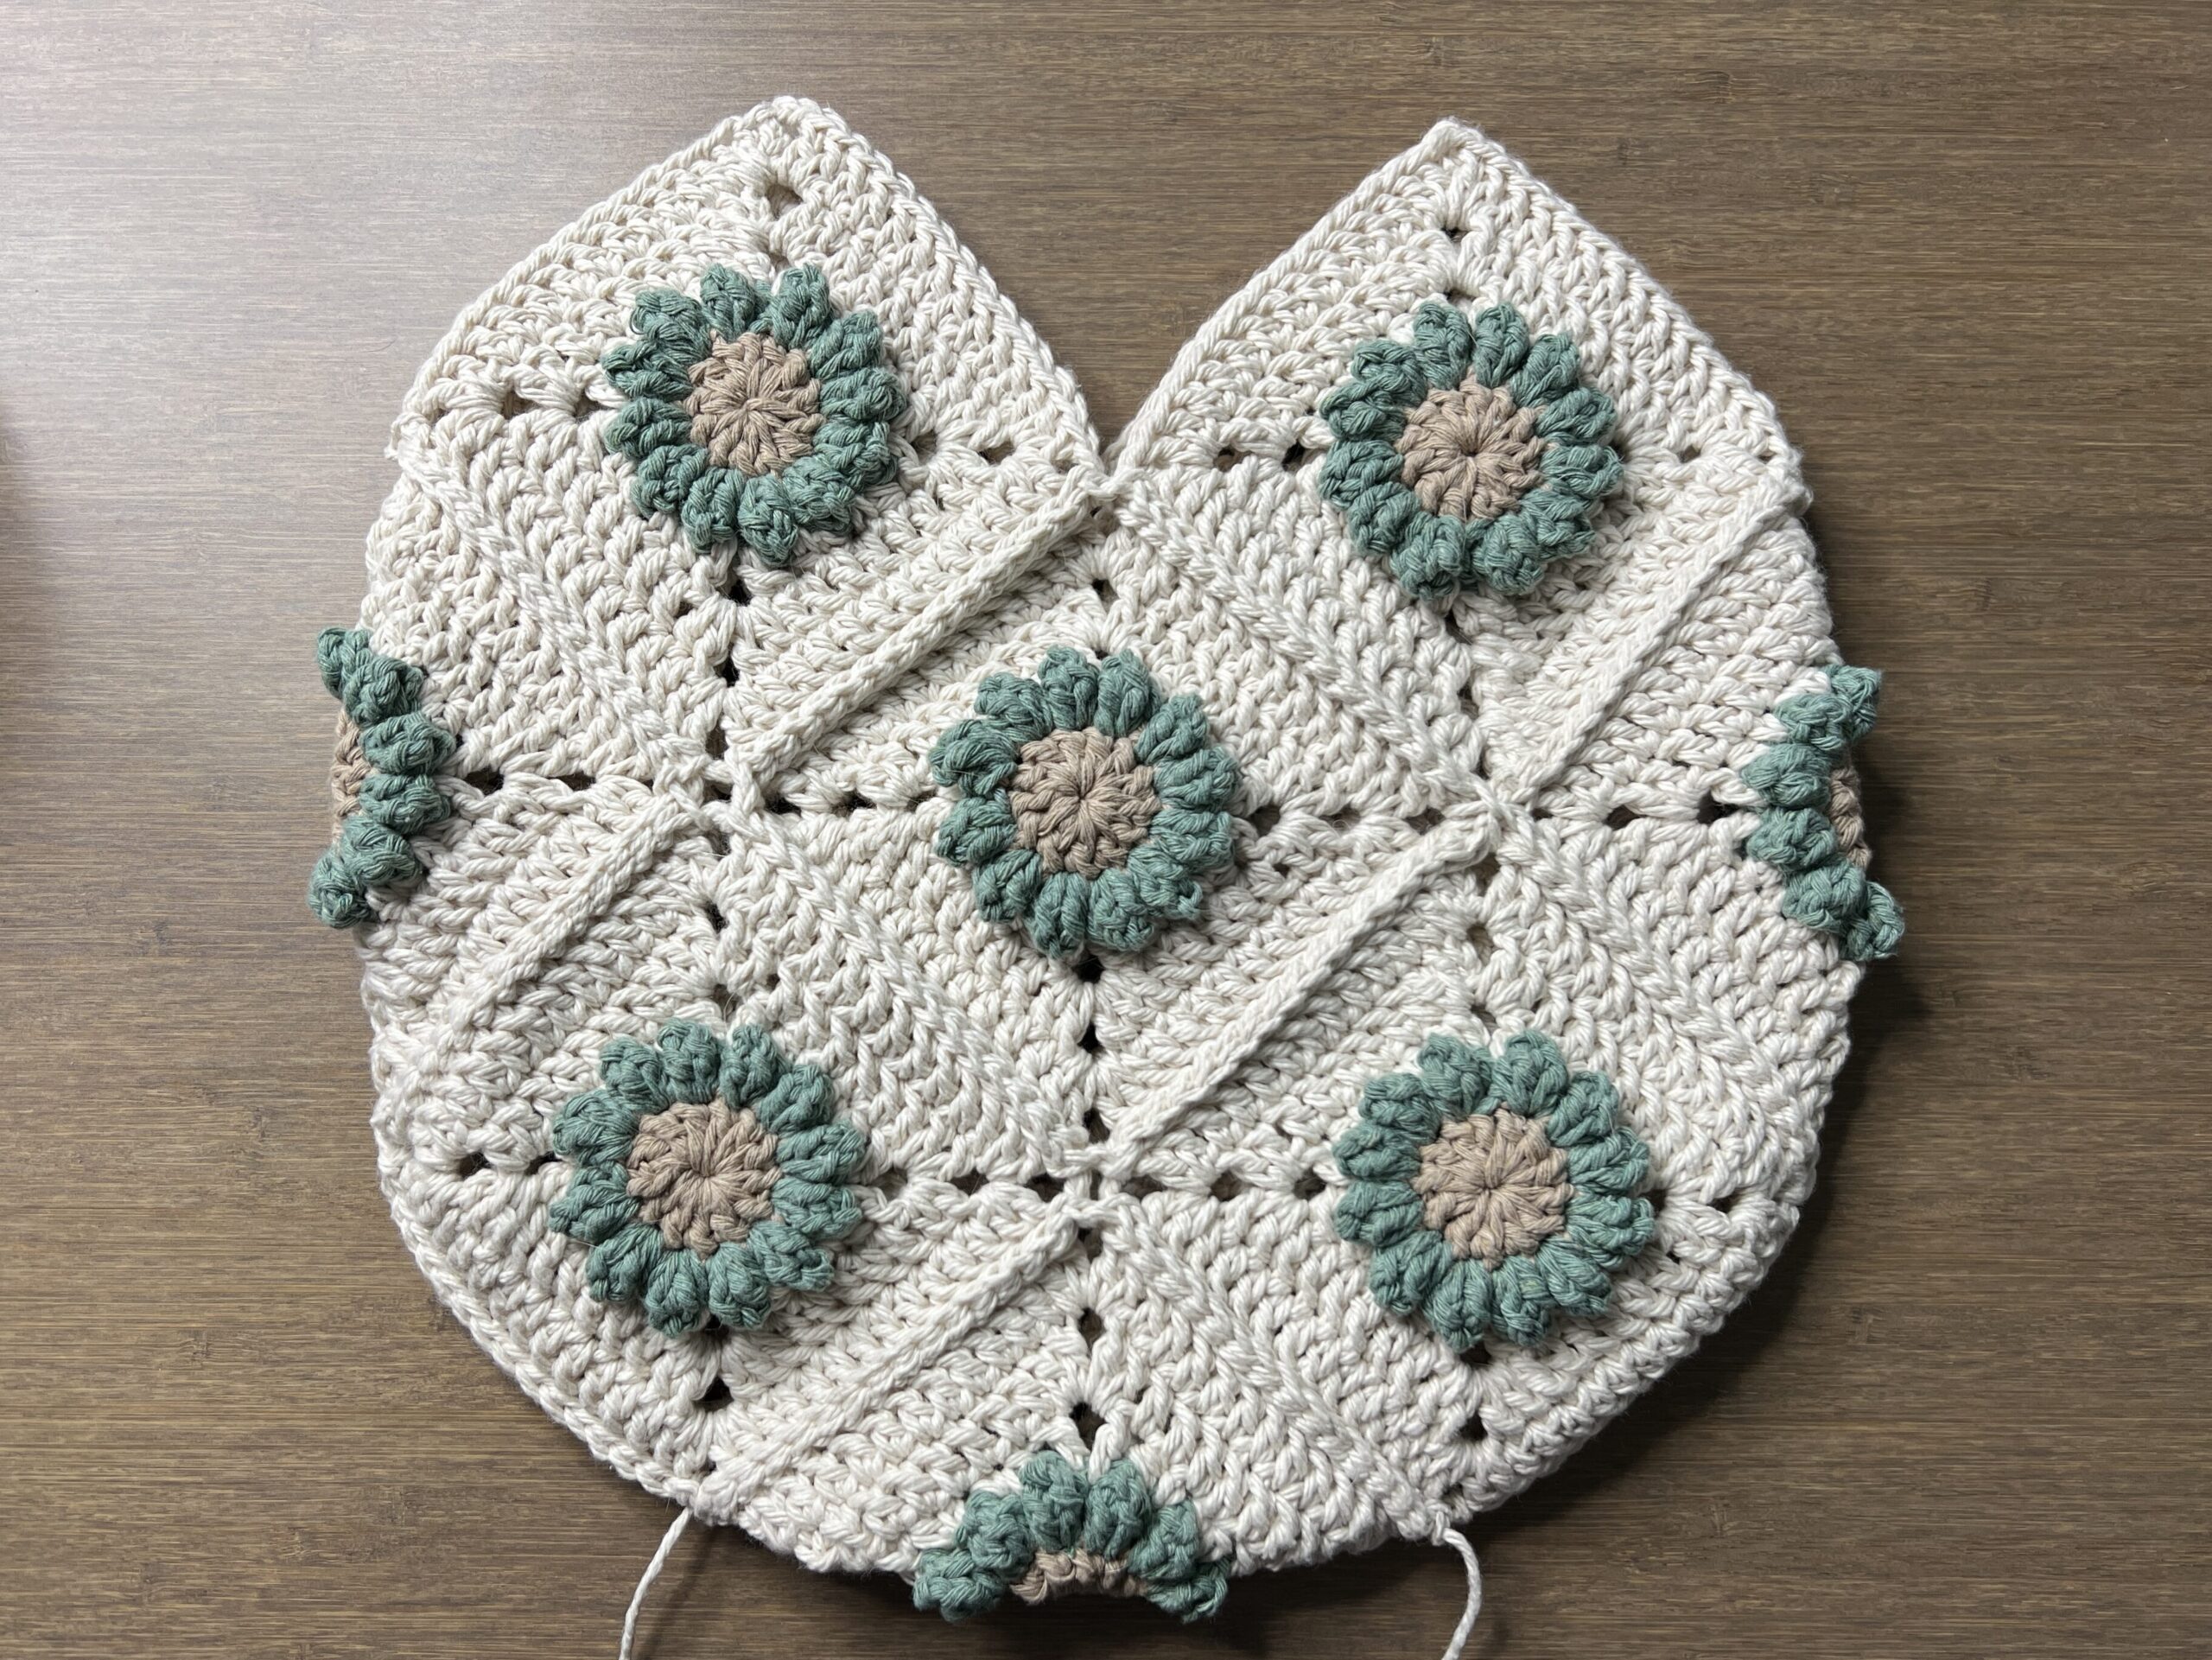
Strap
Attach your yarn to the chain space on the right side of the top-right granny square. Now, we will work around the opening of the bag to crochet the straps.

Round 1: ch1, *sc in ch-sp and across, sc in ch-sp, ch60, sk the next 2 sides of granny squares, sc in ch-sp and across, sc in ch-sp, flip over, rep from *, sl st
Note: Do fewer chains for a shorter strap or more chains for a longer strap.
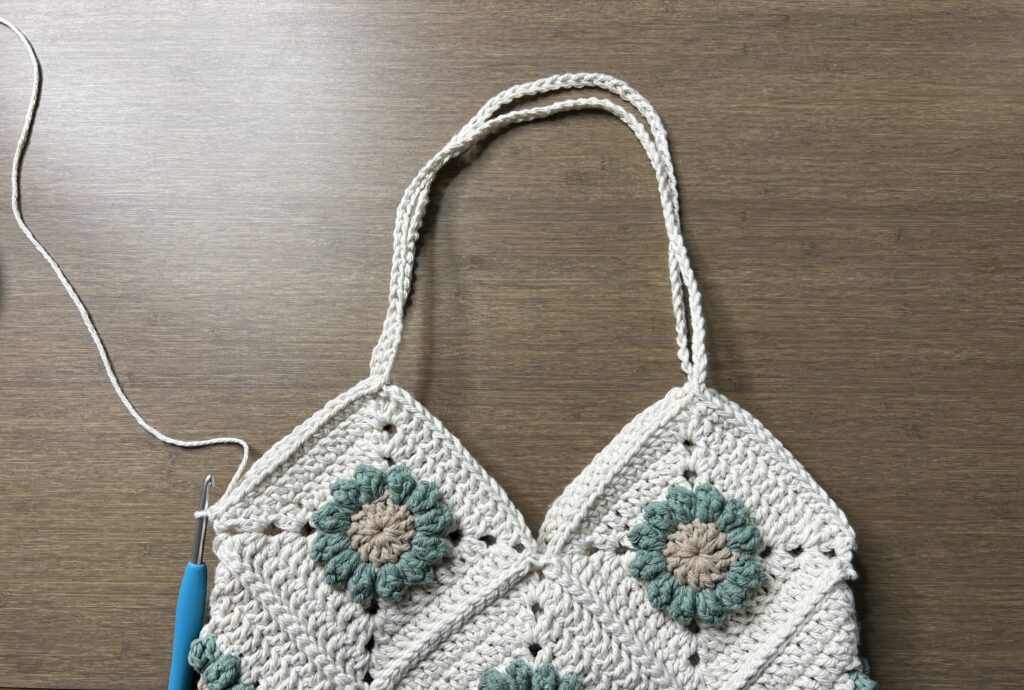
Round 2-3: ch1, sc in each st and ch around (184)
Note: Do fewer rounds for a thinner strap or more rounds for a wider strap. Stop 1 round before it’s thick enough.
Fasten off.
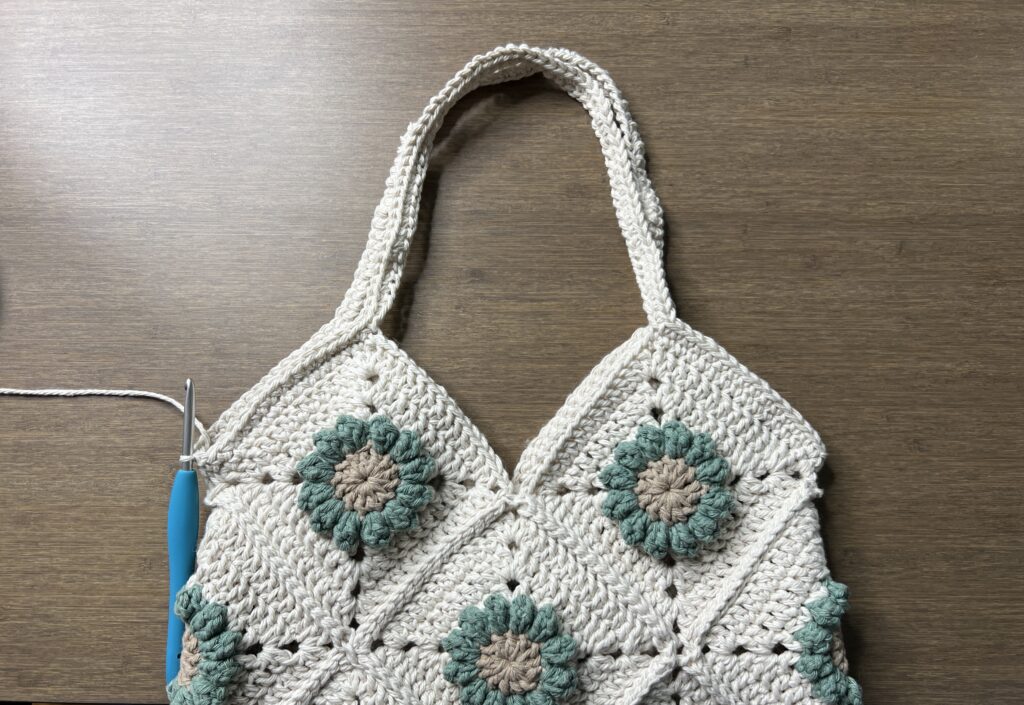
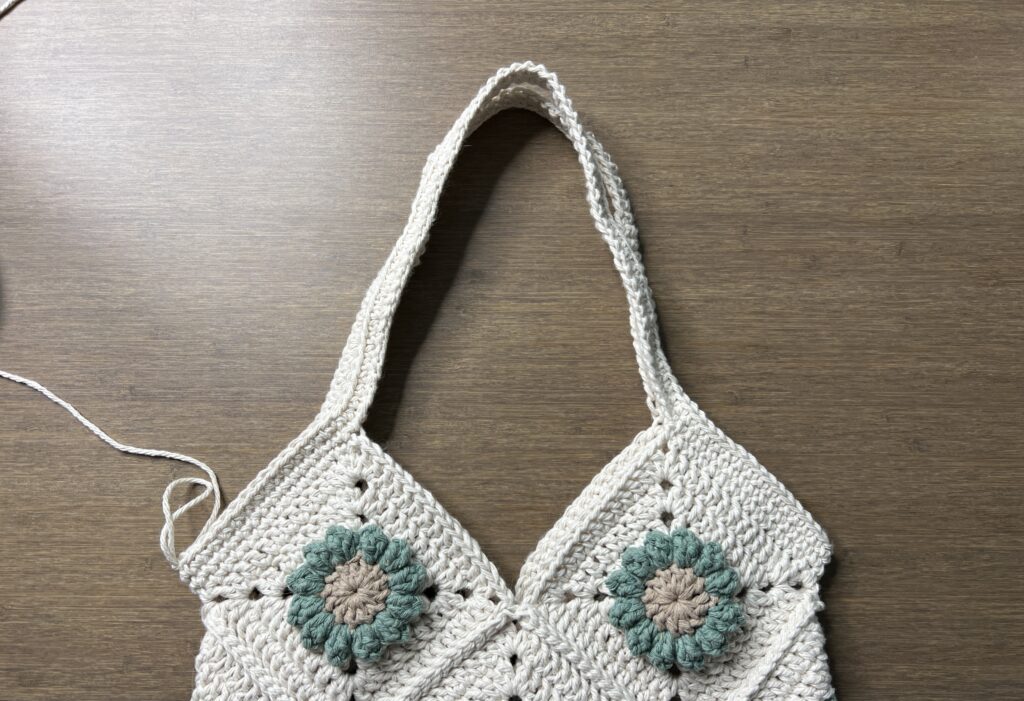
Attach your yarn to the chain space on the right side of the top-left granny square. Now, we will work around the space under the strap.
Round 1: ch1, *sc in ch-sp and across, sc in ch-sp,* sc in the underside of each ch, rep between **, sl st, fasten off (92)
Repeat on the other side.
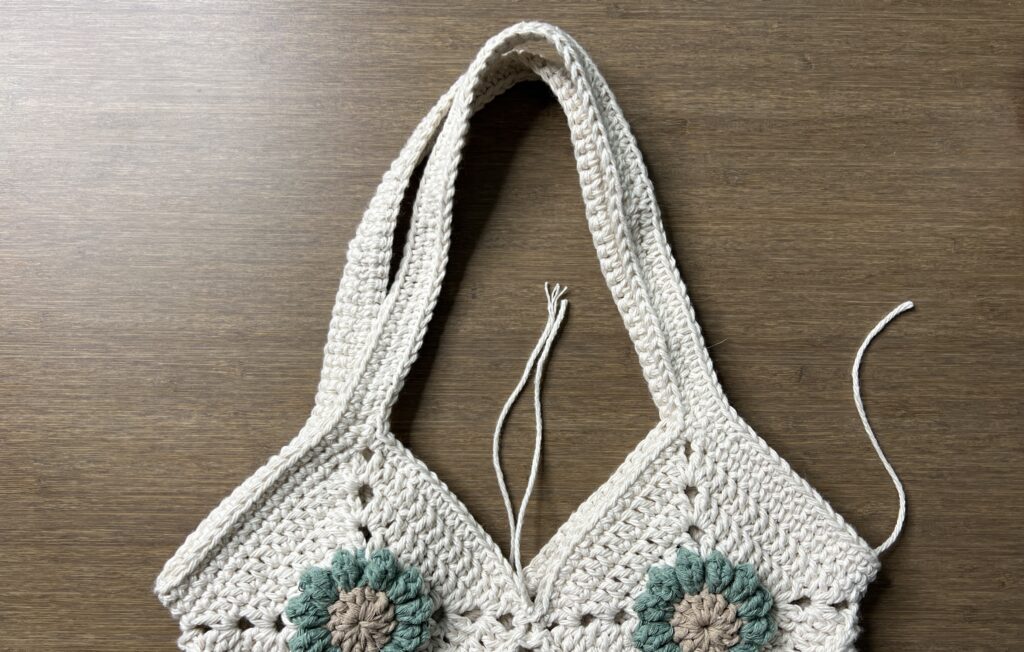
Finished Crochet Flower Tote Bag
Weave in any loose ends and your flower granny square tote is finished!





Will the bag still be strong if I used acrylic yarn? I know cotton is stronger but wanted to know if acrylic would stretch too much to be used as a bag.