Crochet Granny Square Dress | Free Pattern & Video Tutorial
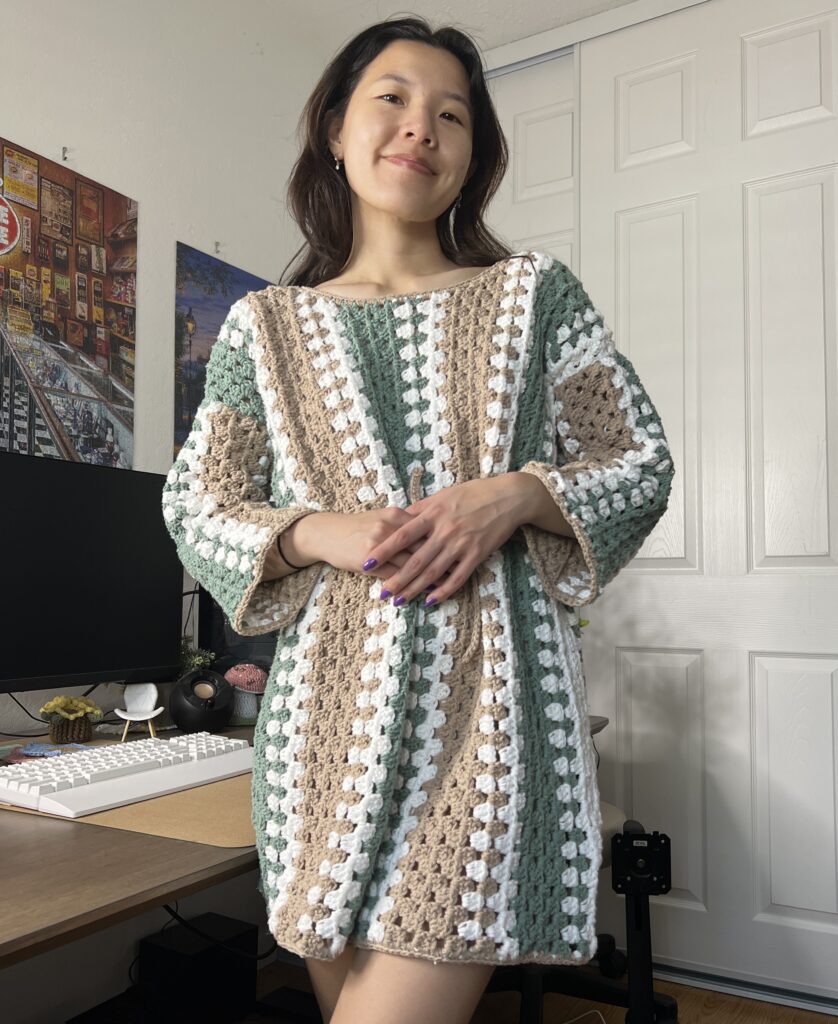
This granny square dress pattern was inspired by the crochet dress Taylor Swift wore recently. It uses the granny stitch worked in rows instead of in the round. This dress has the option for a belt to cinch in the waist and transform this boxy dress to a more fitted one!
Inspiration – Taylor Swift Crochet Dress
The inspiration for this pattern is the purple and orange dress that Taylor Swift wore. When I first saw the picture, I immediately wanted to crochet the dress! I didn’t really like the colors, so I chose my own and came up with my own color pattern.
Intermediate Crochet Project
This pattern is most suitable for intermediate crocheters. It uses decreasing and increasing techniques that beginners may not be comfortable with. But with the help of the video tutorial coming soon, beginners may find this project achievable!
Sizing
This pattern is written to make an oversized dress for a size small. There are notes included within the pattern to let you know how to increase or decrease the size.
To slightly change the size without changing the pattern, use a smaller yarn/hook for a smaller size or a larger yarn/hook for a larger size.

Project Overview
This crochet dress is worked in 4 separate panels: 2 sleeve panels, a front panel, and a back panel. These panels are then sewn together in the typical drop-shoulder fashion to form a dress.
Choosing Yarn & Hook Size
The original dress is made with acrylic, but I recommend using a cotton blend if you plan to wear this dress in warm weather. Acrylic can be too warm, but you can get away with it since the granny stitch has a lot of holes!
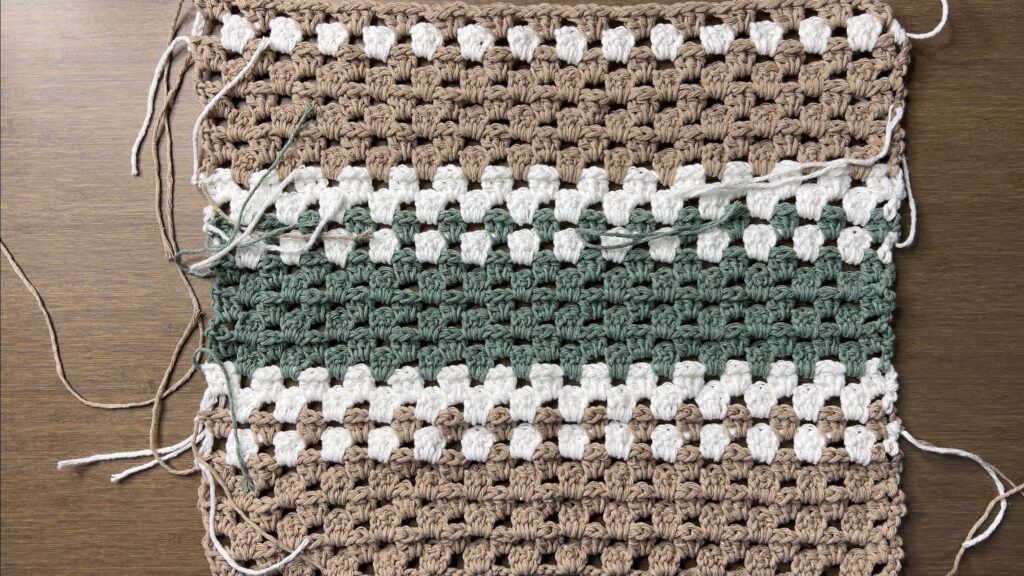
Color Pattern
I decided to go with a different color palette than the original dress, and you can use any colors you want! The pattern I’m doing is 6 rows of one of the main colors (tan), 1 row of white, 1 row of that main color (tan), then 2 rows of white. Then, the next 10 rows are that same pattern, but with the other main color (green).
The front and back panels start with green and the sleeve panels start with tan to even out the amount of each color.

Other Projects You Might Like


Crochet Dress Video Tutorial
Become a member to get early access to new videos!
You can follow along with my YouTube video to make your own crochet granny square dress! I have timestamps included to section the video and help you jump to any point you need to!
This post may contain affiliate links. I may earn a small commission on qualifying purchases at no additional cost to you!
Materials
- 380 grams of Re-Up in “Mineral Springs“
- 360 grams of Re-Up in “Surf Spray“
- 290 grams of Lily Sugar’n Cream in “White” (or Re-Up in “Full Moon“)
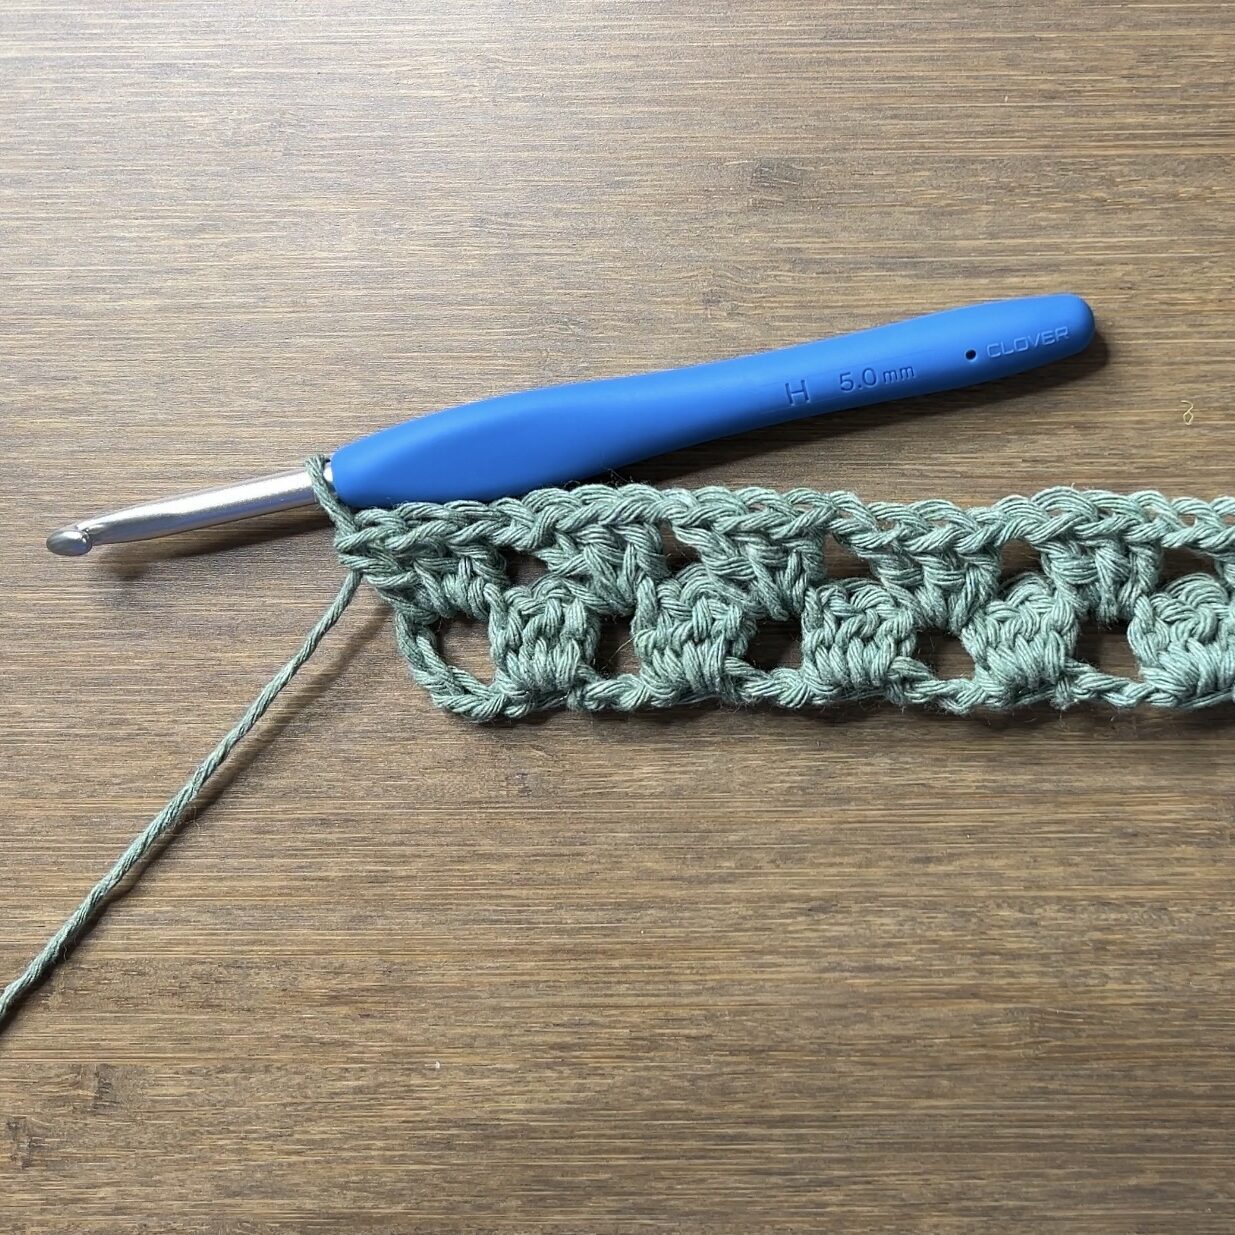
- 5mm Clover Amour crochet hook
- Scissors
- Yarn needle
- Yarn bowl (optional)

Dimensions
Front and Back Panels : 52 centimeters wide x 70 centimeters long (20.5 x 27.6 inches)
Sleeves: 29 centimeters wide (around) 35 centimeters long (11.4 x 13.8 inches)
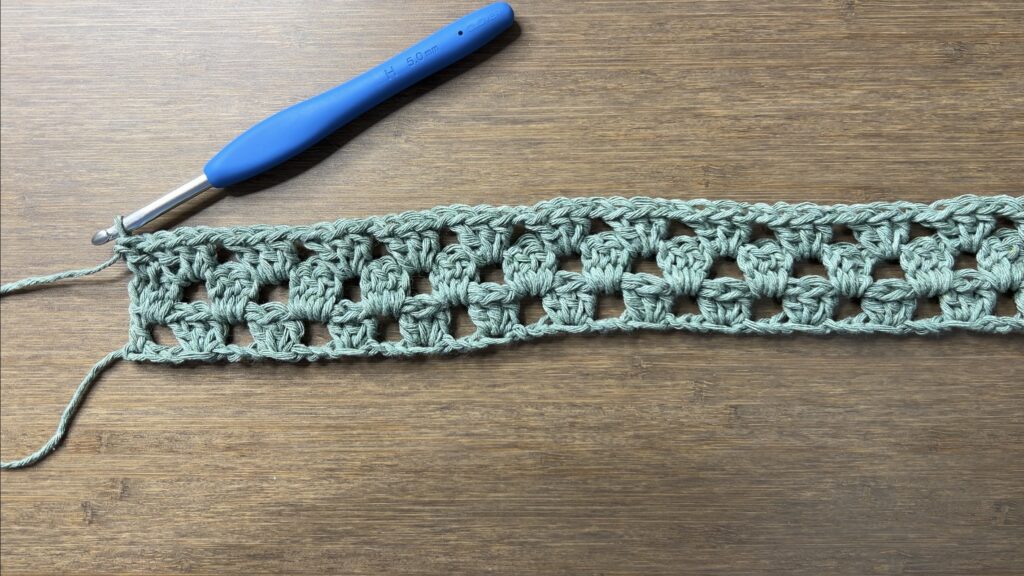
Gauge
10 rows of 4 clusters and 4 spaces makes a 10 x 10 centimeter square
Notes and Tips
- This pattern is written using US crochet terms
- The chain 3 at the beginning of a row counts as a double crochet
- The chain 4 at the beginning of a row counts as a double crochet and chain 1
Abbreviations
ch = chain
ch-sp = chain-space
cl = cluster (3 double crochets placed in the same space)
dc = double crochet
rep = repeat
sk = skip
st = stitch
Front Panel
Foundation: Make a slipknot, ch122
Note: Chain less for a shorter dress or chain more for a longer dress. The foundation chain must be a multiple of 4, plus 6.
Row 1: dc3 in the 7th ch from hook, rep[ch1, sk3, dc3] until 3 ch left, ch1, sk2, dc in last ch (29 cl)


Row 2: ch3, turn, dc2 in first ch-sp, rep[ch1, dc3 in next ch-sp] across (30 cl)

Row 3: ch4, turn, rep[dc3 in next ch-sp, ch1] across, dc in between ch3 and first dc from row before (29 cl)
Rows 4-16: rep[Row 2, Row 3]
Note: Do fewer rows to make the width at the side of the neck hole less wide or more rows to make it wider. Do an even number of rows.

Now, we will shape the neck hole with decrease rows.
Row 17: ch4, turn, dc3 in first ch-sp, rep[ch1, dc3 in next ch-sp] until 2 ch-sp left, dc in next ch-sp (24 cl)

Row 18: ch2, turn, dc3 in first ch-sp, rep[ch1, dc3 in next ch-sp] across (24 cl)
Row 19: ch4, turn, dc3 in first ch-sp, rep[ch1, dc3 in next ch-sp] across, dc in between last st and last cl in row before (23 cl)
Row 20: rep[Row 18] (23 cl)
Note: Do fewer decrease rows to make the neckline higher or more decrease rows to make it lower by alternating Rows 18 and 19. Do an even number of rows.
Row 21: ch4, turn, rep[dc3 in next ch-sp, ch1] across, dc in between last st and last cl in row before (22 cl)
Row 22: ch3, turn, dc2 in first ch-sp, rep[ch1, dc3 in next ch-sp] across (23 cl)
Row 23: ch4, turn, rep[dc3 in next ch-sp, ch1] across, dc in between ch3 and first dc from row before (22 cl)
Rows 24-31: rep[Row 22, Row 23]
Note: Do fewer rows to make the neck hole less wide or more rows to make it wider. Do an odd number of rows.
Now, we will mirror the first half of this panel by continuing to shape the neck hole with increase rows.
Row 32: ch4, turn, dc3 in first ch-sp, rep[ch1, dc3 in next ch-sp] across (23 cl)
Row 33: ch4, turn, rep[dc3 in next ch-sp, ch1] across, dc3 in between ch4 and last cl in row before (23 cl)
Row 34: ch4, turn, dc3 in first st, rep[ch1, dc3 in next ch-sp] across (24 cl)
Row 35: rep[Row 33] (24 cl)
Note: If you did more decrease rows, rep[Row 34, Row 33] until your number of increase rows matches your number of decrease rows.

Row 36: ch11, turn, dc2 in 4th ch from hook, rep[ch1, sk3, dc3] until 3 ch left, ch1, sk3, dc3 in first st, rep[ch1, dc3 in next ch-sp] across (30 cl)

Row 37: ch4, turn, rep[dc3 in next ch-sp, ch1] across, dc in between ch3 and first dc from row before (29 cl)
Row 38: ch3, turn, dc2 in first ch-sp, rep[ch1, dc3 in next ch-sp] across (30 cl)
Row 39-51: rep[Row 37, Row 38]
Note: If you did a different number of rows before shaping the neckline, do that same number of rows after the neckline.
Fasten off with a long enough loose end to sew the front and back panels together at the top of the shoulder.
Back Panel
Repeat the front panel, but make the neckline higher. The only things you need to change are rows 17 and 36.
Row 17: ch4, turn, dc3 in first ch-sp, rep[ch1, dc3 in next ch-sp] until 1 ch-sp left, dc in last ch-sp (28 cl)
Row 36: ch7, turn, dc2 in 4th ch from hook, sk3, dc3 in first st, rep[ch1, dc3 in next ch-sp] across (30 cl)

Sleeves
Foundation: Make a slipknot, ch62
Note: Chain less for a shorter sleeve or chain more for a longer sleeve. The foundation chain must be a multiple of 4, plus 6.
Row 1: dc3 in the 7th ch from hook, rep[ch1, sk3, dc3] until 3 ch left, ch1, sk2, dc in last ch (14 cl)
Row 2: ch3, turn, dc2 in first ch-sp, rep[ch1, dc3 in next ch-sp] across (15 cl)
Row 3: ch4, turn, rep[dc3 in next ch-sp, ch1] across, dc in between ch3 and first dc from row before (14 cl)
Rows 4-28: Rep[Row 2, Row 3]
Note: Do fewer rows to make the sleeve less wide or more rows for a wider sleeve.
Fasten off with a long enough loose end to sew the sleeve to the body panels. Make an identical sleeve.
Assembly

- Sew the front and back panels together at the tops of the shoulders
- Sew the sleeves to the front and back panels
- Fold in half and sew one side of the dress and the underside of one sleeve in an L-shape
- Repeat the L-shape on the other side
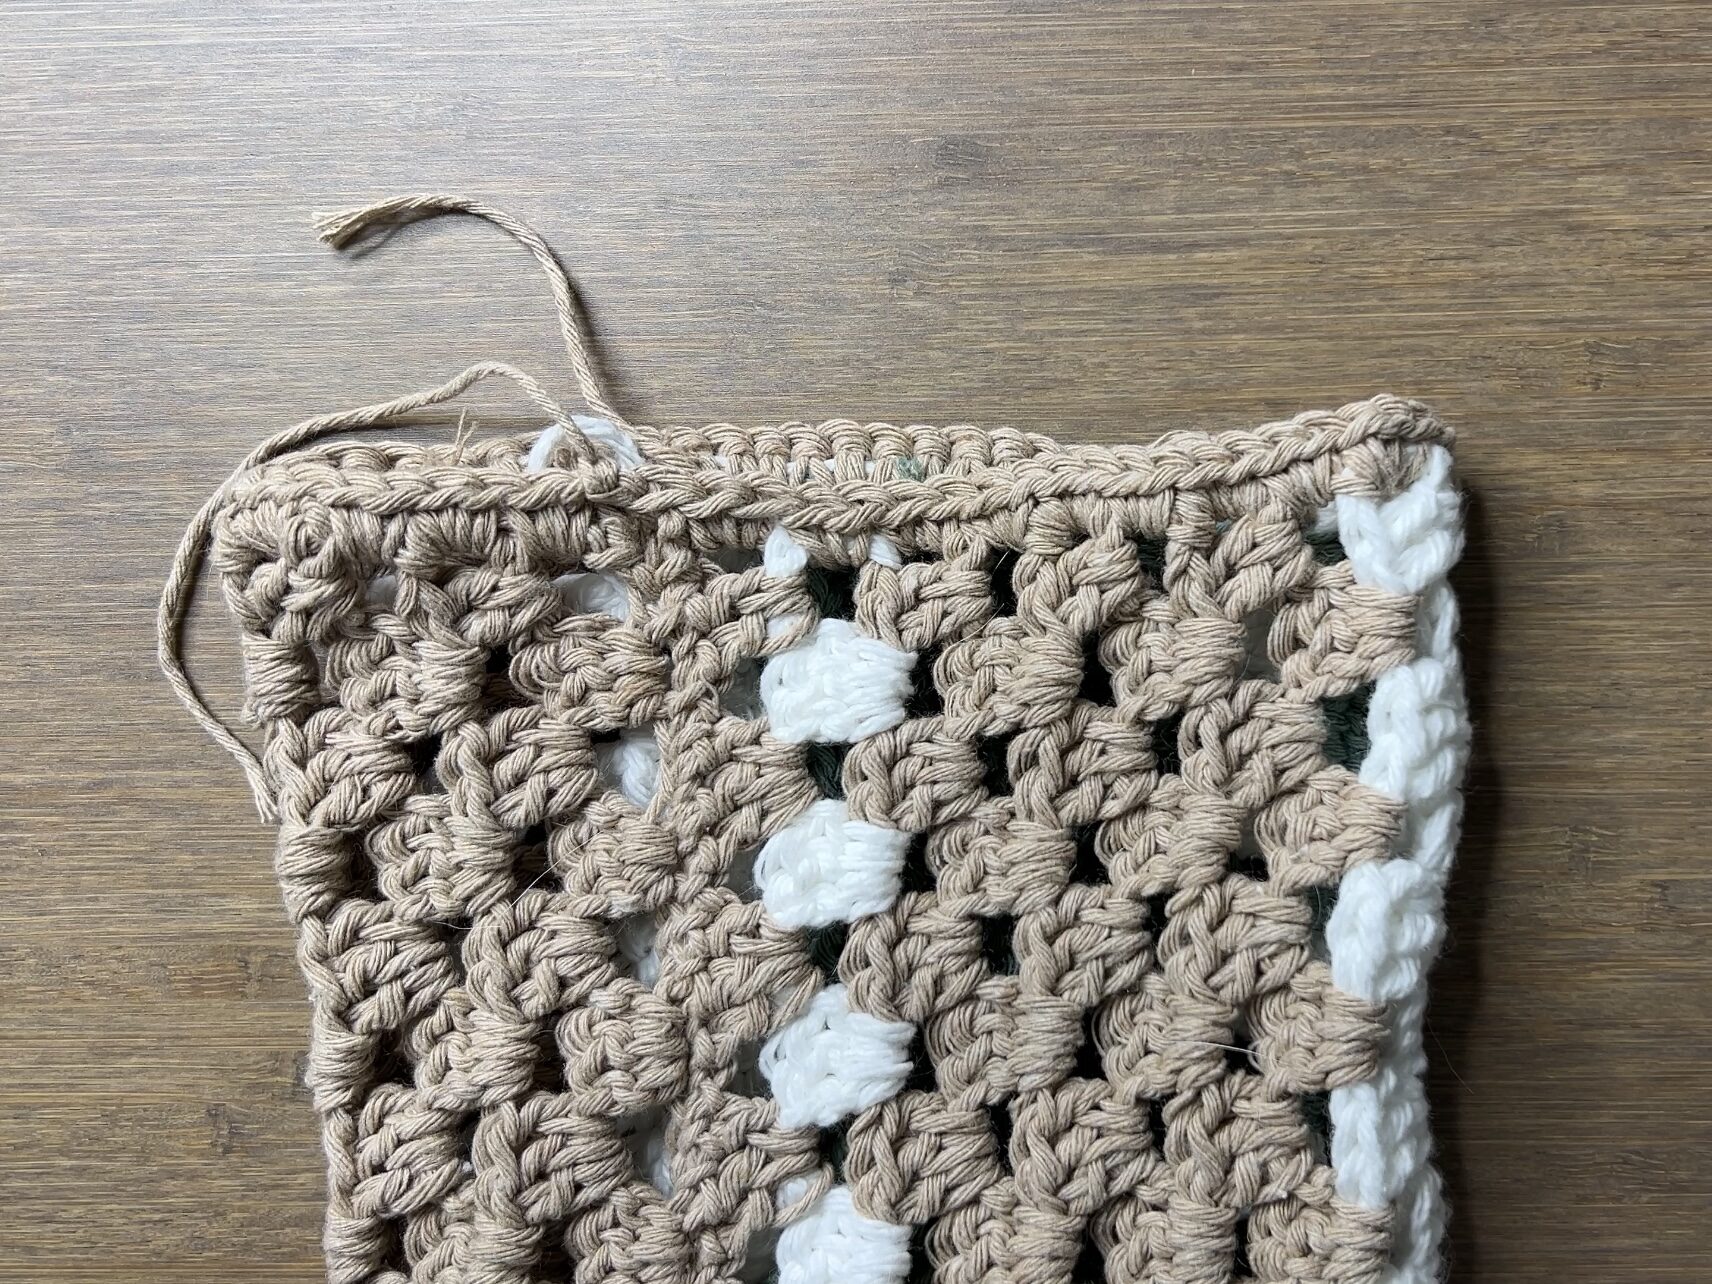
Finishing Edges and Hiding Loose Ends
Do a single crochet border around the neck hole, armholes, and bottom of the dress to straighten the edges and hide your loose ends. The side of each row should have 2 single crochets.
Belt (Optional)
Foundation: Make a slipknot, ch201
Row 1: sl st in 2nd ch from hook and across, fasten off (200)
You can tie the belt over the dress at your waist or weave it through the dress like you would with belt loops.
Finished Crochet Dress
Weave in the rest of your loose ends and your crochet granny square dress is finished!


Hi! Do you think the dress would be too heavy if made entirely with Lily Sugar and Cream?
Yes, I think 100% cotton would be too heavy. I would do a cotton blend instead!
Is there a pdf of this pattern ?
No, sorry! I’m working on converting my patterns to PDF. You can see what I have so far (3 patterns) in my etsy shop: https://vivcrochets.etsy.com