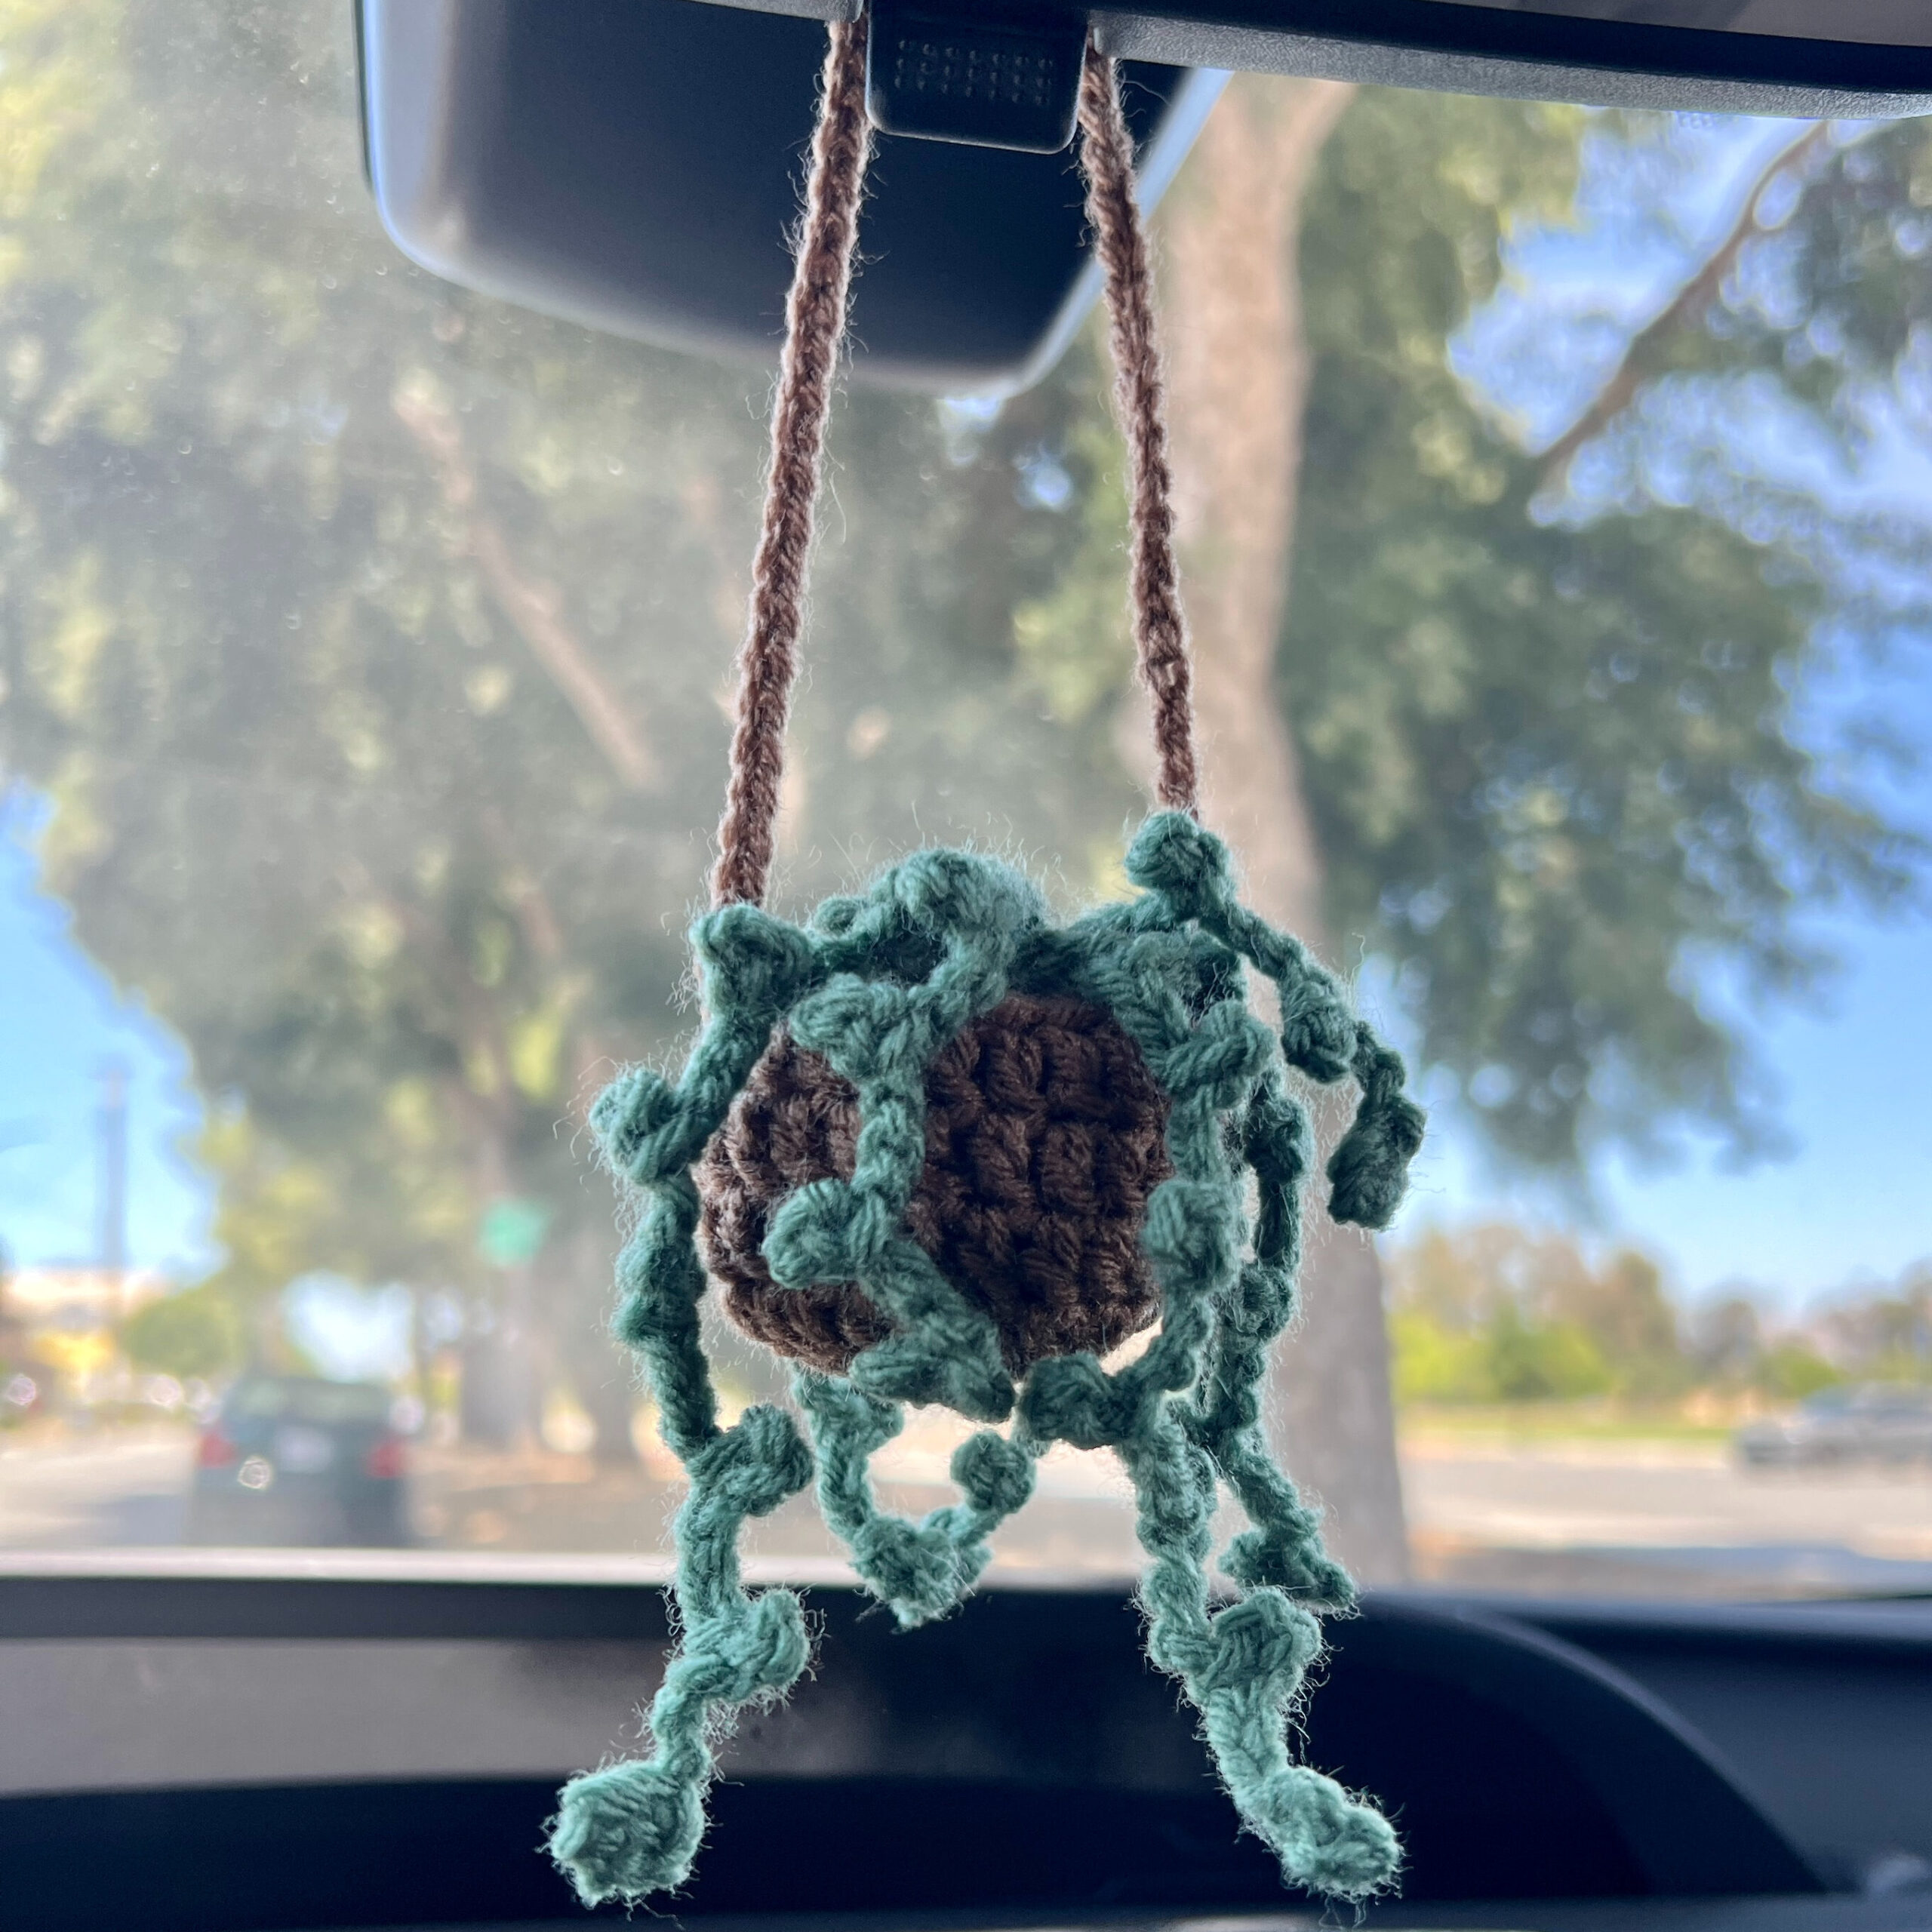
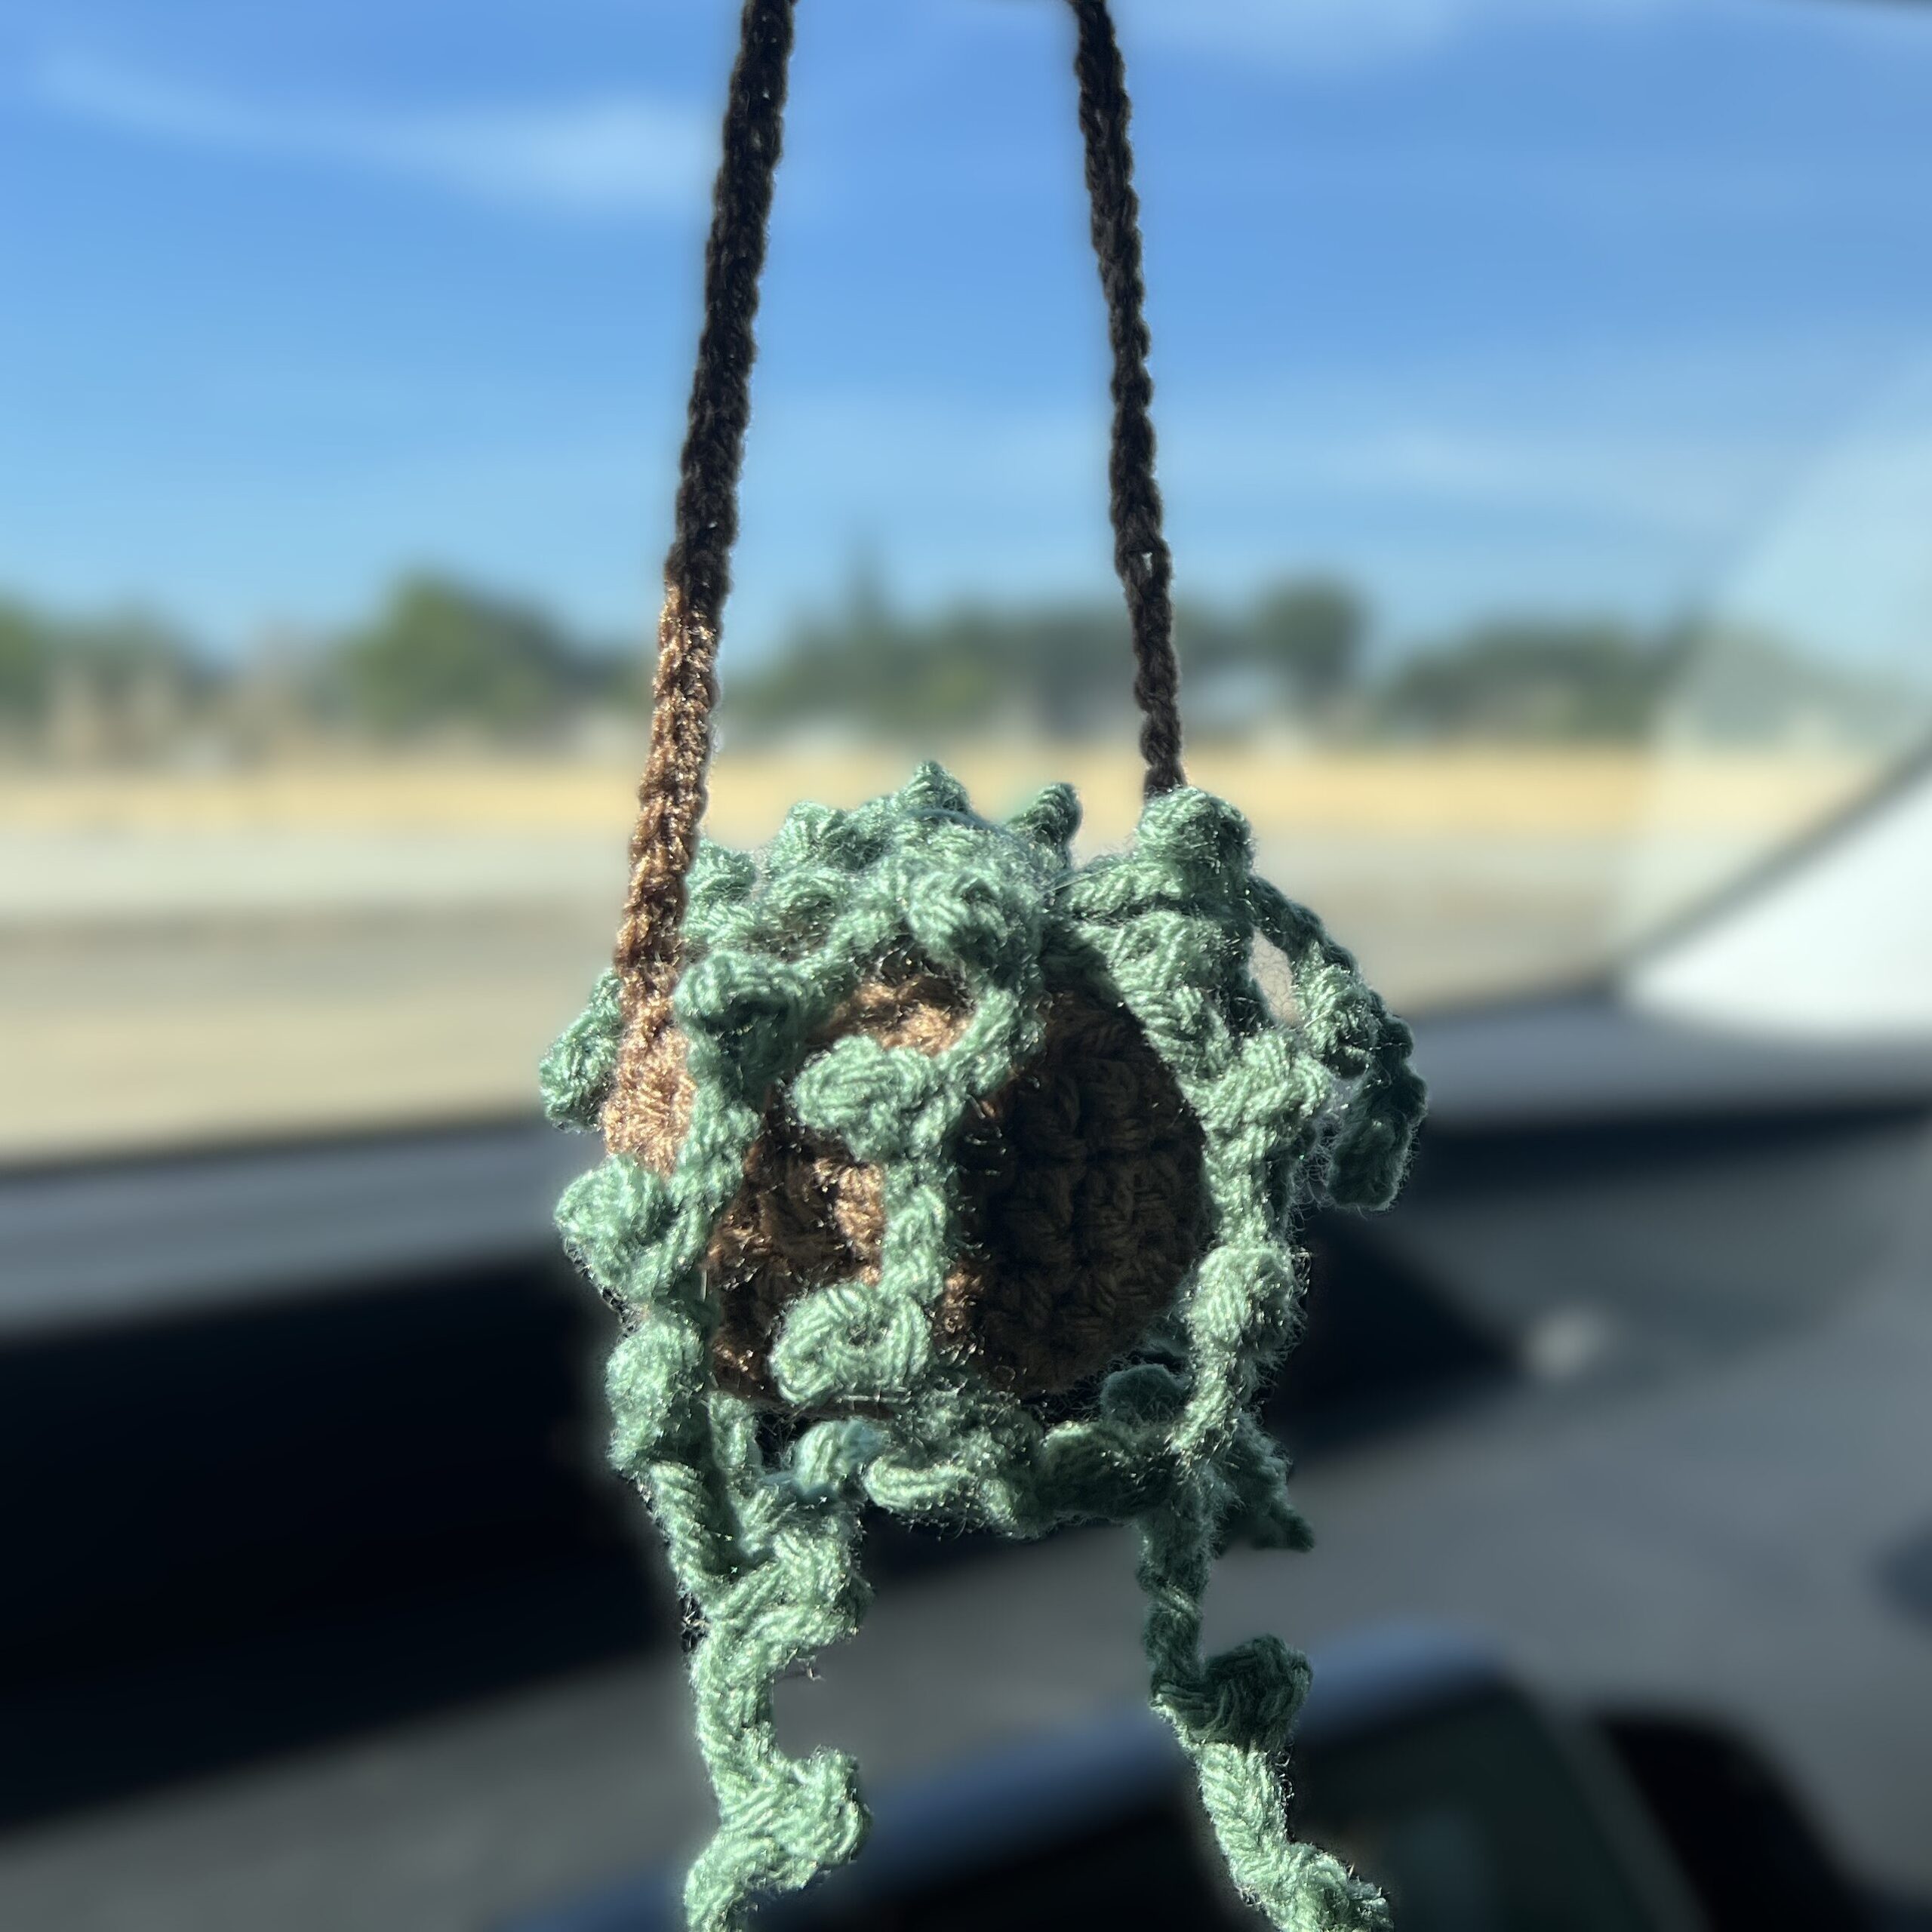
Crochet Hanging Plant Car Accessory | Free Pattern & Video Tutorial
This crochet hanging plant is a fun, easy, and quick project you can make in an hour! The perfect project for beginners, this mini hanging plant can be completed in one crochet session and uses crochet basics. Use this string of pearls plant to decorate your car, office, or bedroom!
Want something to hang on your car mirror, but looking for something different? Check out my strawberries charm pattern!
Advanced Beginner Crochet Project
This crochet pattern is most suitable for crocheters who have completed at least a few projects. It’s not a complicated or intricate pattern, but it does have a slightly more advanced stitch that absolute beginners may not know.
This pattern uses double crochet decreases or dc2tog, which may be difficult to do in your first crochet project. As for the assembly of this plant, I believe any level of crocheter can do it!
If you’re ever unsure of anything, please refer to the video tutorial or leave a comment below!
Sizing
The size of this crochet plant can be changed by using a thinner or thicker yarn and hook. If you’re a more advanced crocheter, you can easily adapt the pattern to a larger size without changing the yarn and hook.
Project Overview


Choosing Yarn & Hook Size
The yarn and hook size you choose will have a slight impact on the size of your crochet hanging plant. If you use a larger yarn and hook, you will get a larger plant. And vice versa: a smaller yarn and hook will yield a smaller plant. Keep in mind that if you want to hang it on your car mirror, you want it to be small so it doesn’t block your view while driving.
For my project, I chose a medium weight yarn in the colors I wanted. This yarn recommends a 5.5 millimeter hook, so I decided to go with a 4 millimeter hook to make the plant smaller.
Other Projects You Might Like


Crochet Hanging Plant Video Tutorial
Become a member to get early access to new videos!
You can follow along with my YouTube video to make your own crochet hanging plant! I have timestamps included to section the video and help you jump to any point you need to!
This post may contain affiliate links. I may earn a small commission on qualifying purchases at no additional cost to you!
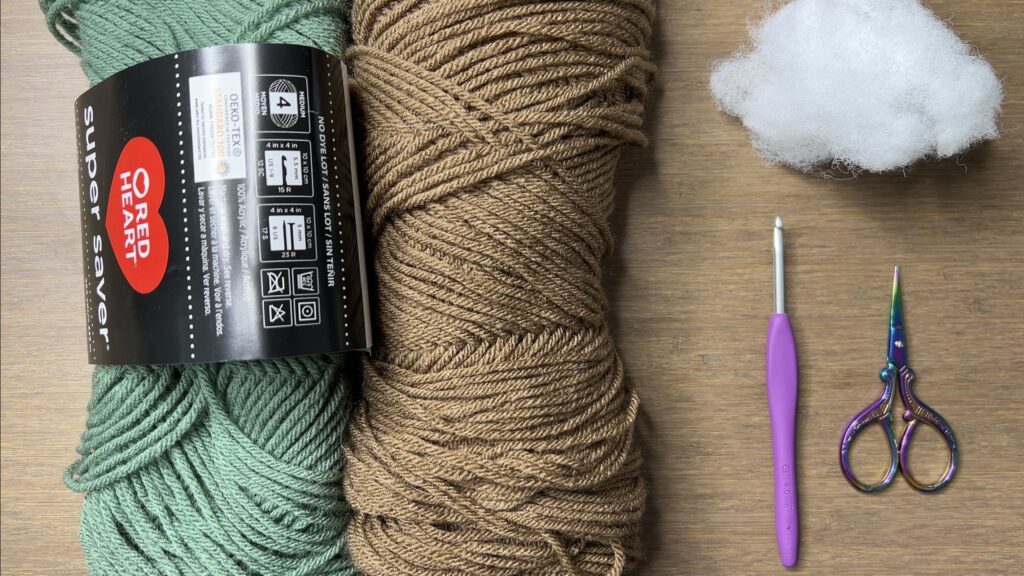
Materials
- 15 grams of medium weight yarn (Red Heart Super Saver in “Light Sage” and “Cafe Latte“)
- 4mm Clover Amour crochet hook
- Scissors
- Fiberfill
- Yarn bowl (optional)
Dimensions
Hanging Strap: 32 centimeters long total (12.6 inches)
Overall: 8 centimeters wide x 24 centimeters long (3.1 x 9.4 inches)
Notes and Tips
- This pattern is written using US crochet terms
- The pot is worked in joined rounds. At the end of each round, slip stitch to the first stitch of the round
- The chain 2 at the beginning of each round does NOT count as a double crochet
- Vary the number of pearls for a more natural-looking plant
Abbreviations
blo = back loop only
ch = chain
dc = double crochet
dec = decrease with double crochet
inc = increase with double crochet
rep = repeat
sk = skip
sl st = slip stitch
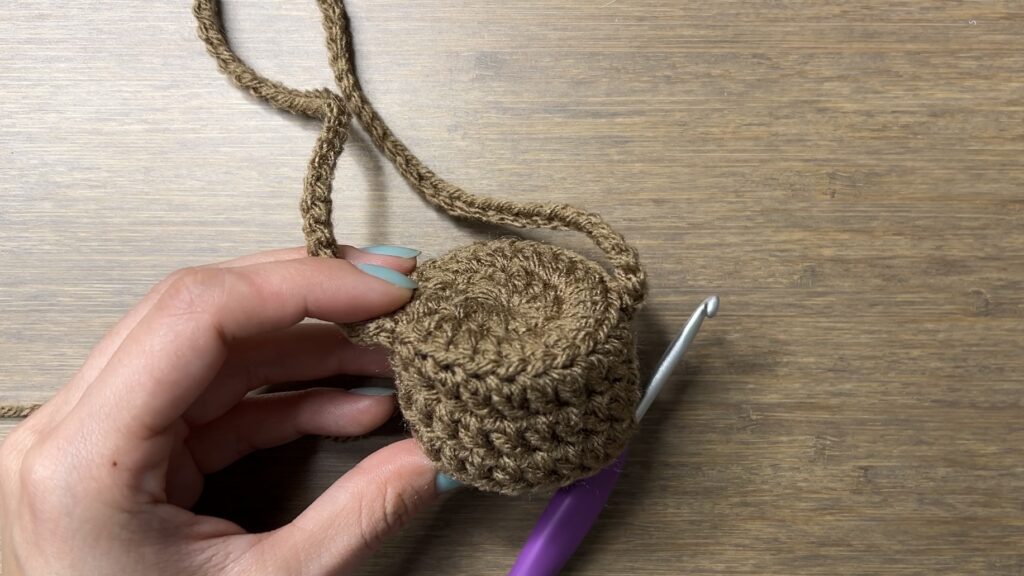
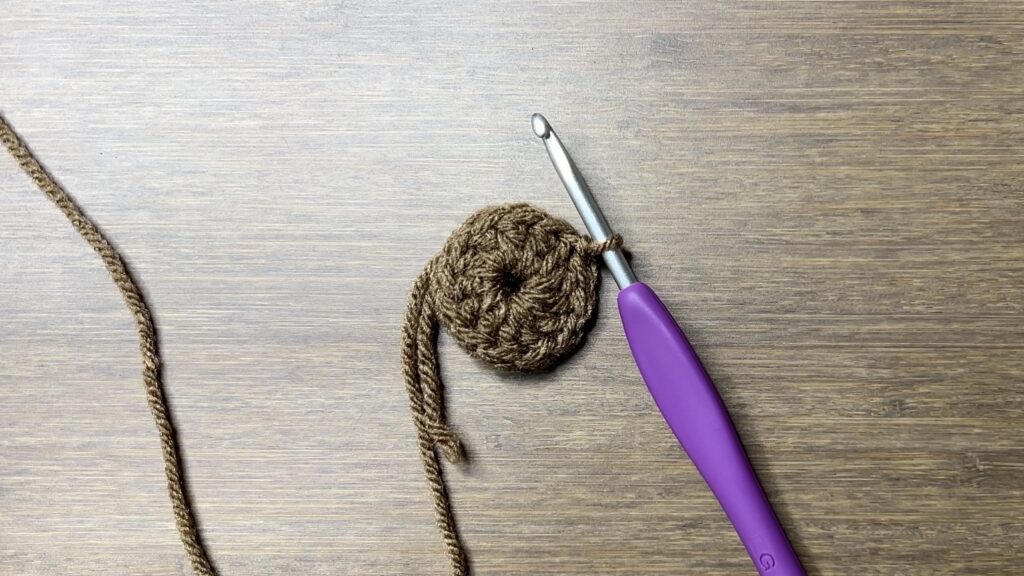
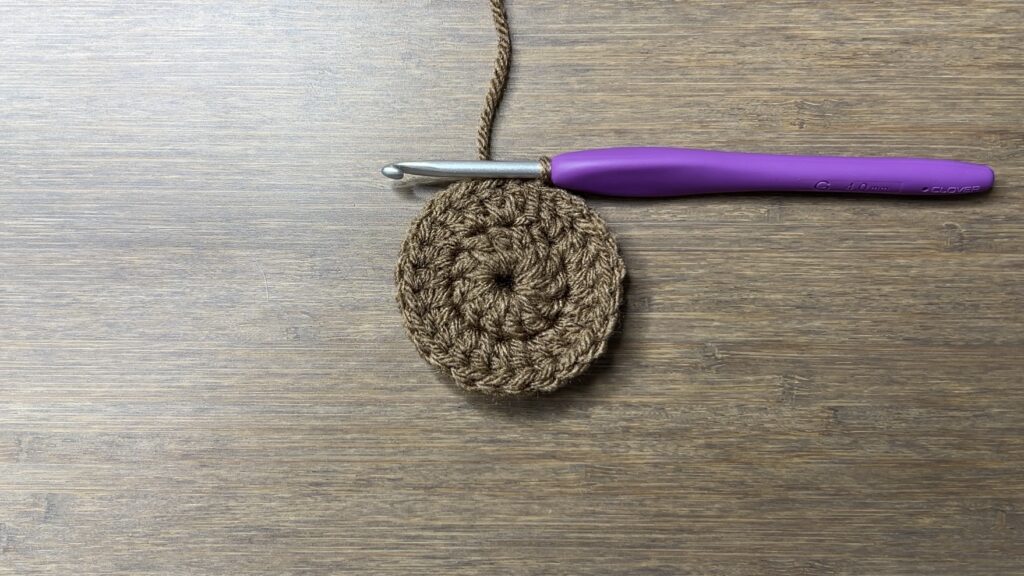
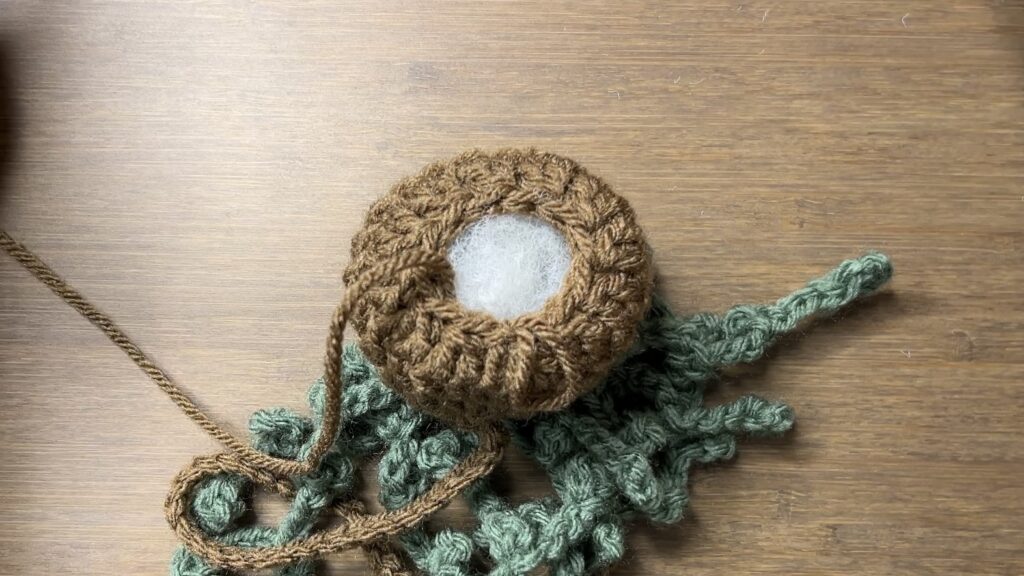
Starting Pot
Foundation: Slipknot, ch4, sl st to 1st ch to form a ring (or make a magic ring)
Round 1: ch2, dc12 into ring, sl st (12)
Round 2: ch2, inc around, sl st (24)
Hanging Strap: ch68, sk11, sl st
Before continuing, make sure it’ll fit over your car mirror! Do fewer chains to make it shorter or more chains to make it longer.
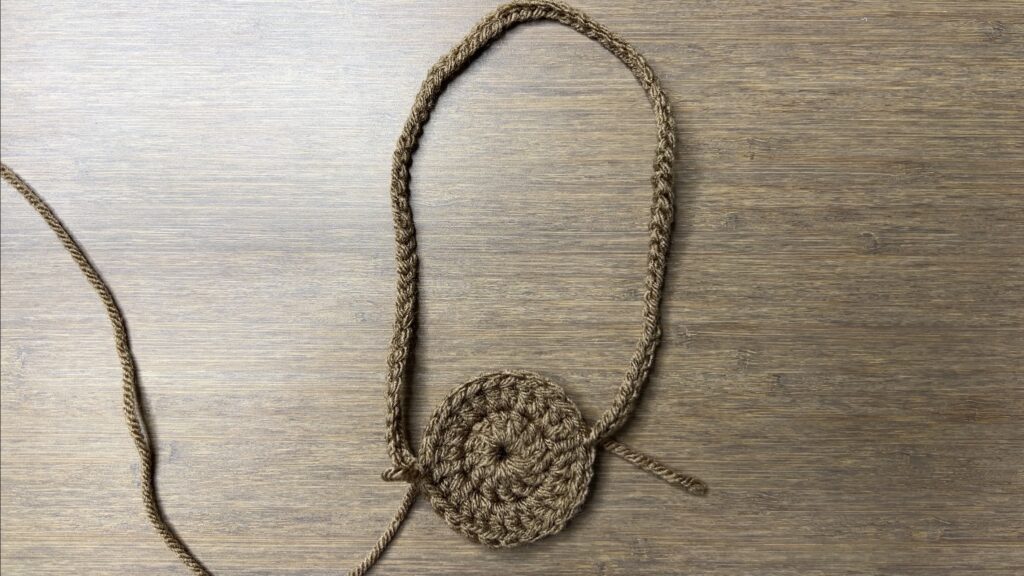
Round 3: ch2, dc in blo around, sl st (24)

Round 4-5: ch2, dc around, sl st (24)


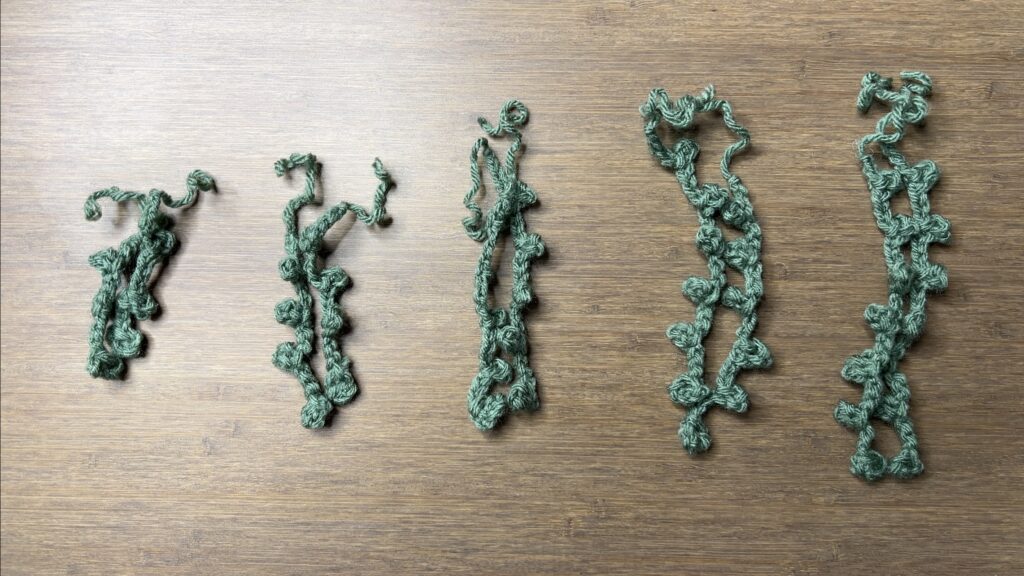
String of Pearls
First pearl: Slipknot, ch4, sl st to 1st ch
Add a pearl: rep[ch7, sl st to 4th ch from hook]
You can add as many pearls as you want by repeating [ch7, sl st to 4th ch from hook]. Once you add enough pearls, ch3 and fasten off by cutting the yarn and pulling through with your hook.
Note: You can make the pearls smaller by sl st to a chain closer to the hook (3rd instead of 4th) or bigger by doing the opposite. You can make the gap between each pearl smaller by doing less chains (6 instead of 7) or bigger by doing the opposite. And finally, you can make the length between the soil and the first pearl down smaller by doing fewer chains before fastening off (2 instead of 3) or bigger by doing the opposite.
For example, a string of 5 pearls looks like this:
Slipknot, ch4, sl st to 1st ch, rep[ch7, sl st to 4th ch from hook] 4 times, ch3, fasten off
Weave in the loose end next to the first pearl we made. Do not weave in the other loose end.

Make many strings with a different number of pearls to get a fuller and more accurate-looking plant. I made 10 total: 2 strings each of 3, 4, 5, 6, and 7 pearls. For the 2 strings with the same number of pearls, one has 3 chains before fastening off and the other has 5. This is so that even if it has the same number of pearls, they are not the same length.
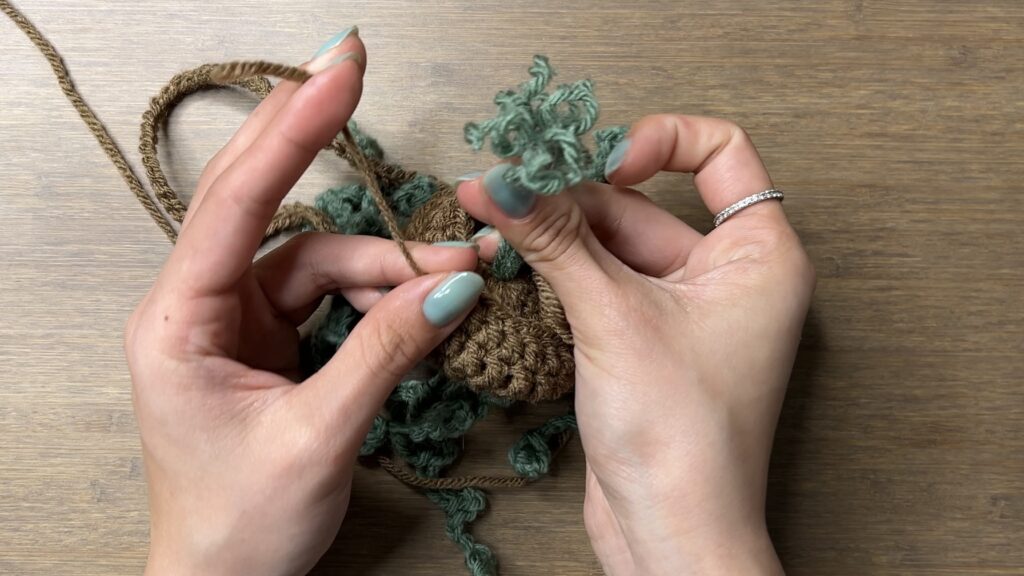
Assembly
Insert your hook in through the opening of the pot and out the center of round 1. Pull the loose end of each string of pearls through until the last chain meets the soil.
Pull on the loose end from the slipknot at the beginning of the pot to close the hole in the center of round 1. Double knot that loose end to the bunch of loose ends from the strings of pearls.
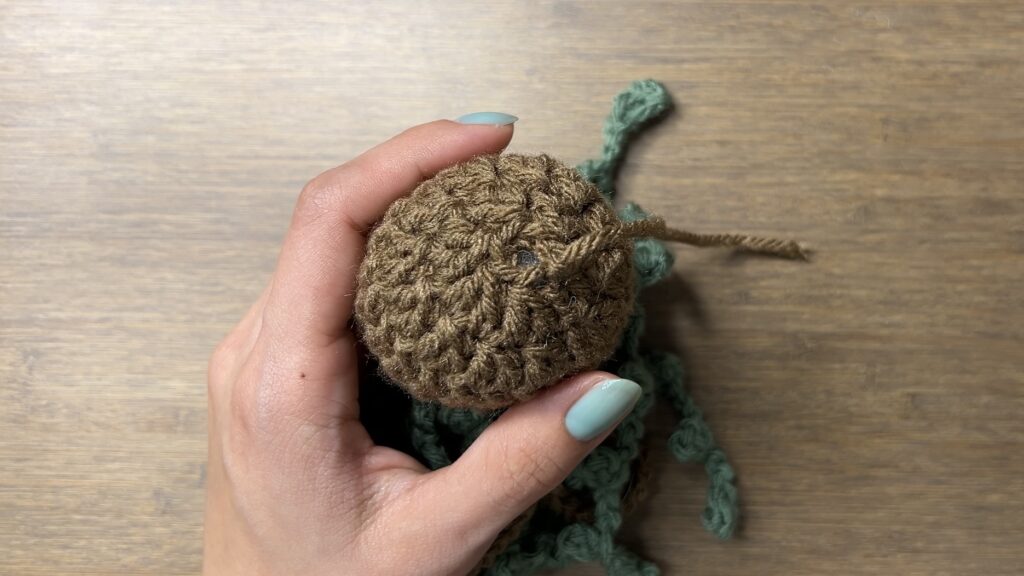
Finishing Pot
Round 6: ch2, dec around, sl st (12)
Insert fiberfill into the pot through the hole at the bottom. Don’t overstuff! Make sure the soil (rounds 1 and 2) is flat.
Round 7: ch2, dec around, sl st, fasten off (6)

With the loose end, sew the hole at the bottom of the pot closed and tie a knot. You can use a yarn needle, but I just used my hook to pull the loose end through each of the 6 stitches.
Finished Crochet Hanging Plant
Hide your loose end by pulling it to the inside of the pot and your crochet hanging plant is finished!


If I use a magic ring instead of a chain, do I do 4 single crochets into the magic ring?
Oh never mind, I didn’t read far enough into the pattern 😅