Easy Crochet Bow Keychain | Free Pattern & Video Tutorial
See the free crochet bow keychain pattern and video tutorial below or purchase an ad-free, printable PDF file of this pattern!
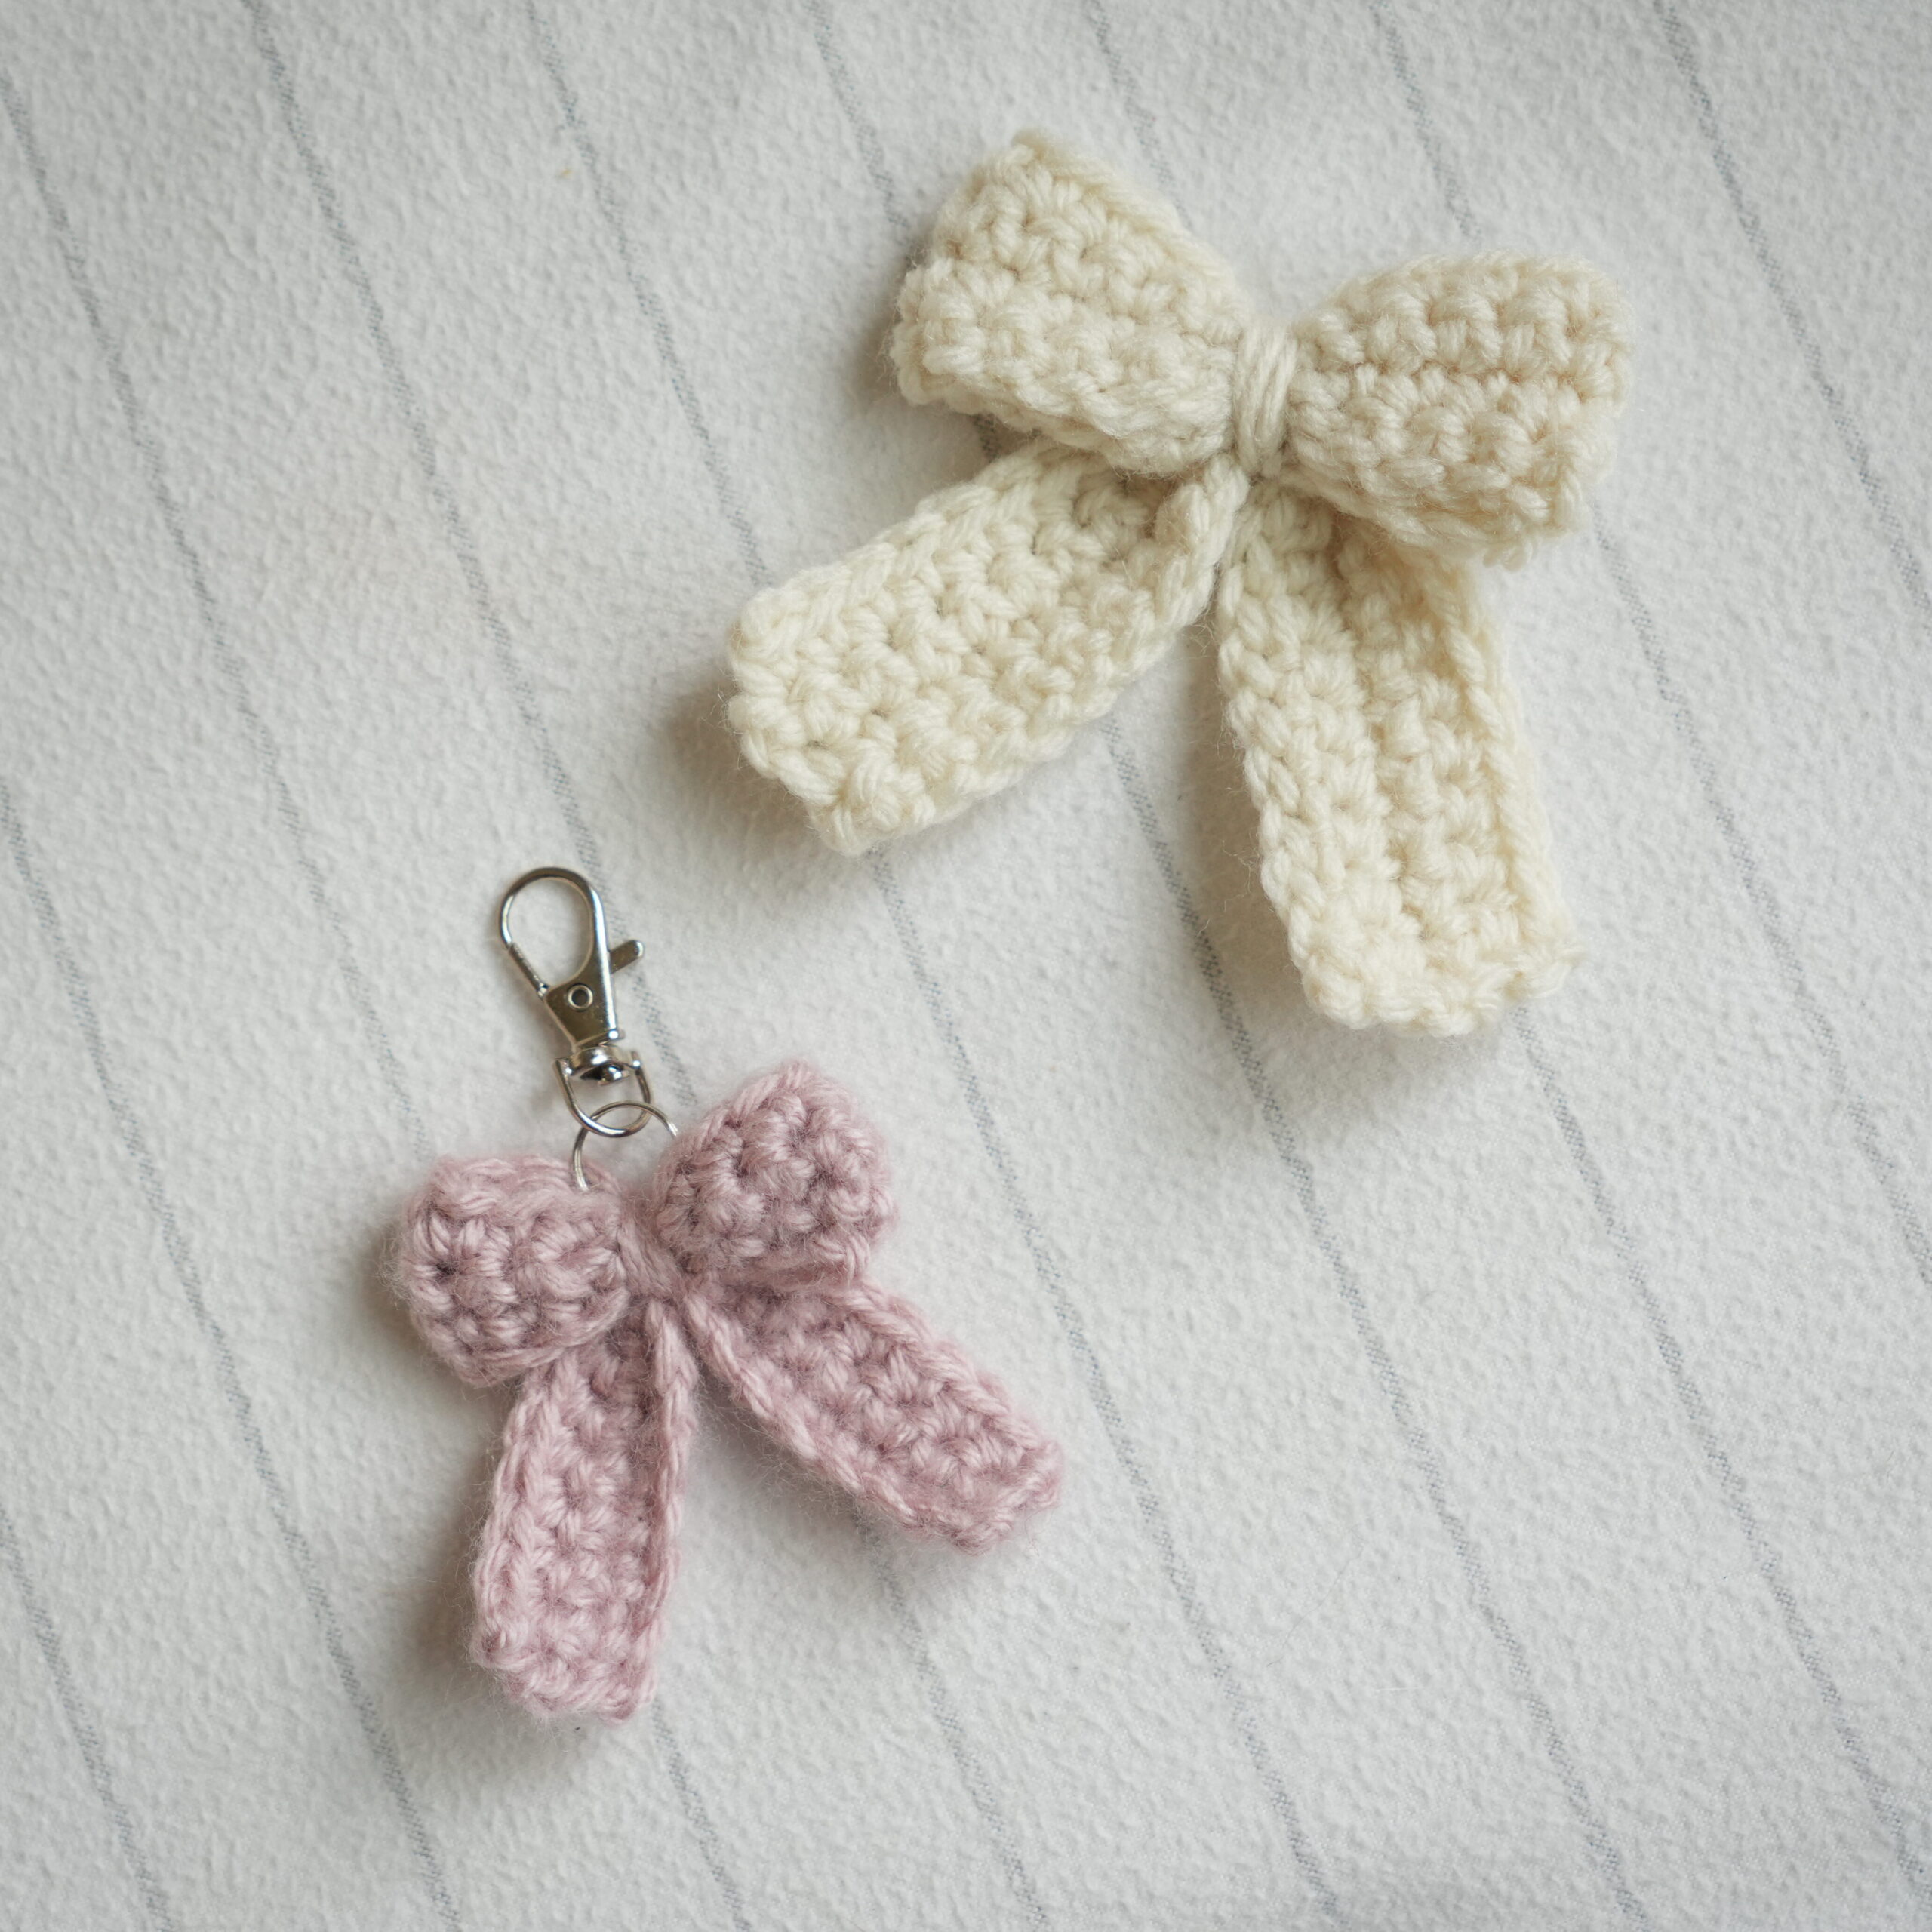
This crochet bow is easy to crochet and quick to assemble! It can also be made to be any size you want. Use this bow as a cute crochet keychain or an applique for a bigger project.

Table of Contents
Beginner Crochet Project
This is a great first crochet pattern! You basically crochet two rectangles and assemble them into a bow. The crocheting portion is repetitive and a small part of this pattern.
If you want to take on this project as a complete beginner, make sure to view the tutorial if any part of the written pattern is confusing for you! Also, please leave any questions in the comments if you have any.

This post may contain affiliate links. I may earn a small commission on qualifying purchases at no additional cost to you!
Crochet Bow Video Tutorial
Become a member to get early access to new videos!
You can follow along with my YouTube video to make your own crochet bow! I have timestamps included to section the video and help you jump to any point you need to!
Pattern Information
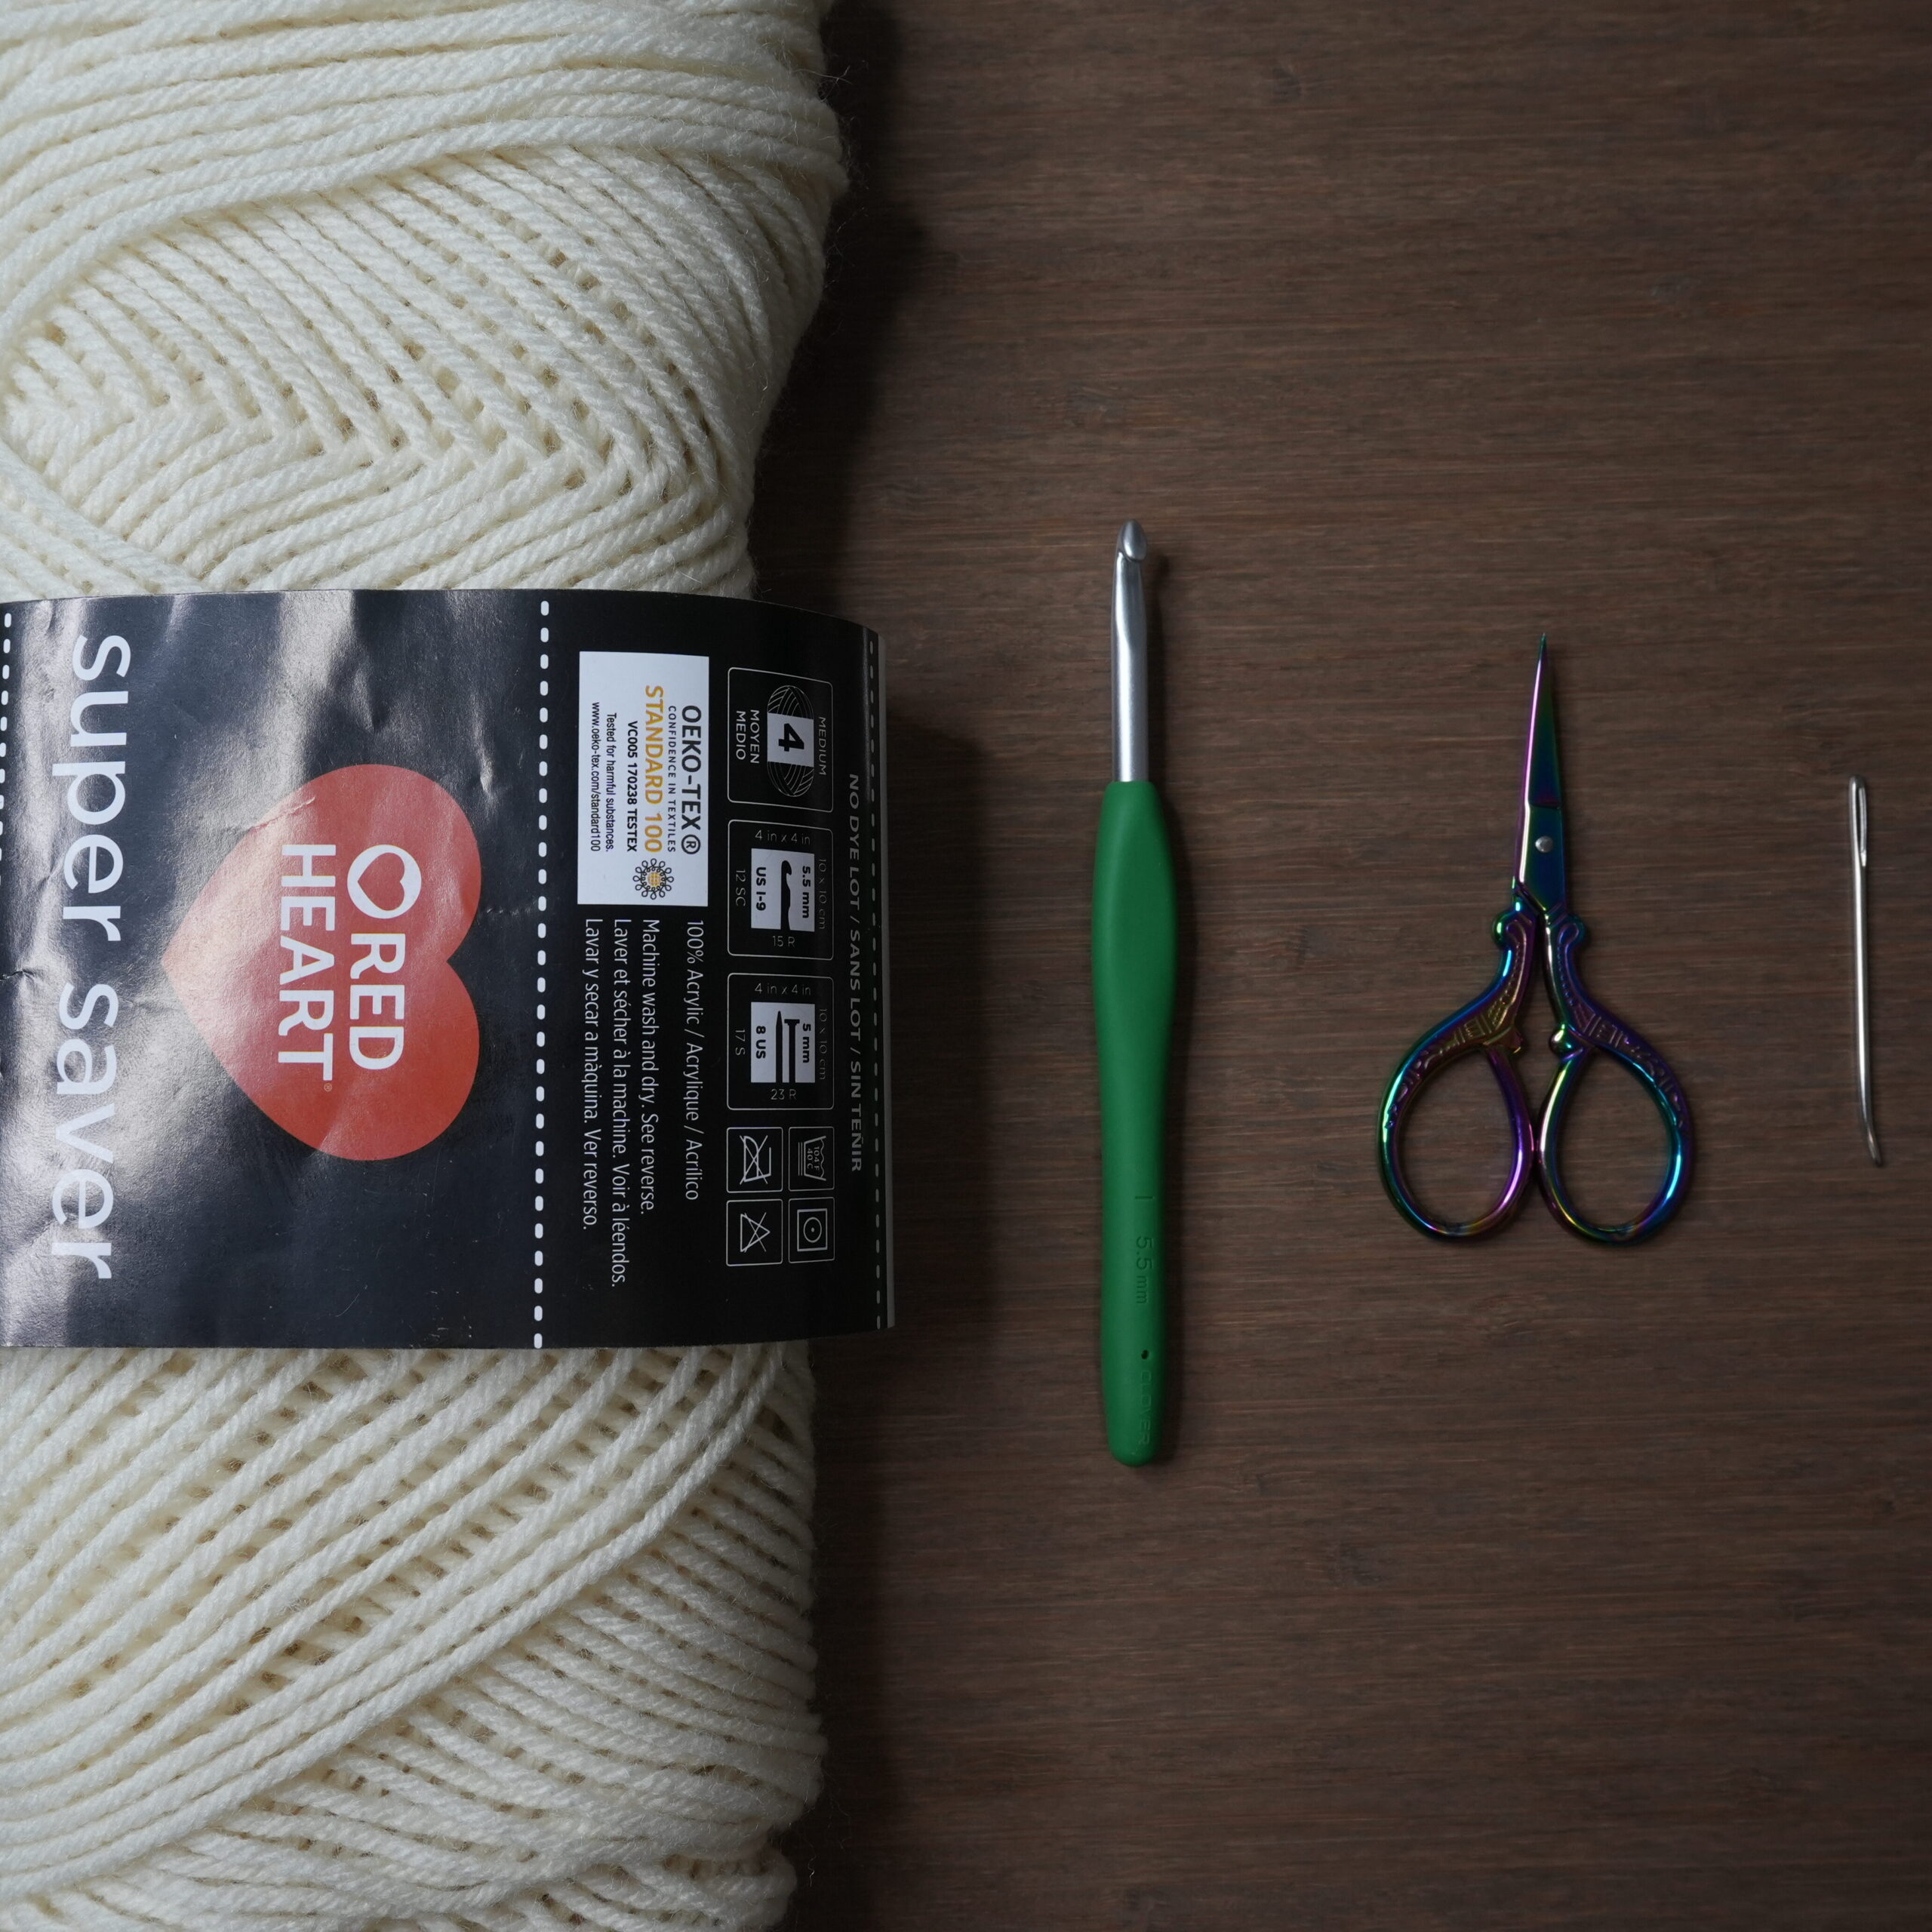
Materials
- 6 grams of medium weight yarn (Red Heart Super Saver in “Aran”)
- 5.5mm Clover Amour crochet hook
- Scissors
- Yarn needle
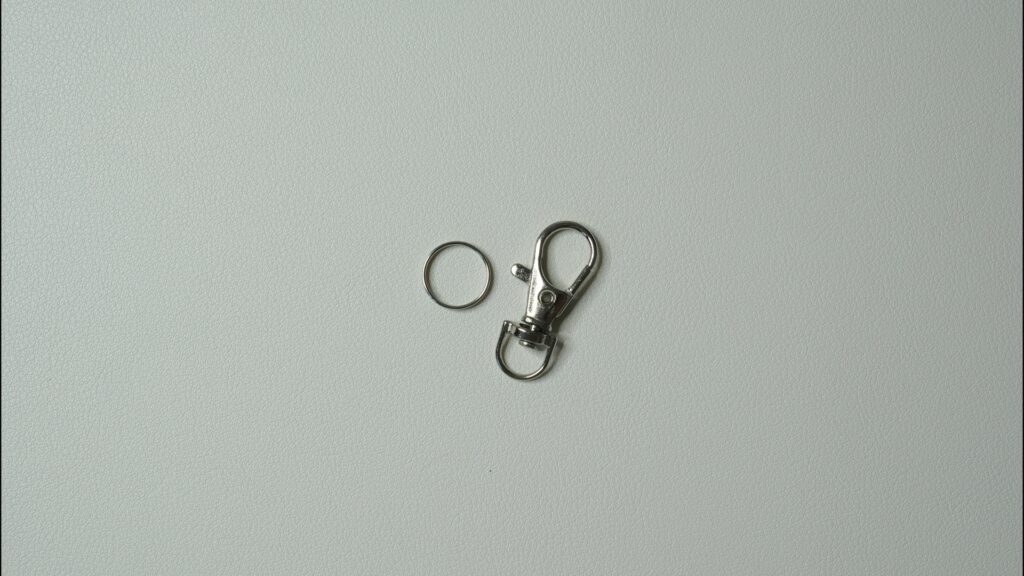
- Keychain Clasp (optional)
Crochet Abbreviations
ch = chain
sc = single crochet
Gauge
11.5 rows of 14 single crochets makes a 10 x 10 centimeter (4″ x 4″) square
Dimensions
*includes instructions to adjust sizing
7.5 centimeters wide x 9 centimeters long (3 x 3.5 inches)

Notes and Tips
- This pattern is written using US crochet terms
- The number in (parentheses) at the end of each row is the stitch count after finishing that row
- Italicized notes tell you what to change to adjust the size
- The chain 1 at the beginning of each row does NOT count as a single crochet
Crochet Bow Pattern
Top Piece
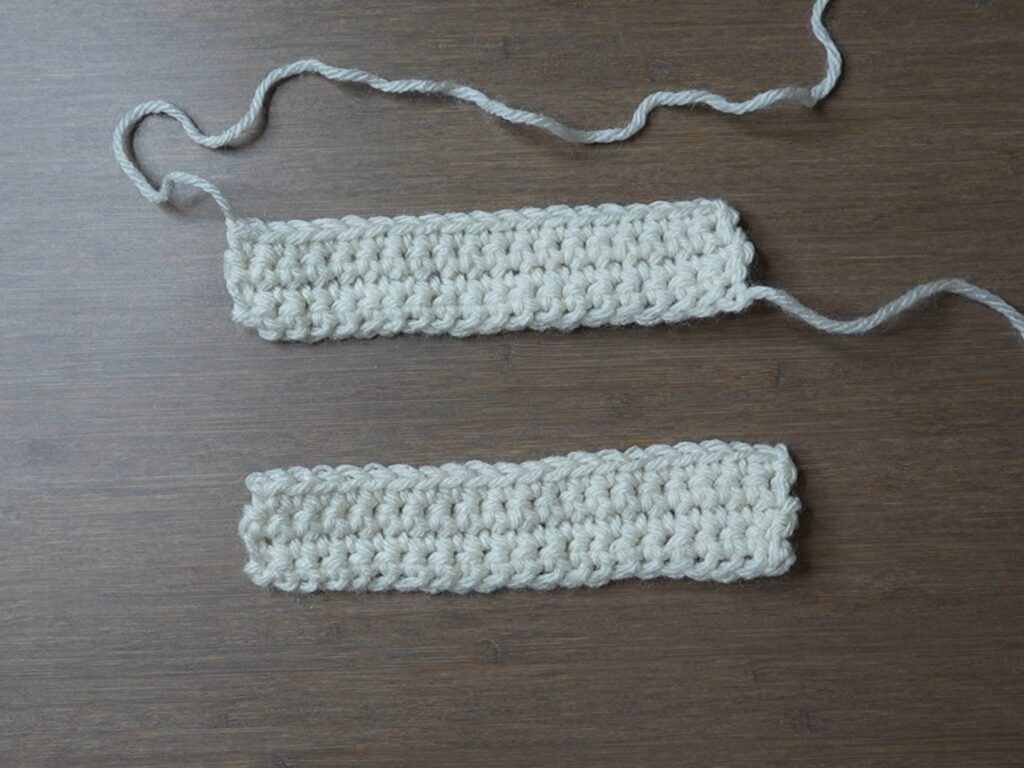
Foundation: Make a slipknot, ch21
Note: Do fewer chains for a less wide bow or more chains for a wider bow. The width of the bow will end up being the length of the chain folded in half.
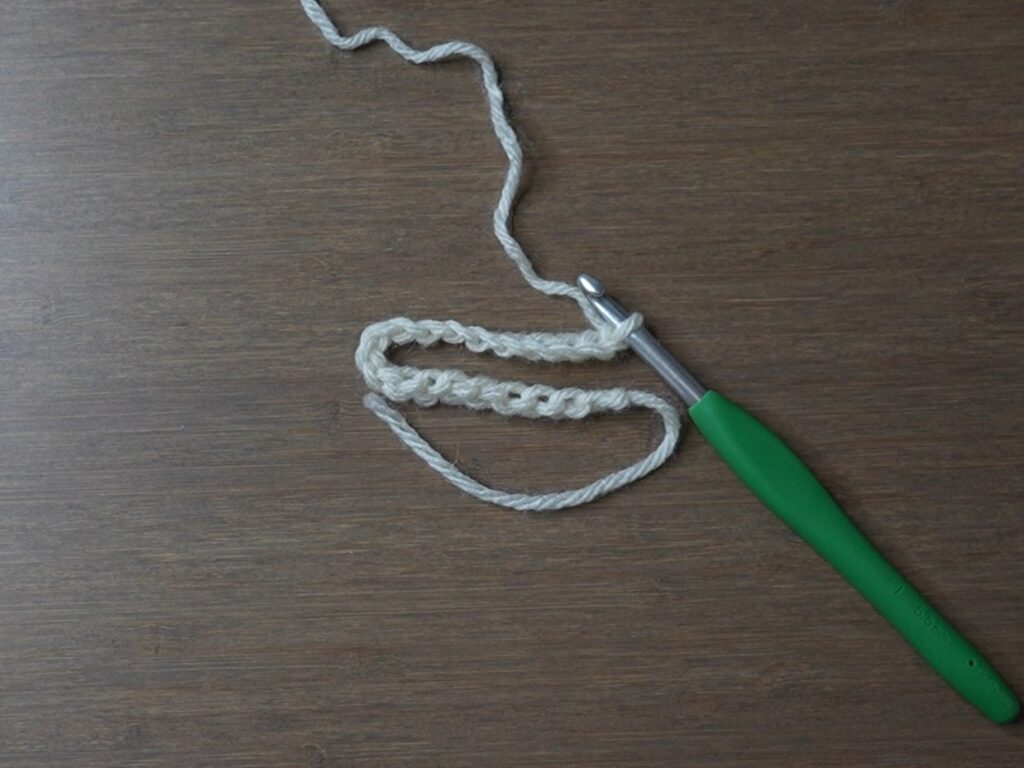
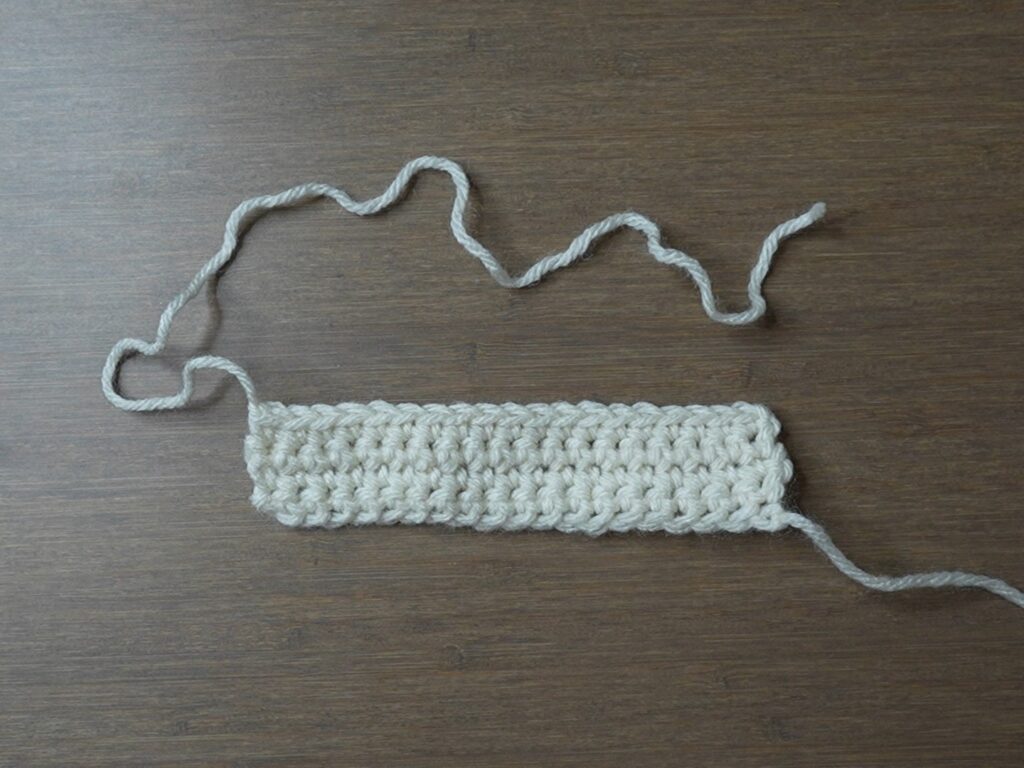
Row 1: sc in 2nd ch from hook and each ch across (20)

Rows 2-4: ch1, turn, sc across (20)
Note: Do fewer rows to make the top piece of the bow shorter or more rows to make it longer.
Fasten off with a 45cm (1.5 ft) loose end.
Tail Piece
Make a second one, but fasten off with a normal loose end. Weave in the loose ends. This is the tail piece.
Assembly
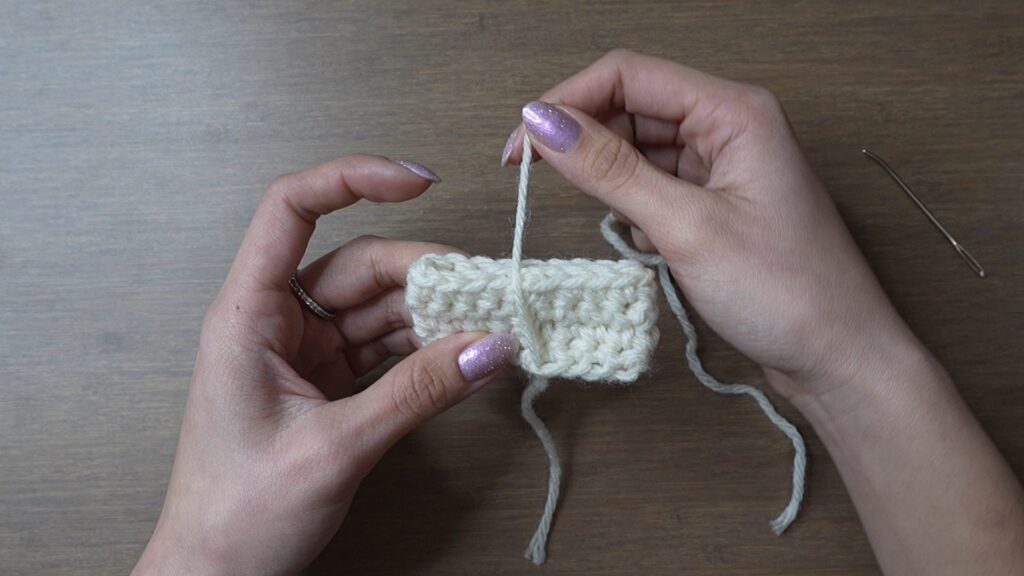
With the long loose end on the top piece, sew the ends of the rows together to form a ring.
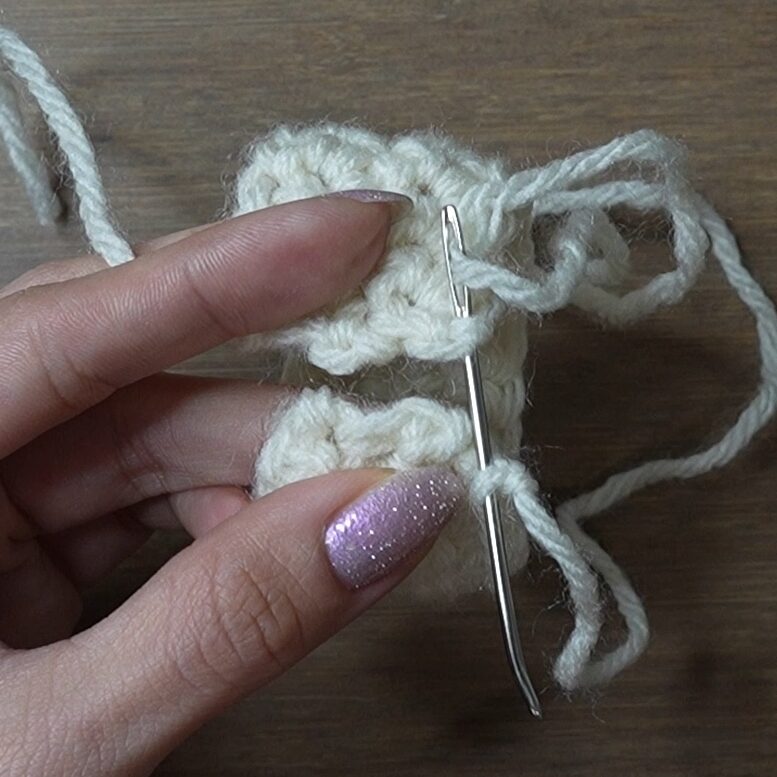

- Flatten the top piece with the seam in the center
- Wrap the long loose end around the top piece once along the middle
- Tie a tight double knot with the other loose end
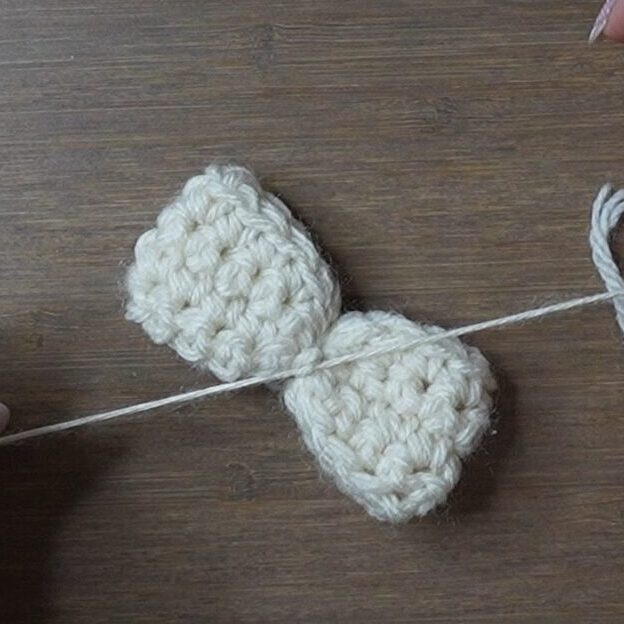
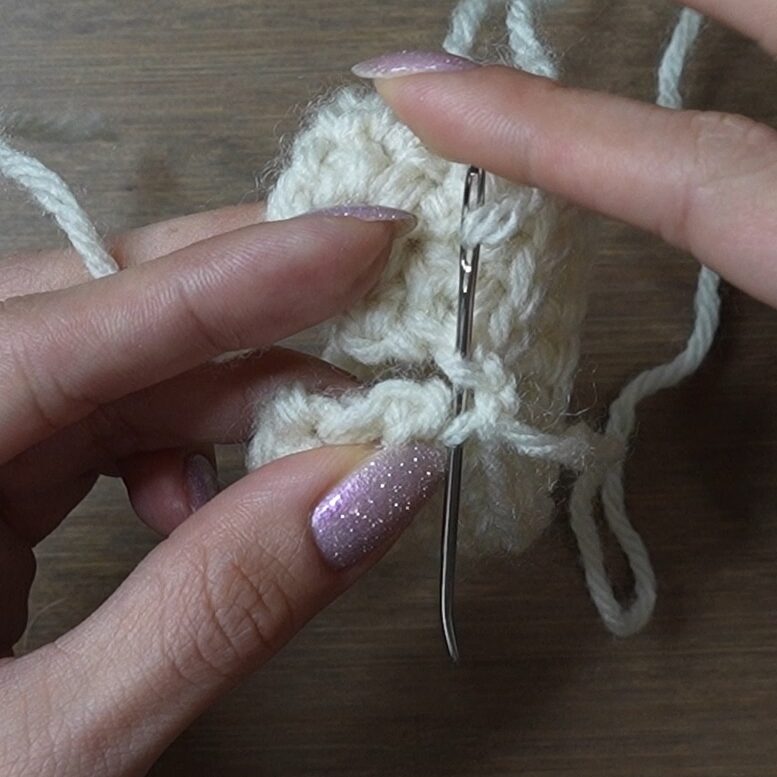
- Fold down the top of the middle of the tail piece
- Center the top piece on top of the tail piece
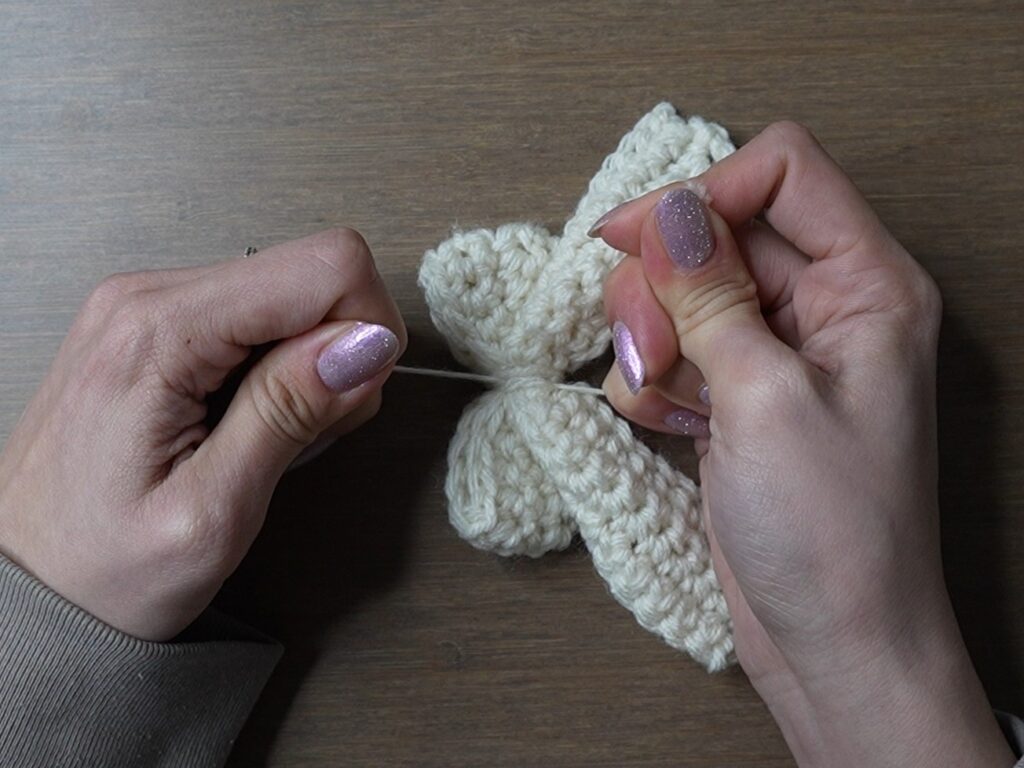
- Wrap the long loose end around both pieces while tightening it until it’s only a few inches long
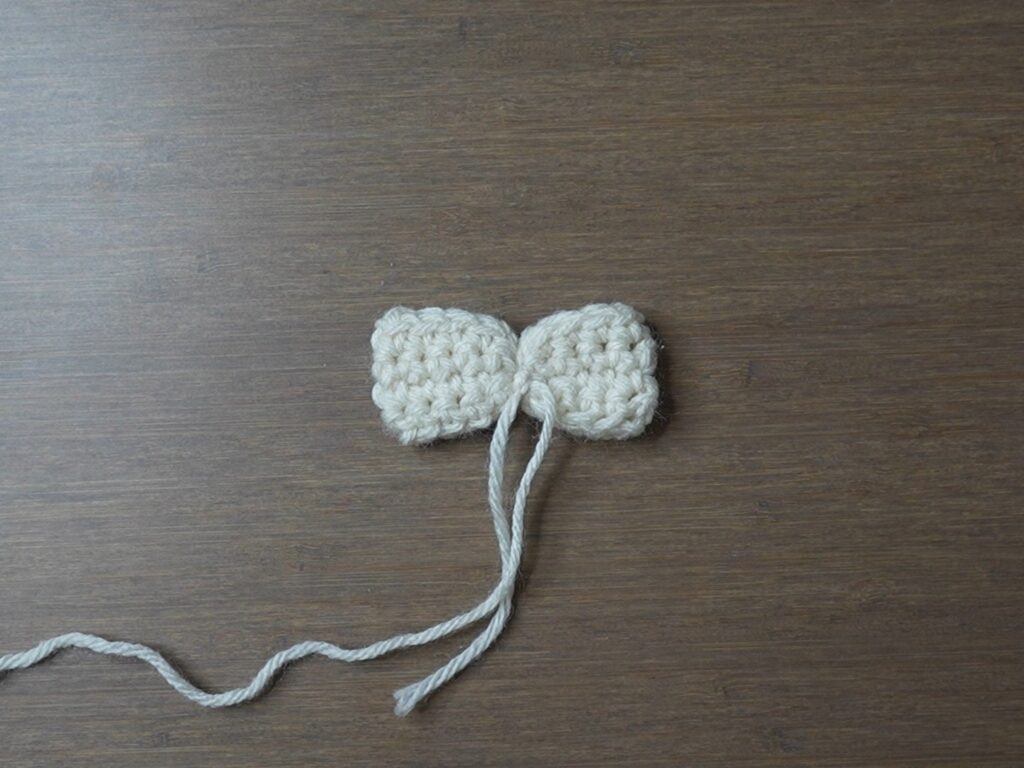
- Tie a tight double knot with the two loose ends


Adding a Keychain Clasp (Optional)
Insert the keyring at the middle of the top of the bow under the strands of yarn we wrapped around the top piece.

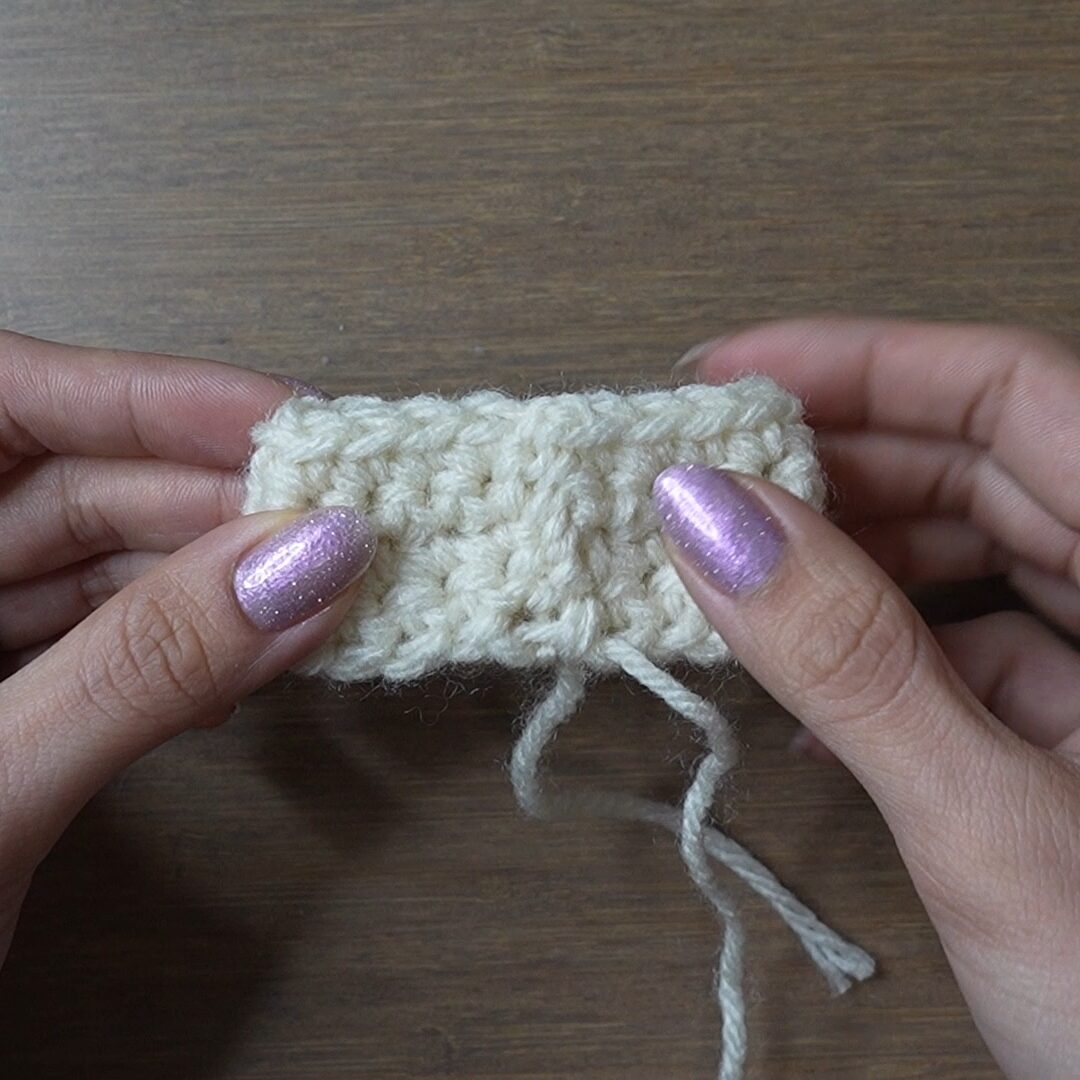
Finished Crochet Bow
Weave in your loose ends, stretch out the rows at the sides of the top piece, and your crochet bow is finished!

yes this is soooo good
Very easy to follow
I’m a beginner so I watched your yt video and came on your website. 🥰🩷🩶🖤
Thank You Ma’am. it is so easy to understand😉
Thank you for your pattern! This is easy to adjust based on the size of bow you want. i made a bigger one with 41 stitches length but I added rows, and one that followed your pattern , 21 stitches.
FR!!! I totally agreee!╰(*°▽°*) ╯
I have been knitting since I was 7 yo, but have never tried to crochet, this was my first ever crochet project (first time I even picked up a crochet hook), you explained it so well and I got it nearly perfectly done (I just crocheted a bit too tight).
I have sent my granny the link to your website as she loves knitting and crocheting, I just don’t see her often enough for her to teach me. She loves your patterns and has done nearly all of them. It keeps her busy.
Thank you for all your hard work and explainations, you are a super star!
I’m so happy I could help you make your first project! And that’s so amazing she’s done almost all of my patterns!! Thank you so much for your kind comment!