Tie-Front Crochet Mesh Vest | Free Pattern & Video Tutorial
Add a crochet mesh vest to your summer wardrobe! This cute piece is fashionable and comfortable to wear in warm weather. The tie-front closure makes it easy to wear and easy to get the right fit!
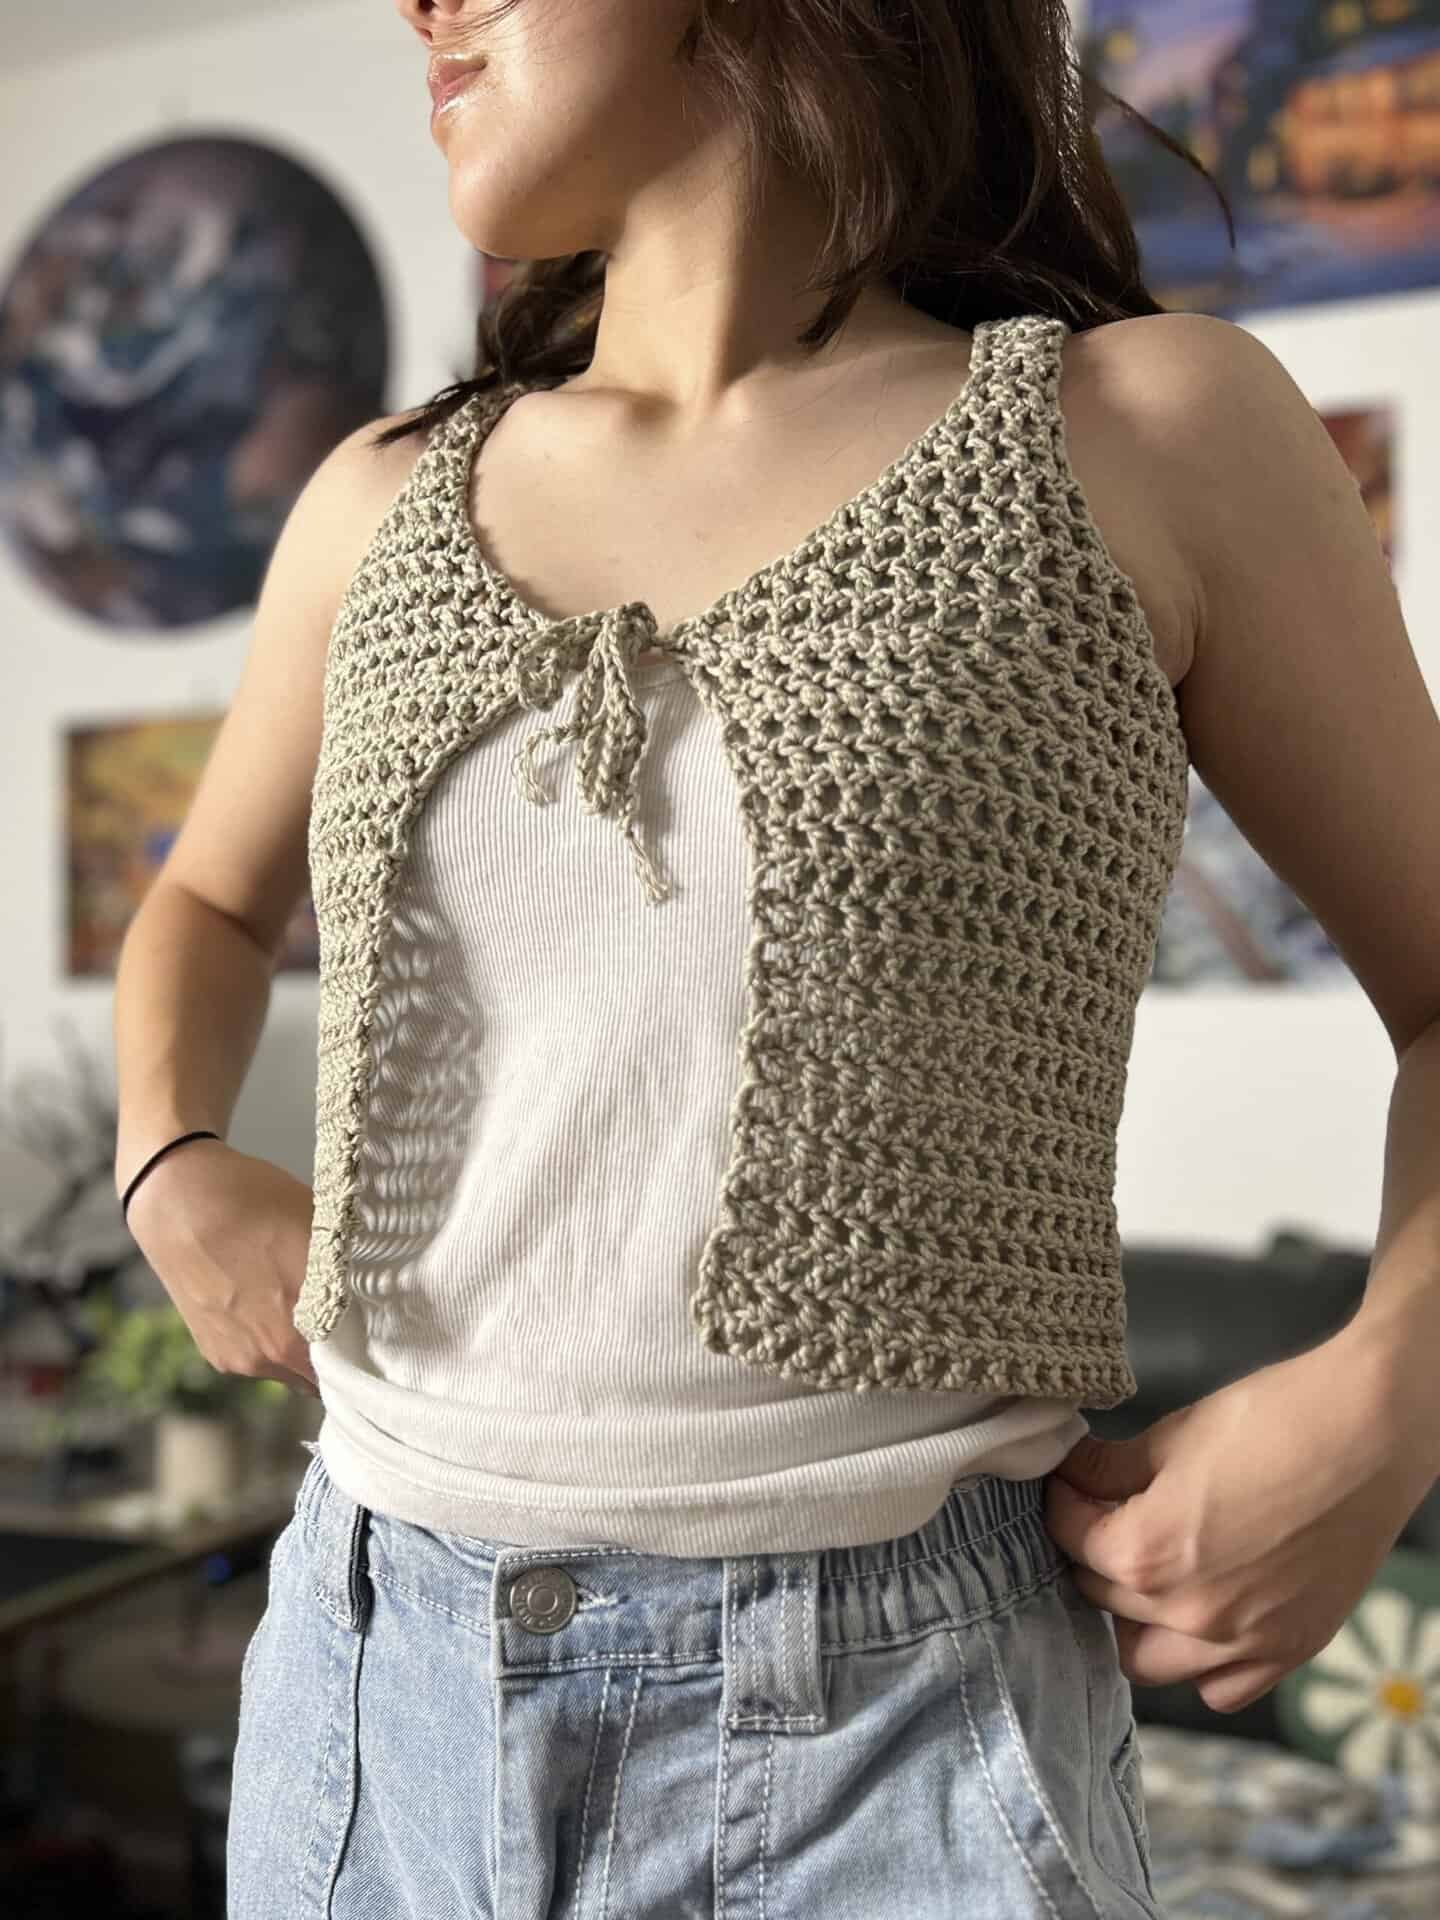
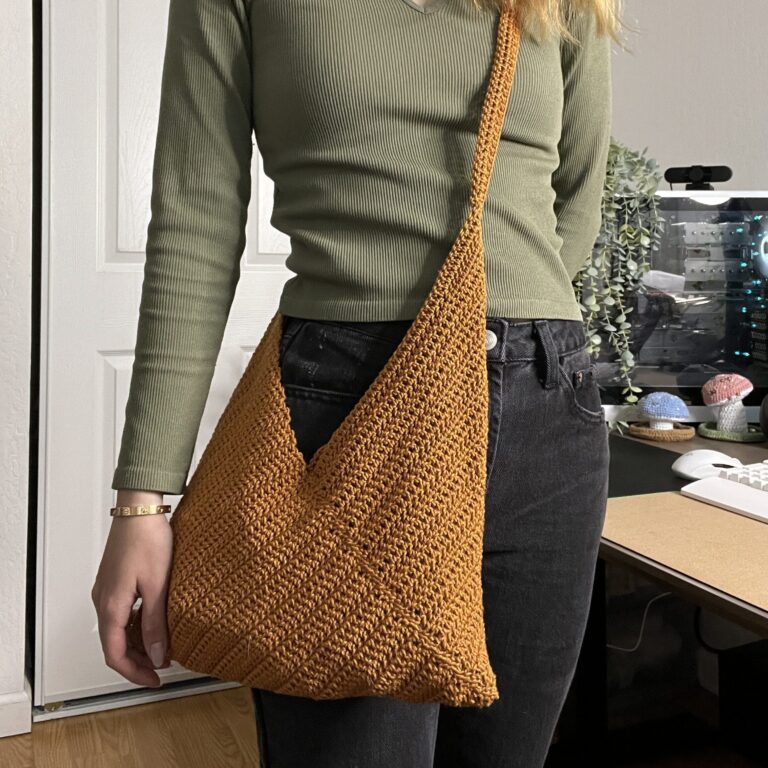
For another crochet pattern using this stitch, check out the mesh tote bag!
Advanced Beginner Crochet Project
This crochet mesh vest is most suitable for advanced beginner crocheters. After a couple of projects, this one should be no problem!
I would say the most difficult part of this pattern is the decreasing for the neck and armholes. It is straightforward but might be confusing for absolute beginners. Check out the video tutorial for more tips!
Sizing
This pattern makes an x-small crochet mesh vest. The italicized notes within the pattern let you know when and what to adjust to get a different size.

Project Overview


Choosing Yarn & Hook Size
You can use almost any yarn to make this tie-front vest. Keep in mind that the pattern is written for medium weight yarn, so use that if you plan to follow along!
Since this crochet vest uses a mesh stitch, the hook size does not matter much because it will almost always drape well! Use the recommended hook size on your yarn label or choose one that’s most comfortable for you.

Other Projects You Might Like


Crochet Mesh Vest Video Tutorial
Become a member to get early access to new videos!
You can follow along with my YouTube video to make your own crochet mesh vest! I have timestamps included to section the video and help you jump to any point you need to!
This post may contain affiliate links. I may earn a small commission on qualifying purchases at no additional cost to you!
Materials
- 210 grams of medium weight yarn (Soft & Simple in “Beige”)
- 5mm Clover Amour crochet hook
- Scissors
- Yarn needle
- Stitch markers
- Yarn bowl (optional)

Dimensions
Overall: 33 centimeters wide x 37 centimeters long (13 x 14.6 inches)
Armhole Height: 16 centimeters (6.3 inches)
Straps: 22 centimeters long (8.7 inches)
Gauge
9 rows of 10 spaces (including double crochets on either side) makes a 10 x 10 centimeter square
Notes and Tips
- This pattern is written using US crochet terms
- Do your first row under the top and back loop of each chain or under the back bump to keep it from curling
- The chain 3 at the beginning of each row counts as a double crochet and chain 1
- We will NOT be working into the chain-1-spaces
- The last stitch of each row goes in the middle chain of the chain 3 from the start of the row before
- The chain 2 at the beginning of each decrease row does NOT count as a stitch
- The ends of the body panel will end up being the front flaps of the vest
- If you don’t have stitch markers, bobby pins and safety pins work, too!
Abbreviations
ch = chain
ch1-sp = chain-space
dc = double crochet
dec = decrease (dc2tog)
rep = repeat
sk = skip
sl st = slip stitch
sp = space
st = stitch
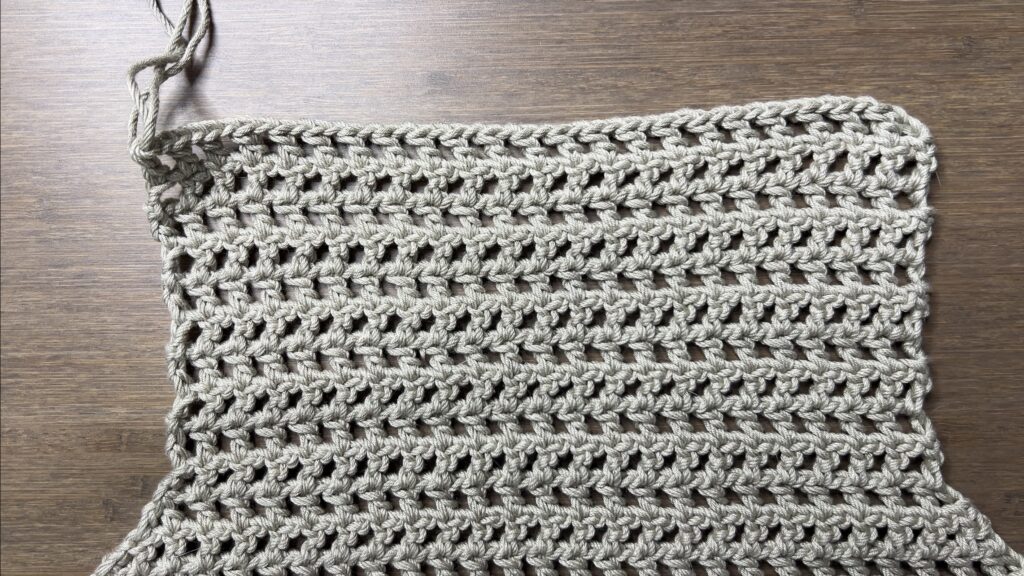
Body
Foundation: Make a slipknot, ch132
Note: Chain until it can wrap around your bust. Your number of chains must be a multiple of 8, plus 4.
Row 1: dc in 6th ch from hook, rep[ch1, sk1, dc] across (64 sp)
Work under the top AND back loop of each chain or under the back bump to keep the first row from curling. View the video tutorial to see how.

Row 2-20: ch3, turn, dc in next st, rep[ch1, dc in next st] across (64 sp)
The last dc of each row will go in the 2nd ch down of the turning chain from the row before.
Note: Adding rows builds the height of the vest from the very bottom to the bottom of the armholes. Do fewer rows to make it shorter or more rows to make it longer.


Dimensions: 21.5cm tall
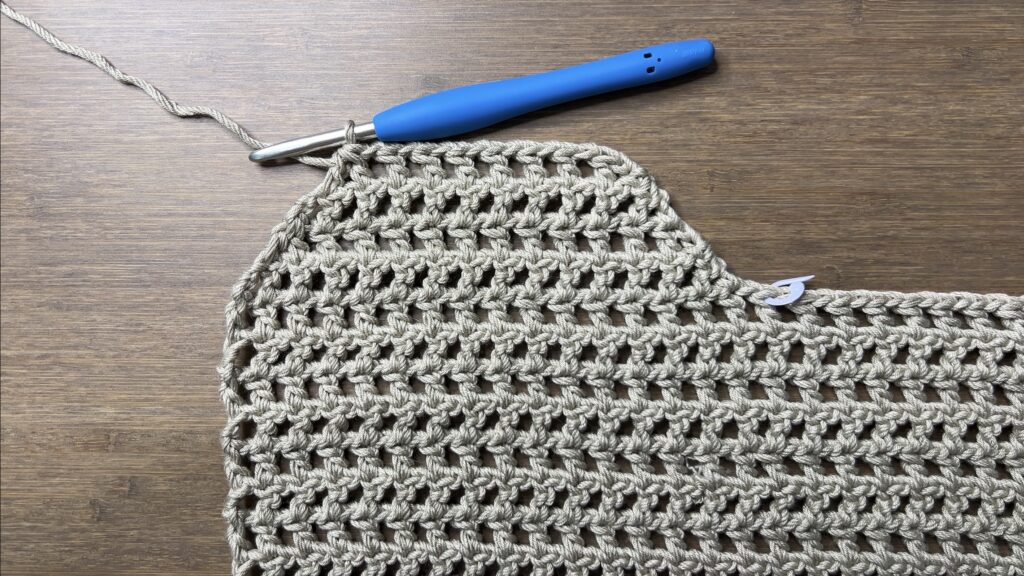
Divide the front panels from the back panel by marking the stitch after the 16th ch1-sp on either end. There are 64 total spaces in a row. Divide it into 16, 32, and 16 spaces.
Note: If you started with a different number of chains, take that number, subtract 4, then divide by 8. Mark the stitch after that many ch1-sp on either end.

Front Panels
Row 1: ch2, turn, dc in next st, rep[ch1, dc in next st] until 2 st before st marker, dec (13 sp)
The ch2 at the start of these decrease rows does NOT count as a st.
Rows 2-4: ch2, turn, dc in next st, rep[ch1, dc in next st] until 2 st left, dec (11, 9, 7 sp)
Note: The length from the side of the last row to the stitch marker will be half the size of the armhole. For a smaller armhole, do fewer rows. For a larger armhole, do more rows. Do an even number of rows or you will have to switch rows 5 and 6.
Now, the armhole is large enough, so we will stop decreasing on the side with our stitch marker. To continue the v-neck at the front of the vest, we will continue decreasing along the edge without the st marker.
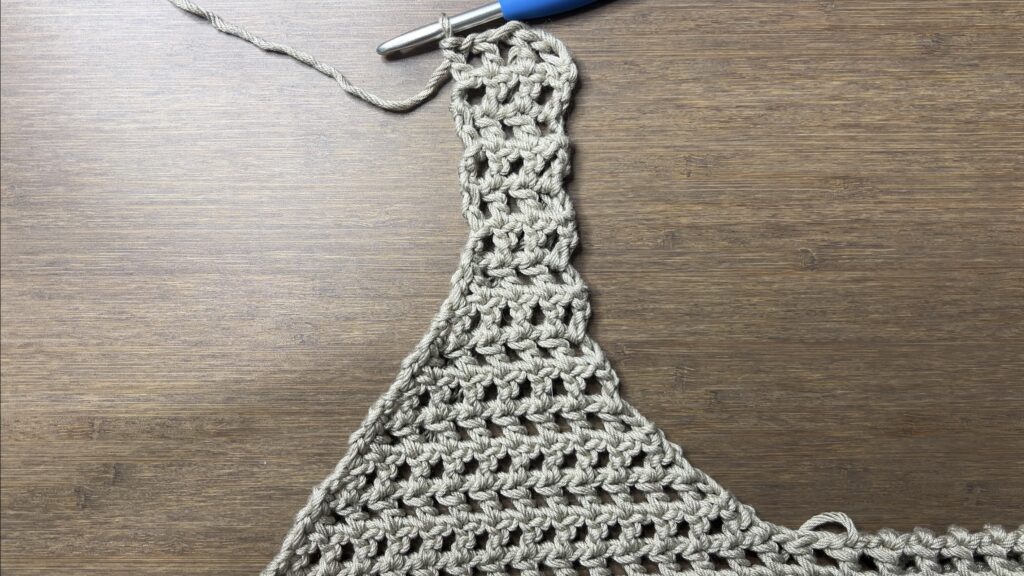
Row 5: ch2, turn, dc in next st, rep[ch1, dc in next st] across (6 sp)
Row 6: ch3, turn, dc in next st, rep[ch1, dc in next st] until 2 st left, dec (5 sp)
The ch3 from Row 6 counts as a stitch because we are no longer decreasing on the side with the armhole. Make sure your last stitch of Row 7 goes in the 2nd chain down of this ch3.
Rows 7-8: rep[Row 5, Row 6] (4, 3 sp)
Note: For a wider shoulder strap, do fewer rows. For a less wide strap, do more rows of alternating Rows 5 and 6.
Now that the strap will be too small if we continue decreasing, we will stop and make straight rows to complete the height of the vest.

Rows 9-14: ch3, turn, dc in next st, rep[ch1, dc in next st] across (3 sp)
Notes: For higher armholes/shorter vest, do fewer rows. For lower armholes/longer vest, do more rows.
Fasten off with a long enough loose end to sew the top of the front panel to the top of the back panel.
The other panel will be worked on the other end of the body panel. It will be the same, just mirrored. Flip your work so the first front panel is on the right end. Attach your yarn to the stitch to the left of the other stitch marker.
Note: If you did a different number of rows, make sure to do the same number of rows for your second front panel.
Row 1: ch2, dc in next st, rep[ch1, dc in next st] until 2 st before st marker, dec (13 sp)
Rows 2-4: ch2, turn, dc in next st, rep[ch1, dc in next st] until 2 st left, dec (11, 9, 7 sp)
Row 5: ch3, turn, dc in next st, rep[ch1, dc in next st] until 2 st left, dec (6 sp)
Row 6: ch2, turn, dc in next st, rep[ch1, dc in next st] across (5 sp)
Rows 7-8: rep[Row 5, Row 6] (4, 3 sp)
Rows 9-14: ch3, turn, dc in next st, rep[ch1, dc in next st] across (3 sp)
When you fold the entire panel in half, the front panels should line up.
Fasten off with a long enough loose end to sew the top of the front panel to the top of the back panel.
Back Panel
Flip your work so the first front panel is on the right end. Attach your yarn to the stitch to the left of the stitch marker on the right.
Row 1: ch2, dc in next st, rep[ch1, dc in next st] until 2 st before st marker, dec (28 sp)
Rows 2-4: ch2, turn, dc in next st, rep[ch1, dc in next st] until 2 st left, dec (26, 24, 22 sp)
Note: If you did a different number of rows for decreasing at the armholes, do that same number of rows.
Rows 5-14: ch3, turn, dc in next st, rep[ch1, dc in next st] across (22 sp)
Note: If you did a different number of rows for the front panels, make sure your back panel has the same number of rows.
Fasten off.

Assembly
Now, your project should look something like this.

Fold the front panels in to lay on top of the back panel. With the loose ends we left on the front panels, sew the tops of the shoulders together with the whip stitch or whichever method you prefer.

Ties
Attach your yarn to the side of the first row of decreases on one of the front panels.
ch40, fasten off
Note: For shorter ties, do fewer chains. For longer ties, do more chains.
Repeat on the other front panel.

Finished Crochet Mesh Vest
Weave in your loose ends and your crochet mesh vest is finished!


One Comment