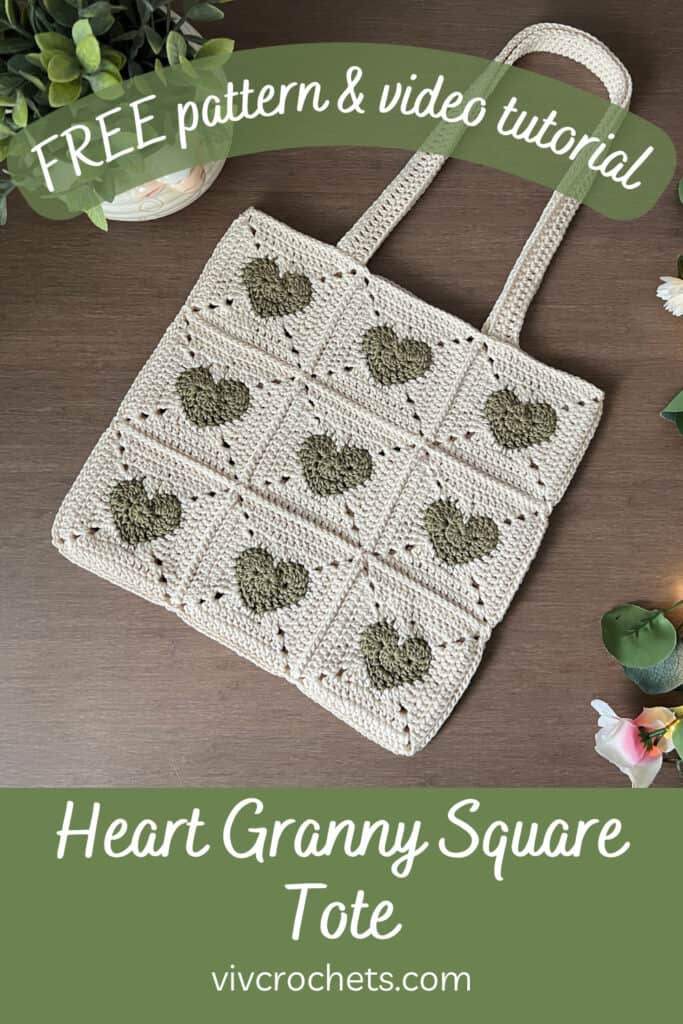
Heart Granny Square Tote Bag | Free Pattern & Tutorial
Scroll down for the free crochet heart tote pattern and video tutorial or purchase an ad-free, printable PDF file!
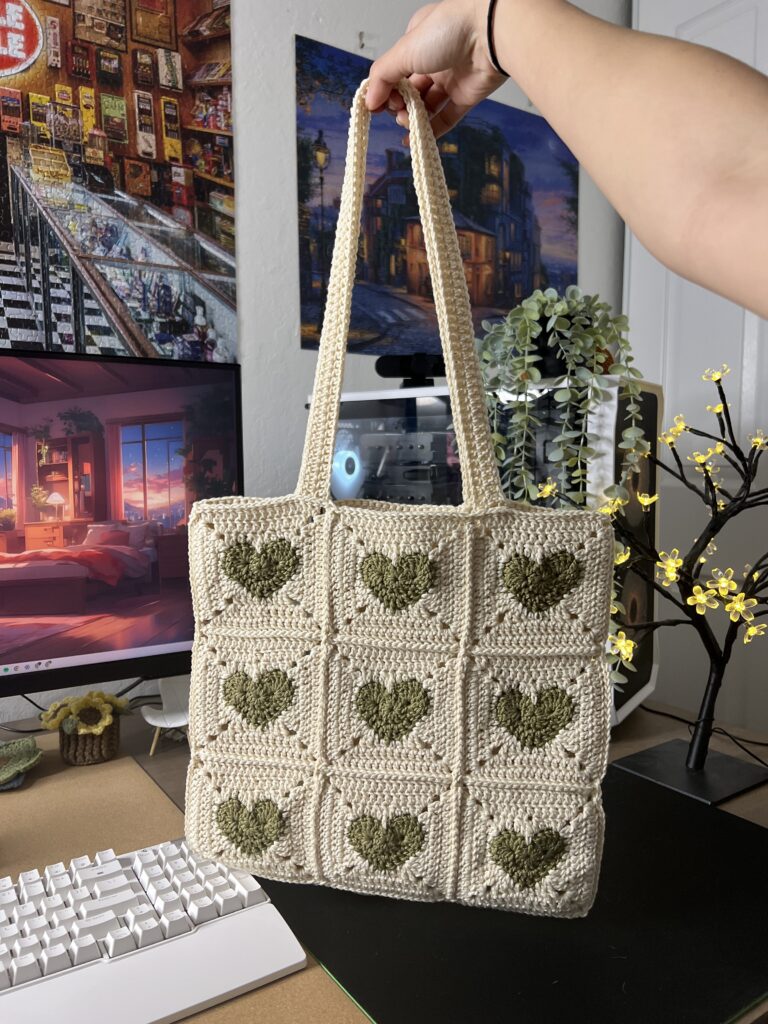
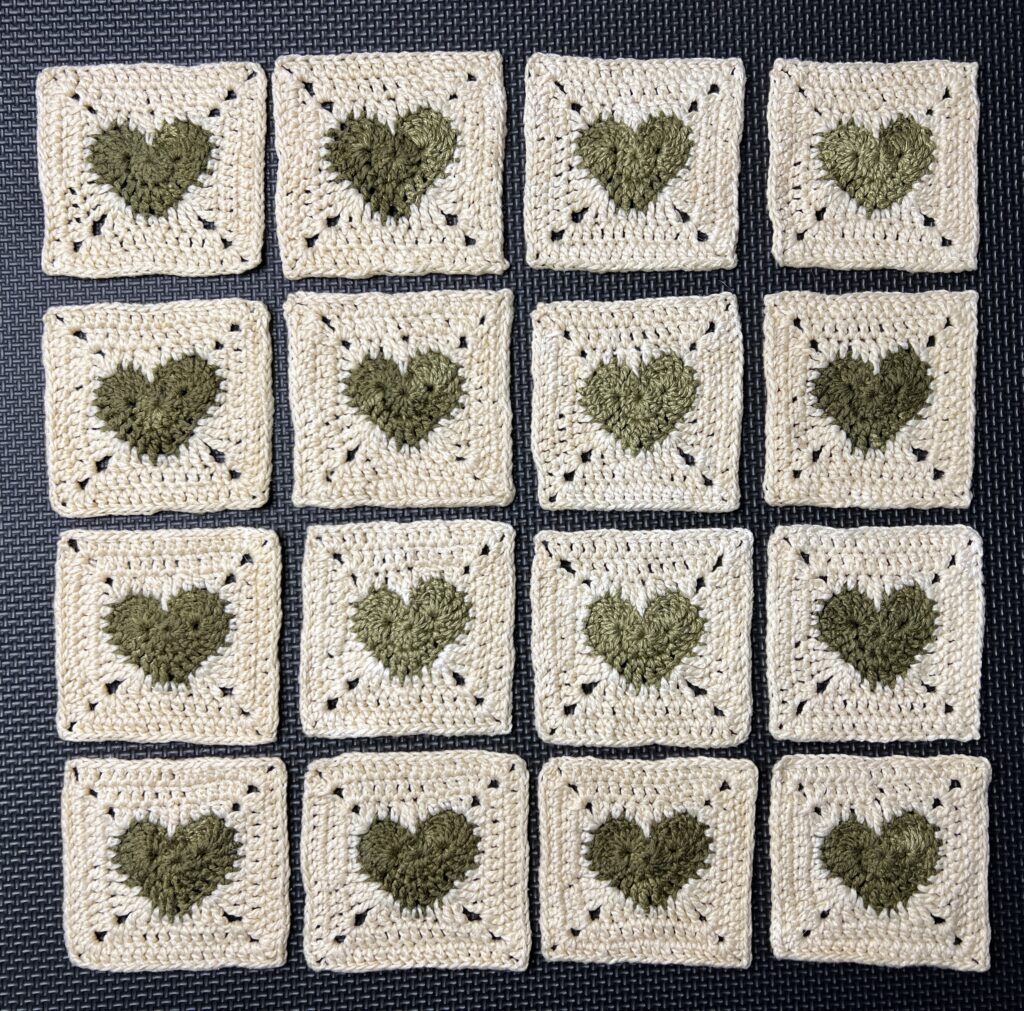
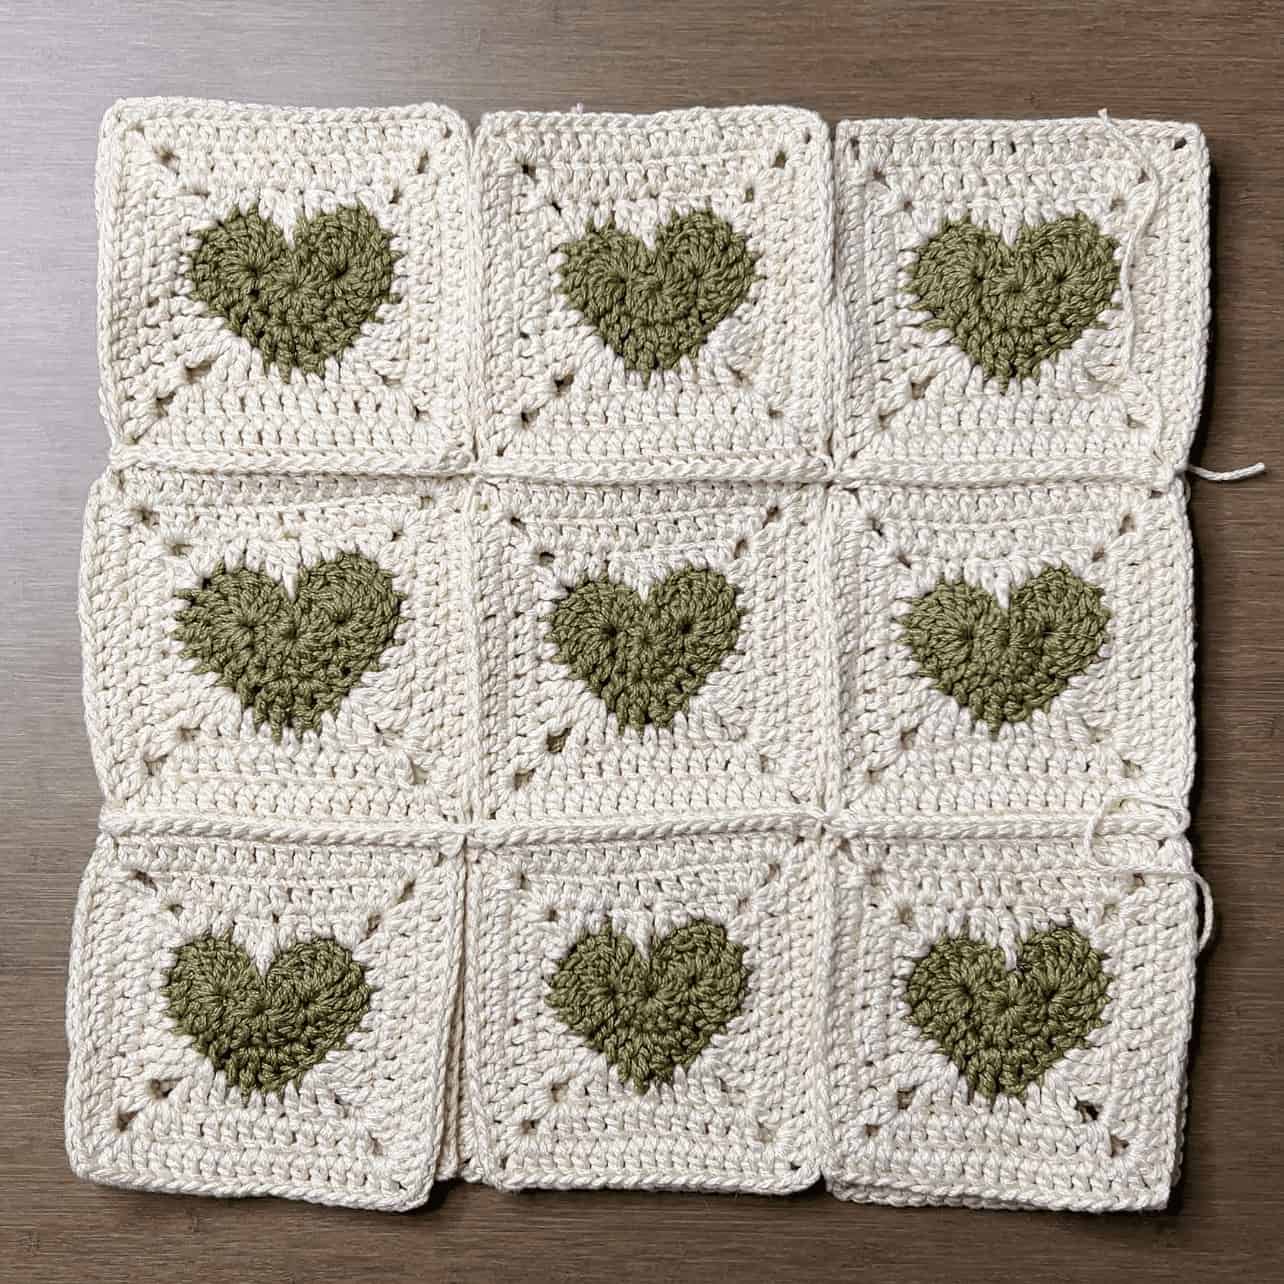
Crochet a super cute heart granny square tote with this free pattern! This crochet bag uses a previous pattern of mine for the heart granny squares. It has a total of 18 squares (9 per side) and they are stitched together rather than sewn. The straps are reinforced to prevent stretching and are also stitched to the bag. For an interactive, ad-free pattern, visit my Ribblr shop!

Heart Granny Square
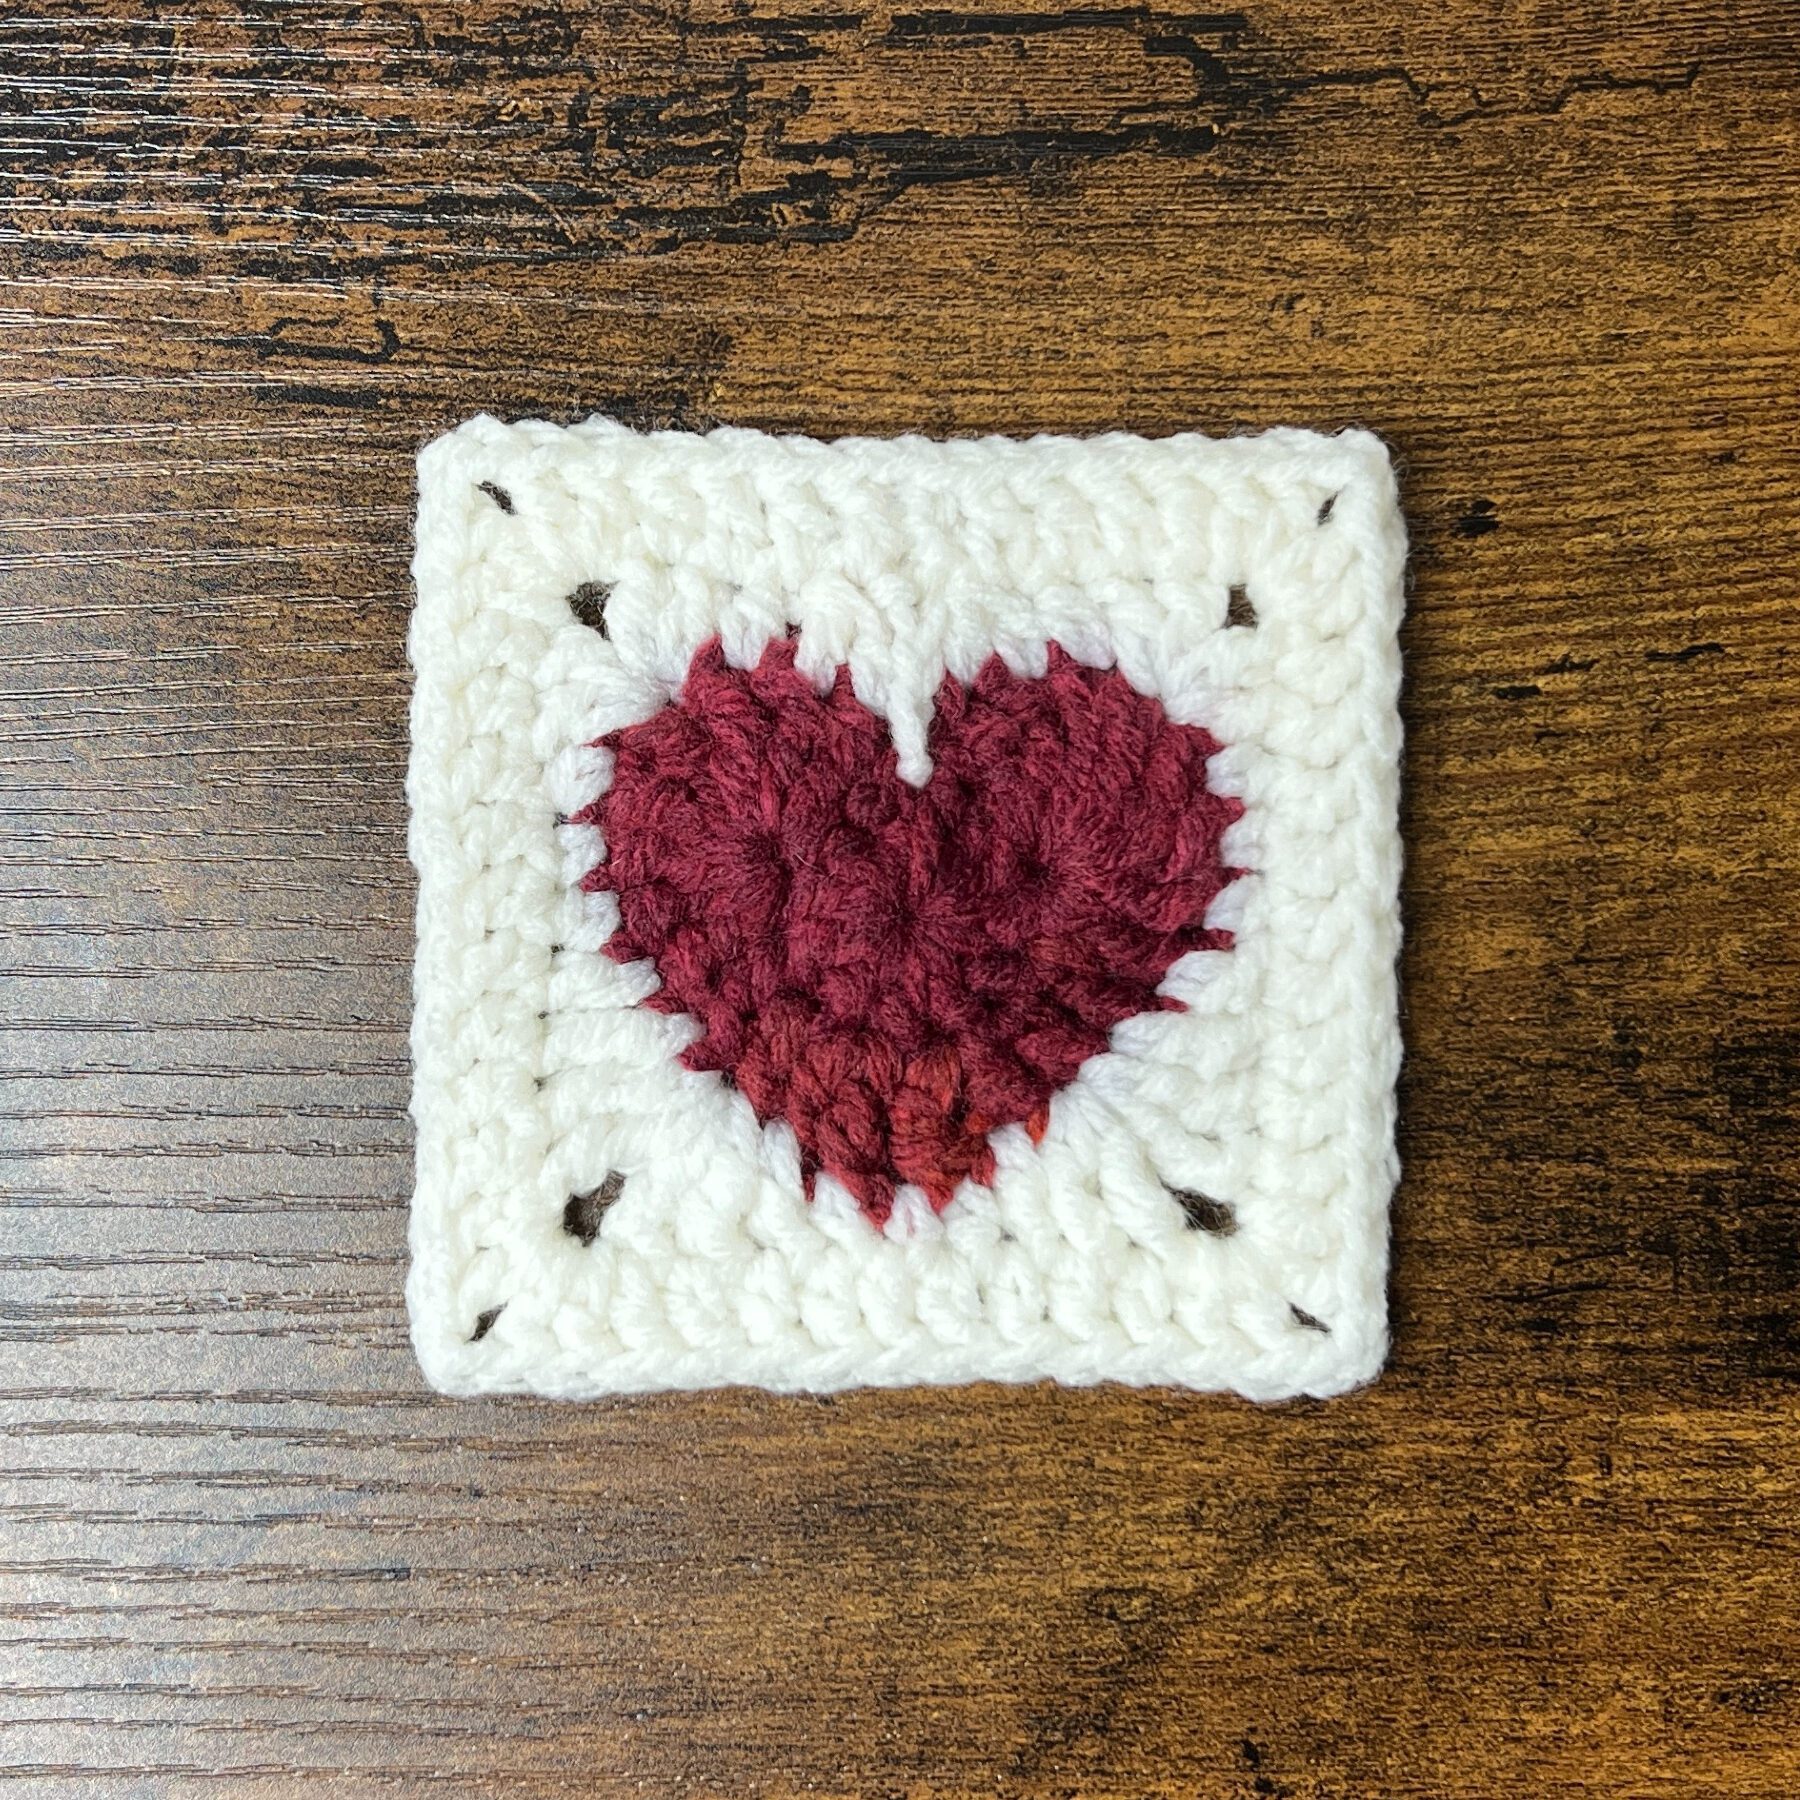

The heart granny square used in this pattern is the same as the one I made a few months back. I also have another pattern where I turned it into a heart pouch. It is also super cute and much smaller and quicker to make than this pattern, so consider it if you’re looking for an easier project!
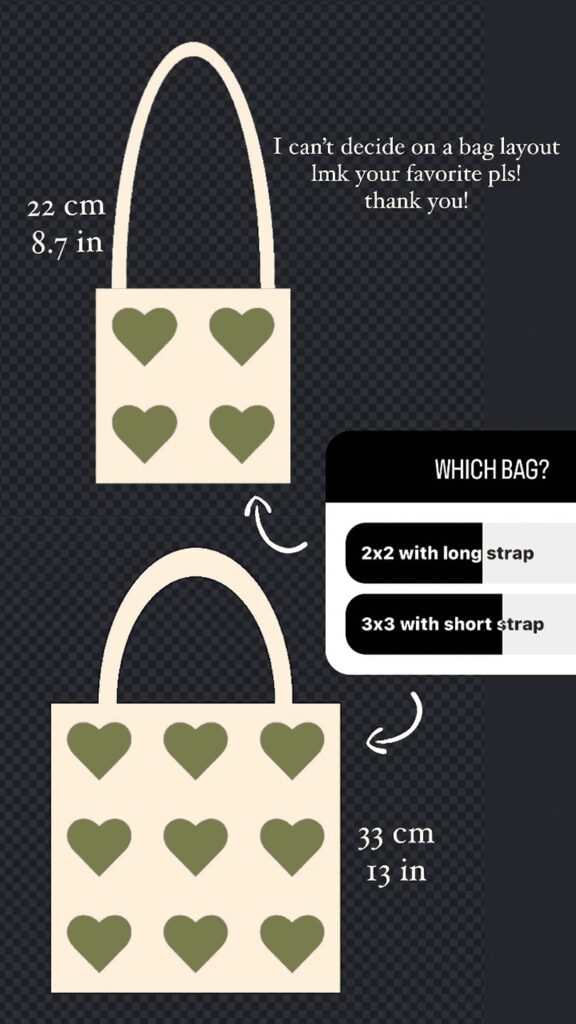
Heart Squares Arrangement Ideas


I had some ideas for how I wanted to bag to look, and I narrowed it down to the third and fifth option. In the end, I couldn’t decide, so I left it up to my Instagram followers. I set up a poll in my Instagram story and the majority voted for #3. If you want to participate in future polls and decision-making on my channel, follow my instagram to stay updated!
This post may contain affiliate links. I may earn a small commission on qualifying purchases at no additional cost to you!
Blocking Granny Squares
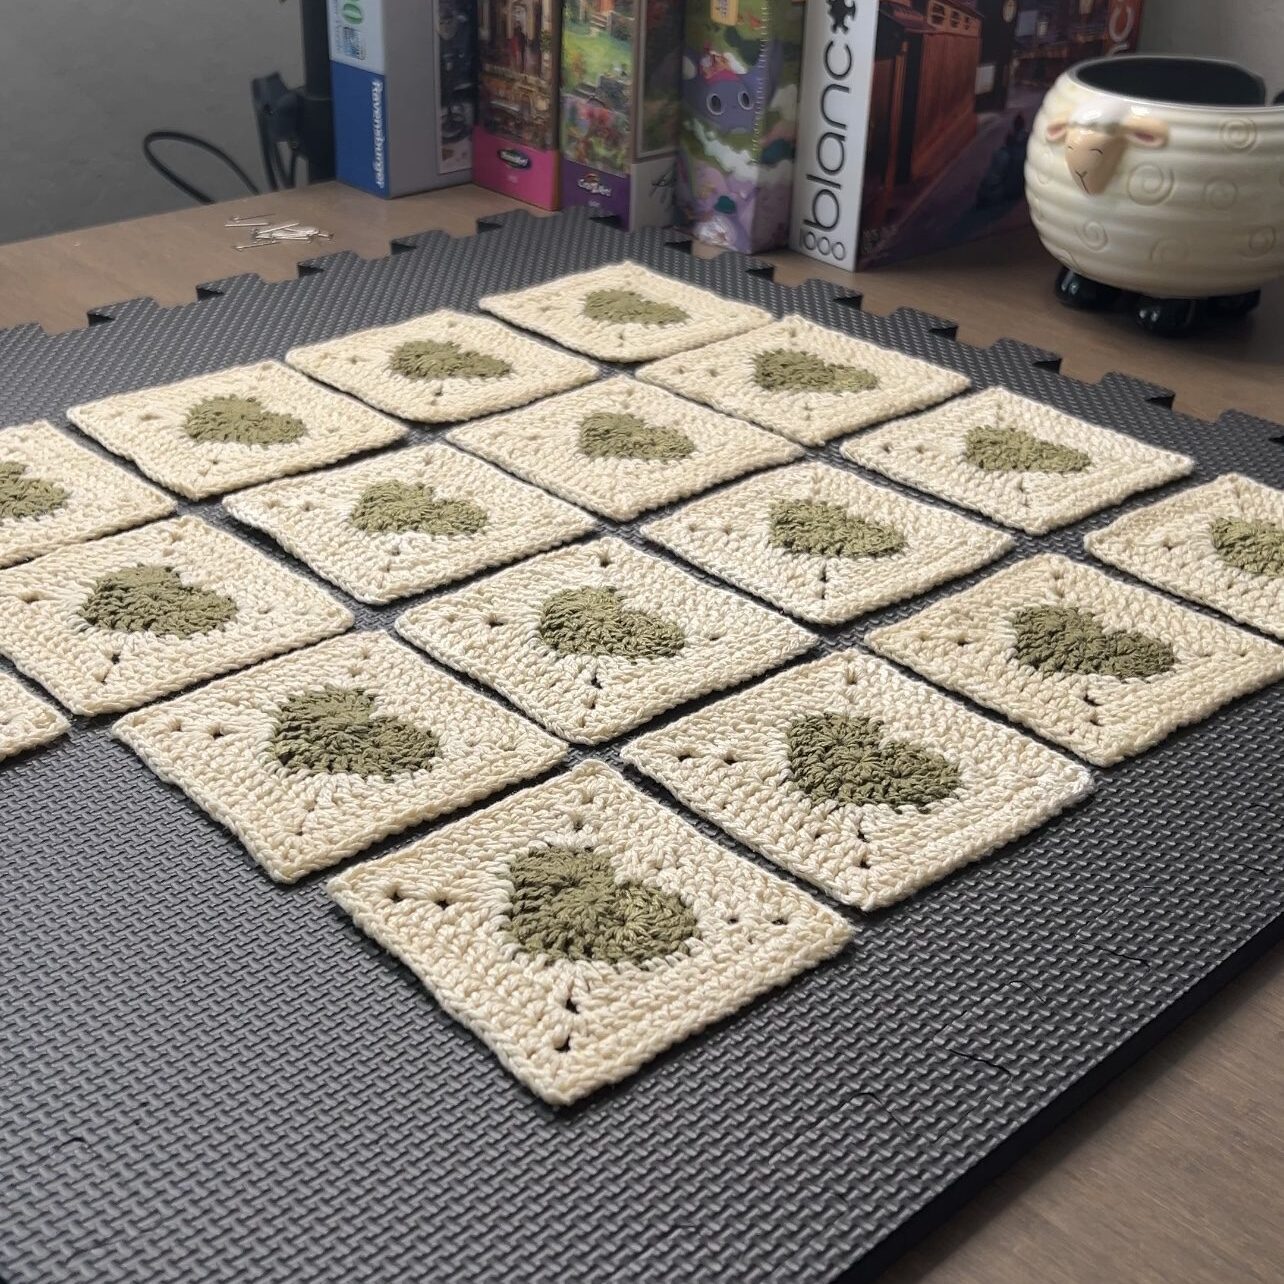
I blocked my granny squares before stitching them together, but it’s not definitely not required. I did like that it flattened the edges if they curled up and it made the bag look neater overall. I used interlocking foam boards with T pins. I actually ended up not using the pins, but if you want super square squares, then I would recommend using them.
Joining Granny Squares (Stitching vs Sewing)
There are many different ways you can join the granny squares. The two main options are stitching and sewing and each have their different methods. I prefer stitching because I feel like it’s more uniform than sewing and you don’t have to estimate how much yarn you need.
The stitching done in this pattern and tutorial is slip stitching with the outer loops. By “outer loops,” I mean when you’re joining two squares and they’re back-to-back, the outer loops are the front loop of the closer square and the back loop of the further square.

If you prefer sewing, I would recommend the whip stitch or the mattress stitch. The whip stitch is easiest, in my opinion, while the mattress stitch is a little more difficult, but gives a really clean and flat look.
Pin this for later!
Patterns You Might Like

Video Tutorial
You can follow along with my YouTube video to crochet a heart granny square tote! I have timestamps included to section the video and help you jump to any point you need to!
Materials
- 186 grams of medium weight cotton yarn (Lion Brand 24/7 Cotton in “Ecru“)
- 54 grams of medium weight cotton yarn (Lion Brand 24/7 Cotton in “Bay Leaf“)
- 4mm Clover Amour crochet hook
- Scissors
- Yarn needle
- Blocking board & T-pins (optional)

Dimensions
Each square: 10.5 centimeters wide x 10.5 centimeters long (4.13 x 4.13 inches)
Bag (excluding straps): 31.5 centimeters wide x 30 centimeters tall (12.4 x 11.81 inches)
Straps: 2.5 centimeters wide x 60 centimeters long (0.98 x 23.62 inches)
Gauge
11 rows of 19 double crochets makes a 10 x 10 centimeter square
Notes and Tips
- This pattern is written using US crochet terms
- The chain 3 at the beginning of each round DOES count as a double crochet
- Leave yarn attached to use for stitching to reduce number of loose ends
Abbreviations
ch = chain
ch-sp = chain-space
ch1-sp = chain-1-space (the space created by chaining 1)
ch2-sp = chain-2-space
dc = double crochet
dc2tog = double crochet 2 stitches together (a decrease)
hdc = half double crochet
rep = repeat
sc = single crochet
sk = skip
sl st = slip stitch
st = stitch
tr = treble crochet
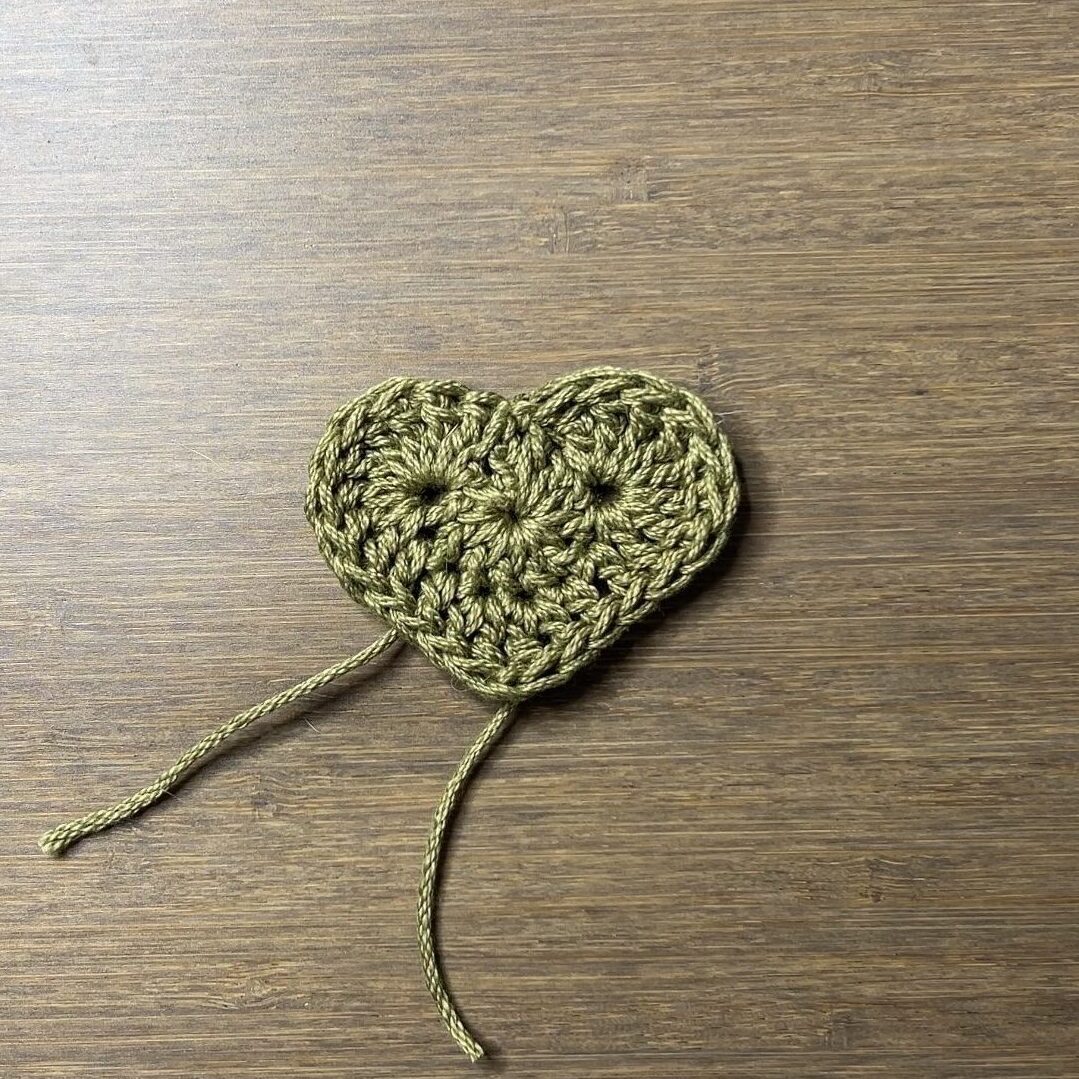
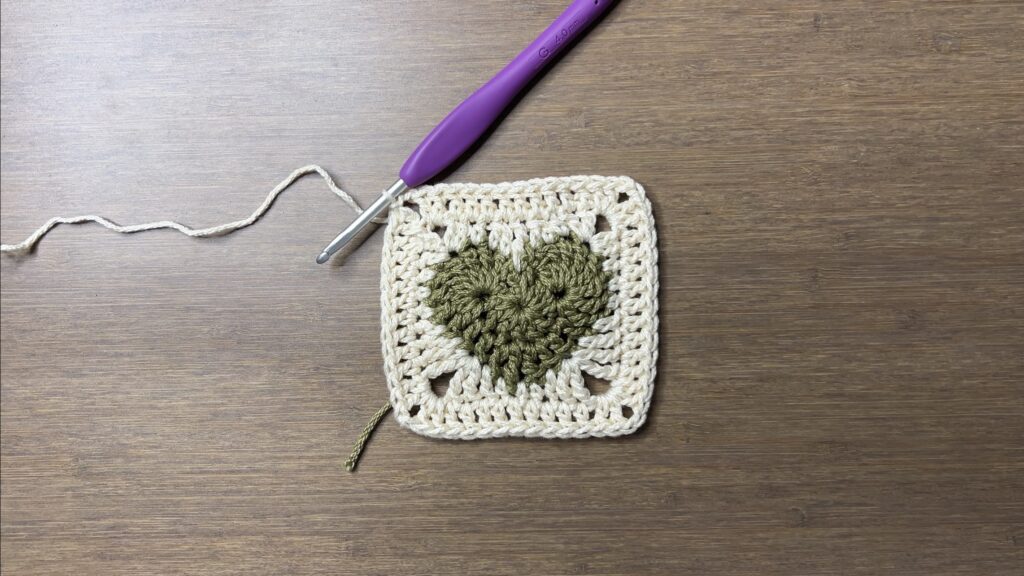
Heart Granny Square
Foundation
With your heart color yarn, you can either make a magic circle or (make a slipknot, ch4, and sl st to 1st ch to form a loop). I prefer the latter because it feels stronger.
If you have trouble with doing all the stitches in the ring for round 1, try chaining 5 instead.
Heart
Round 1: ch3, dc11 into ring, sl st to top of ch3 (12)
The ch3 counts as the first stitch.
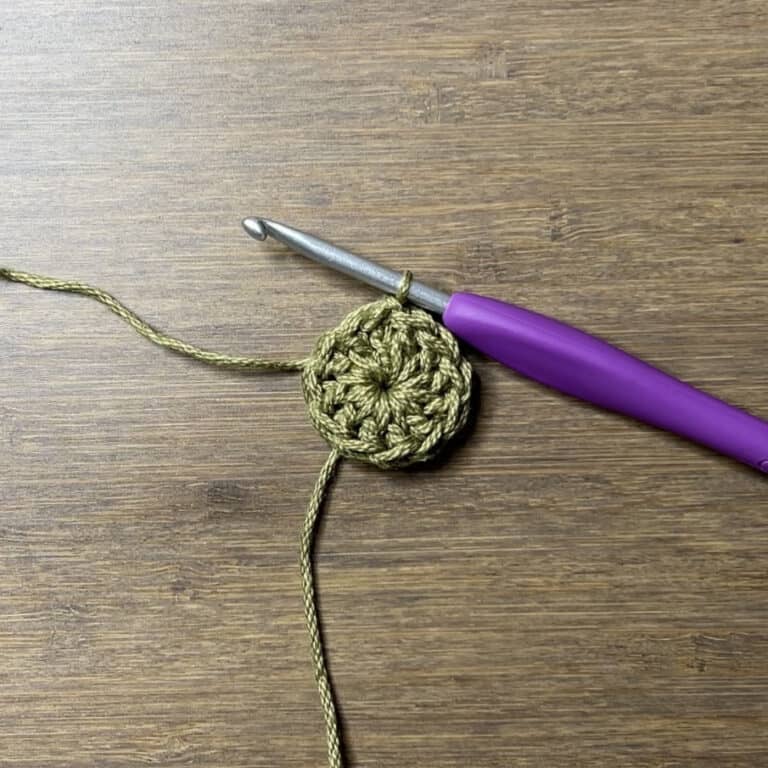
Round 2: sk2, tr8 into third st, dc in each of next 2 st, [dc, tr] in next st, ch1, [tr, dc] in next st, dc in each of next 2 st, tr8 into next st, sl st between first and last st of round 1 (24 st, ch1 at bottom point)
Note: The bolded ch1 marks the point at the bottom of the heart. The stitches are mirrored on either side of this ch1.
Fasten off.
Forming Square Around Heart
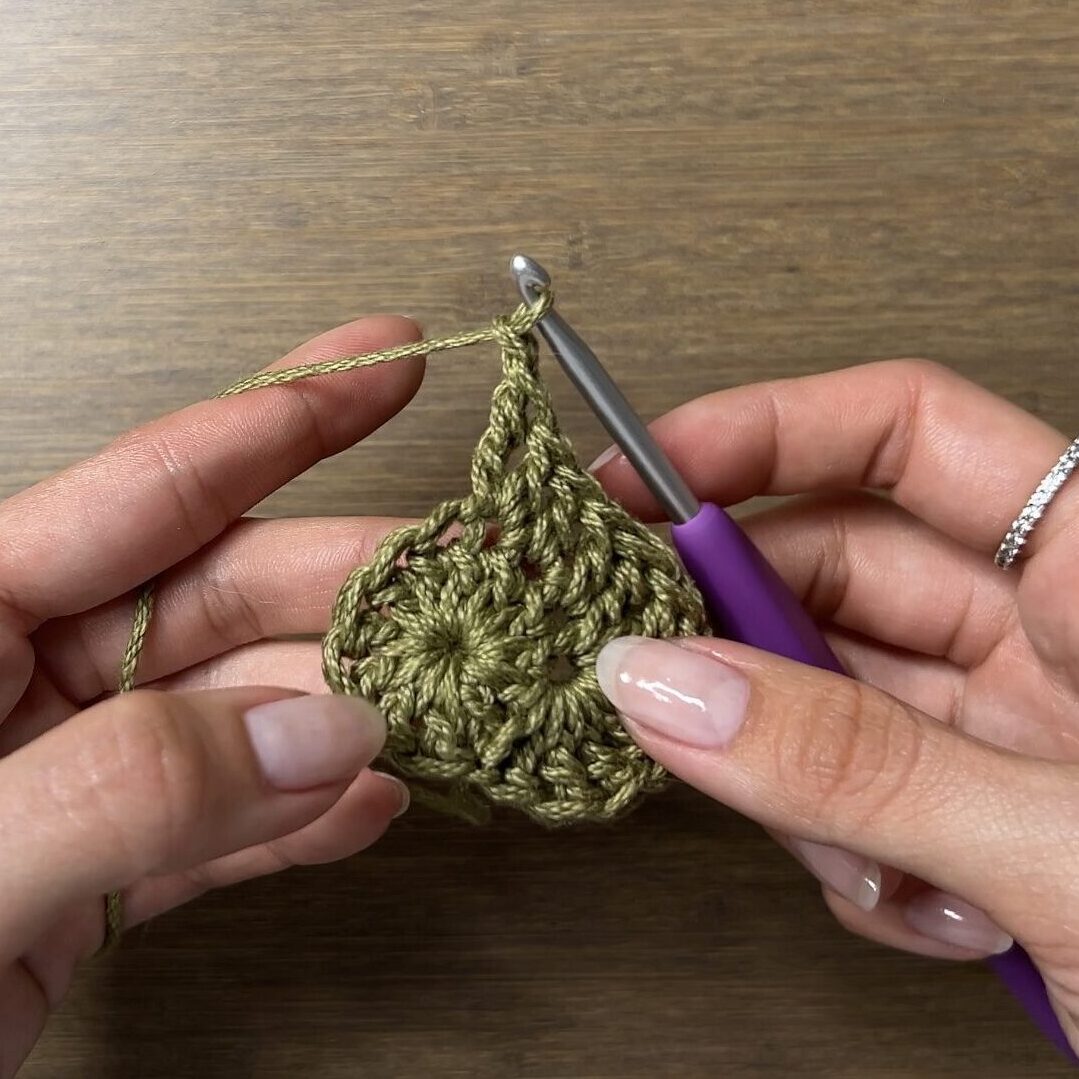
Attach your square color yarn to the fourth tr you made in round 2. This is the top left corner of the square. If you want, you can attach the yarn to the top center and start at the treble crochet. I just prefer one of the corners, so we can stitch across 1 whole side of the square right after completing it.
Round 3: ch3, dc in same st, hdc, sc, hdc, dc, tr, [tr2, ch2, tr2] in next st, dc, hdc, sc in ch1-sp, hdc, dc, [tr2, ch2, tr2] in next st, tr, dc, hdc, sc, hdc, [dc2, ch2, dc2] in next st, hdc, dc2tog, tr between first and last st of round 1, dc2tog, hdc, [dc2, ch2] in next st, sl st (9 st on each side of square, ch2 in each corner)
Note: The bolded sc marks the point at the bottom of the heart. The stitches are mirrored on either side of this sc.
Another note: The “ch3, dc in same st” in the very beginning of round 3 creates only part of the top left corner. The first 3 groups of stitches in parentheses in round 3 are the other corners and the last group of stitches complete the top left corner.
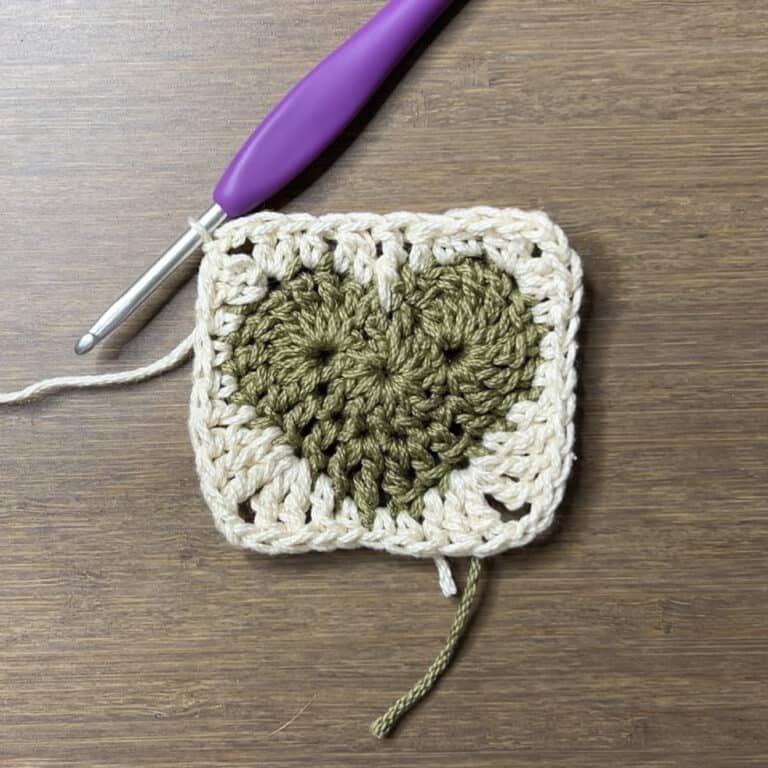
Round 4: ch3, dc in ch2-sp below, *dc in each of next 9 st, [dc2, ch2, dc2] in ch2-sp,* rep between ** 3 more times, but only [dc2, ch2] in last ch2-sp, sl st (13 st on each side of square, ch2 in each corner)
Measure the square and multiply it by 3. If you’re happy with the size the bag will be, skip to the assembly portion. If you want it to be bigger, add round 5.
Round 5: ch3, dc in ch2-sp below, *dc in each of next 13 st, [dc2, ch2, dc2] in ch2-sp,* rep between ** 3 more times, but only [dc2, ch2] in last ch2-sp, sl st (17 st on each side of square, ch2 in each corner)
Fasten off and now you have a crochet heart granny square!
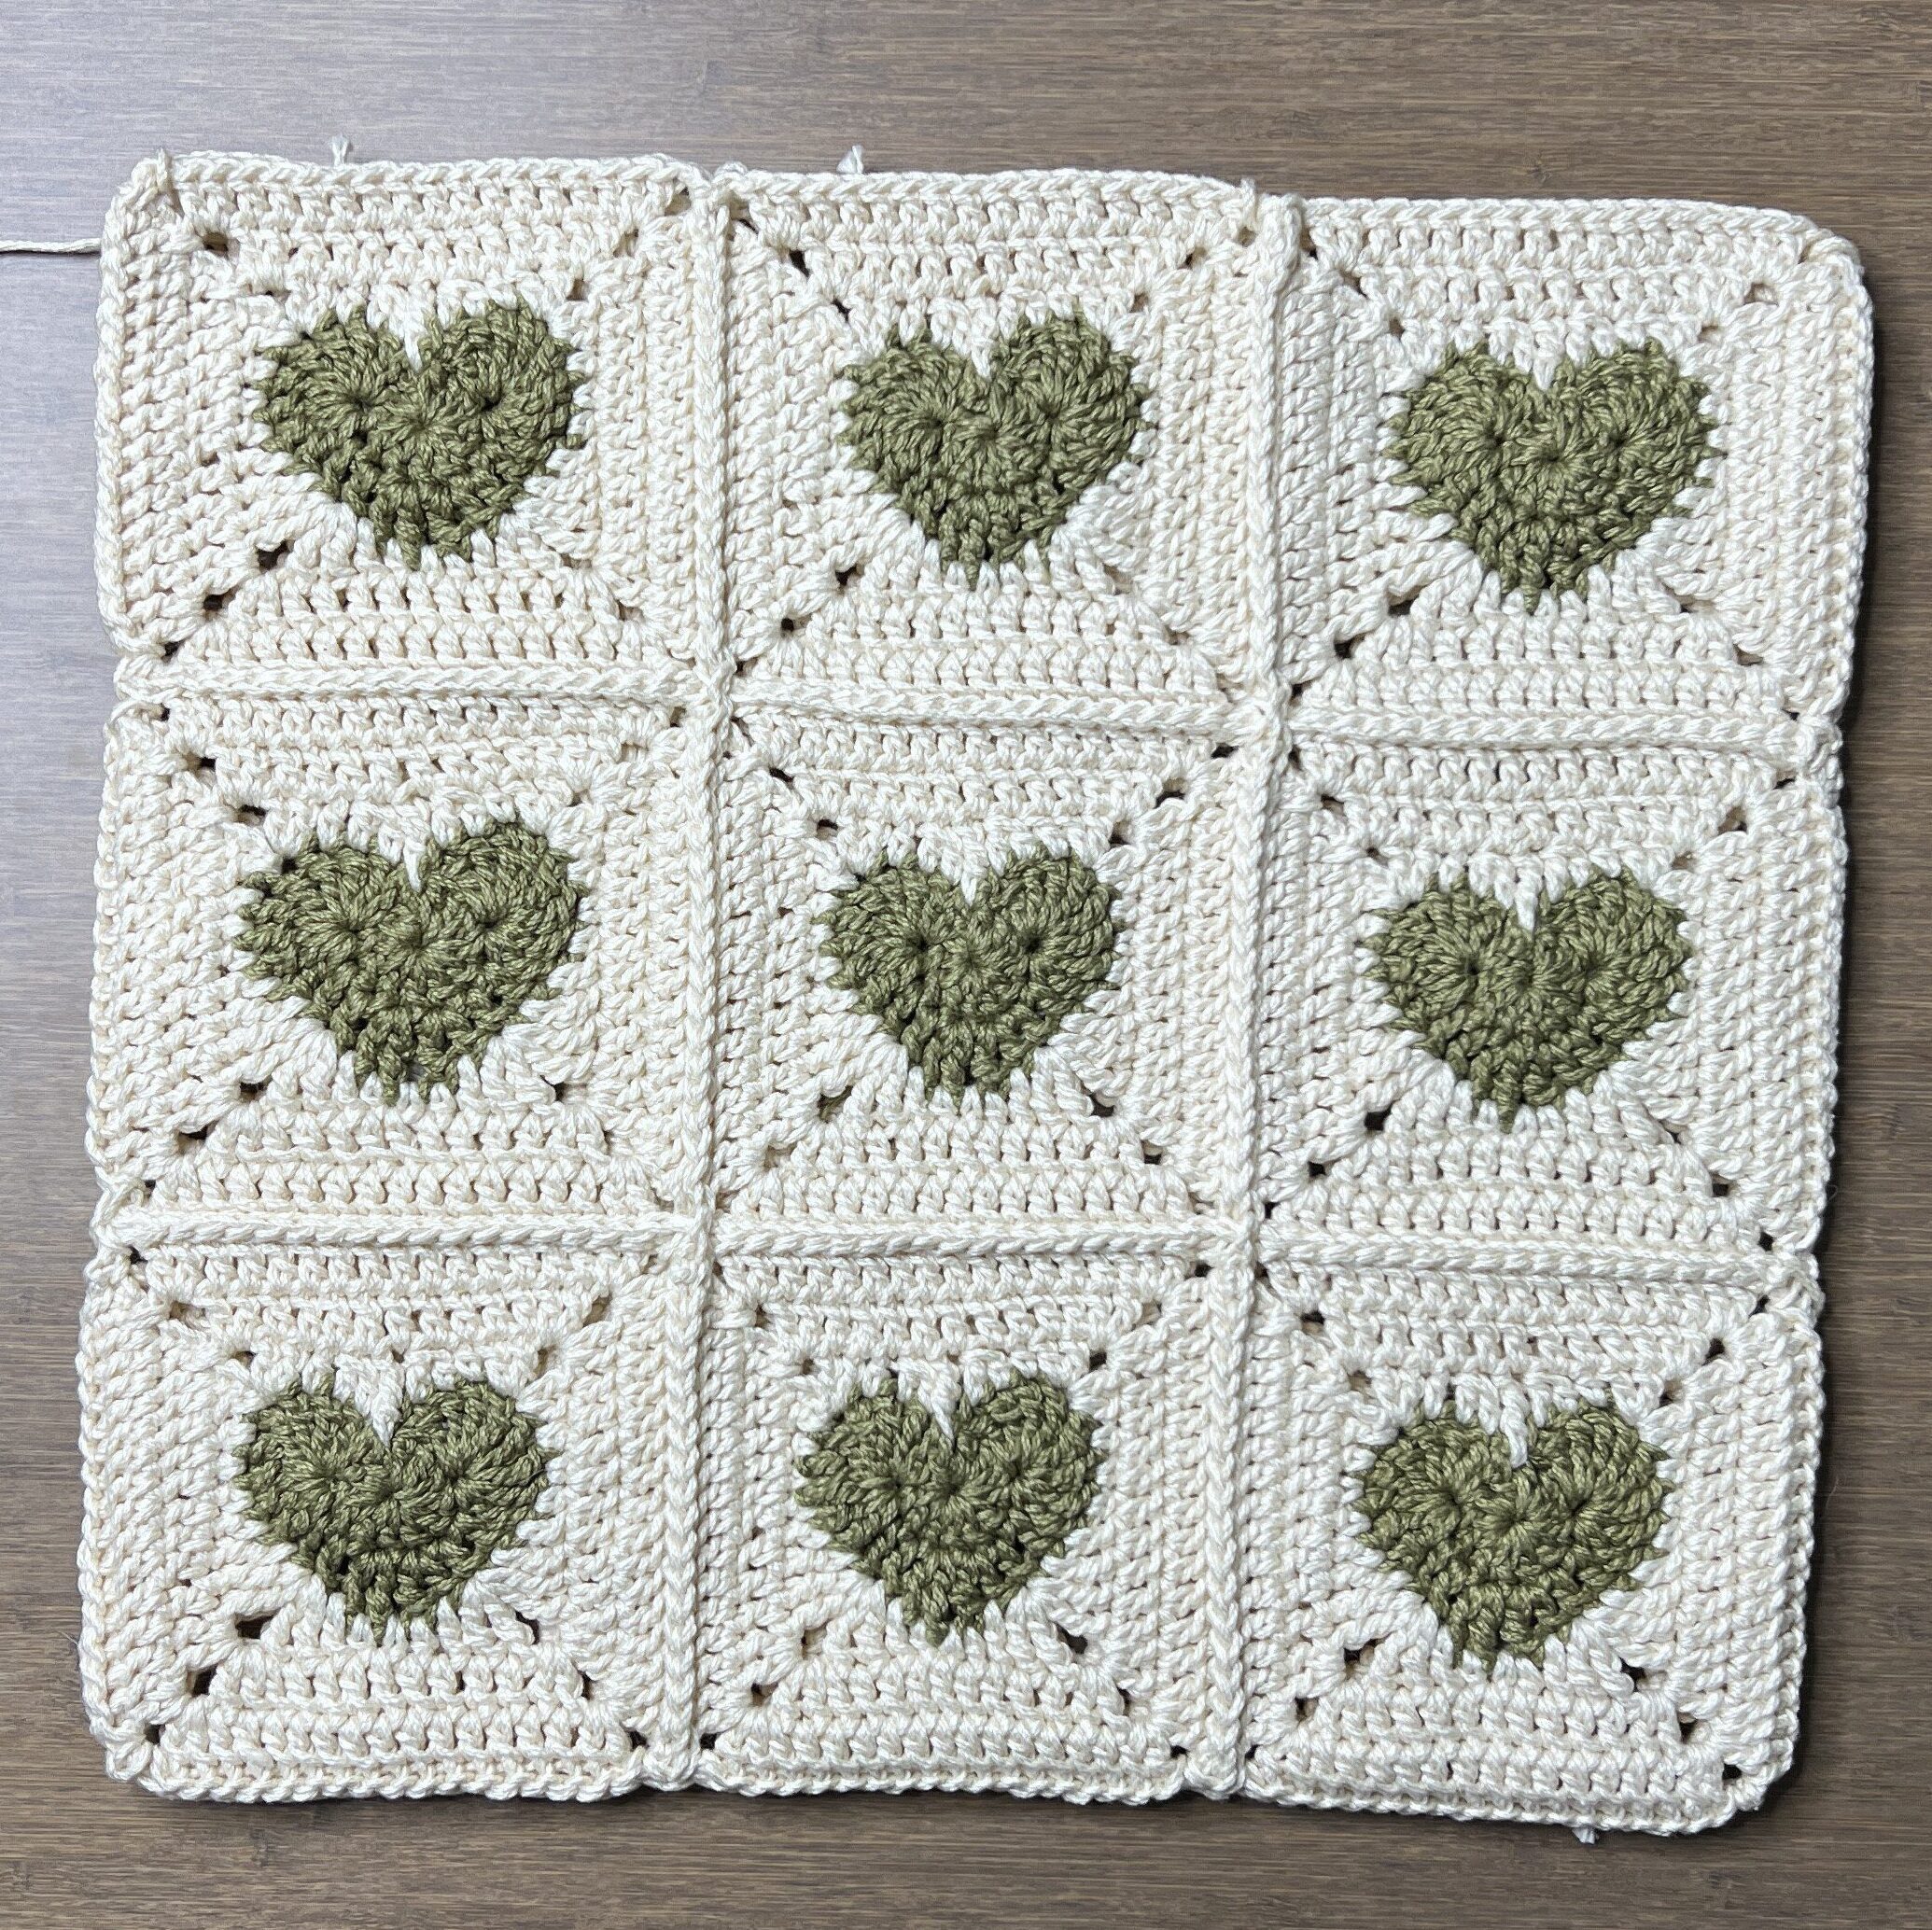
Make 17 more of these squares for a total of 18 heart granny squares, but do not fasten off on the last one. We will use the attach yarn to stitch the squares together.
If you want, block your squares to flatten them and make them more uniform. For cotton yarn, you can wet block. Wet them, squeeze out the excess water, then flatten and shape them. You can use pins to make them perfectly square.
Assembly
Feel free to use whichever joining method you prefer! I will be showing how to slip stitch them together.
Notes
There are two main notes to remember while stitching the squares together:
- Start and end with a slip stitch in the chain space on either end of the square
- Chain 1 in between each set of squares to prevent bunching at the seam
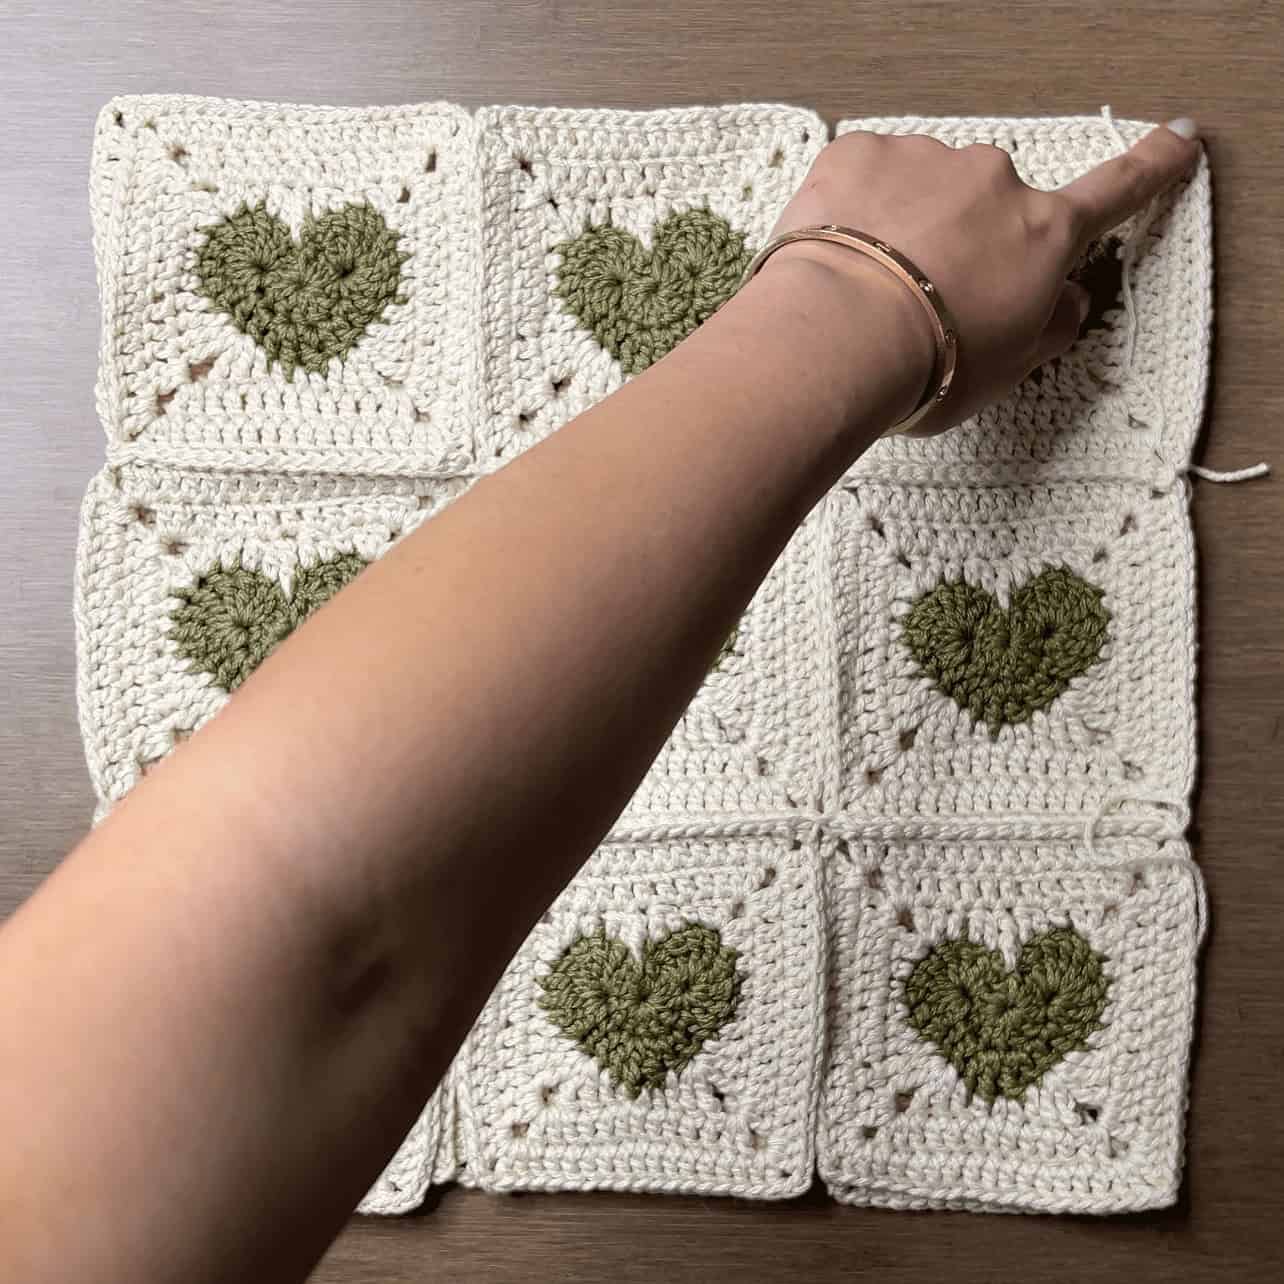
Place the last heart granny square you made (with attached yarn) with the right side (RS) facing up and the heart upside-down. Place another square directly above it with the same orientation (RS up, heart upside-down). Your hook should be in the middle, on the right side, so we can work right-to-left.
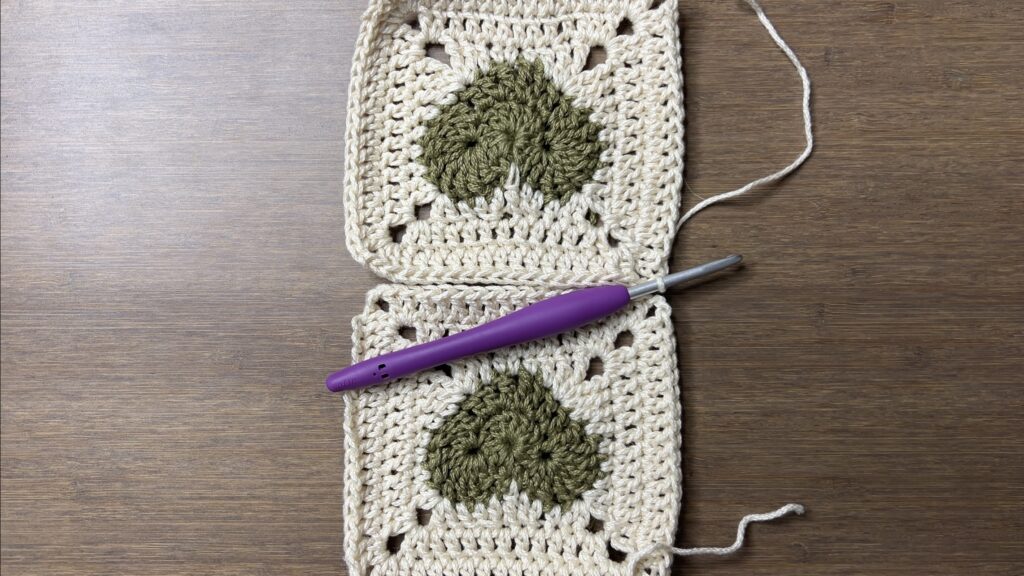
Stitching: ch1, sl st through both ch2-sp, sl st through outer loops of each st on both squares, sl st through both ch2-sp

Grab two more squares and put them to the left of your two squares with the hearts upside-down.
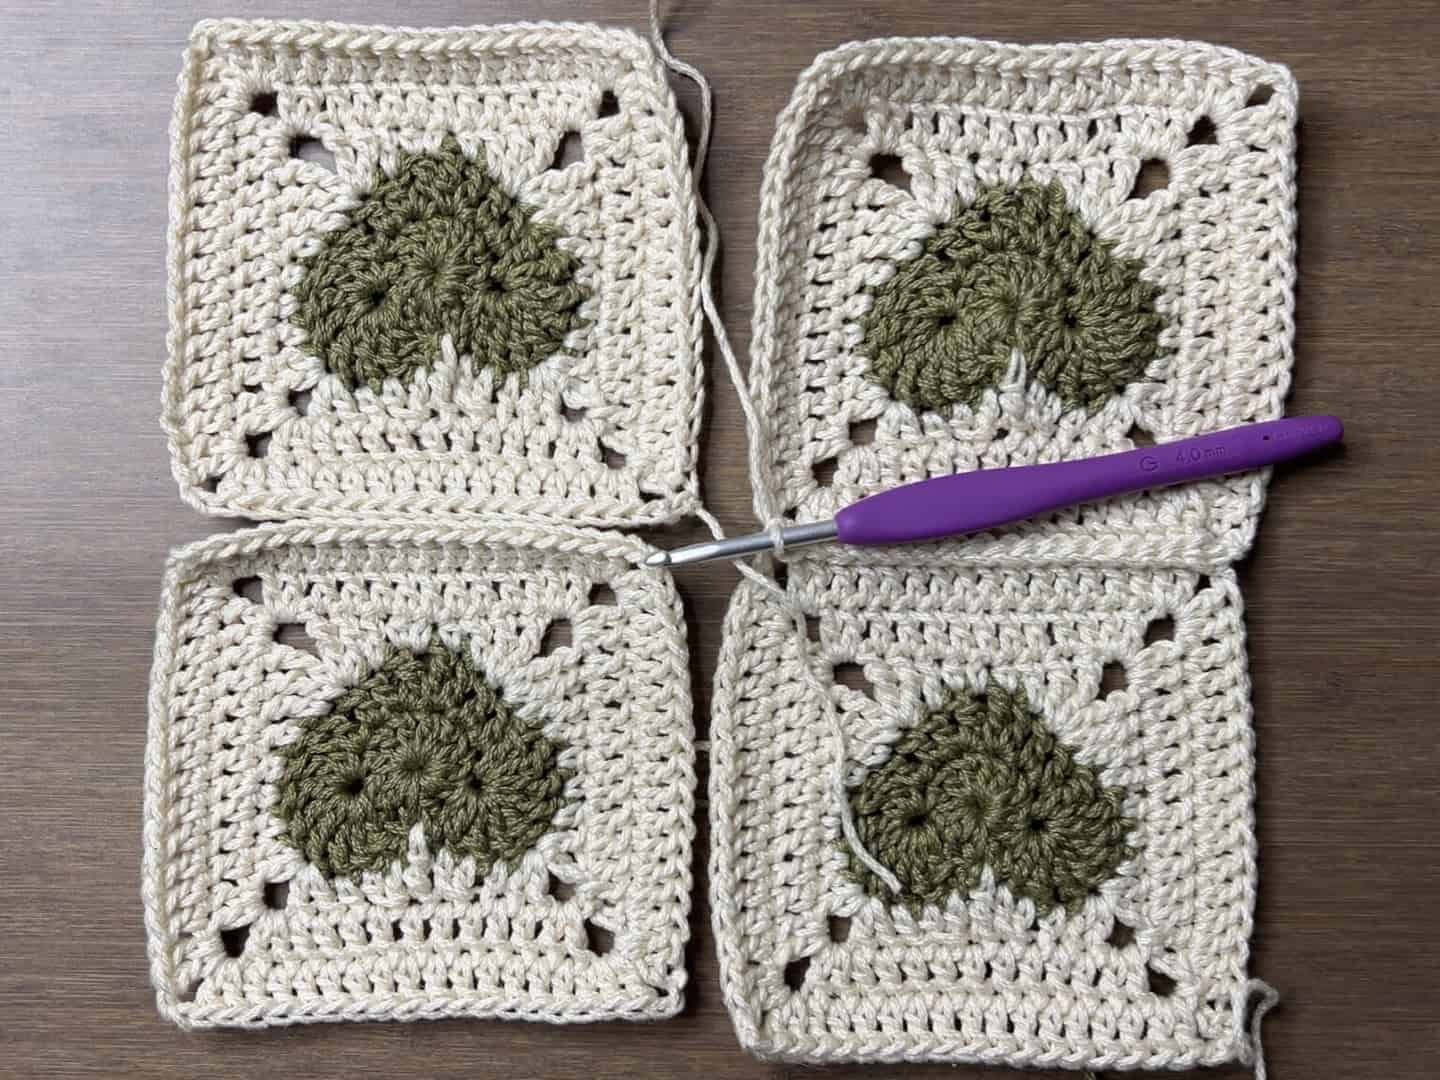
Stitching: ch1, sl st through both ch2-sp, sl st through outer loops of each st on both squares, sl st through both ch2-sp

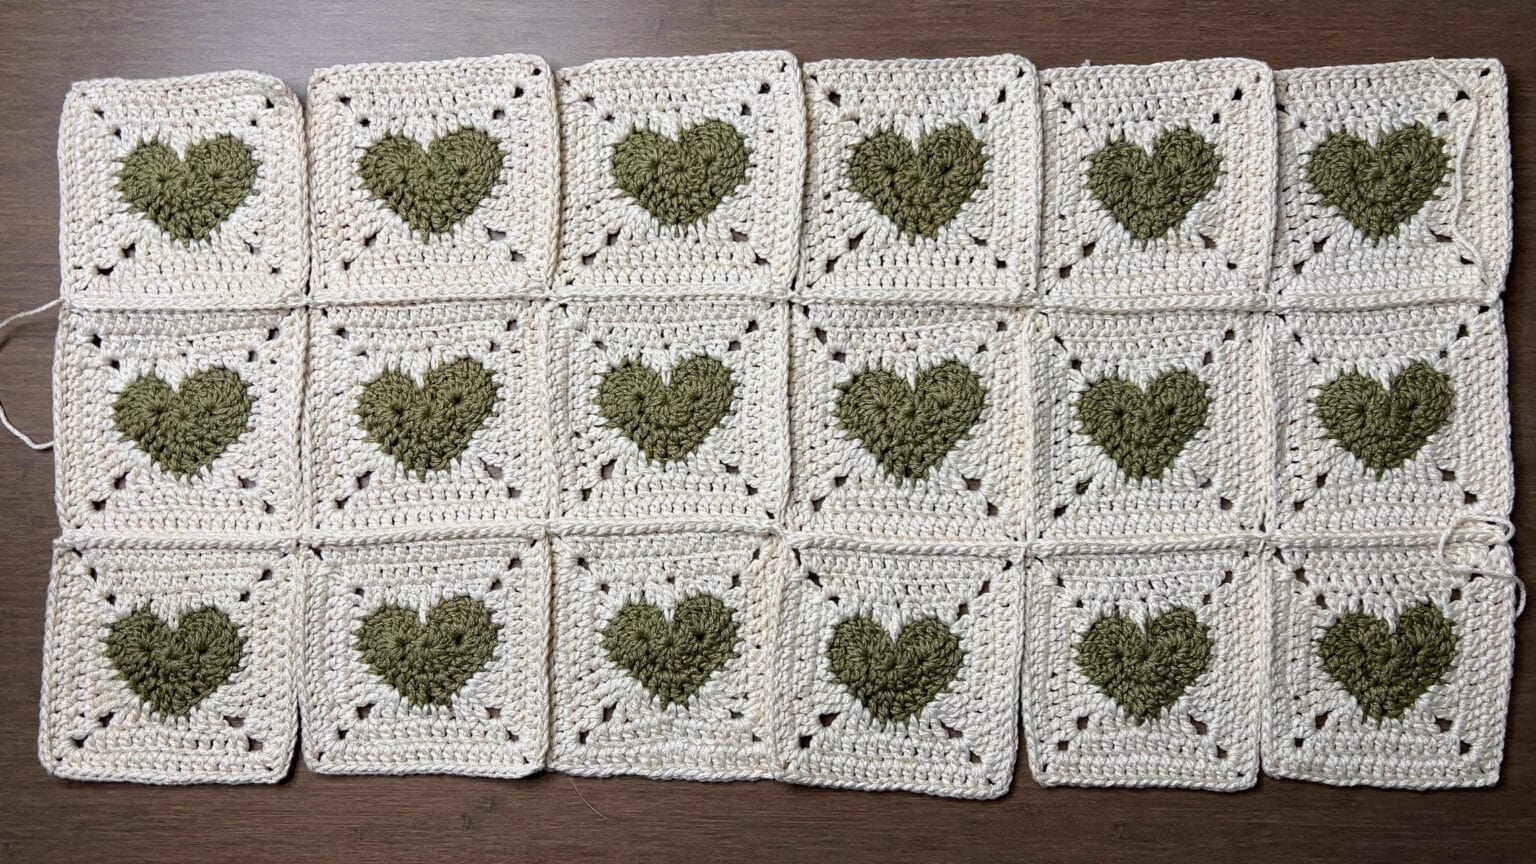
Repeat until you have connected 12 squares (2 rows of 6). Fasten off.

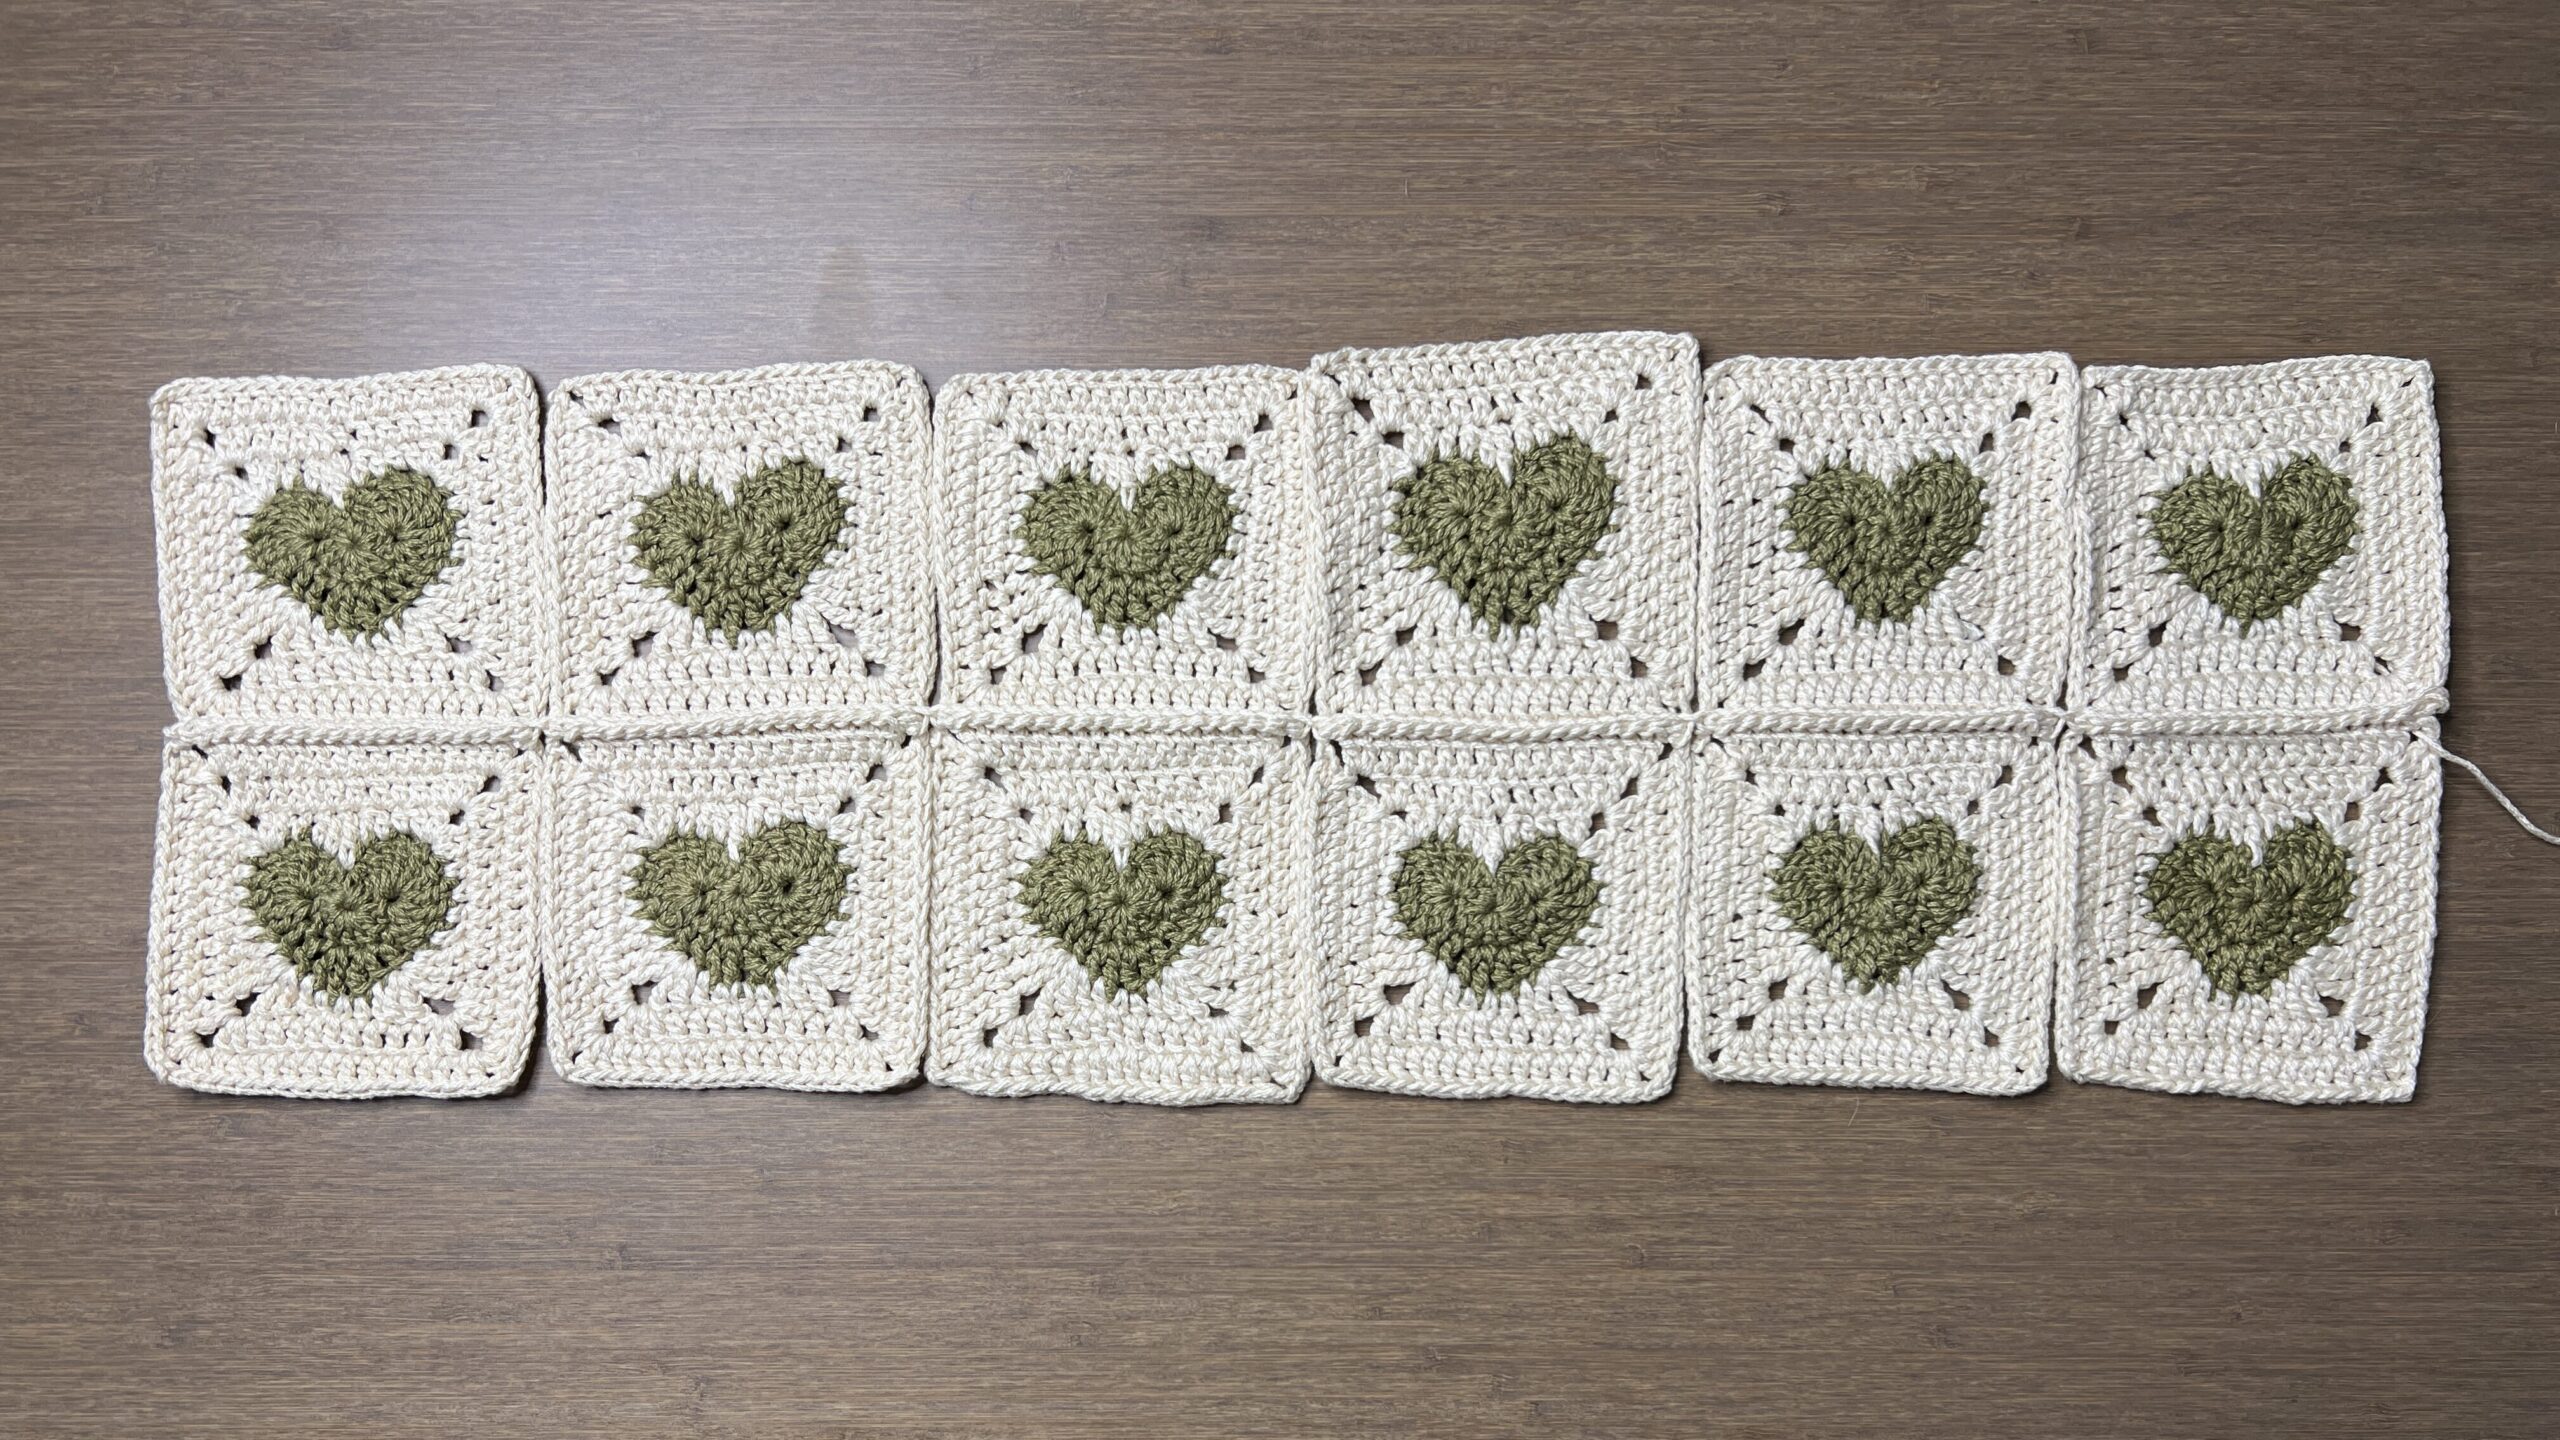
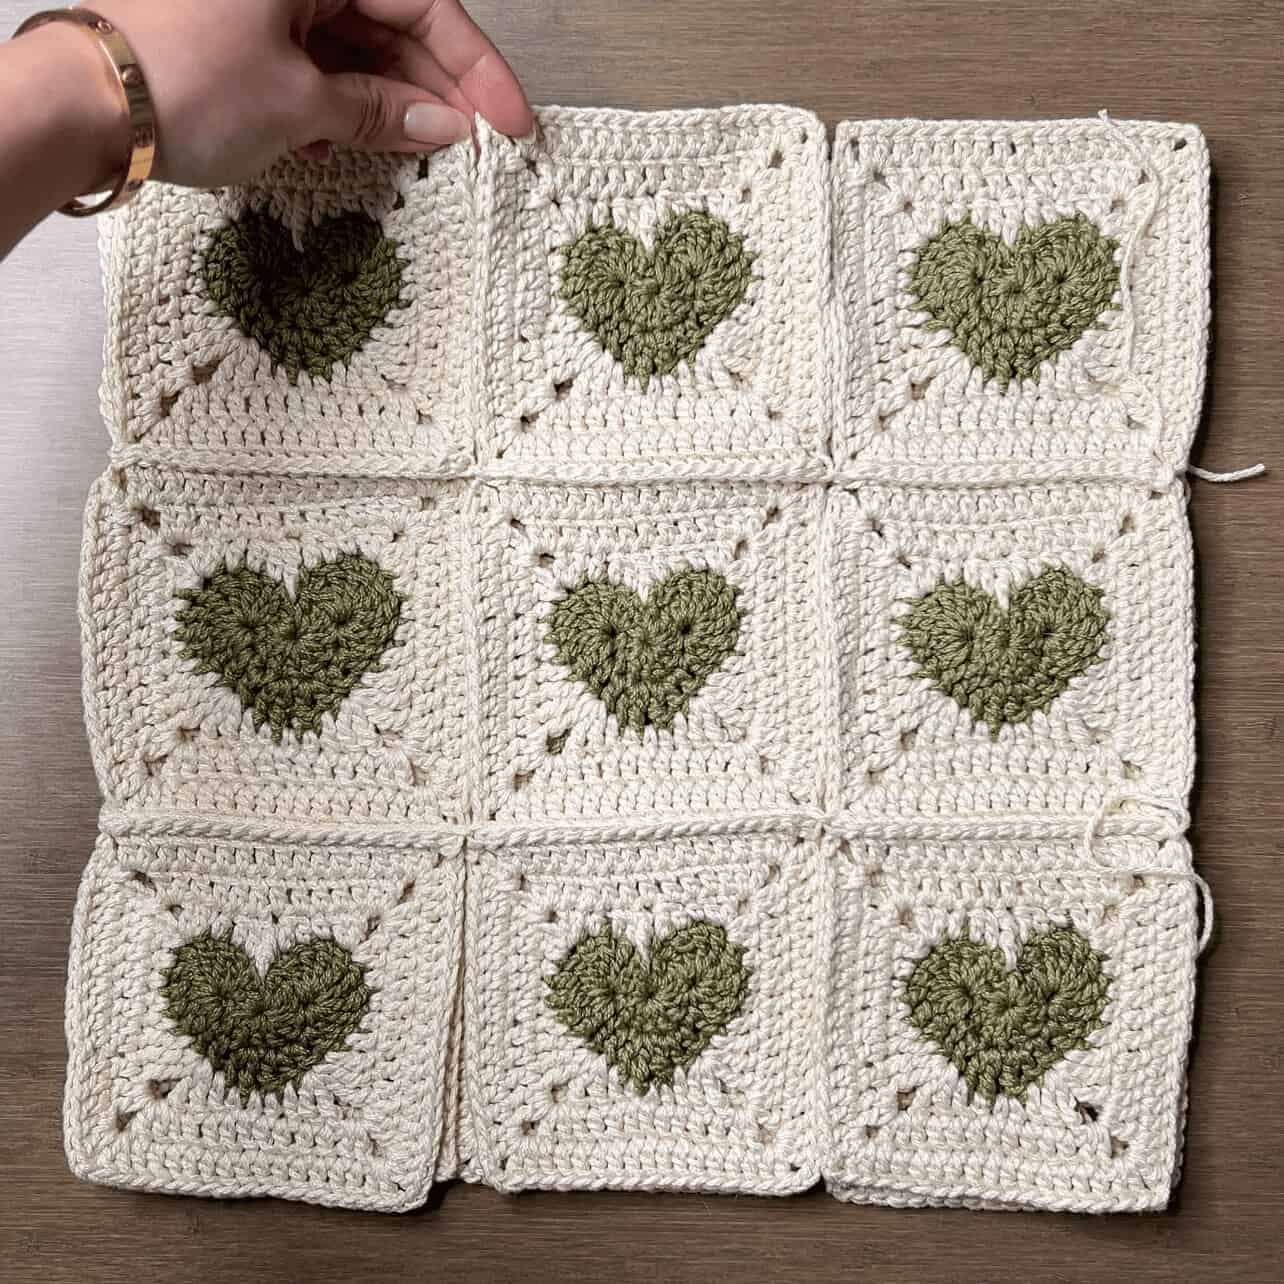
Now, we can work with the hearts right-side-up. Attach your yarn to the chain space in the very top right. Connect a new row of squares, one by one from right-to-left, using the same technique.
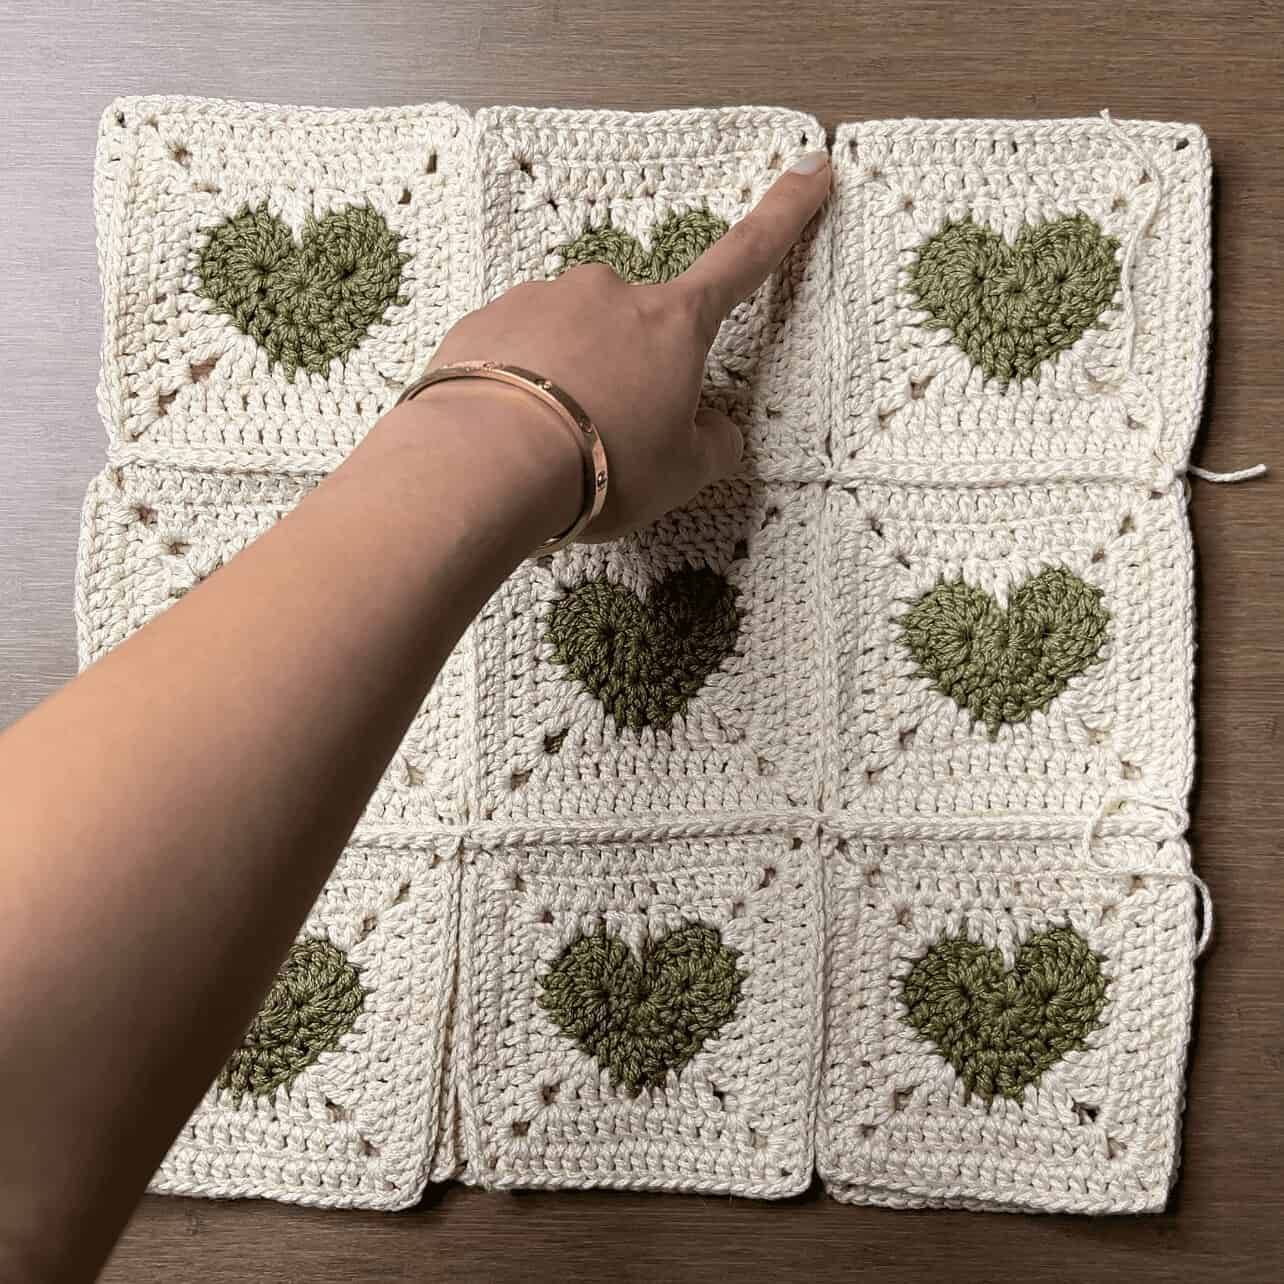
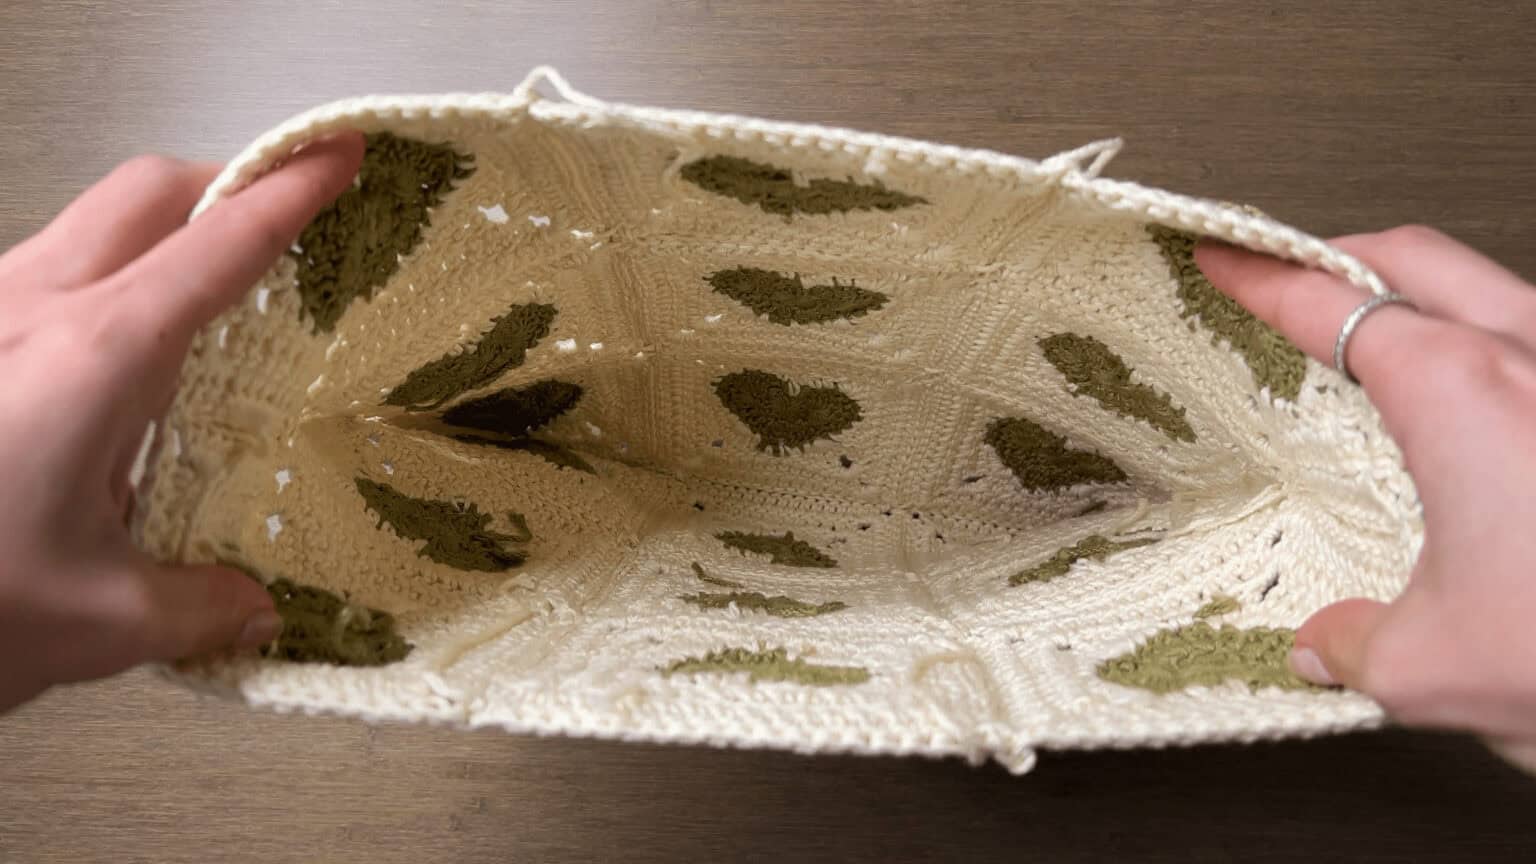
Grab from the middle and fold it in half, so there are 9 squares on each side. Now, we’ll be doing 3 more seams to connect all the squares together.
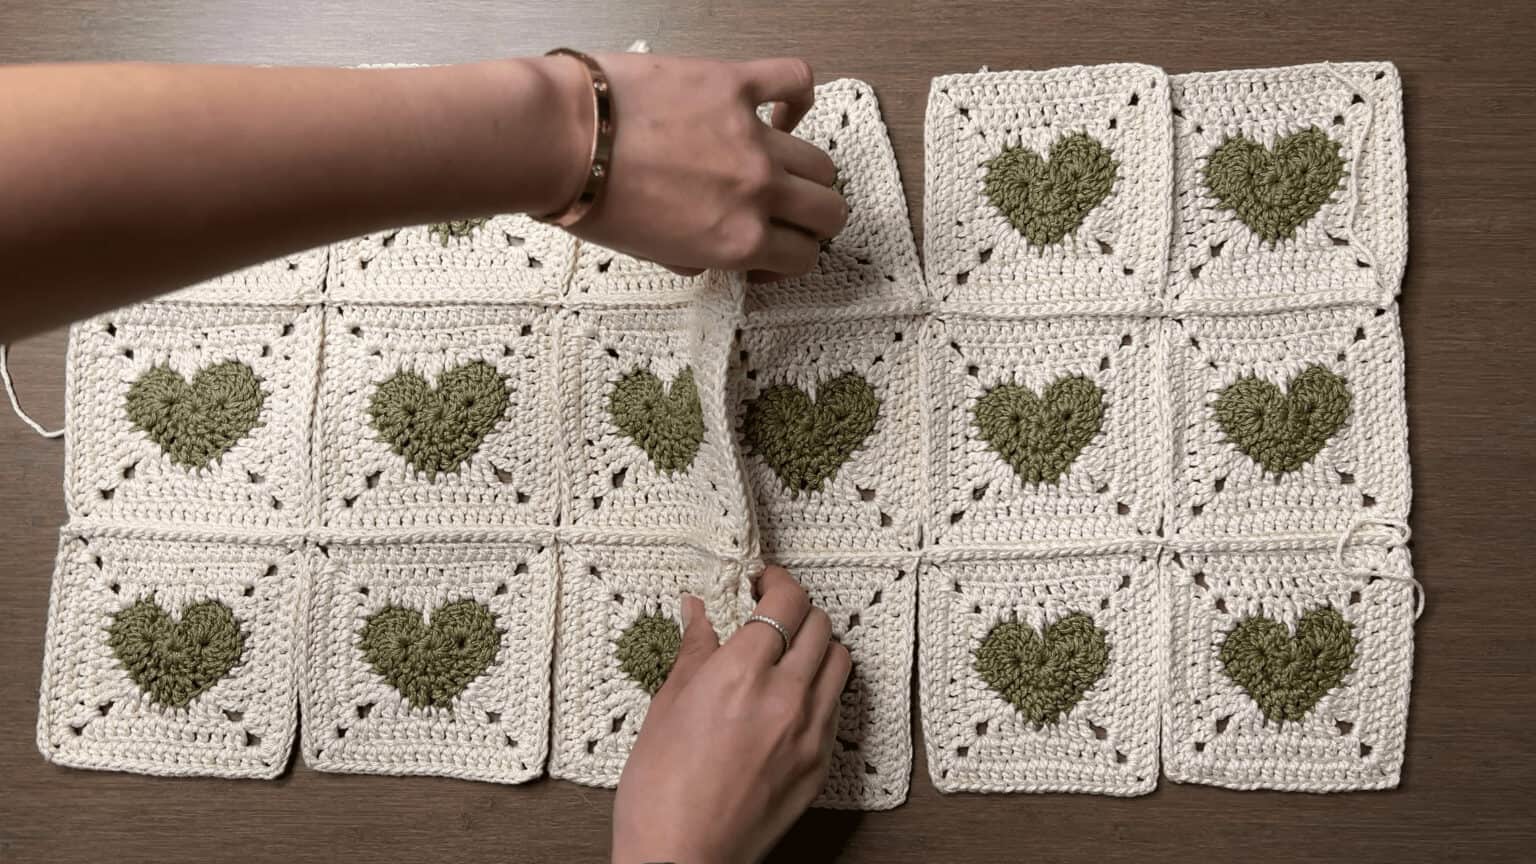
First, attach your yarn to these two chain spaces, then stitch down, flip the bag, and stitch back up to the top. Fasten off.

Then, attach your yarn to these two chain spaces, stitch down, flip the bag, and stitch back up to the top. Fasten off.
Finally, attach your yarn to the top left, stitch down, across the bottom, then up the other side, and fasten off. In the bottom-left and bottom-right chain spaces, sl st, ch1, sl st to work around the bend. Fasten off.

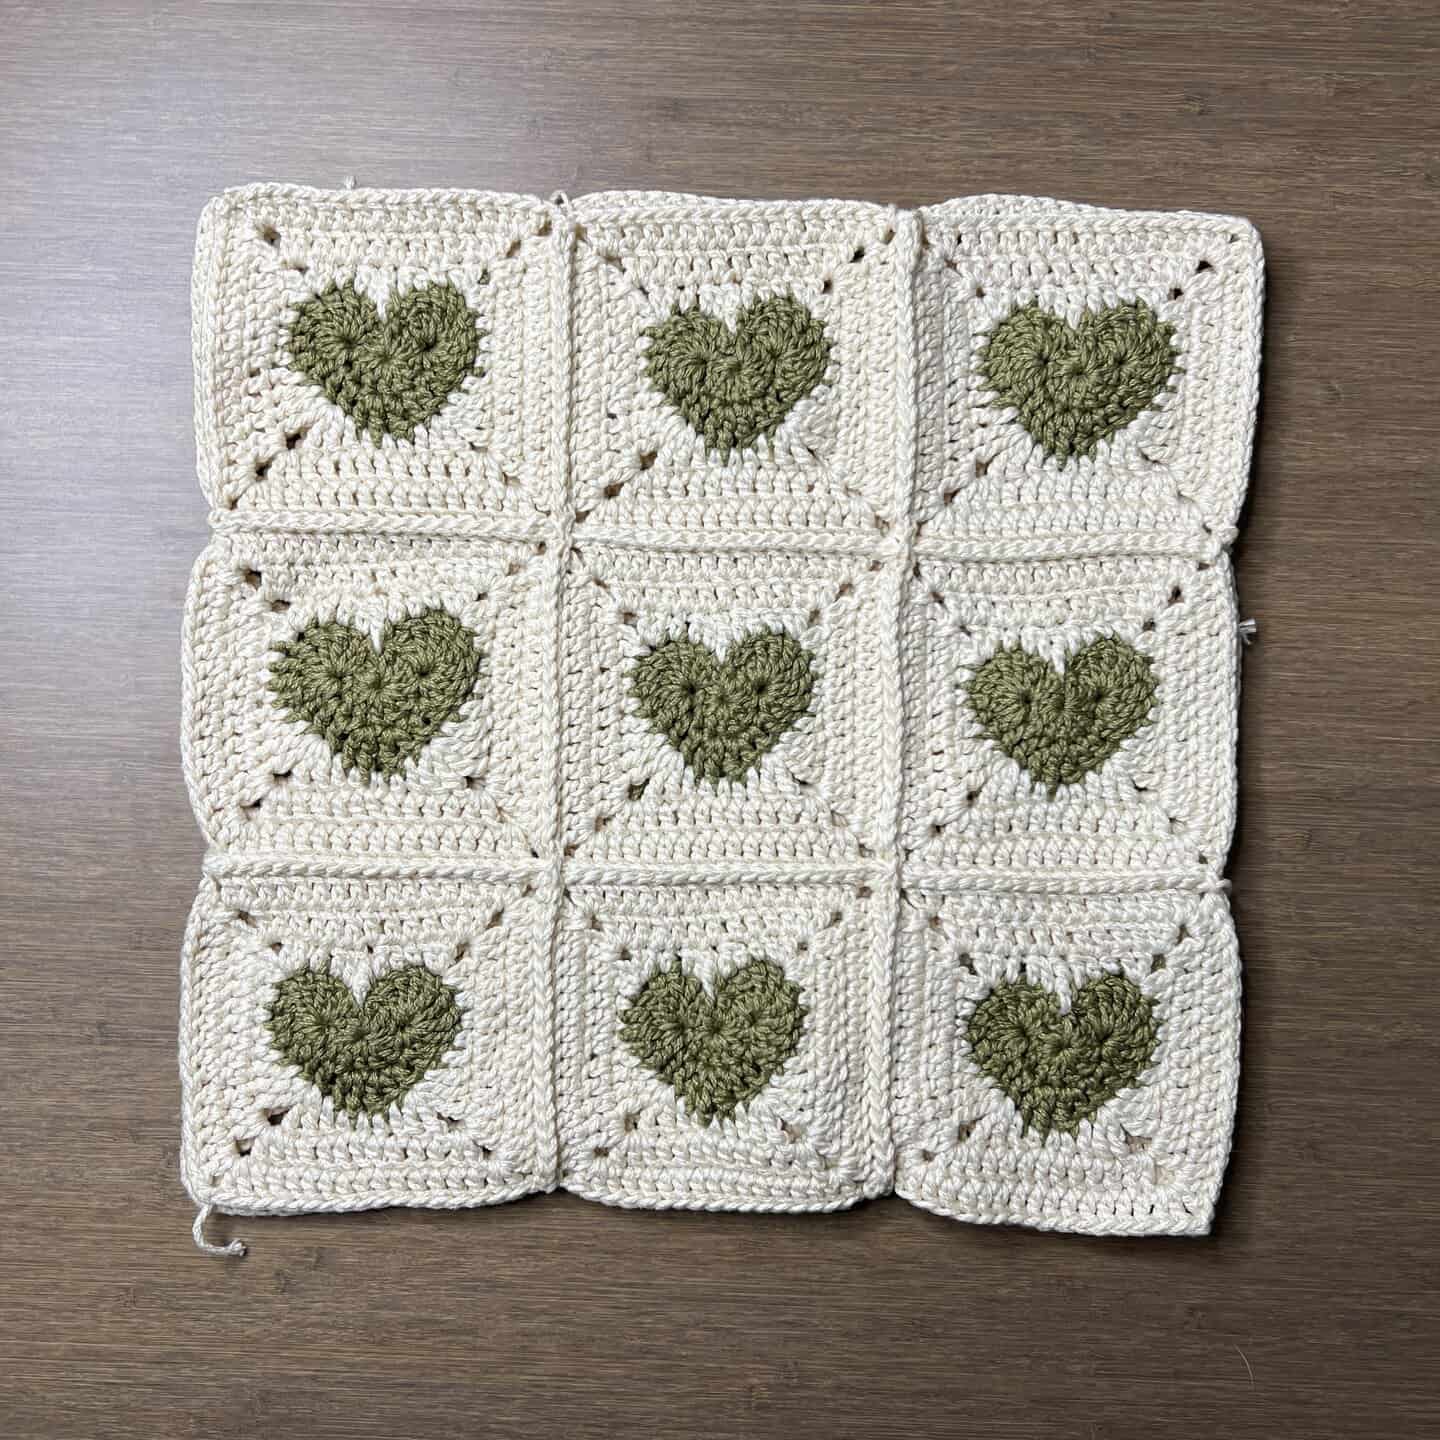
Now all the squares should be connected except for the opening at the top!
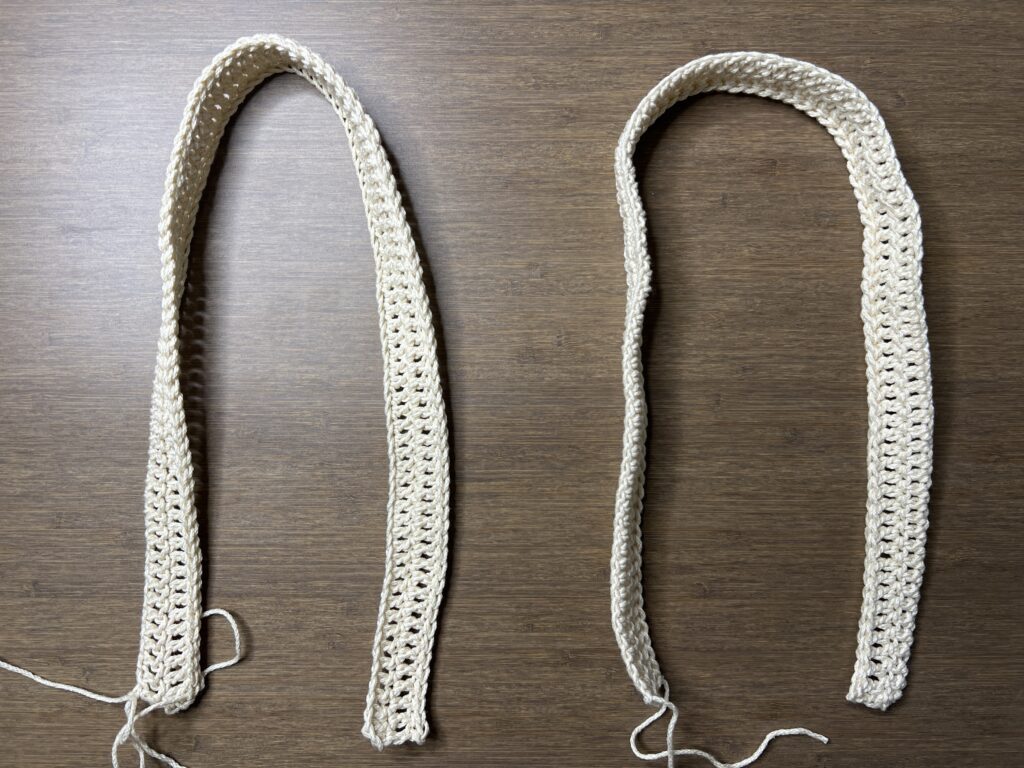
Crochet Bag Straps
Foundation: Make a slipknot, ch100
For a shorter or longer strap, do less or more chains. Also, account for slight stretching by doing a little less than the length you want. I want 60 centimeters long straps, but I’ll chain about 50 centimeters instead.
Row 1: dc in 3rd ch from hook and in each ch across (98)
Row 2: ch2, turn, dc across
Continue adding rows until the strap is as wide as you want it to be. Next, we’ll reinforce the strap with slip stitches.
Row 3: ch1, turn, sl st across
The row of slip stitches makes the strap less stretchy. Make sure that your slip stitches aren’t too loose or it will be stretchy.
Stretch the strap out so it lays flat and fasten off.
Make an identical strap, but do not fasten off.
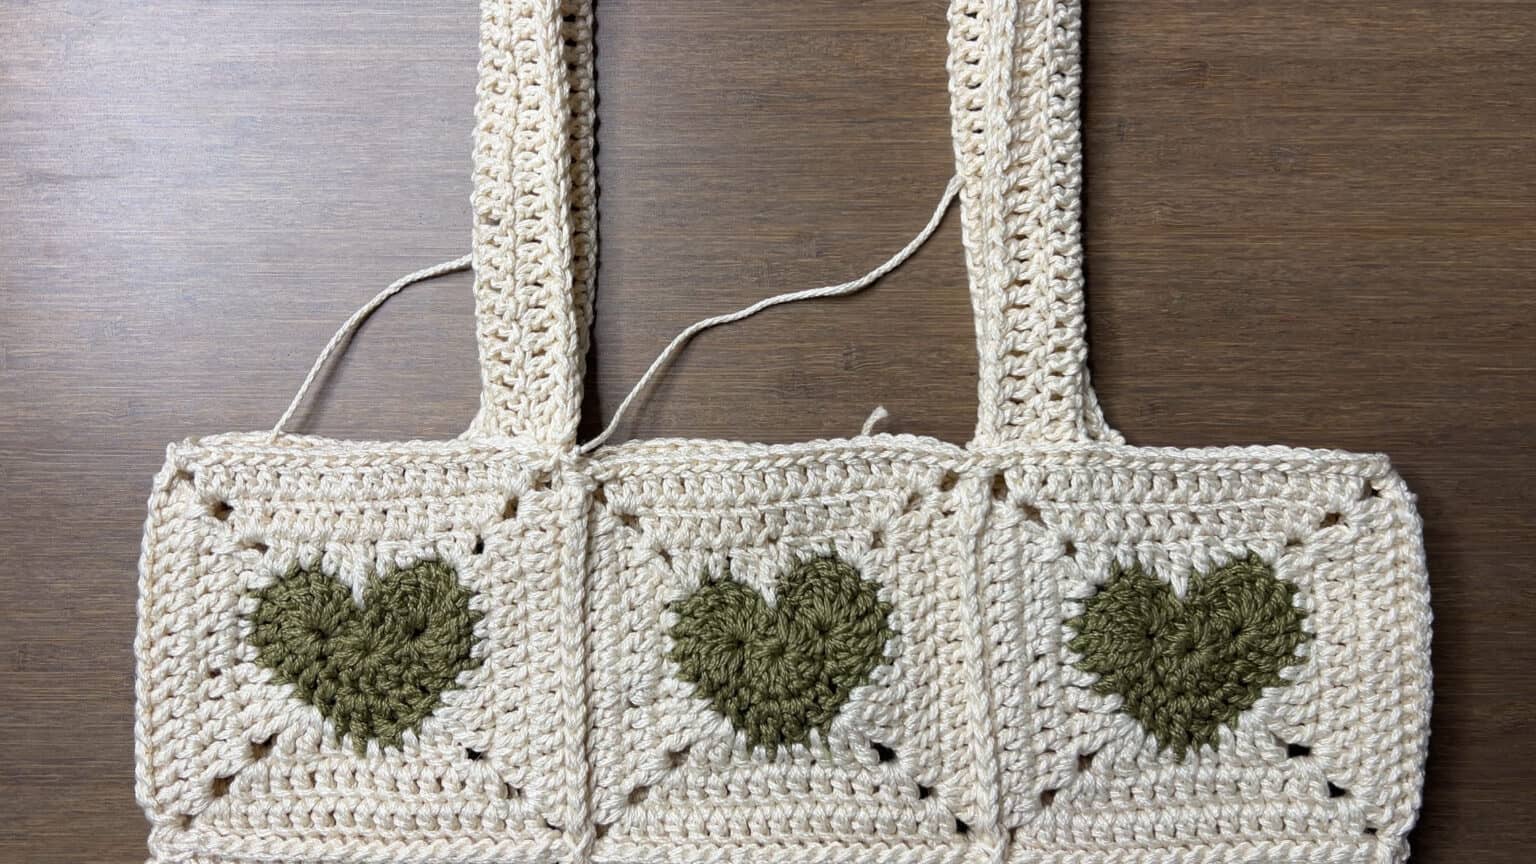
Attaching Bag Straps & Straightening and Reinforcing Bag Opening
The straps will be attached to either side of the middle square over 5 stitches.
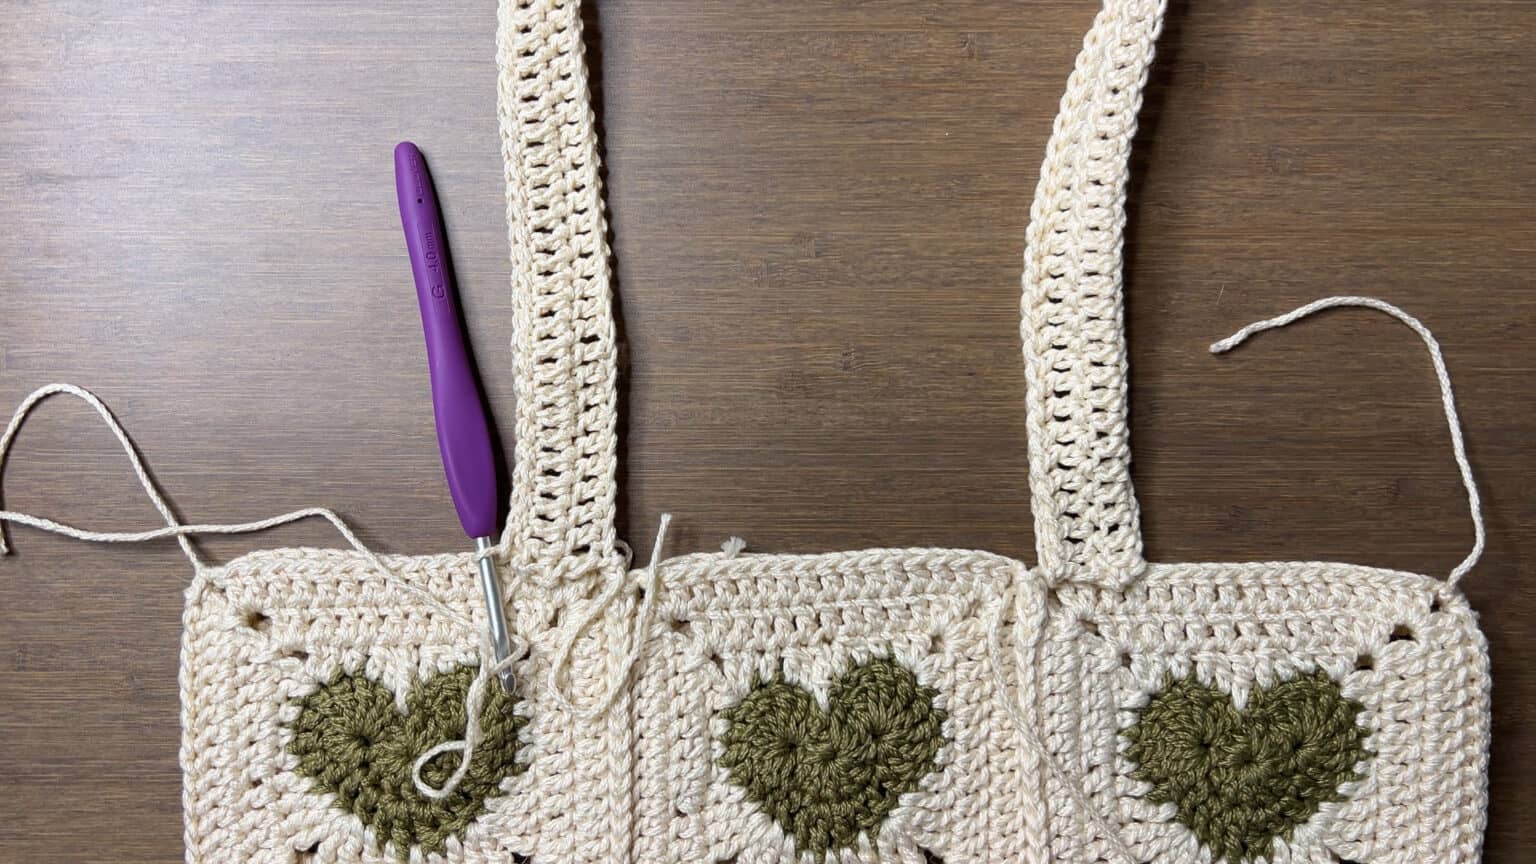
I flat slip stitched them while doing a round of slip stitches around the top of the bag. It’s hard to explain through words and pictures, so view the tutorial to see how I did this.
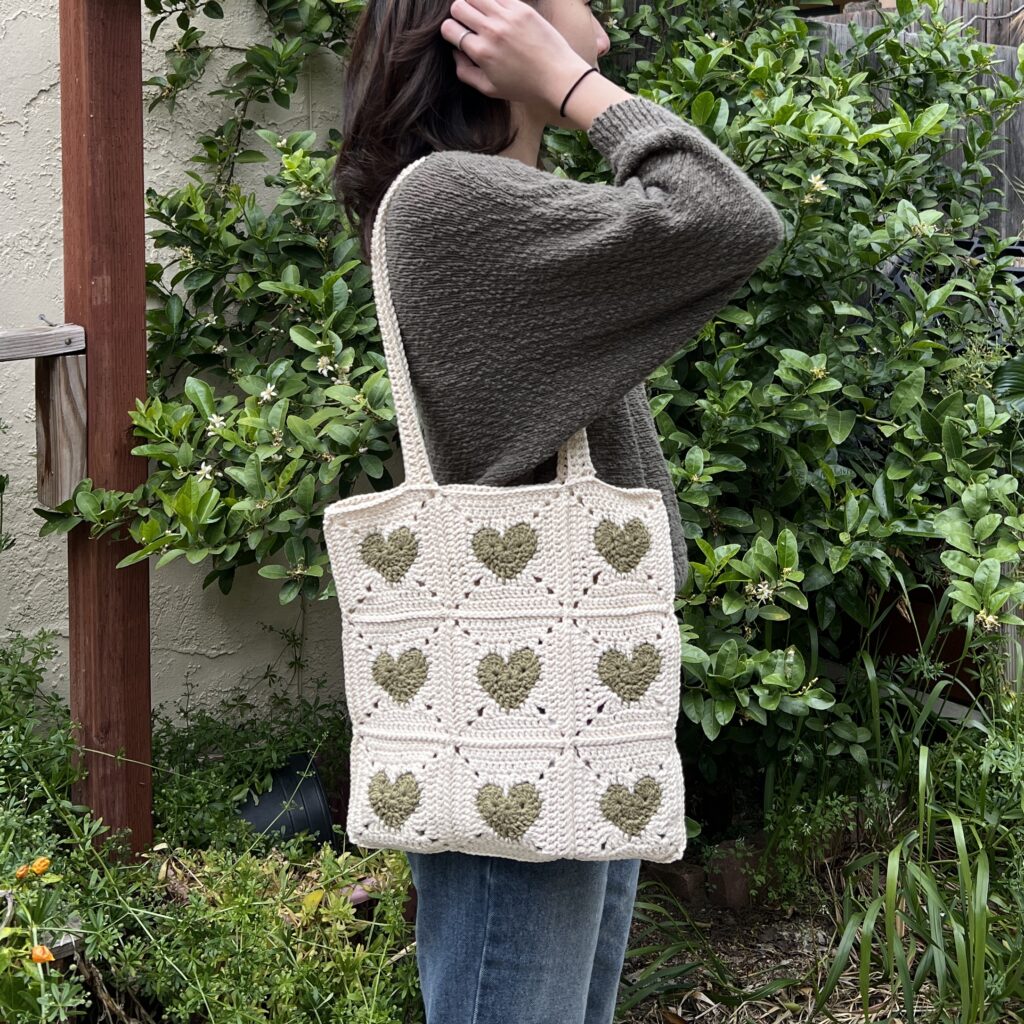
Finished Crochet Heart Granny Square Tote Bag
Now you have a super cute crochet heart tote bag! If you didn’t use 100% cotton yarn and/or you plan to use this bag for more than just the daily essentials, I would recommend reinforcing the bag. You can line the bag with fabric and do more slip stitches along the strap to minimize stretching.


what is decreasing
Do you have a suggested pattern for a plain square ? I like some of the “less hearts” ideas. Thank you.
Frustrating. I spent an hour making a petal. The instructions in round 1 where it says “st 24” don’t work no matter what stitch you use. Now I have to frog it. Ug.
Oh boy. It looks good but the pattern is missing something at the end of Round 1. It just says “24 st”. What stitch am I supposed to be doing?
Did you mean at the end of Round 2? The number in parentheses at the end each round is the total number of stitches in that round.
hi there. round two. why is the first corner DC, ch2, DC? should it be tr instead?