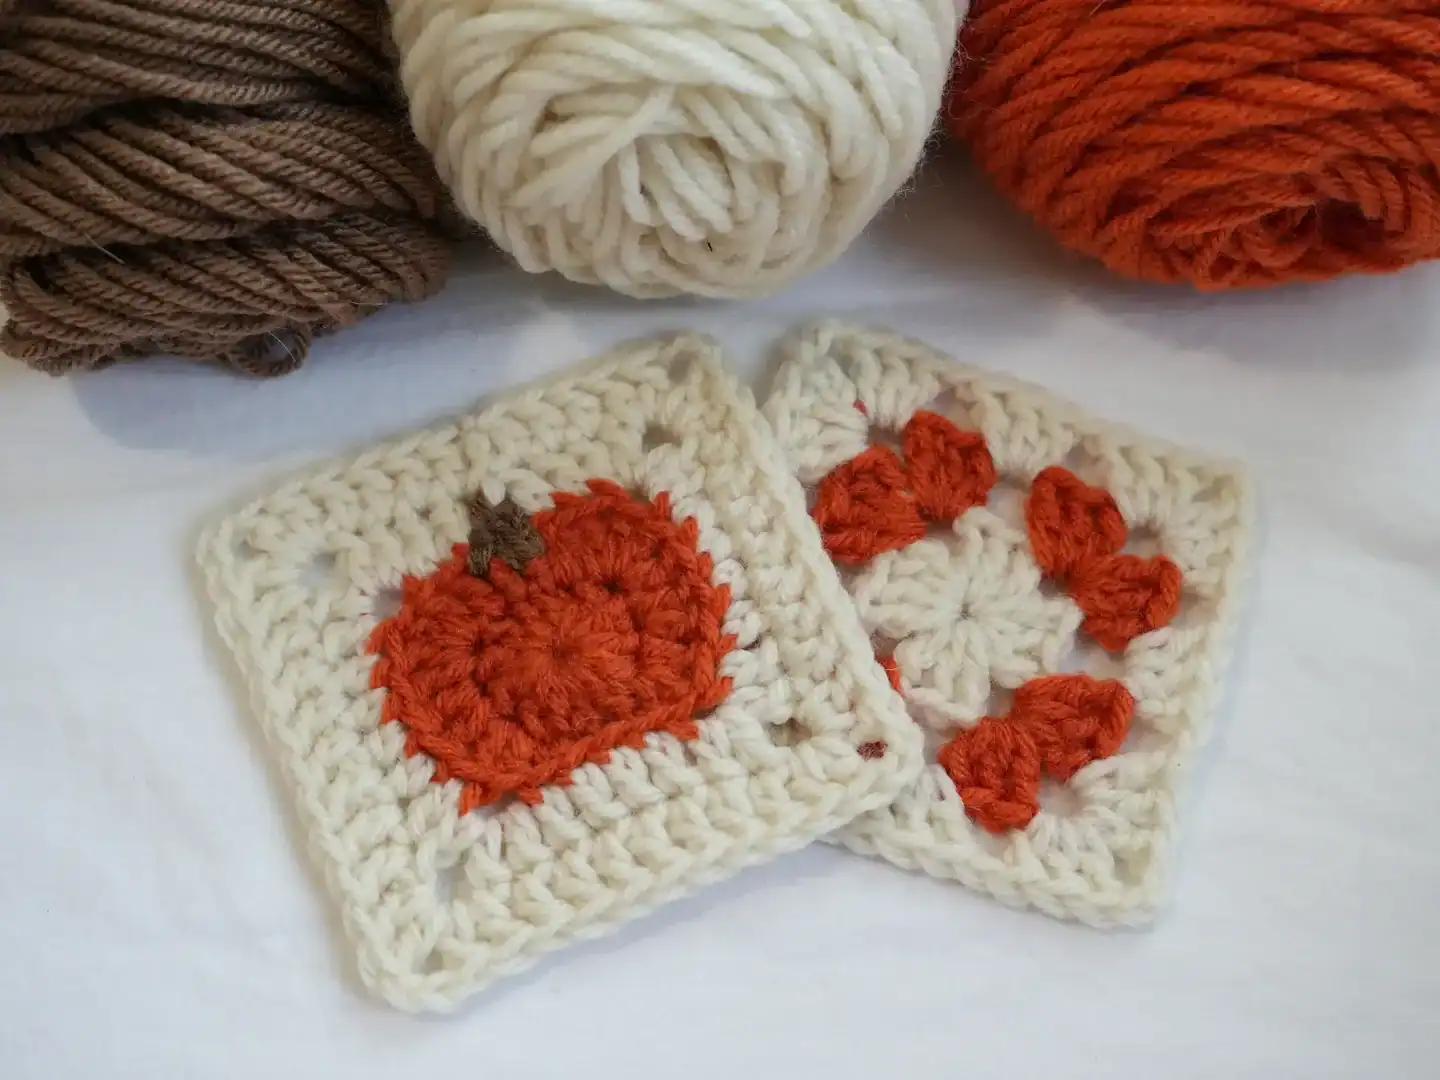
Crochet Pumpkin Granny Square | Free Pattern & Video Tutorial
See the free crochet pumpkin granny square pattern and video tutorial down below or purchase an ad-free, printable PDF file of this pattern!
This fun pumpkin granny square can be made into a larger project like a blanket or pillow. You can also skip the square part and just crochet a pumpkin applique!
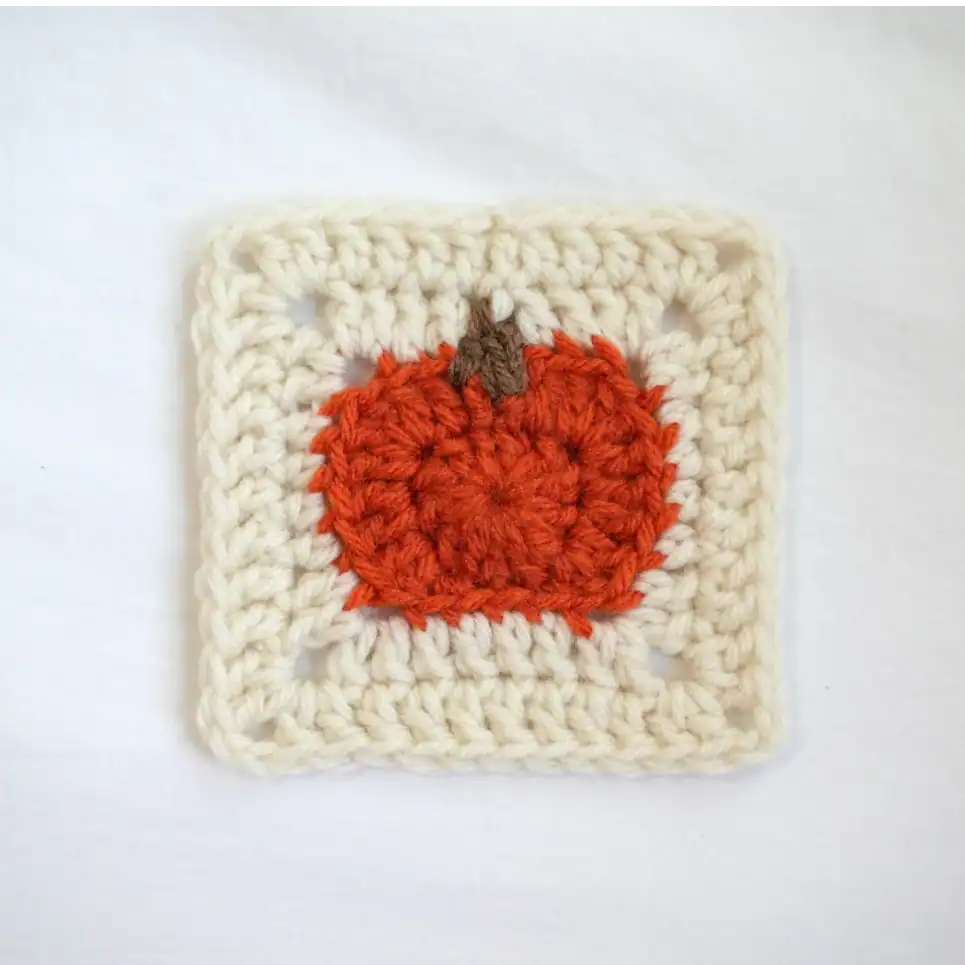
Table of Contents
Crochet Pumpkin Granny Square Video Tutorial
Become a member to get early access to new videos!
You can follow along with my YouTube video to make your own pumpkin granny square! I have timestamps included to section the video and help you jump to any point you need to!
This post may contain affiliate links. I may earn a small commission on qualifying purchases at no additional cost to you!
Pattern Information
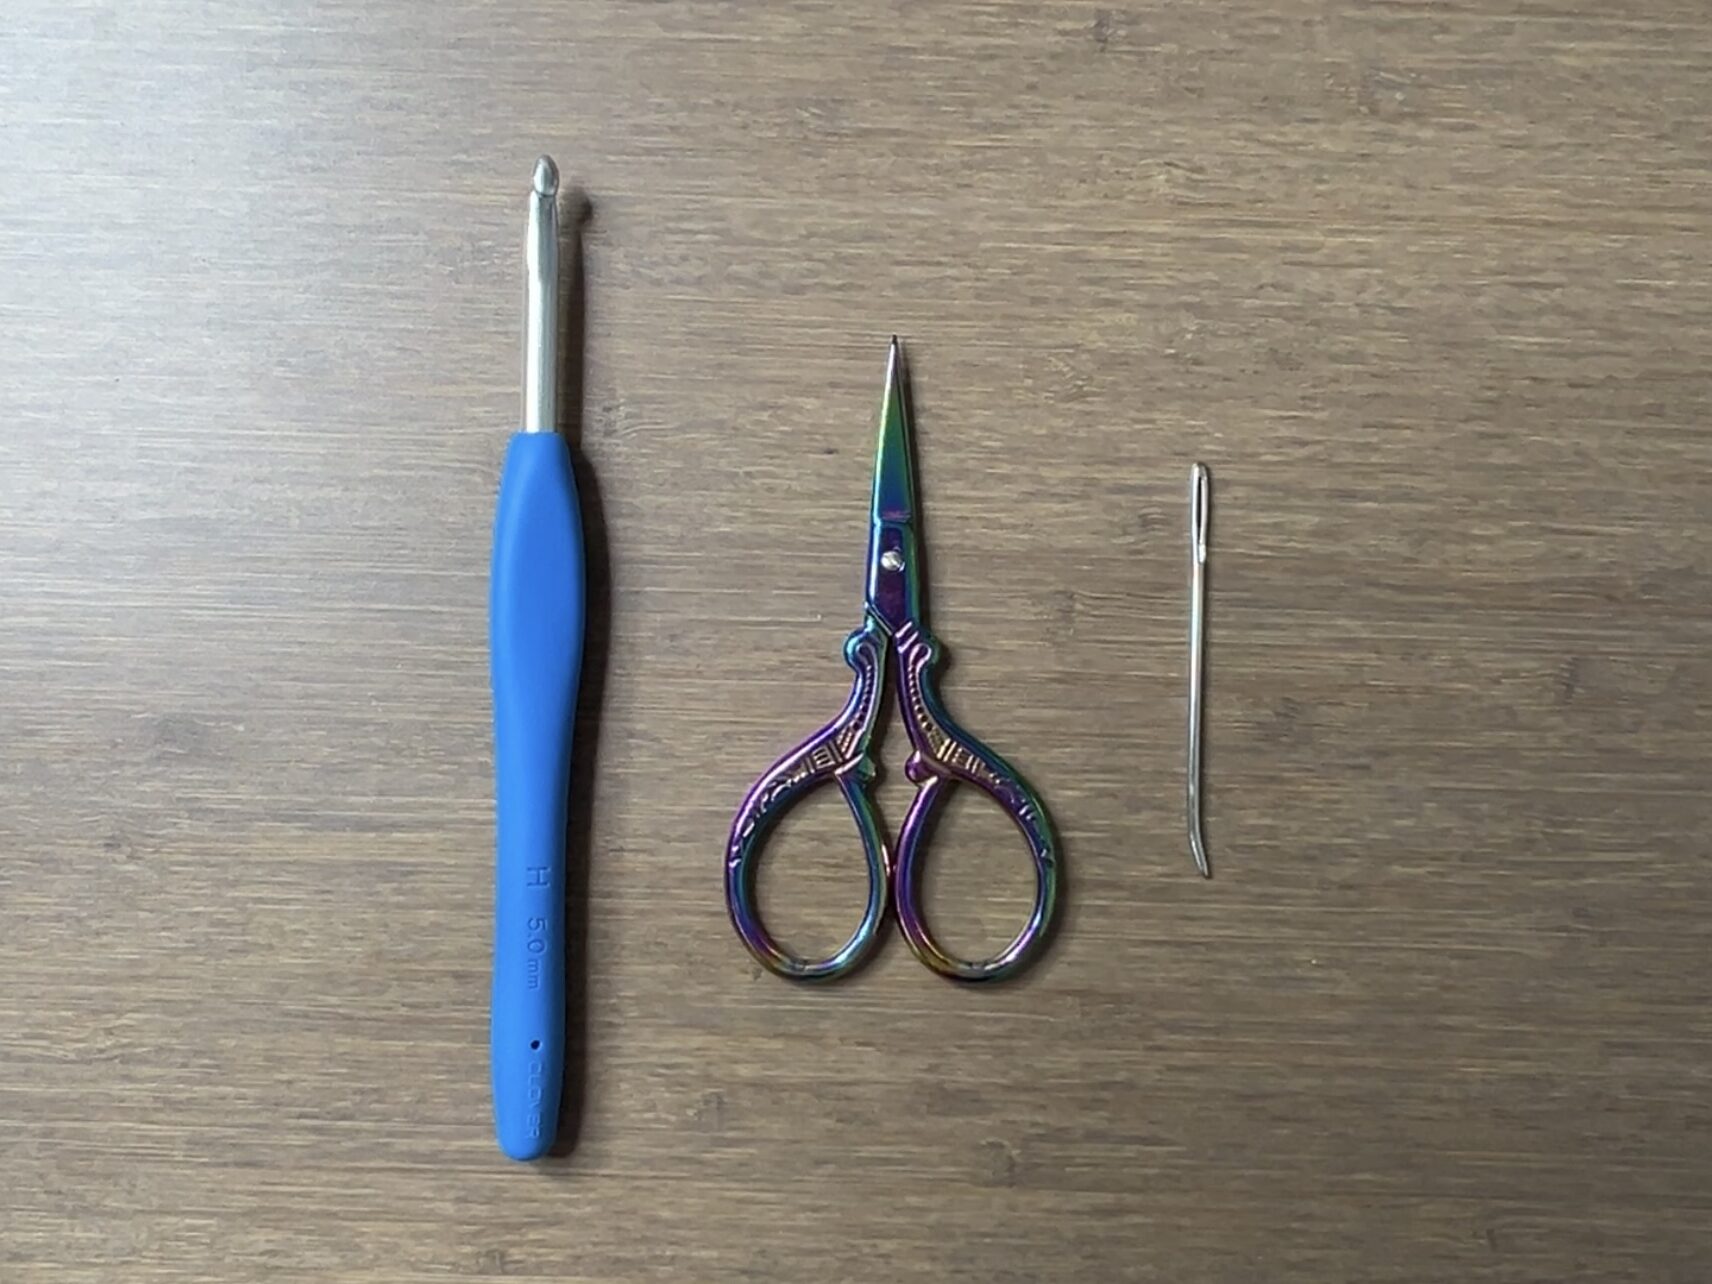
Materials
- Orange medium weight yarn (Red Heart Super Saver in “Carrot“)
- Brown/Green medium weight yarn (Red Heart Super Saver in “Cafe Latte“)
- Base Color medium weight yarn (Red Heart Super Saver in “Aran“)
- 5mm Clover Amour crochet hook
- Scissors
- Yarn needle
- Tension ring (optional)
- Yarn bowl (optional)
Dimensions
9 centimeters wide x 9 centimeters long (3.54 x 3.54 inches)
Notes and Tips
- This pattern is written using US crochet terms
- The chain 2 at the beginning of each row/round does NOT count as a double crochet
- Carry the loose ends in your stitches to avoid having to weave them in later on
Abbreviations
blo = back loop only
ch = chain
ch2-sp = chain-2-space (space created by a chain 2)
dc = double crochet
hdc = half double crochet
rep = repeat
sc = single crochet
sk = skip
sl st = slip stitch
sp = space
st = stitch
Crochet Pumpkin Granny Square Pattern
Pumpkin Applique
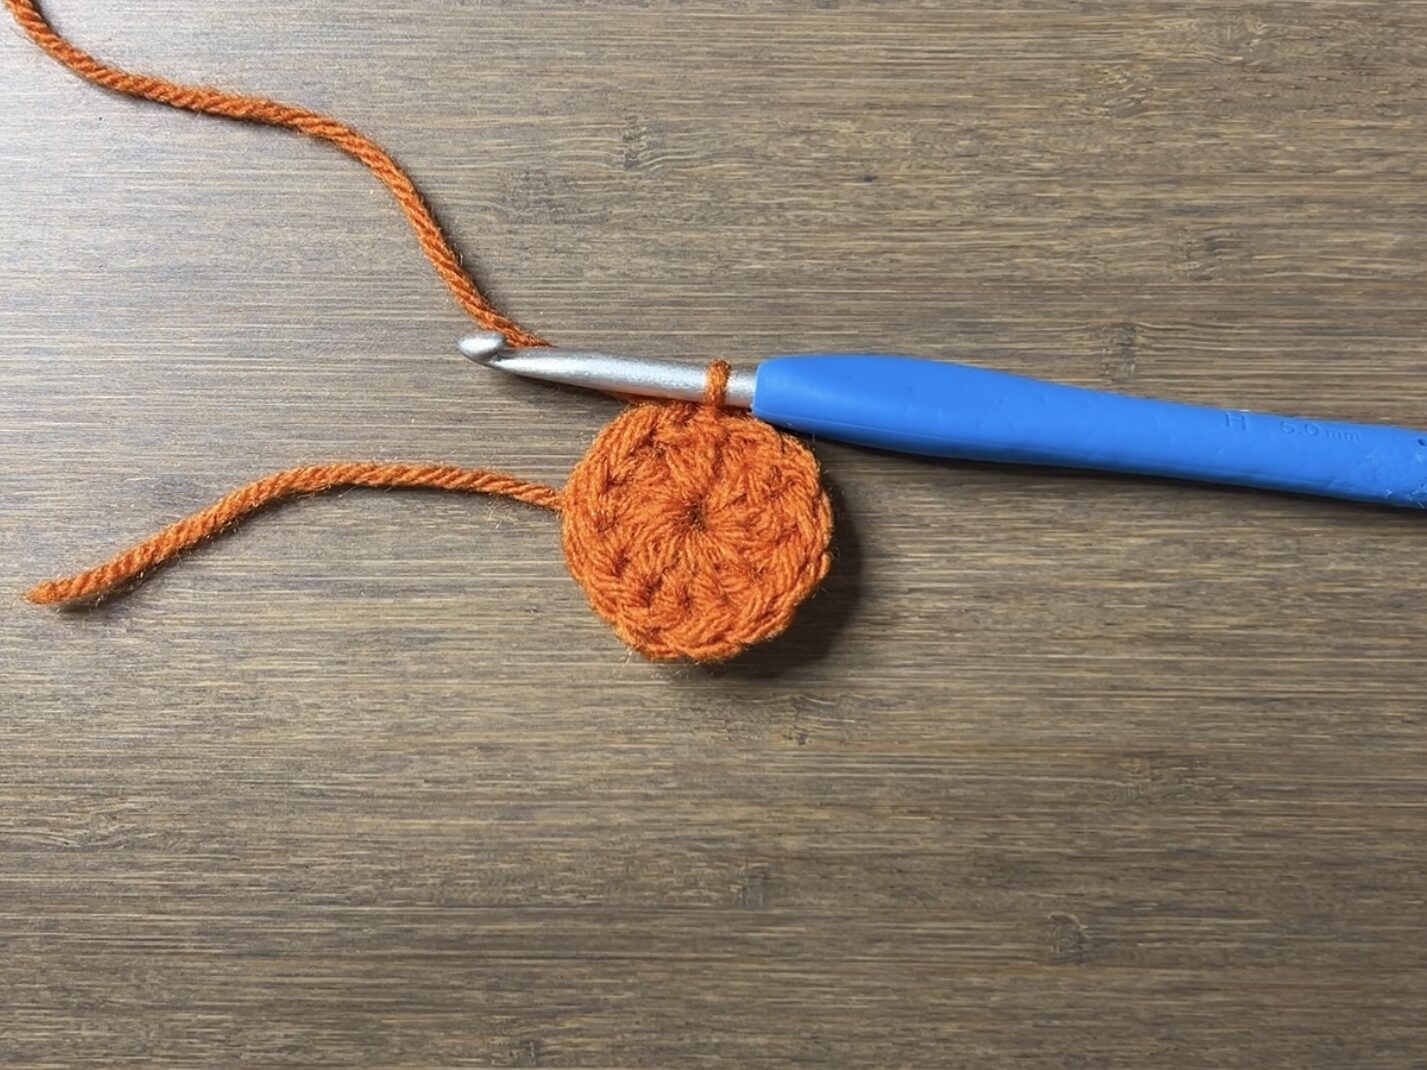
Foundation: With orange yarn, make a magic ring or make a slipknot, ch4, sl st to 1st ch to form a ring
Round 1: ch2, dc12 into ring, sl st (12)
Round 2: ch2, dc, dc4 in next st, dc2 in next 2 st, sc, sl st in next 2 st, sc, dc2 in next 2 st, dc4 in next st, [dc, ch2, sl st] in next st (22)

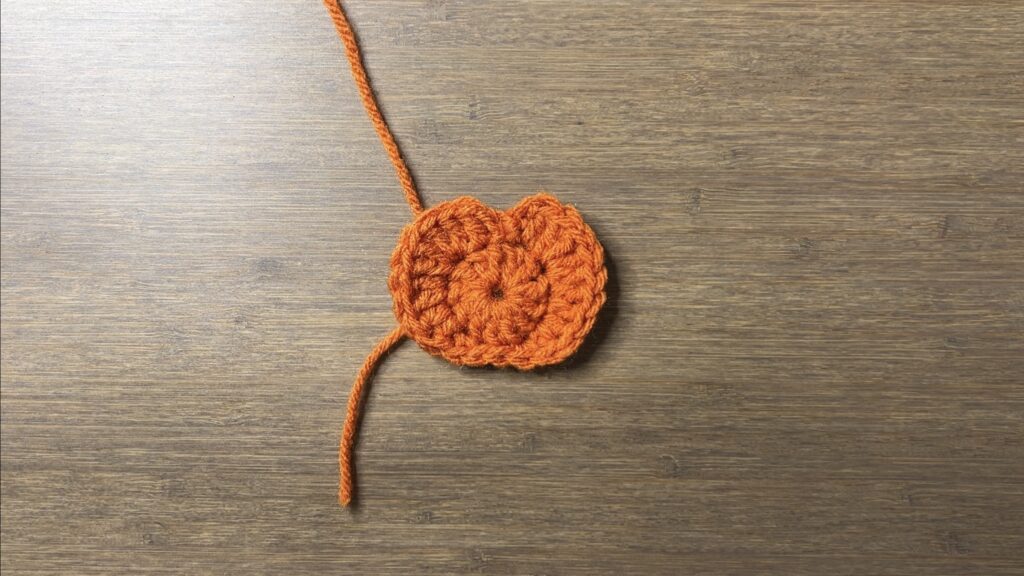
Stem: switch to brown yarn, ch2, dc in sp between turning ch and first st while switching to base color yarn
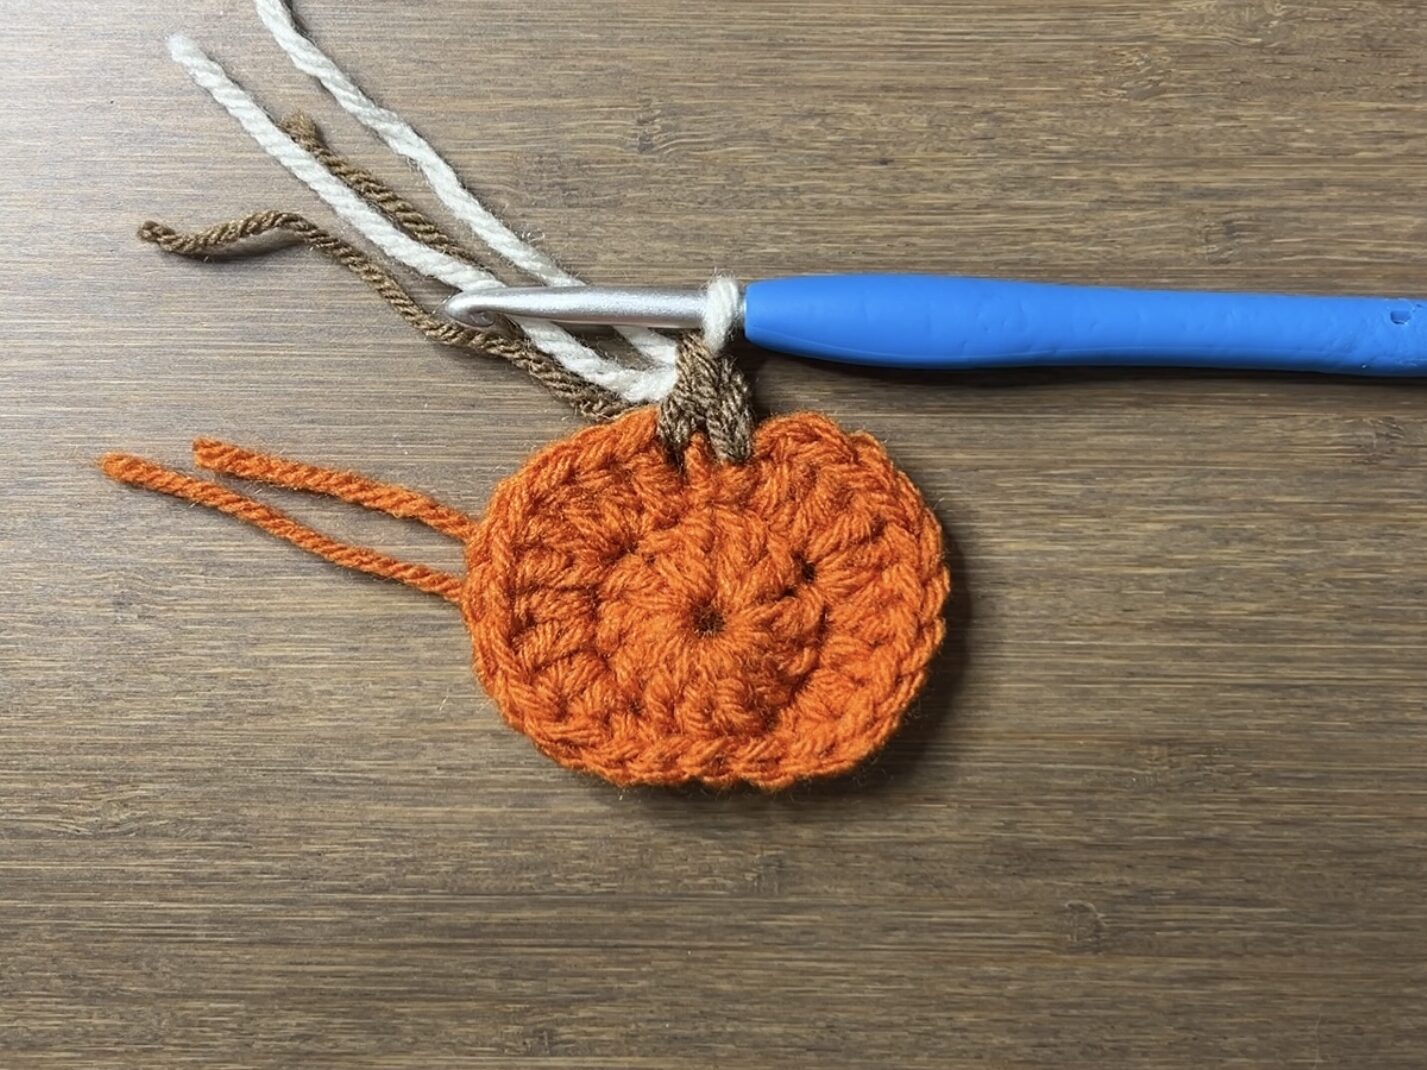
Forming Square Around Pumpkin
Round 3 (worked in blo): dc in next 2 st, [dc2, ch2, dc2] into next st, hdc in next 4 st, dc, [dc, ch2, dc2] into next st, dc in next 4 st, [dc2, ch2, dc] into next st, dc, hdc in next 4 st, [dc2, ch2, dc2] into next st, dc in next 2 st, sk stem, sl st (8 st on each side of square, ch2 in each corner)
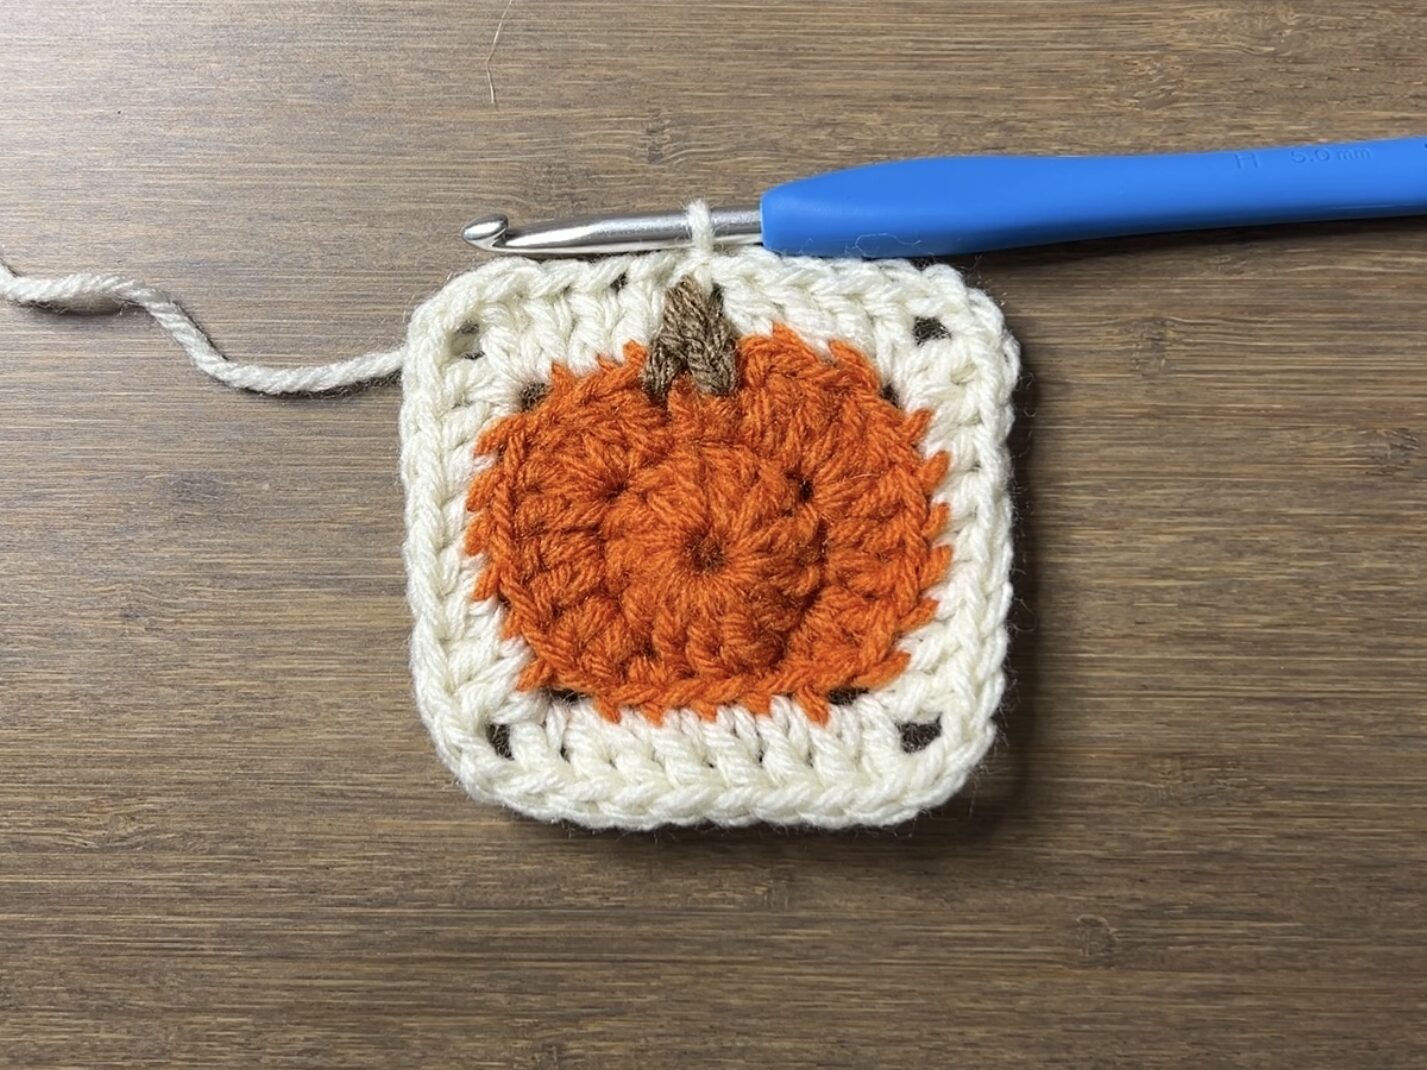
Round 4: ch2, dc in next 4 st, *[dc2, ch2, dc2] in ch2-sp, sk1,** dc in next 7 st, rep from * around, stop at ** on last rep, dc in last 3 st, sl st (11 st on each side of square, ch2 in each corner)
Fasten off.
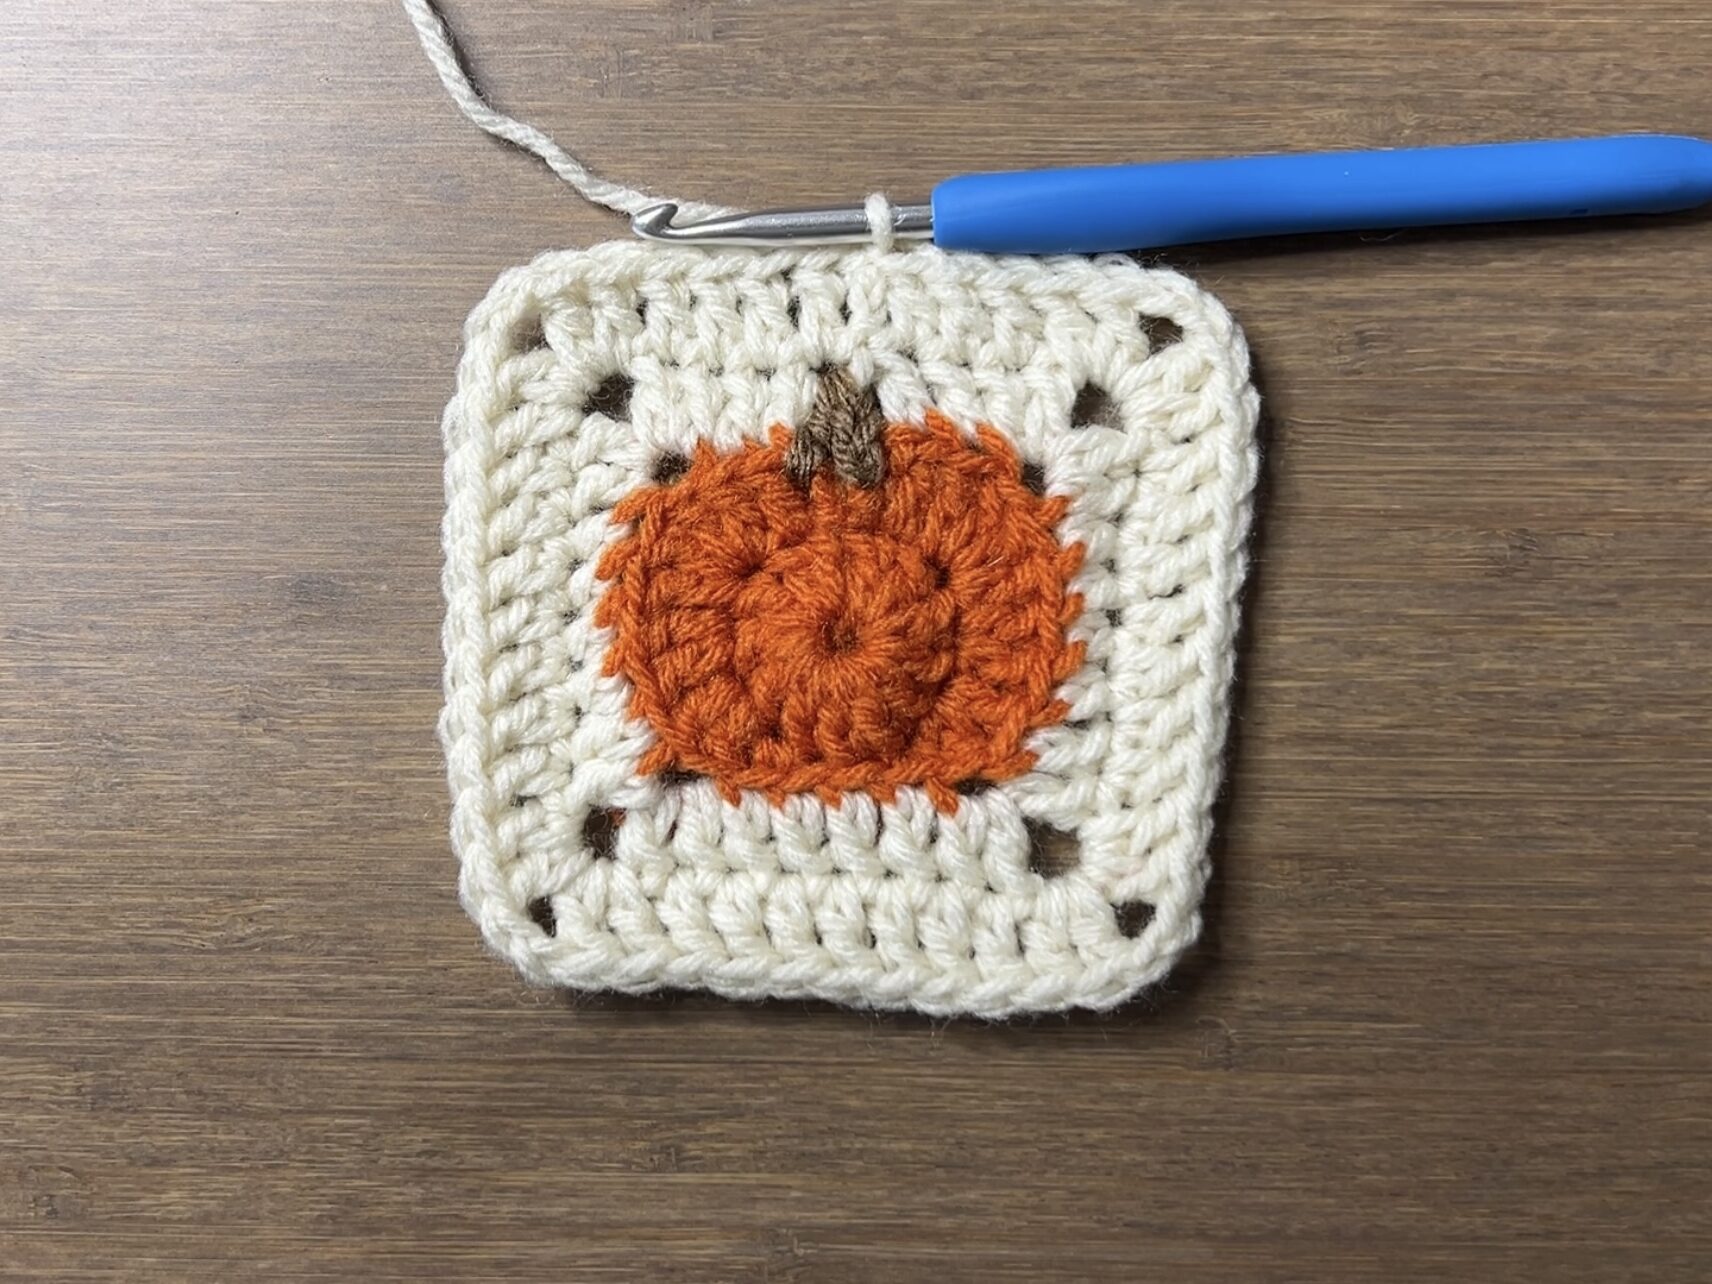
Finished Crochet Pumpkin Granny Square
Weave in your loose ends and your granny square is finished!