Crochet Water Bottle Holder | Free Pattern & Video Tutorial
See the free crochet water bottle holder pattern and video tutorial down below or purchase an ad-free, printable PDF file of this pattern!
Crochet a bag for your water bottle to stay hydrated while out and about! This crochet water bottle holder pattern can be adjusted to fit any size bottle and be worn on the shoulder or as a crossbody bag.

Advanced Beginner Crochet Project
This pattern uses different techniques like working in the round, mesh stitches, and a tiny bit of sewing. It’s great for beginners and even absolute beginners!
If you want to take on this project as an absolute beginner, make sure to view the tutorial if any part of the written pattern is confusing for you! Also, please leave any questions in the comments if you have any.

Sizing
This pattern is easily adjustable to match the width and height of your water bottle. The strap is also customizable in length and width. Refer to the italicized notes to change the size.
Project Overview


Choosing Yarn & Hook Size
For this project, using a non-stretchy yarn is best so your bag doesn’t stretch too much! These are fibers like cotton and bamboo.
Hook size isn’t that important for this pattern. I opted to use the recommended size on my yarn label.

Other Projects You Might Like
Crochet Water Bottle Holder Video Tutorial
Become a member to get early access to new videos!
You can follow along with my YouTube video to make your own crochet water bottle holder! I have timestamps included to section the video and help you jump to any point you need to!
This post may contain affiliate links. I may earn a small commission on qualifying purchases at no additional cost to you!
Materials
- 65 grams of medium weight yarn (Re-Up in “Full Moon“)
- Colored scrap yarn for bow (optional)
- 5.5mm Clover Amour crochet hook
- Scissors
- Yarn needle
- Tension ring (optional)
- Yarn bowl (optional)

Dimensions
Body: 11 centimeters wide x 17.5 centimeters long (4.3 x 6.9 inches)
Strap: 4 centimeters wide x 67 centimeters long (1.6 x 26.4 inches)
Gauge
9 row of 16 double crochets makes a 10 x 10 centimeter square
Notes and Tips
- This pattern is written using US crochet terms
- The chain 2 at the beginning of each row/round does NOT count as a double crochet
- The chain 4 at the beginning of each round of the body DOES count as a double crochet and 1 chain. The slip stitch for a mesh round goes into the 3rd chain up of the 4 chains
- Italicized notes tell you what to change to adjust the size
Abbreviations
ch = chain
ch1-sp = chain-1-space (space under ch1)
dc = double crochet
inc = increase (2 dc into 1 stitch)
rep = repeat
sk = skip
sl st = slip stitch
st = stitch
Solid Base
Foundation: Make a magic ring or make a slipknot, ch4, sl st to 1st ch to form a ring
Round 1: ch2, dc12 into ring, sl st (12)
Round 2: ch2, inc around, sl st (24)
Round 3: ch2, rep[dc, inc] around, sl st (36)

Note: If this circle is smaller than the circumference of your water bottle, add more rounds by adding another dc before the increase in the pattern. For example, Round 4 would be ch2, rep[dc in next 2 st, inc] around, sl st (48). Round 5 would be ch2, rep[dc in next 3 st, inc] around, sl st (60).
Mesh Body
Round 4: ch2, dc around, sl st (36)
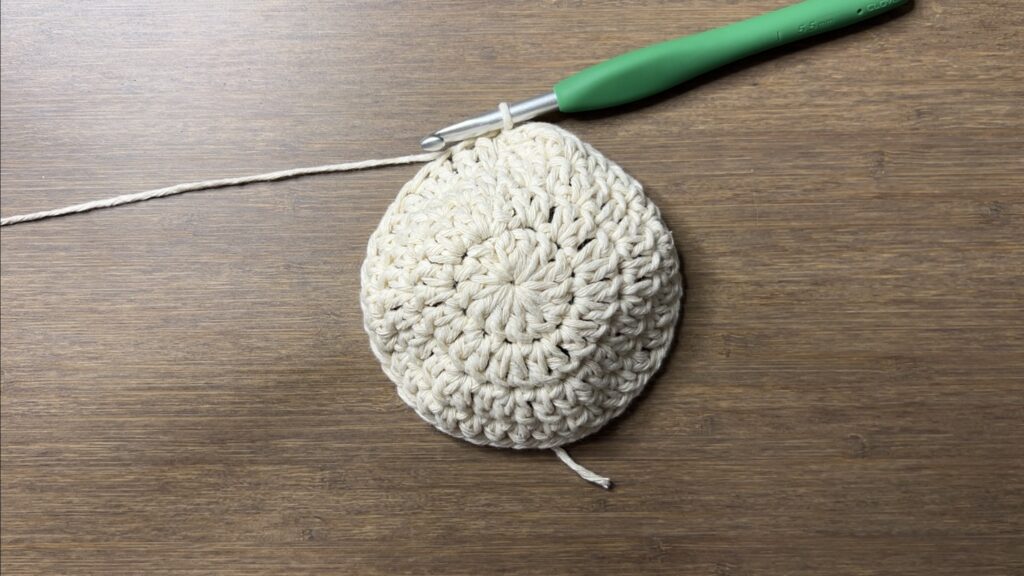
Round 5: ch4, sk2, rep[dc, ch1, sk1] around, sl st (18 dc, 18 ch1-sp)
The ch4 counts as a dc, ch1. The sk2 skips the first and second st of the round (see the image below). The sl st goes in the 3rd ch up on the ch4.

Round 6: ch2, rep[dc, dc in ch1-sp] around, sl st (36)

Rounds 7-18: rep[Round 5, Round 6]
This means Round 7 is a repeat of Round 5, Round 8 is a repeat of Round 6, Round 9 is a repeat of Round 5, and so on.
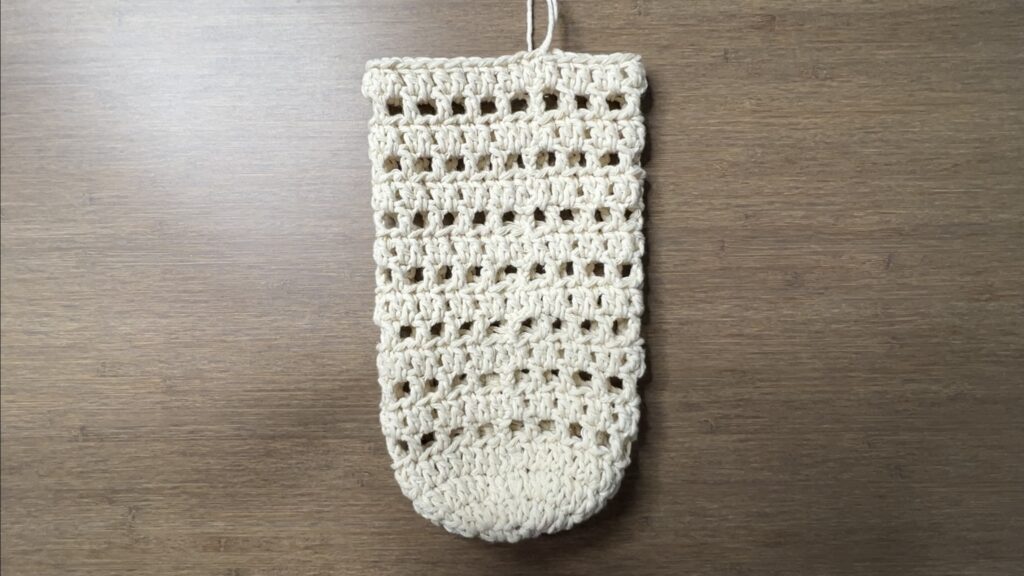
Note: Continue alternating Rounds 5 and 6 until it’s tall enough for your water bottle. Make it slightly shorter to account for stretching.
Strap
Row 1: ch2, dc in next 6 st (6)
Note: Do fewer double crochets for a thinner strap or more double crochets for a wider strap.

Rows 2-50: ch2, turn, dc across (6)
Note: Do fewer rows for a shorter strap or more rows for a longer strap. Make it slightly shorter to account for stretching.
Fasten off with a long loose end.
Sewing Strap
Use the long loose end to sew the last row of the strap to the other side of the bag opening. Leave 12 stitches in between the straps. Tie a double knot.
Note: If you did a different number of rounds for the base or a different number of stitches for the width of the strap, use the equations below to calculate how many stitches to leave between the ends of the strap. I used my numbers as an example.
# of stitches in last round (36)
2 x # of stitches in strap (2 x 6 = 12)
36 – 12 = 24
24 / 2 = 12 stitches between straps

Bow
Make a slipknot, ch70, fasten off
Note: Do fewer chains for a smaller water bottle or more chains for a larger water bottle. You should be able to wrap it around the bottle and tie a bow.
Weave the chains in and out around the bottle using the last round of mesh stitches on the body. Tie a bow.

Finished Crochet Water Bottle Holder
Weave in your loose ends and your crochet water bottle holder is finished!



Hi! I just wanted to point out something that might be a mistake in this pattern. In Round 3, you mentioned that we should have 36 stitches after increasing all around, but I believe it should be 48 instead. Could you please clarify this for me?
Thank you so much for the amazing free patterns and videos—they’re the best!
Um, wait never mind! I didn’t read the pattern well, I get how you got 36 now haha. I would have watched the video to understand the pattern but I can’t right now, sorry for the trouble!
No problem! Thanks anyways!!
Great Pattern
This pattern was explained in the video tutorial and was easy to follow and super beginner friendly!
This turned out soooo pretty thank you smm!!!