Crochet Summer Top | Free Pattern & Video Tutorial
This crochet summer top uses the love knot stitch to create a flowy, airy top. It’s the perfect crochet top for summer because it’s super cute and it’ll keep you cool! This top has two separate straps to tie around the neck and at the back, so it’s relatively easy to get the perfect fit. This free written pattern comes with a video tutorial to ensure that everything is perfectly clear!

Intermediate Crochet Project
This project is most suitable for intermediate crocheters. It has a special stitch (love knot stitch) and is crocheted in pieces, so there’s some sewing involved. With the help of the video tutorial, it may be more manageable for less advanced crocheters!
If you’d like to try an easier mesh stitch, I would recommend this mesh tote bag, which is just double crochets and chains. For advanced beginner mesh projects, check out the diamond lace bandana or the granny triangle bandana.
Sizing
The sizing for this top is very forgivable because of the neck and back straps. They can be tightened or loosened to adjust the size. For the bra cups, you can adjust the number of chains and/or rows to change the size.
The written pattern fits a size adult small and includes instructions to adjust sizing wherever applicable.

Project Overview


Choosing Yarn & Hook Size
Since this is a summer top, you should choose a lightweight yarn to crochet it. Fibers like bamboo and cotton are breathable, so you can stay cool while wearing it. On the other hand, acrylic is not breathable, so you should avoid it, at least for the bra cups portion of this pattern.
Hook size isn’t a big factor in this project. You can use the recommended hook size for your yarn.
Crochet Lace Top Video Tutorial
Become a member to get early access to new videos!
You can follow along with my YouTube video to make your own crochet top! I have timestamps included to section the video and help you jump to any point you need to!
This post may contain affiliate links. I may earn a small commission on qualifying purchases at no additional cost to you!
Materials
- 125 grams of medium weight yarn (Soft & Simple in “Cloud”)
- 5mm Clover Amour crochet hook
- Scissors
- Yarn needle

Dimensions
Body: 17 centimeters long x 59 centimeters wide (6.7 x 23.2 inches)
Bra Cups: 15 centimeters long x 18.5 centimeters wide (5.9 x 7.3 inches)
Neck Straps: 41 centimeters long (16.1 inches)
Back Straps: 27 centimeters long (10.6 inches)
Notes and Tips
- This pattern is written using US crochet terms
- The chain at the beginning of each row does NOT count as a stitch, except for the chain 4 in the Row 2 repeat, which counts as a treble crochet
Love Knot Stitch / Solomon’s Knot Stitch
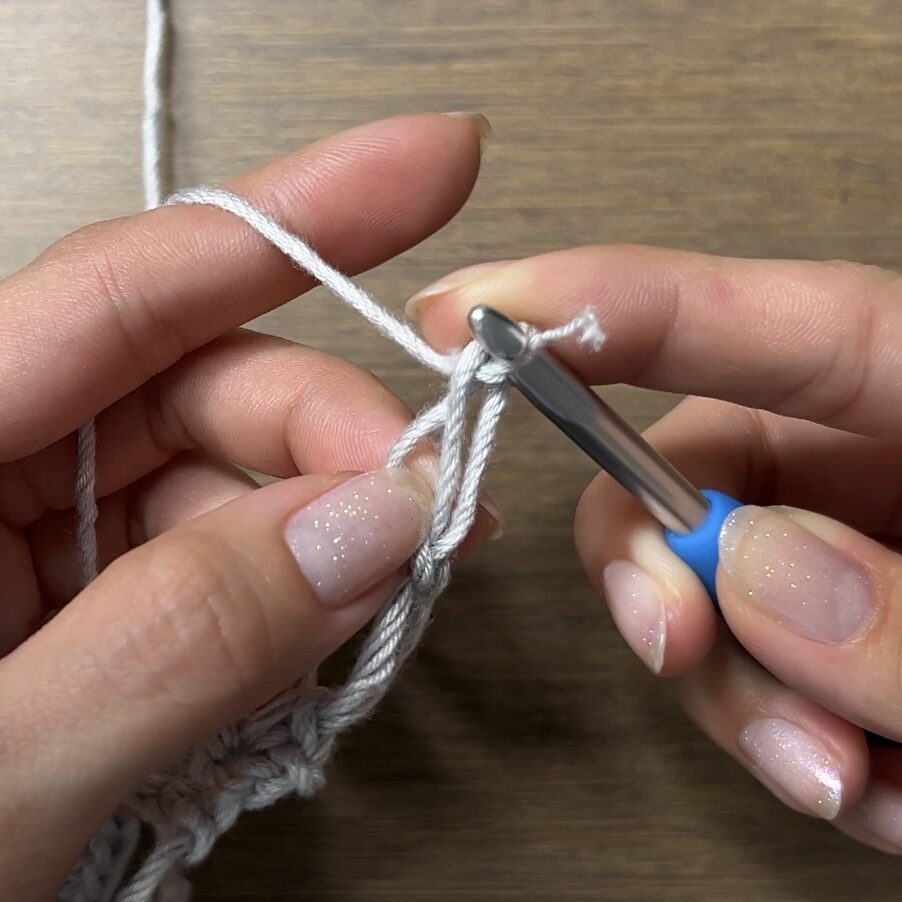
The love knot stitch or Solomon’s knot stitch is a special stitch using the chain stitch and single crochet.
Doing one knot stitch (knot) will produce a half arch used at the beginning and end of the Row 2 repeat. Two knot stitches (knot2) will produce a full arch used in the middle of the Row 2 repeat and throughout the Row 3 repeat.
Below, is a photo tutorial of the love knot stitch. You can also view the video tutorial (timestamped to where I show the love knot stitch).


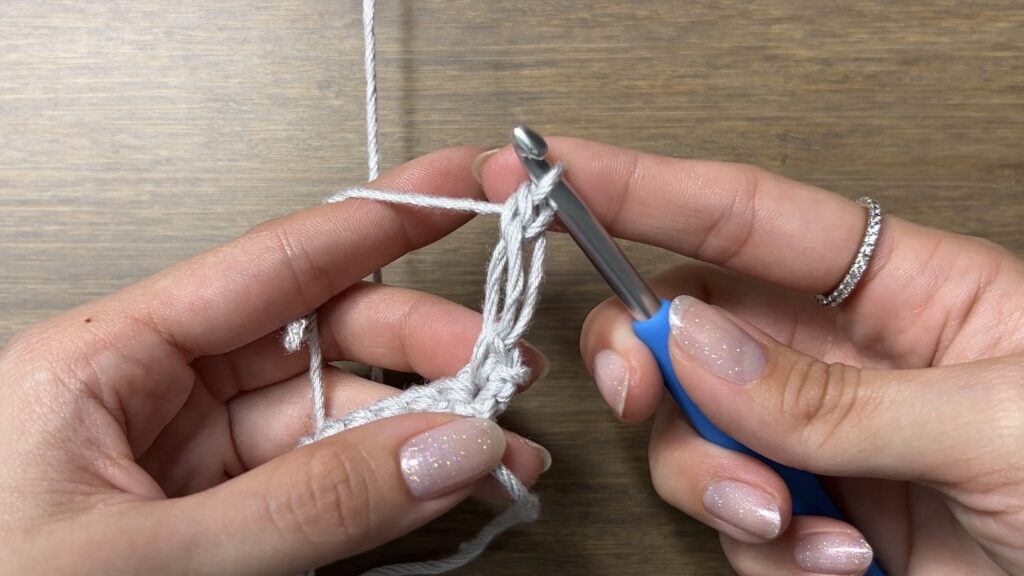
Now, you have completed a love knot stitch. If the pattern says “knot2,” repeat the love knot stitch once more as shown below.

Abbreviations
ch = chain
ch-sp = chain-space
dc = double crochet
rep = repeat
sk = skip
sc = single crochet
st = stitch
Body
Foundation: Make a slipknot, ch90
Note: This chain should fully wrap around your underbust. Chain less for a smaller underbust or chain more for a larger underbust.
Your number of chains must be a multiple of 4, plus 2.
Foundation Row: sc in 2nd ch from hook and across (89)

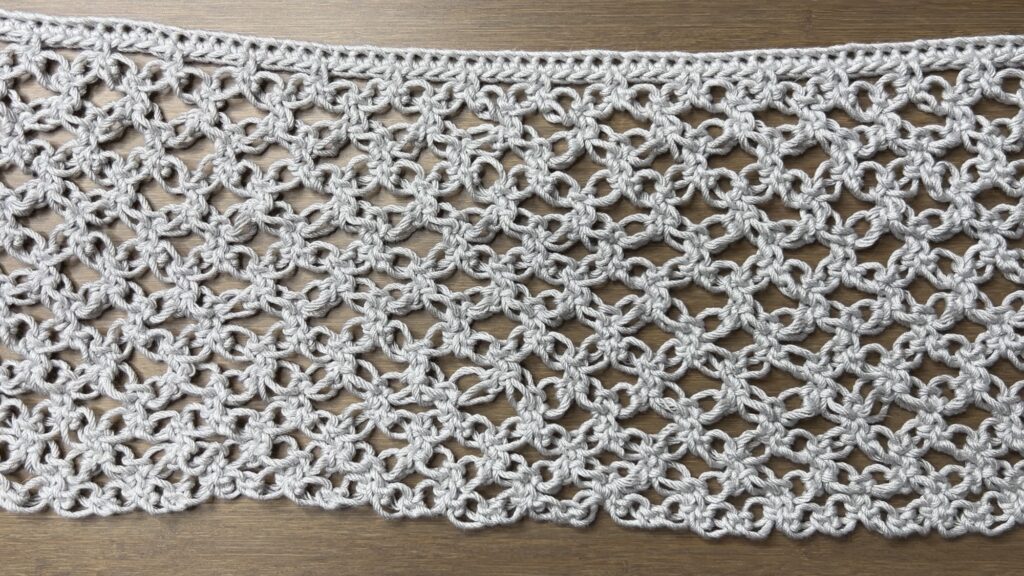
Row 1: ch1, turn, sc, rep[knot2, sk3, sc] across (22 arches)

Row 2: ch4 [counts as tr], turn, knot, sc to middle of first arch, rep[knot2, sc to middle of next arch] across, knot, tr in last st (21 arches, 2 half-arches)

Row 3: ch1, turn, sc, rep[knot2, sc to middle of next arch], knot2, sc in top of ch4 (22 arches)

Row 4-11: rep[Row 2, Row 3]
Dimensions: 17 centimeters long x 59 centimeters wide (6.7 x 23.2 inches)
Note: Hold the Foundation Row around your underbust and test the length of the top. Do fewer rows for a shorter top and more rows for a longer top.
Fasten off.
Bra Cups
Row 1: ch8+2 for turning, dc in 3rd ch from hook and across (8)
Note: Chain less for a rounder bra cup or chain more for a pointier bra cup.

Row 2: ch2, turn, dc across, [dc2, ch1, dc2] under the 2 ch skipped in Row 1, dc along underside of foundation ch (20)


Row 3-9: ch2, turn, dc across, [dc2, ch1, dc2] in ch-sp, dc across (24, 28, 32, 36, 40, 44, 48)
Note: Do fewer rows for a smaller bra cup or more rows for a larger bra cup.


Fasten off with a long loose end for sewing. I made mine twice the length of the bottom of the bra cup, plus a little extra for a loose end.
Dimensions: 15 centimeters long x 18.5 centimeters wide (5.9 x 7.3 inches)
Note: Do fewer rows for a smaller bra cup or more rows for a larger bra cup.
Make an identical bra cup.

Assembly
Once we have all three pieces completed, we can start attaching them together.
We will attach 2 stitches on the body piece to the side of each row on each bra cup. To ensure that the bra cups are centered along the middle piece, we can do a bit of math. If you’d rather not do any math, you can eyeball it!
- Multiply the number of rows you did for each bra cup by 4 (9 * 4 = 36)
- Subtract 2 from your answer in #1 (36 – 2 = 34)
- Multiply your answer in #2 by 2 (34 * 2 = 68)
- Subtract your answer in #3 from your number of stitches in the Foundation Row of the body piece (89 – 68 = 21)
- Subtract 1 from your answer in #4 (21 – 1 = 20)
- Divide your answer in #5 by 2 (20 / 2 = 10)
Your answer in #6 is the number of stitches on either side of the body piece before attaching each bra cup.

Skip 10 stitches on one side of the body piece, and whip stitch one of the bra cups, connecting 2 stitches on the body piece to 1 row on the bra cup. At the end, tie a knot so it doesn’t come loose.

Skip 1 stitch in the middle and whip stitch the other bra cup. There should be 10 stitches left at the end, so you know it’s perfectly centered. Tie a knot at the end of your seam.

Neck and Back Straps
Attach your yarn to the ch-sp at the top of one of the bra cups, ch80, fasten off
Length: 41 centimeters long (16.1 inches)
Note: Do fewer chains for a shorter strap or more chains for a longer strap.
Repeat on the other bra cup.


Attach your yarn to the side of Row 1 on the body piece, ch50, fasten off
Length: 27 centimeters long (10.6 inches)
Note: Do fewer chains for a shorter strap or more chains for a longer strap.
Repeat on the other side of Row 1.

Weave in your loose ends and your crochet summer top is finished!